
You can create experiences from scratch, from a template, or by duplicating an existing experience. We’ll walk through creating one from scratch.
1. From the Experiences page, click on Create Experience to open a new canvas.
.png?cb=cb35c1e887c80cf98aed37ab31c3df11)
2. Give your experience a unique name and add an optional description. Click the Add a Trigger button to show a list of all available trigger nodes.
.png?cb=3e667c24a94662568af3cfb78a195d2e)
3. Select a trigger and configure it to your experience’s unique needs.
4. Click on Add to Experience to create your experience. You can then add Event, Delay, Action, and Split nodes to build out your workflow.
.png?cb=6d7fc989fb20881315746fd60426b9ca)
Experience nodes are what make up an experience. Without any further ado, let’s learn more about how each type of node is used:
Merging Split Nodes
When you create splits in an experience through a Split Node or an Event Node with a time filter, you can merge certain branches back together so that users who qualified for one branch can rejoin the rest of the flow.
A node is eligible if it doesn’t share an ancestral split or create circular loops.
1. If there are splits in your experience and at least one eligible node is available, an option to Merge will appear in your node menu.
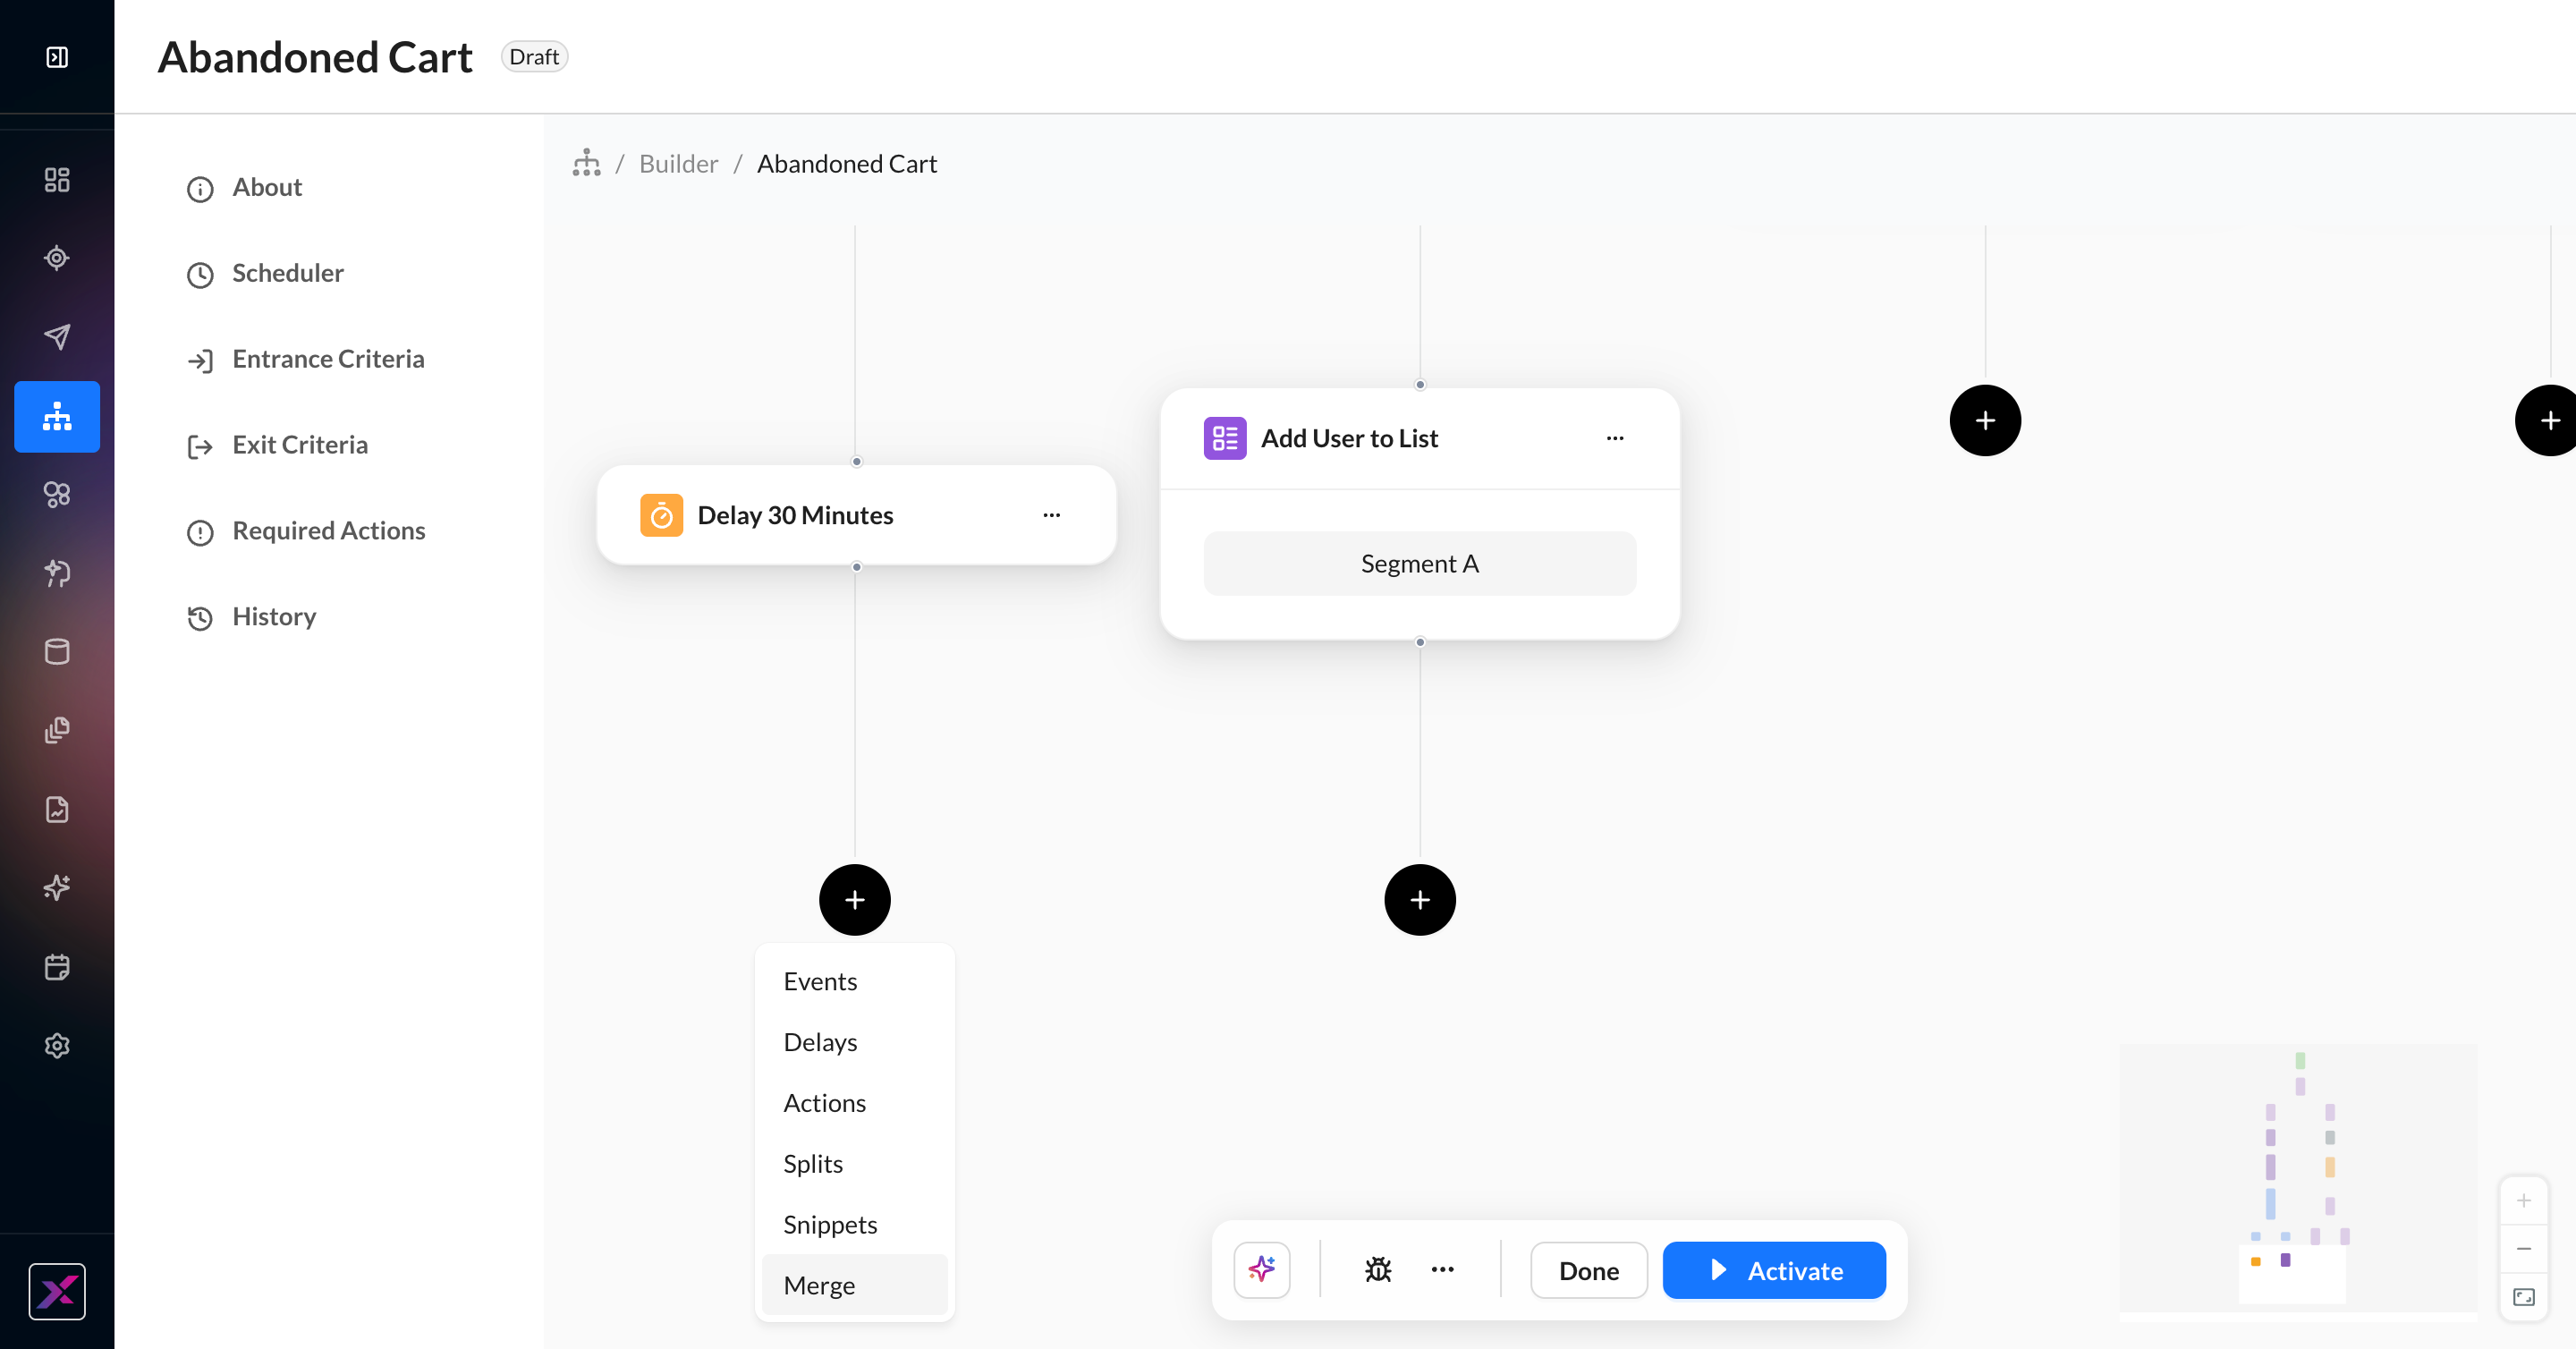
2. Clicking Merge will highlight all eligible nodes to be connected. You can either select an existing node to merge into or select the end of a branch to merge into. Hovering on the lines will show you a direct path and allow you to select a destination.
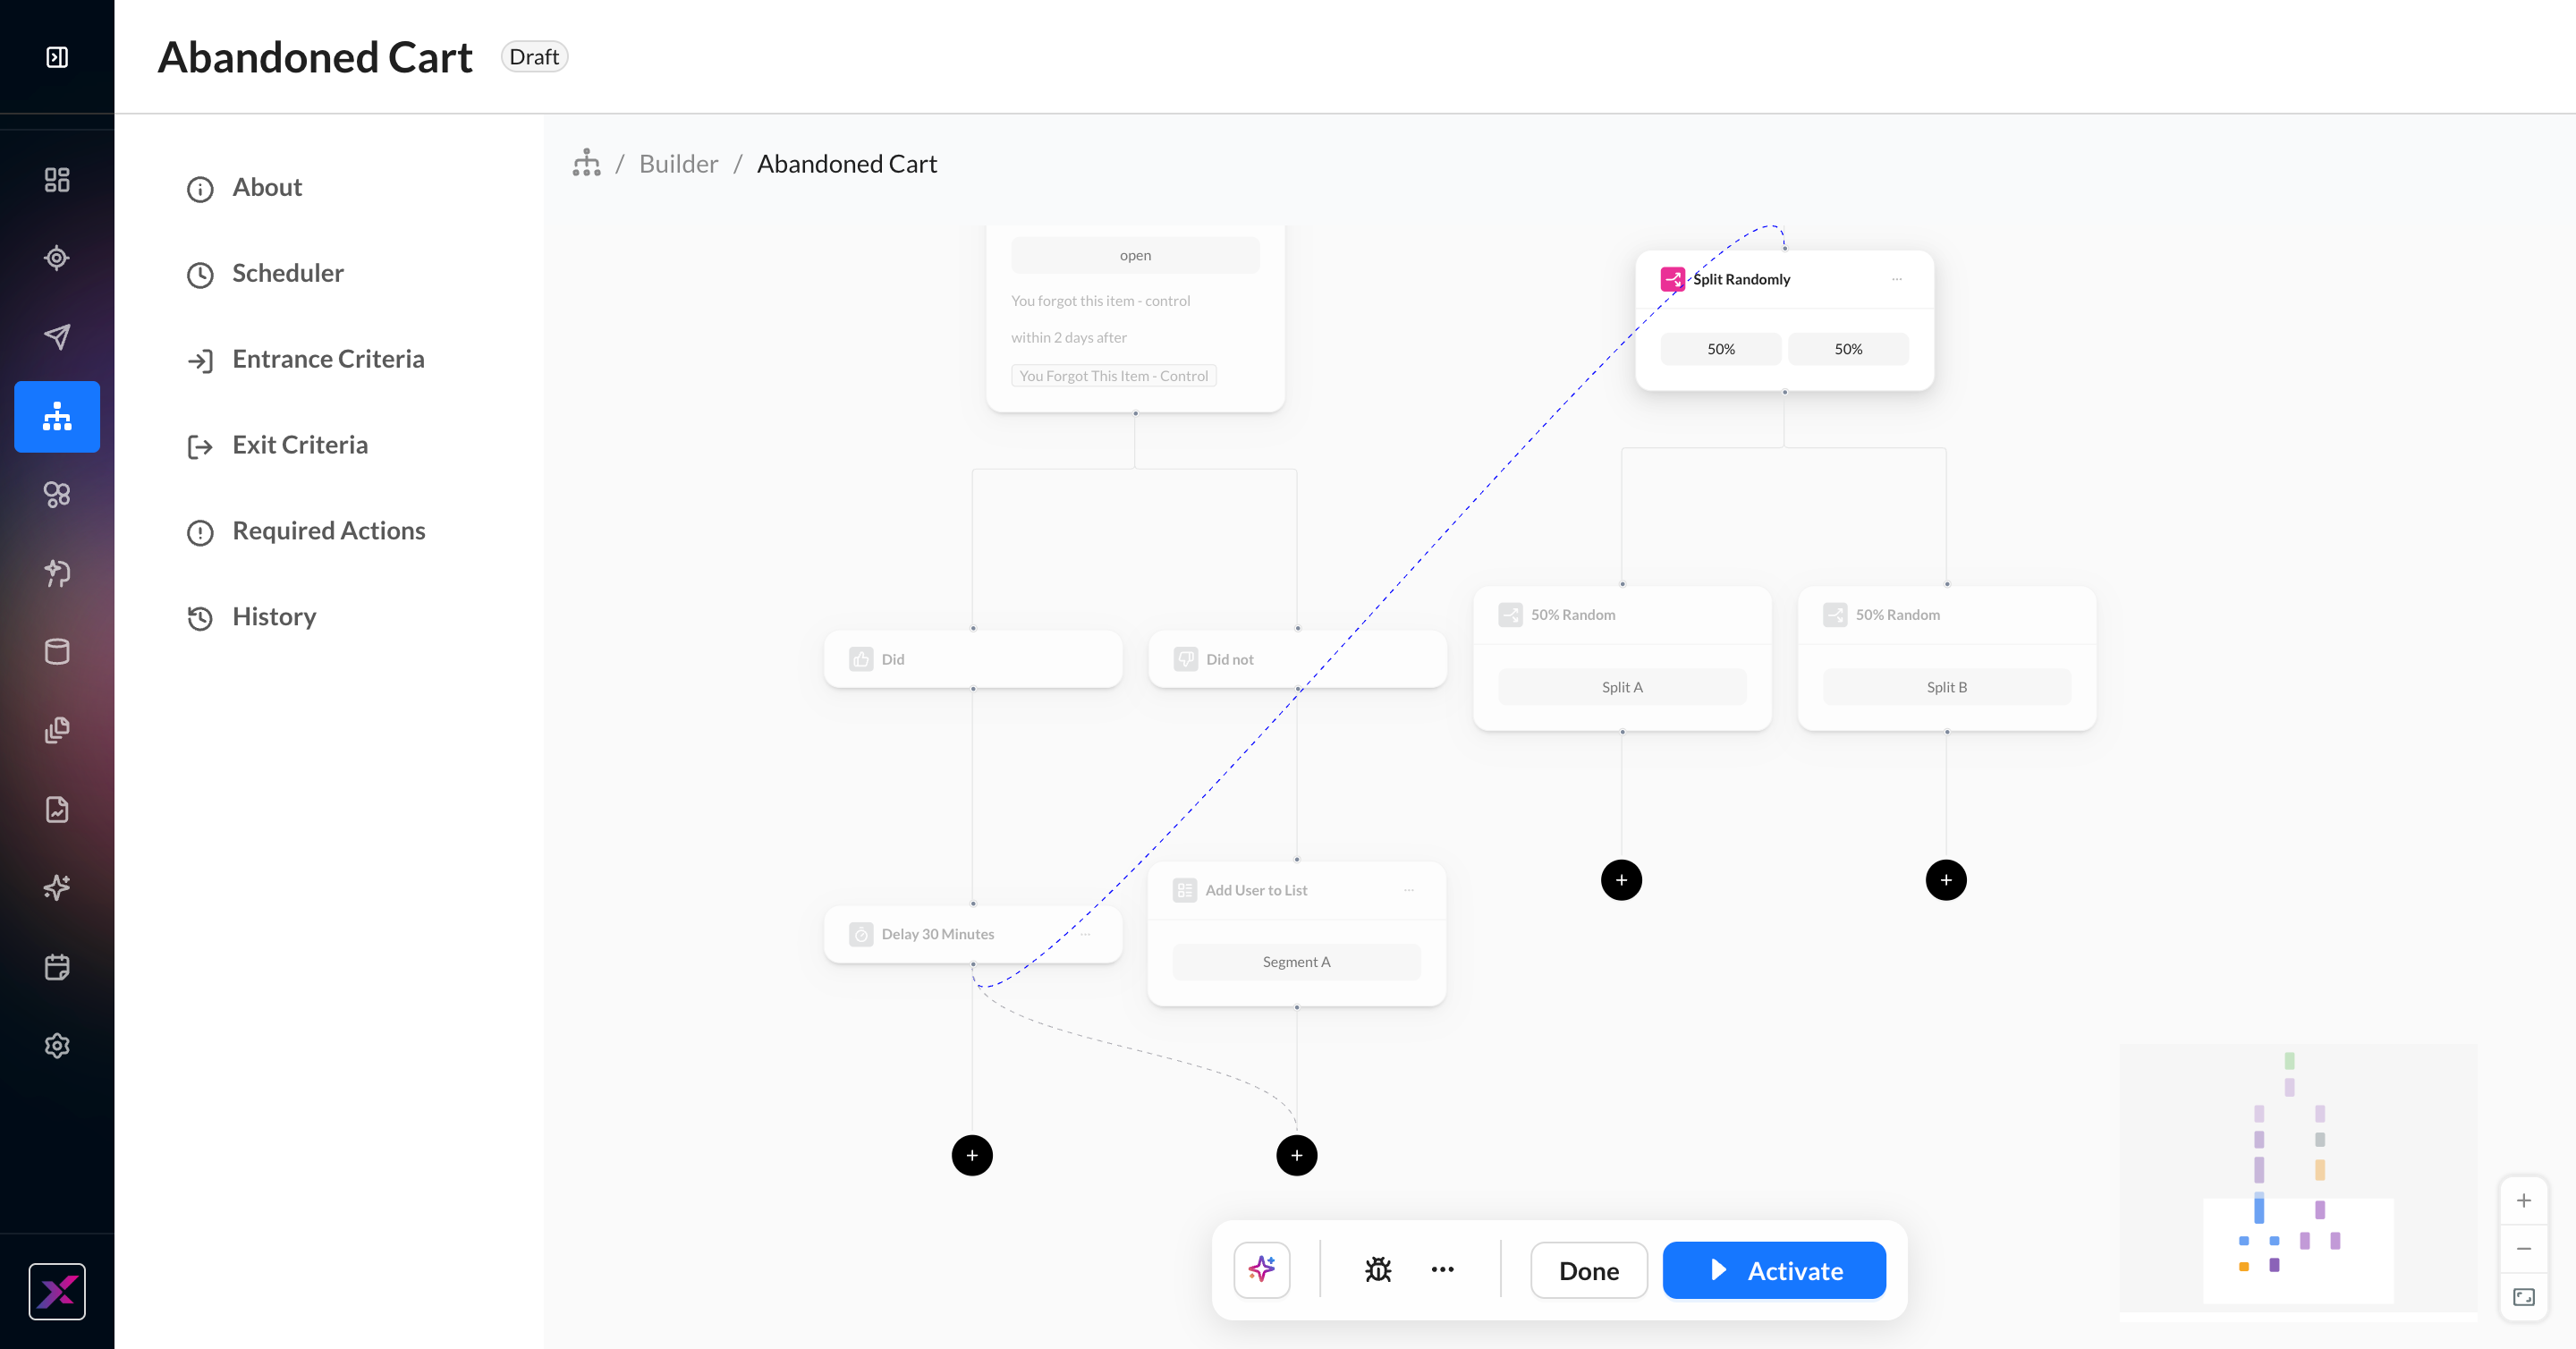
3. Selecting a node will create a new connection between non-consecutive nodes, after which you can continue to build out the experience. There is no limit to the number of nodes that can merge into a single point.
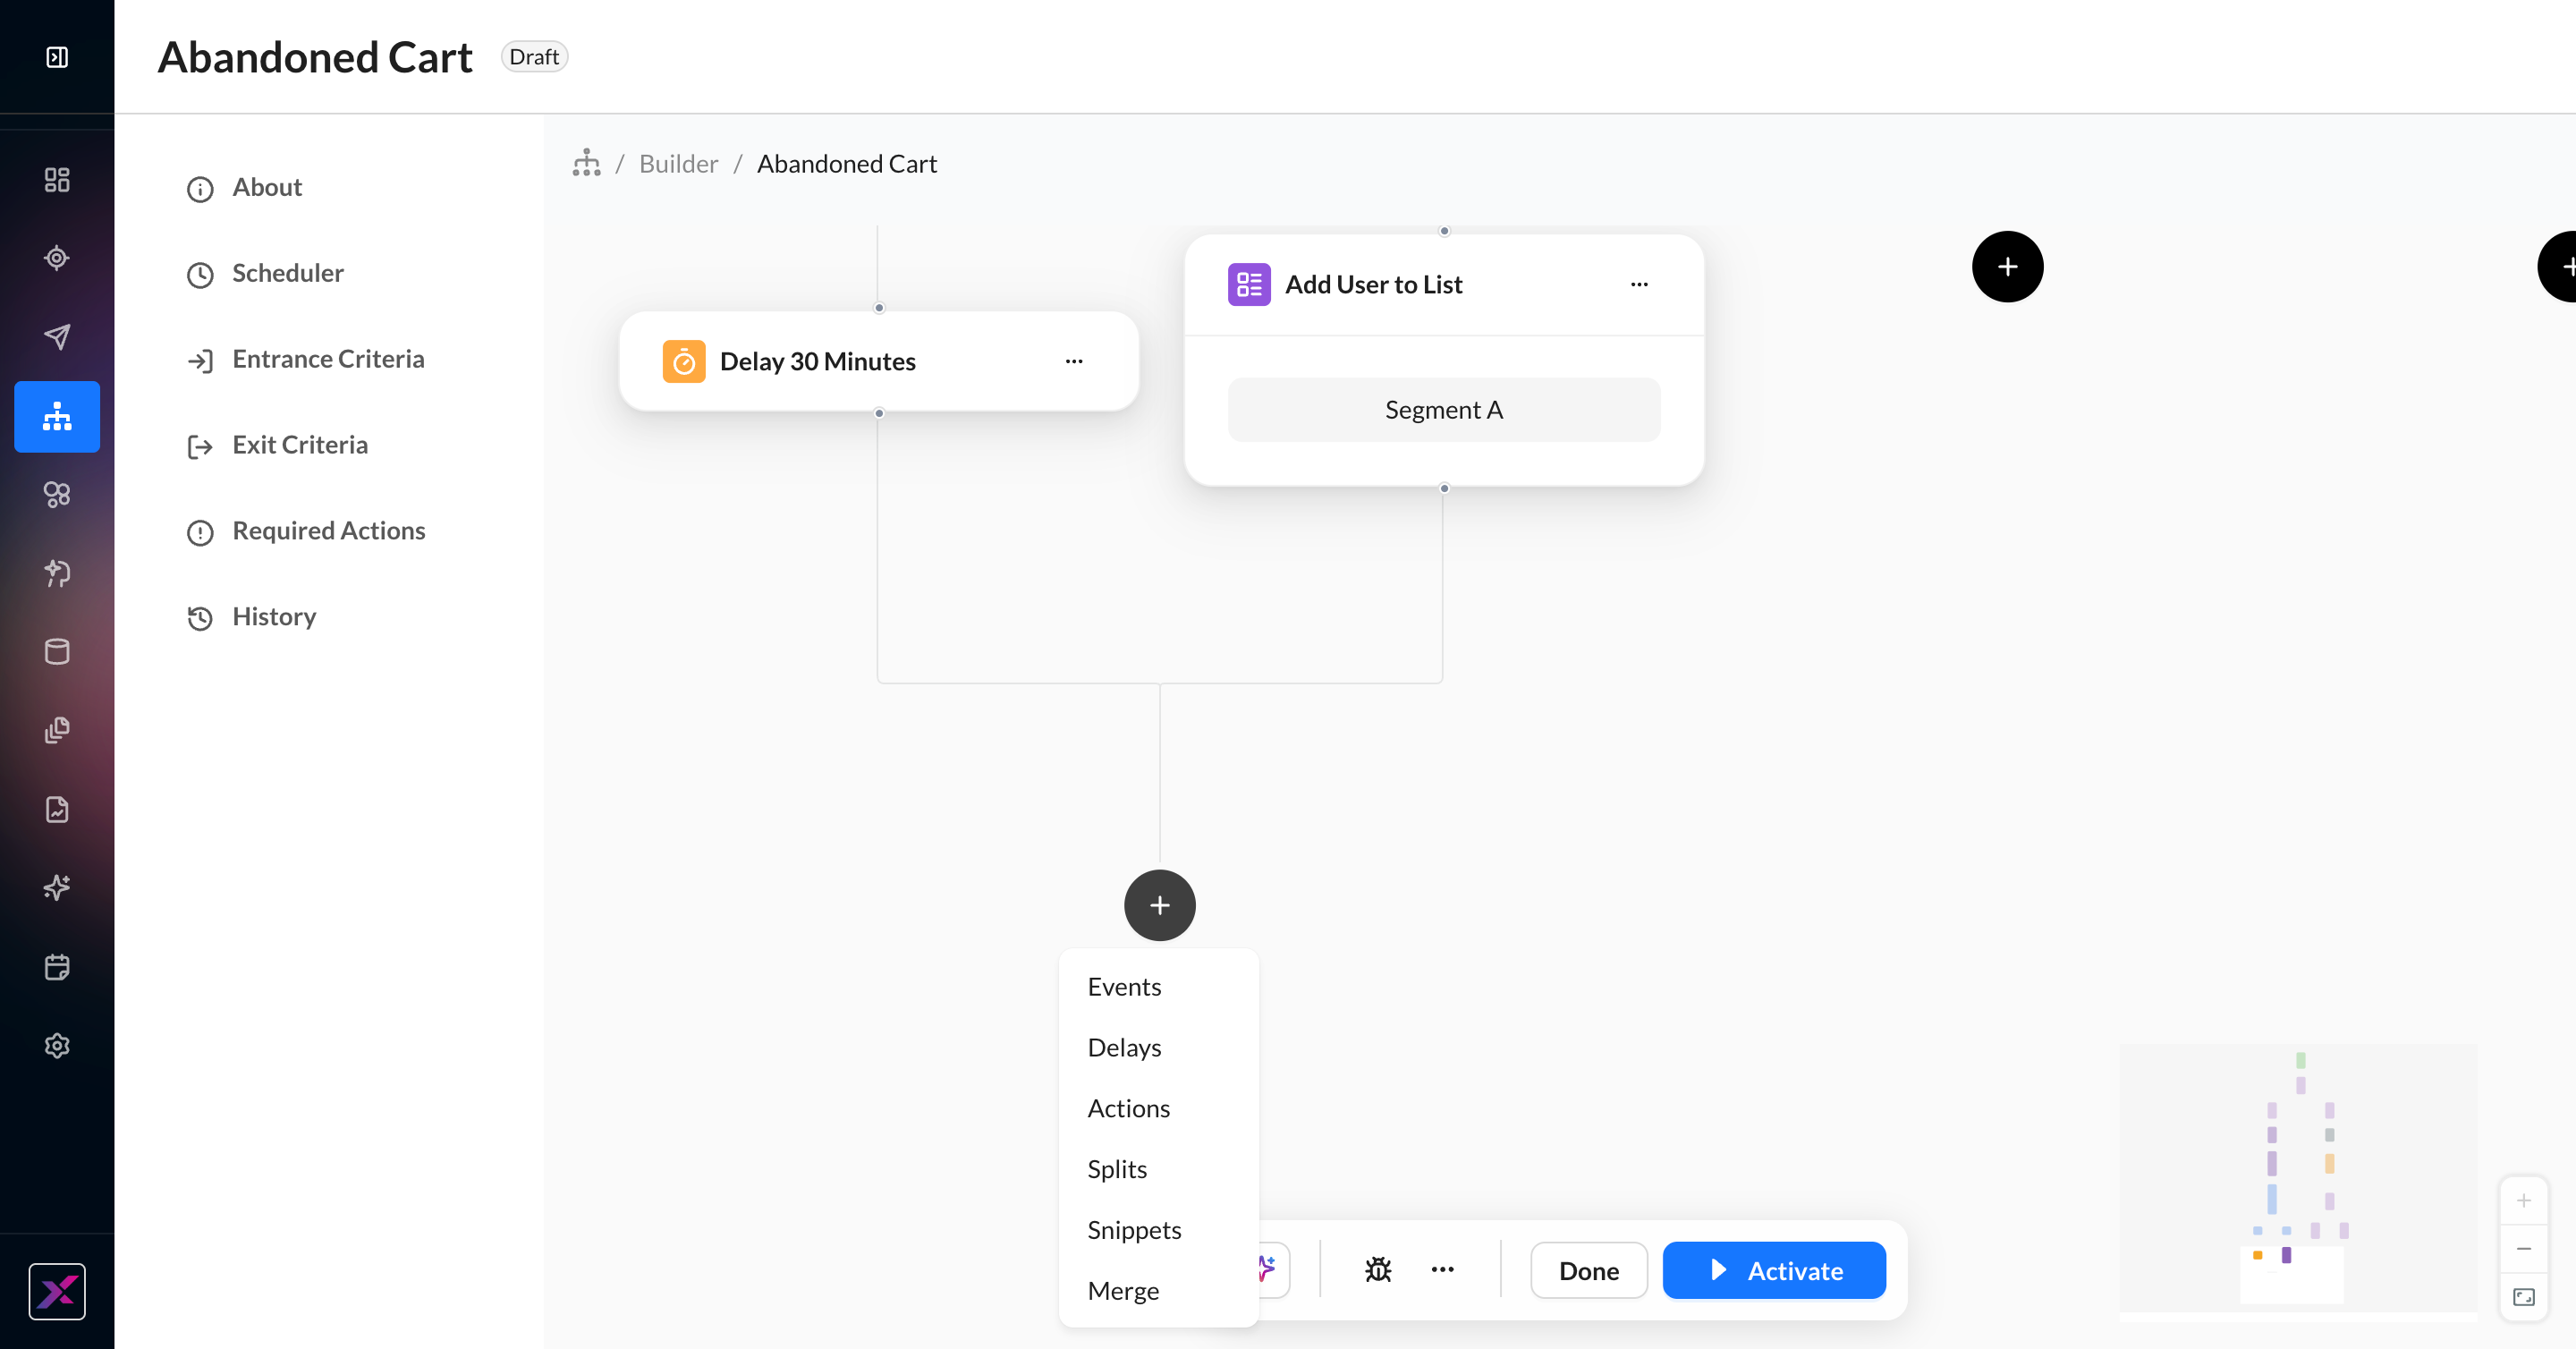
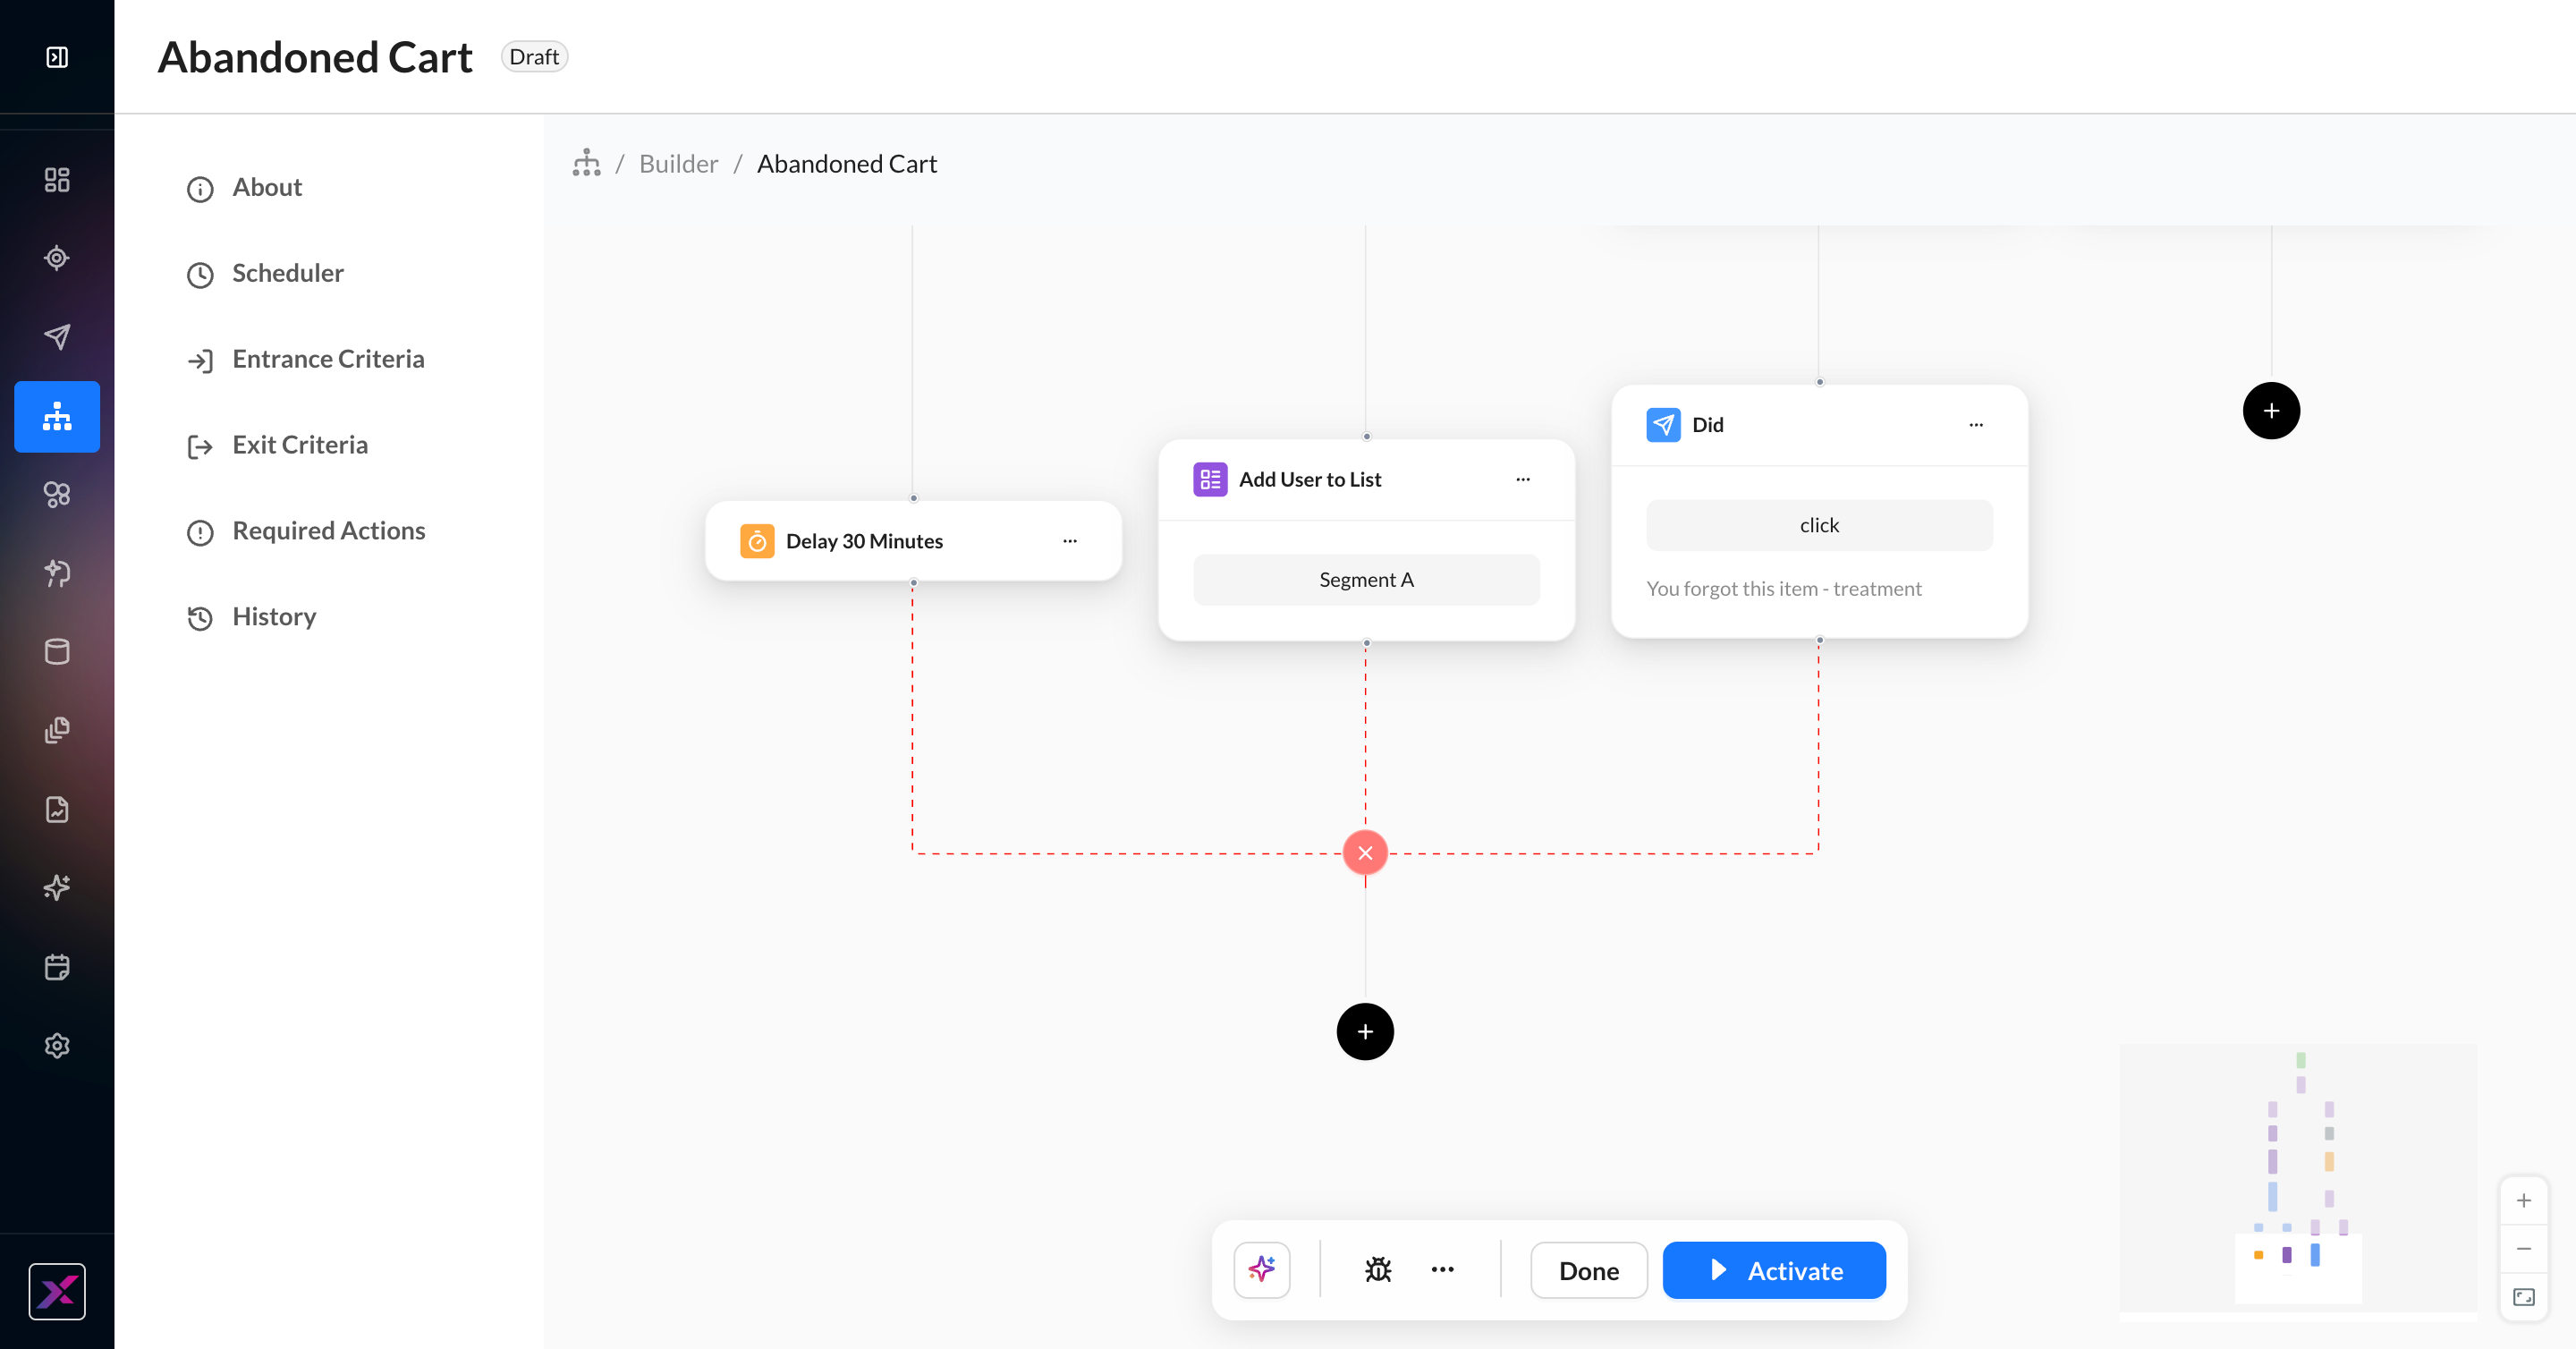
4. To delete a non-consecutive connection, hover on the merge point and click the X that appears.
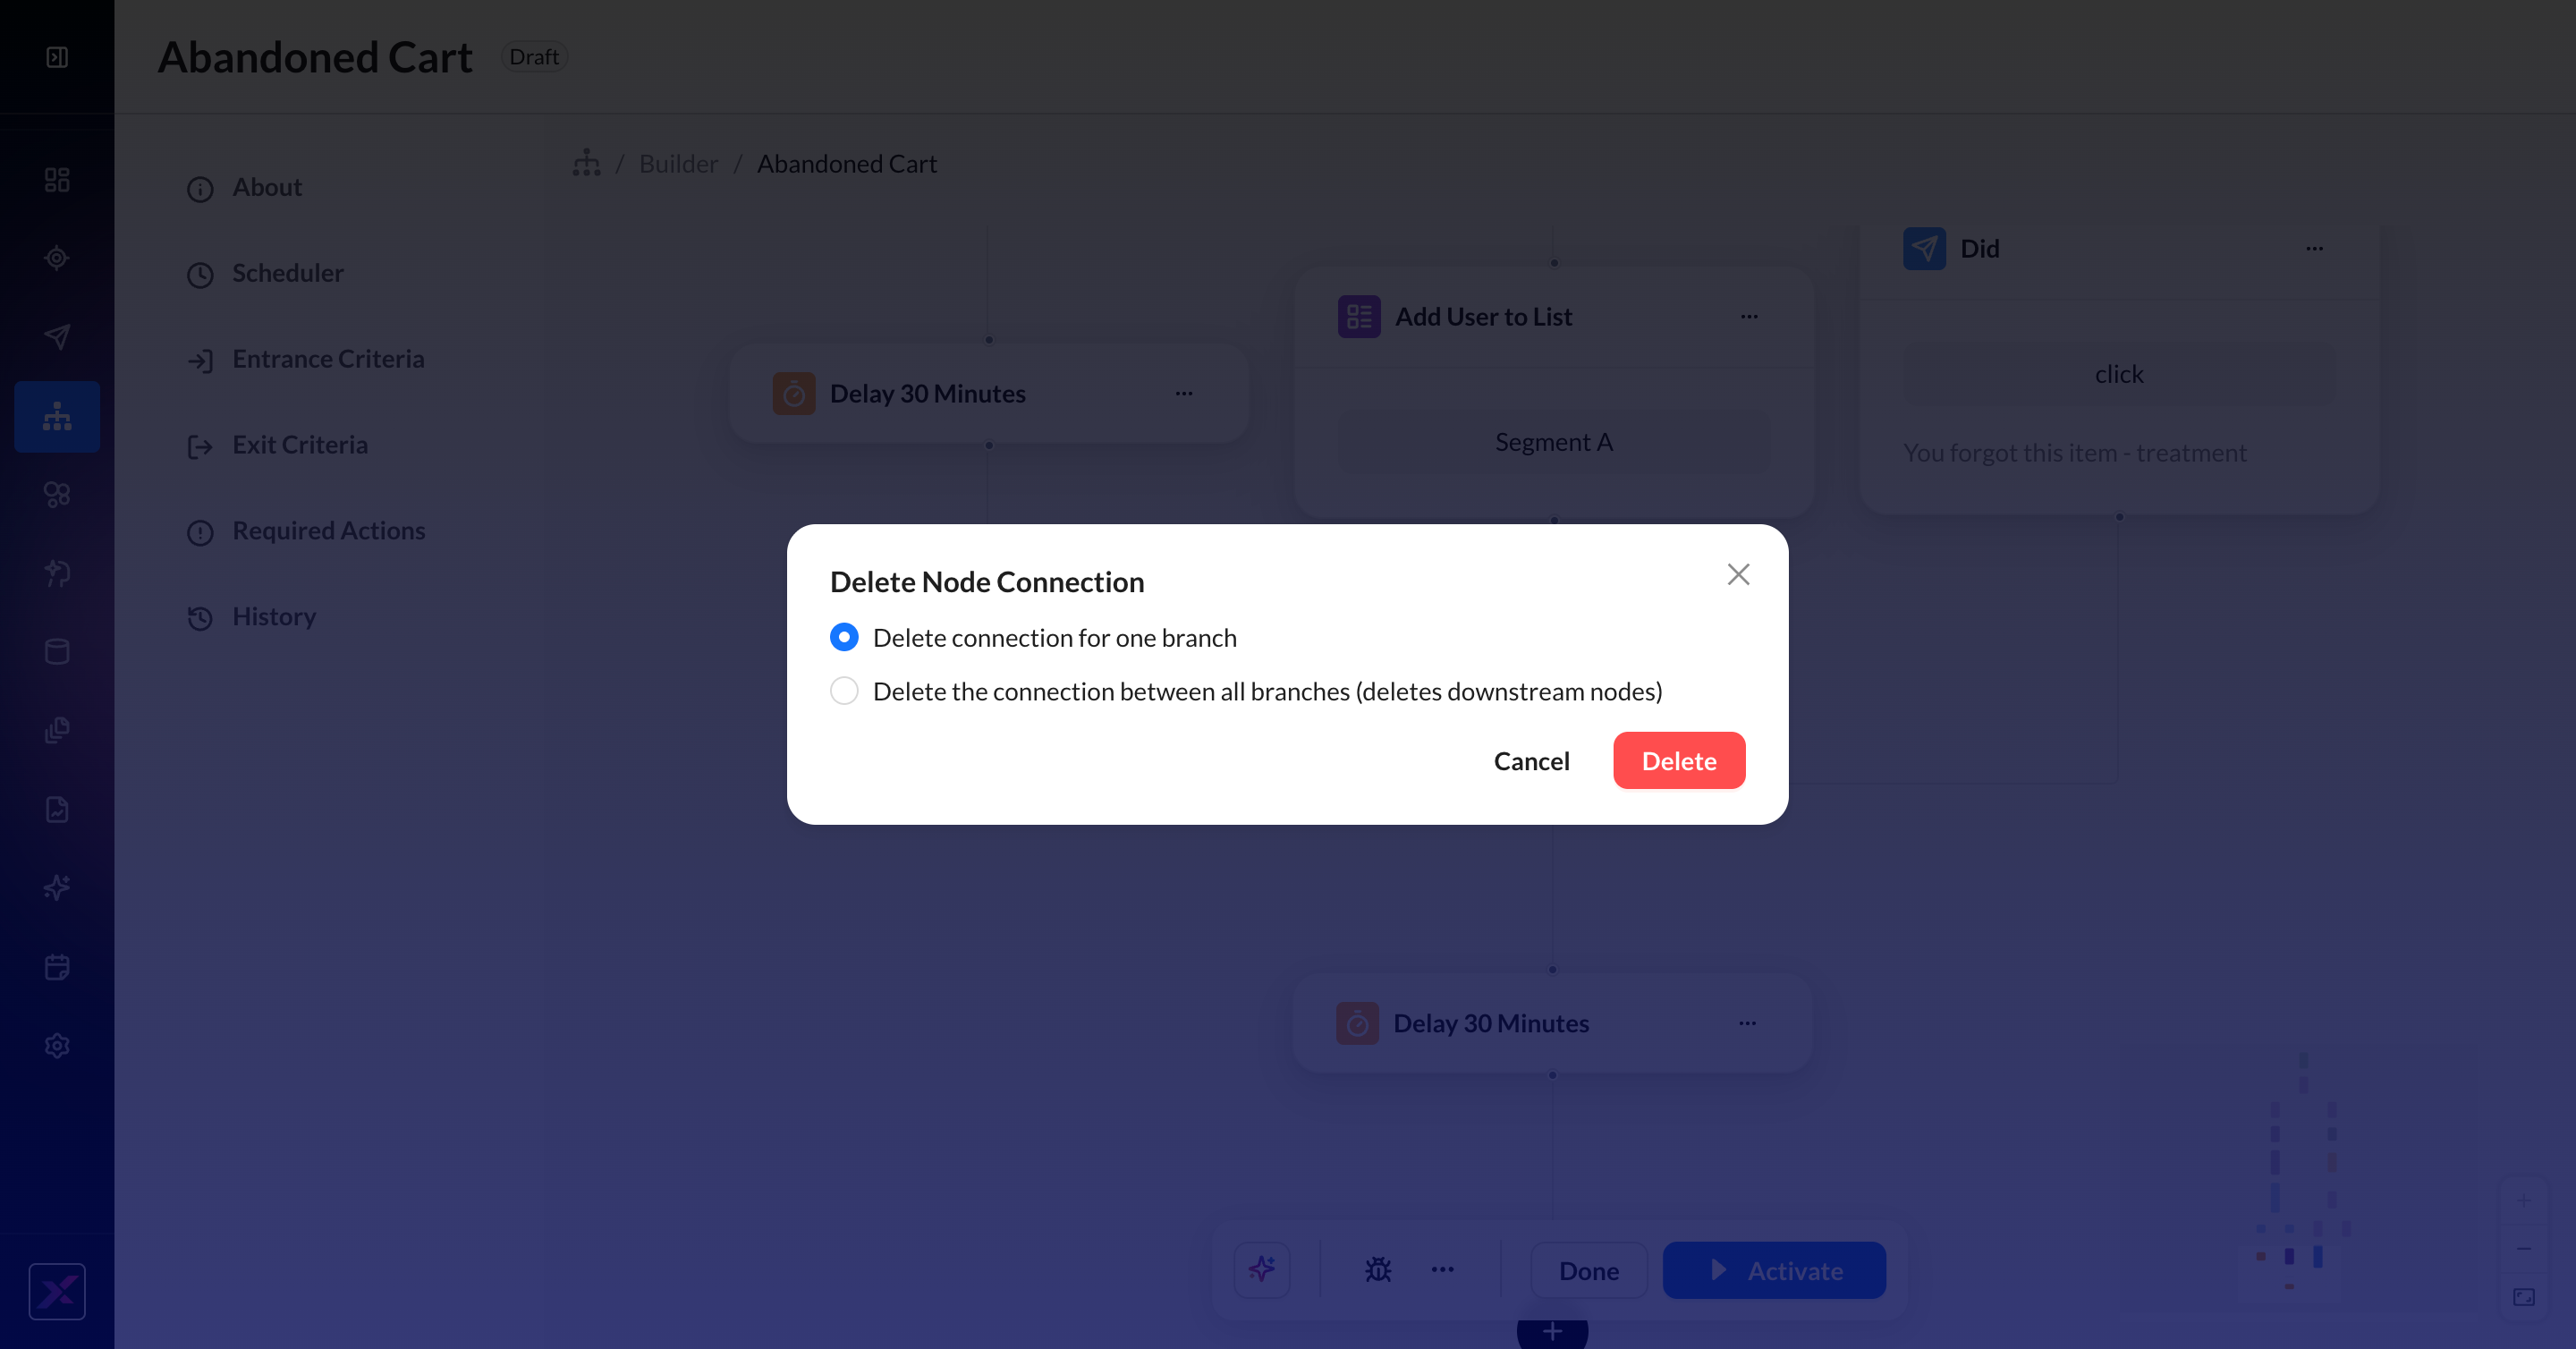
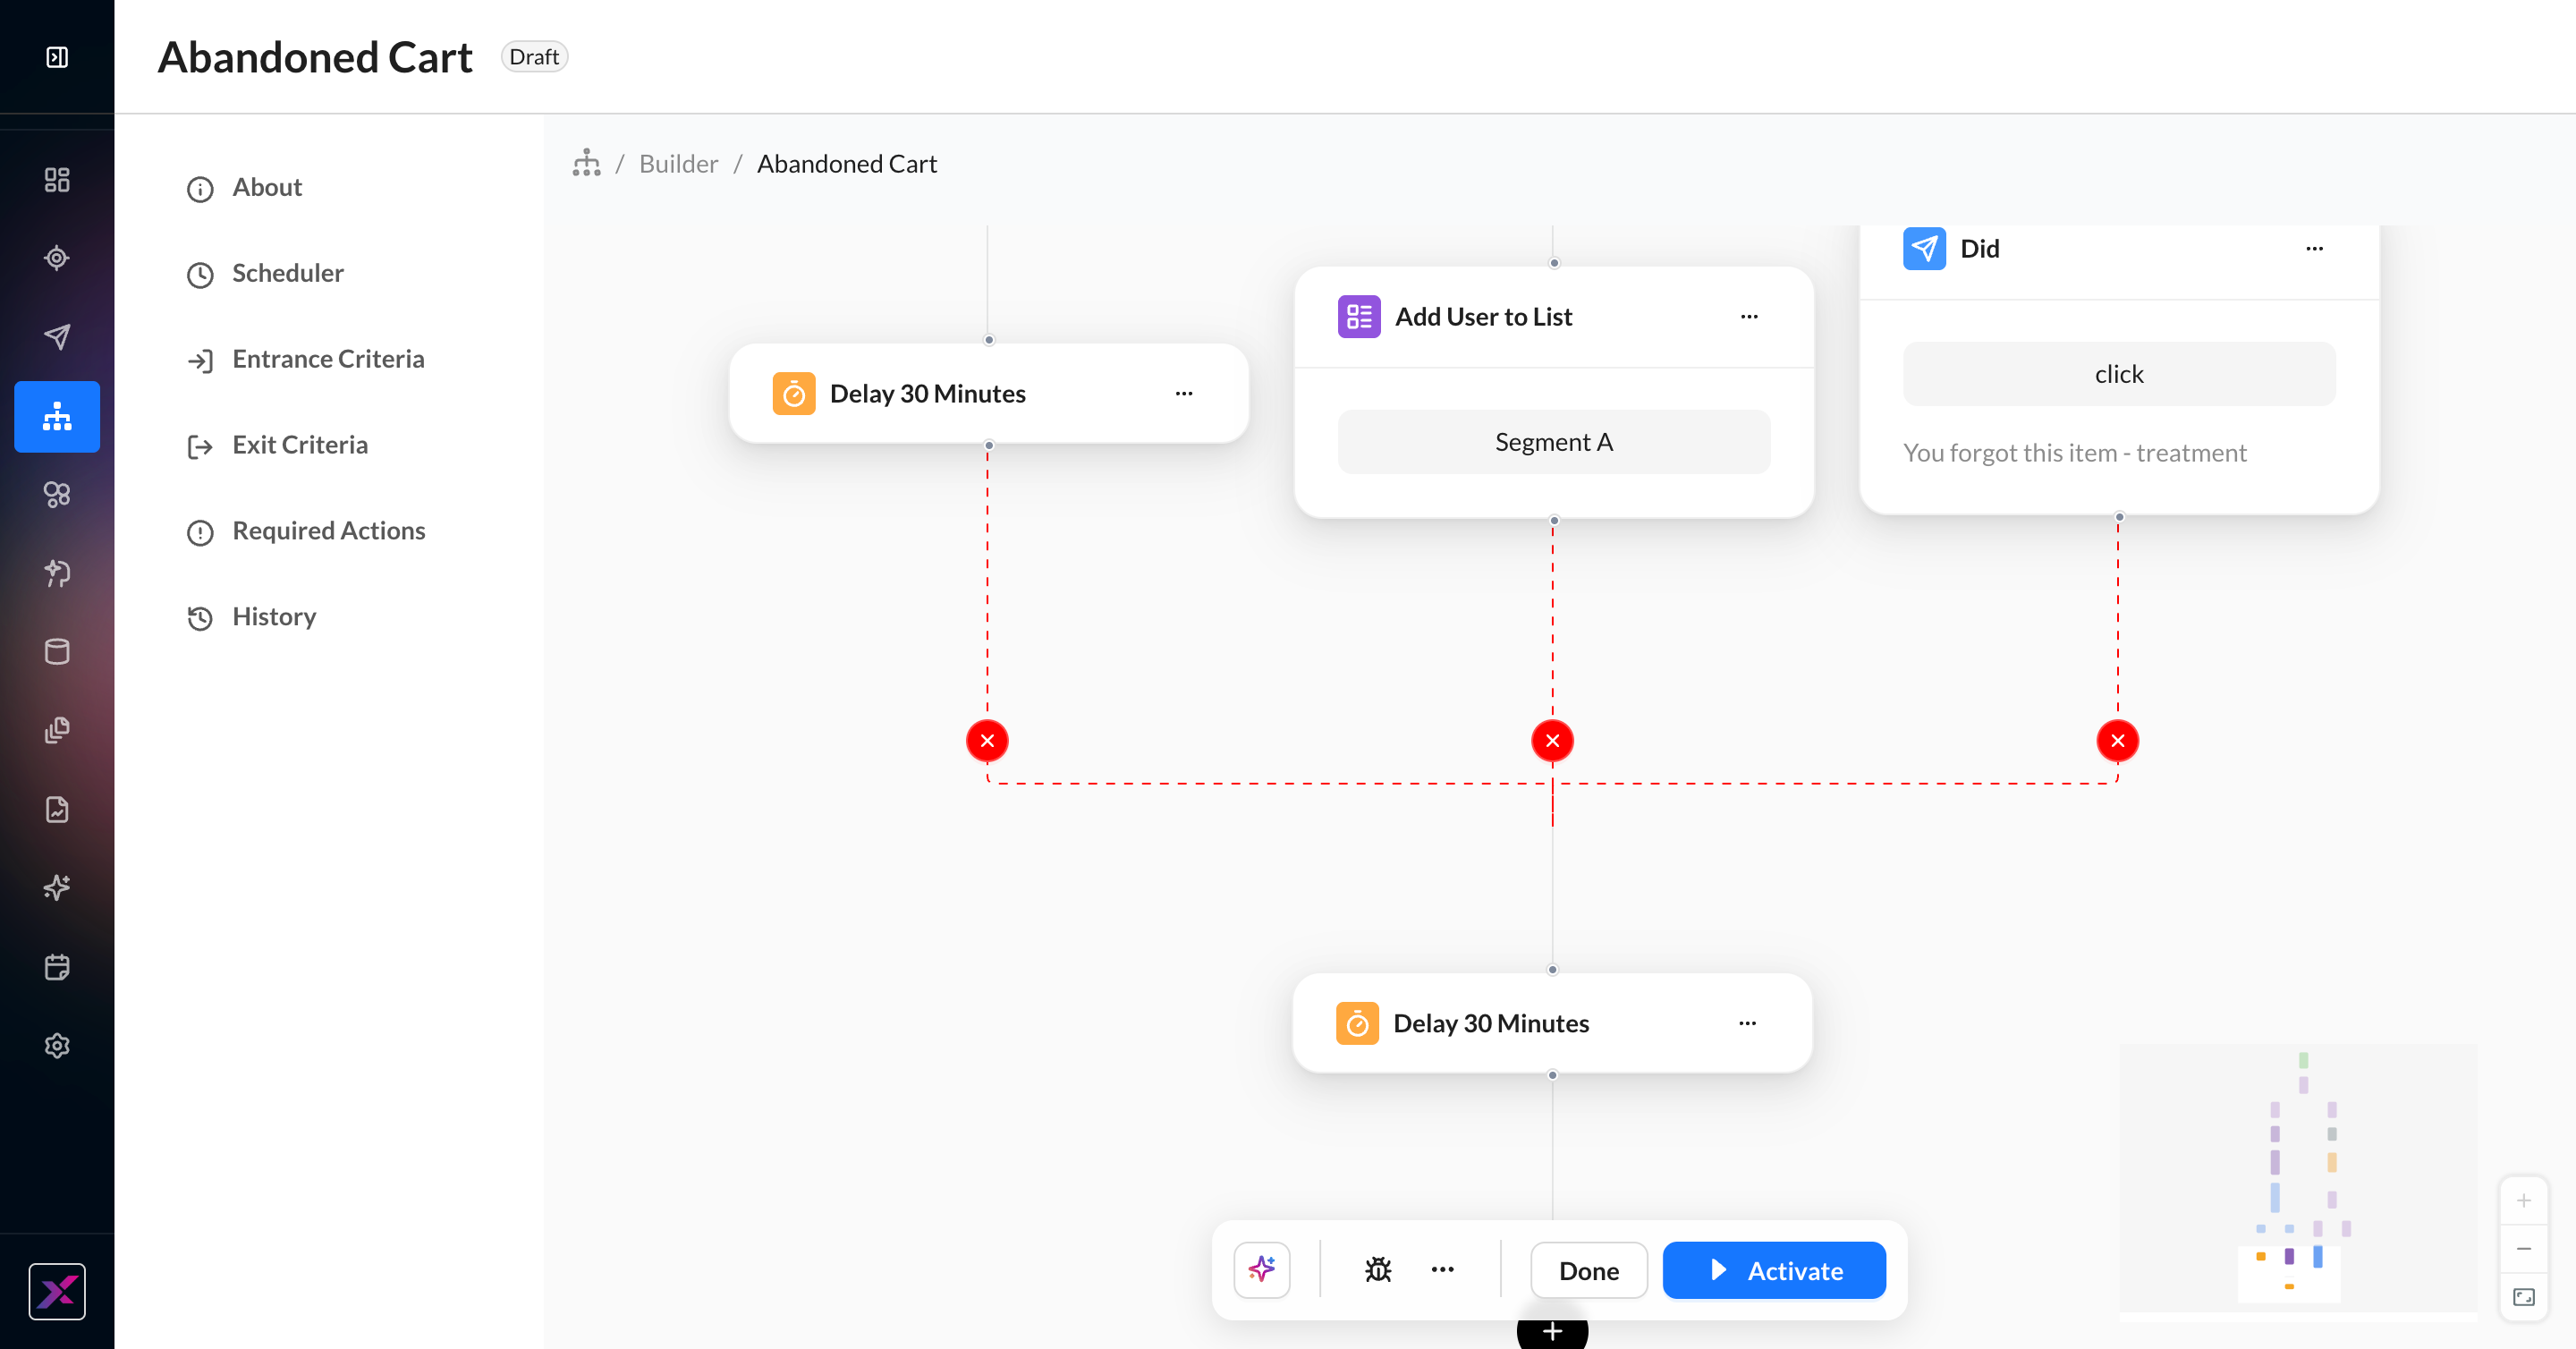
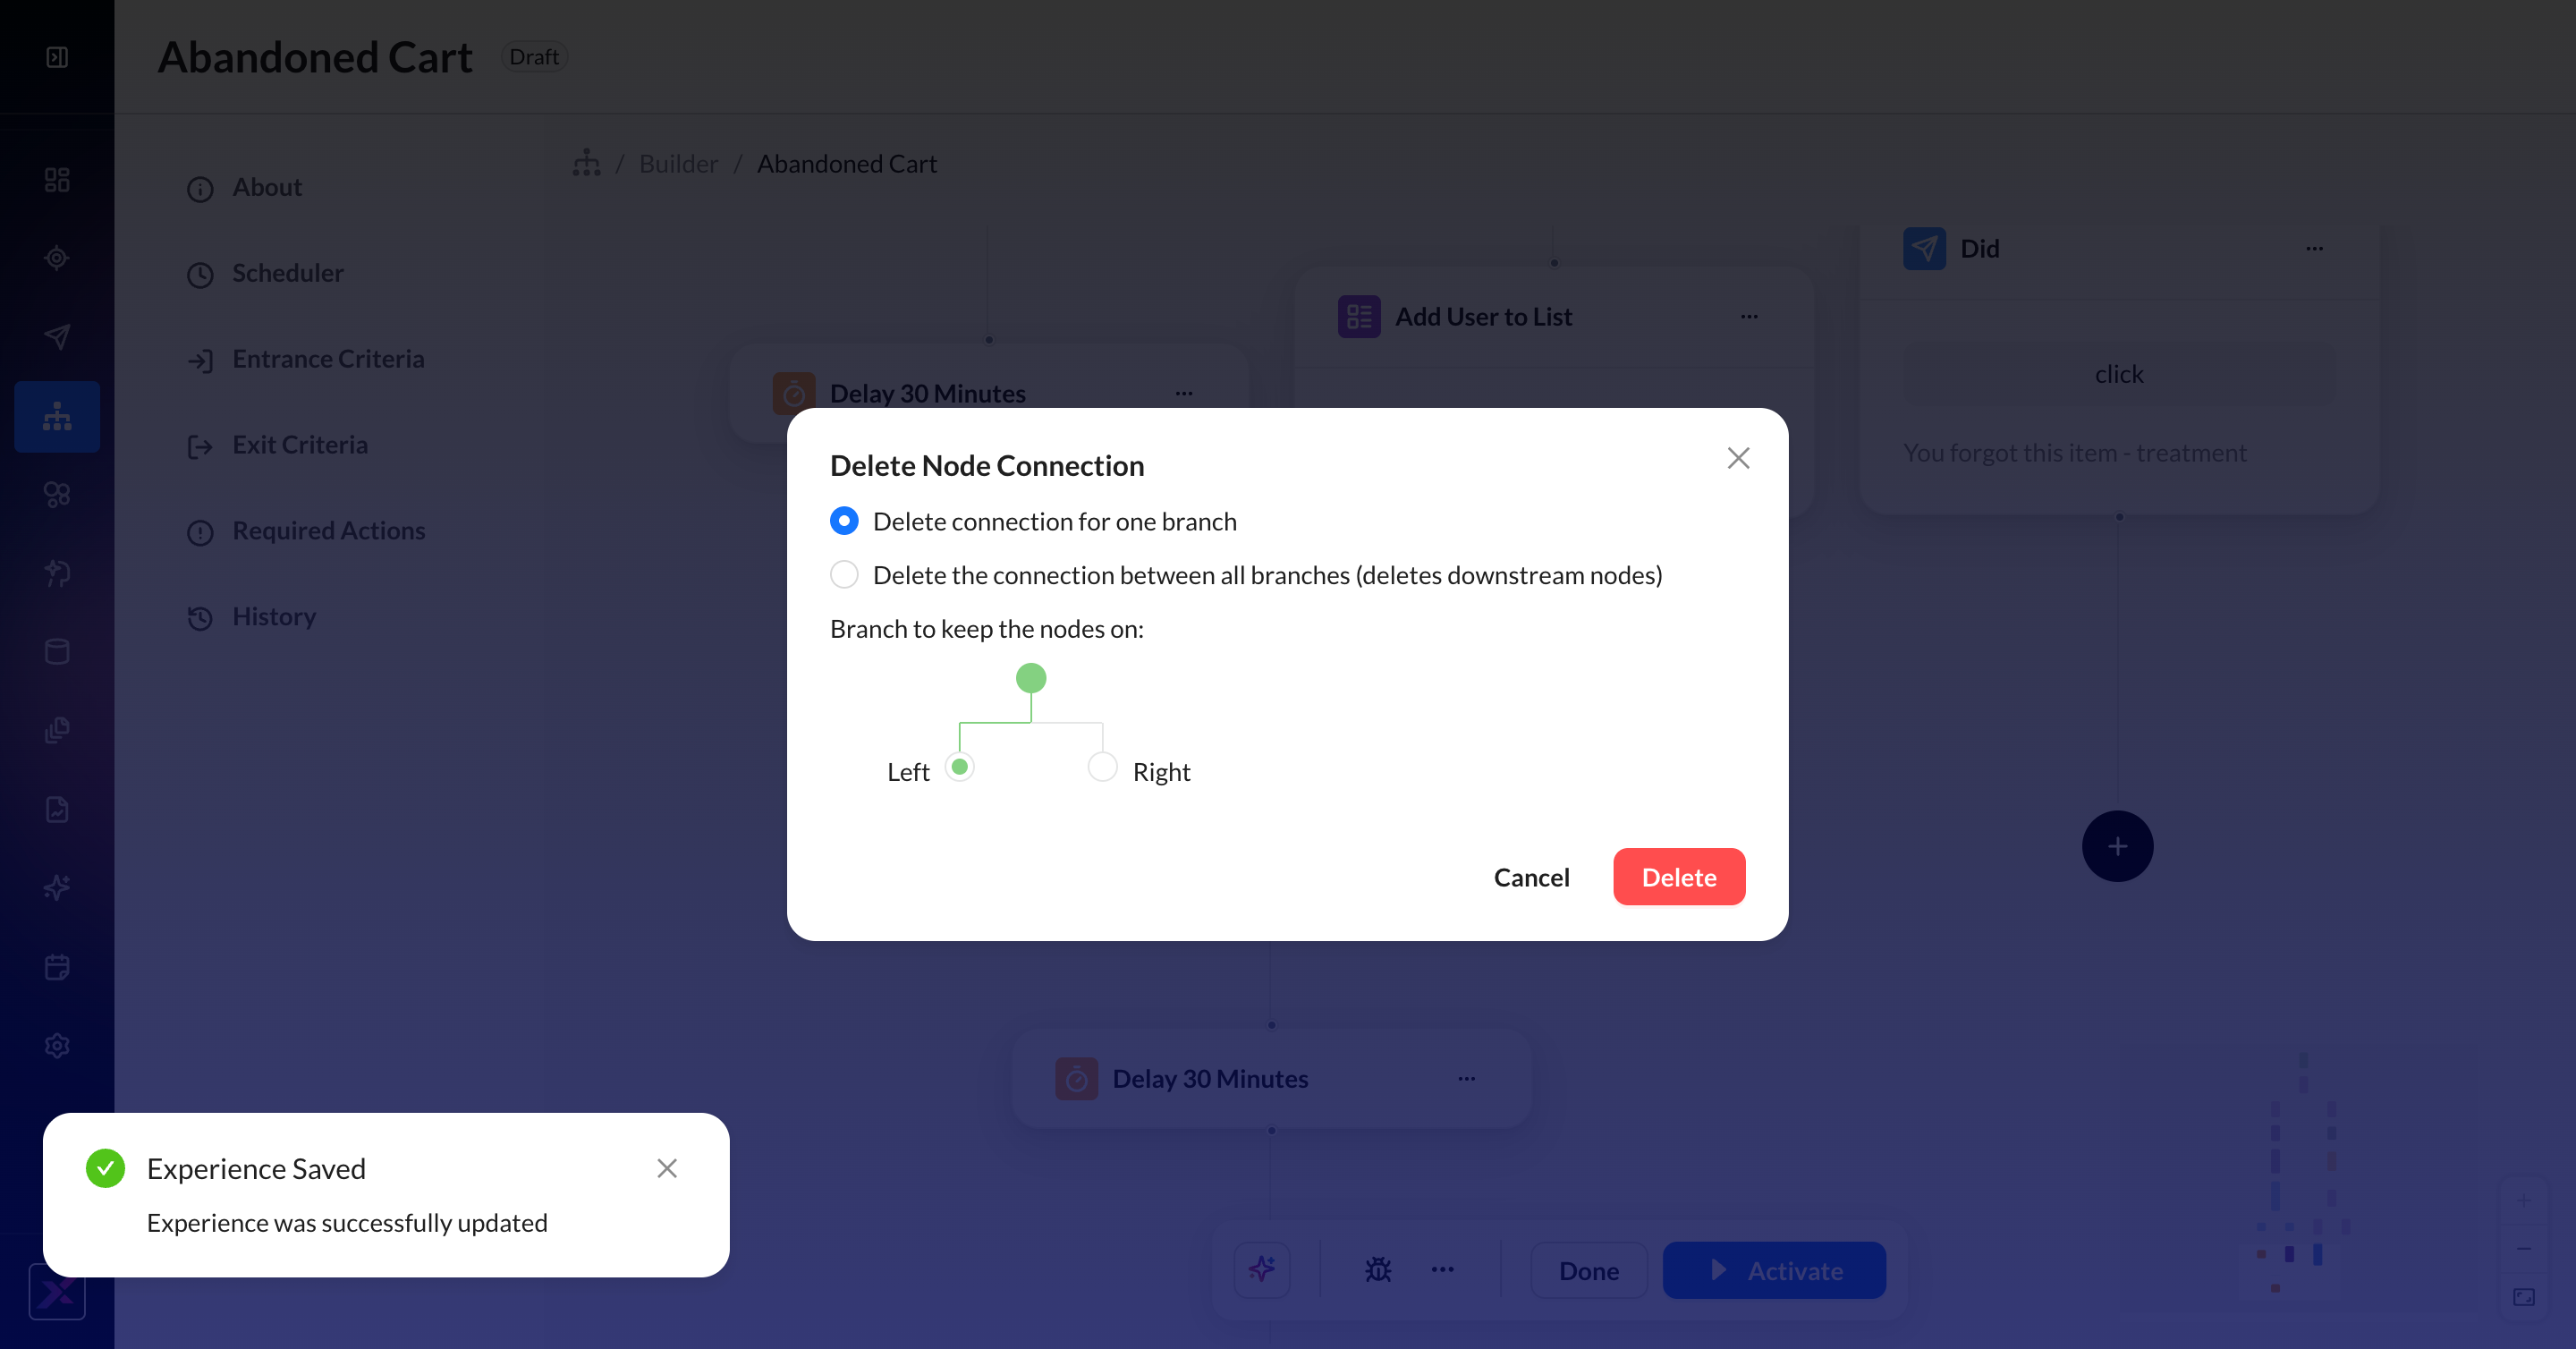
5. When deleting the connection, you’ll have the option to delete the connection for a single branch or delete the entire connection, which will delete downstream nodes. Once you’re down to 2 branches, you will have the option to select the branch you want to keep downstream nodes on.
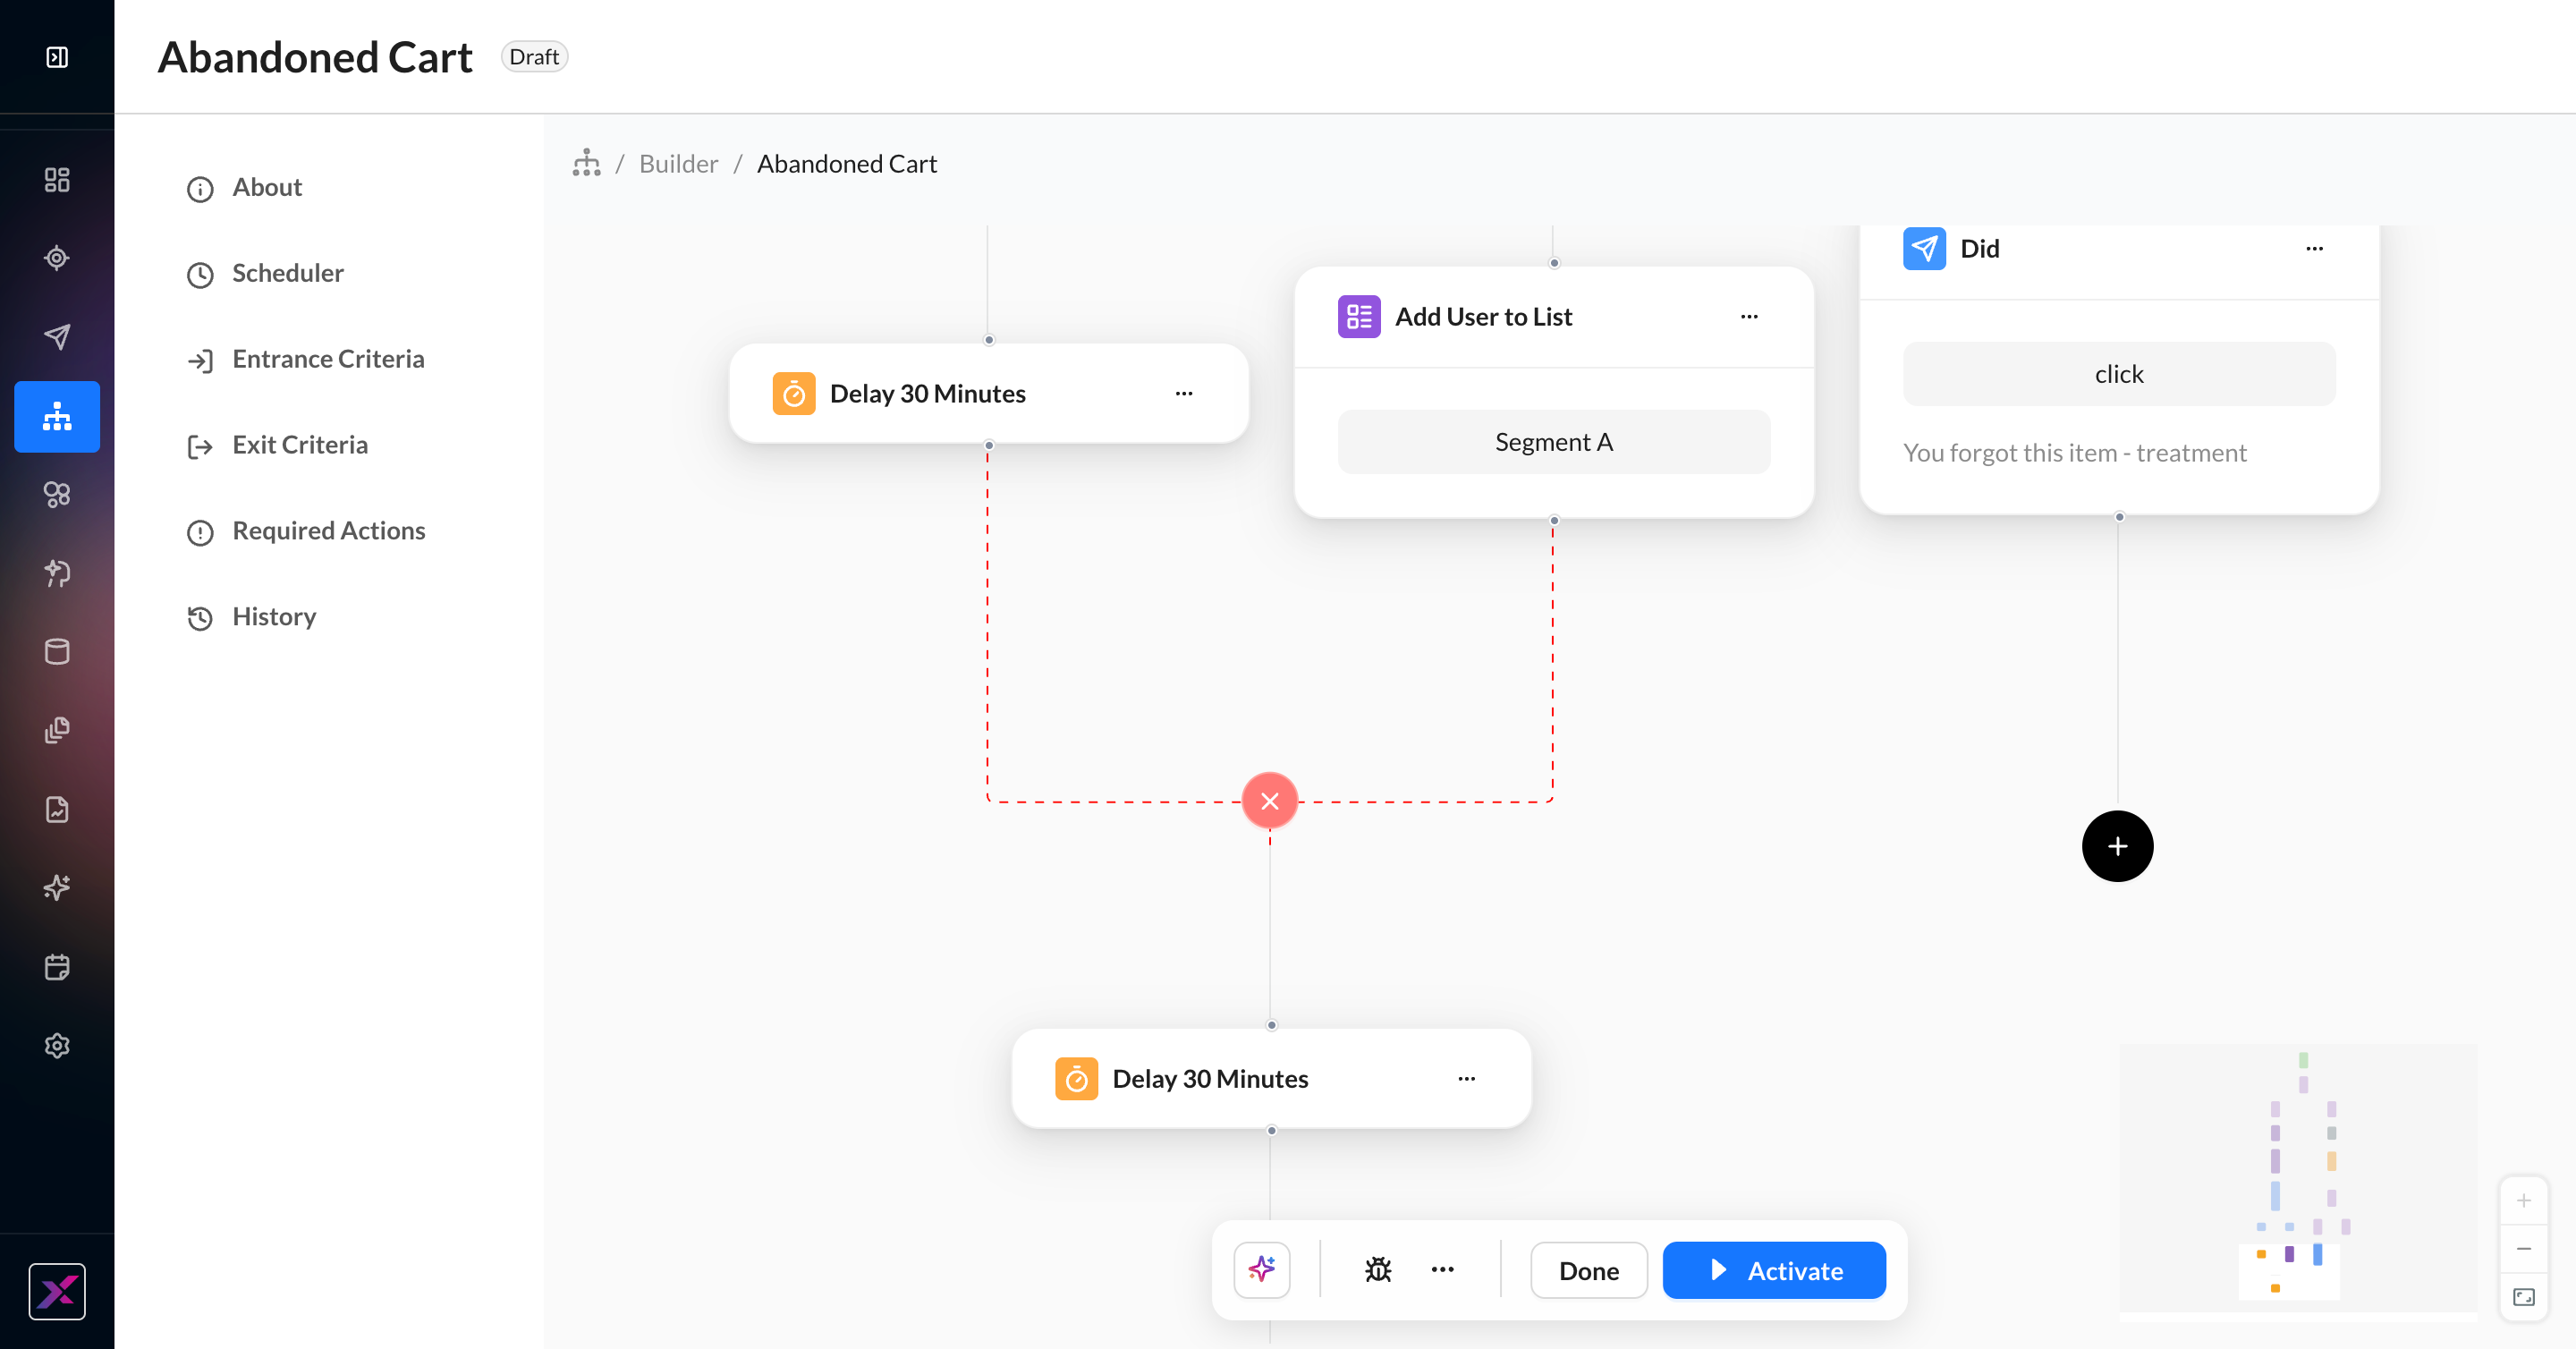
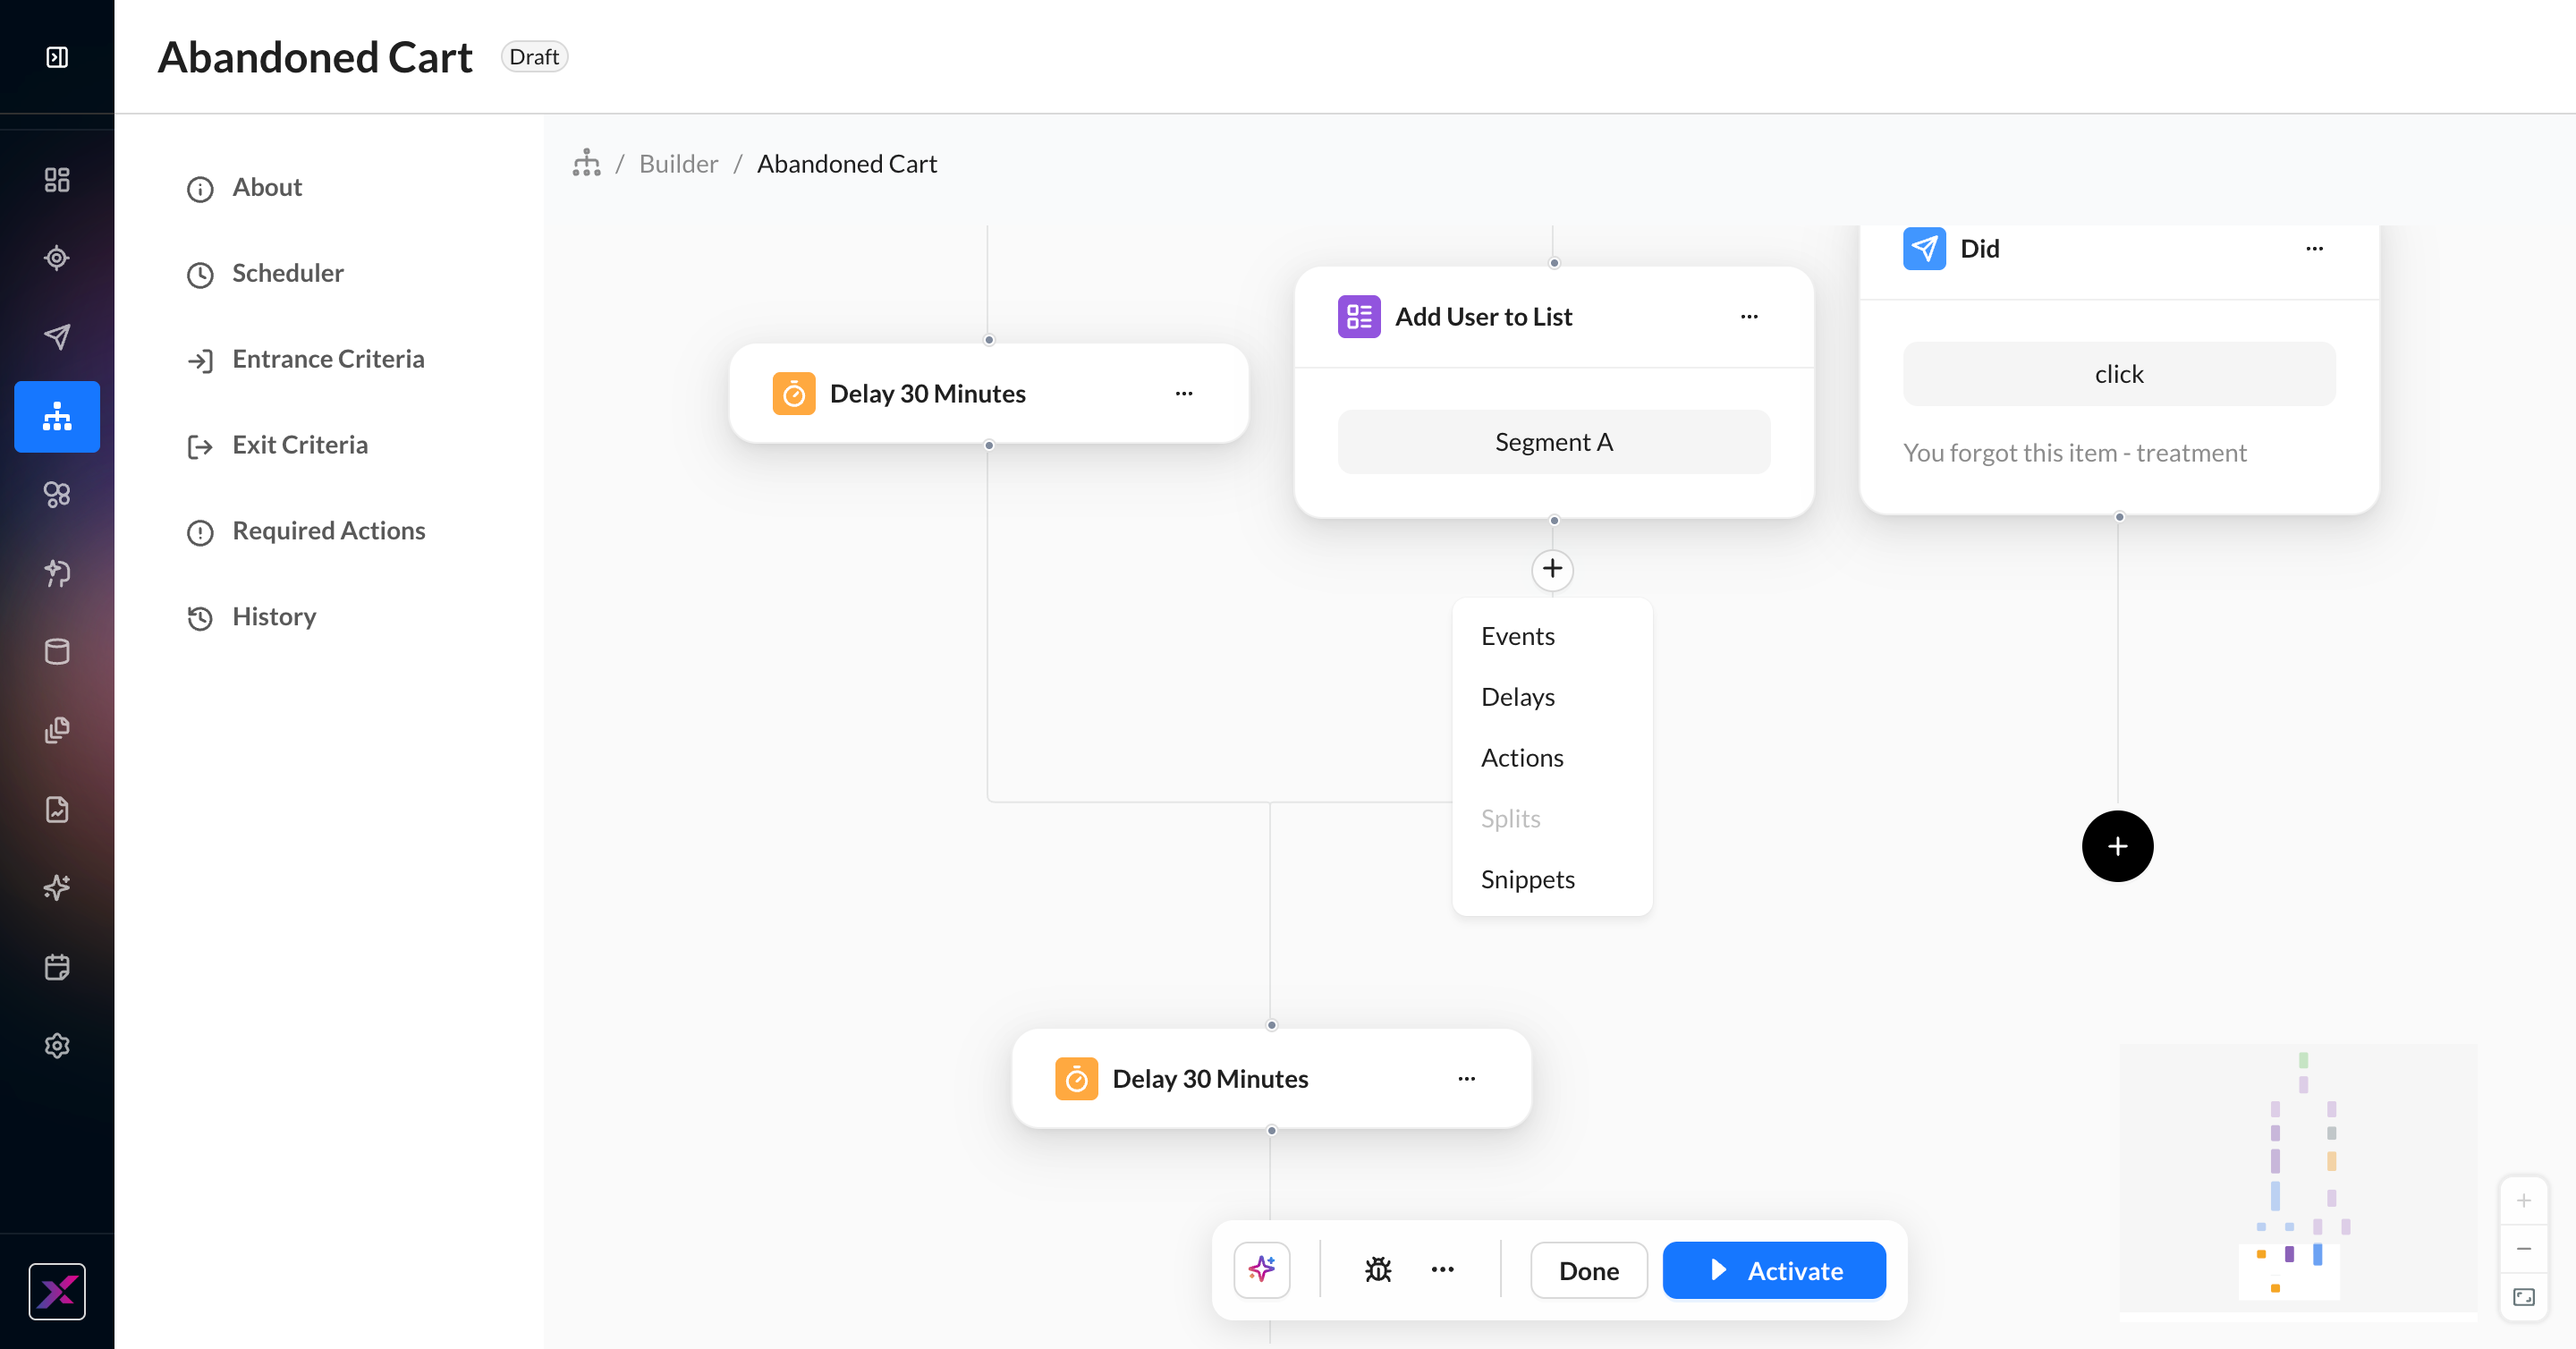
6. You can continue to add nodes along a non-consecutive connection as you normally would a regular branch.
Points to Remember
-
This feature does not support Split by Identity at this time.
-
If there are no eligible nodes, then the Merge button won’t appear in your node menu.
-
There needs to be at least one full node between a branch node and a merge point. For example, a Split by Property node that has a
equals truebranch needs to have at least one node betweenequals trueand a merge. The reason is thatequals trueis part of the Split by Property node and not a standalone node in the logical expression.-
This also applies if you try to delete a full node between a branch node and a merge point. You won’t be able to select Delete in the node menu.
-
-
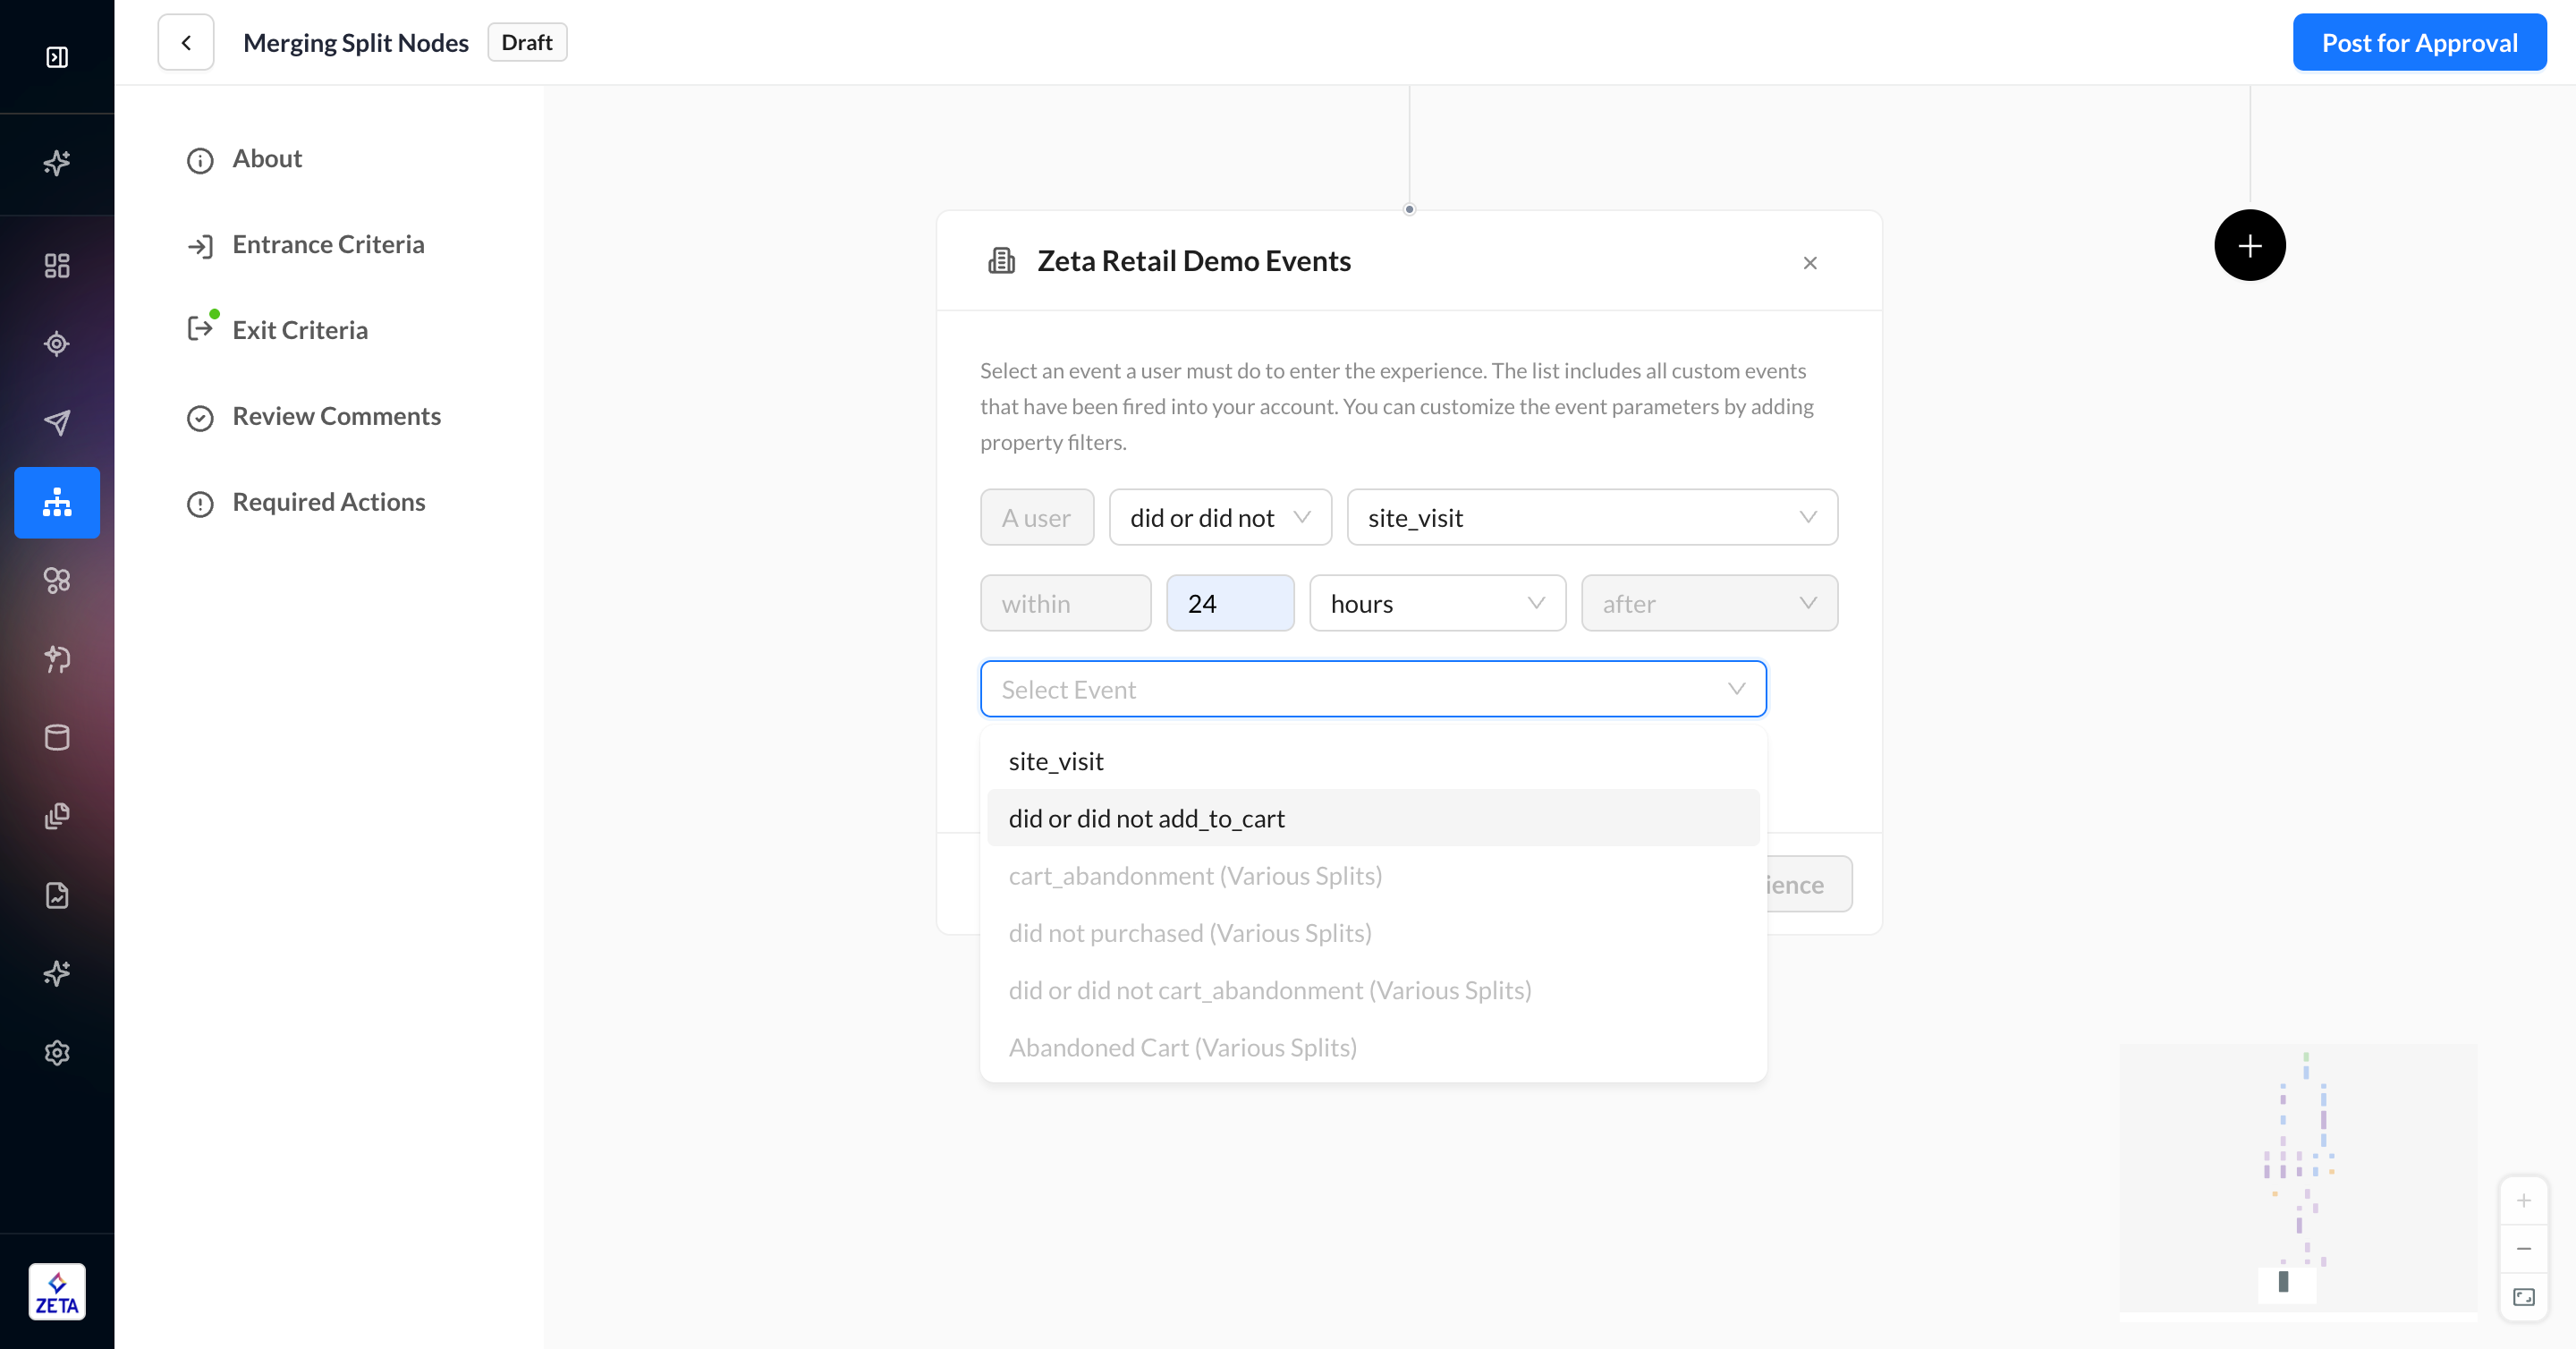
If you add a node that references an upstream node, then only nodes that were passed through by all users will be eligible to be selected.
-
For example, if a branch with an
add_to_cartevent node merges with a branch that did not have anadd_to_cartevent node, thenadd_to_cartcannot be referenced later in the merged flow because that event only applies to some of the users being evaluated at the current node.
-
Swapping Node Positions
Sometimes, merging non-consecutive nodes can result in large loops that can become confusing. If your new connection is between nodes that are far away from each other, you will be prompted to move the positions of the branches to be closer to one another without affecting the underlying logic that powers the experience.
1. Click Merge on the node menu and select a destination point to connect the current node.
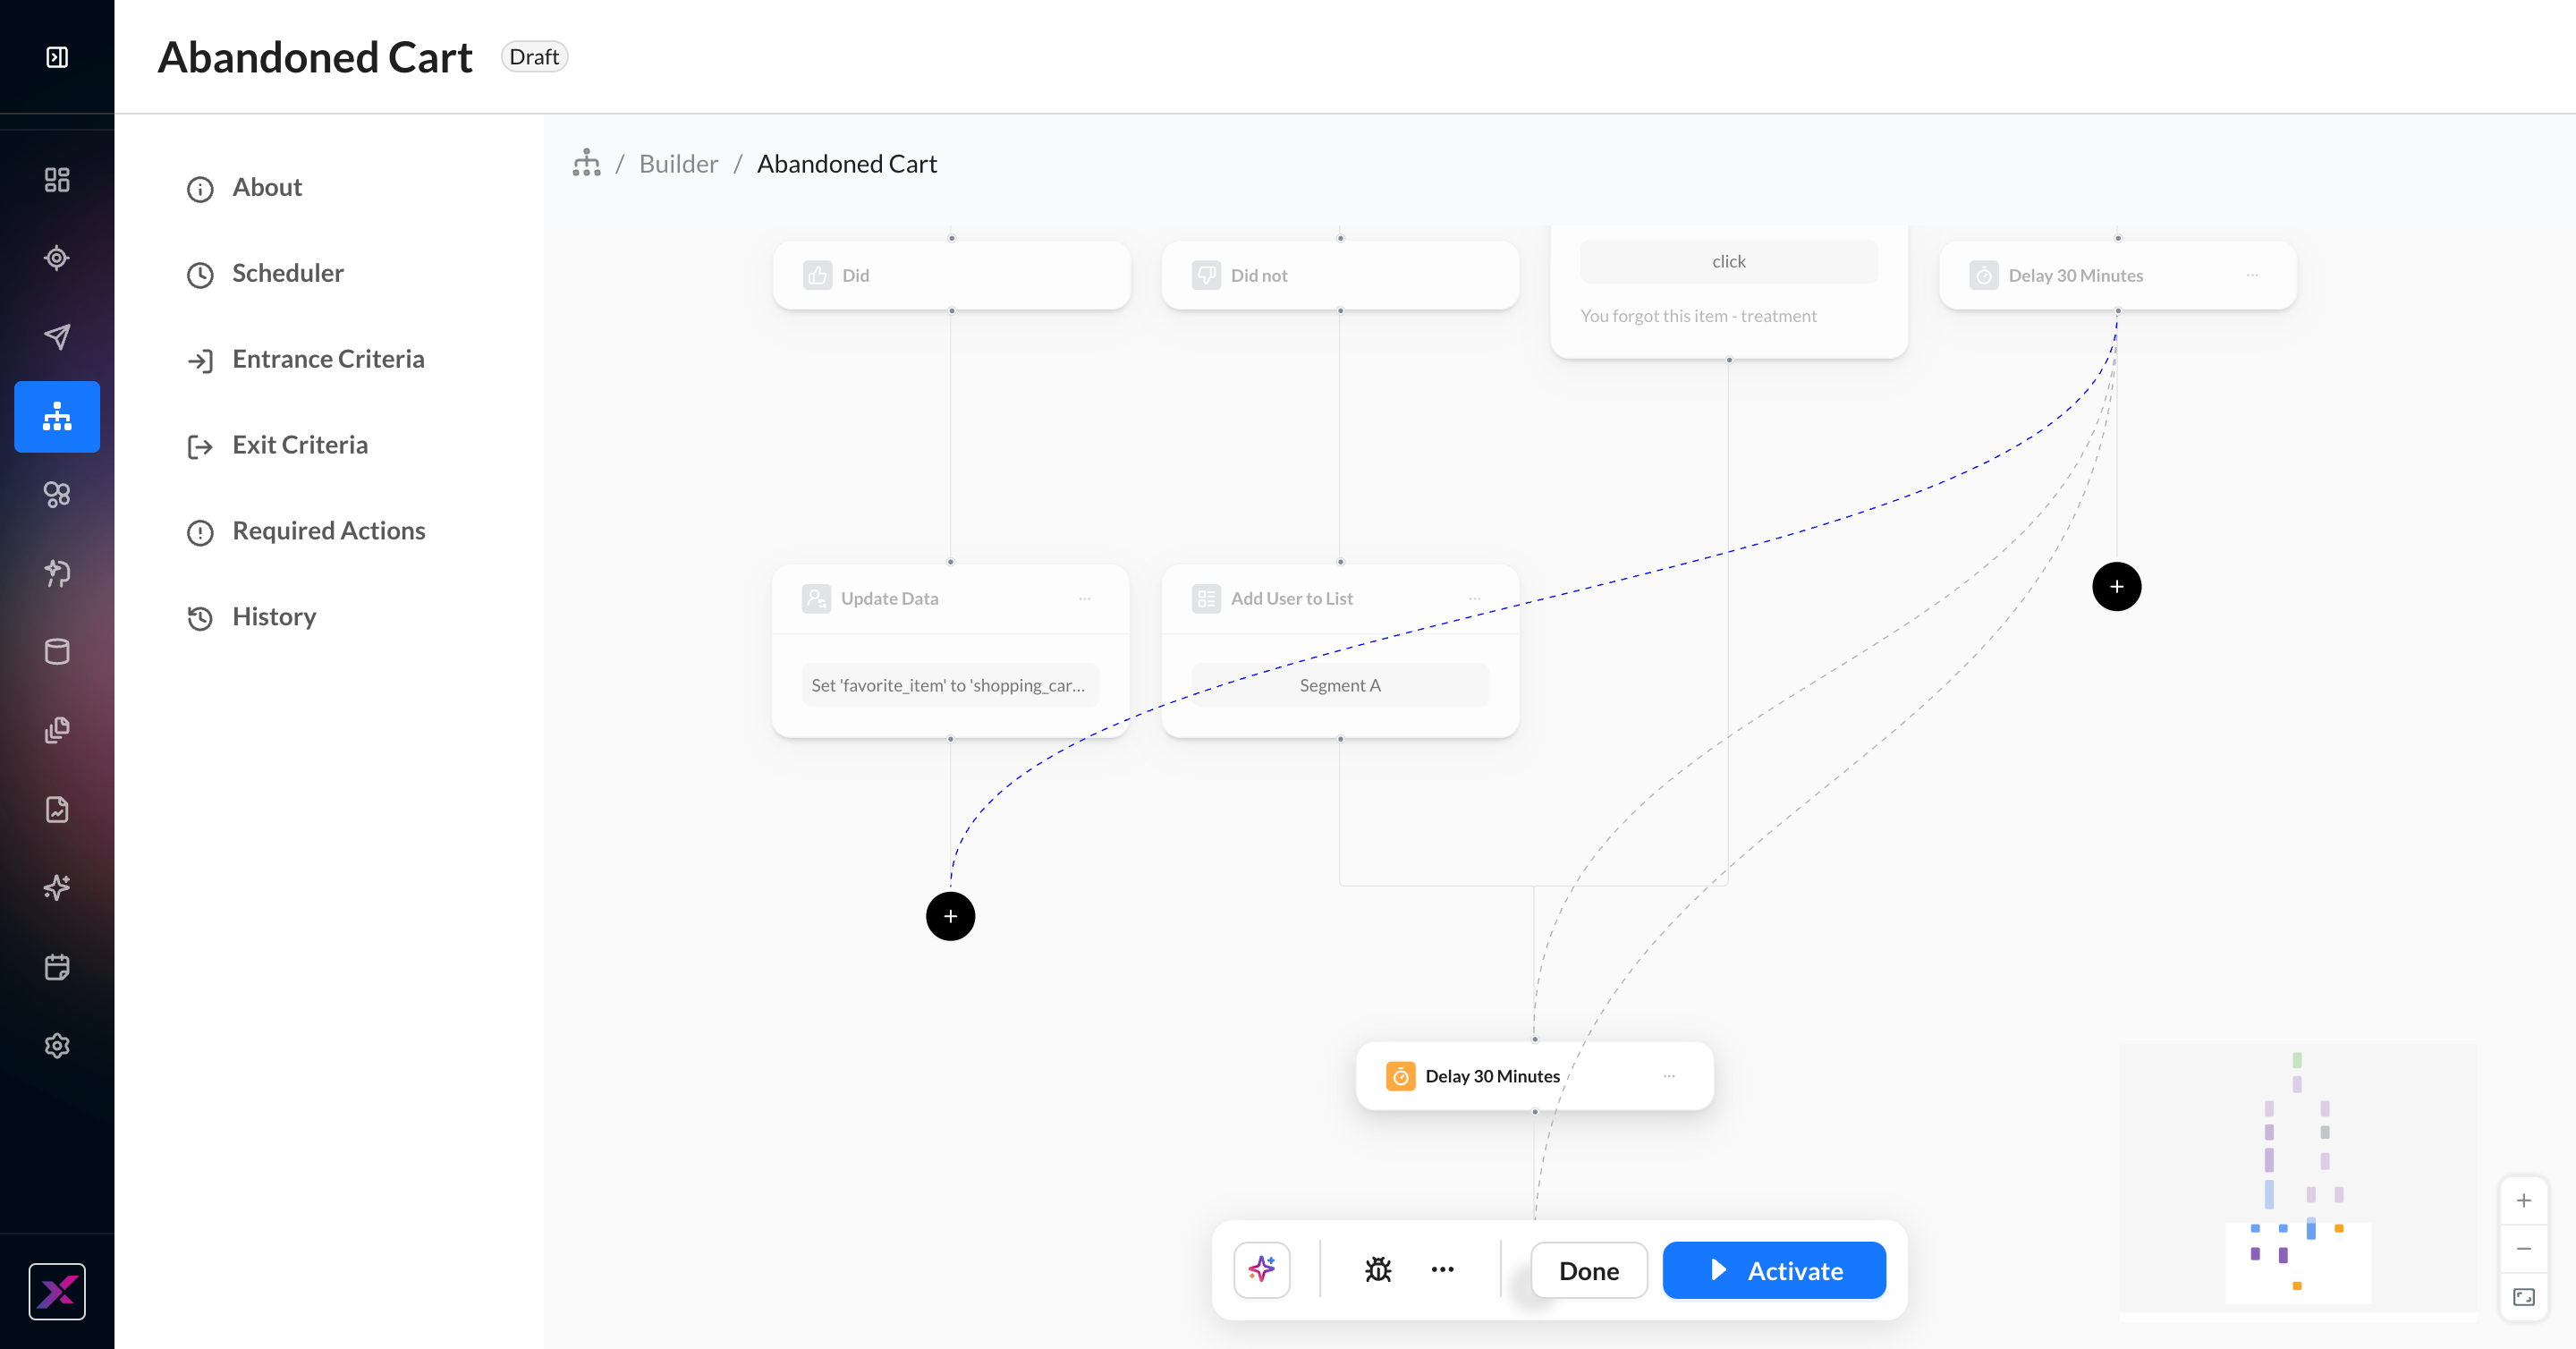
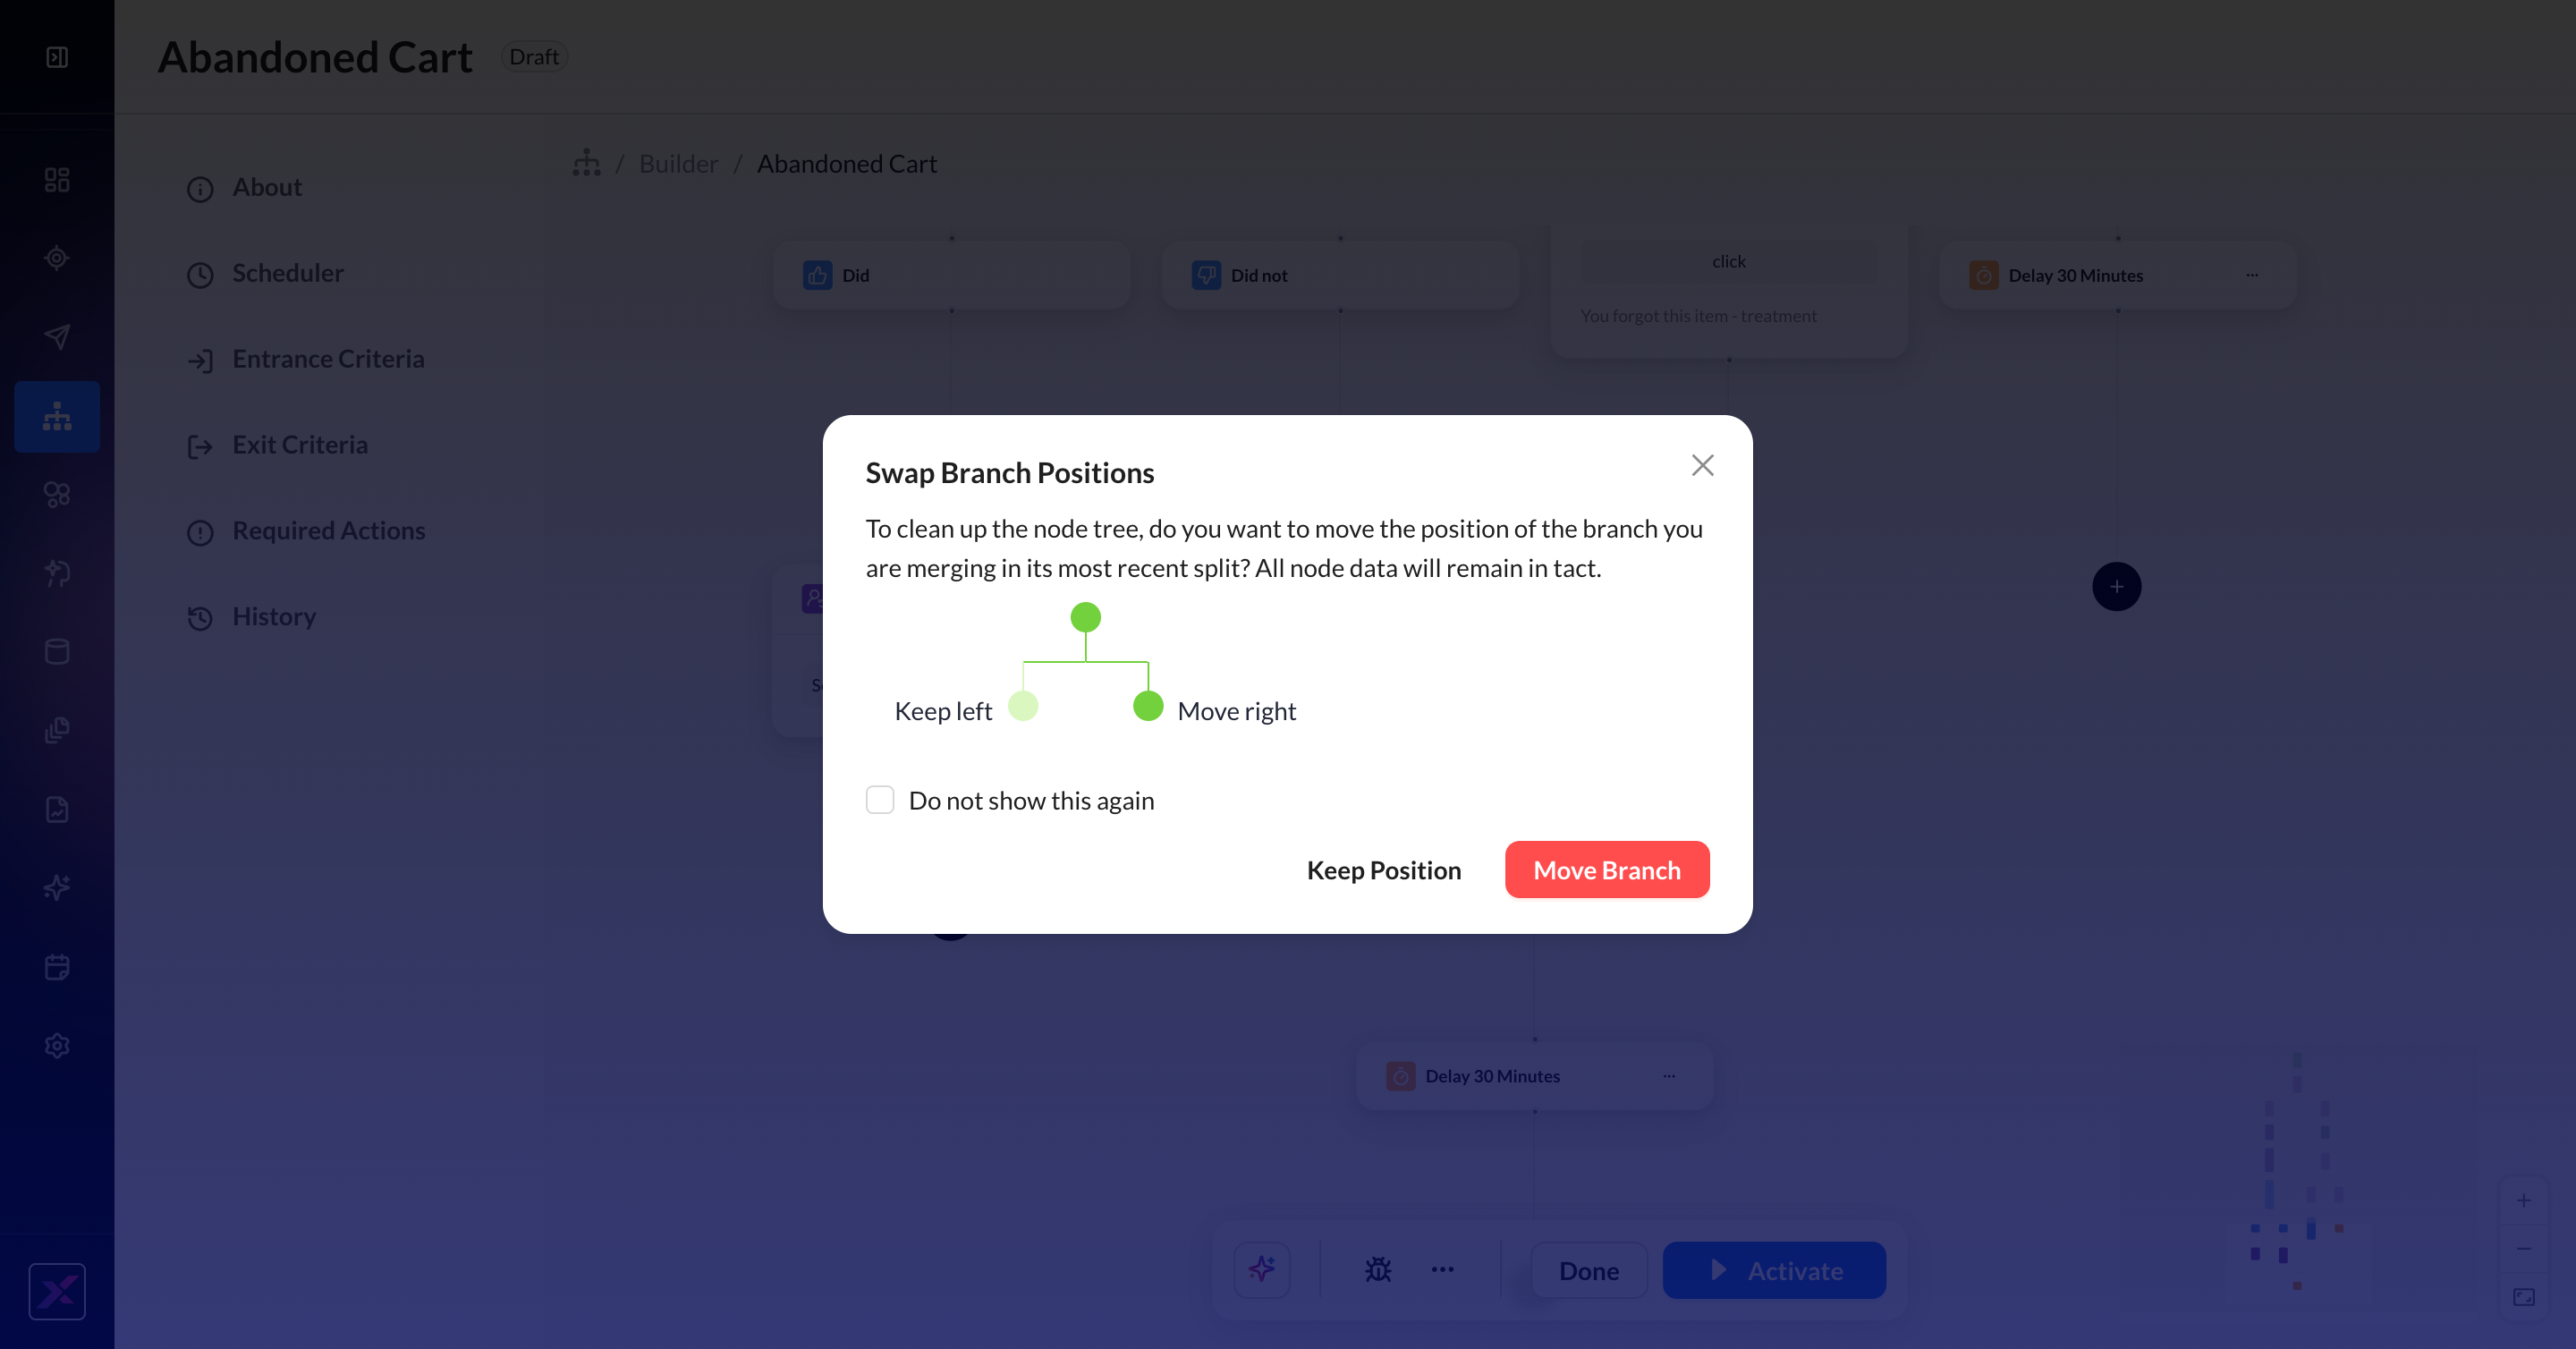
2. When you select the destination node, you will be prompted to confirm if you want to swap branch positions in the destination node’s most recent split. In this example, the Update Data node is in the furthest-left position of a Did or Did Not instrumentation. To move it closer to the Delay 30 Minutes node, the ZMP is proposing that you move the Did > Update Data branch to the further-right position of the Did or Did Not decisioning split.
The original branch position is noted in light green and the proposed position in green. If you do not swap them, the canvas will stay as is, but it may be difficult to discern the path and placement of the nodes.
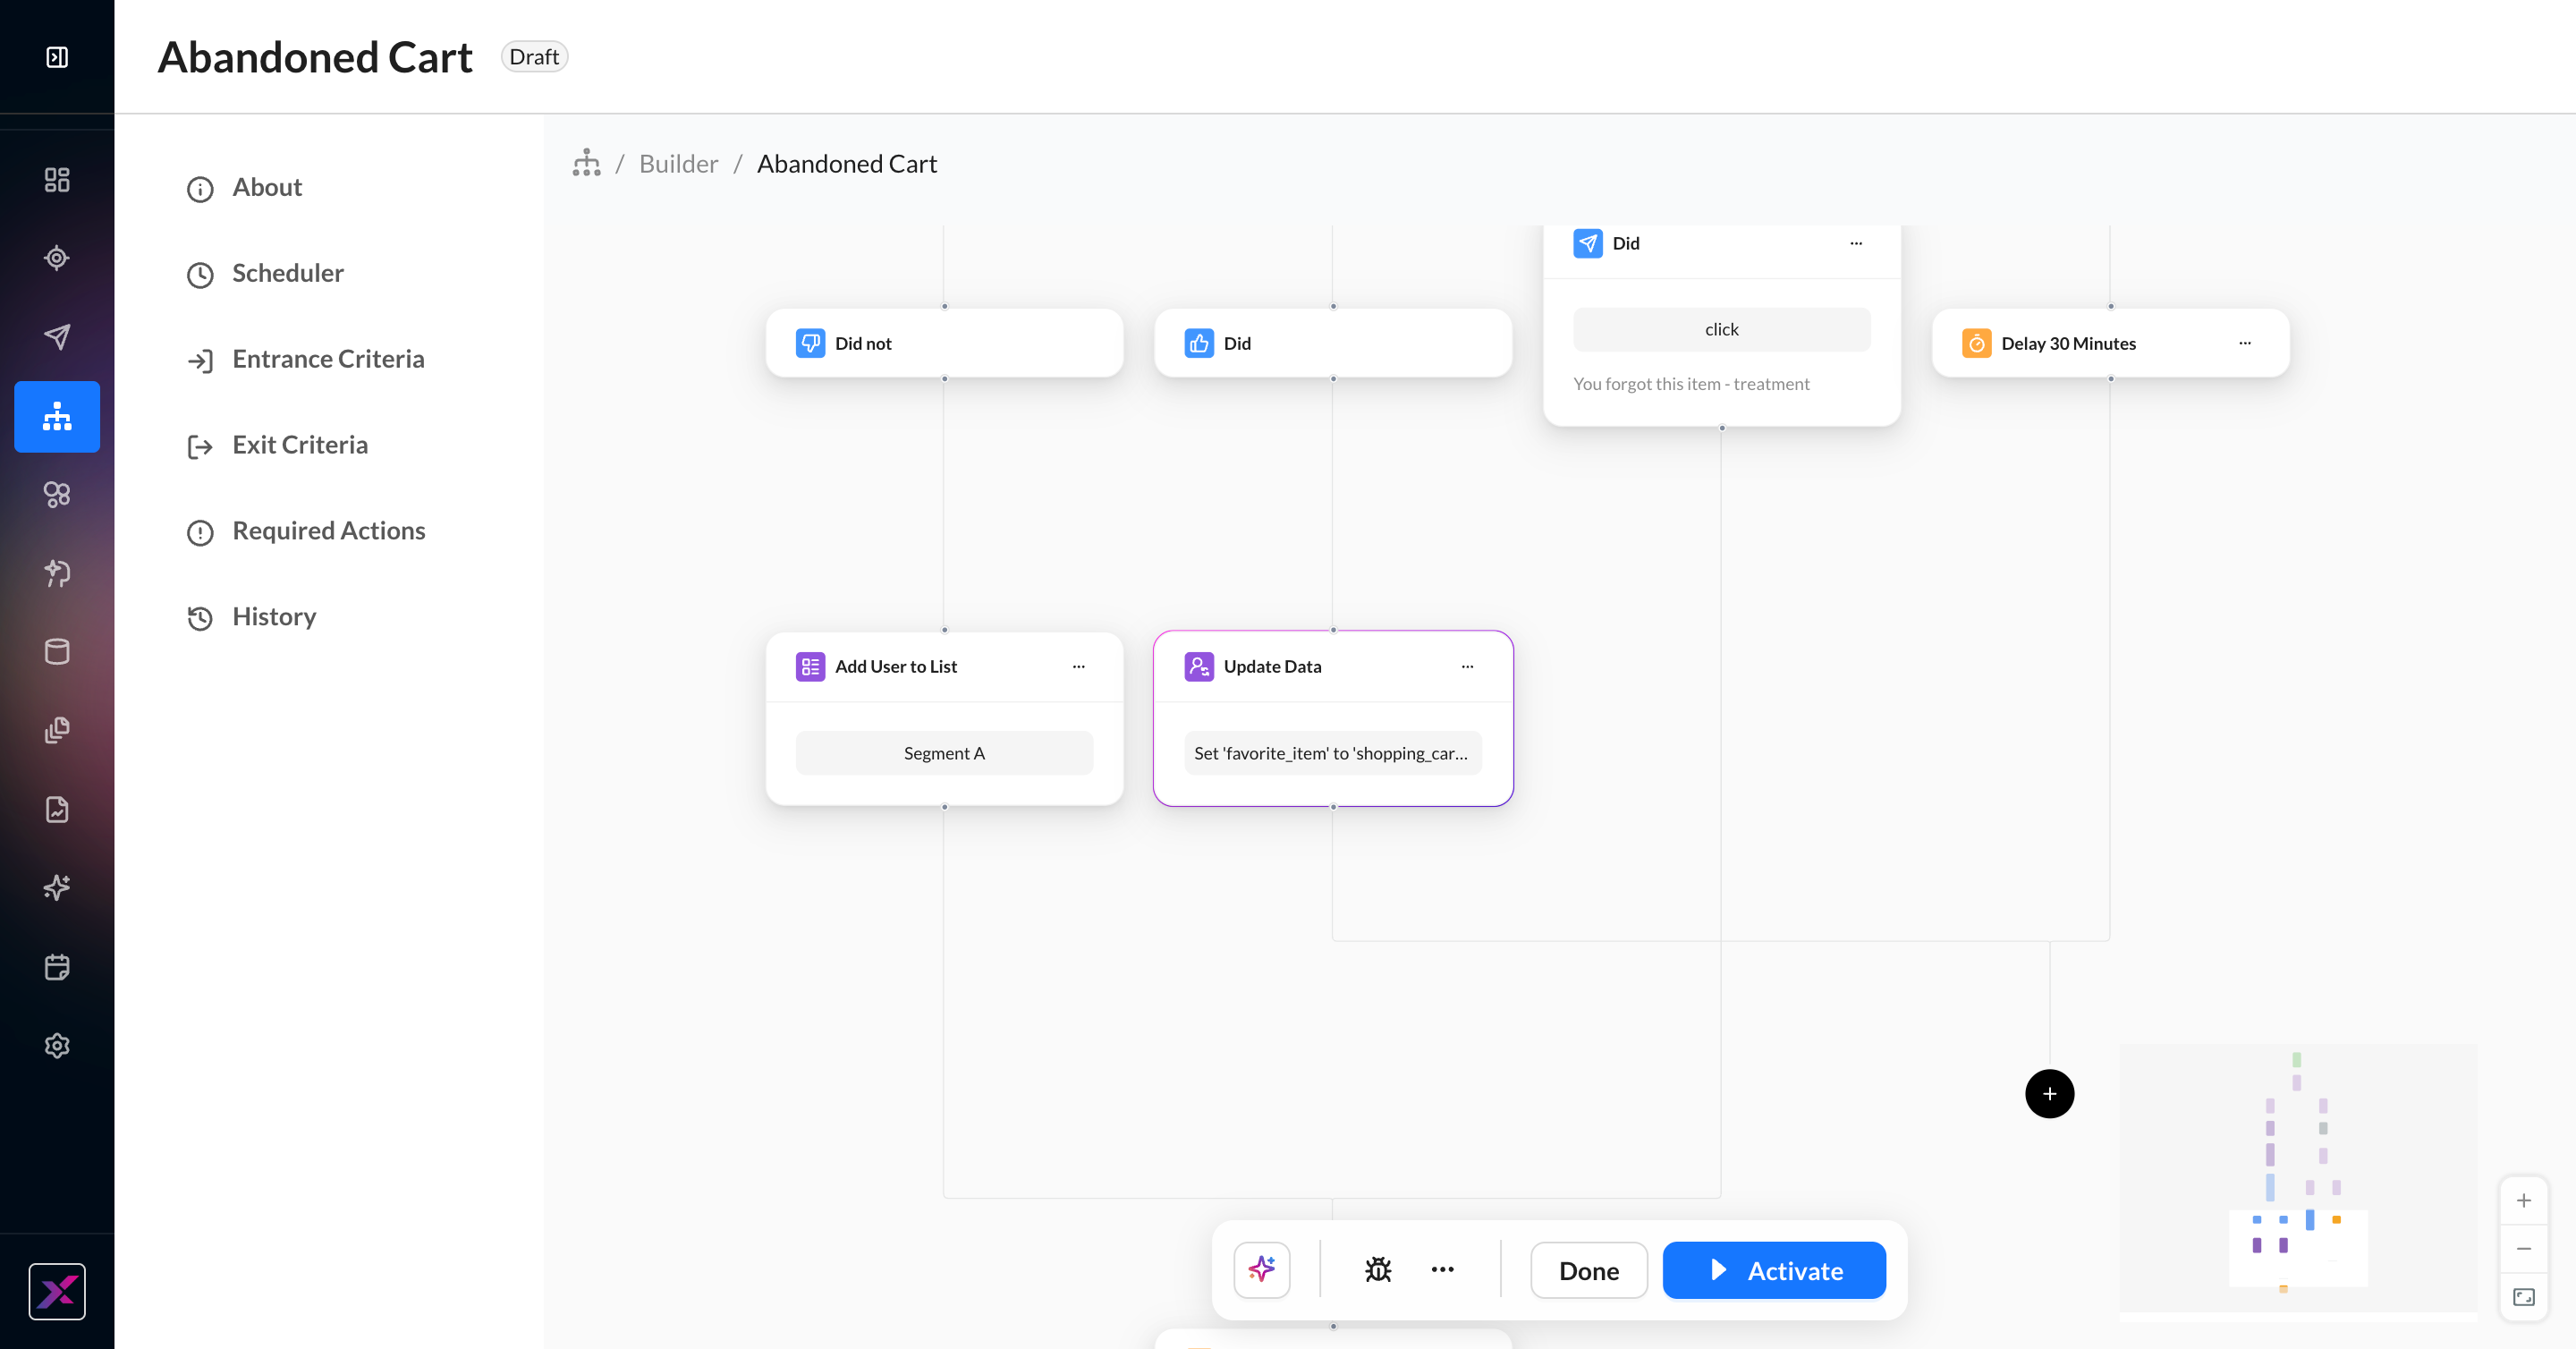
3. If you click Move Branch, then the new positions will take effect. In this example, the Did > Update Data has swapped positions with the Did Not > Add User to List branch, which used to be so that it’s closer to the Delay 30 Minutes node that it is merging with. If this split had more than 2 branches, then each branch would be shifted to the left to make room for the Did > Update Data branch.
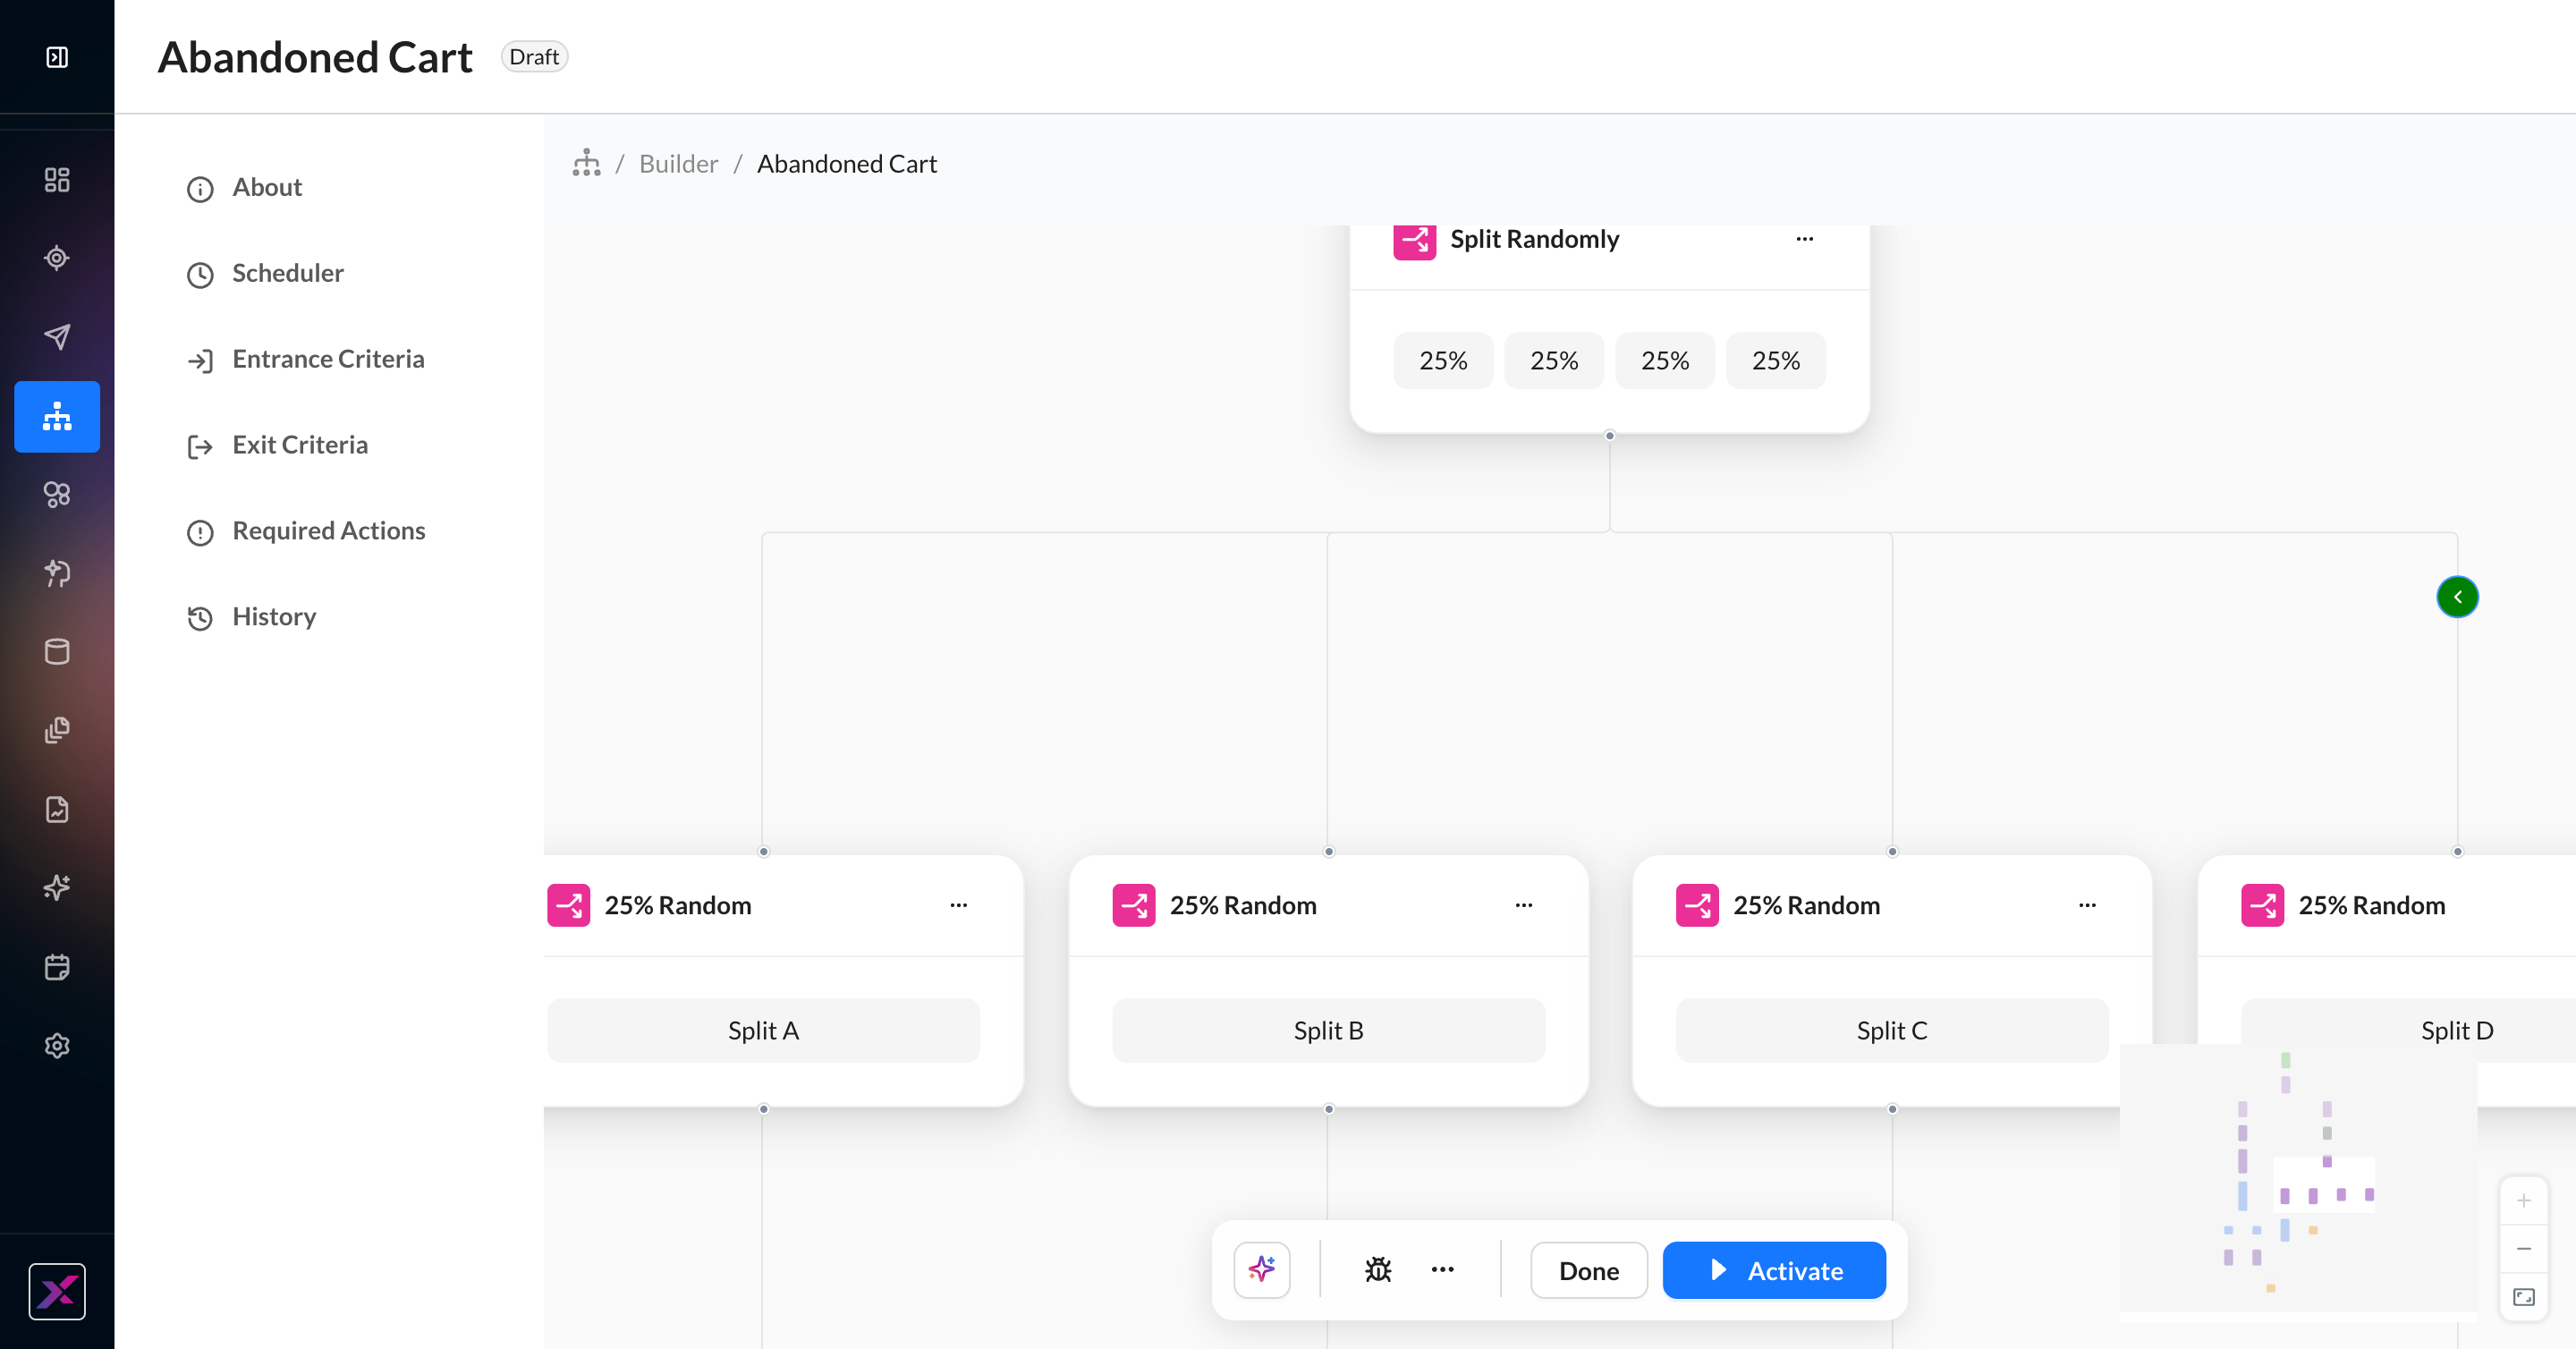
4. Moving branch positions is still possible even without a merge. Hover on each branch of a split to reveal an arrow that will let you swap to the furthest position in the direction of the arrow. For 2-branch splits, the arrows will point in the opposite direction of the branch position. For splits with 3+ branches, the arrow will point to the left.
Deleting Nodes
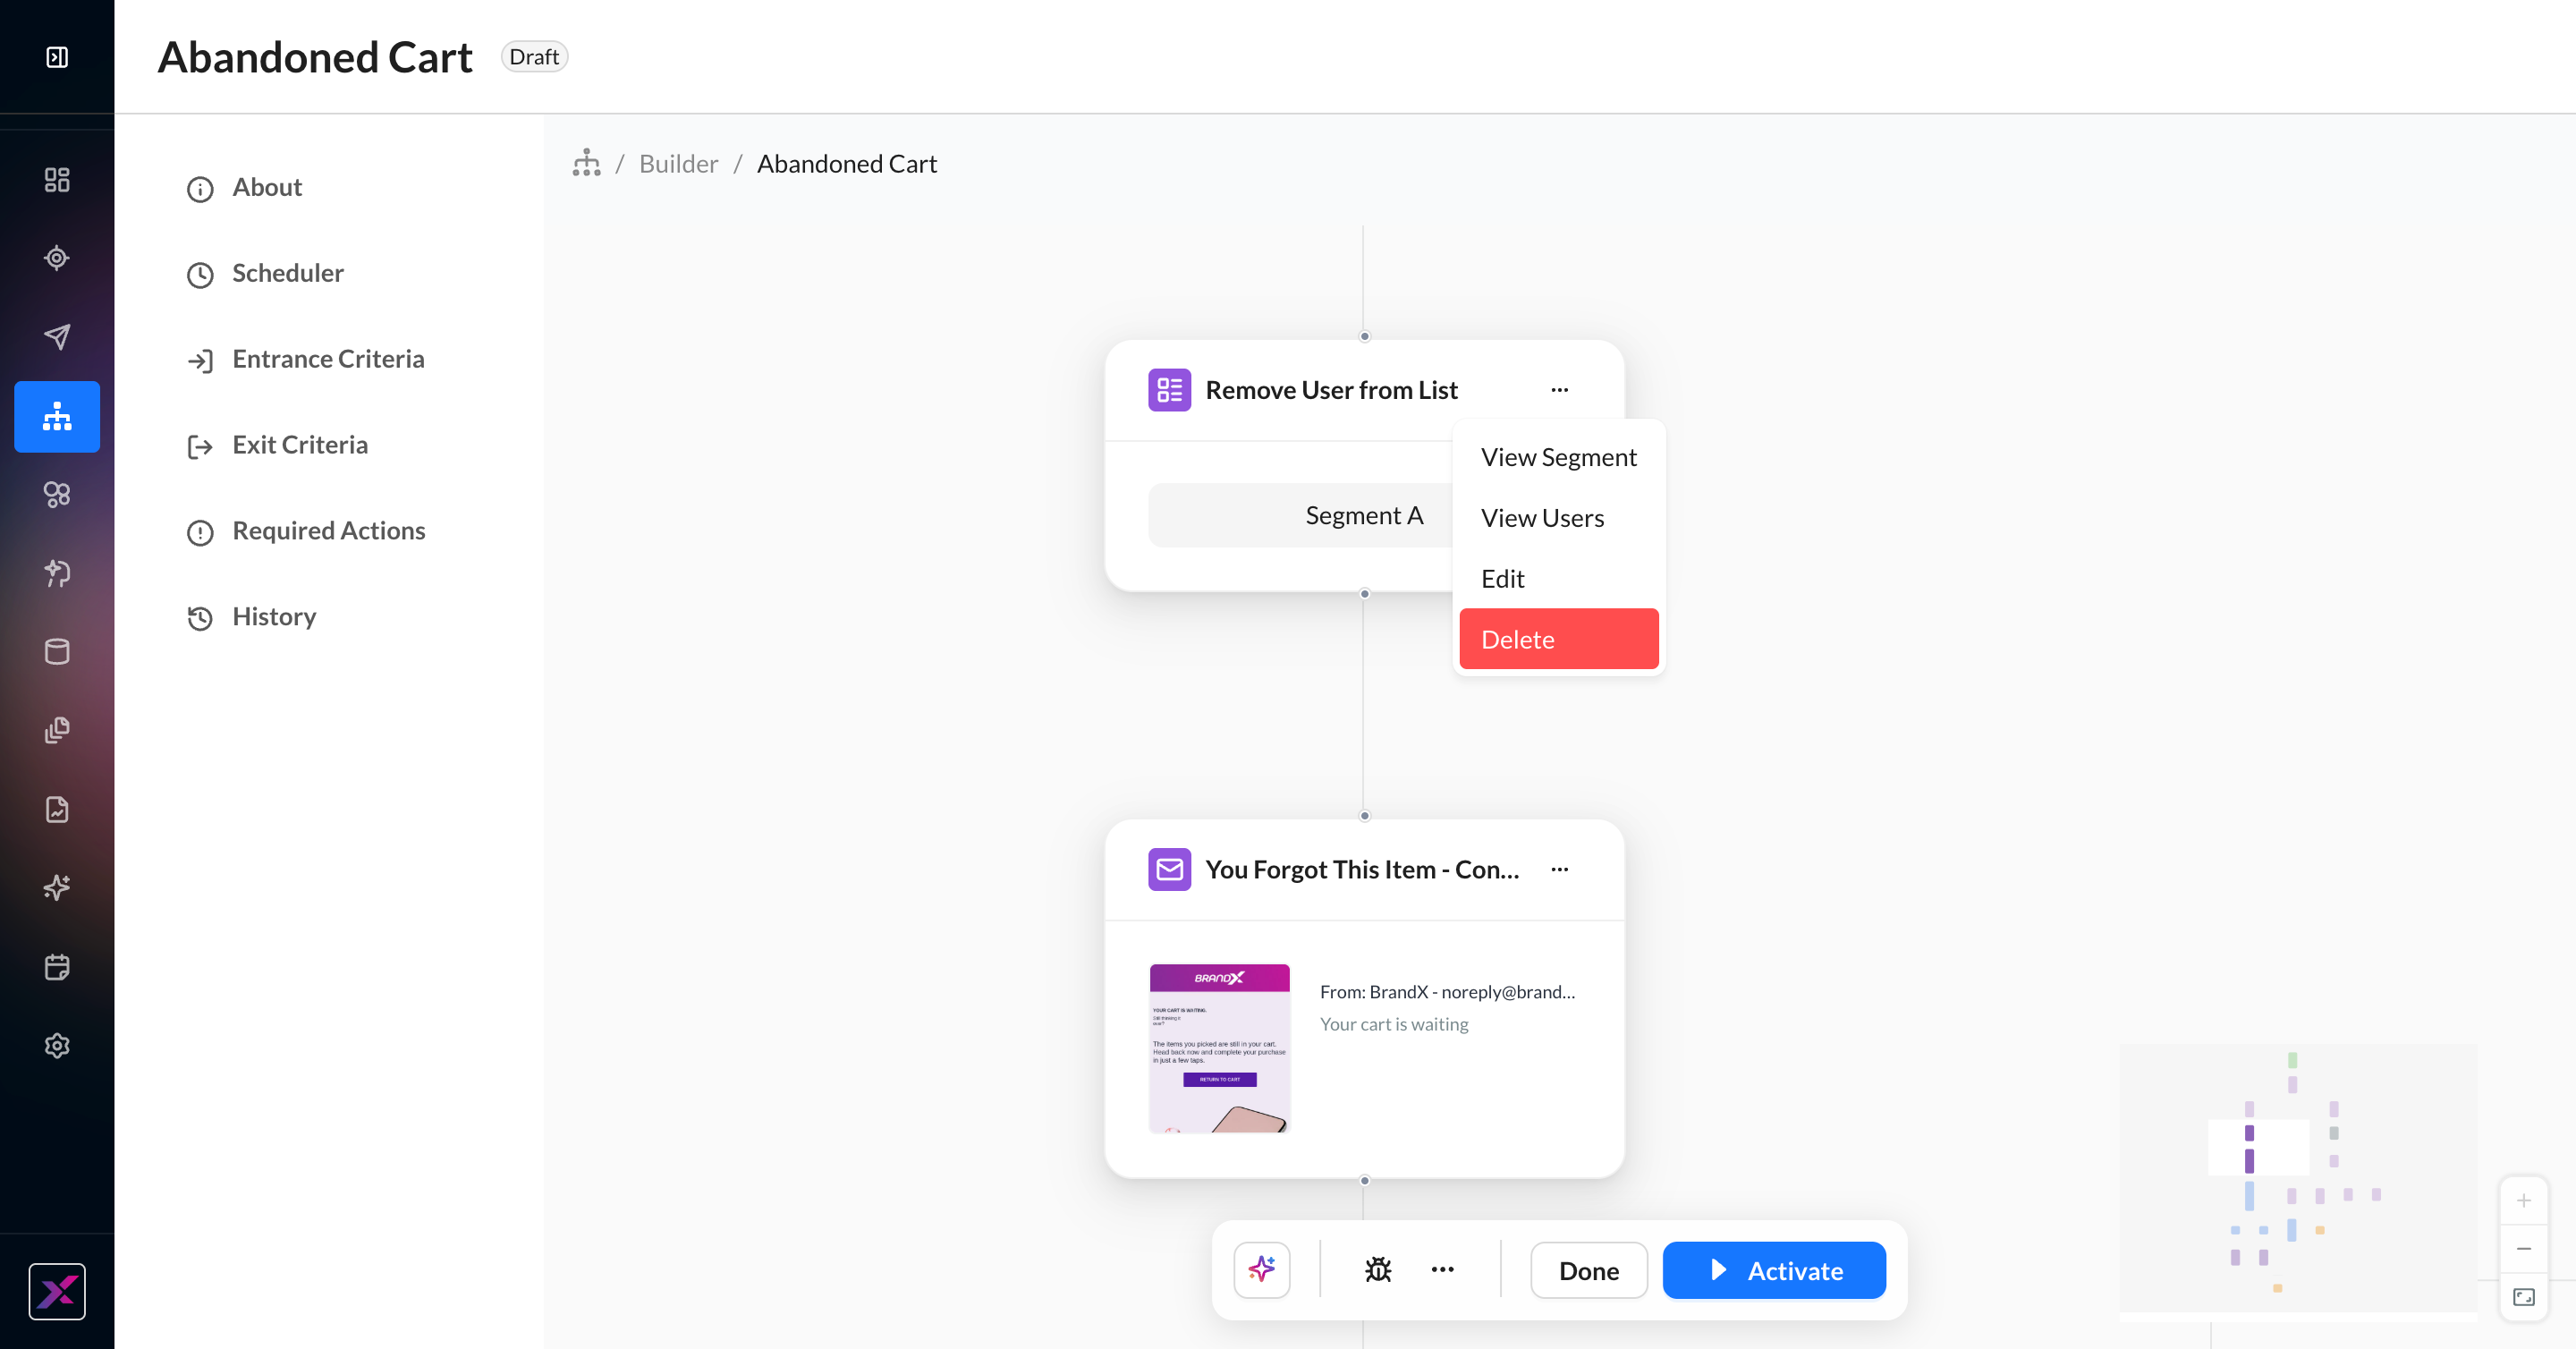
1. To delete a single node, click the ... button on the node to delete it.
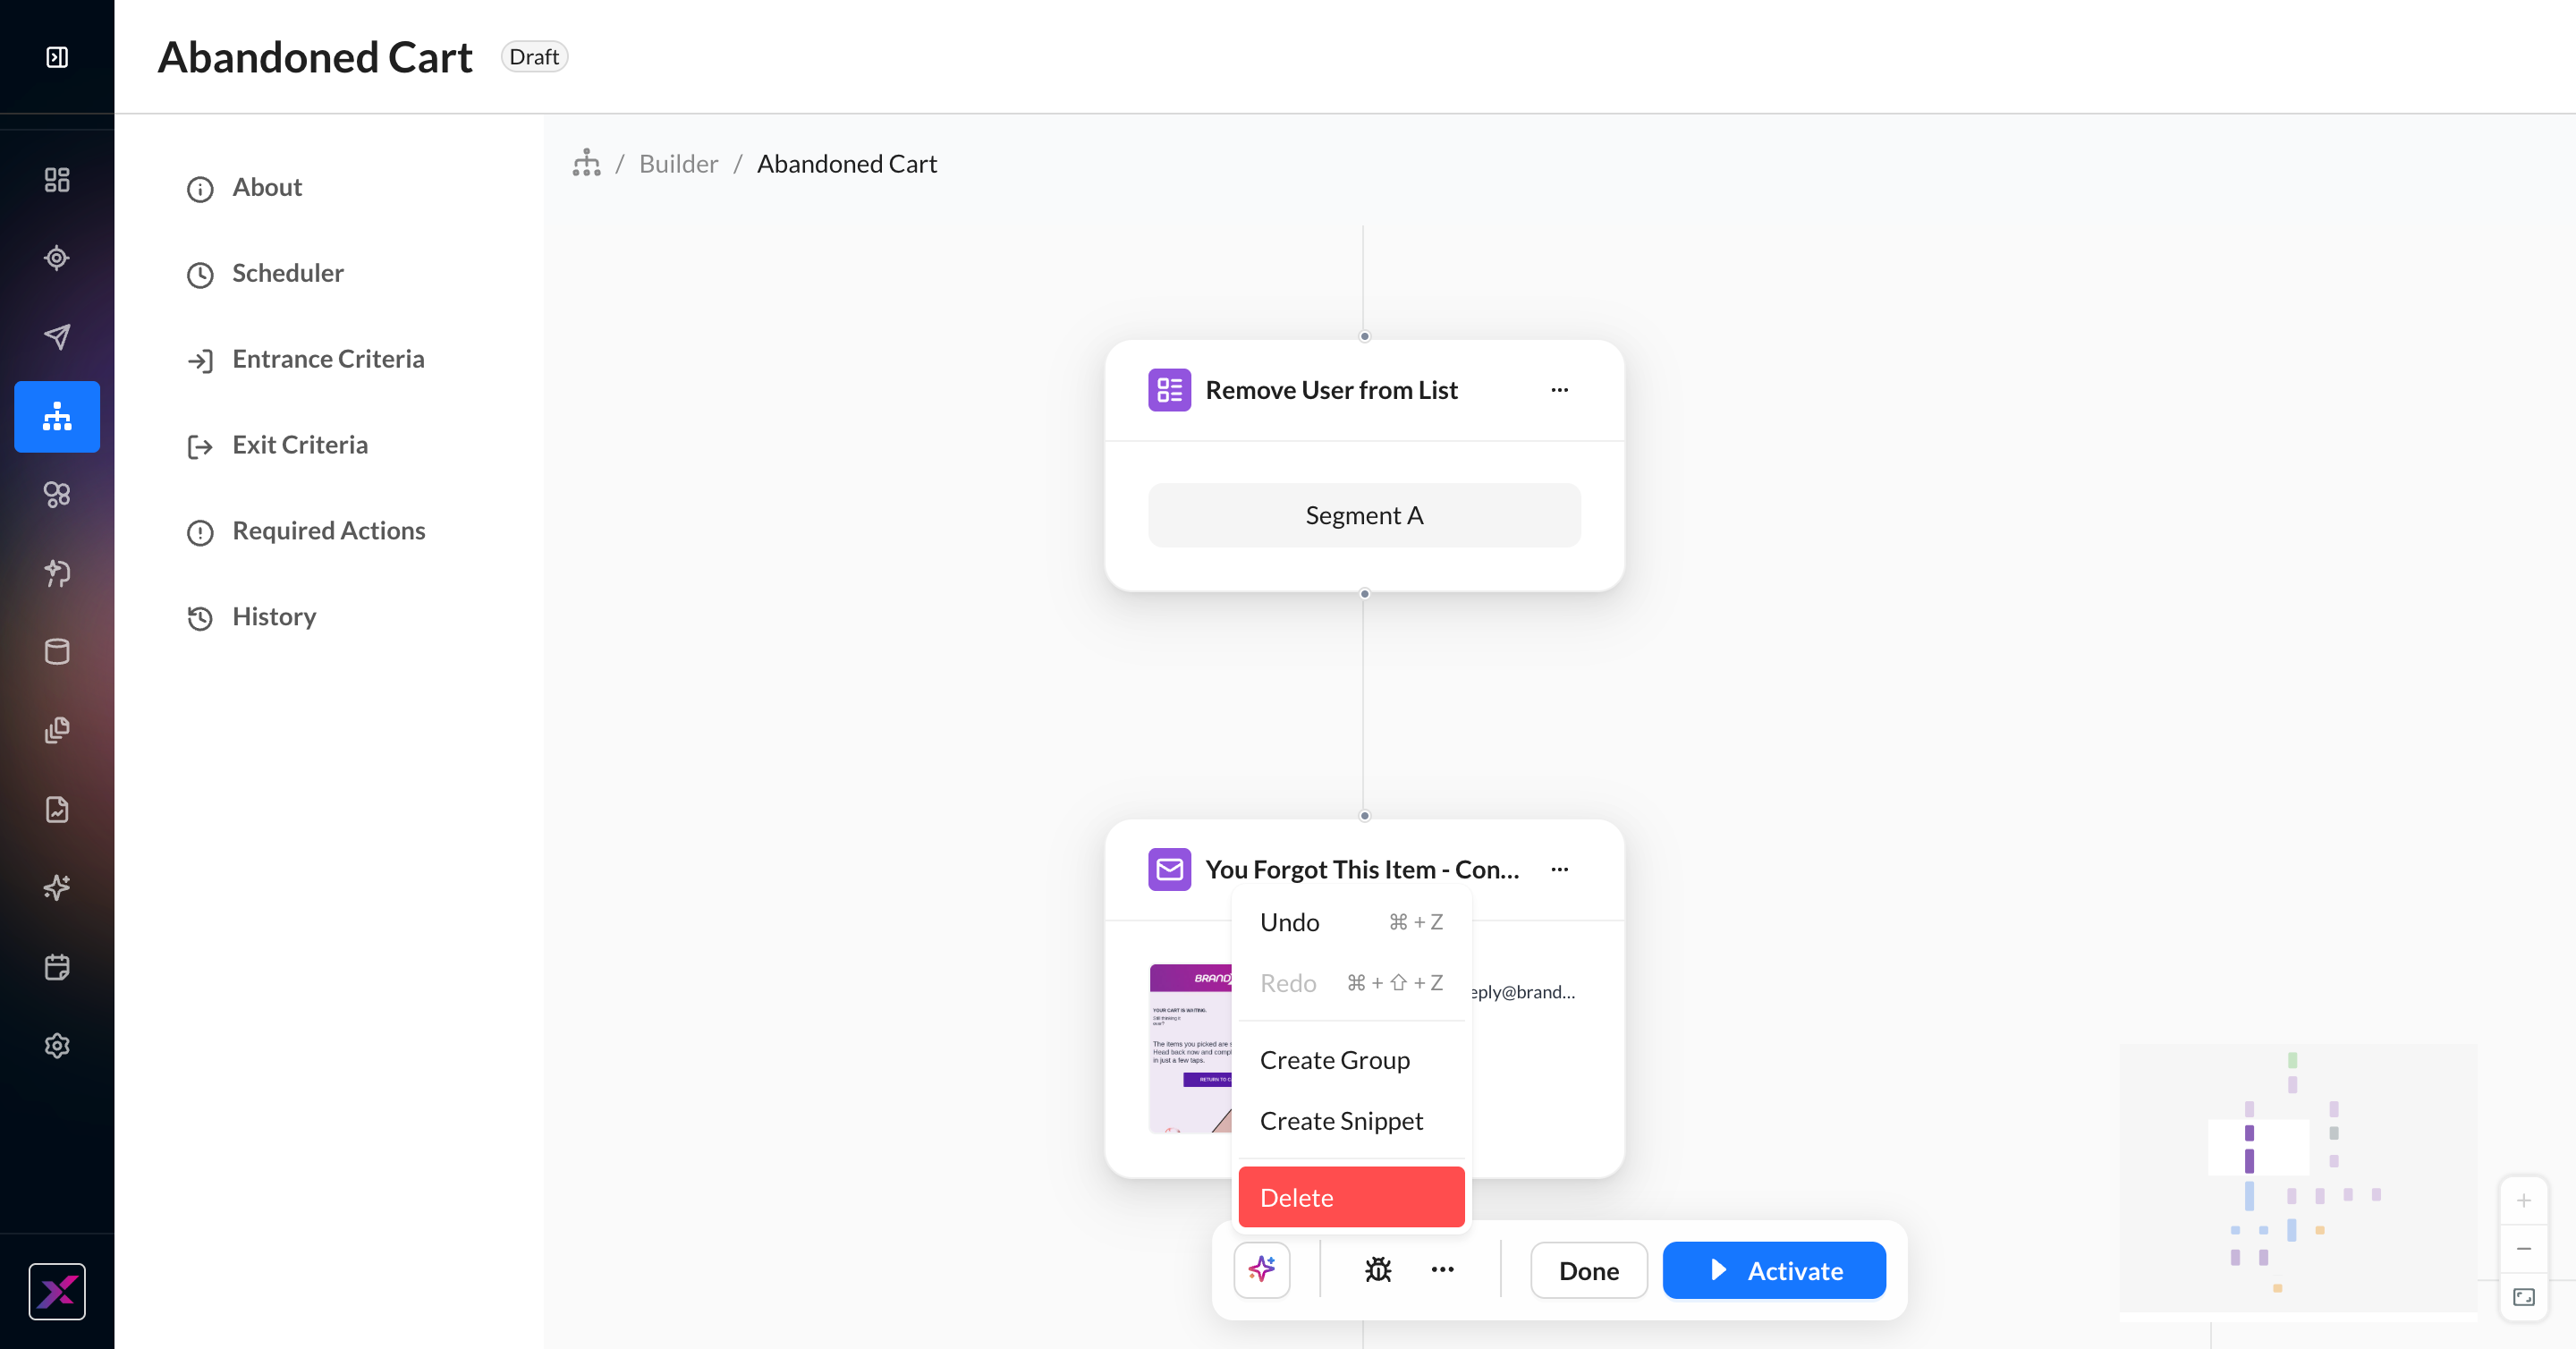
2. To delete multiple nodes, click the ... button on the action bar at the bottom of your screen, then select Delete.
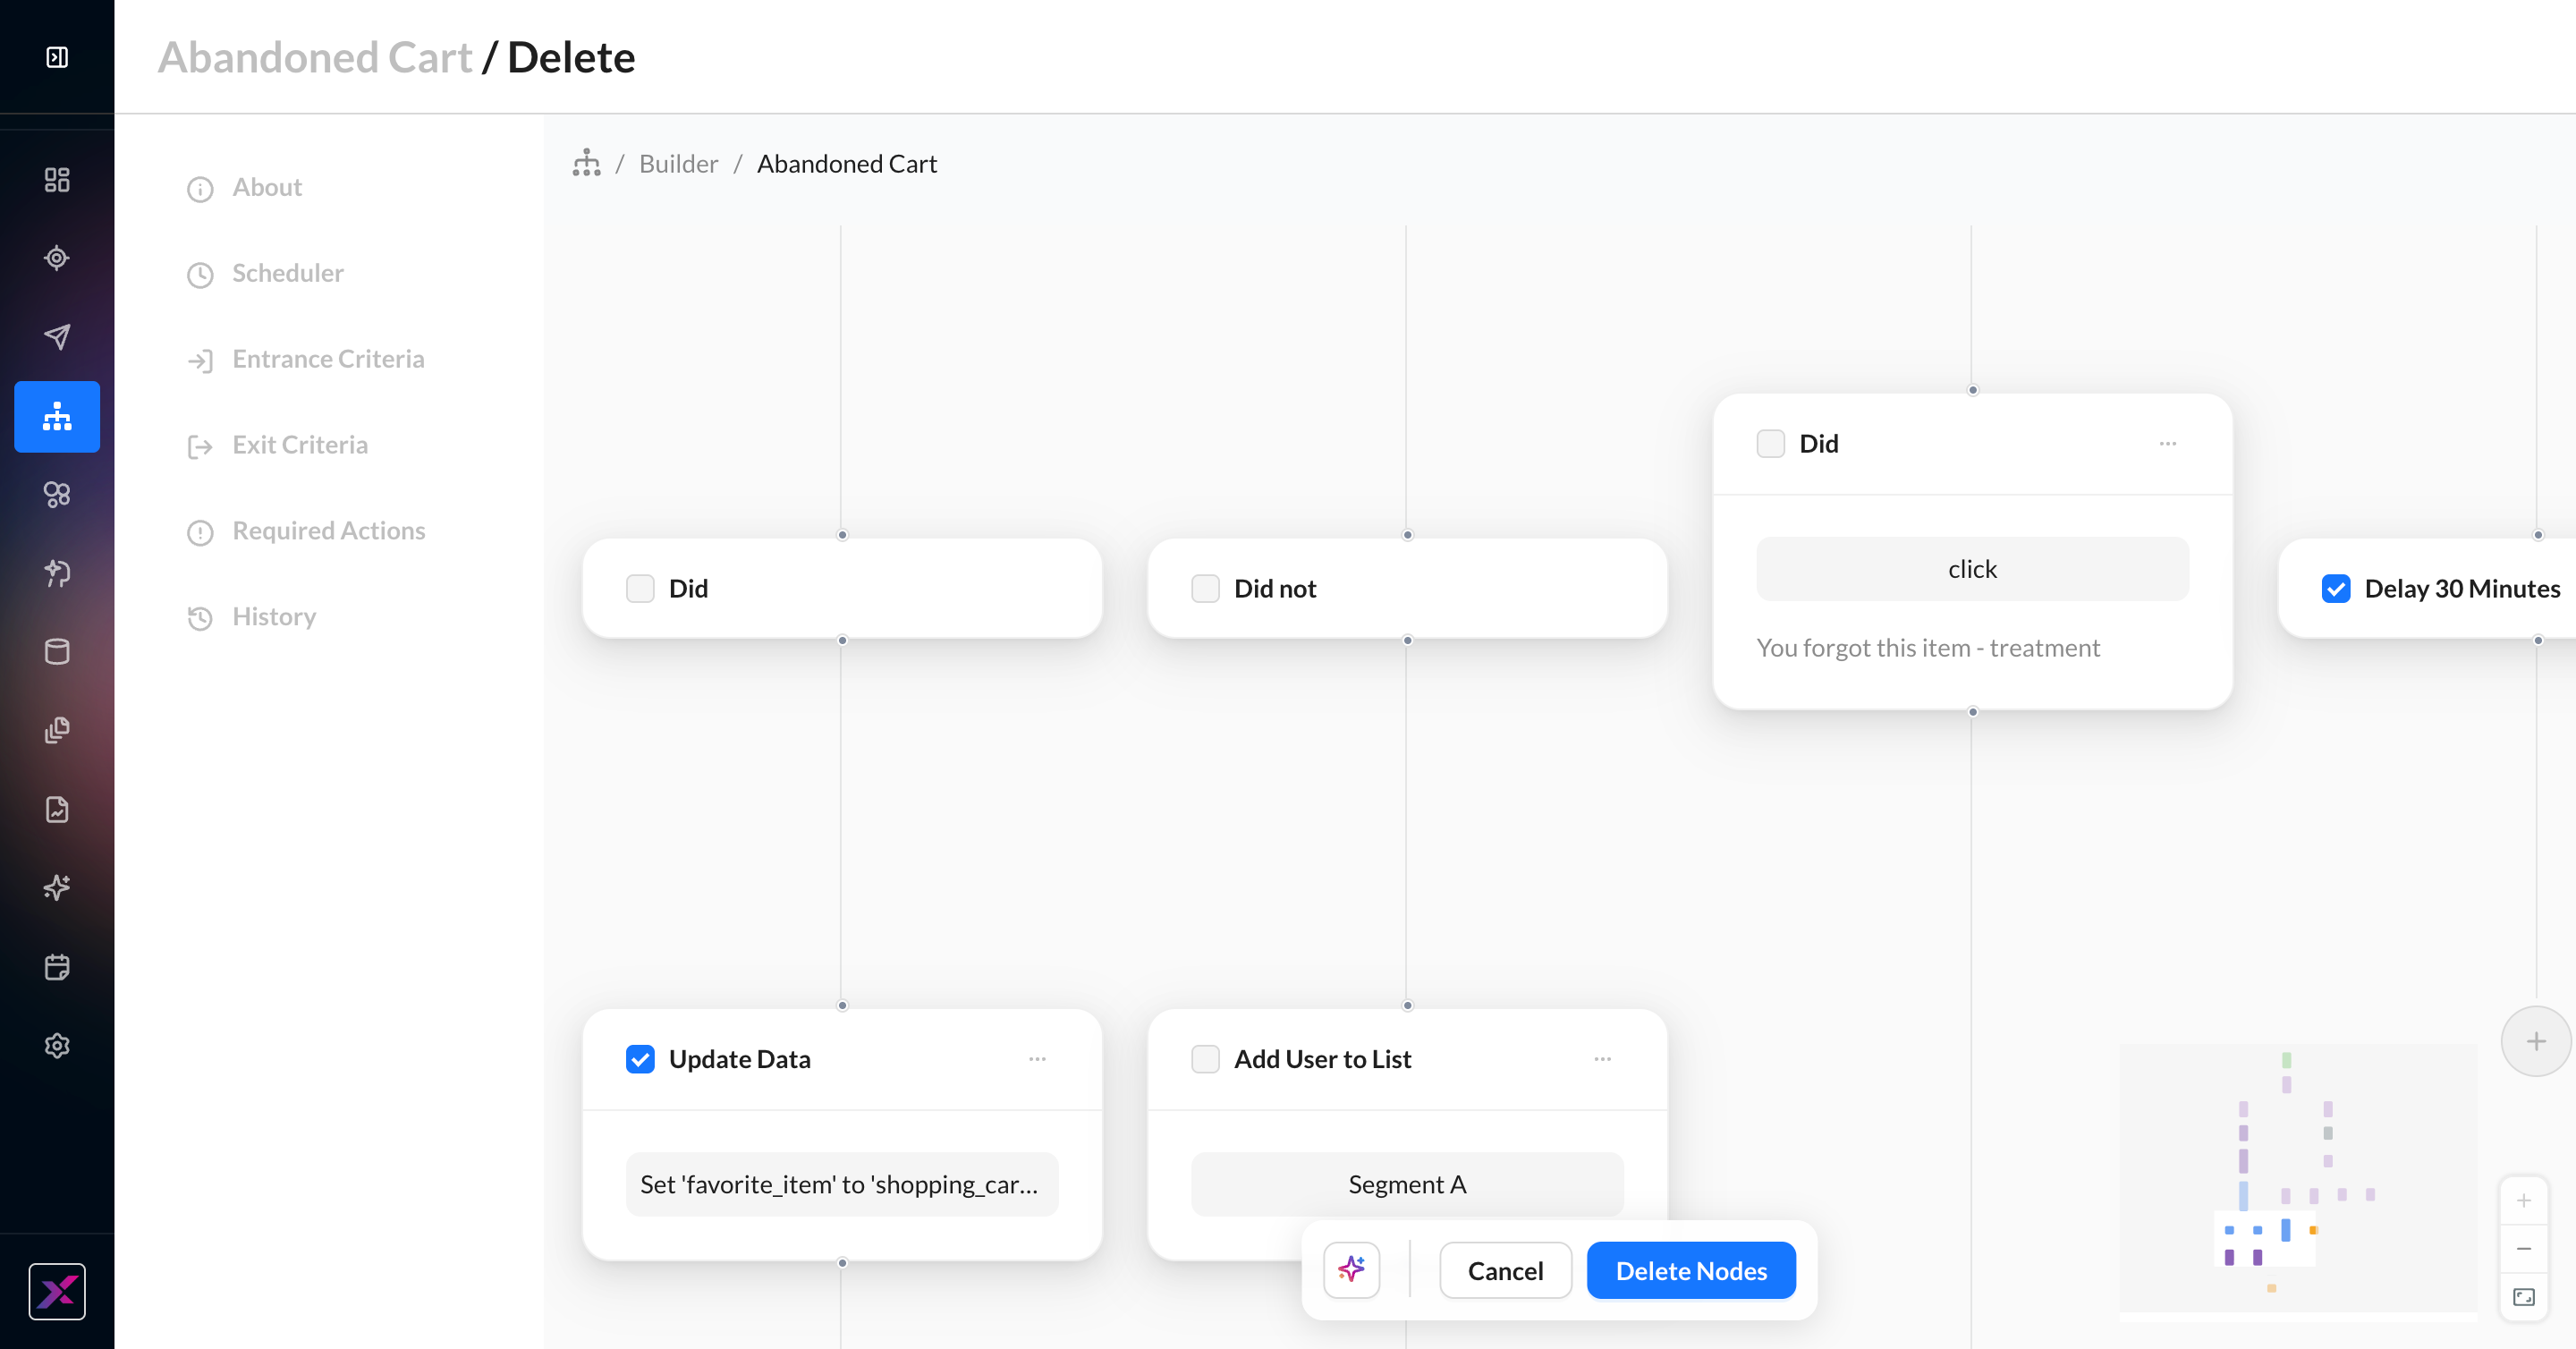
3. Select the nodes you want to delete. They must be consecutive, and you cannot partially select split nodes.
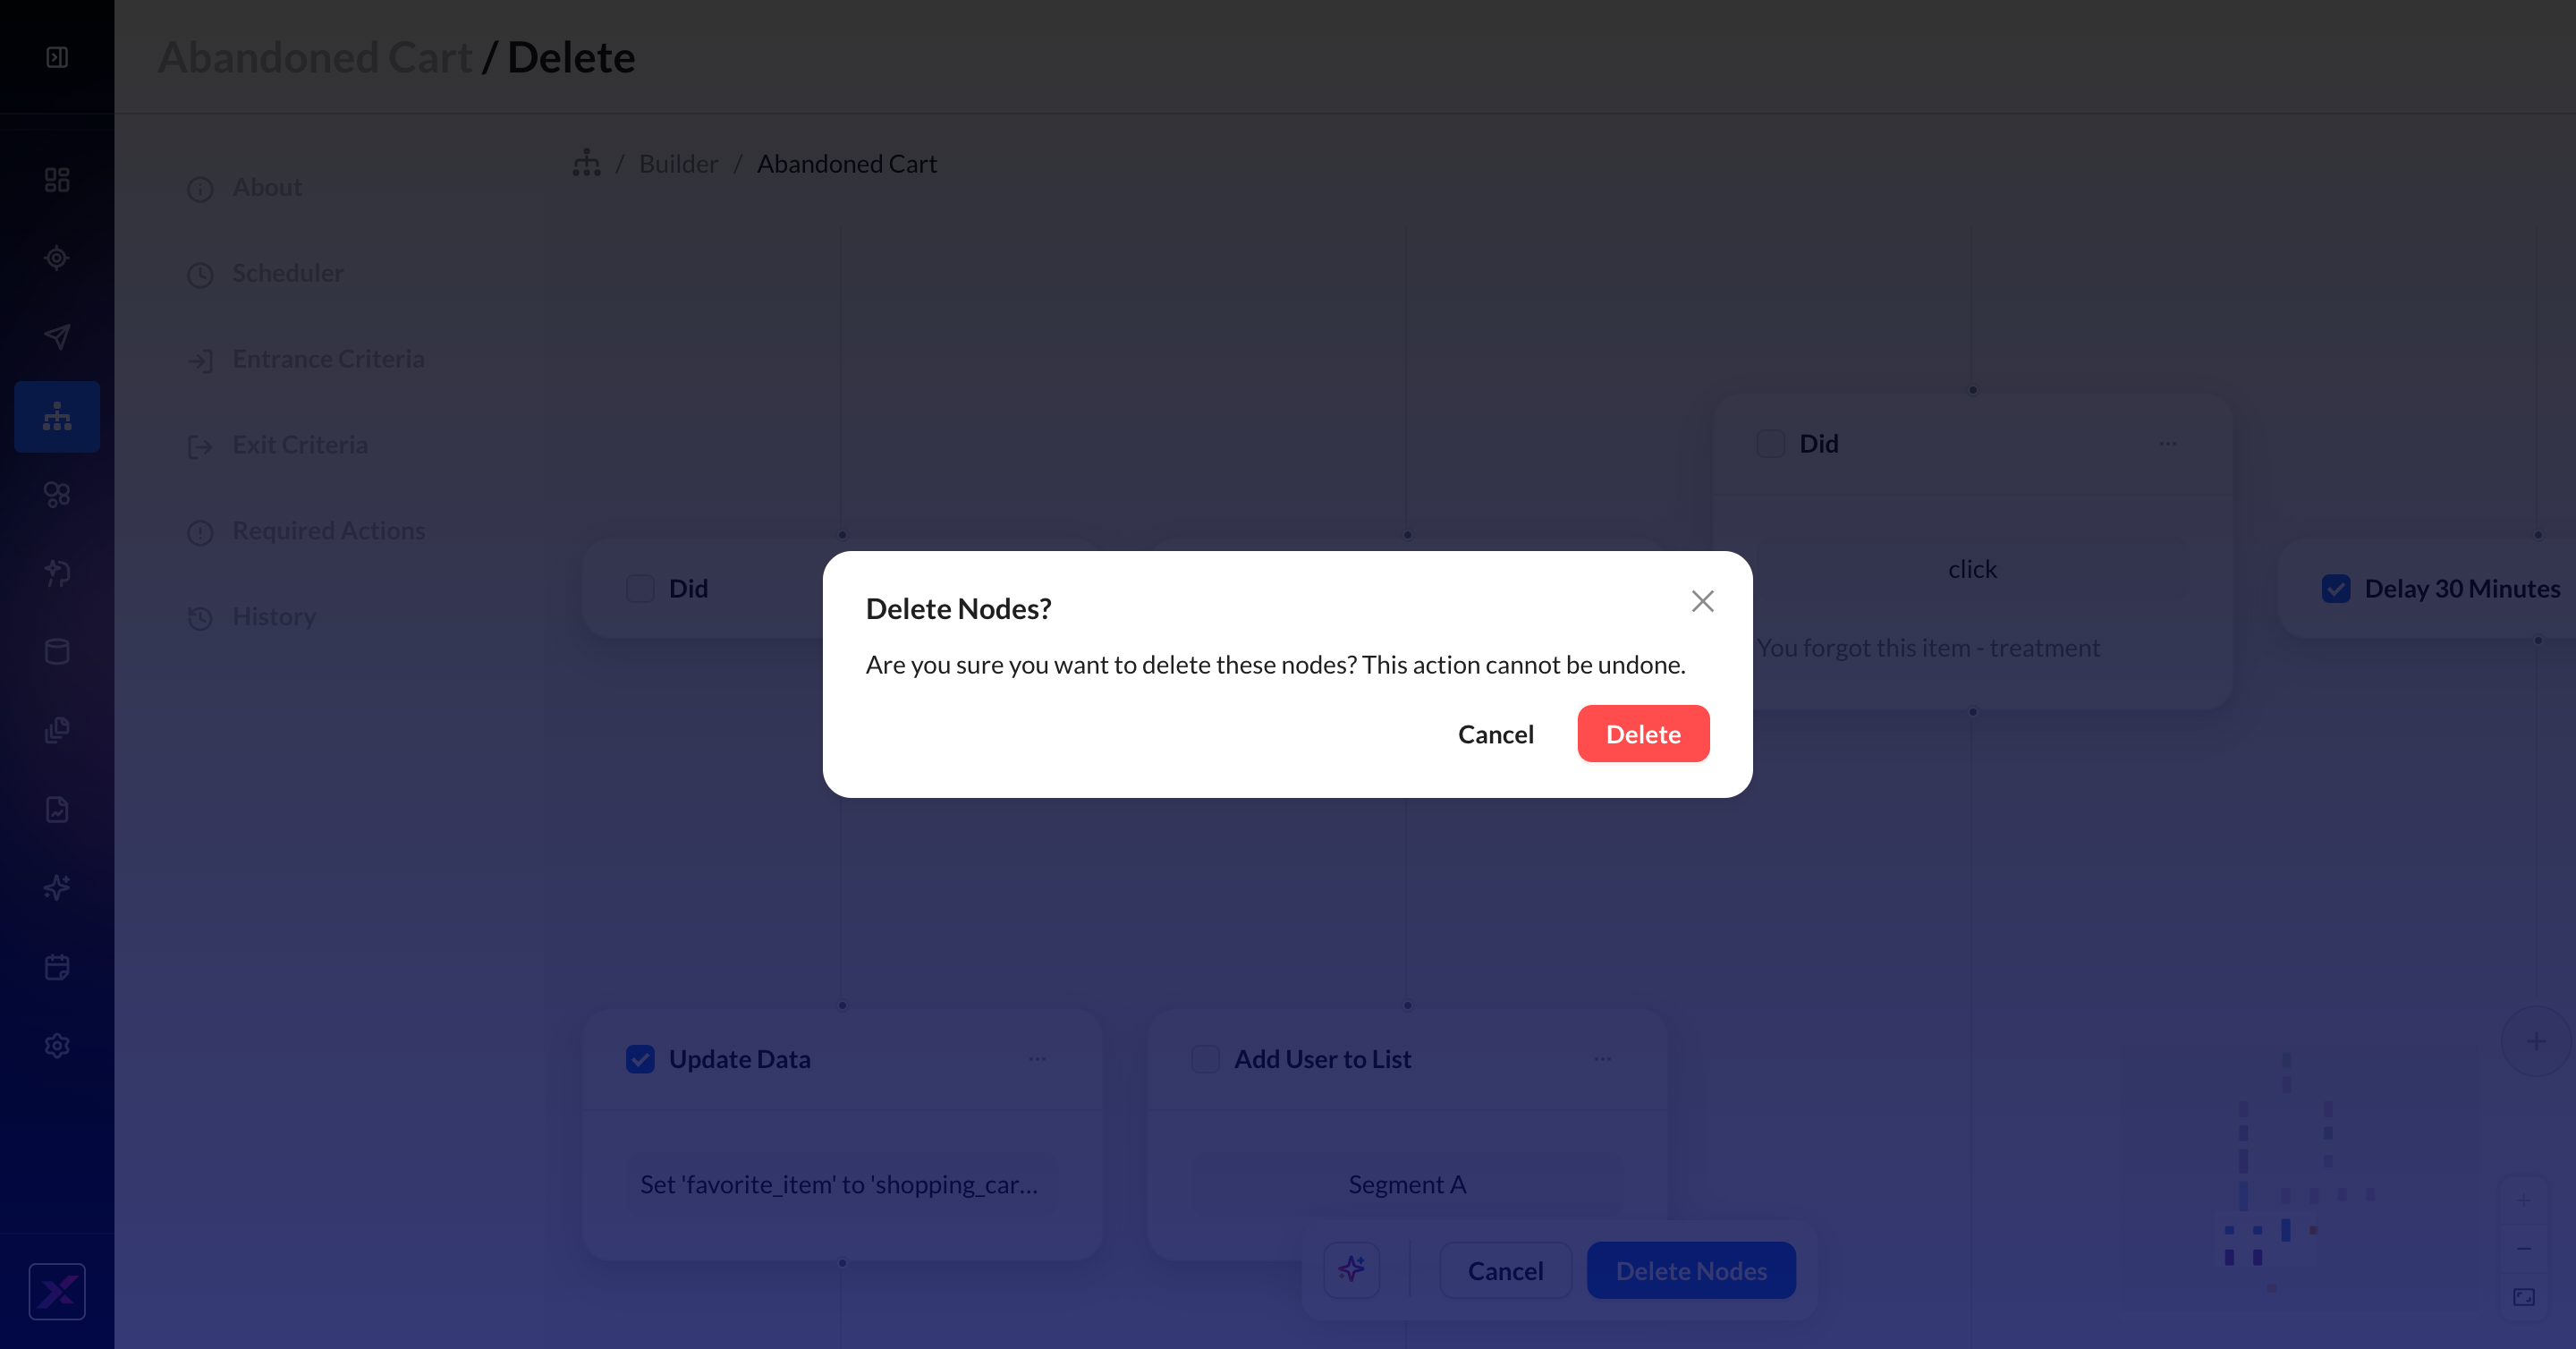
4. Click Delete Nodes to finish. You will be asked for confirmation before the nodes are deleted.
Groups
As an experience grows more complex with many nodes, it may make sense to group related nodes together with the ability to collapse them quickly without changing the underlying logic of the workflow. Groups work in any status, and the expanded or collapsed state persists across users and sessions.
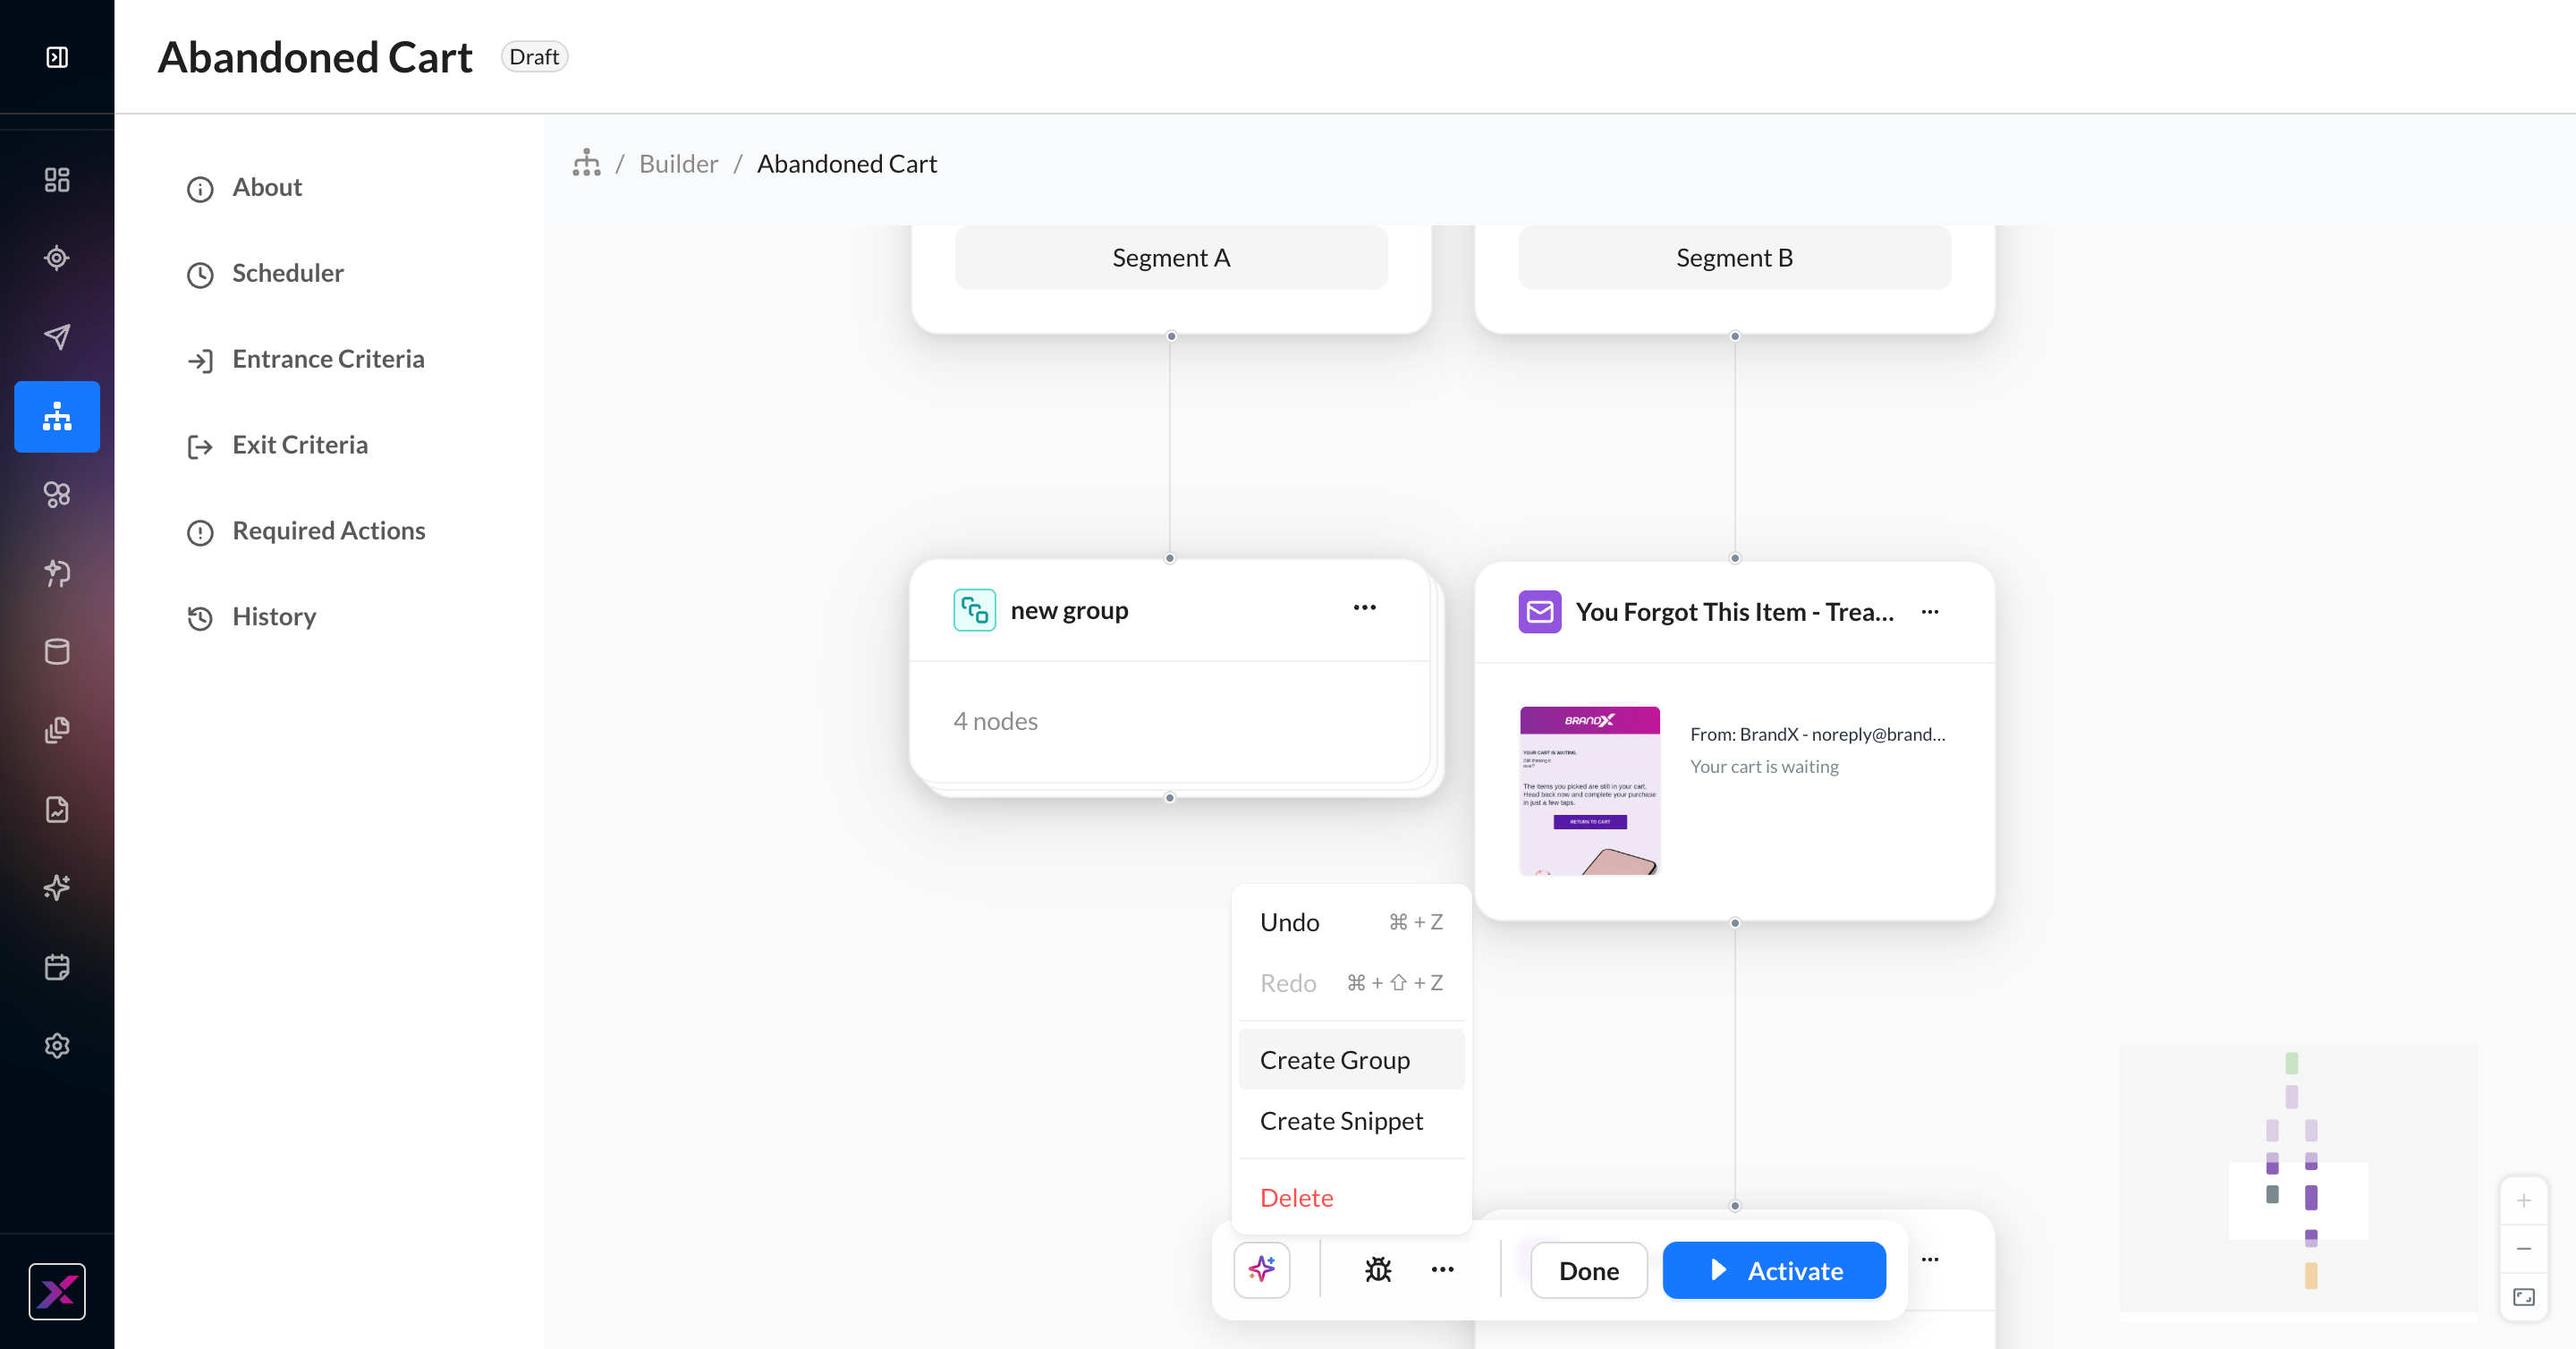
1. In the actions toolbar of a draft experience, click the … button and click Create Group.
2. Select the nodes you want to add to the group by clicking the checkbox that appears in each header. Nodes must be selected consecutively from top to bottom, and split branches cannot be separated. A node that already belongs to another group is not eligible to be added to another group.
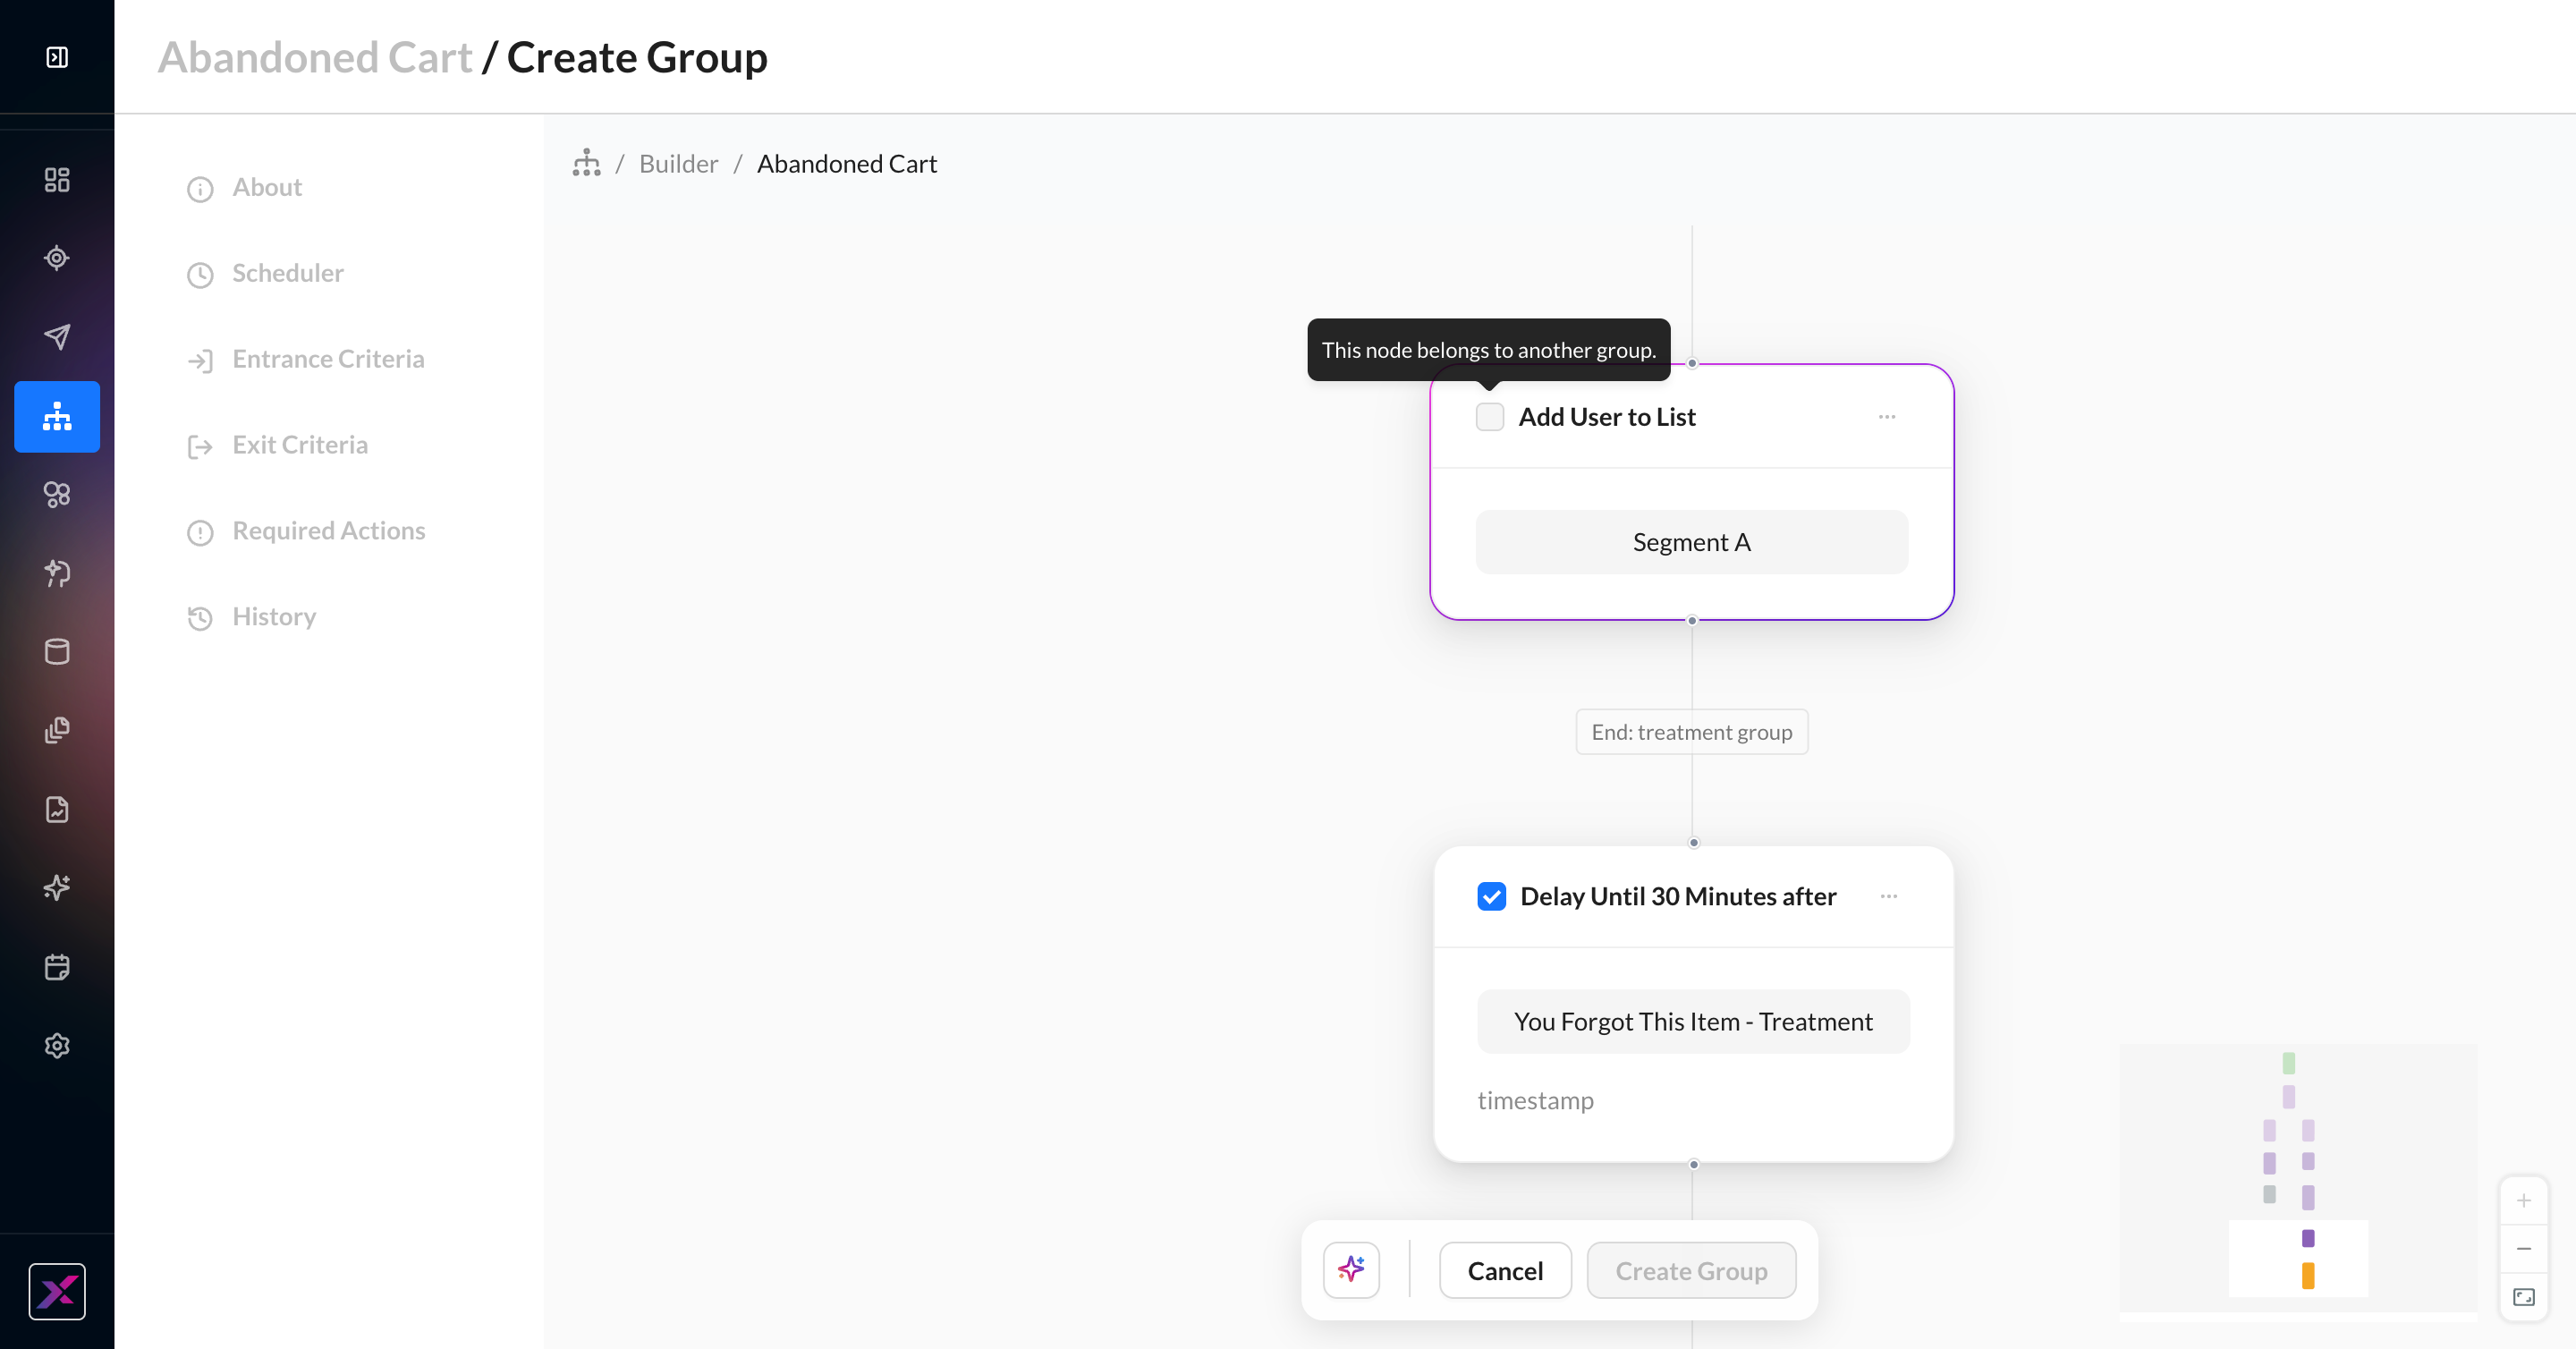
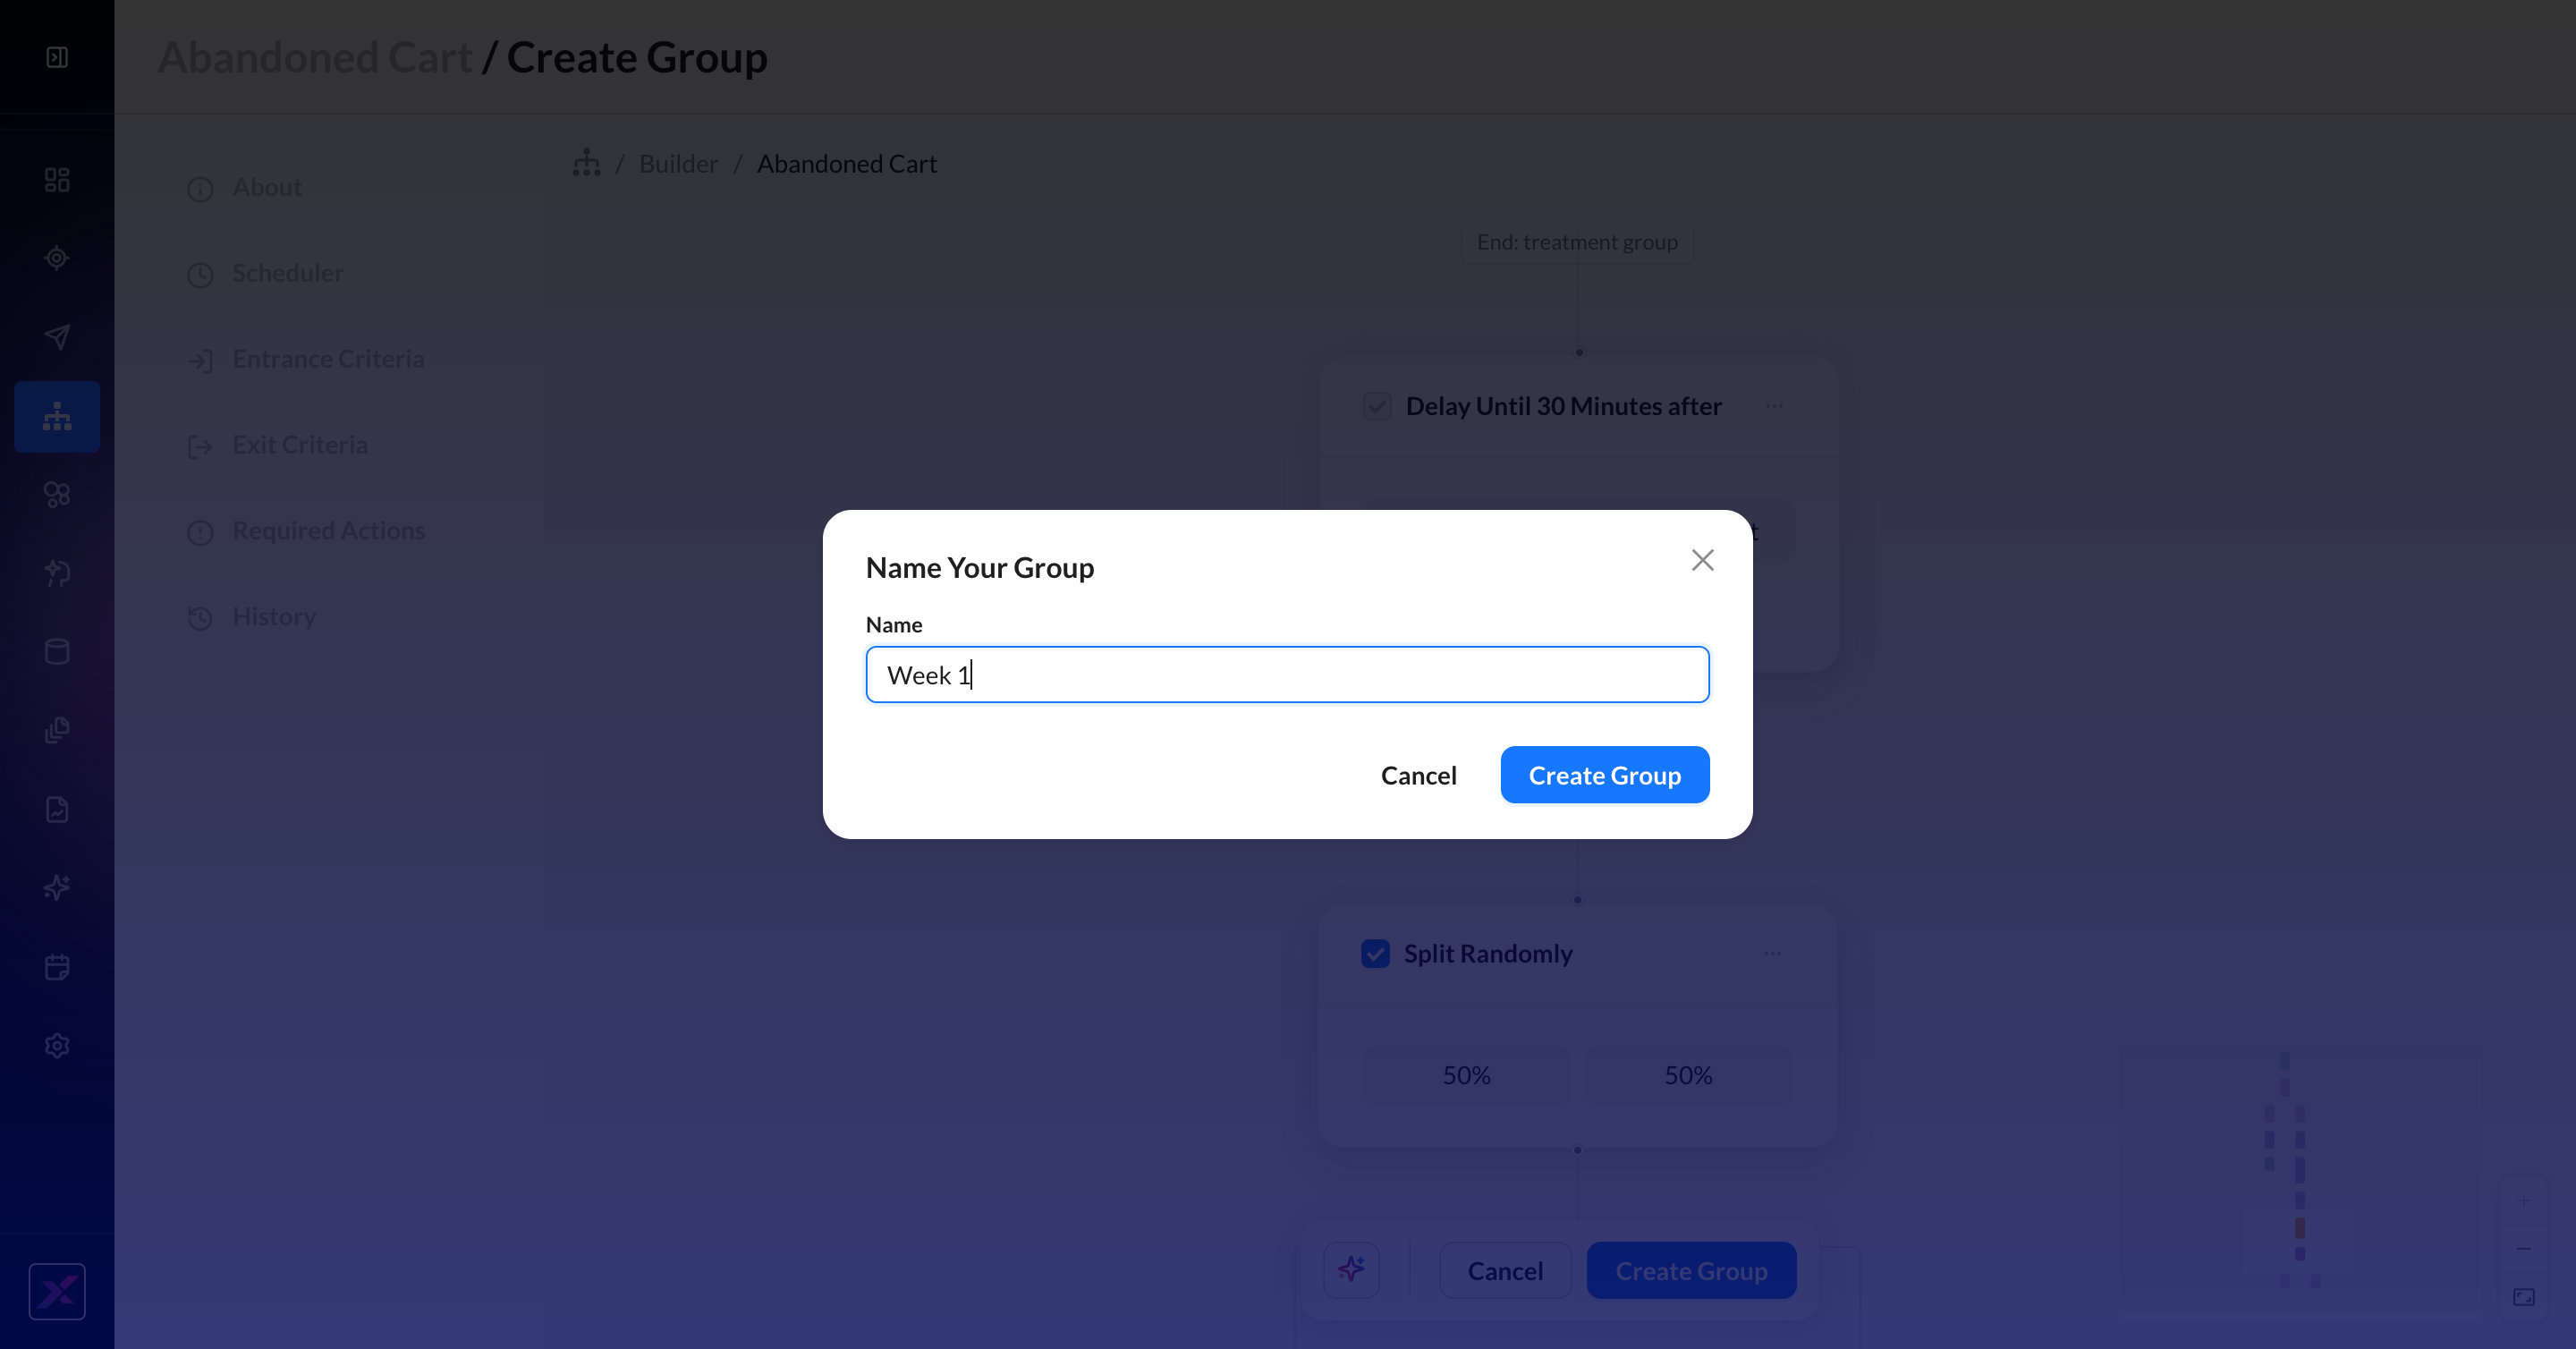
3. Click Create Group, then give your group a unique name and save it. Names must be unique inside a single experience.
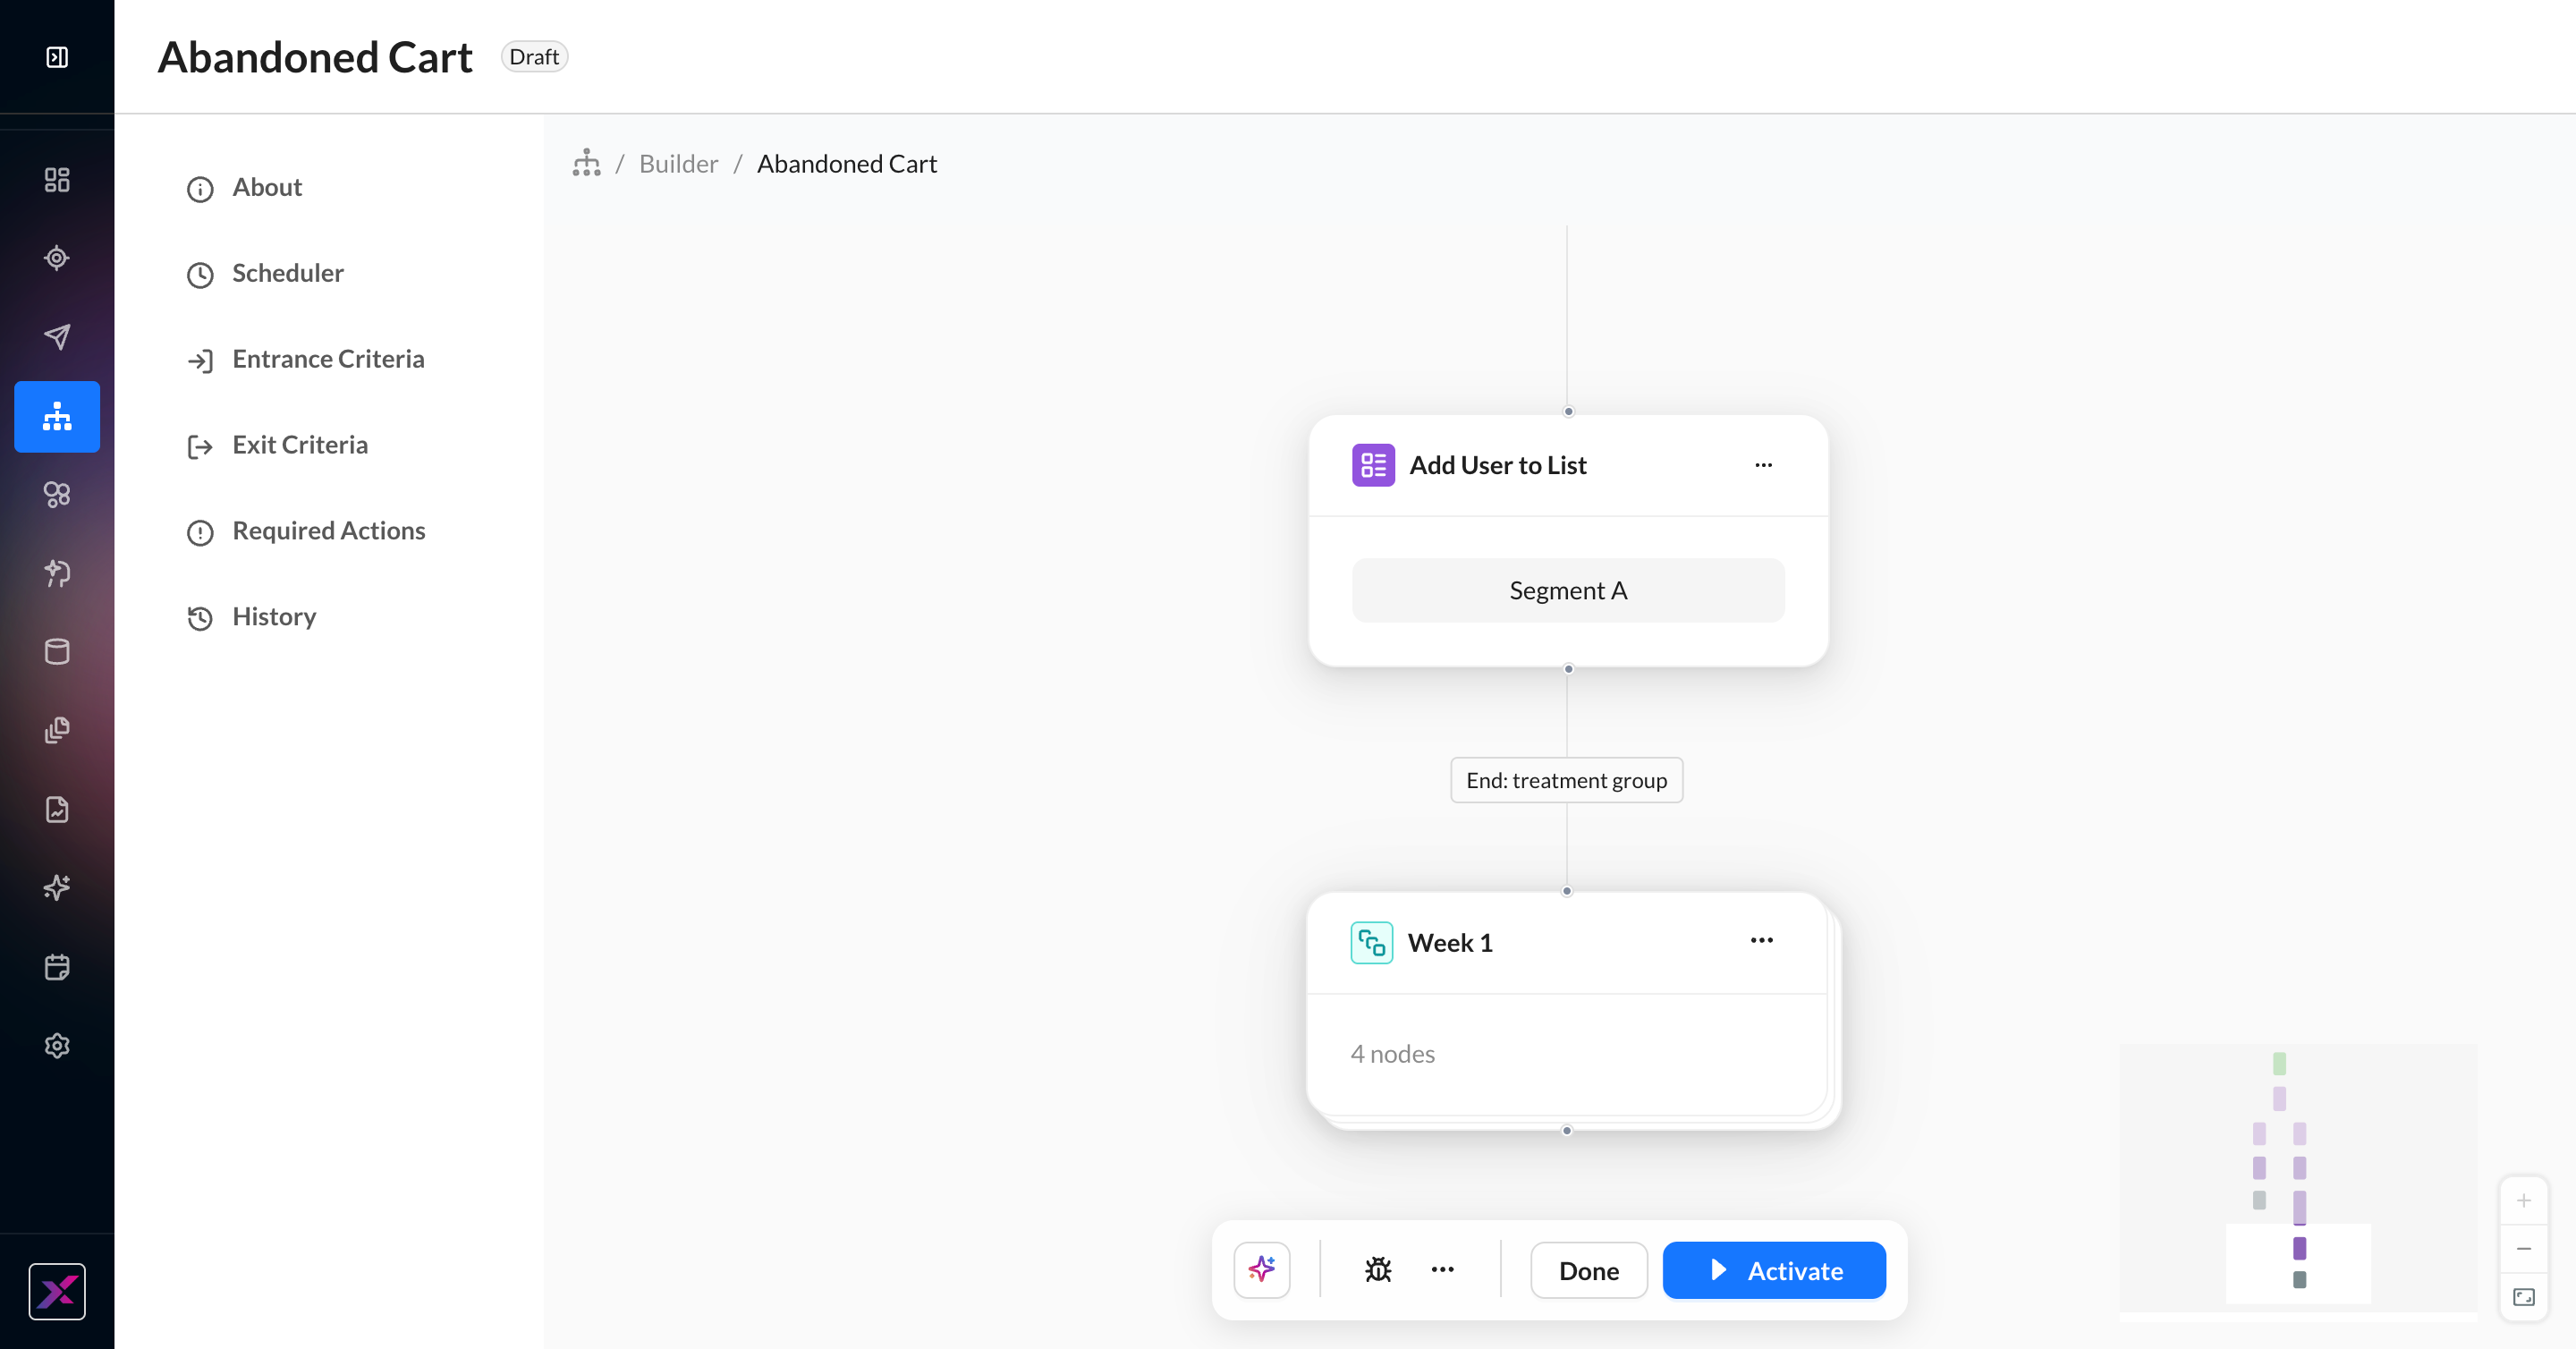
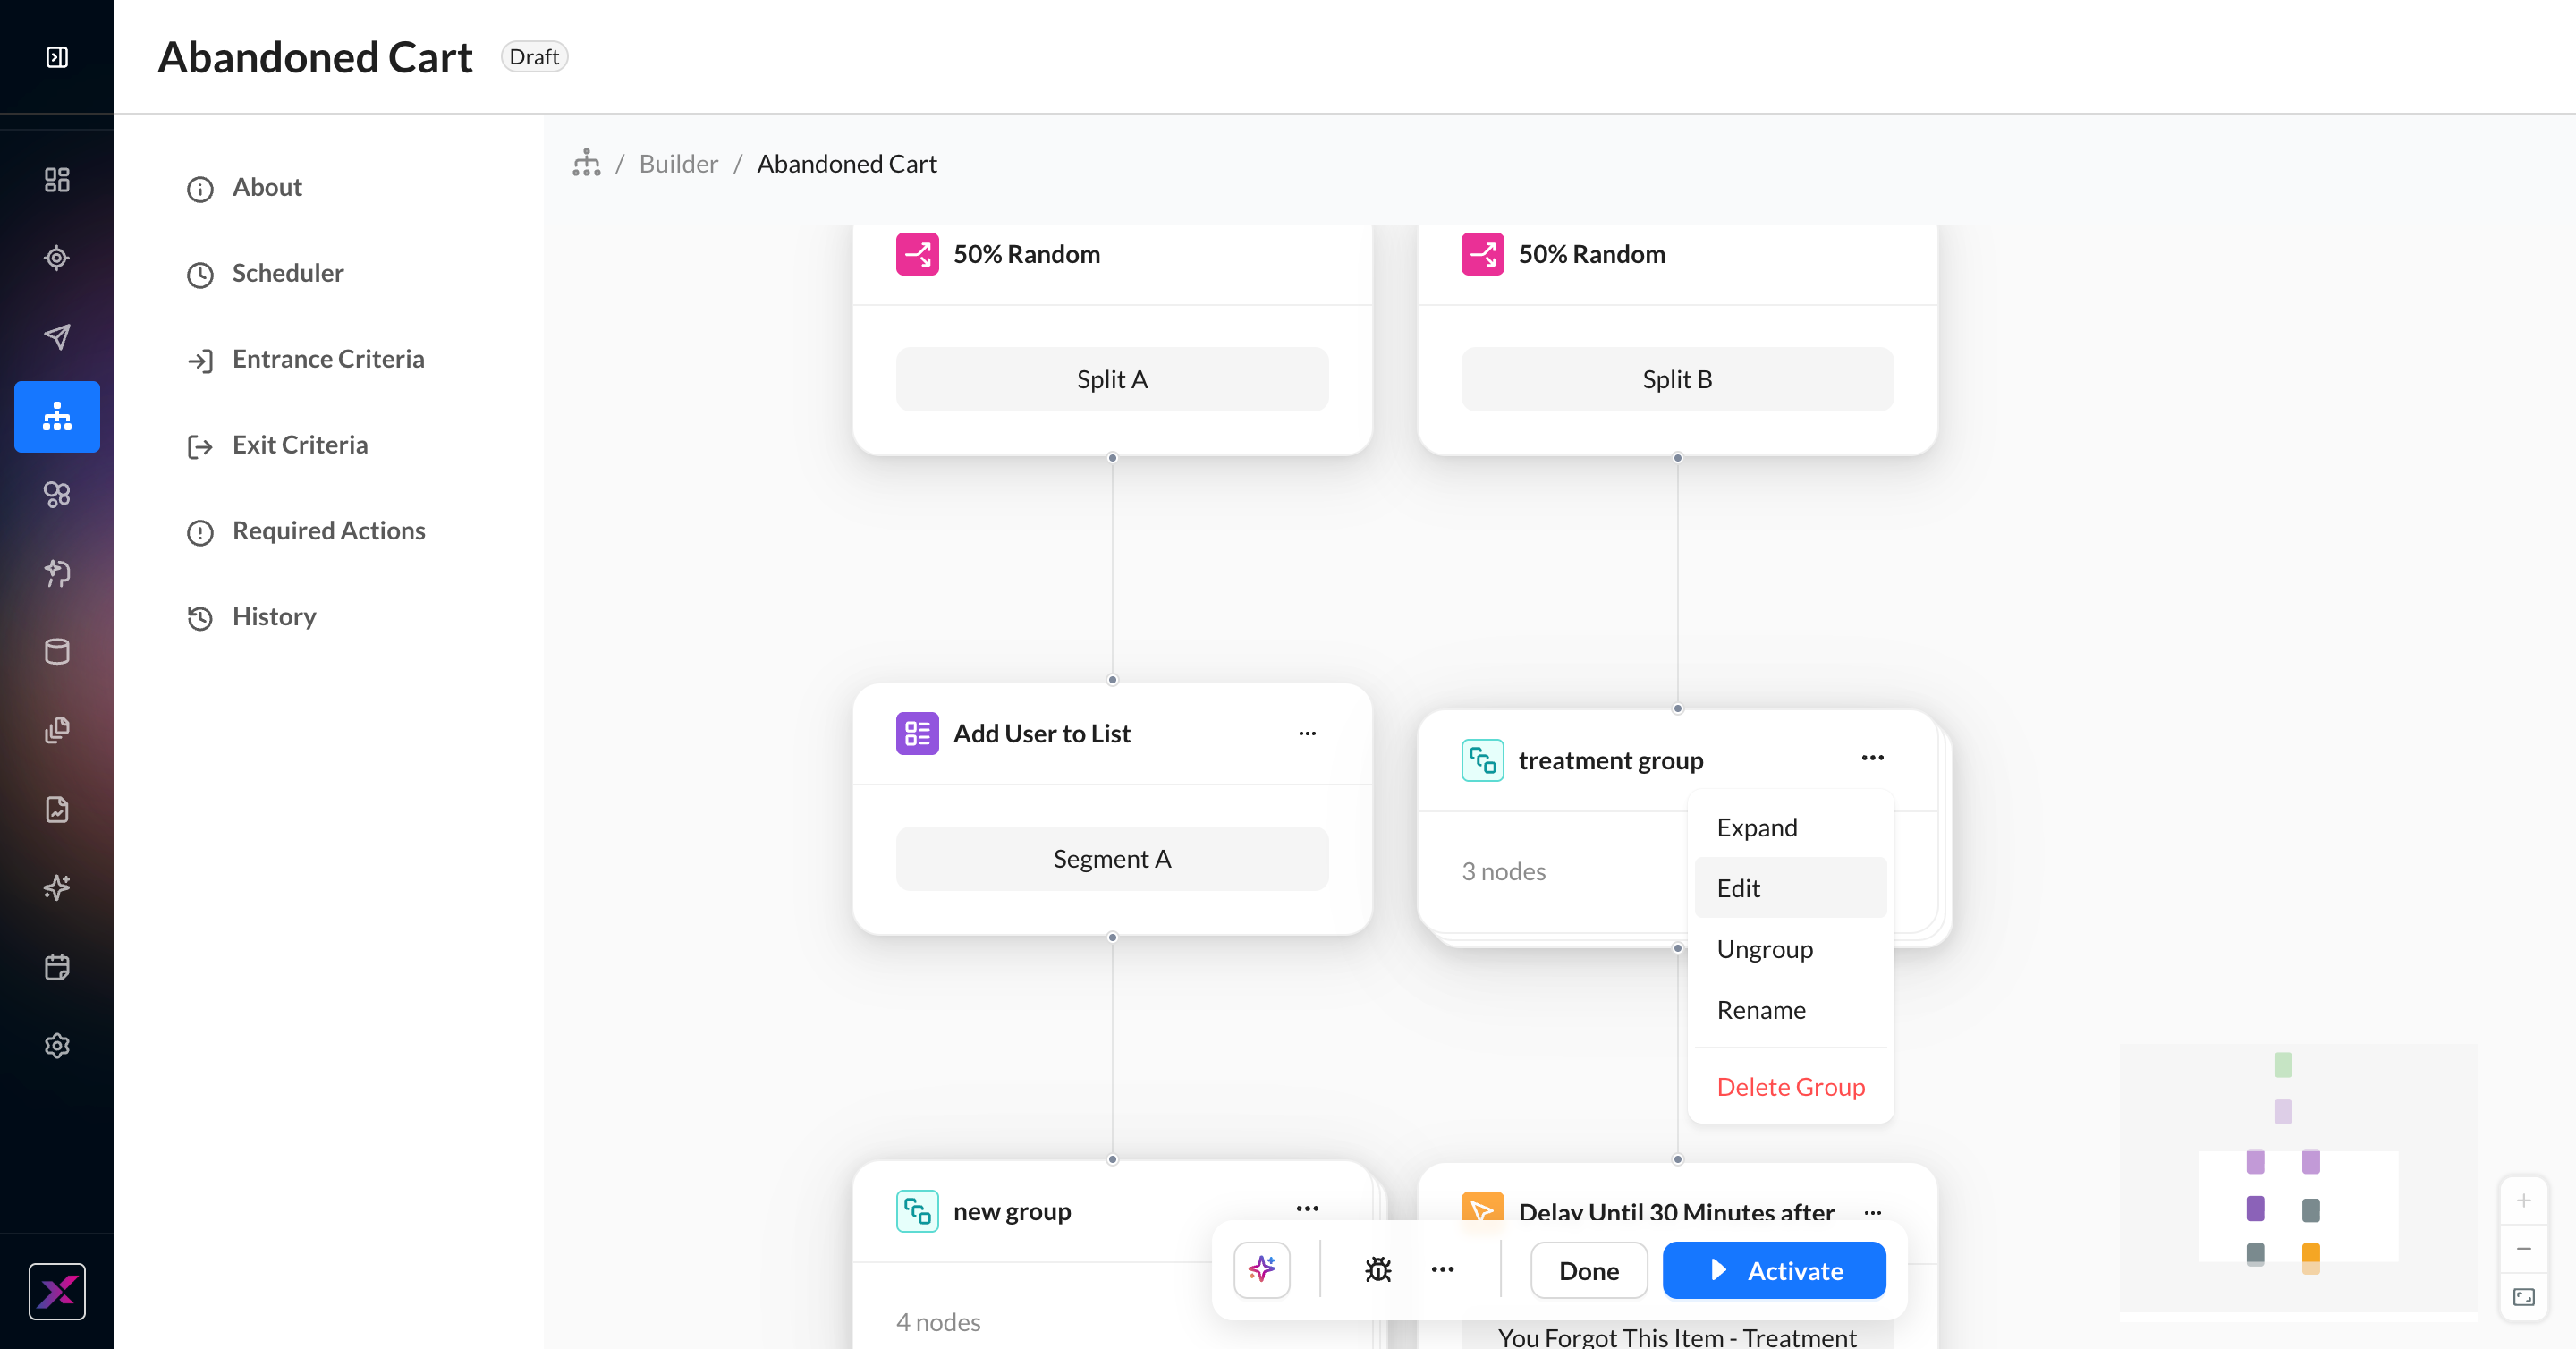
4. Once saved, the group will automatically collapse into a single stack of nodes. The name of the group and the number of nodes appear in the group card. A group must be expanded to add nodes beyond it.
5. Click the group to expand it. While expanded, there will be pills with the group name to indicate the start and end of the group.
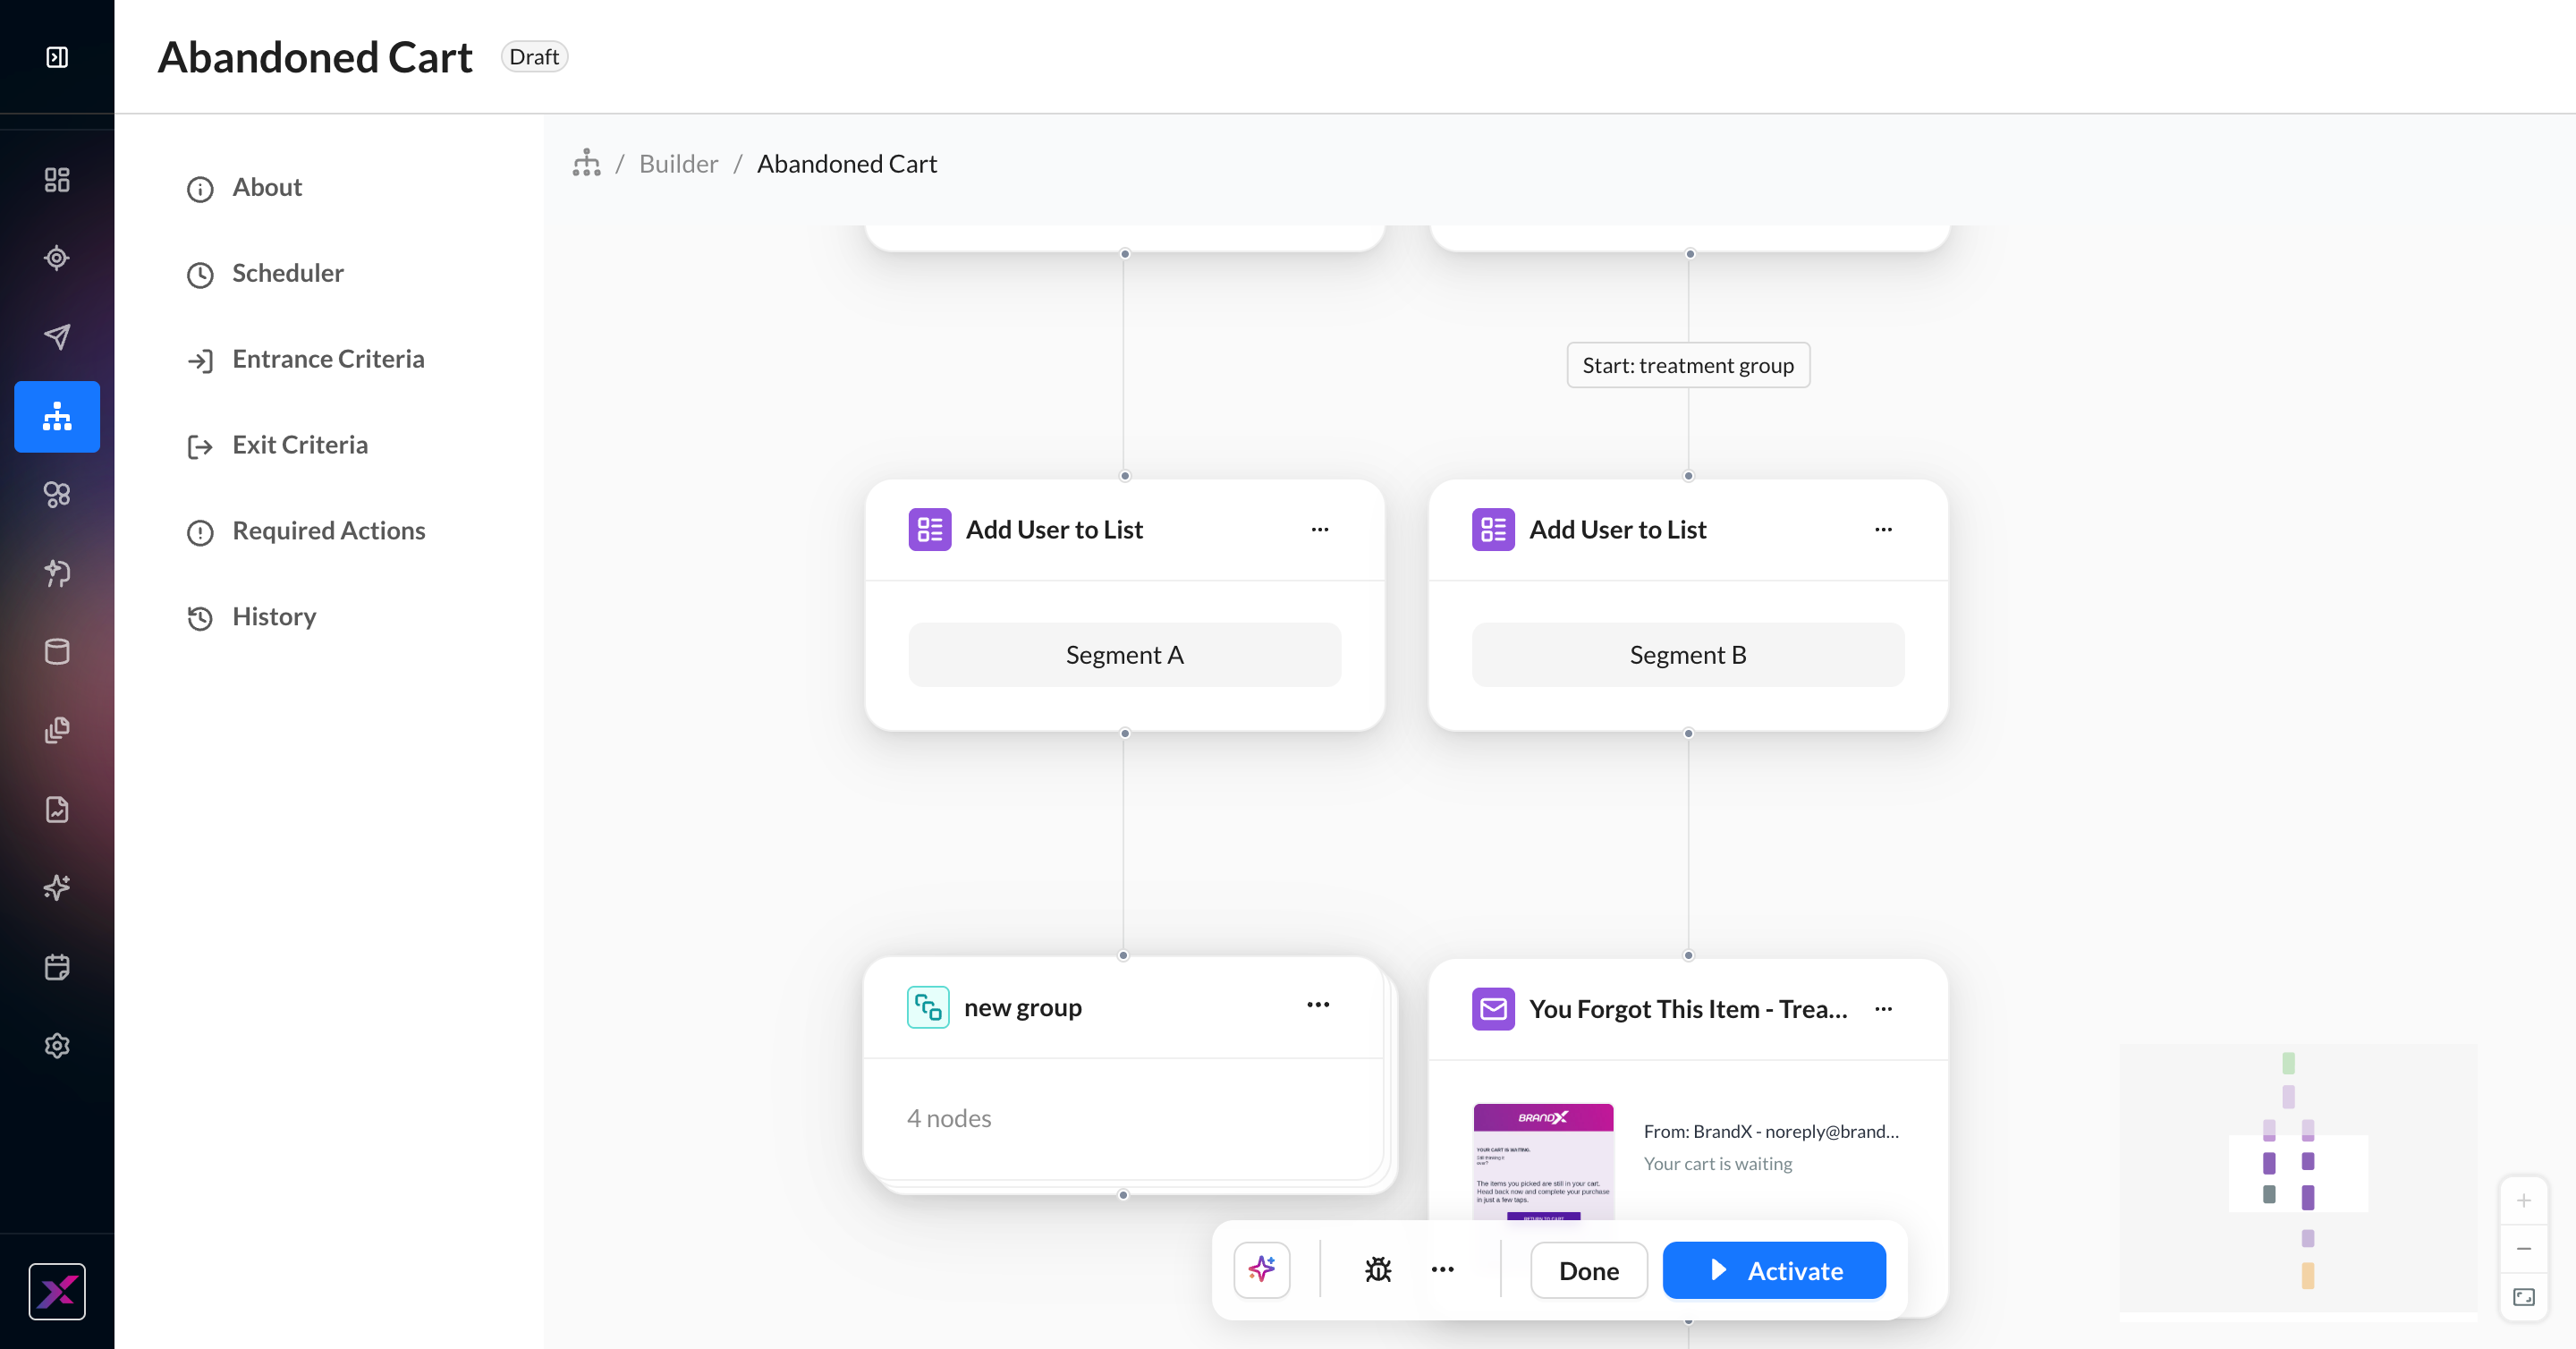
6. To collapse the group, click either the start or end pill.
7. While collapsed, you can click the … menu to expand the group, edit the nodes in the group, rename the group, ungroup the nodes, or delete all nodes in the group from the canvas.
Groups can be expanded or collapsed in any status, but can only be created while in Draft or Inactive state.