
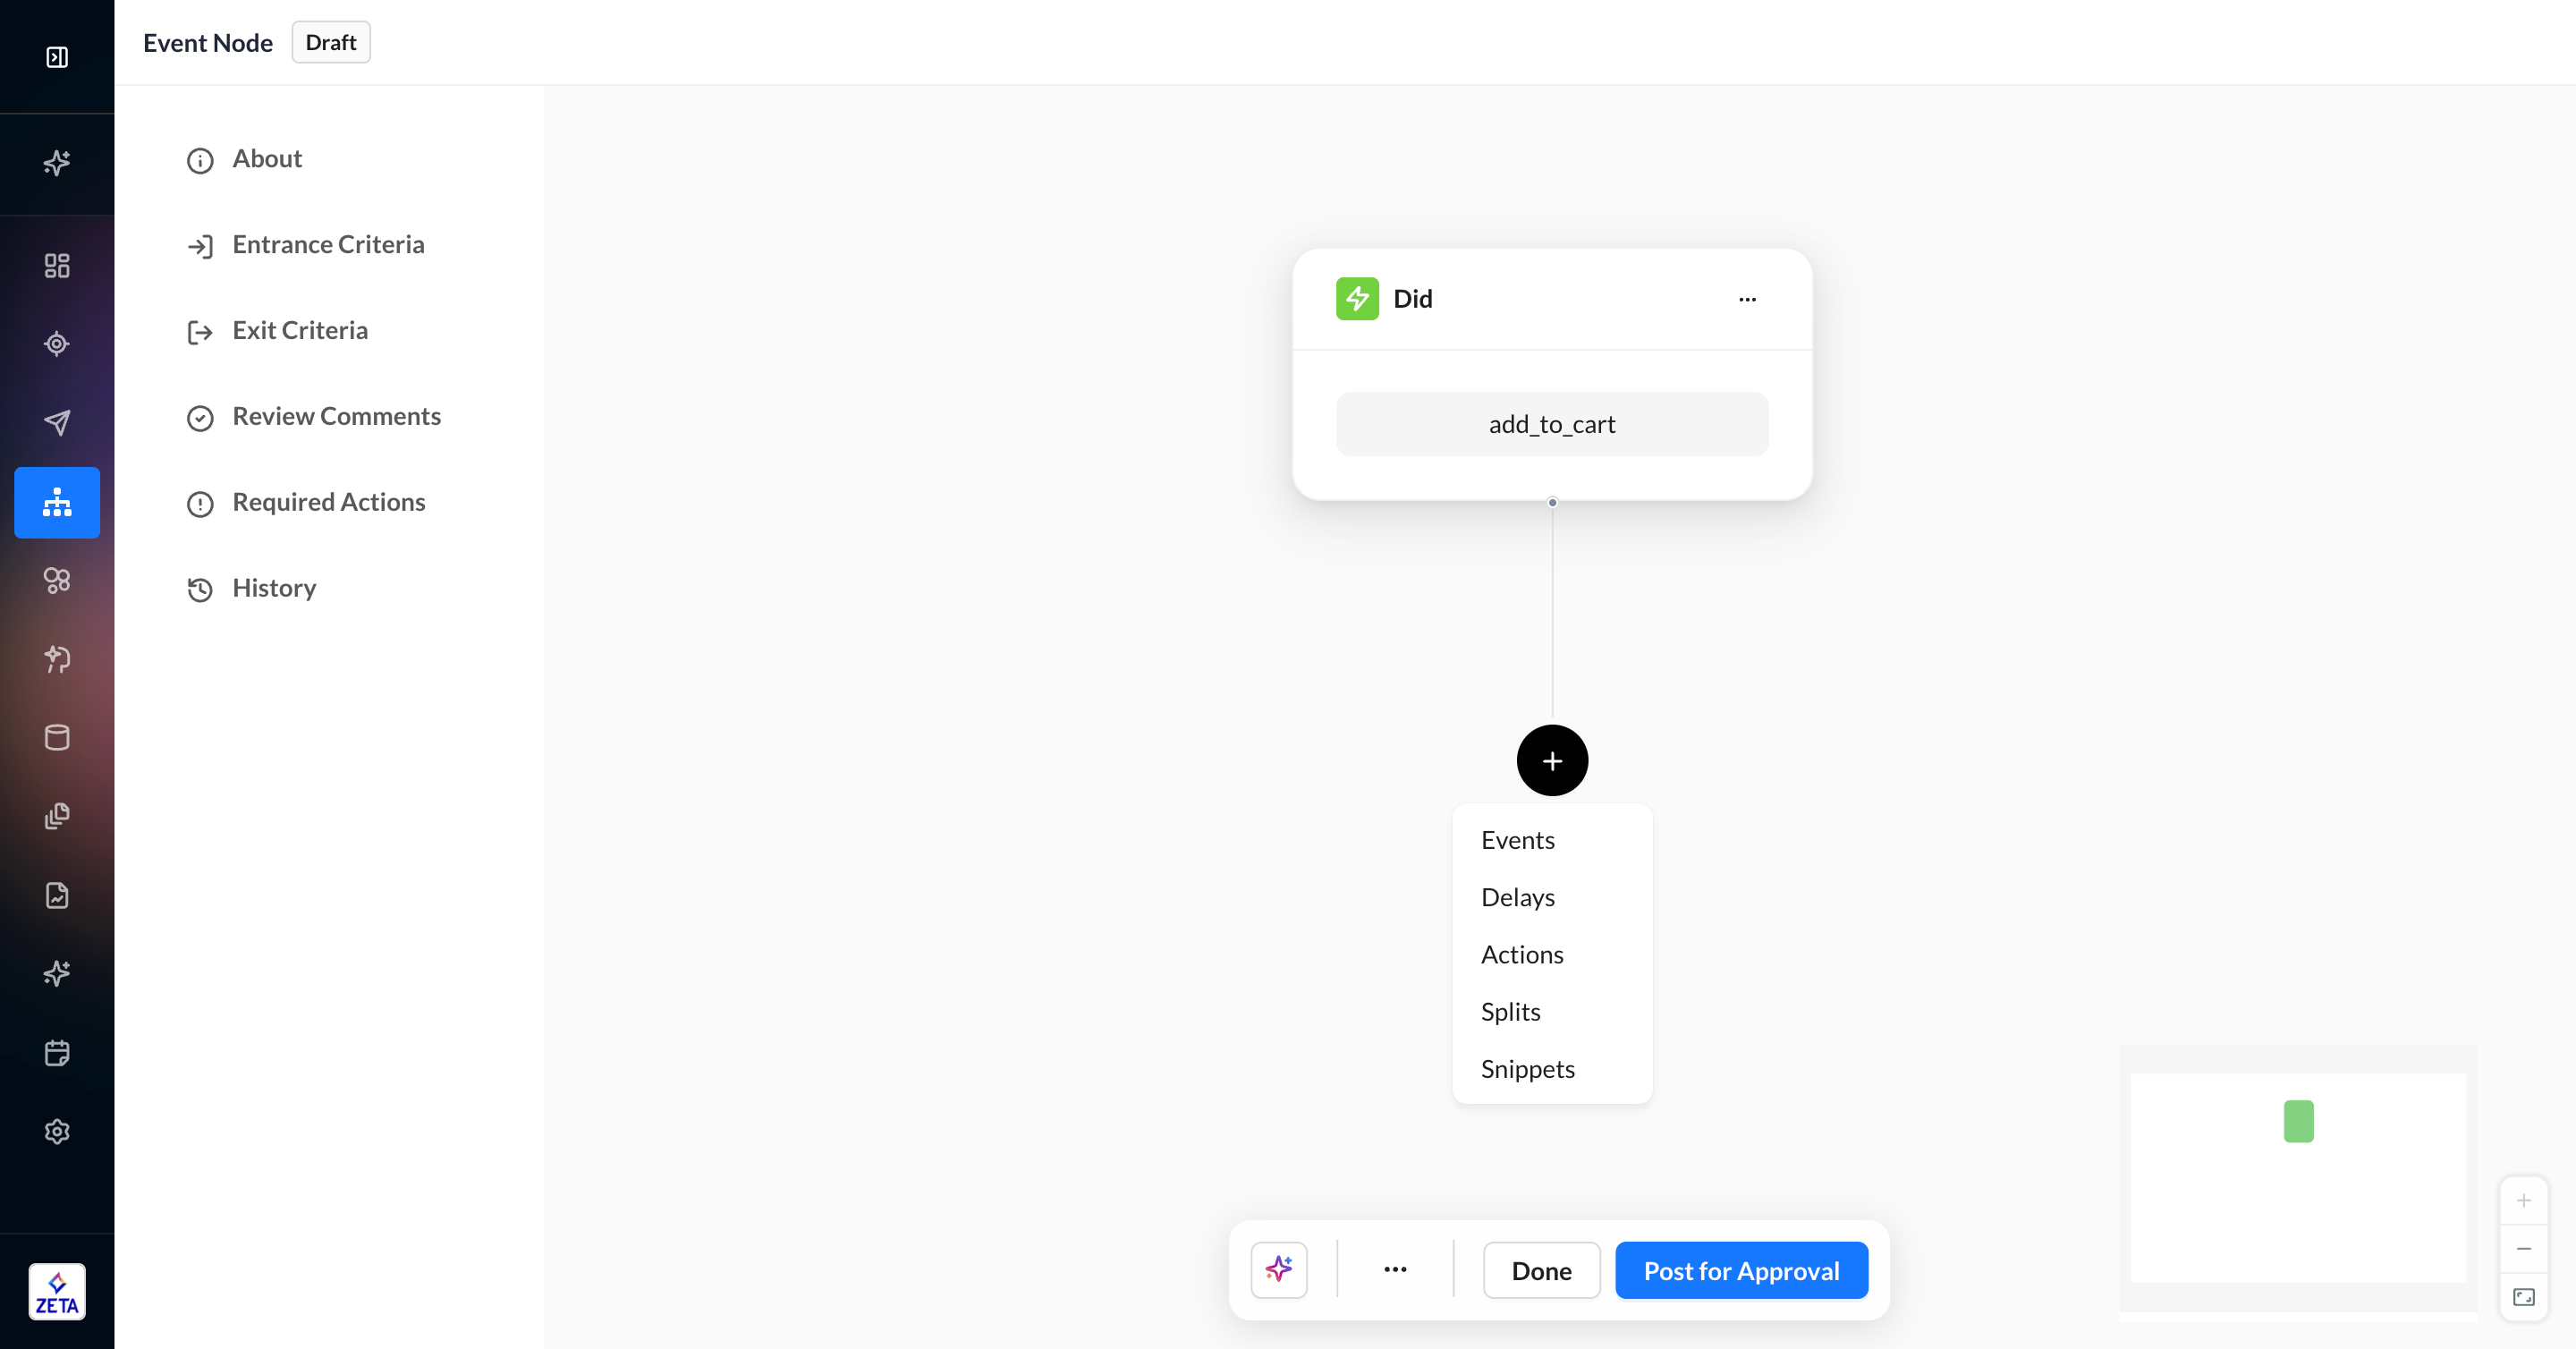
Use this node to check if a user does or does not perform an event to move forward in the experience. These are nodes that listen for real-time events, so people move forward as soon as they qualify.
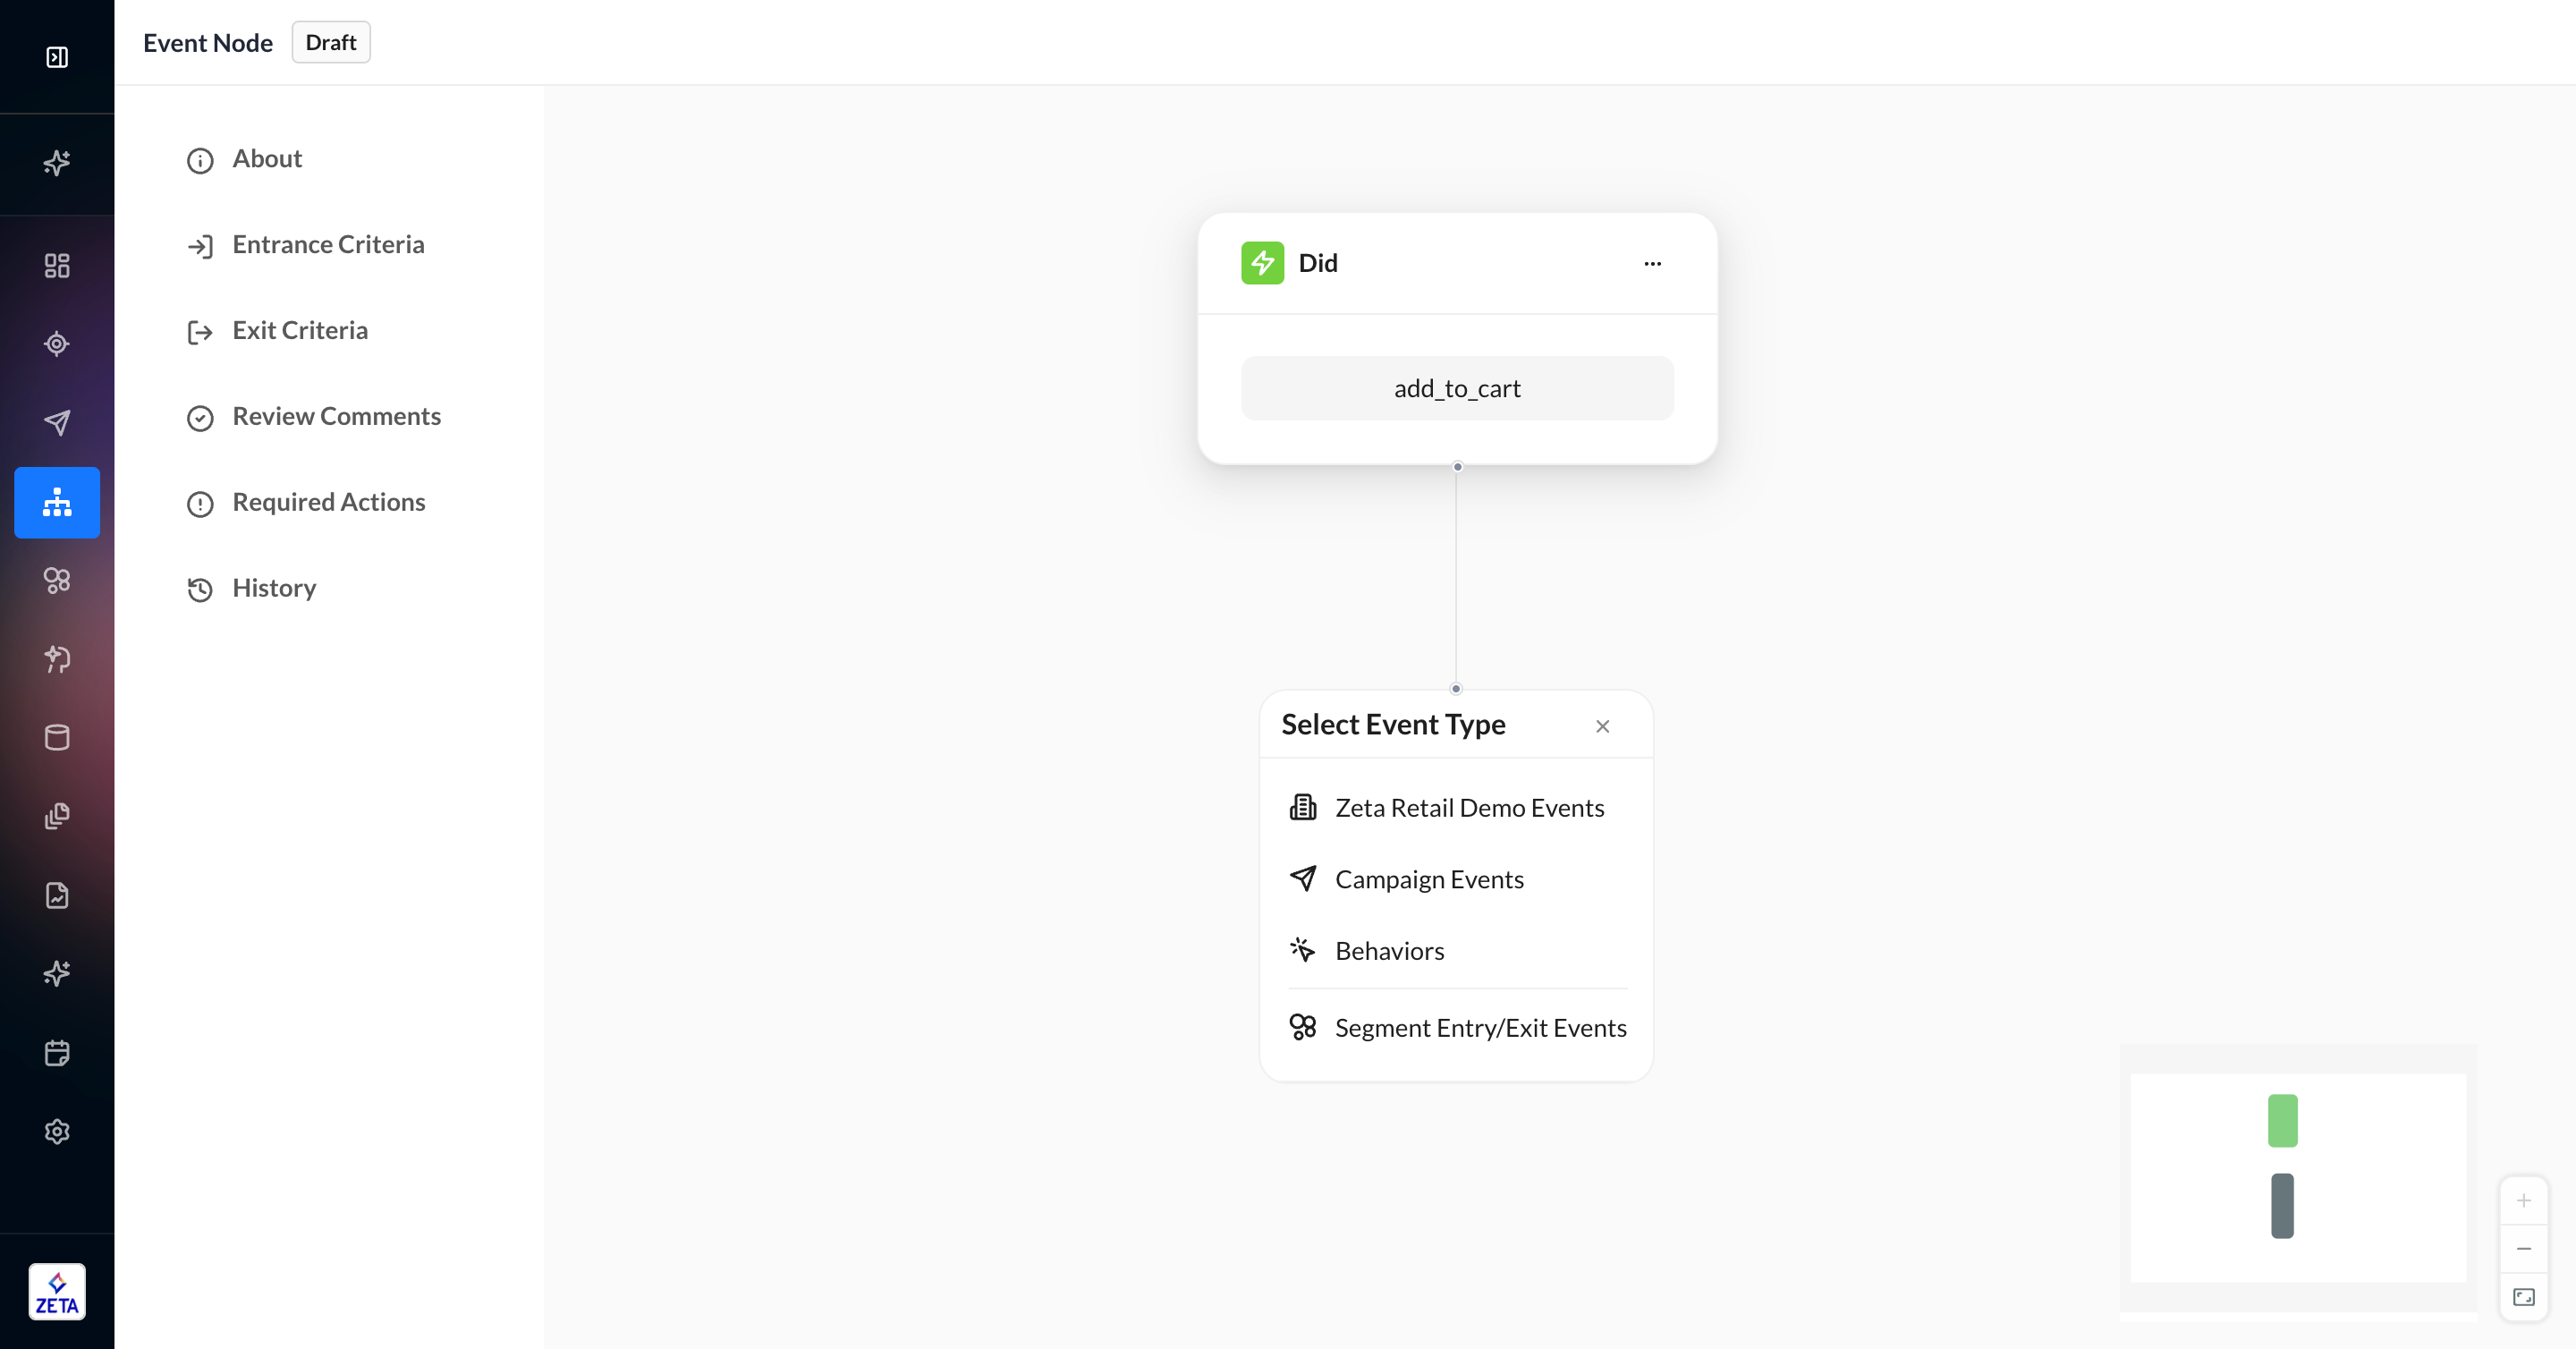
There are four event types:
-
Account Events
-
Campaign Events
-
Segment Entry/Exit Events
-
Behaviors
Common Event Filters
Before we move on to the elaboration of each event category, let’s have a look at the available event filters you can use to configure your event criteria with the most granularity.
-
Time-Based filters look back during a certain period of time after an upstream node to see if a user did or did not do the event type you’ve selected
-
Event Properties allow you to select payload data that must also be true to satisfy the criteria of an event type
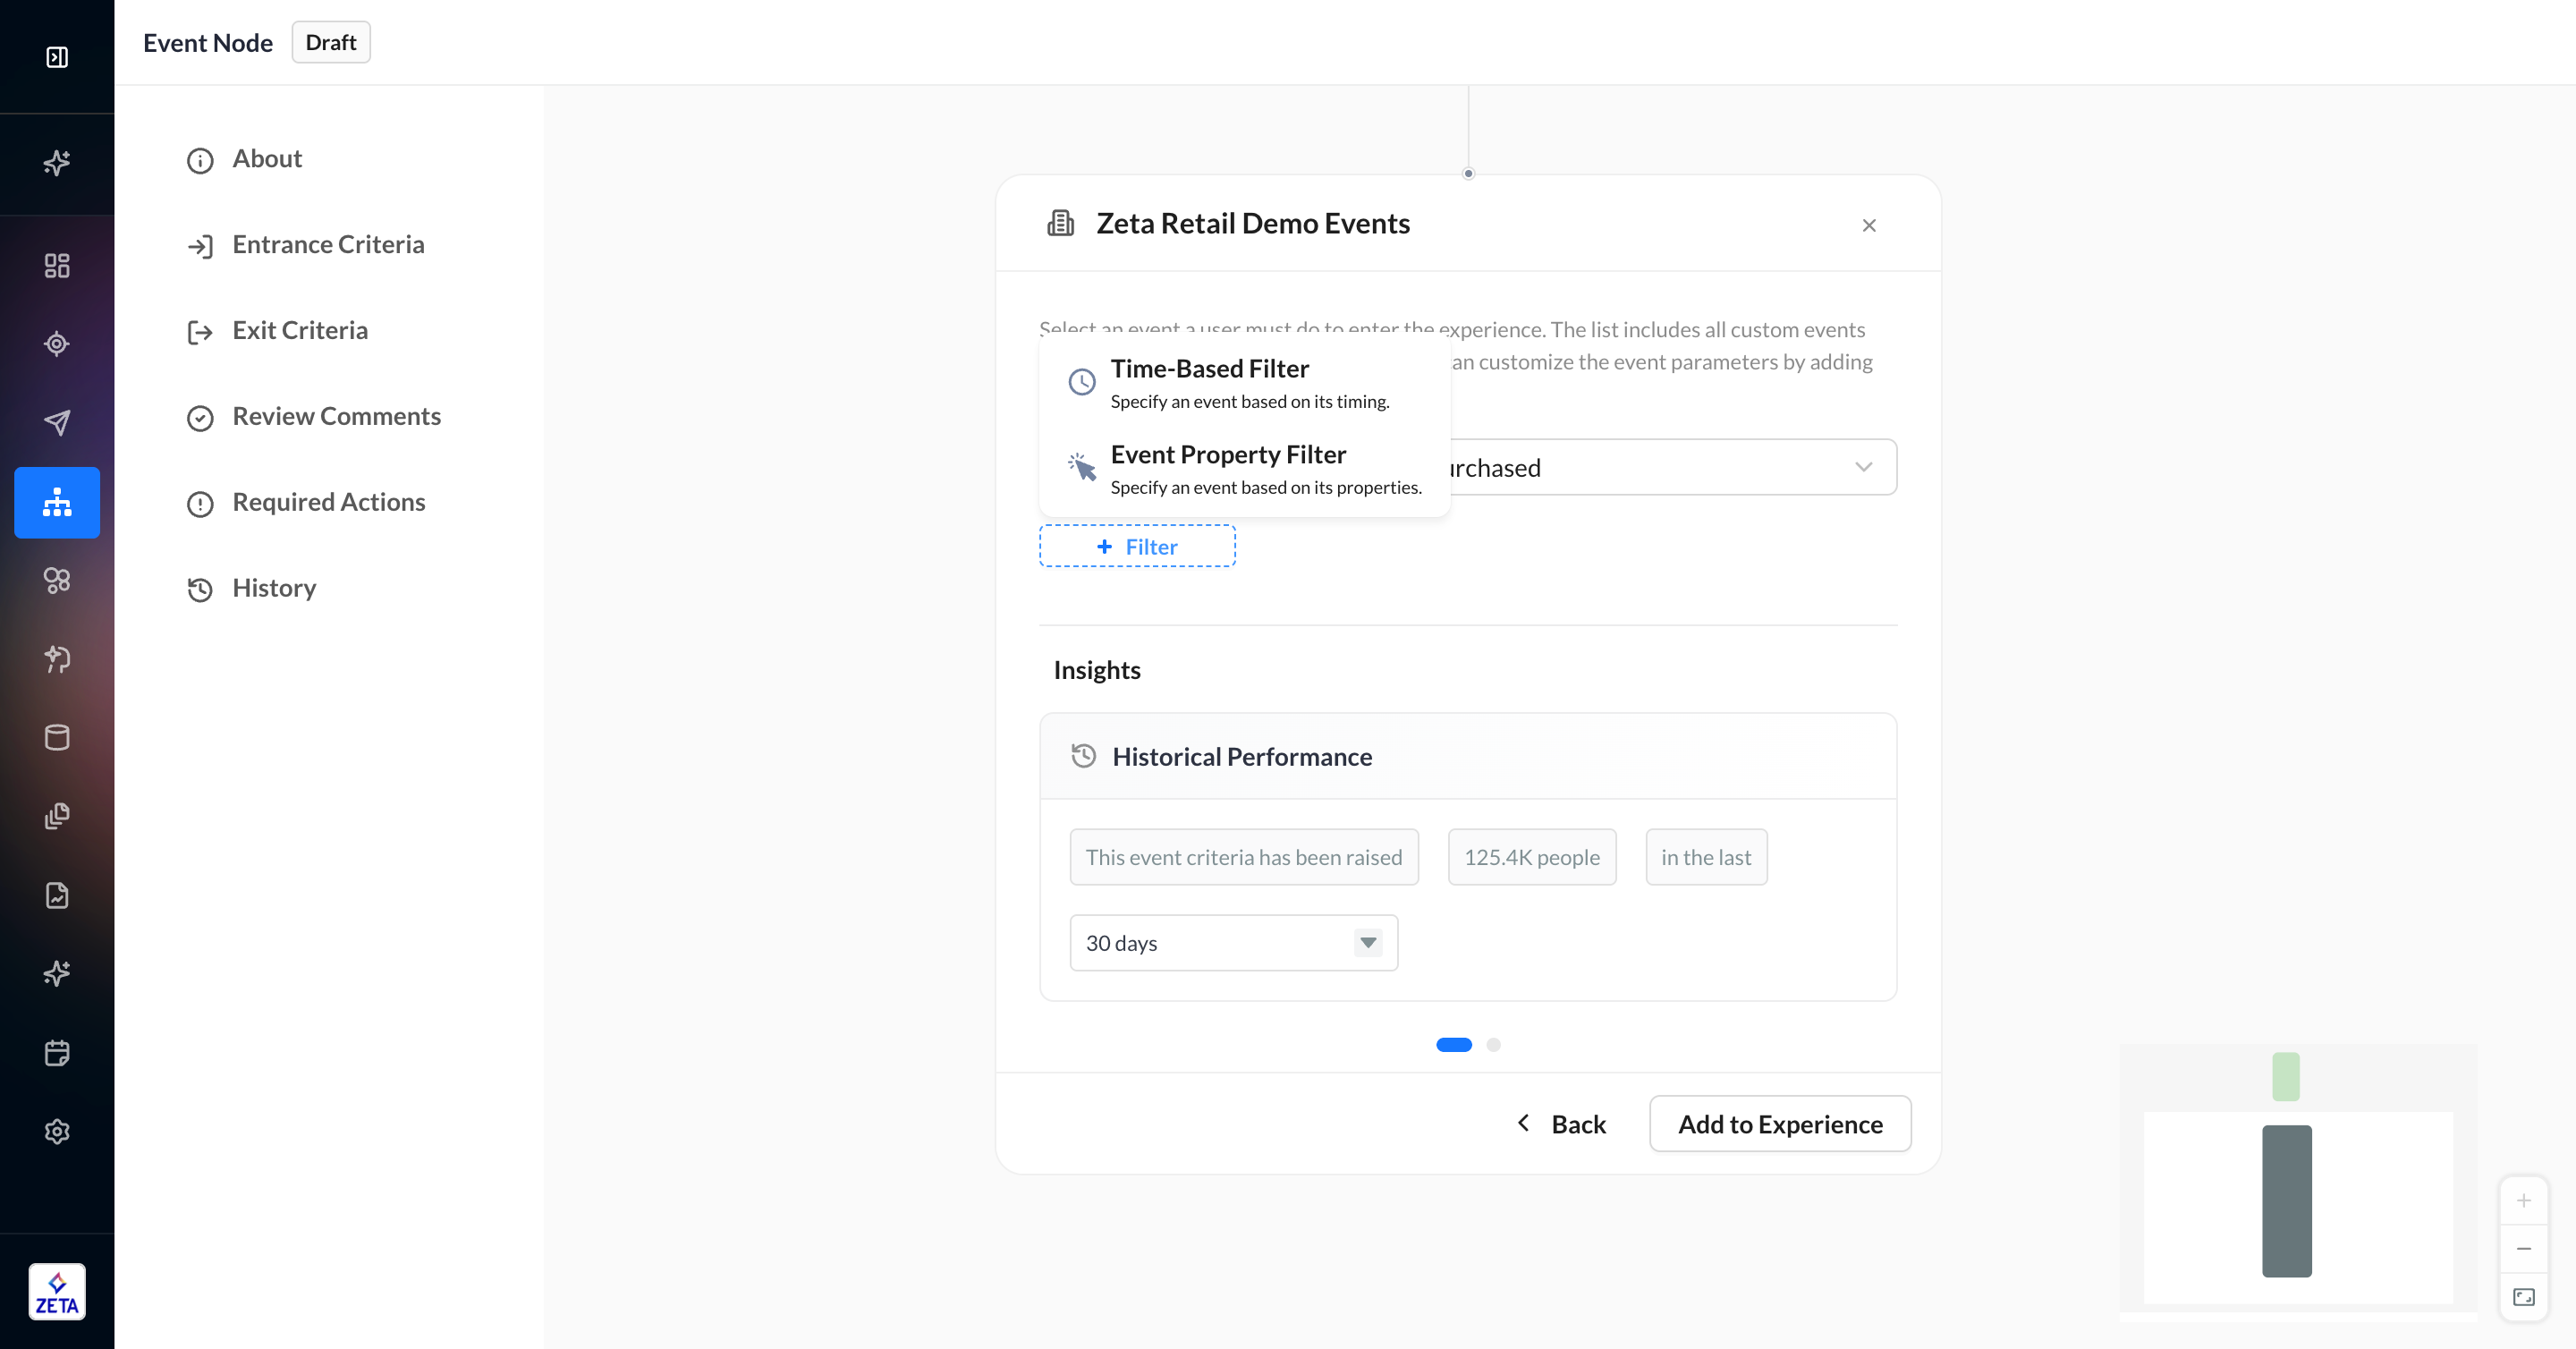
Time-Based
Select Time-Based Filter to determine the amount of time within which the event must occur after the initial experience trigger event or any other prior node within the experience. Events and campaigns are prioritized first, but you can search for and select any node as your reference, provided there’s no time-based delay in between them. The event timer starts once the user enters the referenced node. Available time frames include hours, minutes, and days after an upstream node.
A user must be at the event node at the time of doing the event in order for them to qualify to move forward. Because of this, you cannot add any time-based delays between the event you’re listening for and the upstream node referenced in the lookback period.
Event Properties
Using the Filter icon, you can add additional criteria for the specific event as needed. The properties available to choose from for additional filtering come from the payload of the event selected. In the example below, the user is restricting this node to purchased events that had a source_lib of a certain value.
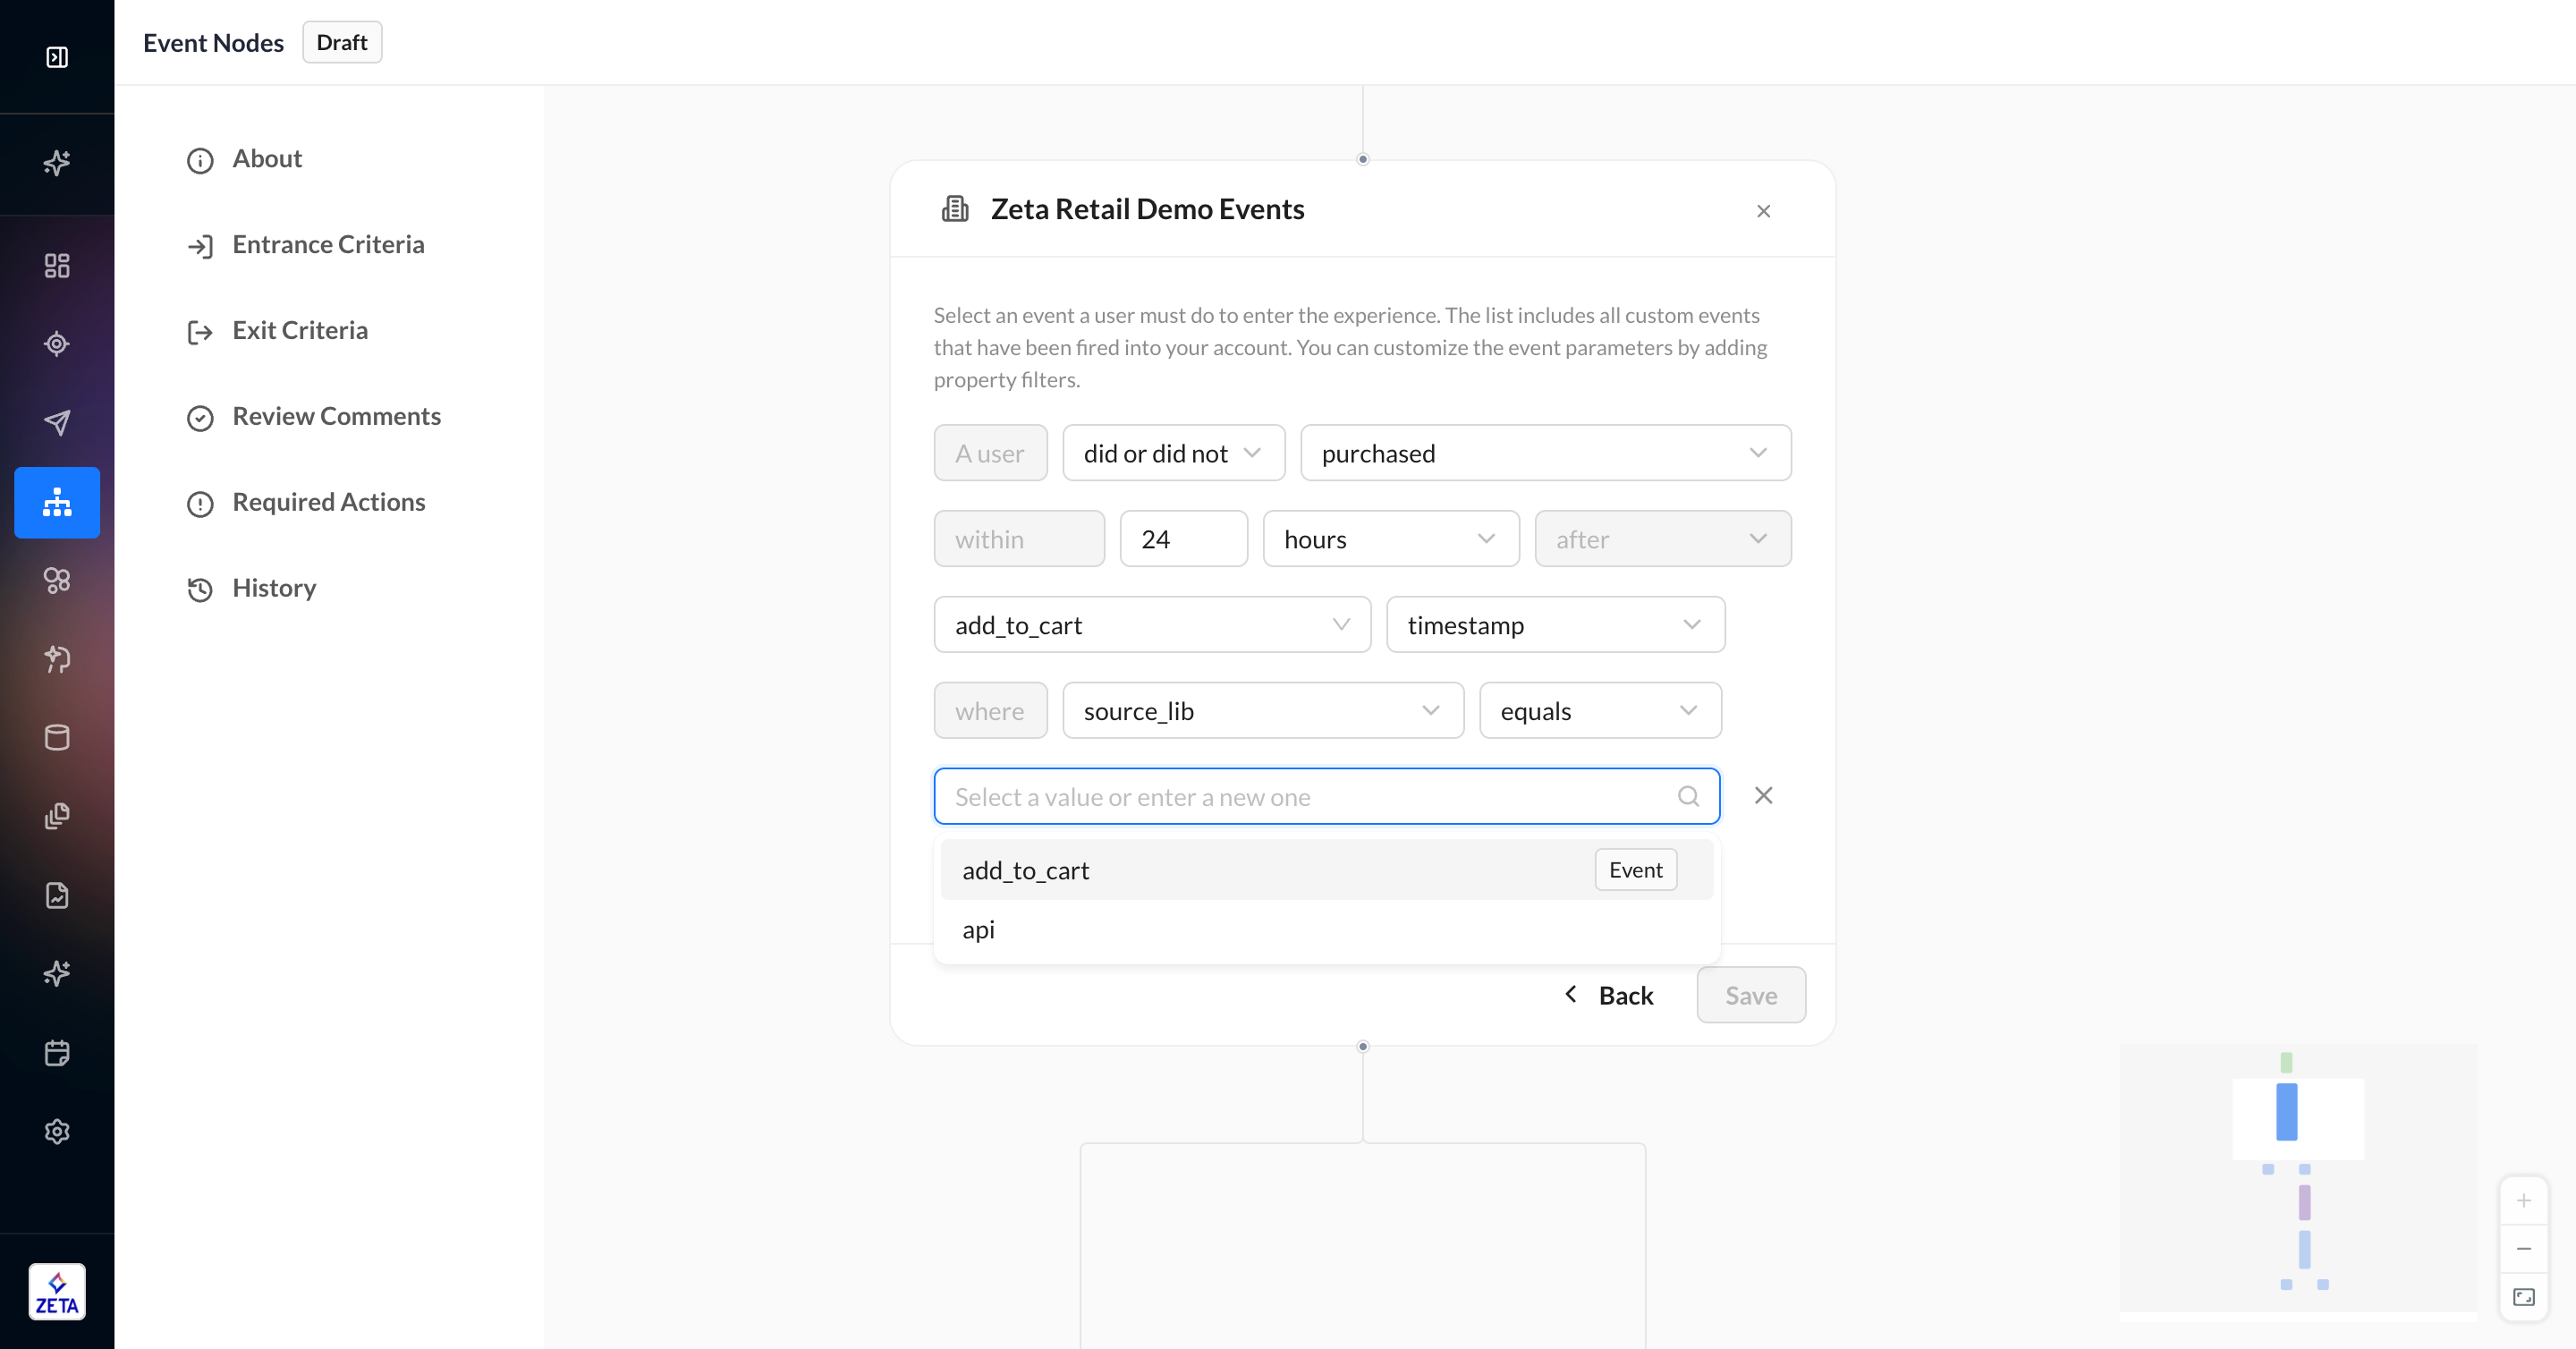
You can either type a value into this property value field for source_lib, or you can use the dropdown arrow to pick another upstream event's property to match. The latter option is specifically useful when matching based on some kind of ID or SKU in the case where a user may have multiple or one type of event.
For example, if a user has 5 purchases and 2 returns, we could use a consistent order_id across these events to properly tie up the 2 return events to the respective 2 purchased events.
Account Events
Learn how to set up custom events for your account: Events
Account events refer to actions that your users are taking — signups, purchases, page views, and more. Any events you can configure to be sent to ZMP can be found in the Account Events trigger type. This is displayed as [Your Account Name] Events.
1. From the event menu, select [Your Account Name] Events.
2. Select an operator to configure your event criteria. These nodes will listen for events and evaluate whether a user Did or Did Not do it during the specified time period. You can also select Did or Did Not as the operator in order to fork the experience based on the user doing or not doing the event.
a. Selecting Did Not or Did or Did Not as your operator requires a time-based filter. For Did events, this remains optional.
b. For single operator event nodes, the user will stay at the node until they do the event or until the time-based filter expires. If the user does not satisfy the event criteria by the end of the time-based filter, they will exit the experience.
c. A user will stay at a Did node with no time-based filter until they do the event. The only other way to move these users is to configure Exit Criteria or change to a Did or Did Not operator so that users who don’t satisfy the node criteria can still move forward in the experience.
A user must be at the event node at the time of doing the event in order for them to qualify to move forward. Because of this, you cannot add any time-based delays between the event you’re listening for and the upstream node referenced in the lookback period.
3. To narrow your criteria, use event property filters to set what these values need to be, such as membership_level = member
4. Click Add to Experience to save the node and add it to the canvas.

Campaign Events
Campaign events are standardized events that are fired when users interact with your Broadcast Campaigns — opens, clicks, bounces, unsubscribes, and more.
1. From the event, select Campaign Events.
2. Select an operator to configure your campaign event criteria. These nodes will listen for events and evaluate whether a user Did or Did Not do it during the specified time period. You can also select Did or Did Not as the operator in order to fork the experience based on the user doing or not doing the event.
a. Selecting Did Not or Did or Did Not as your operator requires a time-based filter. For Did events, this remains optional.
b. For single operator event nodes, the user will stay at the node until they do the event or until the time-based filter expires. If the user does not satisfy the event criteria by the end of the time-based filter, they will exit the experience.
c. A user will stay at a Did node with no time-based filter until they do the event. The only other way to move these users is to configure Exit Criteria or change to a Did or Did Not operator so that users who don’t satisfy the node criteria can still move forward in the experience.
A user must be at the event node at the time of doing the event in order for them to qualify to move forward. Because of this, you cannot add any time-based delays between the event you’re listening for and the upstream node referenced in the lookback period.
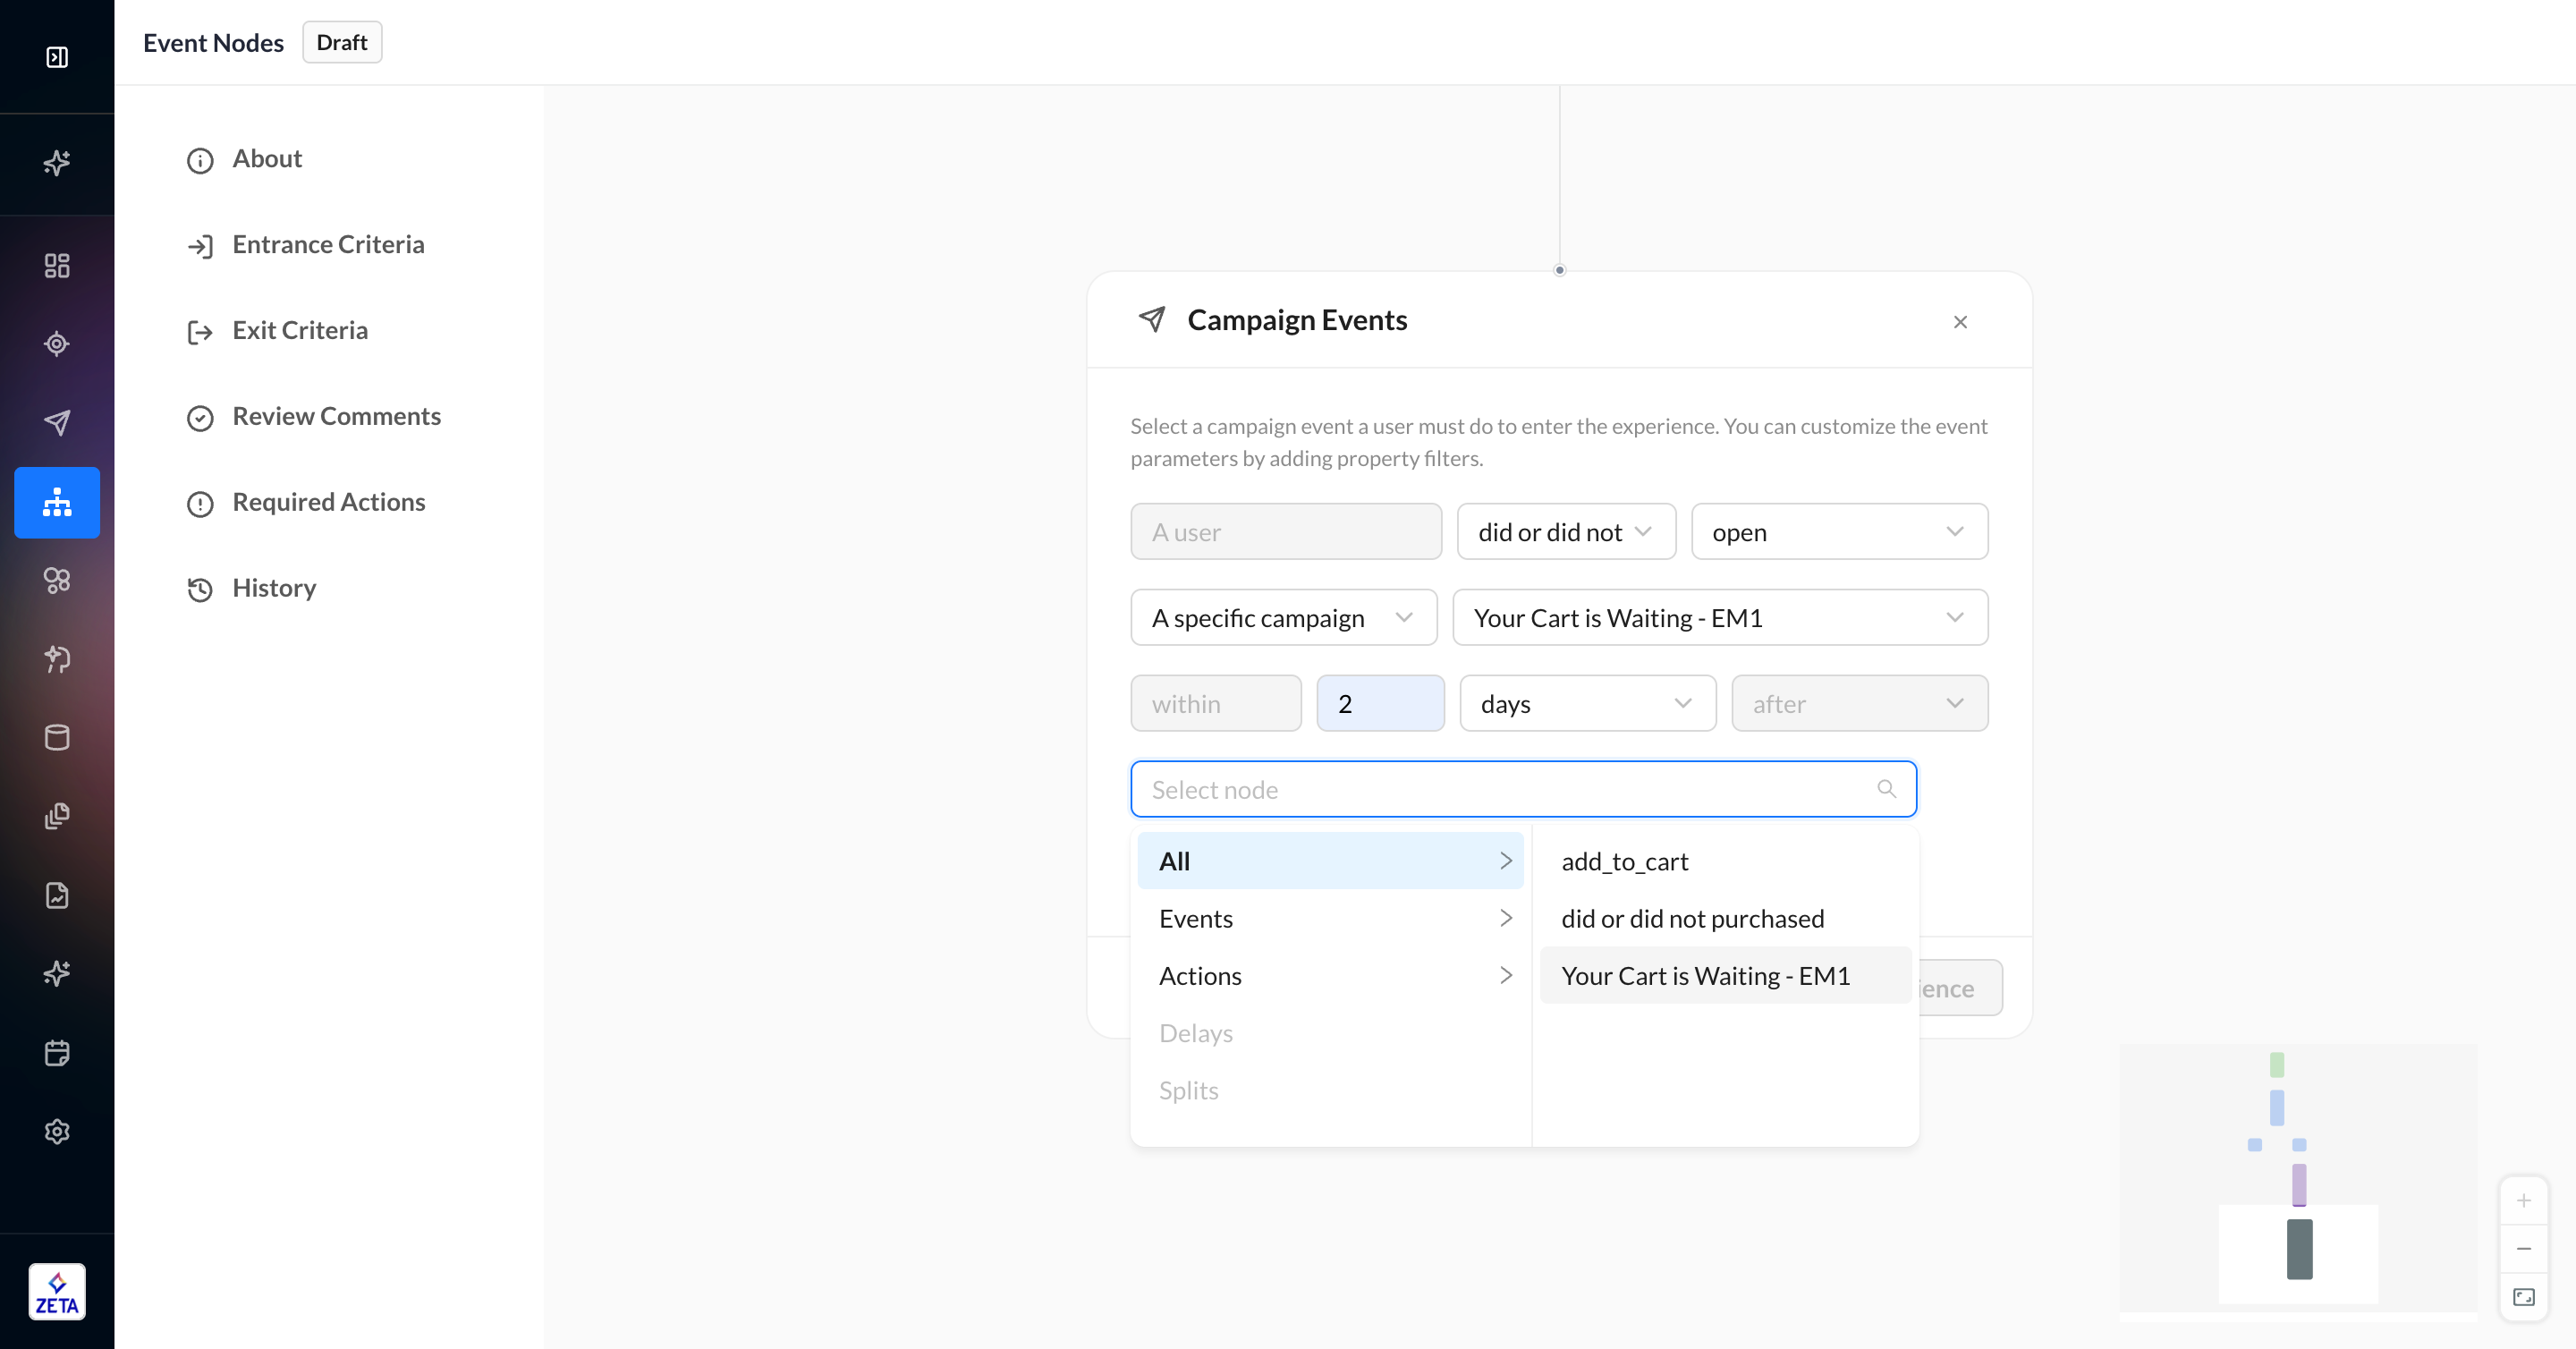
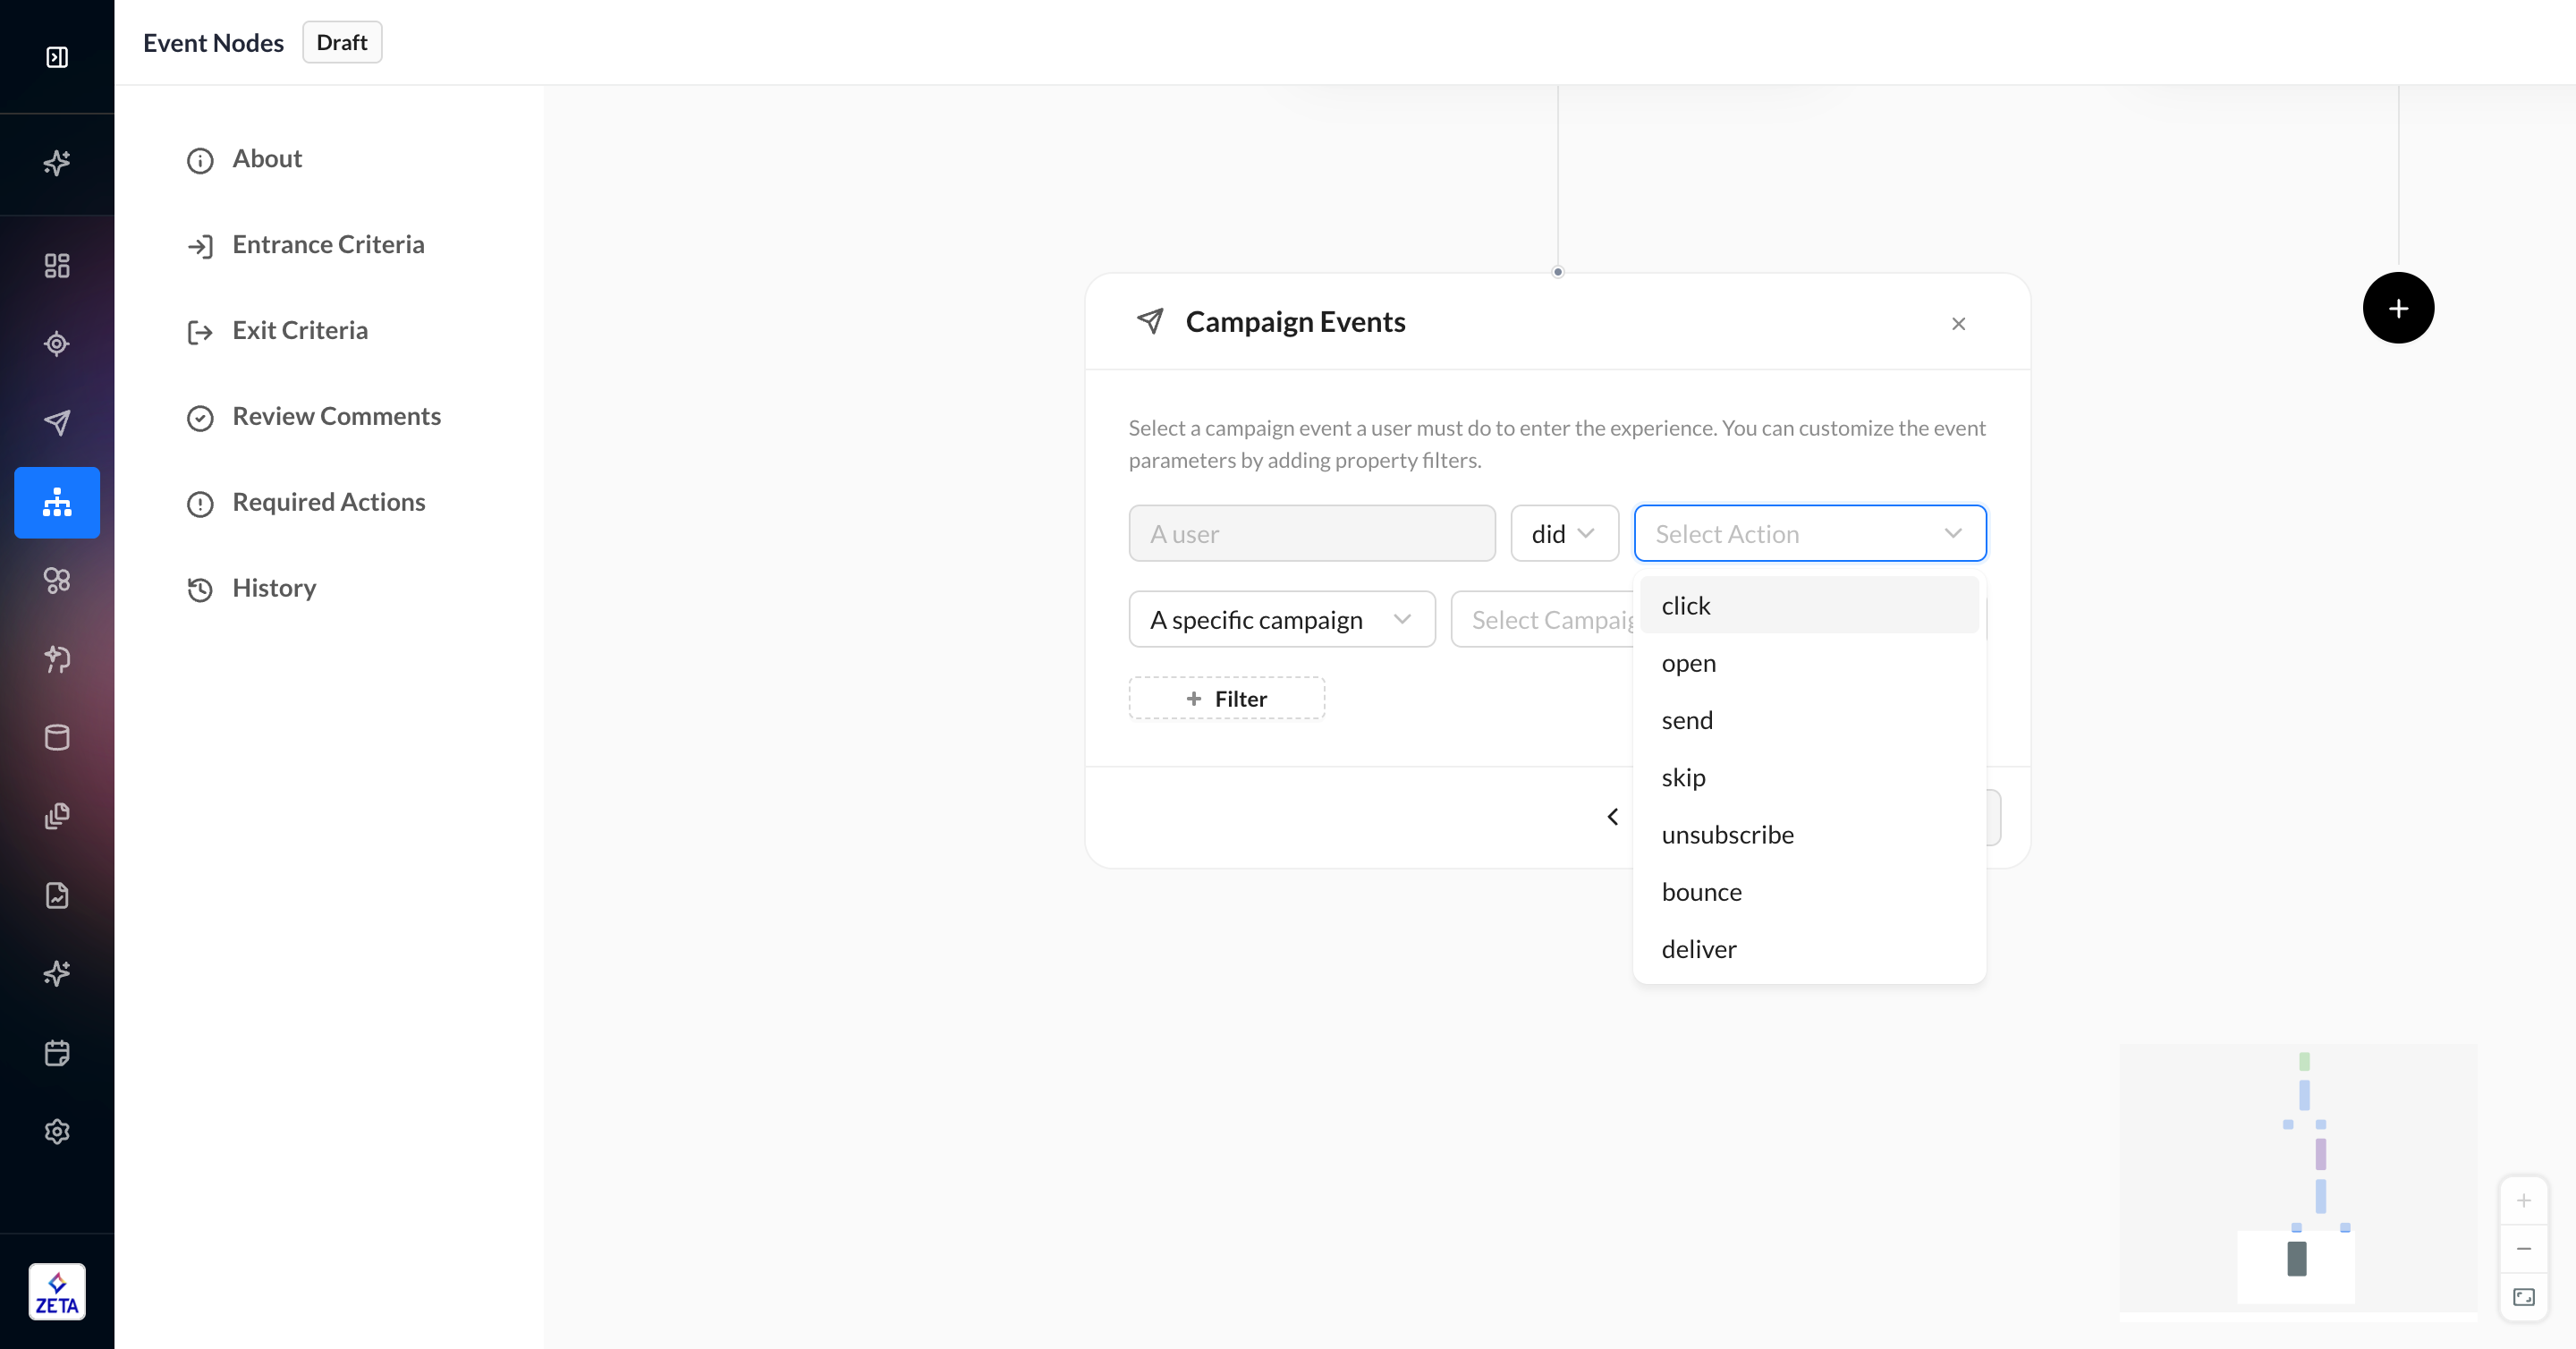
3. Select the campaign event you want to trigger the experience.
-
click
-
open
-
send
-
skip
-
unsubscribe
-
bounce
-
deliver
4. Select whether you want the experience to track this event across a single campaign, any campaign, or any campaign with a specific tag(s).
5. Once you select your event, you can add optional property filters. The filters are populated by the objects in the event payload.
6. Click Add to Experience to save the node and add it to the canvas.

Segment Entry/Exit Events
Segment Entry/Exit Events are standardized events that are fired when users enter or exit Customer Segments with tracking enabled. To change the settings on a Customer Segment, open it in Audience Explorer.
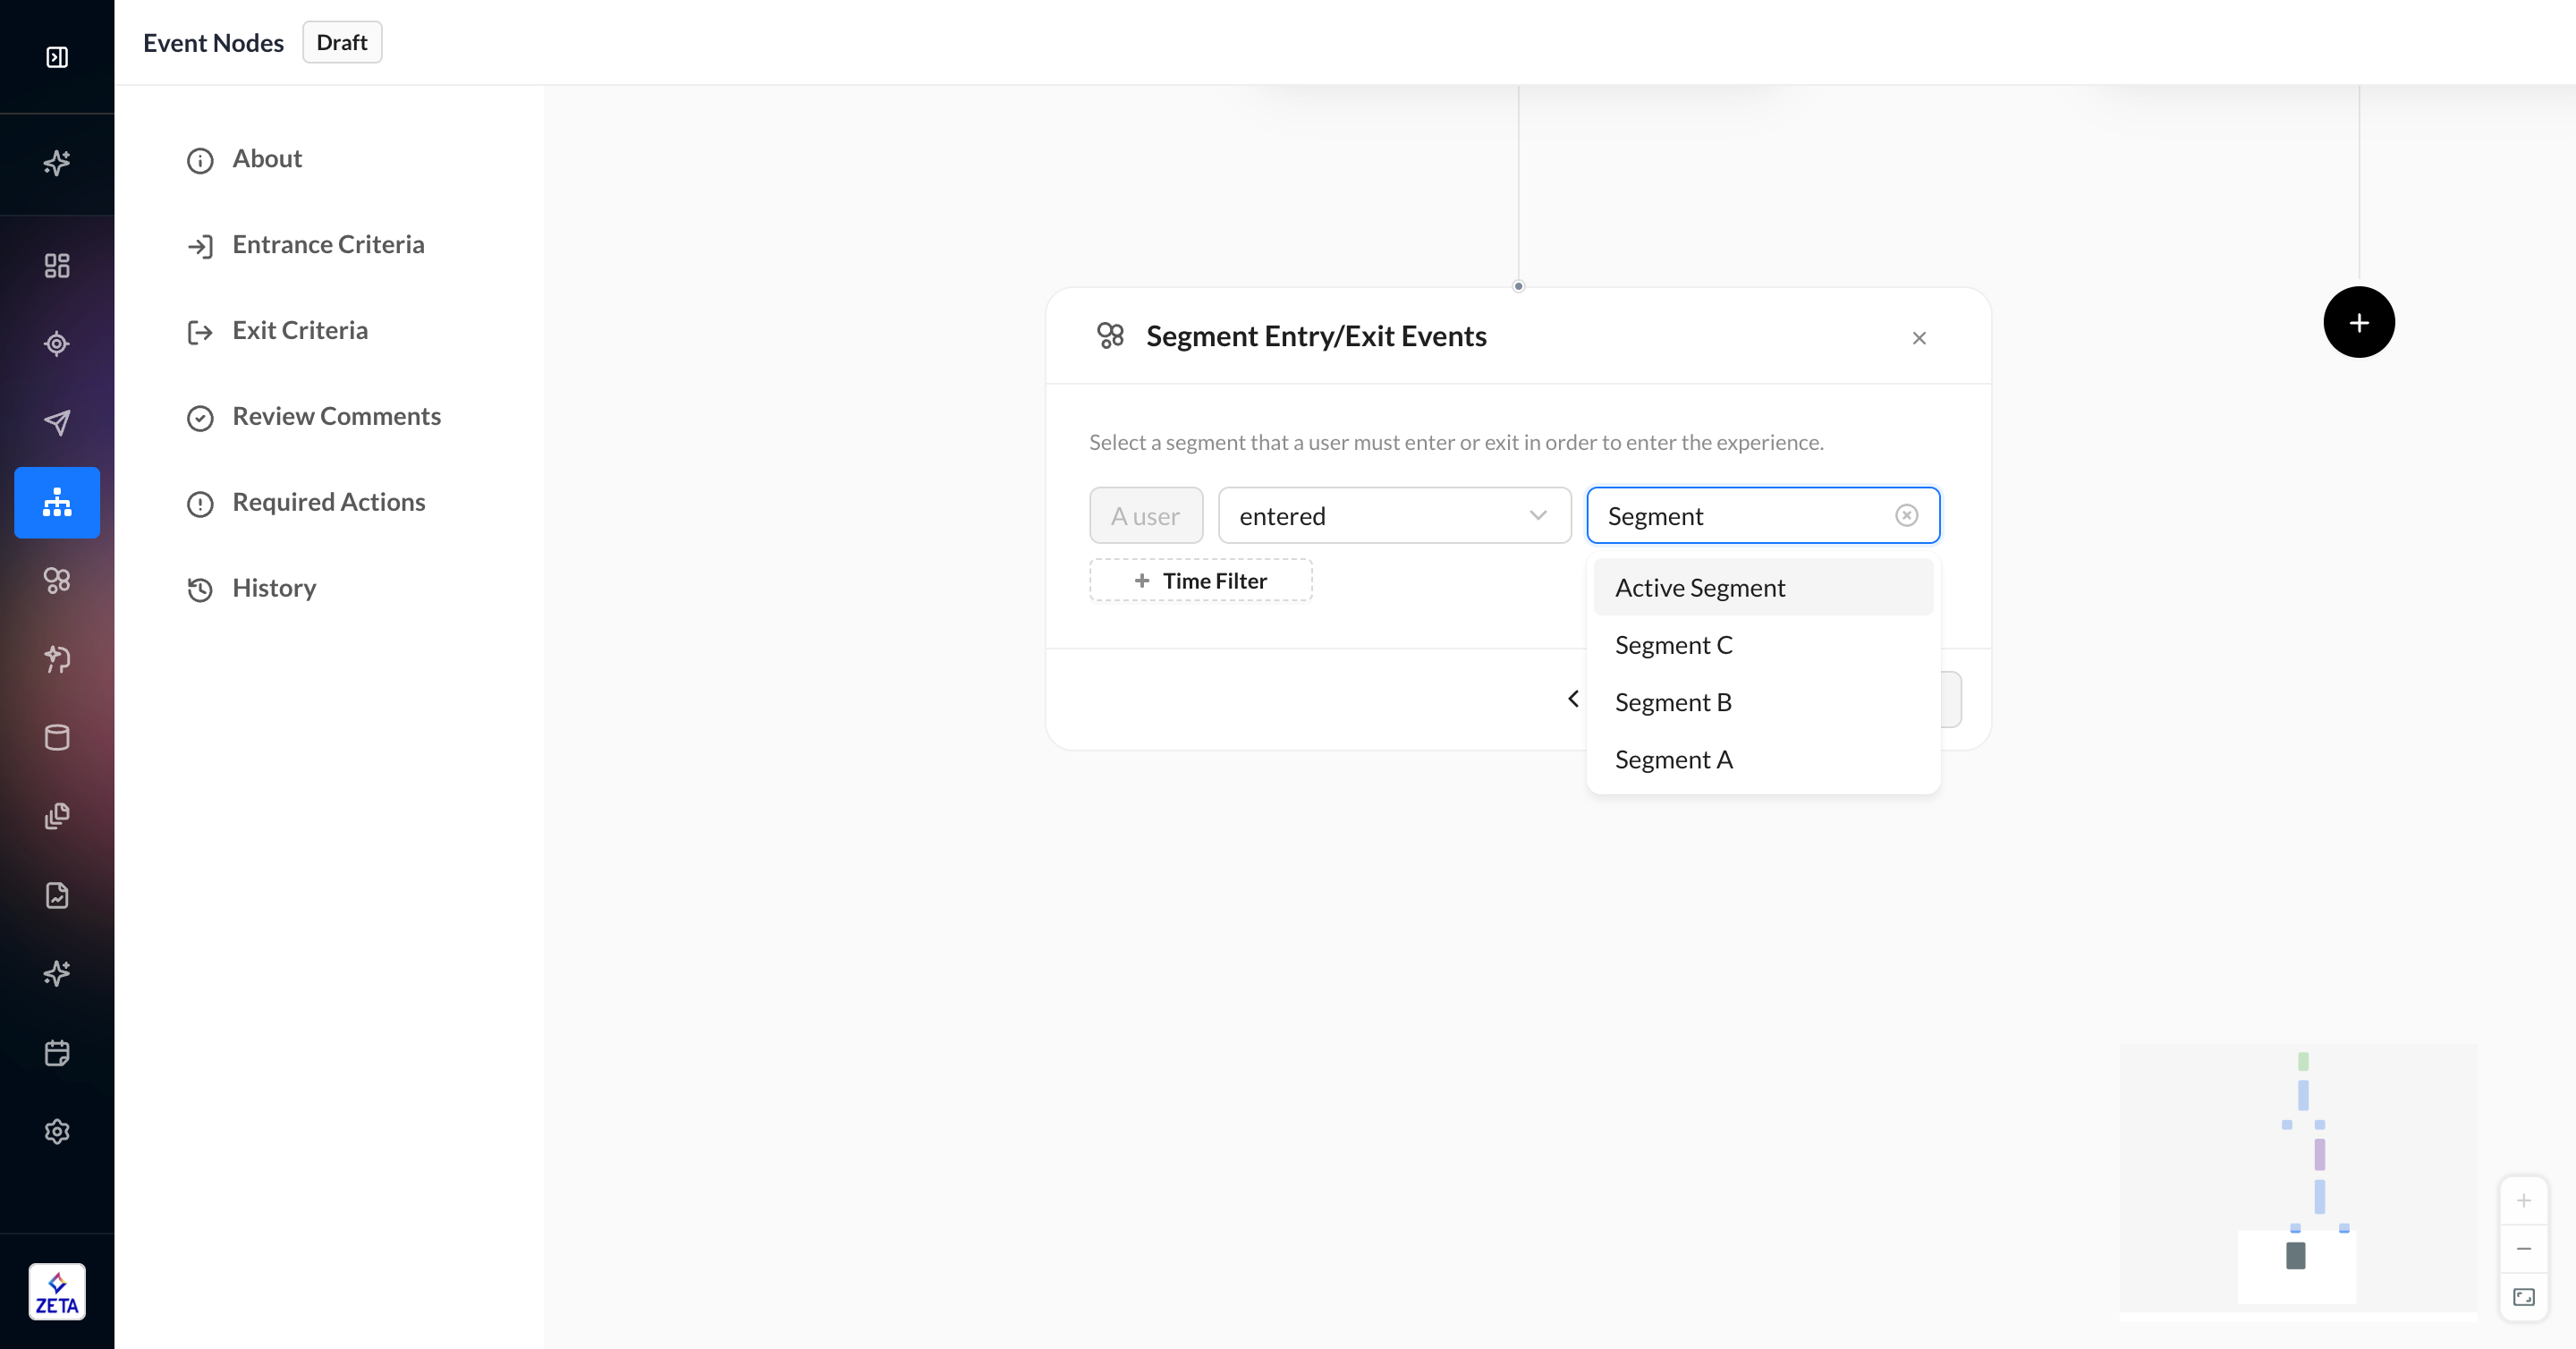
1. From the event menu, select Segment Entry/Exit Events.
2. Select an operator to track whether a user entered or exited a segment.
3. Select the segment that you want to track when the user’s membership changes. Only Customer Segments that have tracking enabled will be listed.
4. You can only add time-based filters because there is no payload attached to the segment entry/exit event. The user must be at the node at the time of their entering or exiting the segment in order for the event to qualify them to move forward.
5. Click Add to Experience to save the node and add it to the canvas.
Behaviors
Learn more about Behaviors, which require a UID, so unknown users will be skipped.
Behaviors are an advanced event type that can listen for multiple events at once. Use them to configure event sequences or “OR” events (eg, user did page_view OR click).
1. From the event menu, select Behaviors.
2. Select an operator to configure your behavior event criteria. These nodes will listen for events and evaluate whether a user Did or Did Not do it during the specified time period. You can also select Did or Did Not as the operator in order to fork the experience based on the user doing or not doing the event.
a. Selecting Did Not or Did or Did Not as your operator requires a time-based filter. For Did events, this remains optional.
b. For single operator event nodes, the user will stay at the node until they do the event or until the time-based filter expires. If the user does not satisfy the event criteria by the end of the time-based filter, they will exit the experience.
c. A user will stay at a Did node with no time-based filter until they do the event. The only other way to move these users is to configure Exit Criteria or change to a Did or Did Not operator so that users who don’t satisfy the node criteria can still move forward in the experience.
A user must be at the event node at the time of doing the event in order for them to qualify to move forward. Because of this, you cannot add any time-based delays between the event you’re listening for and the upstream event referenced in the lookback period.
3. Click Add to Experience to save the node and add it to the canvas.
