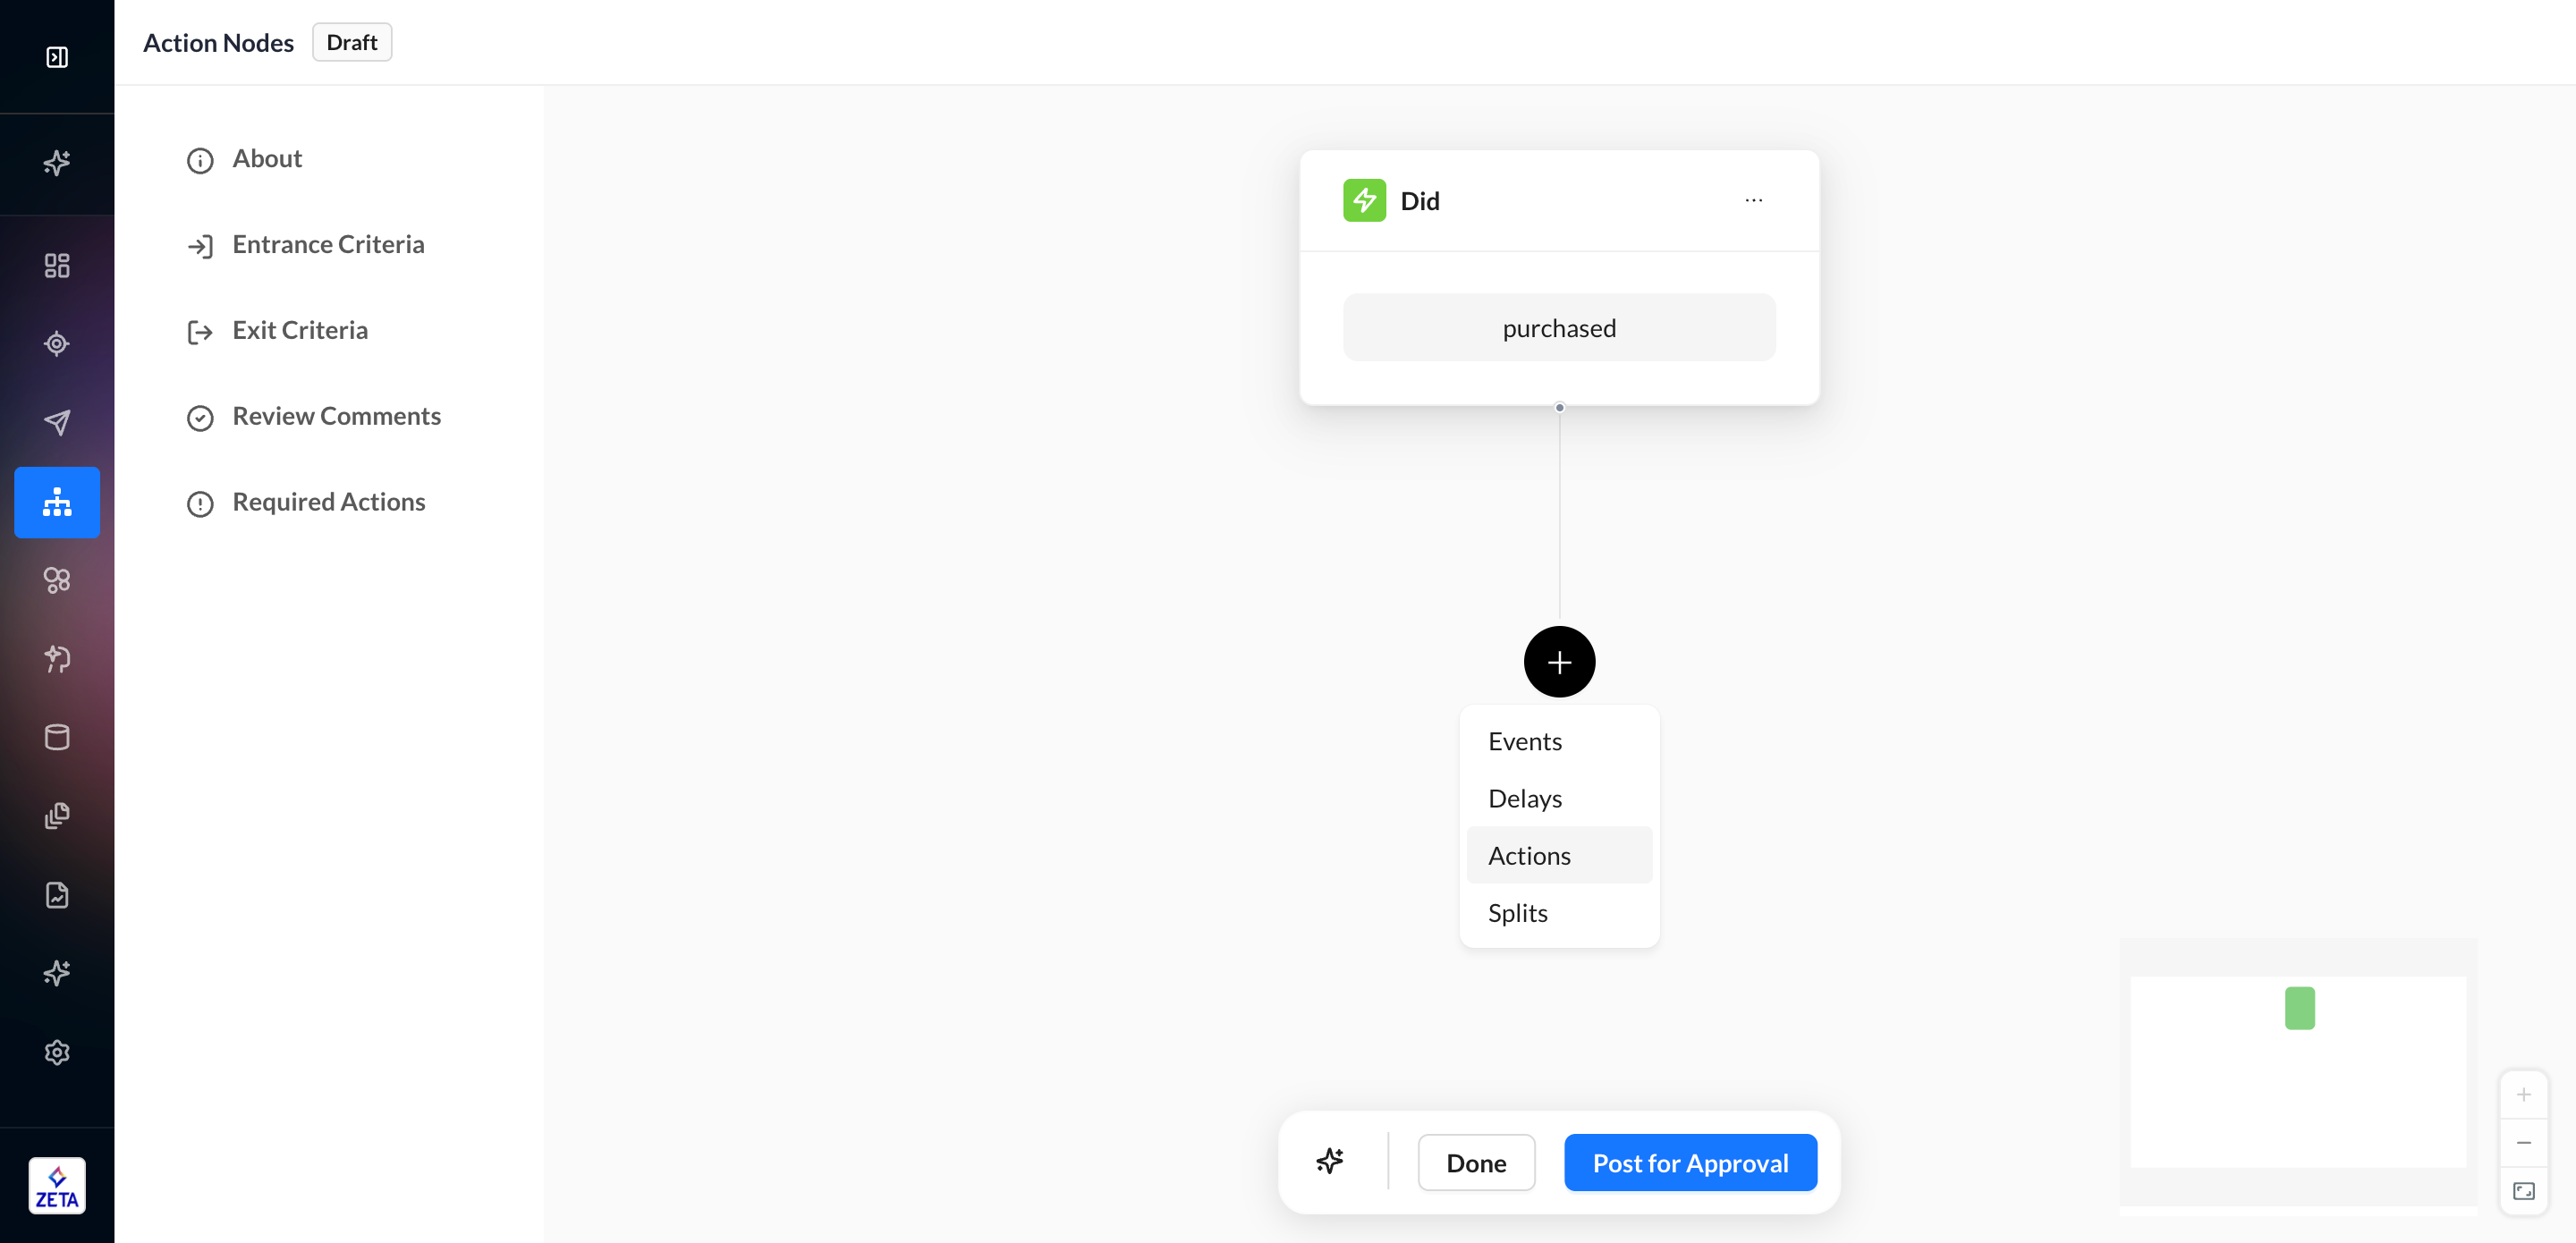
Once a person enters an experience, you can set up events, delays, splits, and actions to move that person along in the workflow. The Actions node allows you to send the user campaigns on owned channels, as well as add them to audiences to be targeted on paid channels or update data on their ZMP profile.
The Action types available are:
-
Add Campaign
-
Add/Update data on the profile
-
Sync
-
Sync to List
-
Sync to Programmatic
-
Sync to Facebook
-
Sync to Google Ads
-
Sync to Yahoo DSP
-
-
Trigger Another Experience
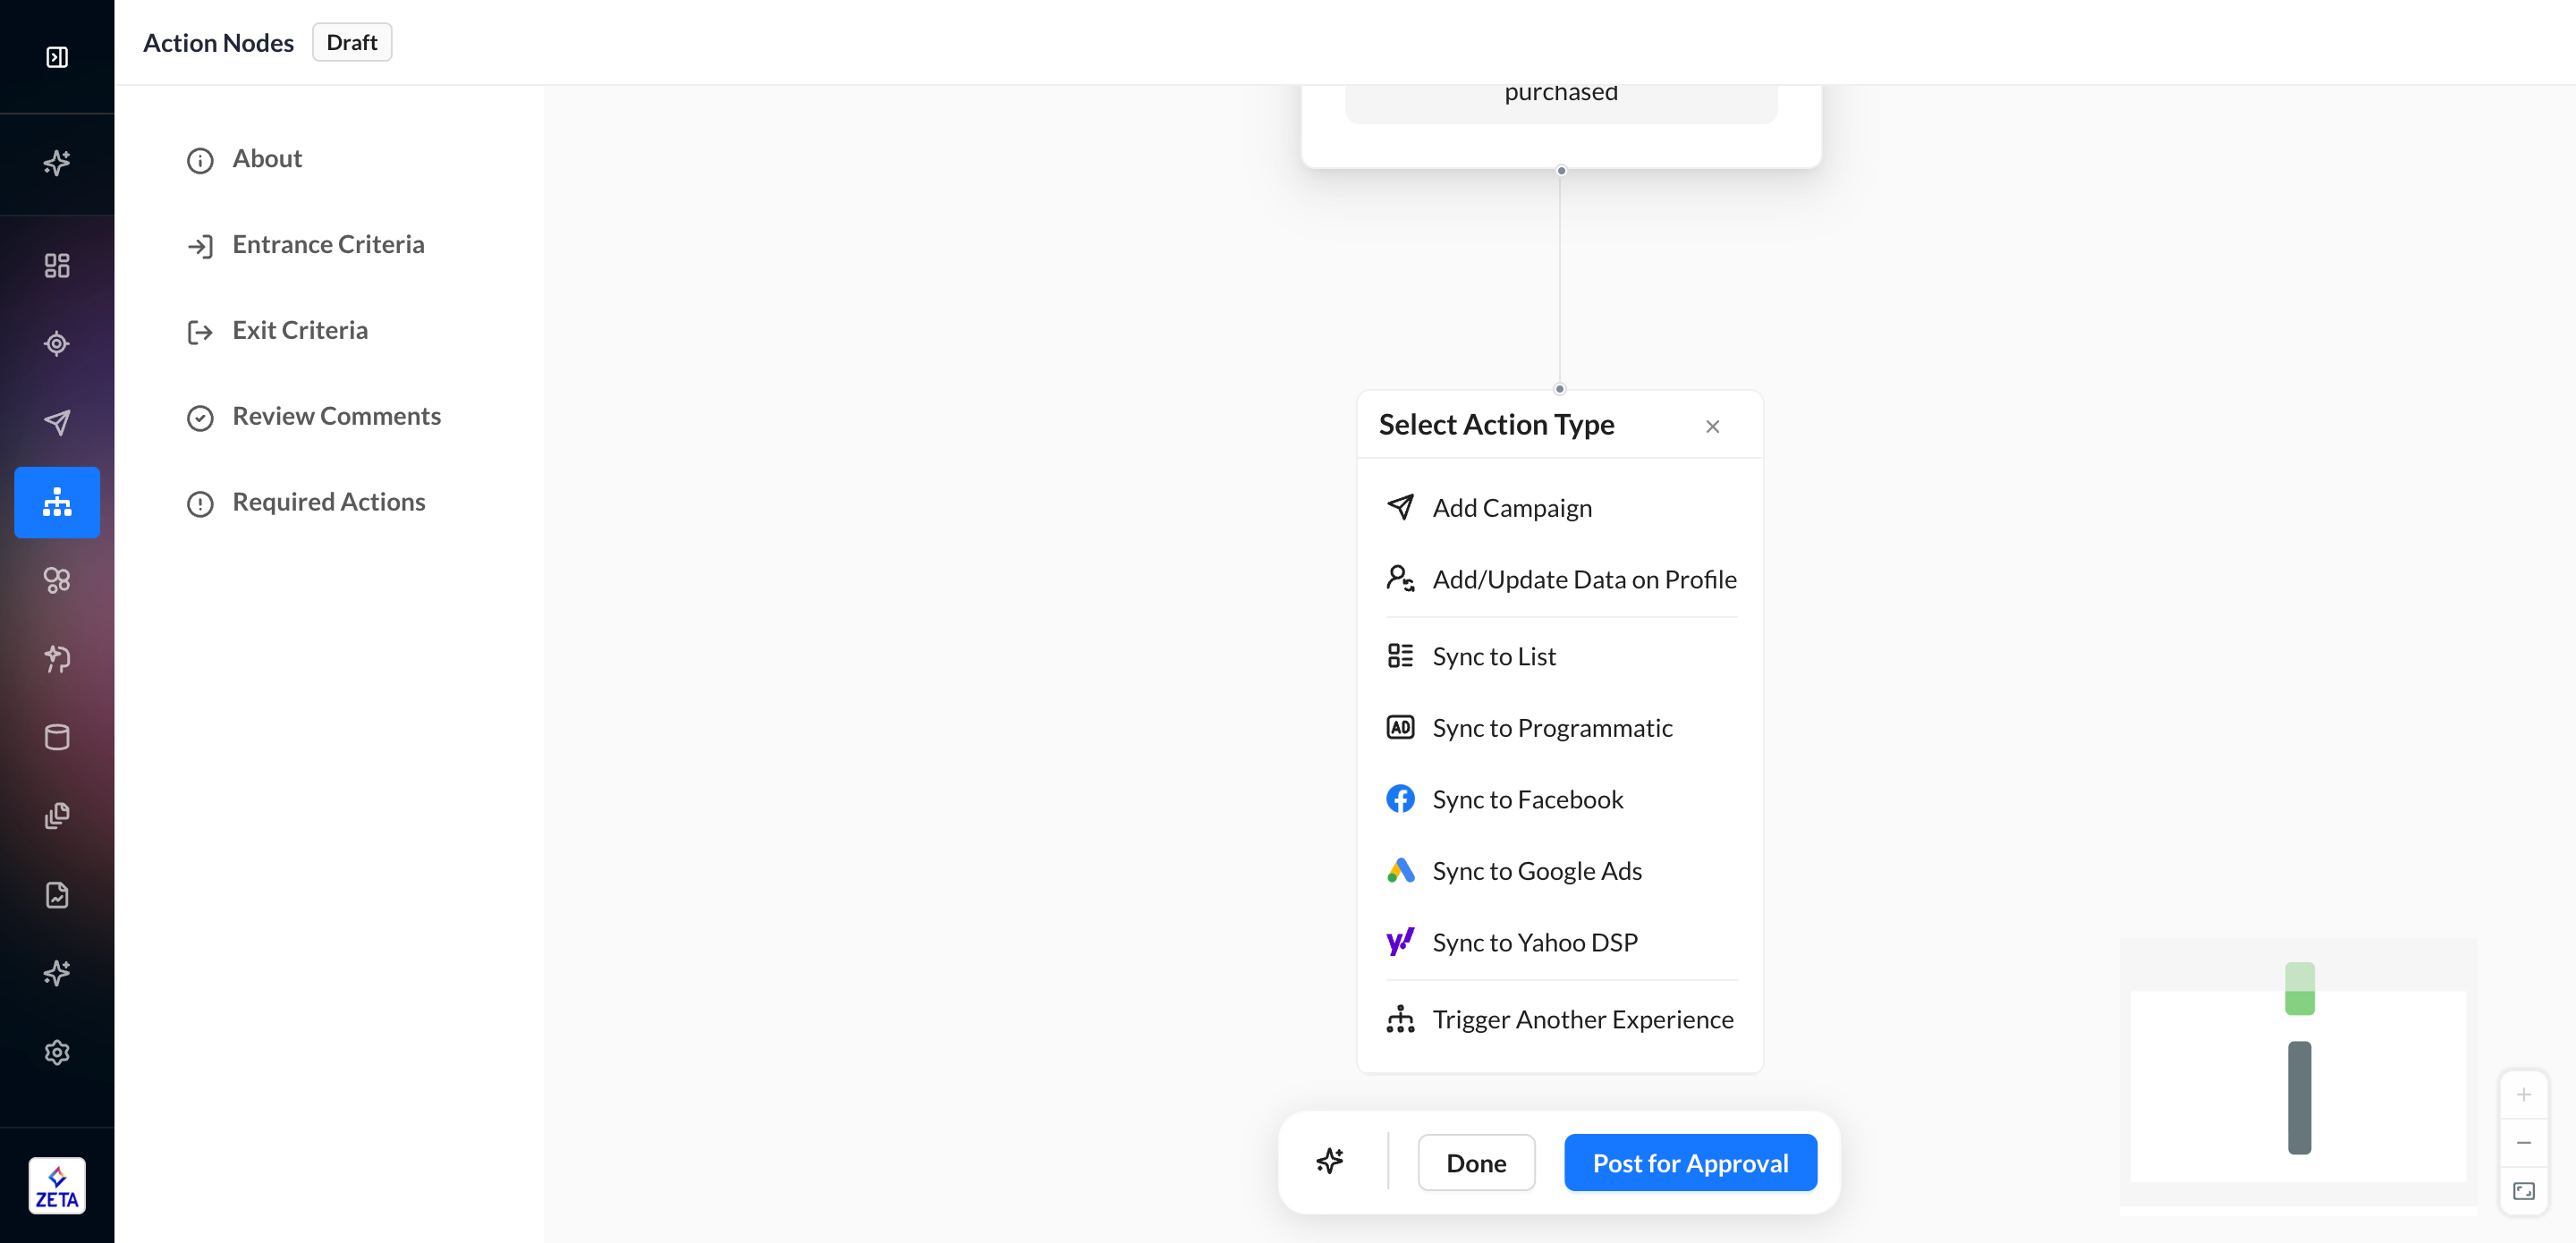
The Actions menu allows you to select how you want to reach the people in your experience.
Send Action
The Send action allows you to deploy a message across email, push, SMS, or webhook channels to a user as part of the experience. The view in campaign creation is similar to that of a broadcast campaign. However, on the right side, instead of an audience selection, you are shown where within the experience the current campaign you're working on, is. Any content to be used within an Experience should be created in a test campaign first and then migrated to the Send Action once it's tested and ready.
Add a Campaign
1. To add a campaign to your experience, select Actions from the node menu to open the Actions panel.
2. Click on Add Campaign.
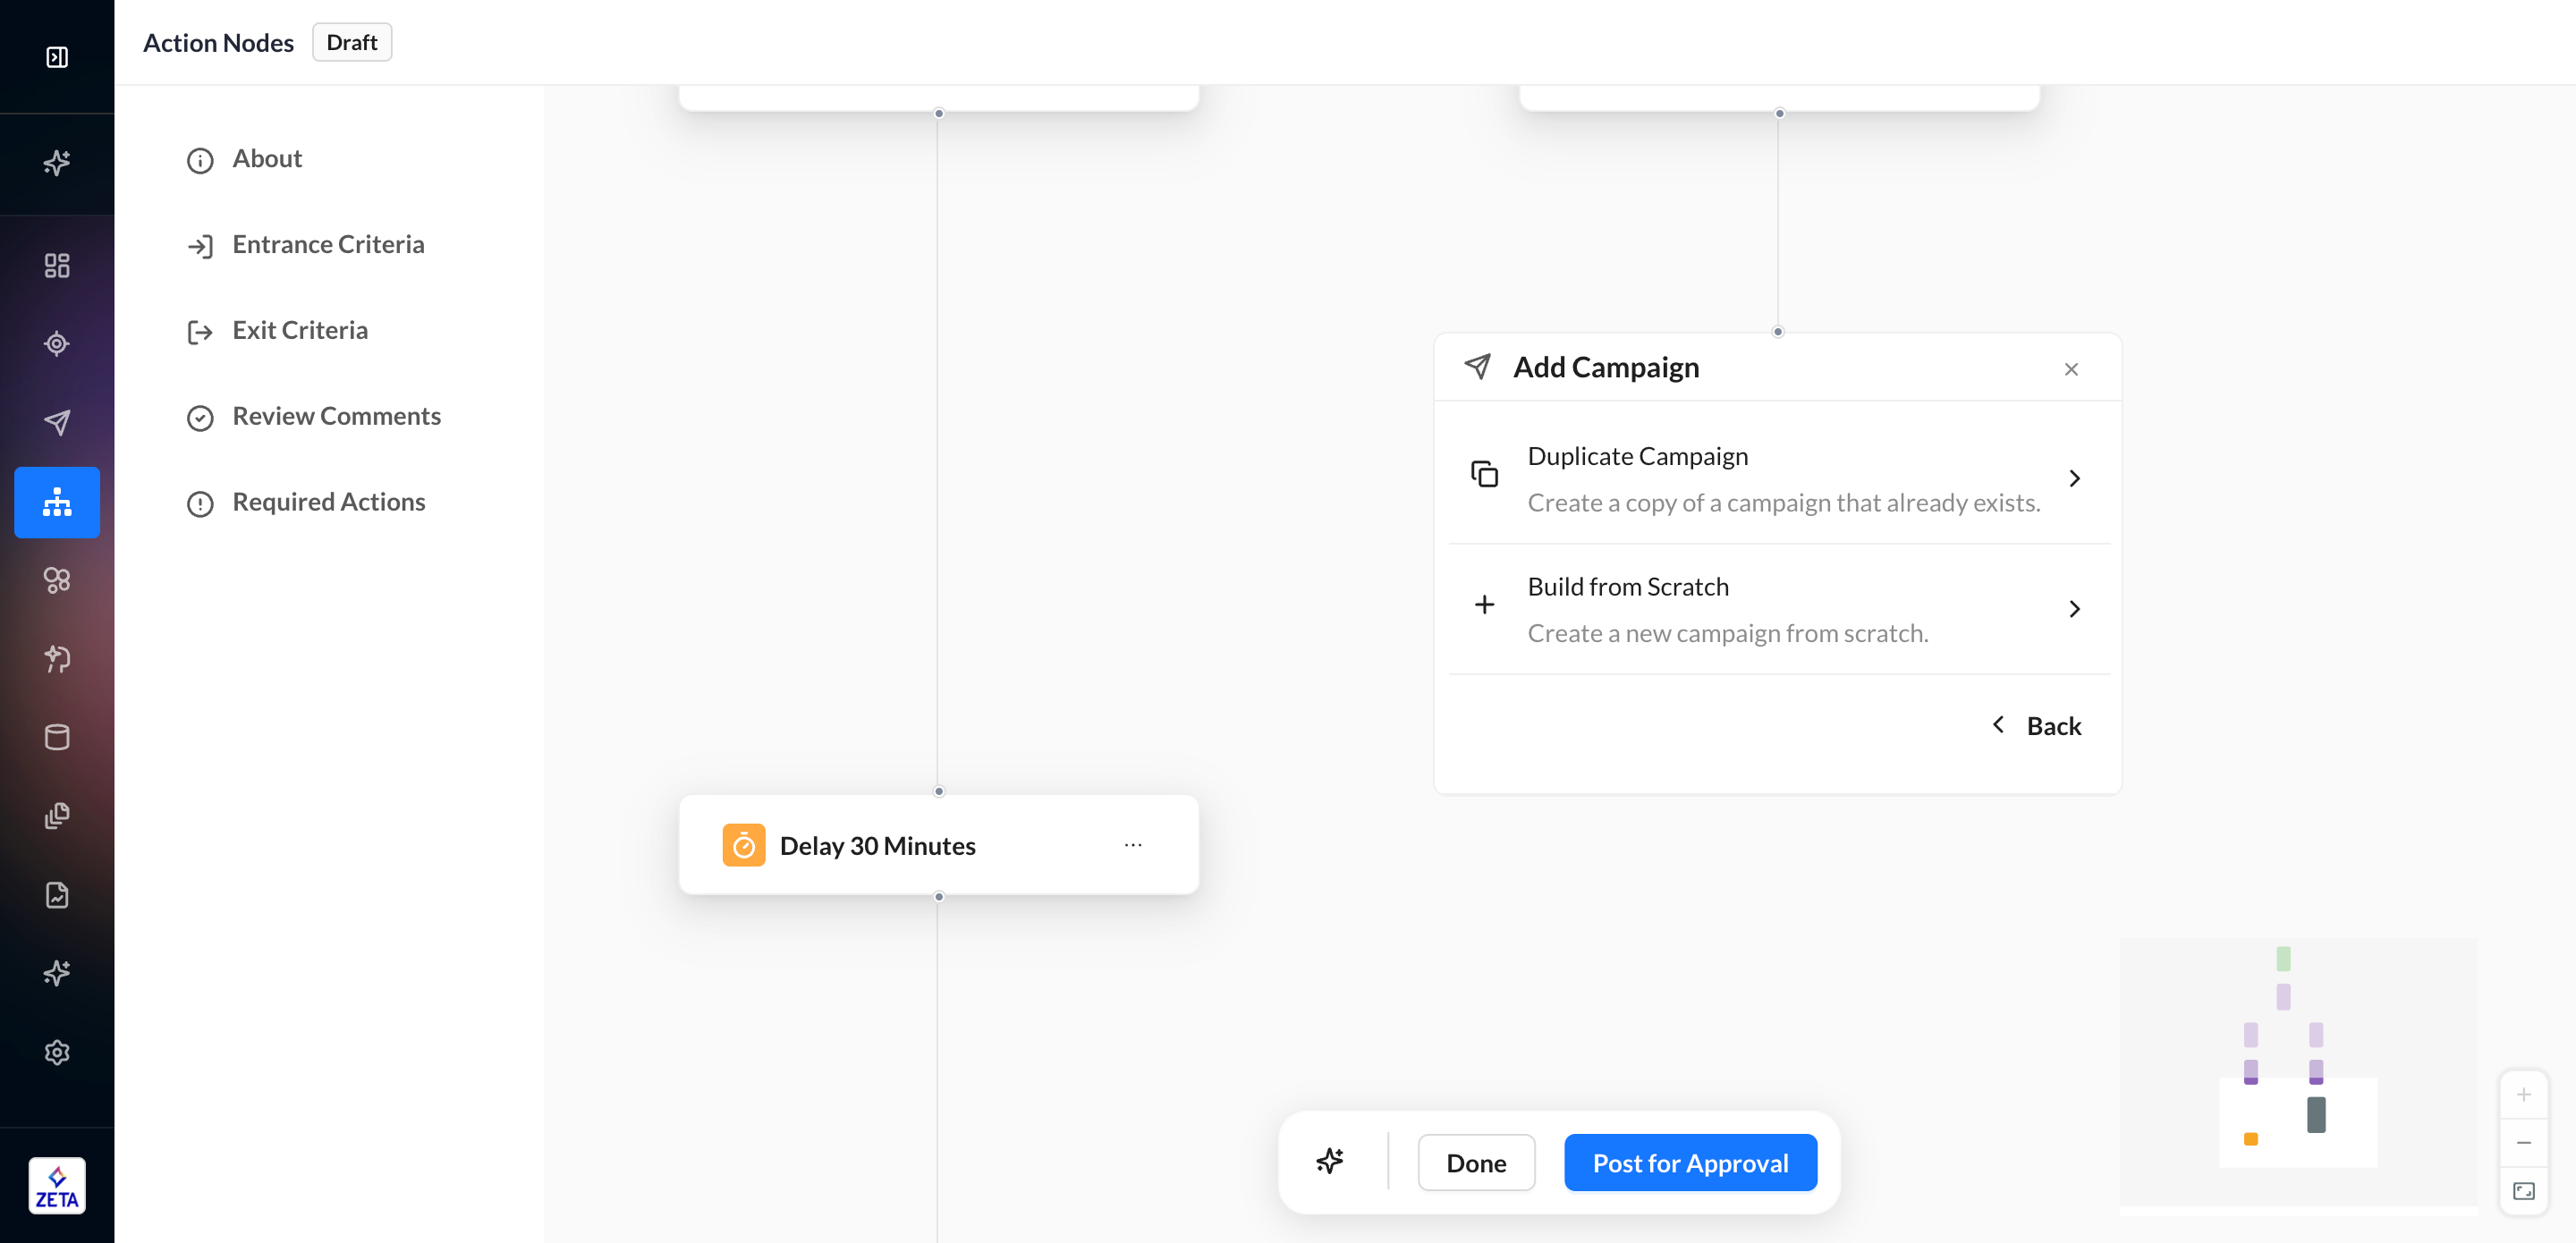
3. You can either duplicate an existing Triggered Campaign from your account or choose to build one from scratch. You can search for your campaigns using the search bar (hit enter to execute a query).
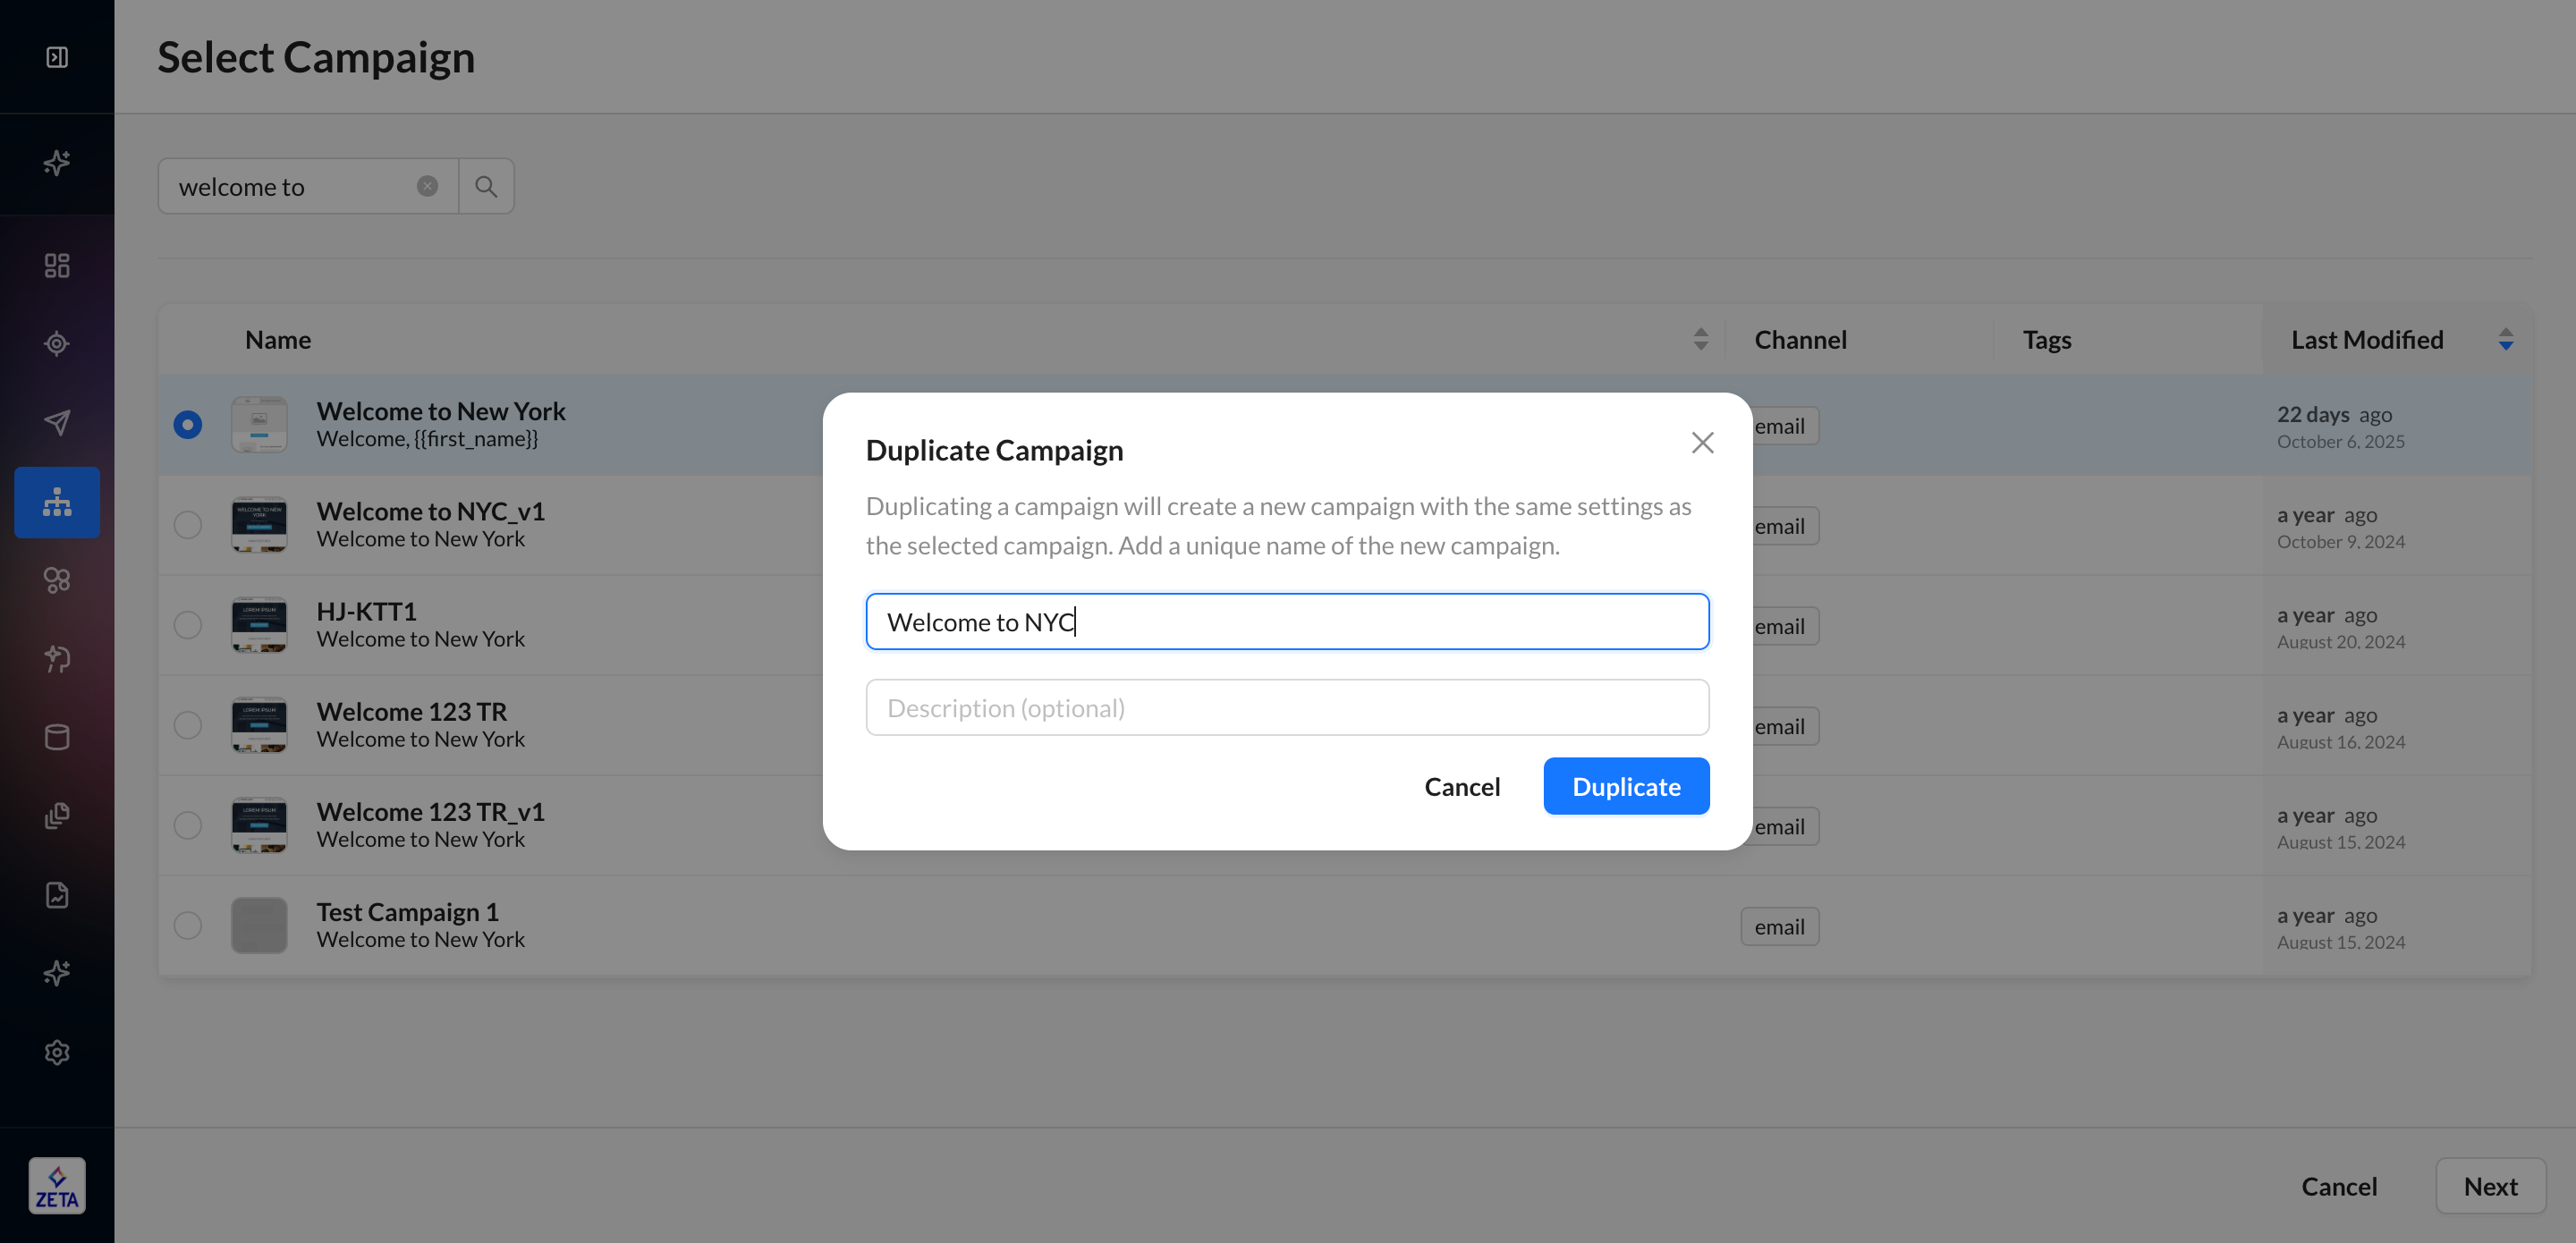
4. Once you make your selection, give it a unique name and click on Create Campaign.
-
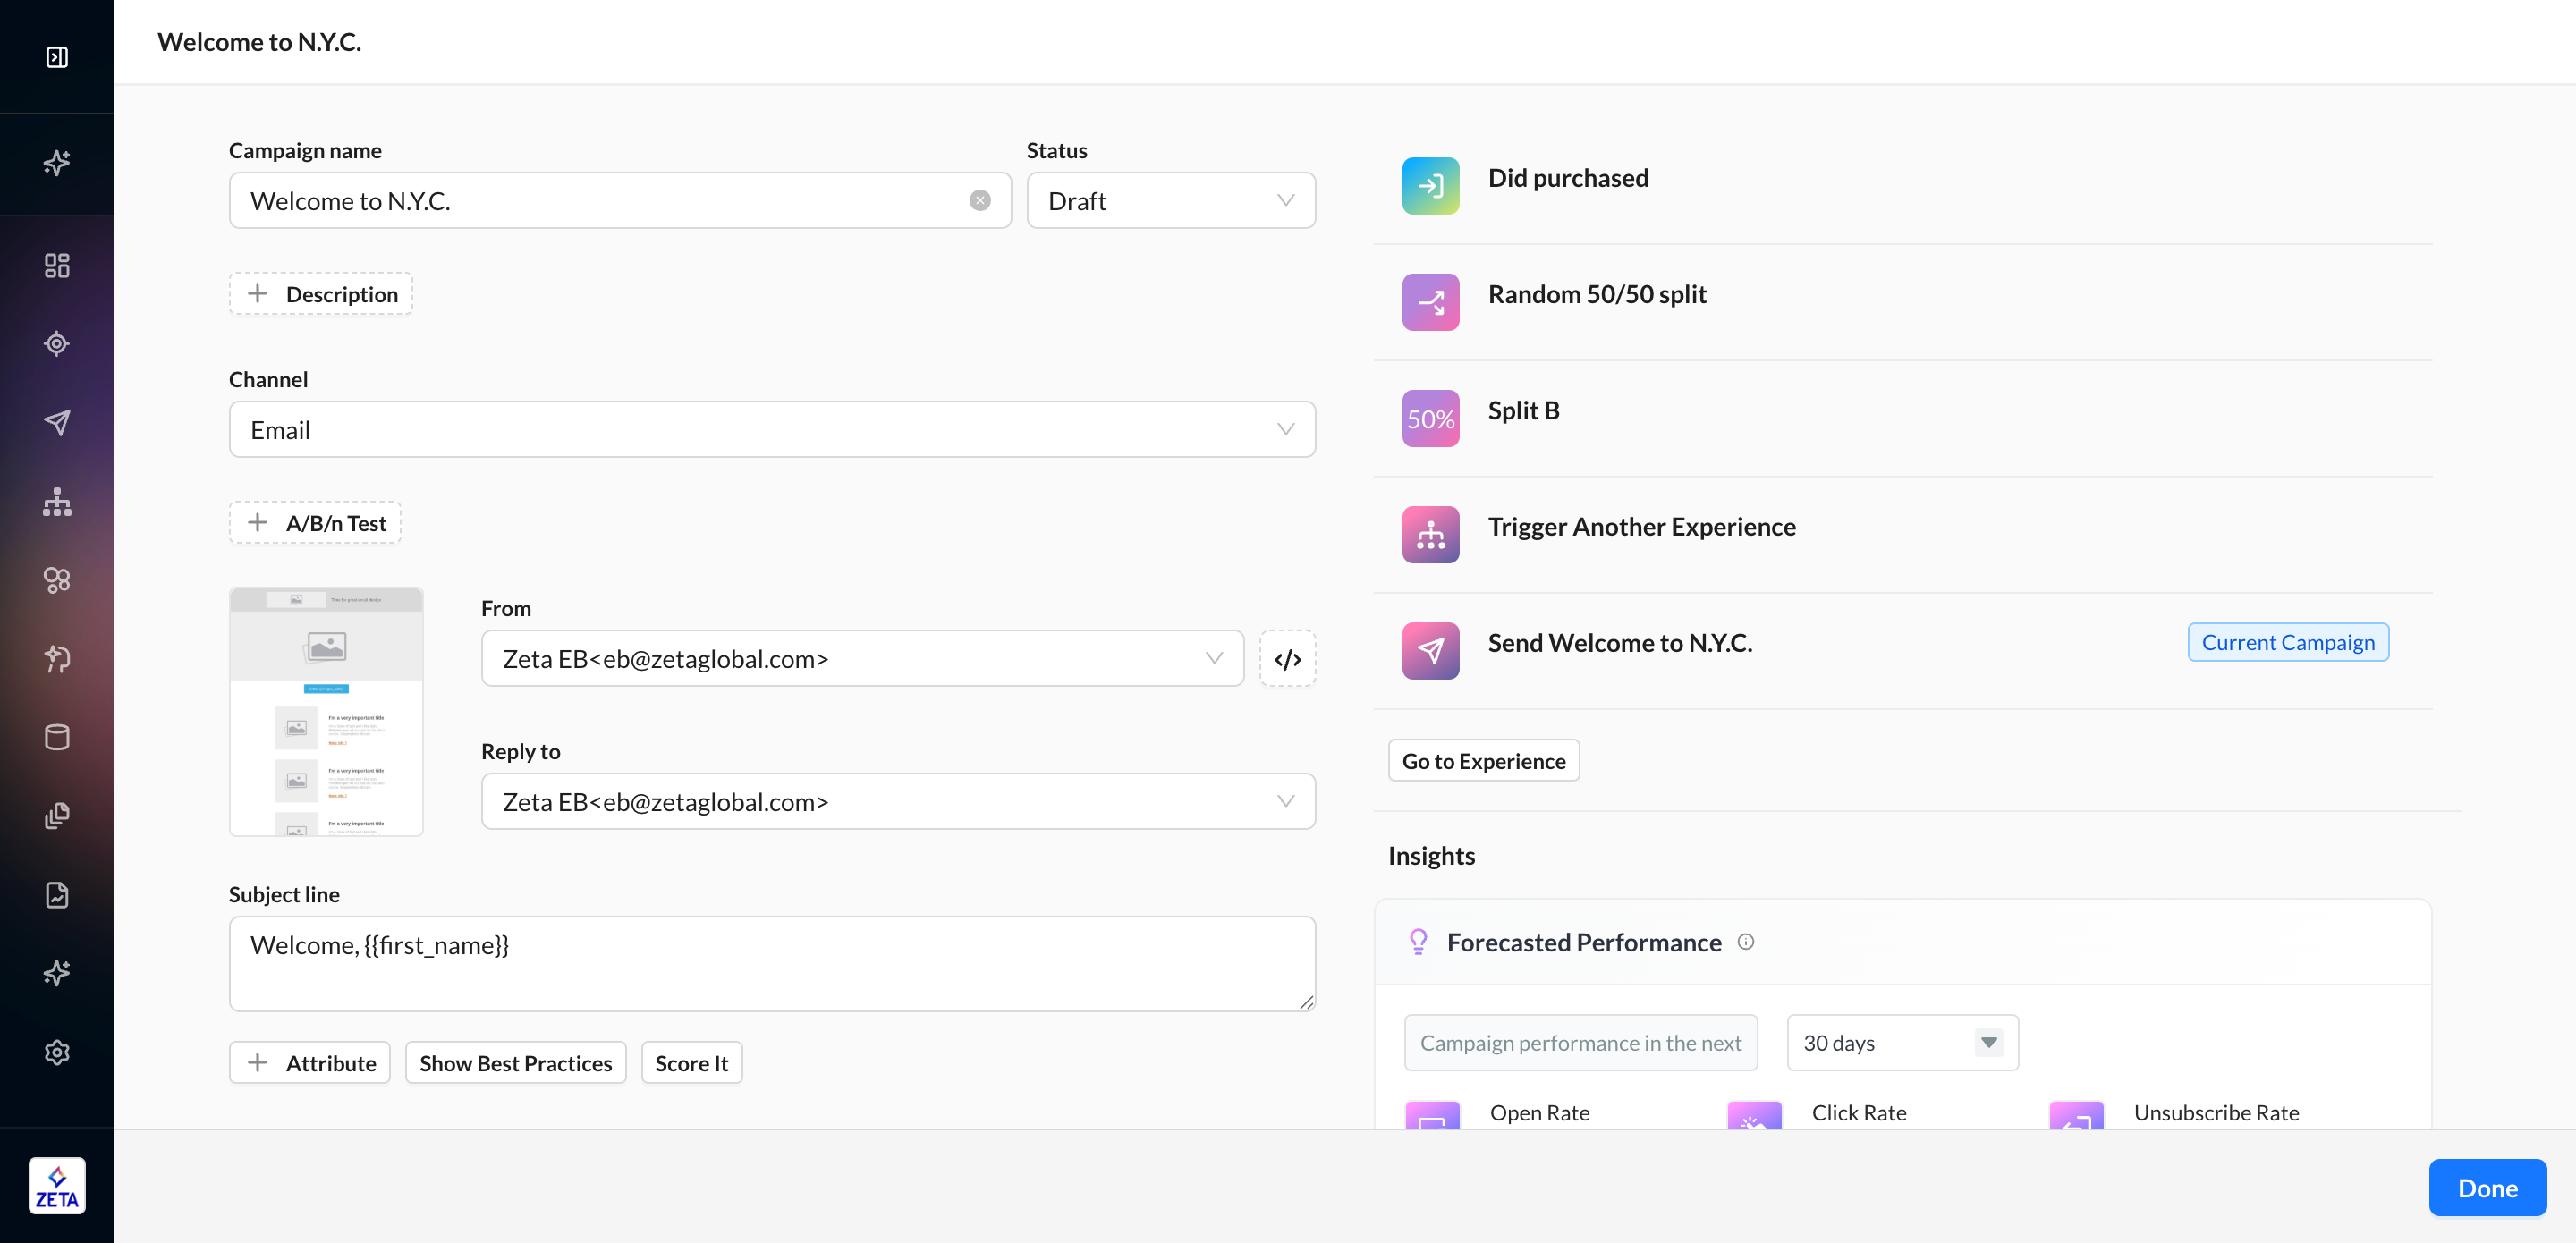
You will be redirected to the Campaign Builder page to make edits. If you choose to duplicate an existing campaign, everything about the campaign will be copied over, from the subject line to body content to tags. Make sure to review your campaign before sending.
-
You will also see Forecasted Performance metrics for email and SMS/MMS.
5. When you’re finished, click on Done to return to the experience. All your changes are auto-saved.
|
|
A/B/n Testing in Experiences
Learn more about native campaign experimentation tools in Experience Builder: A/B/n Testing and Automated Channel Optimization in ZMP.
For most use cases, you can use the native A/B/n testing tool in Triggered Campaigns to set up your optimization metric and distribution. But if you want to test variables such as time of send or use a holdout group as your control, you can set this up using a combination of nodes.
1. At the point of a test, add a Split Randomly node and configure your branches (up to 5) and the percentage of people that should go to each branch.
-
If you want, you can name the branches. Otherwise, the branch names will default to Split A, Split B, etc.
2. Add a campaign (or any relevant action) to your control branch.
3. In the next branch, leverage the duplicate campaigns feature to make a copy of the control campaign and then make the necessary content changes that you’re testing.
-
You can substitute any type of treatment here, such as delays for the testing time of day or other actions, if you want to test by channel. If you’re testing time and not content, you can duplicate the control campaign in a few clicks and move on quickly without having to build from scratch.
Edit a Campaign
Prior to activating an experience, you can make unlimited edits to your campaign and other nodes. However, once you activate an experience, you are not able to deactivate it to make edits without ejecting the people who are in flight at that time. The one exception is the campaign node.
You can edit a campaign in an activated experience from two different places:
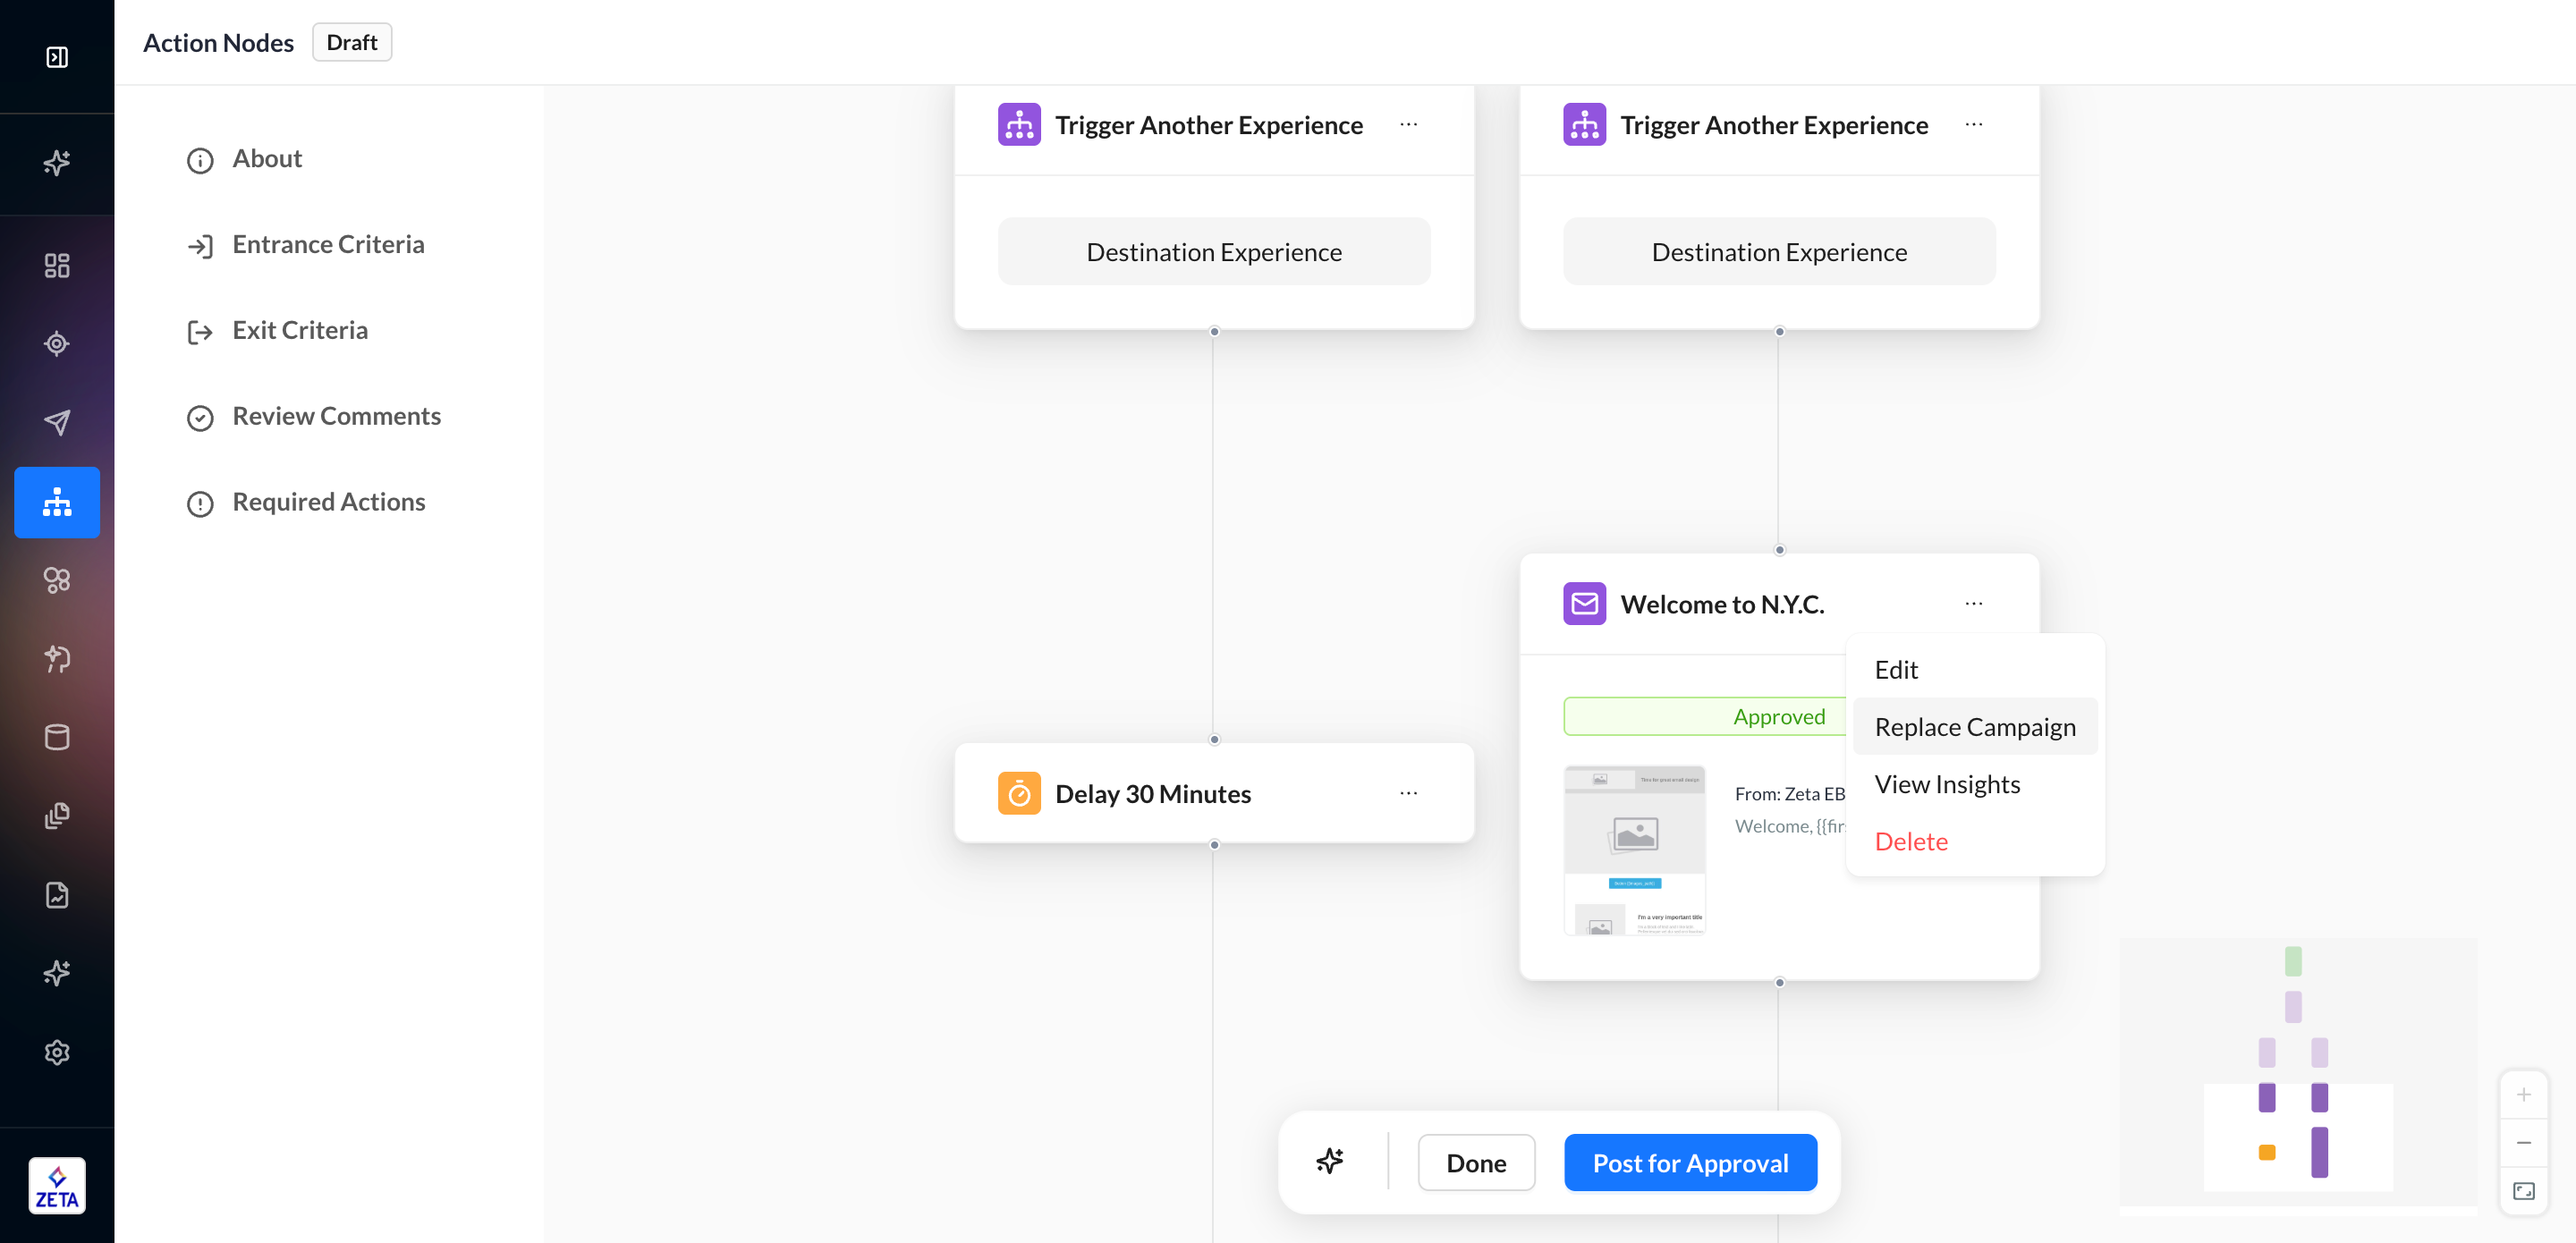
1. Click on the campaign node in the experience canvas.
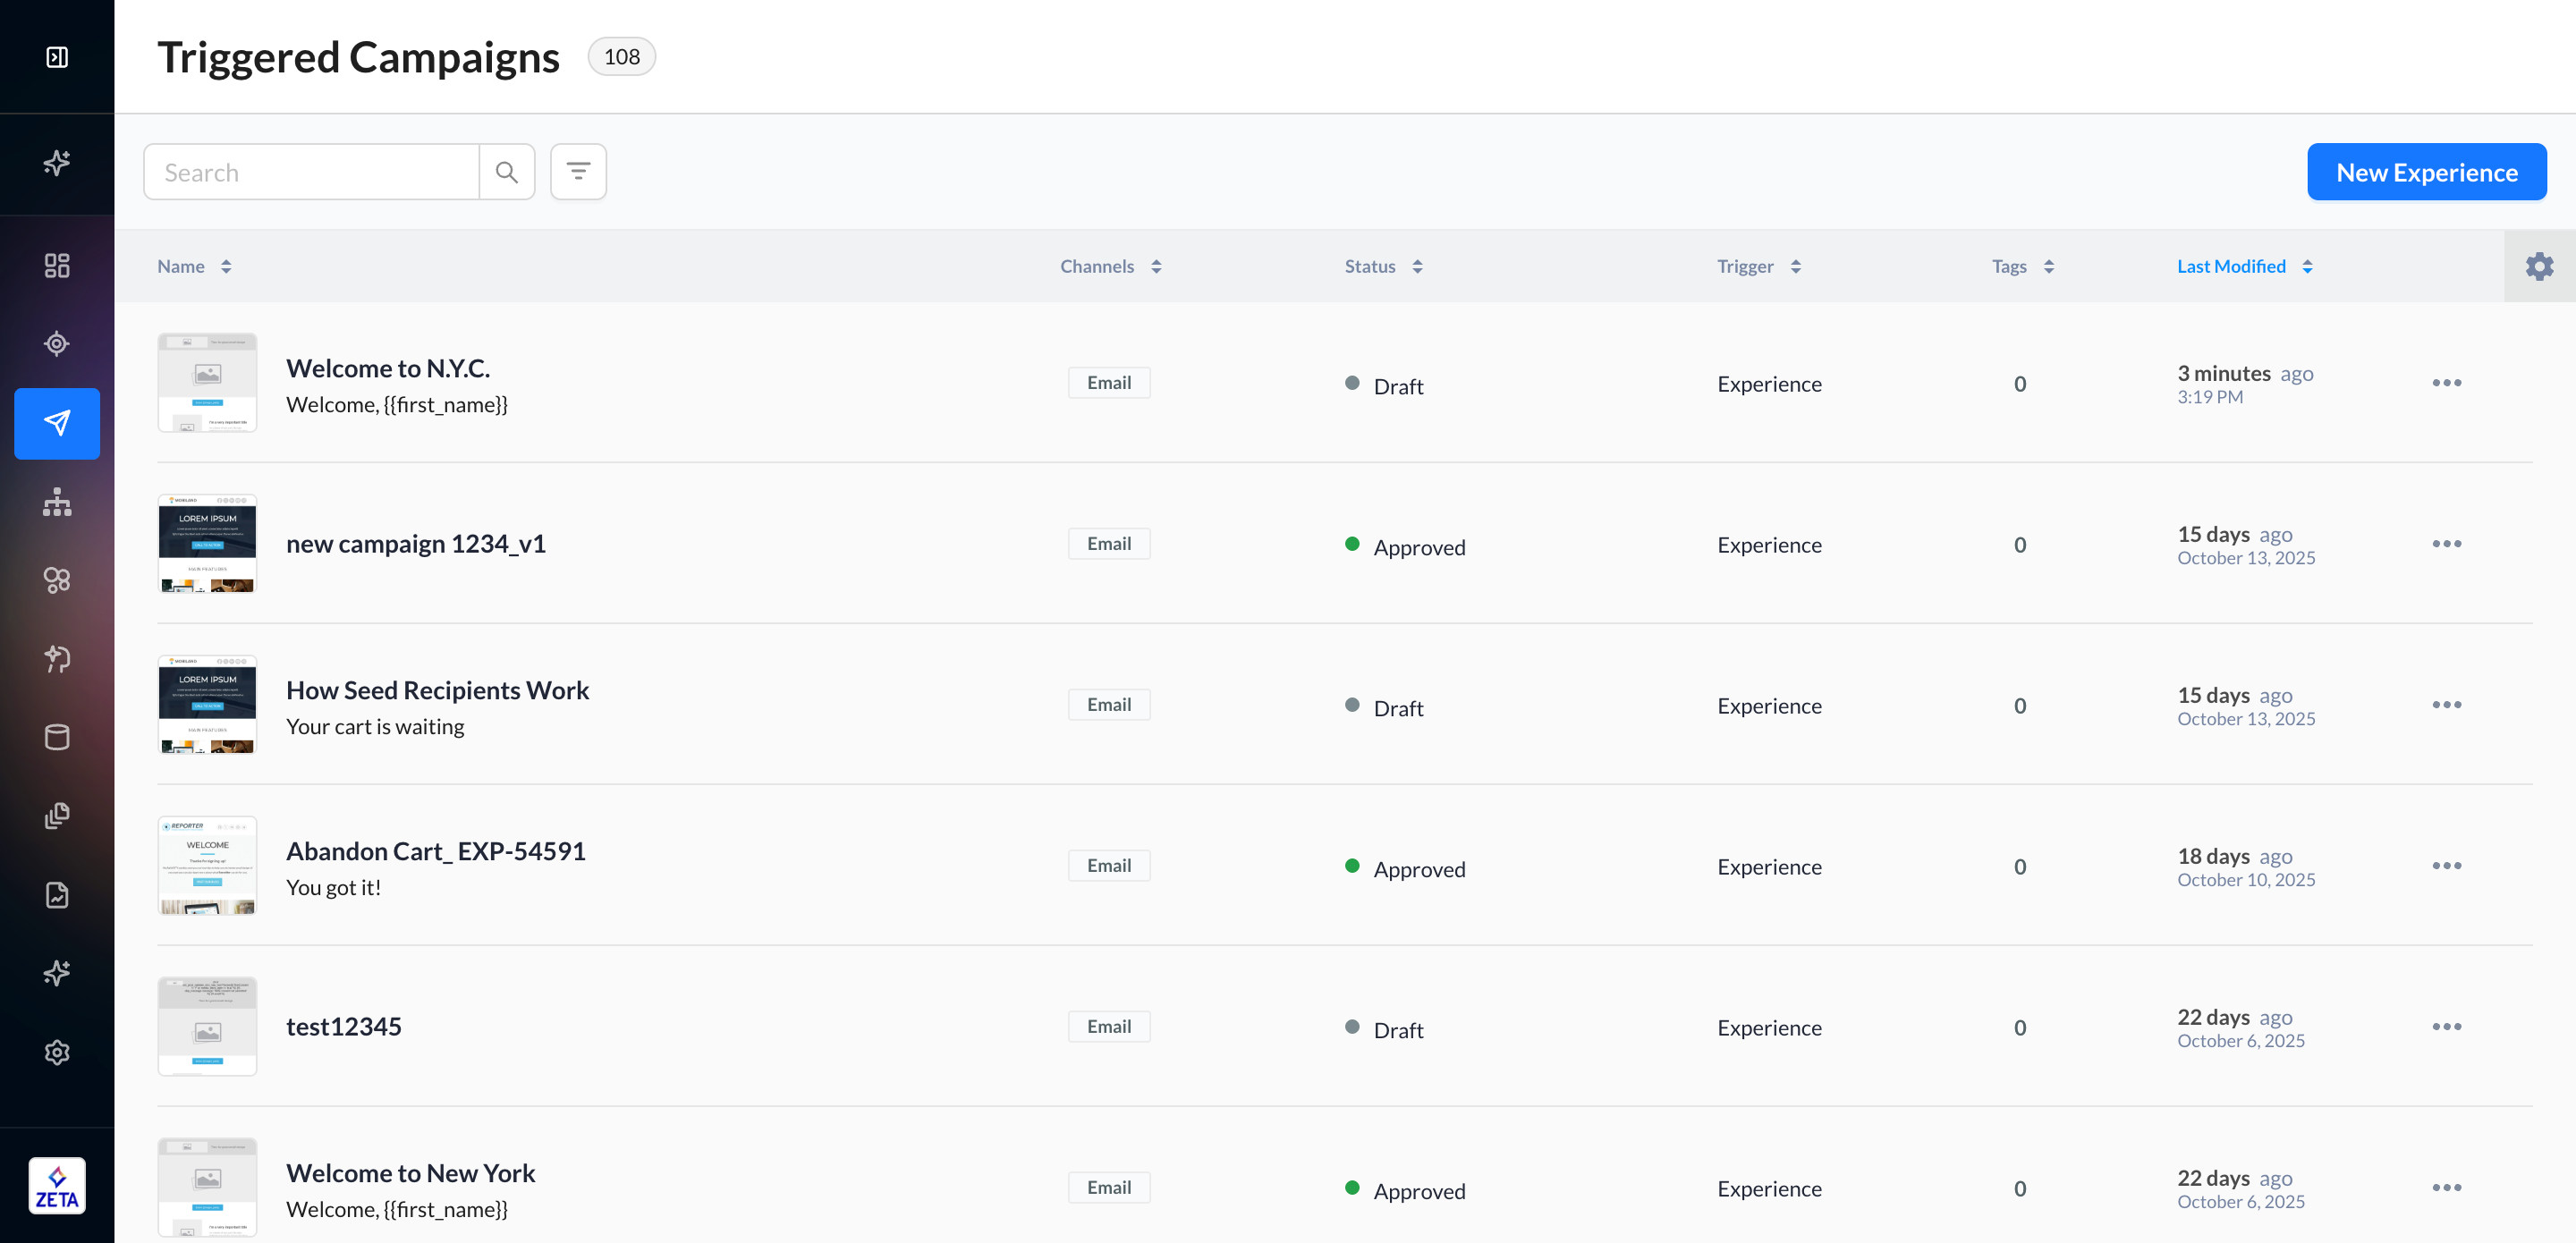
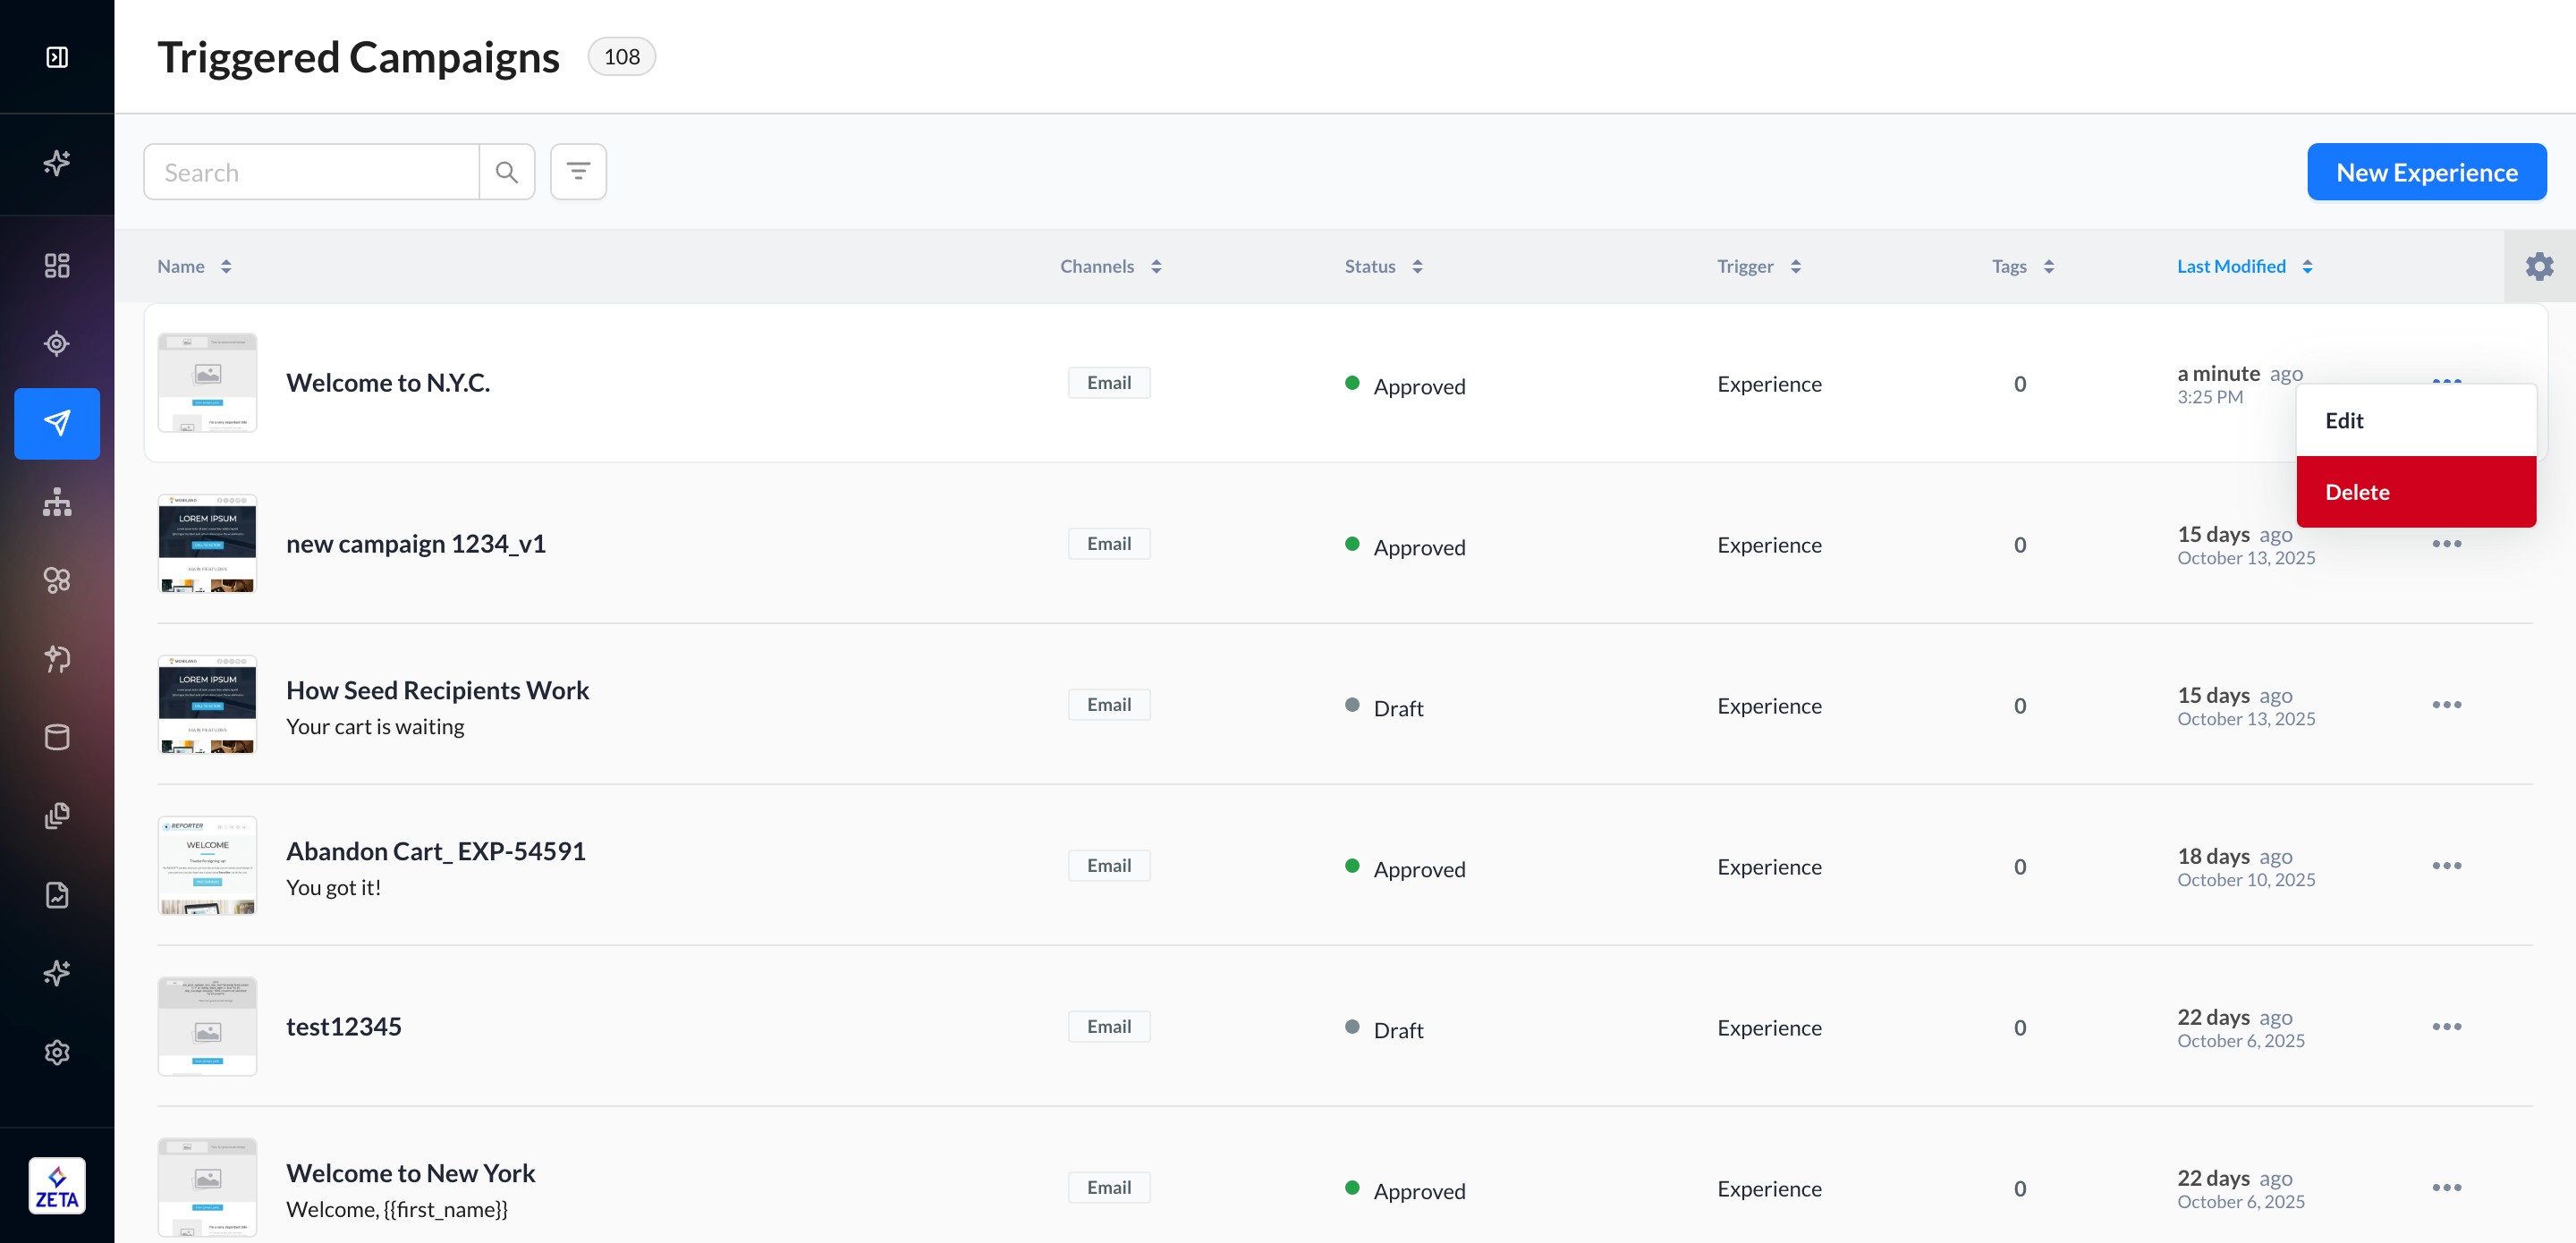
2. Go to Campaigns > Triggered to find your campaign.
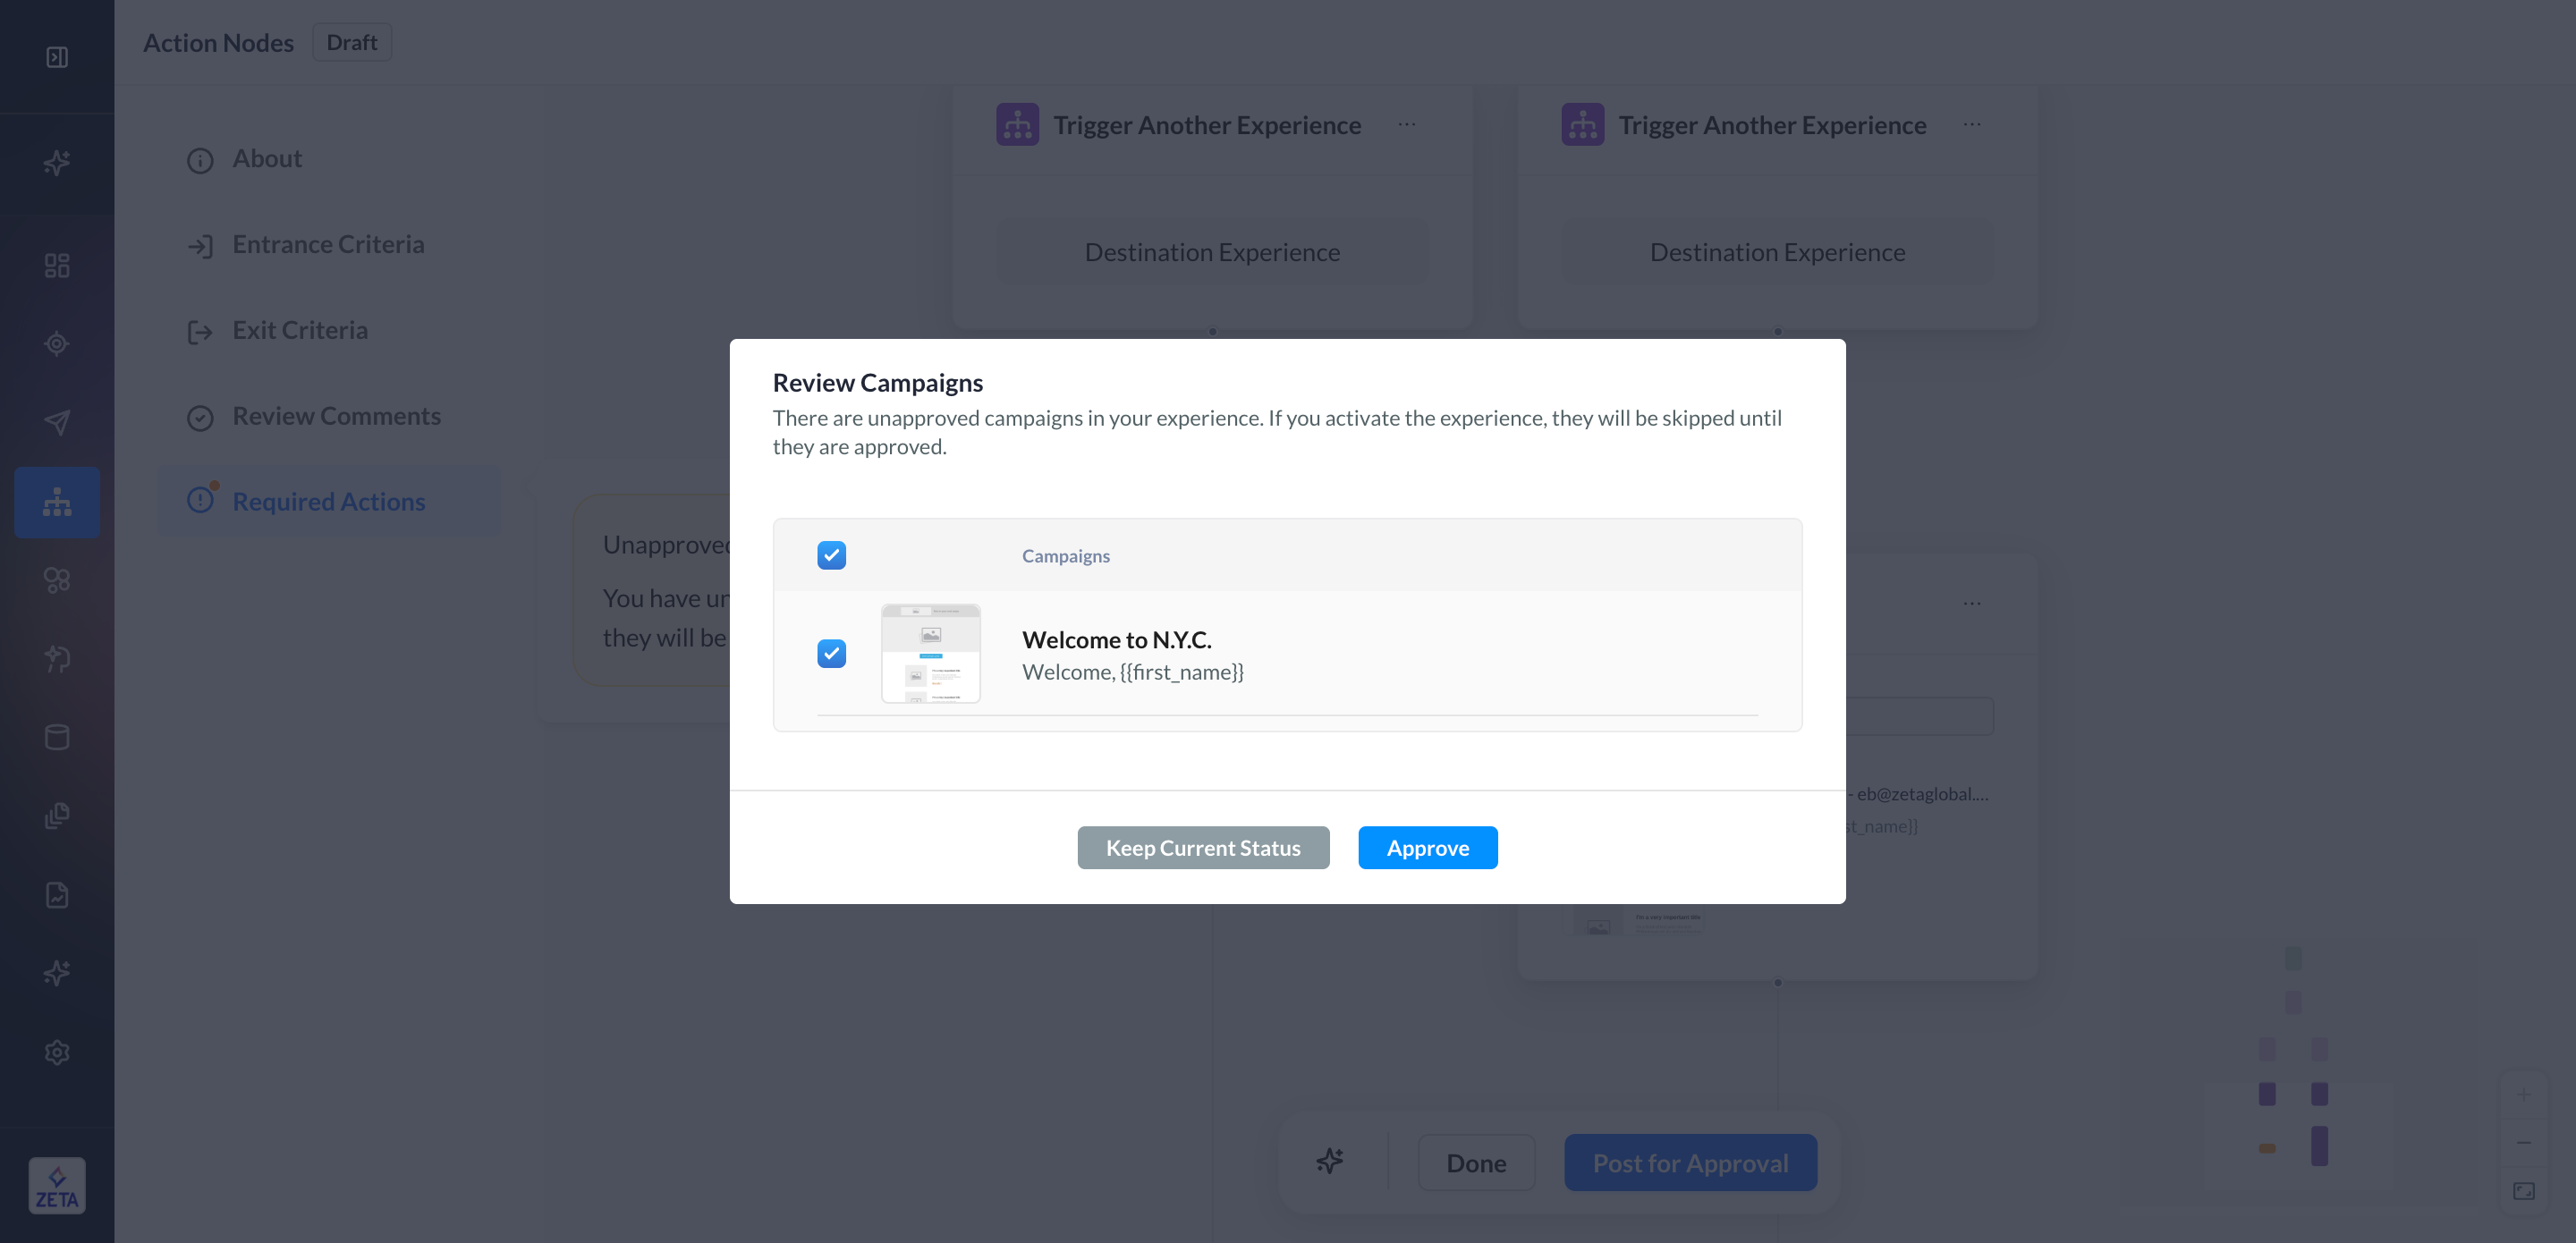
If your account uses the Campaign Approval Management feature, then you will need to set the status to Draft in order to make changes.
Once you make your edits, set the campaign status to Approved and click on Done to confirm your changes. It will take about 1 hour for your changes to take effect due to the caching of the activated experience.
Replace Campaign
If you decide to replace a campaign at a node entirely, you can do so while also updating the downstream dependencies so that the events in the later experience point to the replacement campaign.
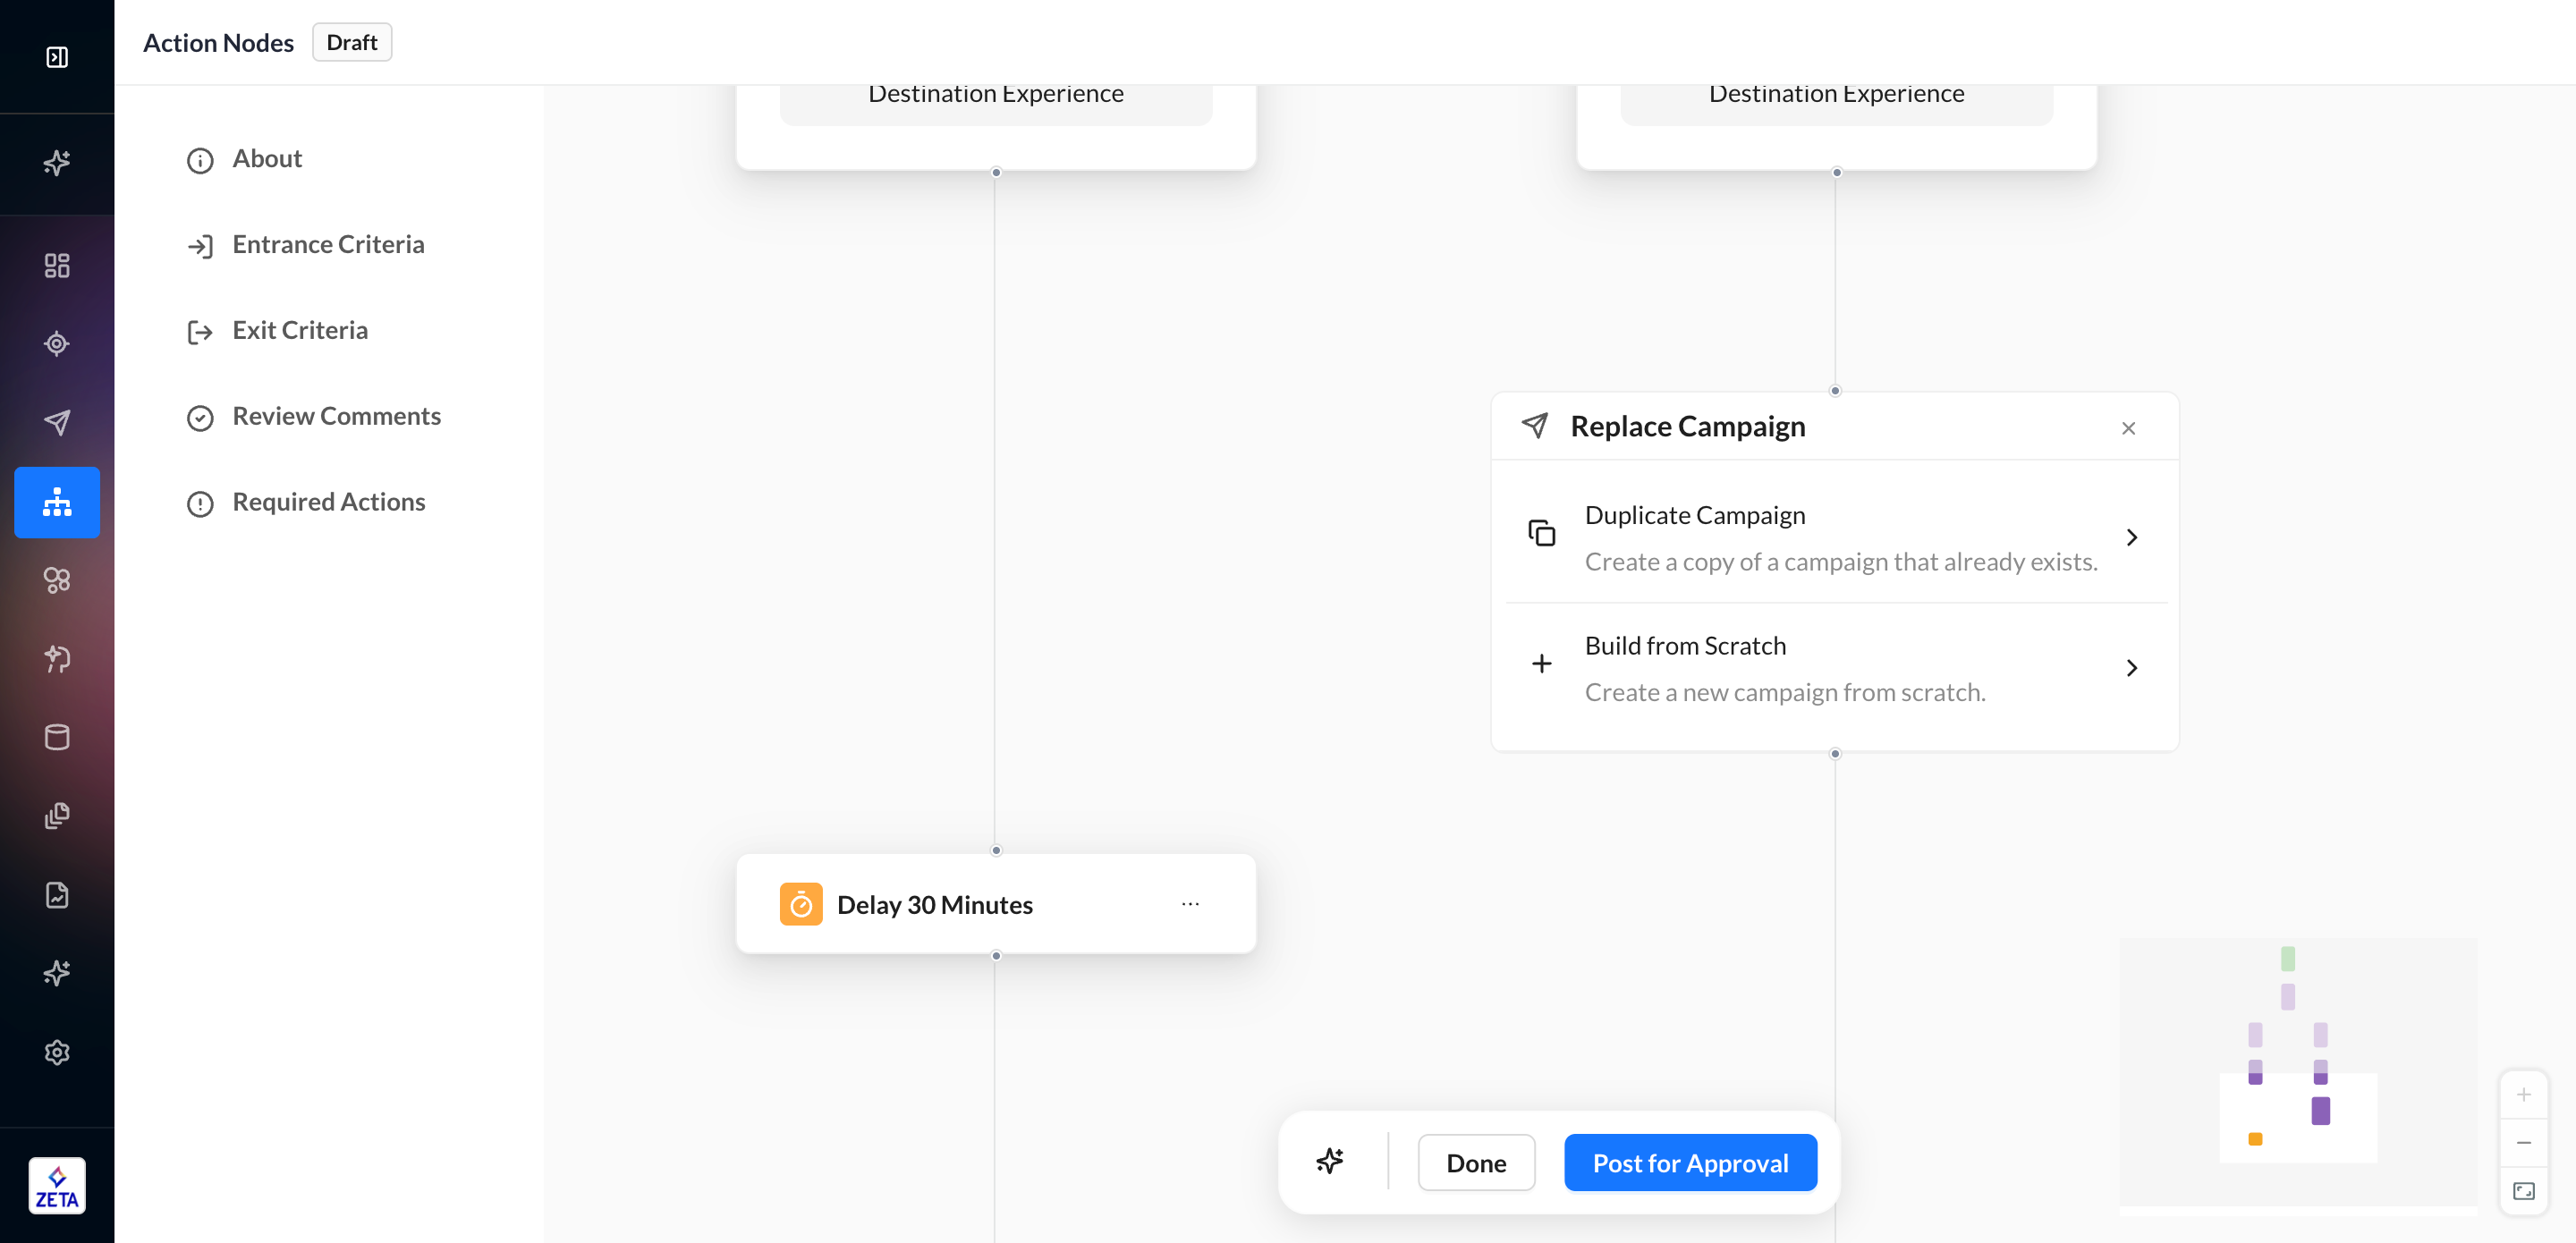
1. Click on the campaign node to open its menu. Select Replace Campaign.
2. The panel will reopen so that you can replace it with a duplicate of an existing campaign or a brand-new campaign.
Delete Campaign
A campaign cannot be moved from one experience to another, nor can it be used in more than one experience.
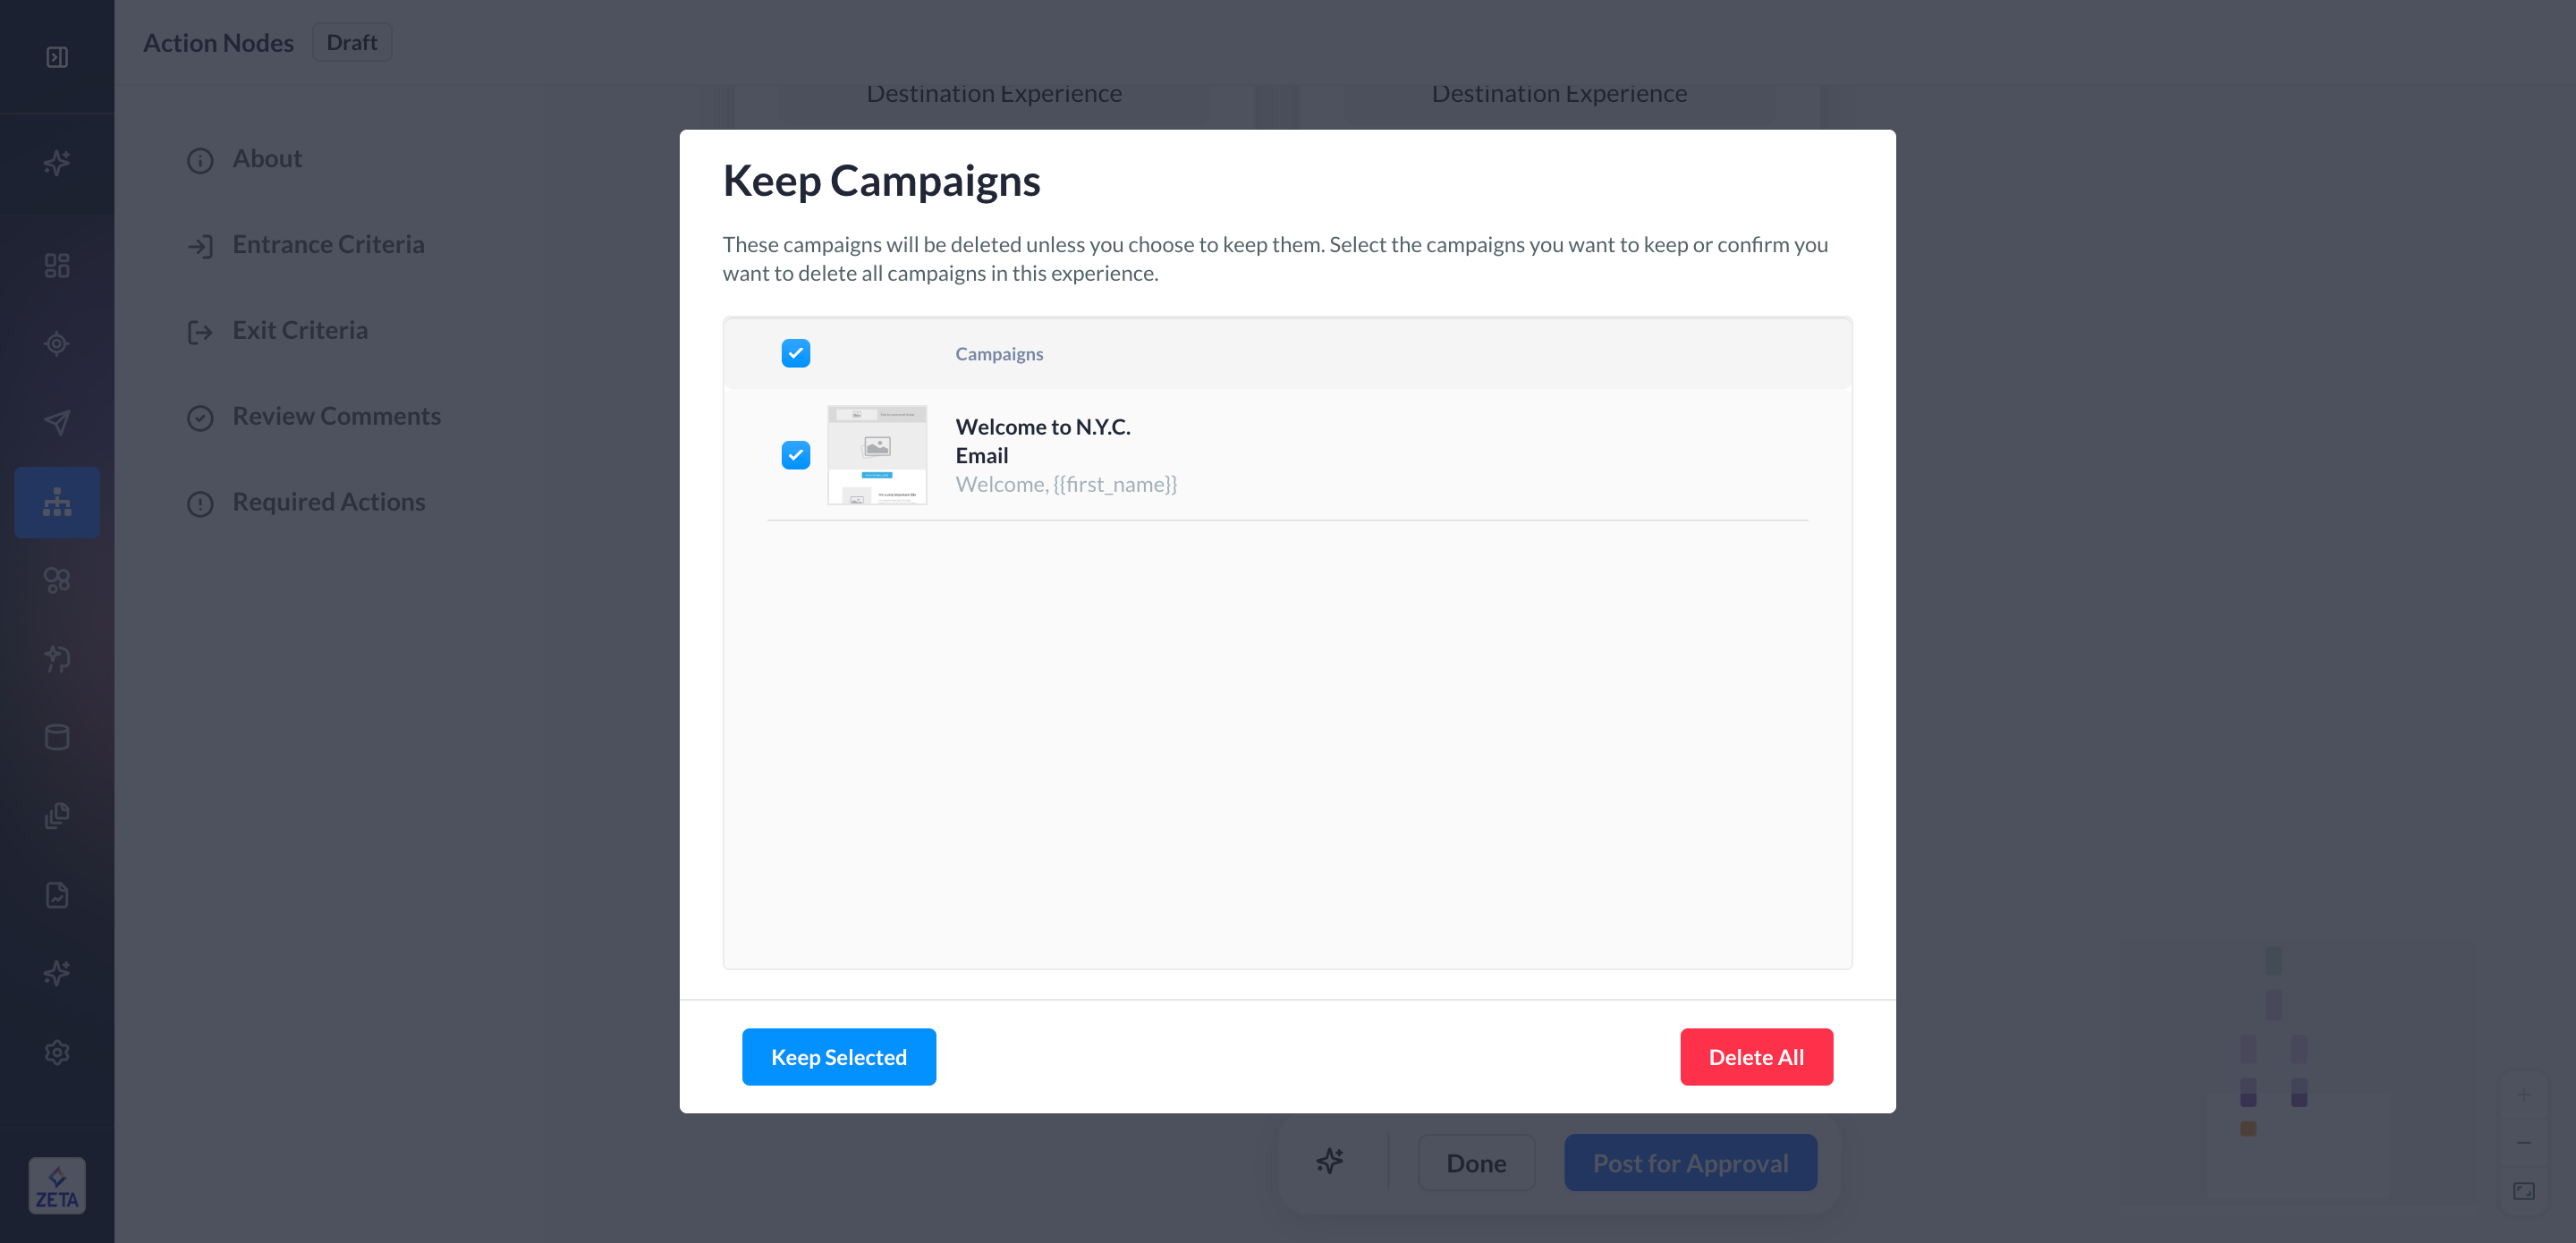
When you delete a campaign node in an experience that has never been activated, you will have the option to keep the campaign to be duplicated later or let it be deleted.
Only campaigns that are not attached to an experience (orphans) can be deleted from the Triggered Campaigns page.

Add/Update Data on the Profile
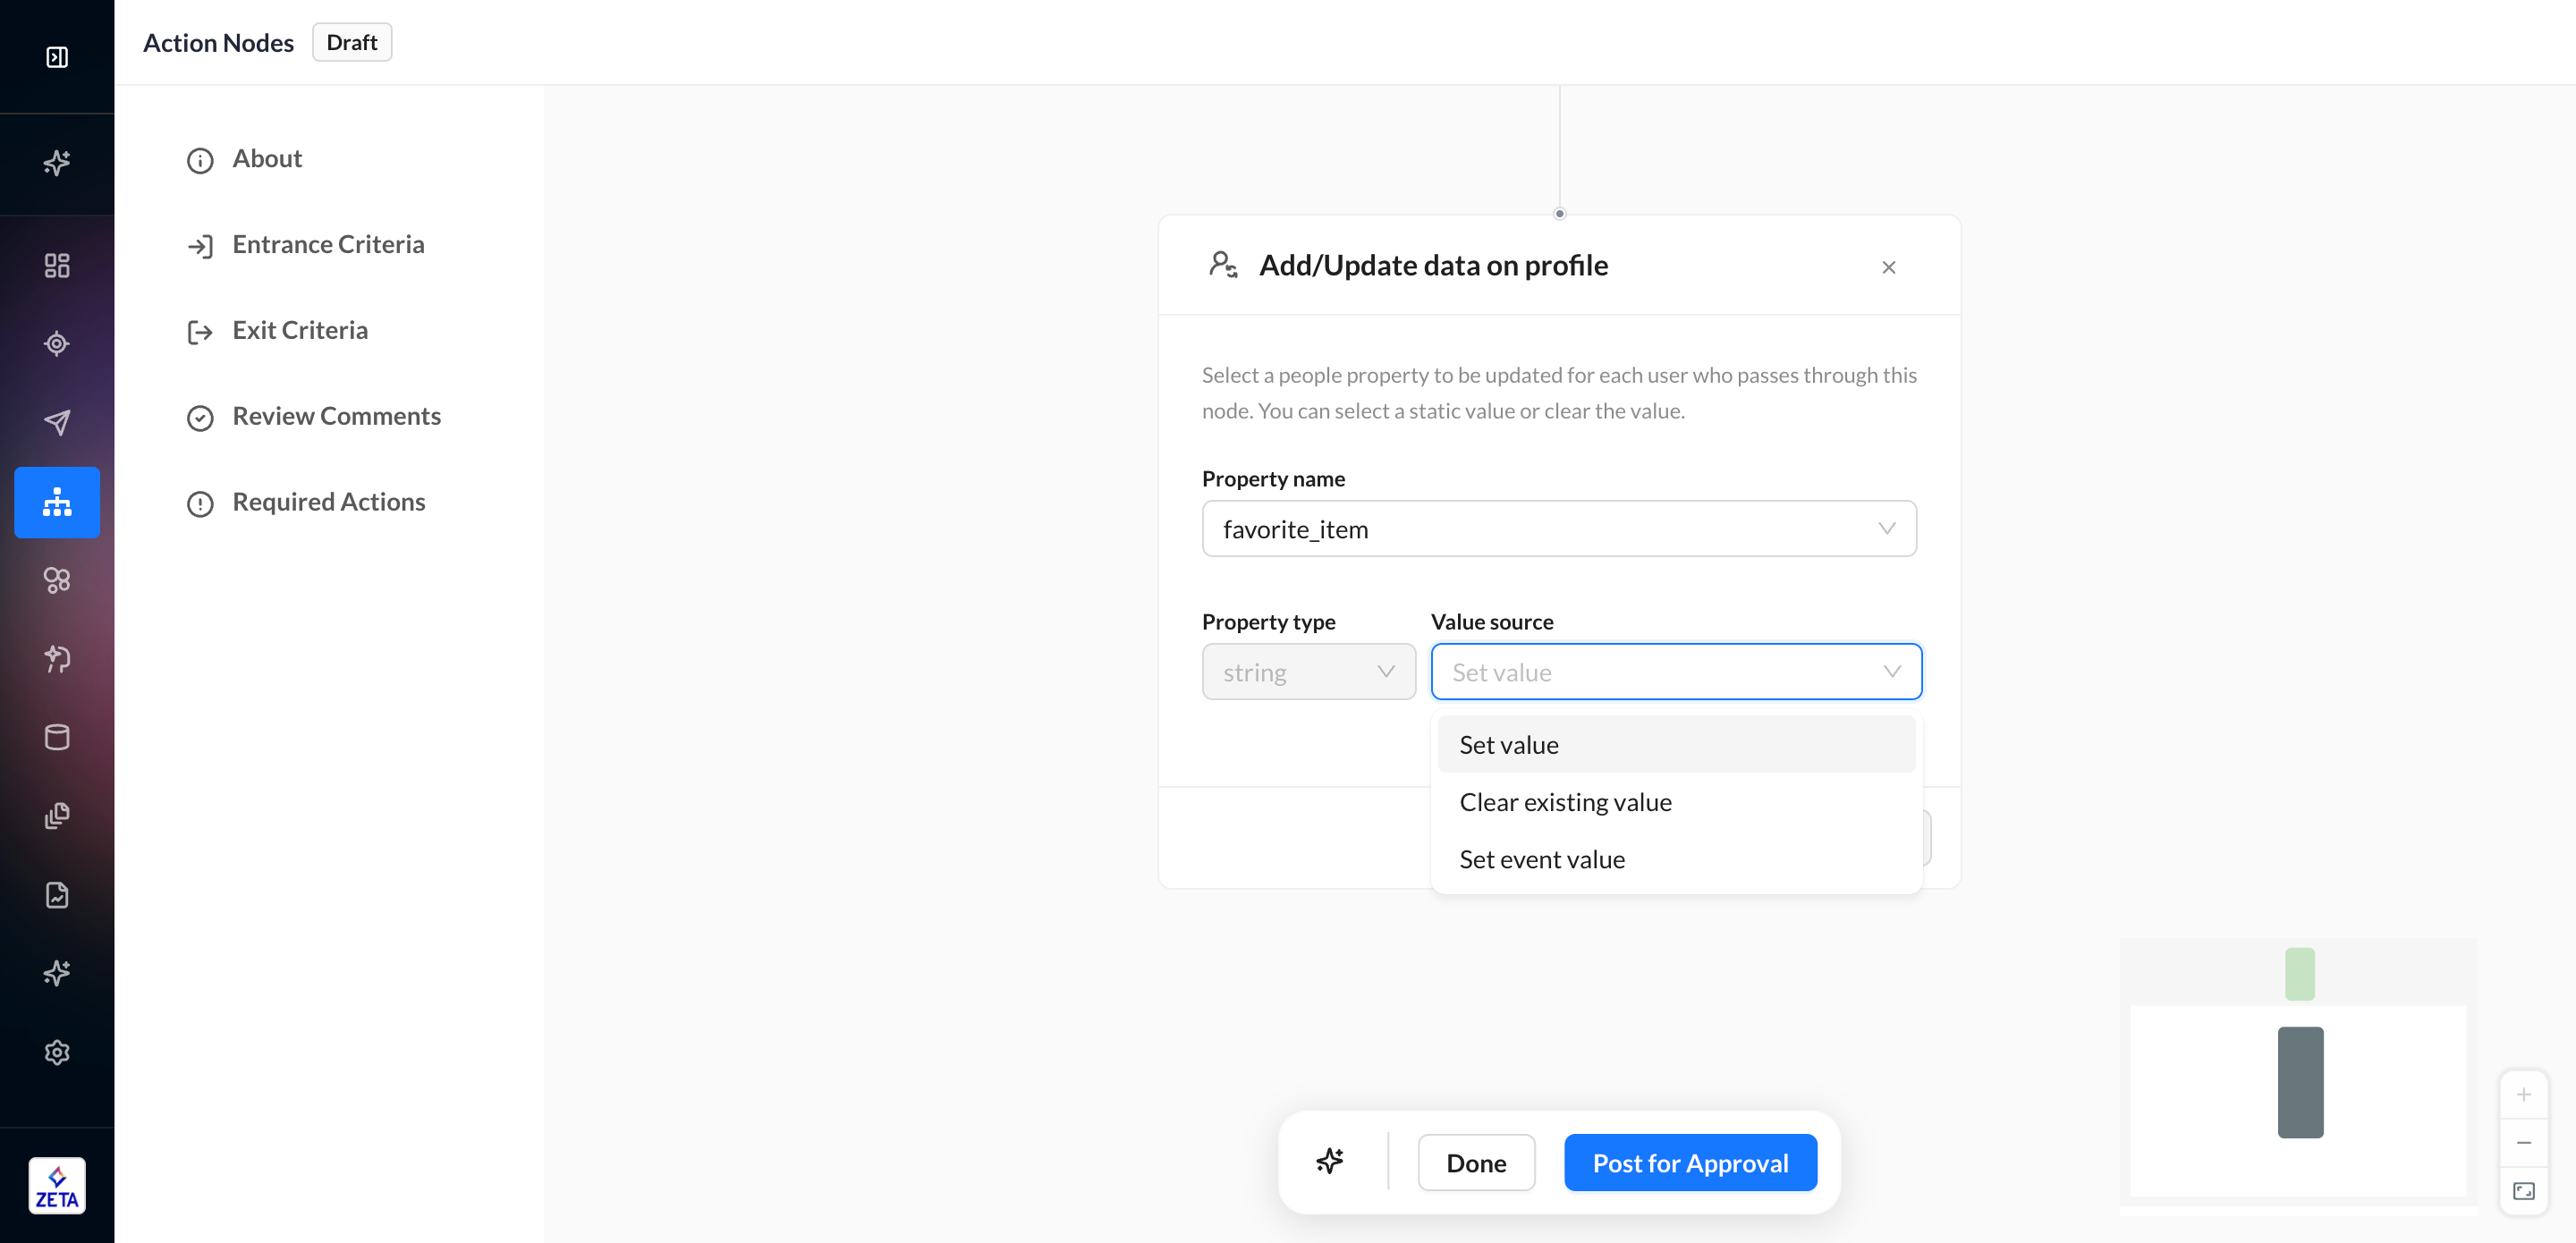
This node type can update people properties per user, either by setting a static value, a value from an upstream event, or clearing the value altogether. If a property doesn’t yet exist on a user’s profile, then it will be created with the specified value when they pass through the node.
-
Selecting Set Value will update the property based on a static value. This field does not currently support ZML tags.
-
For counter data types, you can select whether to increment or decrement by a numeric value. To decrement, enter a negative value.
-
-
Selecting Clear Existing Value will reset the property.
-
Selecting Set Event Value will update the property based on the value of a property in an upstream event. The data types of the profile property and event property must match to sync.
.png?cb=7da1229b7ea6b69de7e88bc2cb399f97)
Sync Action
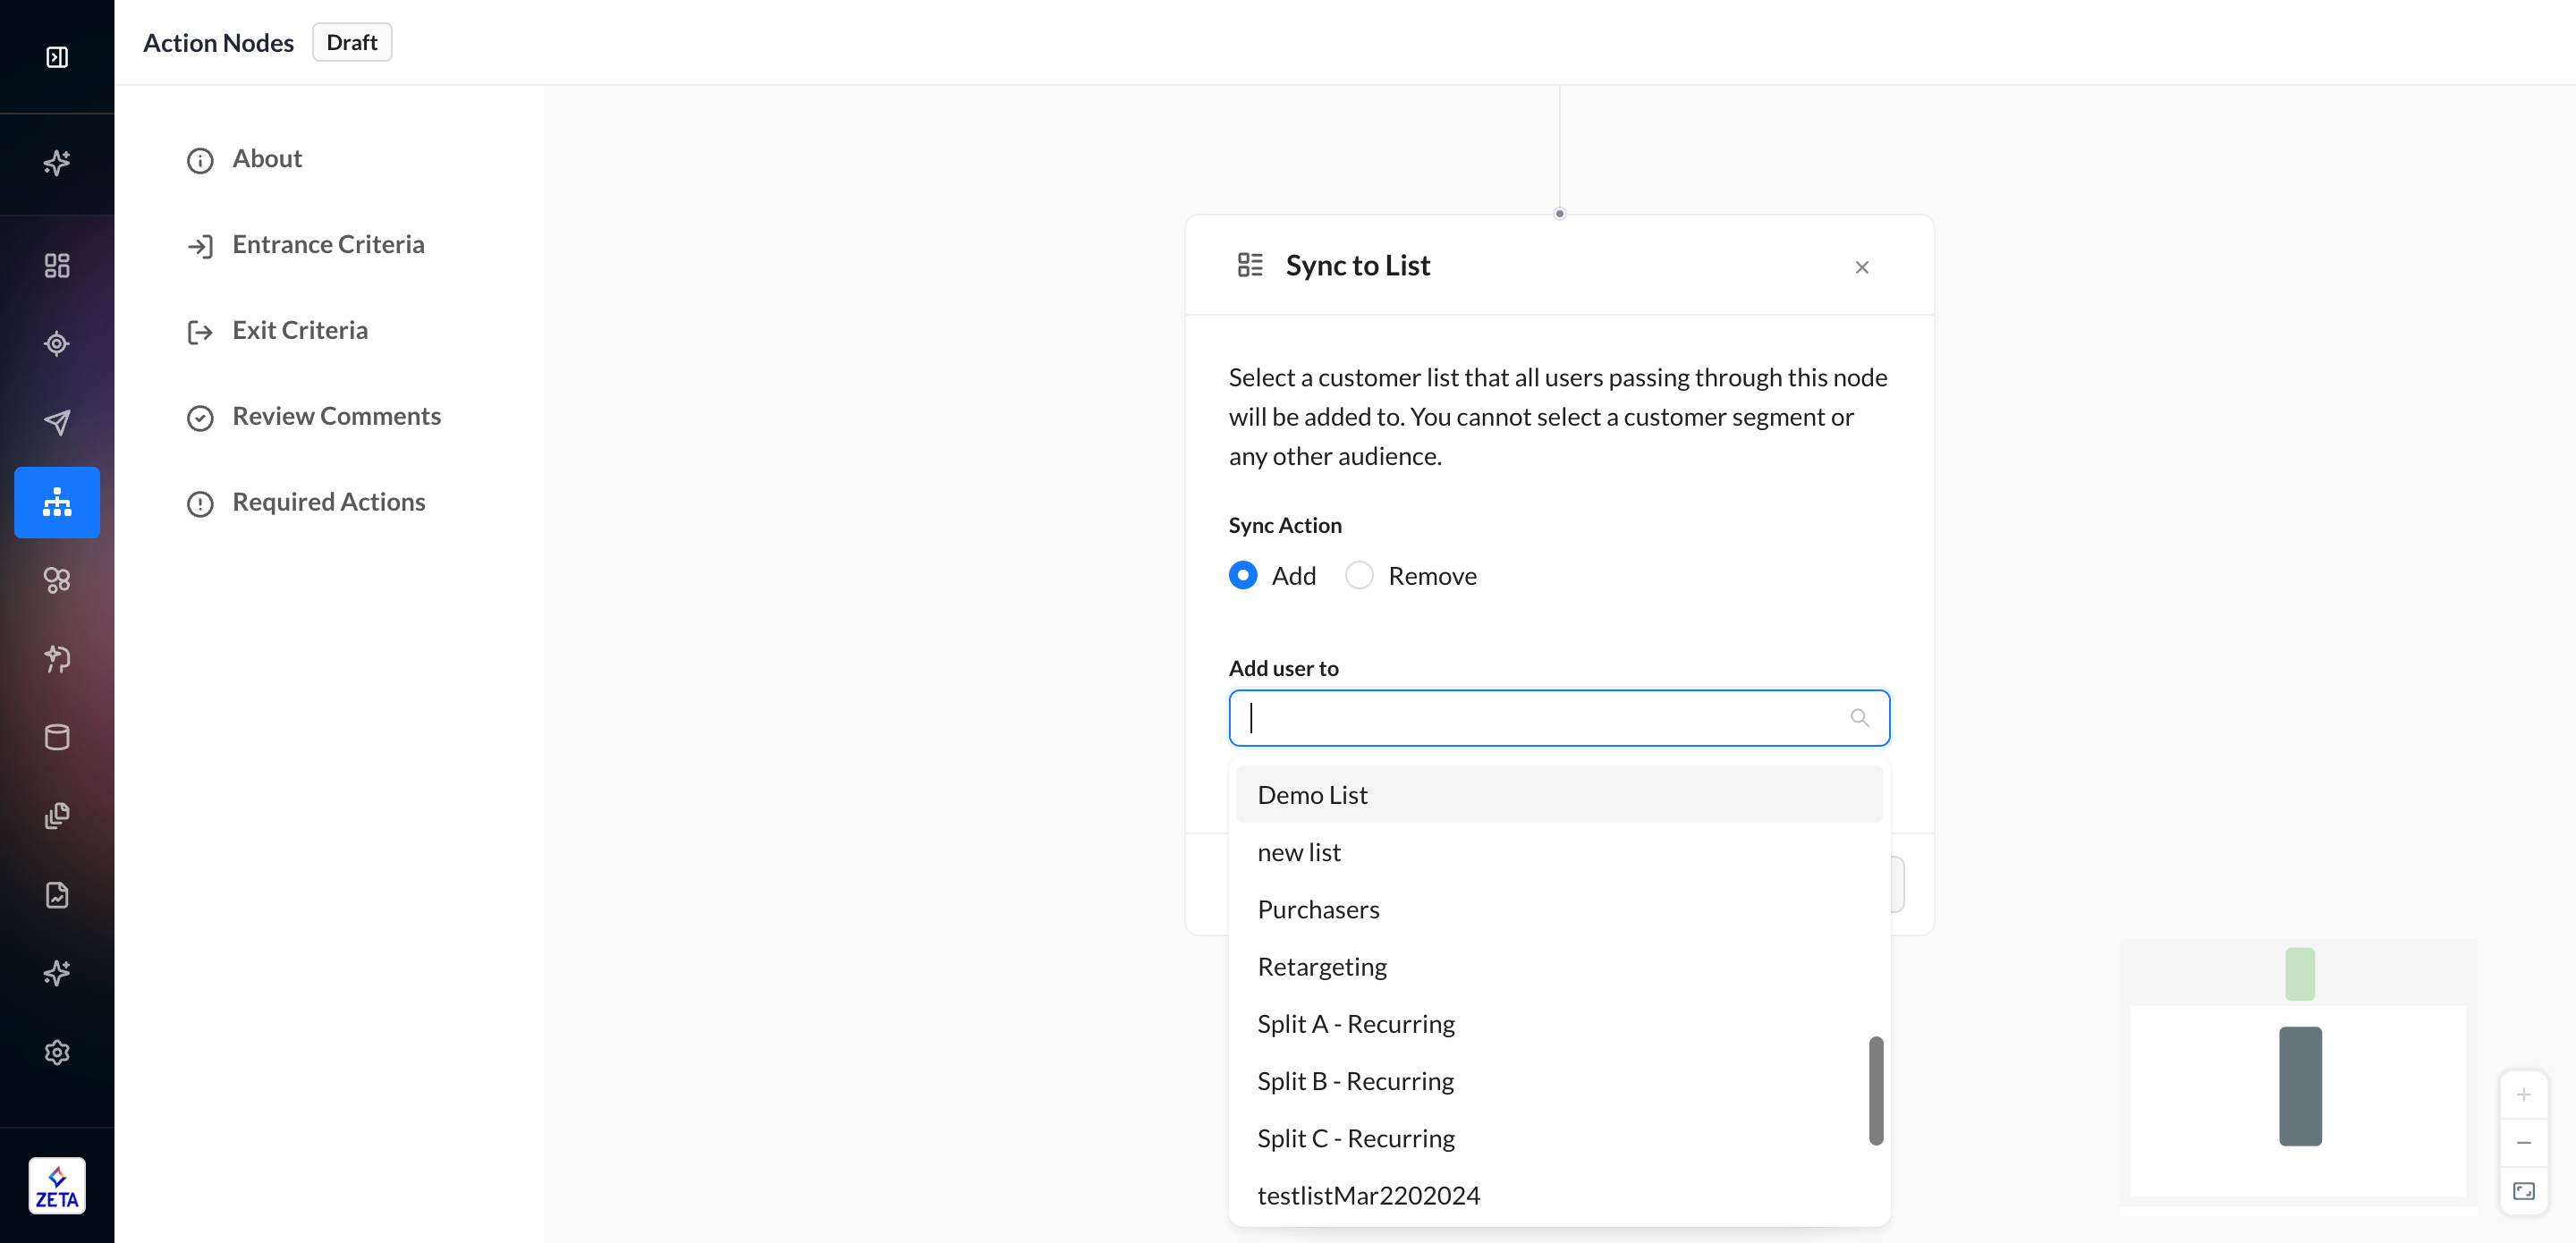
This node type can add or remove users from lists in ZMP, Zeta DSP, or third-party ad networks.
Sync User To a List
You can sync users to Customer Lists in your account. If you want to create a new one, simply type in a name and save it.
Once the node is saved, you can view the segment in a new tab by clicking View Segment in the node menu tab, which will open the Segments & Lists page with a prefilled search result.
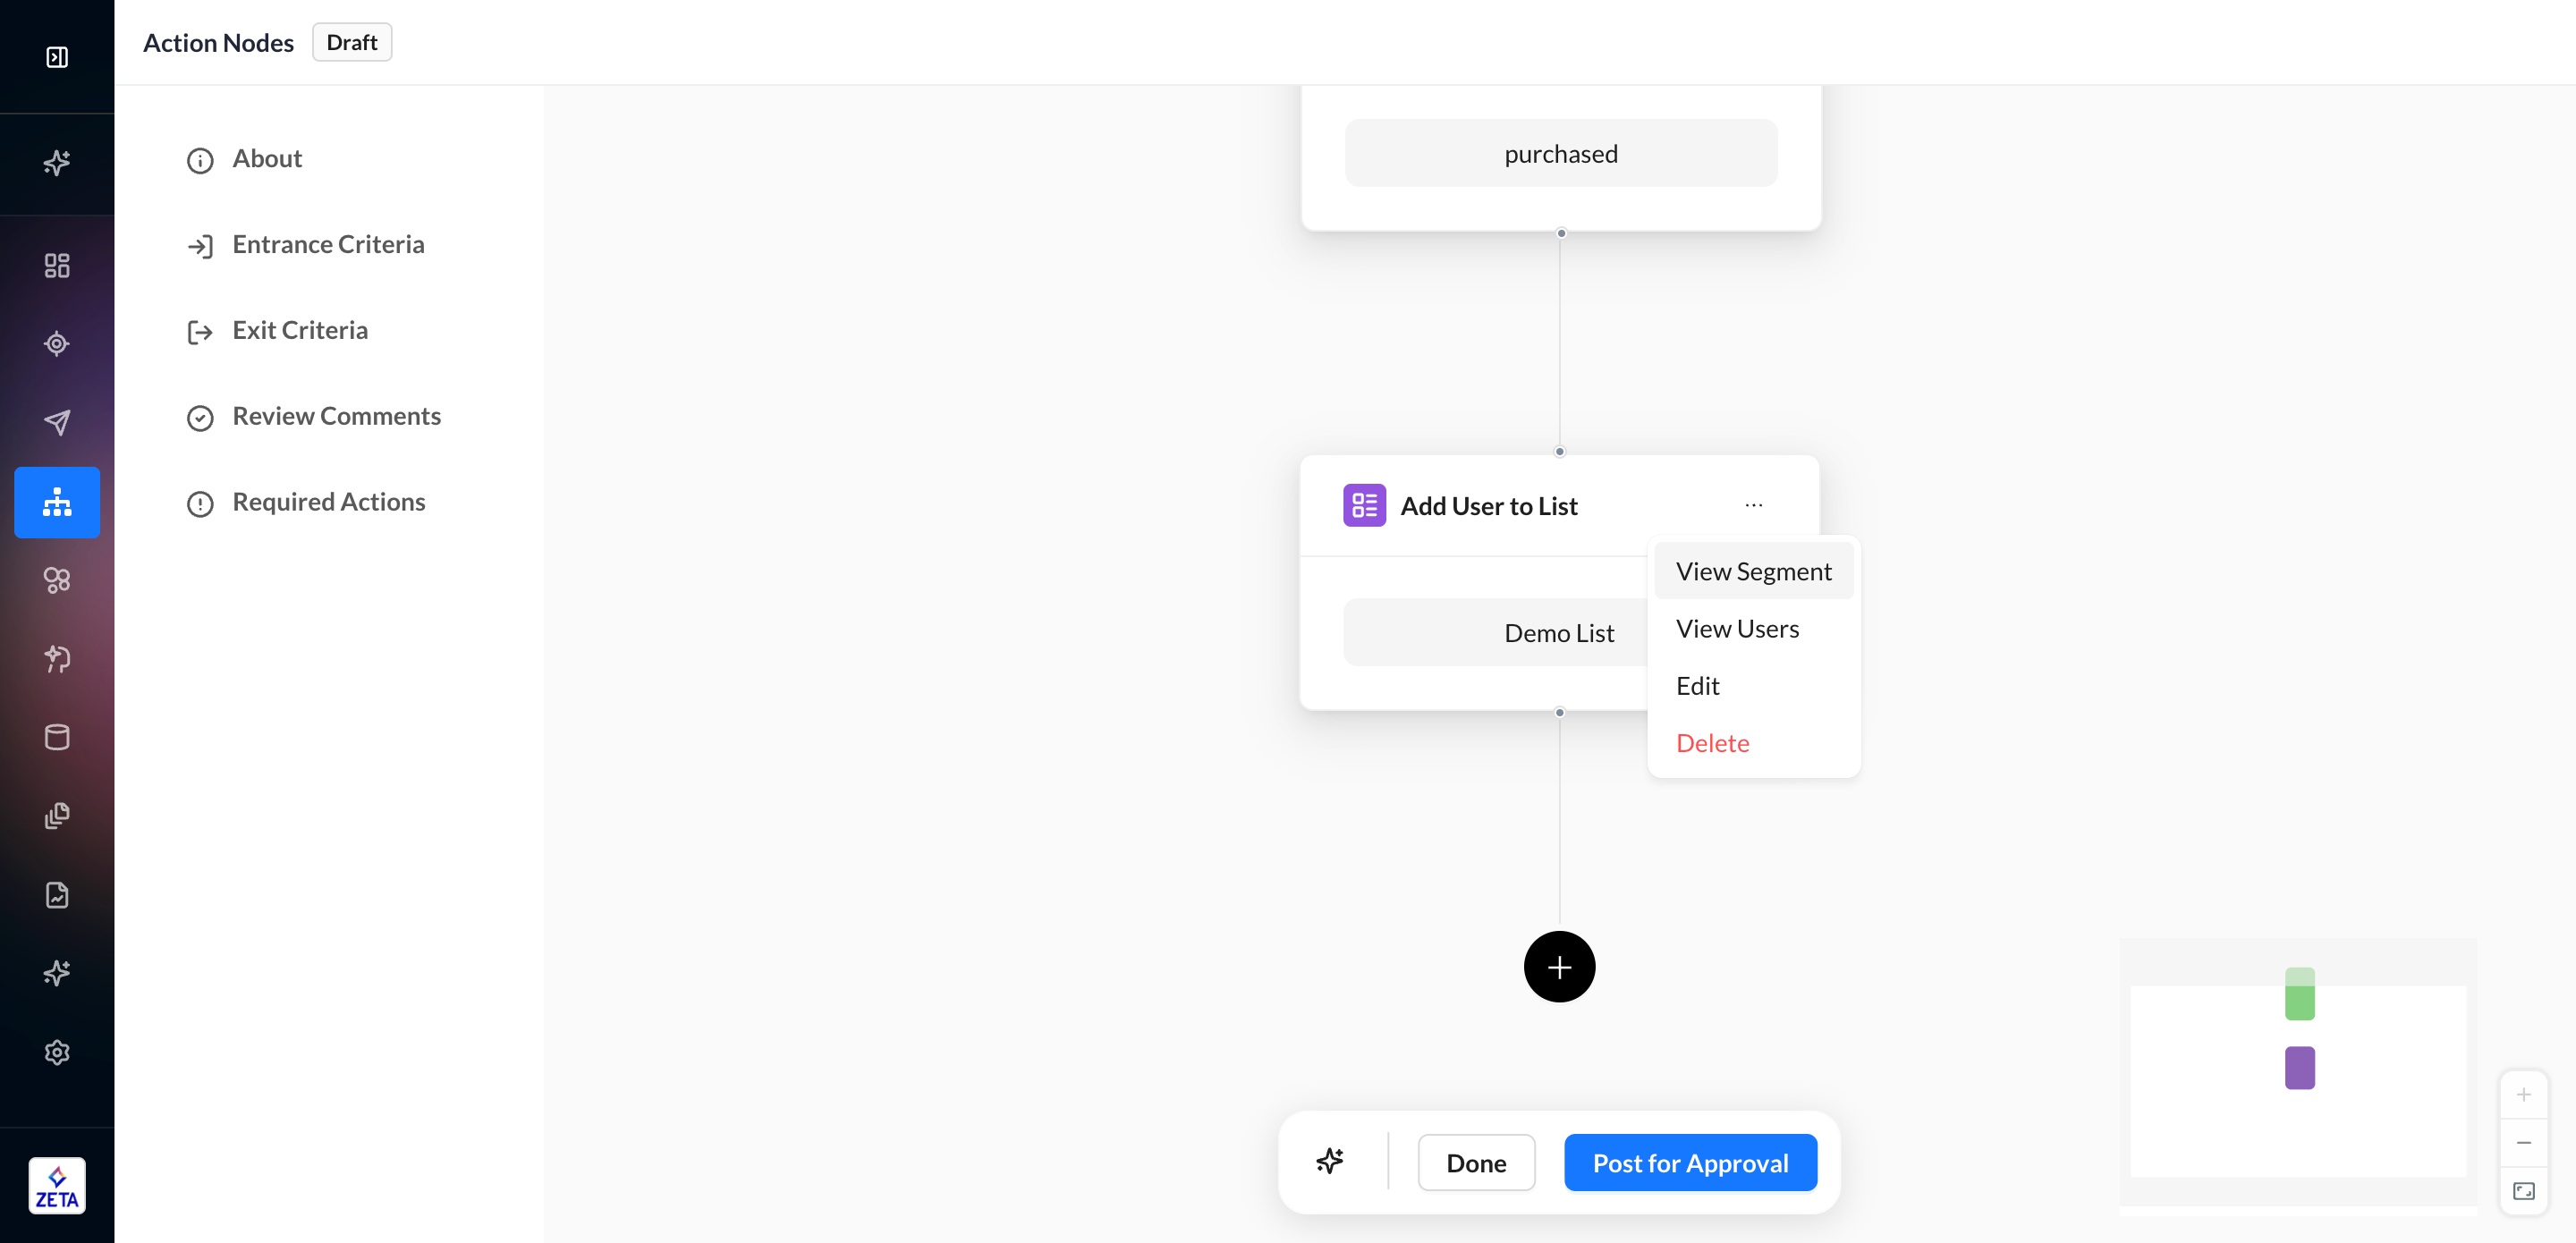
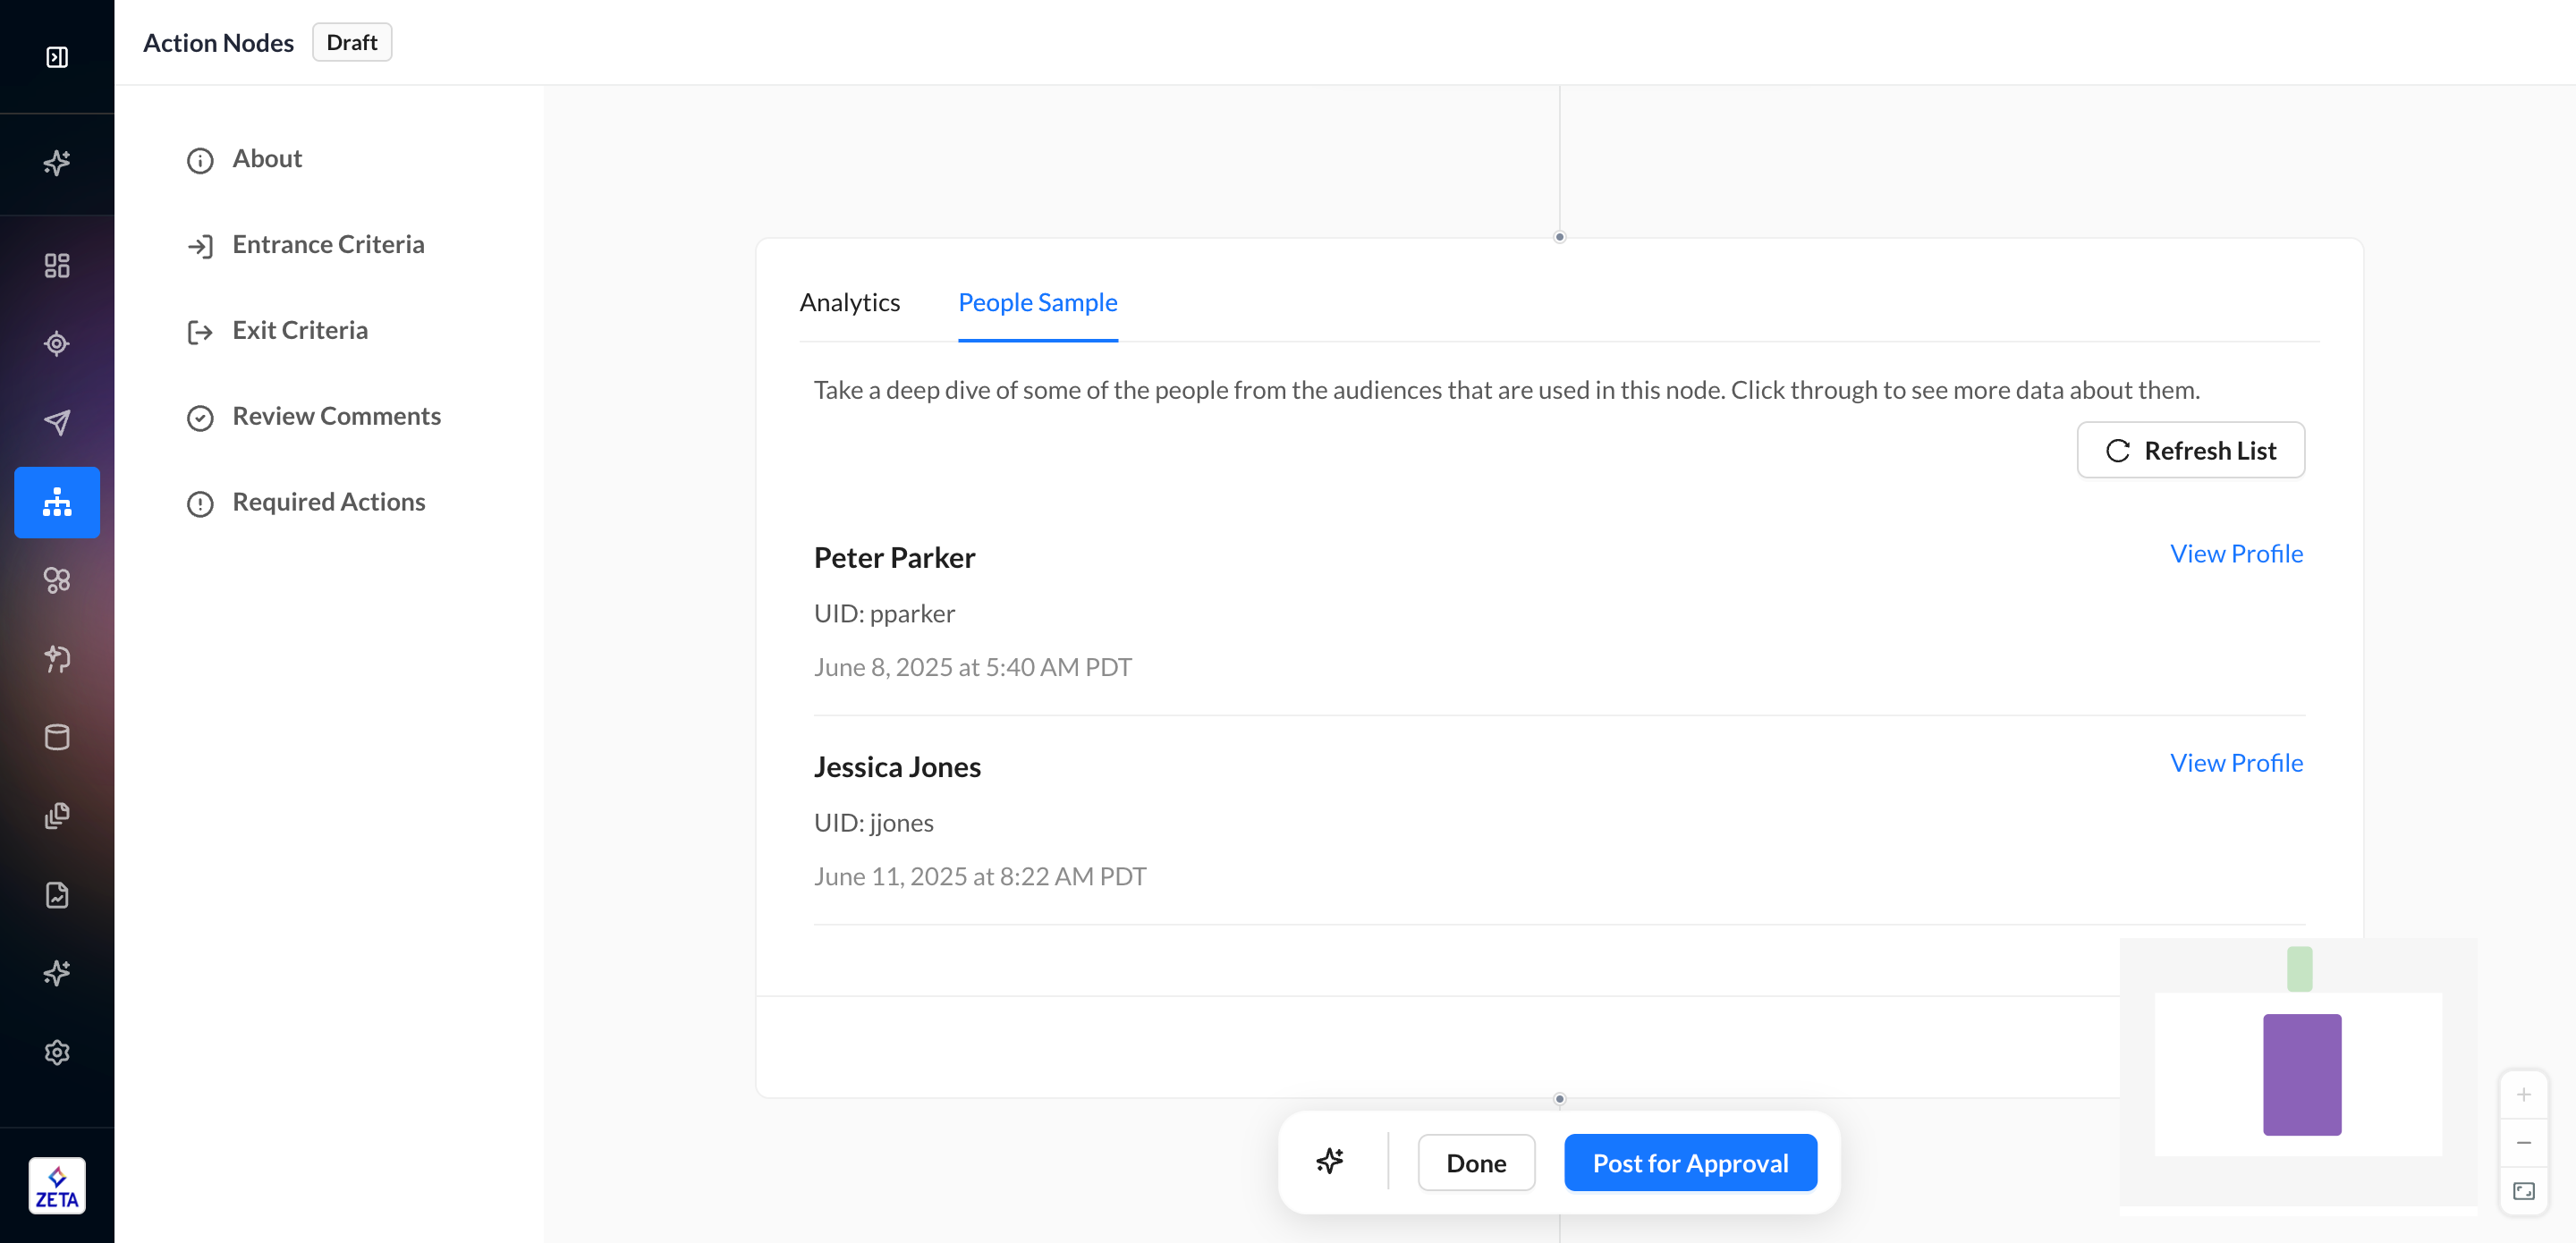
Clicking View Users will give a sample of the users already in the audience without having to leave the experience.
Once a user enters the experience, it is not possible to suppress that specific user. However, if you wish to prevent a particular user from receiving the email, you can add them to the global suppression list. Once the user completes the journey, you will need to add them to the suppression segment. This will ensure that the user is excluded from future email communications.
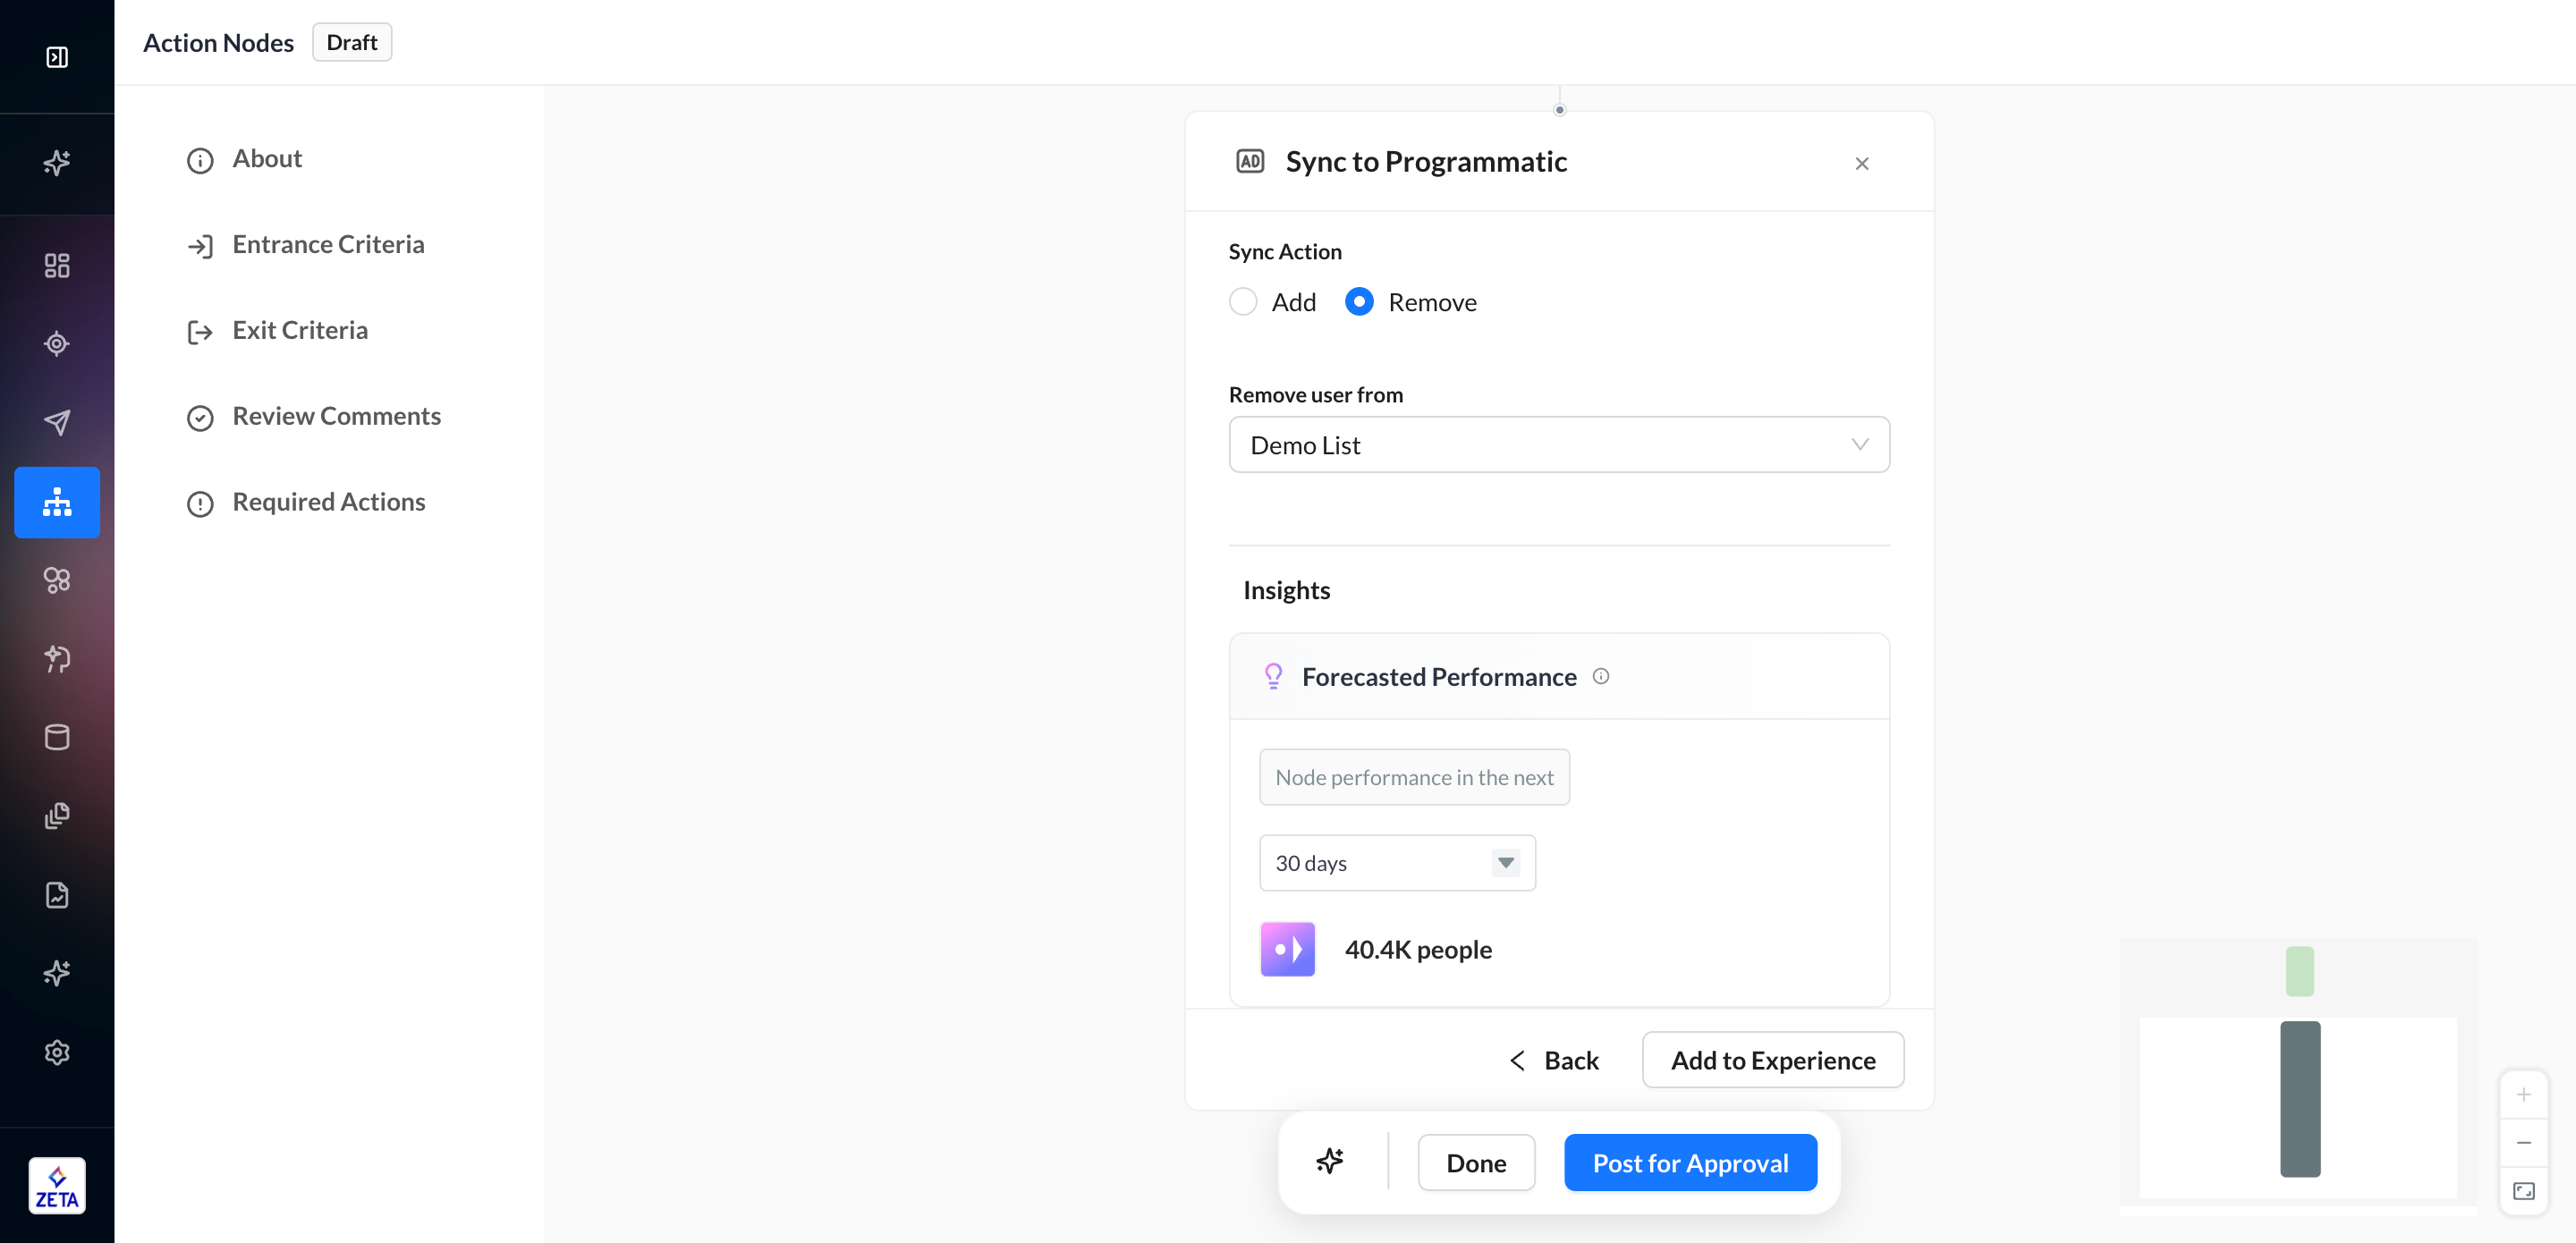
Sync to Programmatic
You can sync users to Zeta DSP via Customer Lists. Every Customer List is also available to be used on Zeta DSP, and you can choose to add or remove people via experiences.
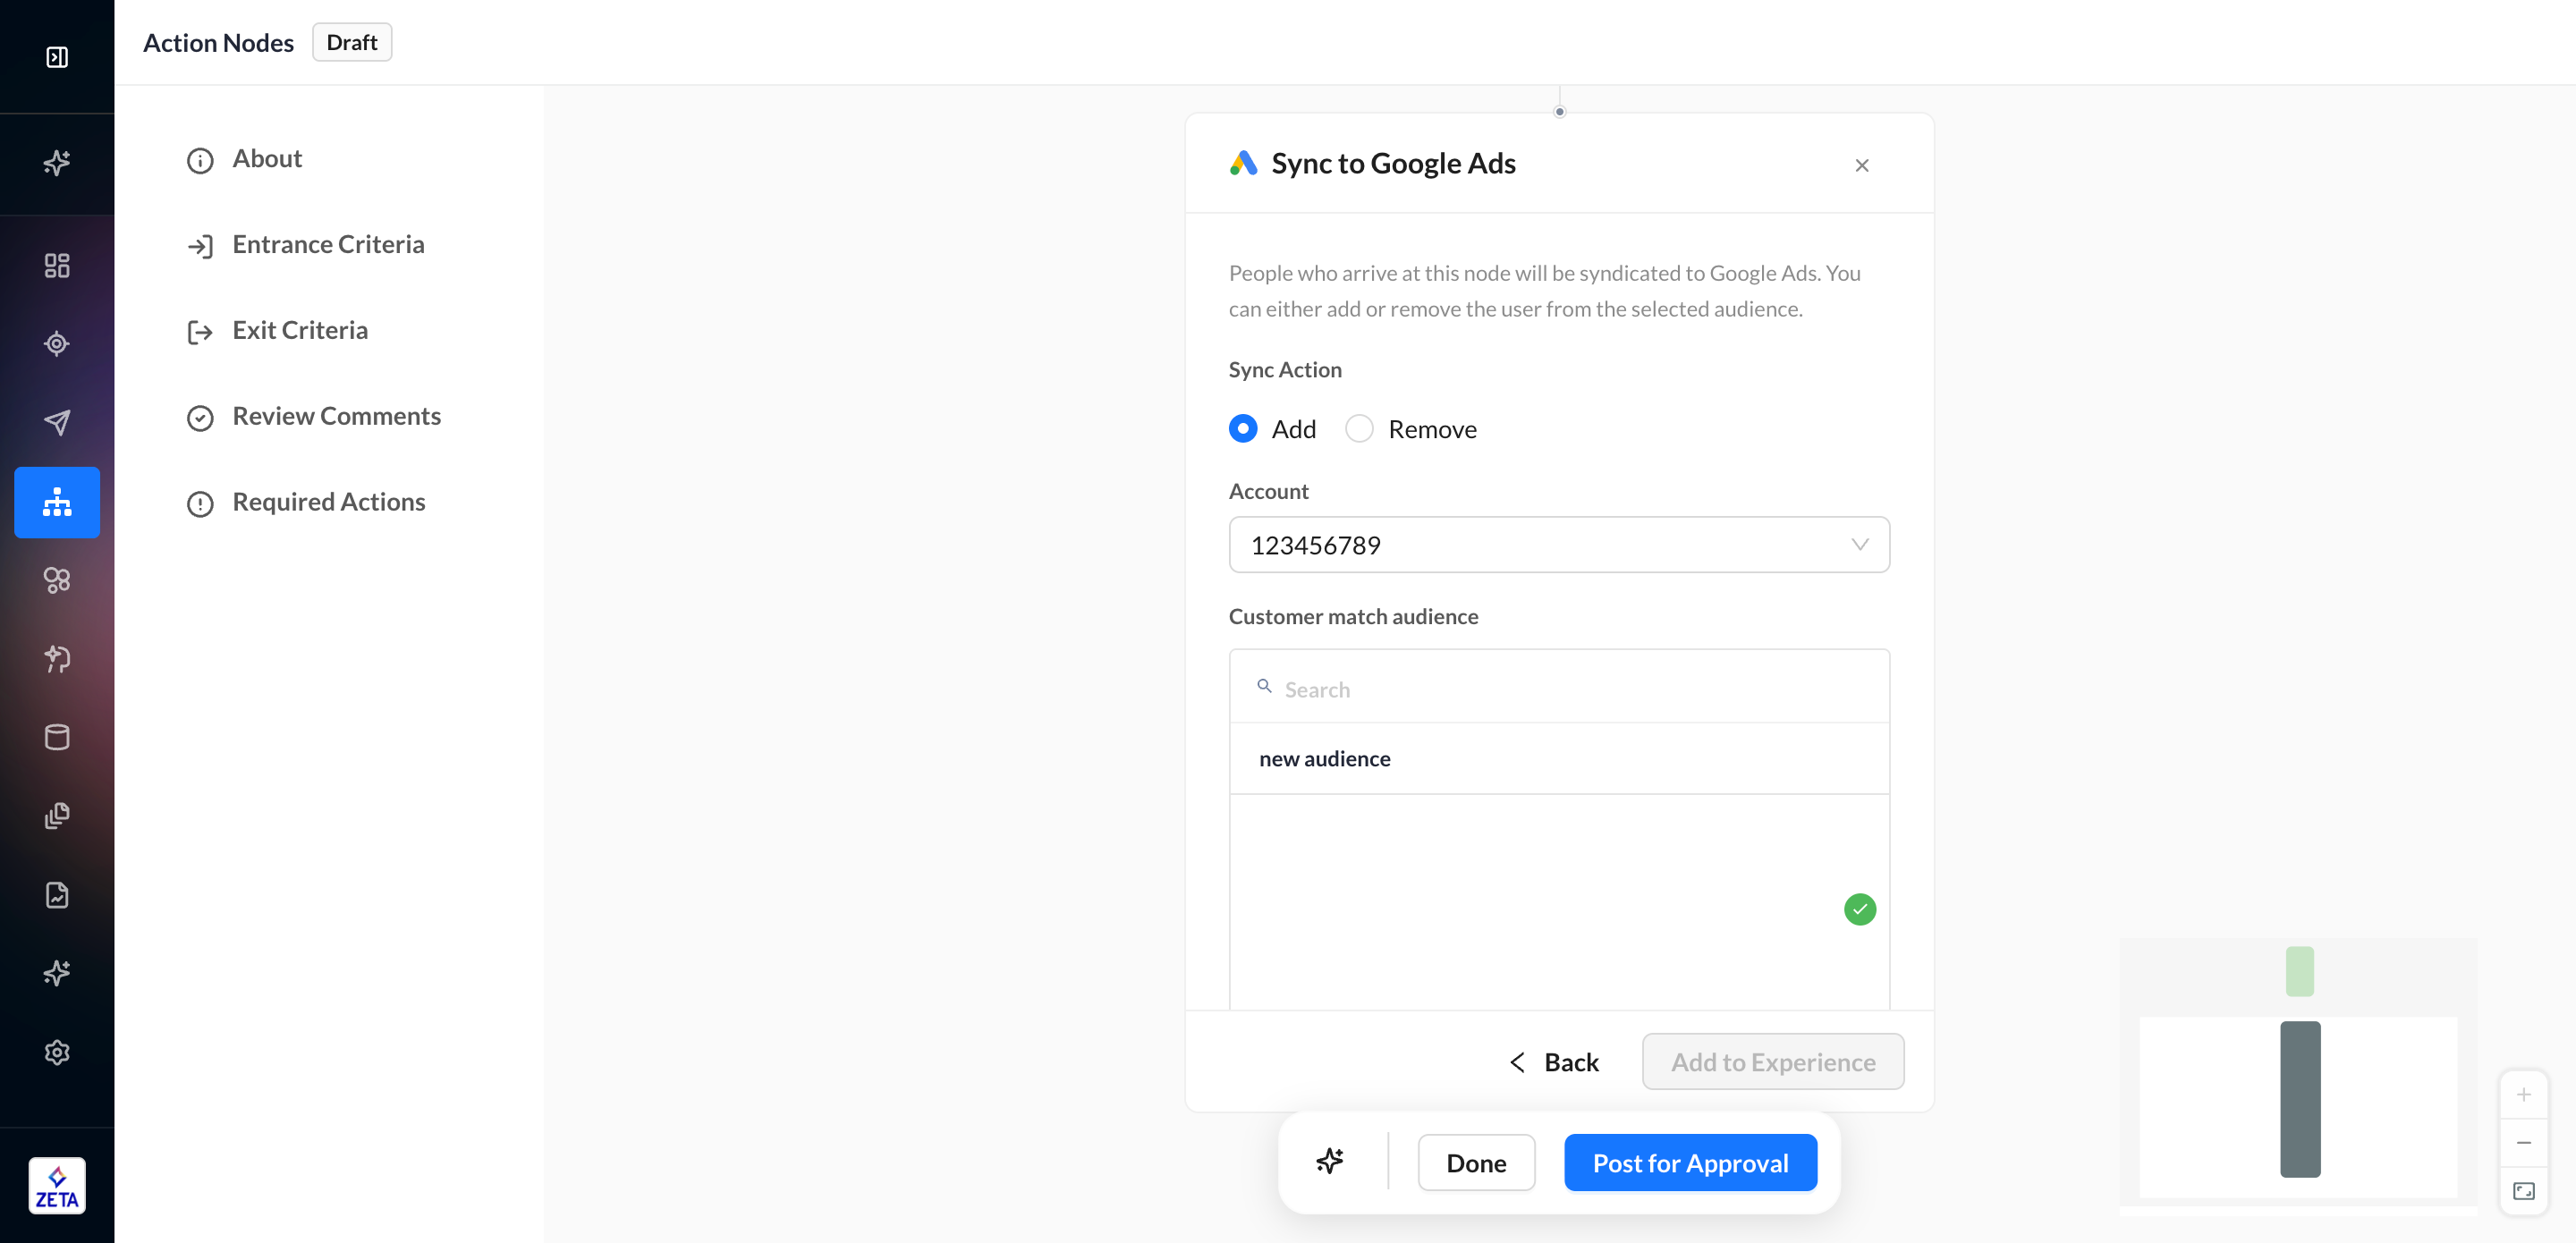
Sync to Google Ads
This Sync Action allows you to add or remove users from an existing or new Google Customer Match Audience for further treatment. This option requires you to authenticate your Google account on the Connections page to be used.
Sync to Facebook
This Sync Action allows you to add or remove users from an existing or new Facebook Custom Audience for further treatment. This option requires you to authenticate your Facebook account on the Connections page to be used.

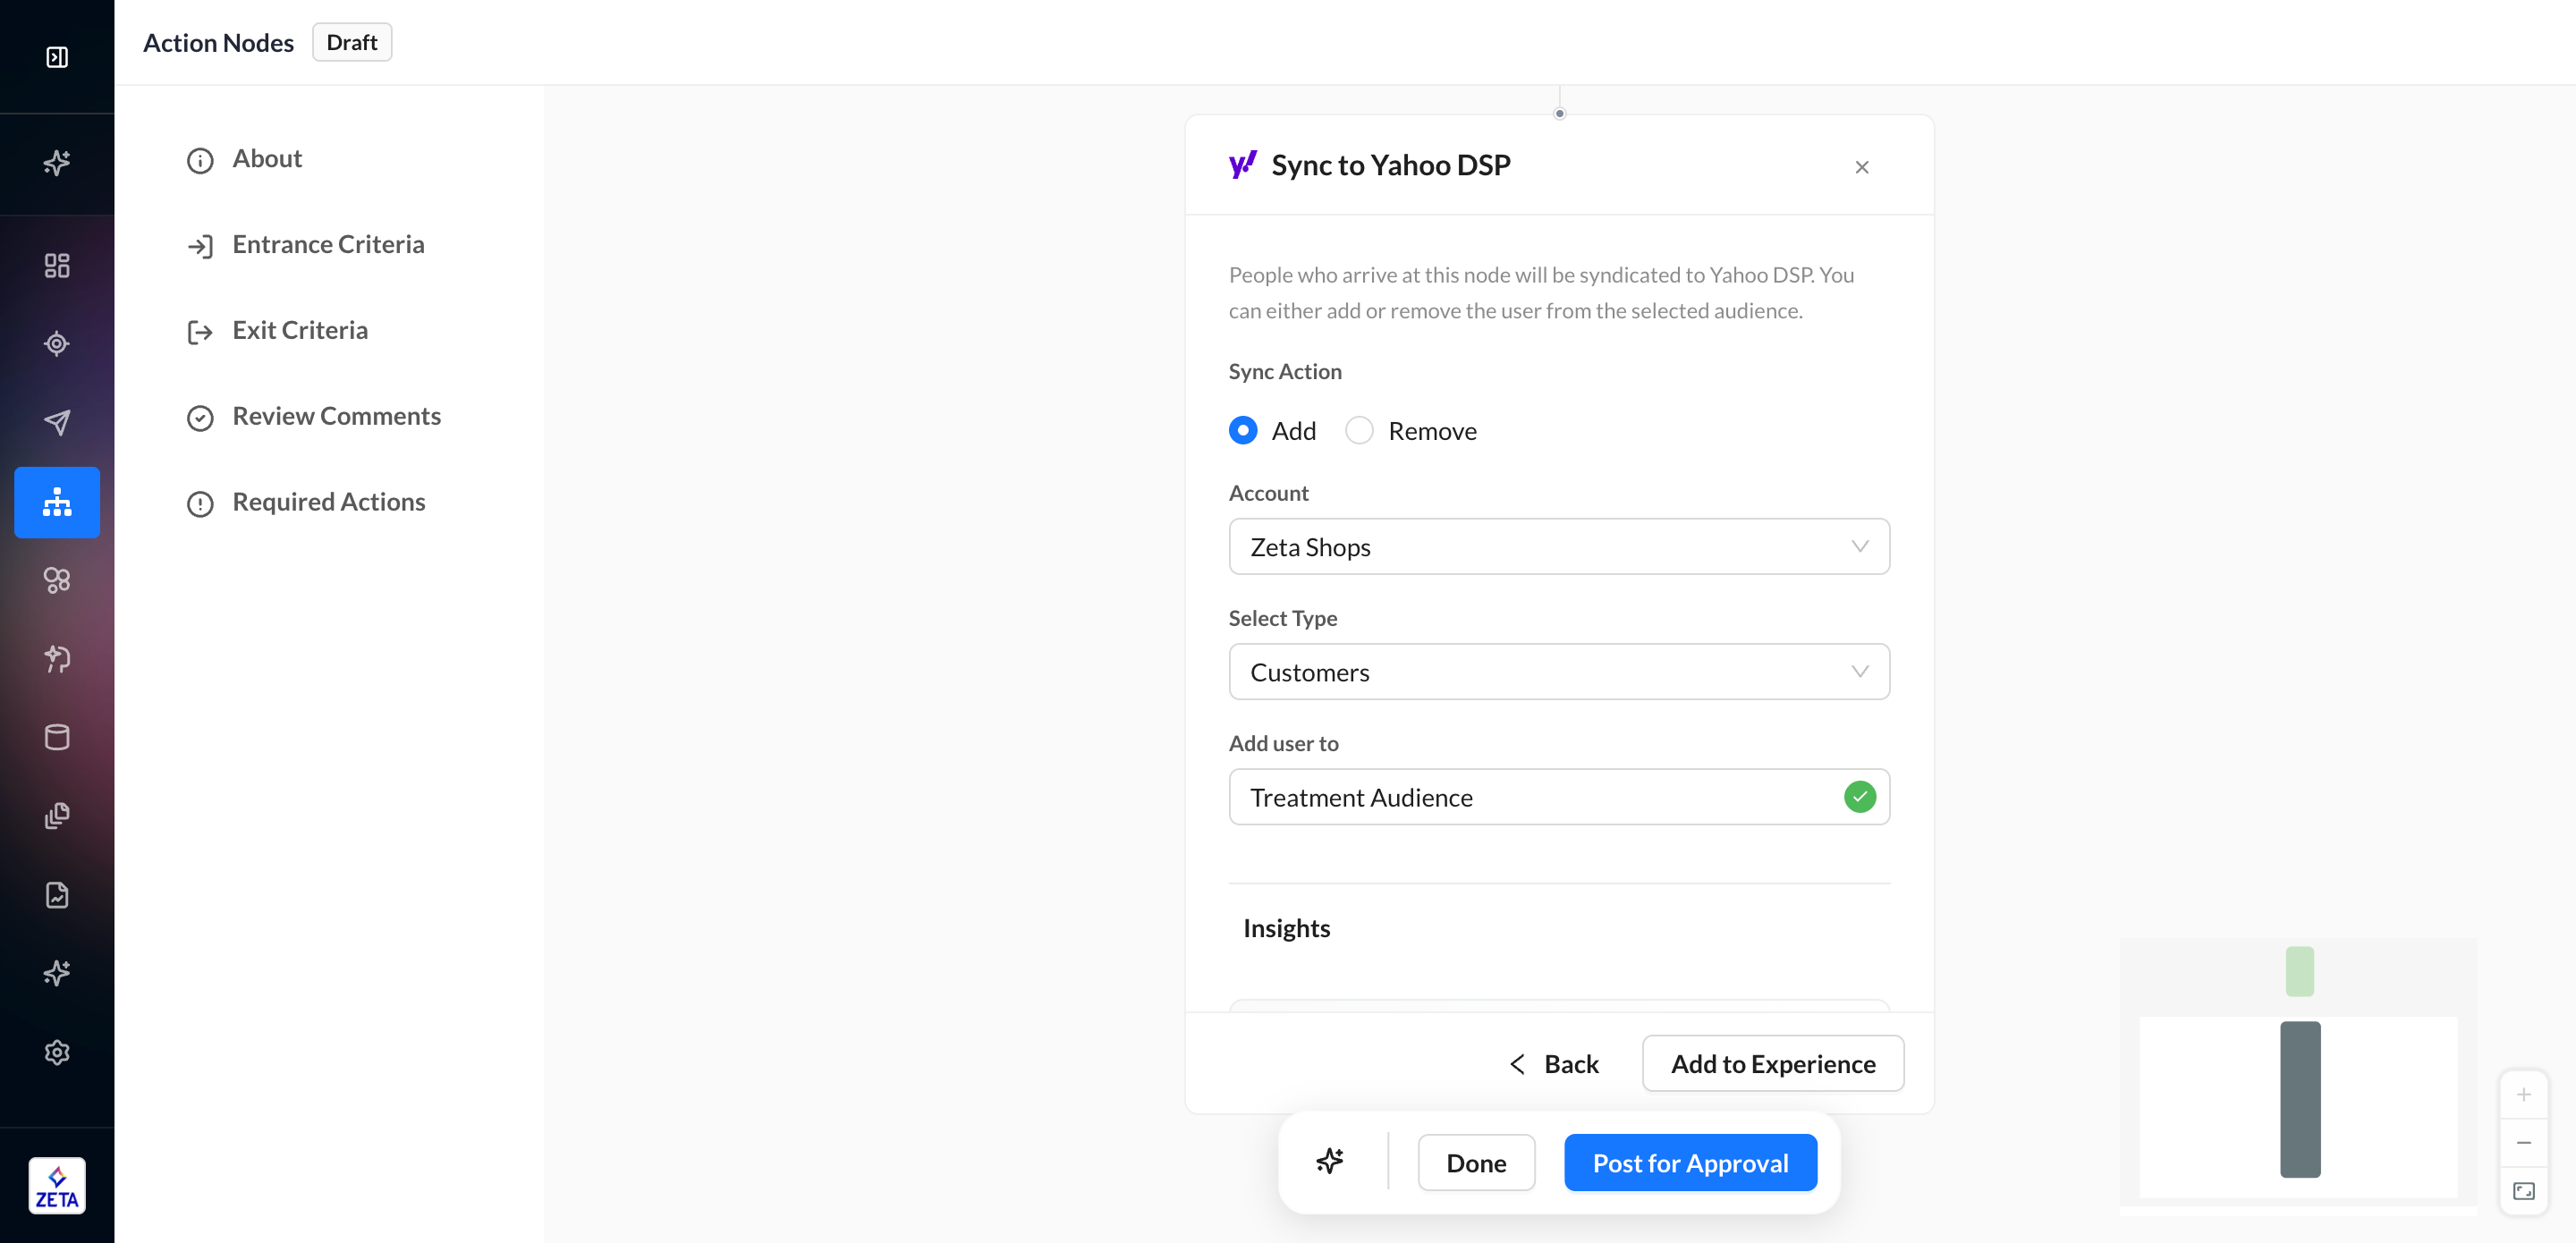
Sync to Yahoo DSP
This Sync Action allows you to add or remove users from an existing or new Yahoo DSP audience for further treatment. This option requires you to authenticate your Yahoo DSP account on the Connections page to be used.
Trigger Another Experience
Experiences with unknown users will be sent as unknown users to the new experience(s).
To chain experiences together, connect them via the Trigger Another Experience action node in one experience and the From Another Experience trigger node in the second experience. This feature allows you to configure users to travel seamlessly between workflows.
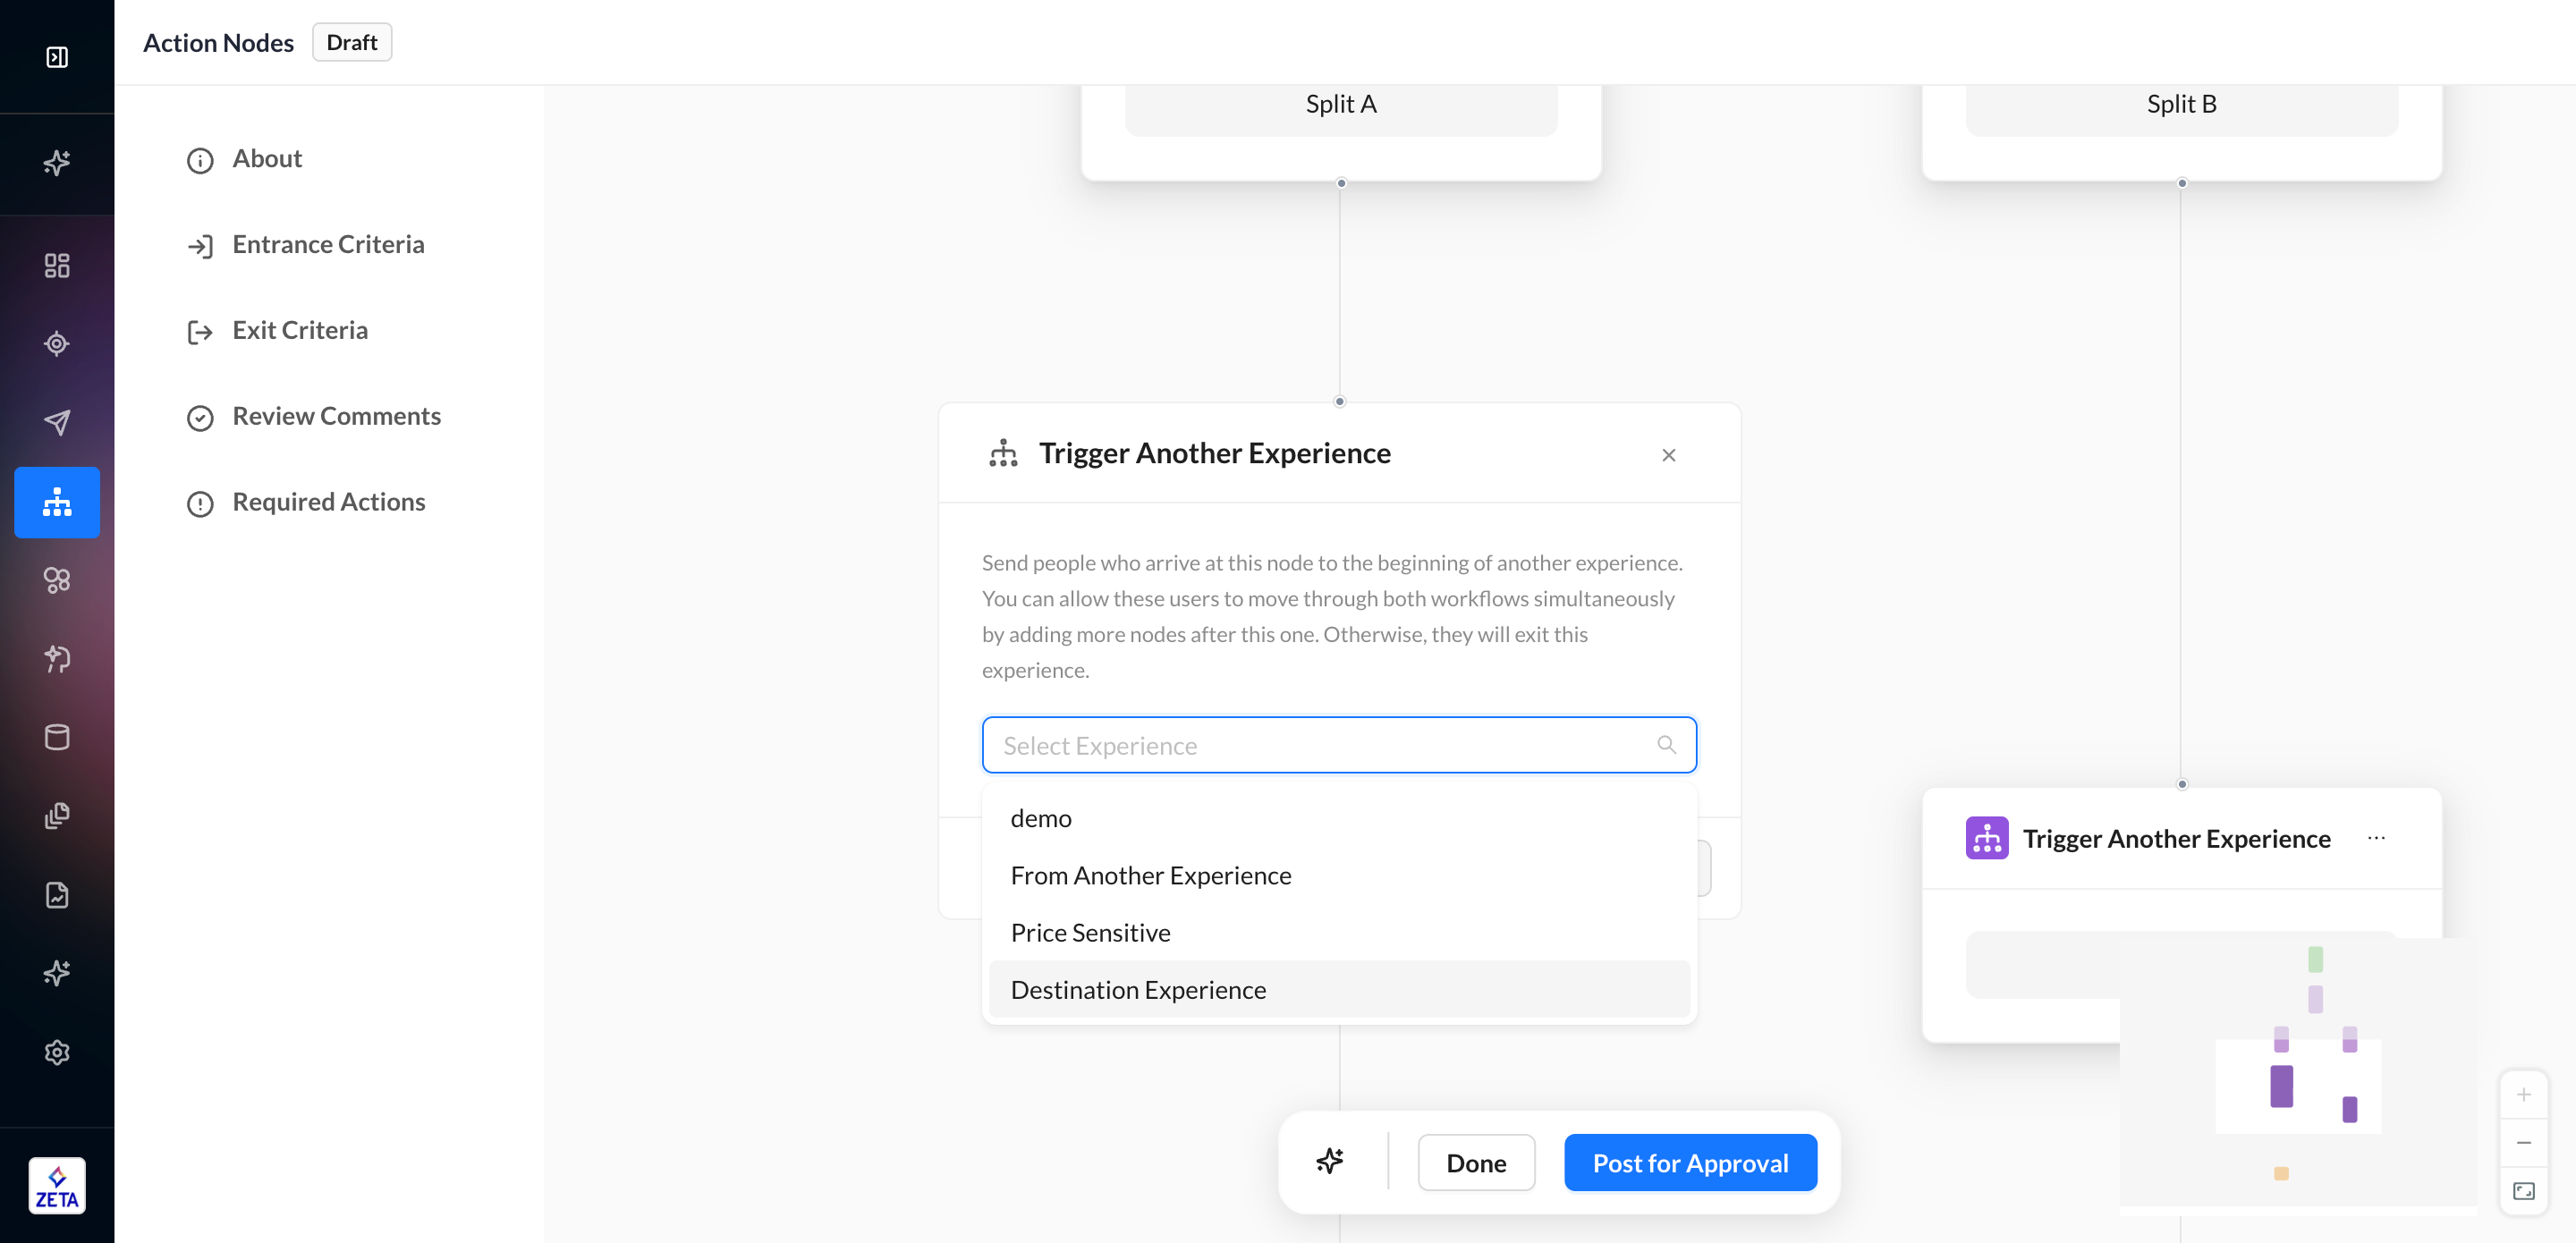
1. From the actions panel, select Trigger Another Experience.
2. Select an experience from the dropdown list. This list consists of experiences that begin with the From Another Experience trigger node.
3. Click Add to Experience to save.
4. This experience will now appear in the From Another Experience trigger node in your destination experience. You can view the name, ID, node ID(s), and status of this experience, as well as a link.
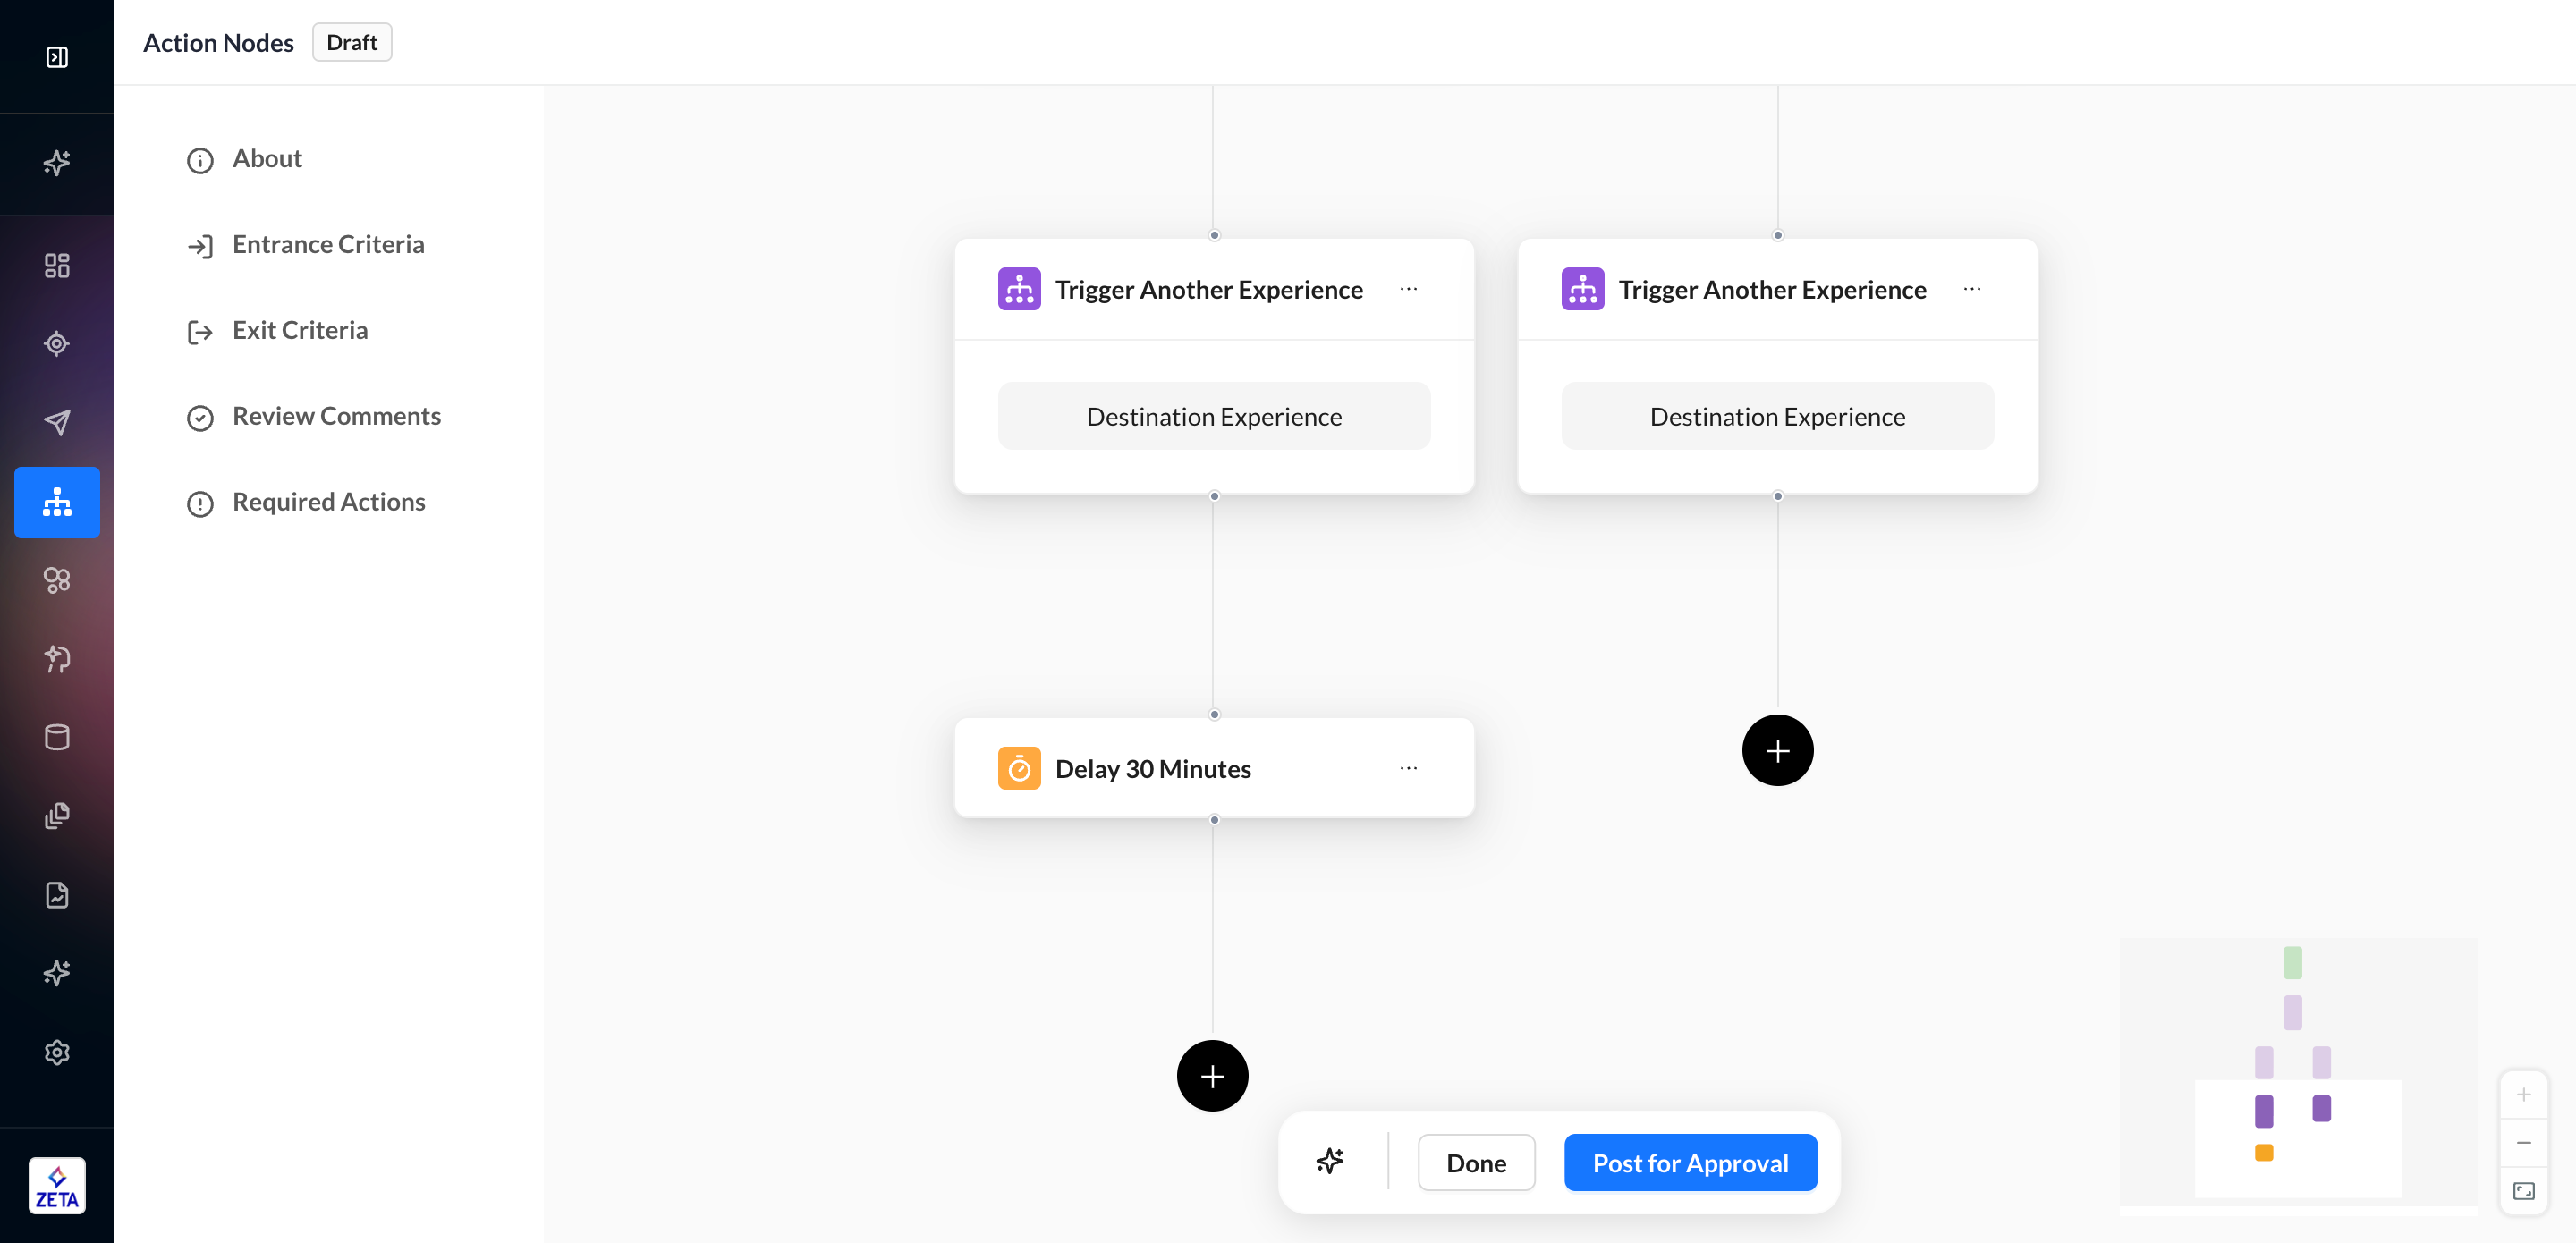
5. There is no limit to the number of experiences that can be triggered from a single source experience, including multiple touchpoints to the same destination experience.
6. By default, a user triggered to another experience will continue its journey in the source experience simultaneously. If you want to exit a user from the source experience so that they are only in the destination experience, don’t put a node after the Trigger Another Experience action node so that it appears as the final point in the experience path. If you put a node after the Trigger Another Experience action node, the user will be in both experiences and continue until they meet exit criteria or finish their journey normally.