
This article outlines the steps that you will need to take to enable the LiveIntent and Northbeam integration.
Step 1: LiveIntent Team Sets Up the Data Flow
-
Reach out to your LiveIntent team to set up the data flow.
-
You do not need to wait for the setup to be completed before proceeding with the remaining steps.
The integration will begin working only after the data flow has been configured.
Step 2: Add Northbeam Tracking Parameters to Your Click URLs
When uploading creatives in the LiveIntent platform, you’ll need to include two tracking parameters into each click URL. These parameters allow Northbeam to attribute performance data correctly.
Add the below macros to each click URL:
-
nbt=nb%3Aliveintent%3A%3A${CAMPAIGN_ID}%3A%3A${CREATIVE_ID}
-
decisionid=${DECISION_ID}
Example landing page click URL with macros:
https://liveintent.com/?nbt=nb%3Aliveintent%3A%3A${CAMPAIGN_ID}%3A%3A${CREATIVE_ID}&decisionid=${DECISION_ID}
For more information about click url macros, see: https://knowledgebase.zetaglobal.com/liveintent/click-url-macros-and-accepted-characters
Step 3: Enter Your Connection Credentials in Northbeam
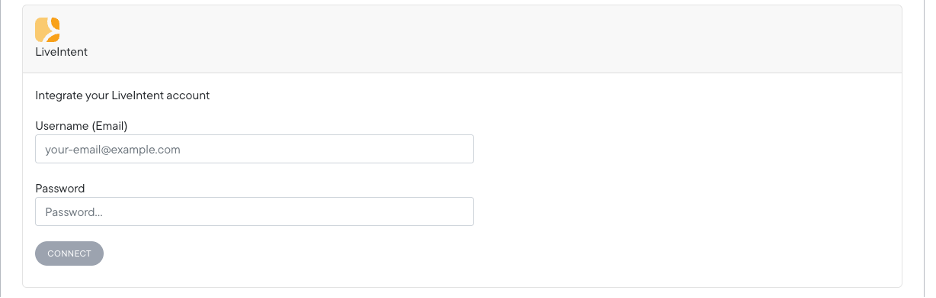
To connect your accounts, Northbeam requires your LiveIntent username and password.
-
Open the Northbeam connection card in either the Settings page or Onboarding.
-
Enter your LiveIntent username (email address) and password.
-
Click Connect.
-
Under the connection card, select the toggle: Enable CD+V for LiveIntent to receive impressions to support the modal.
.png?cb=7487a8e837e04c0d9c4f3f98c1a55e92)