

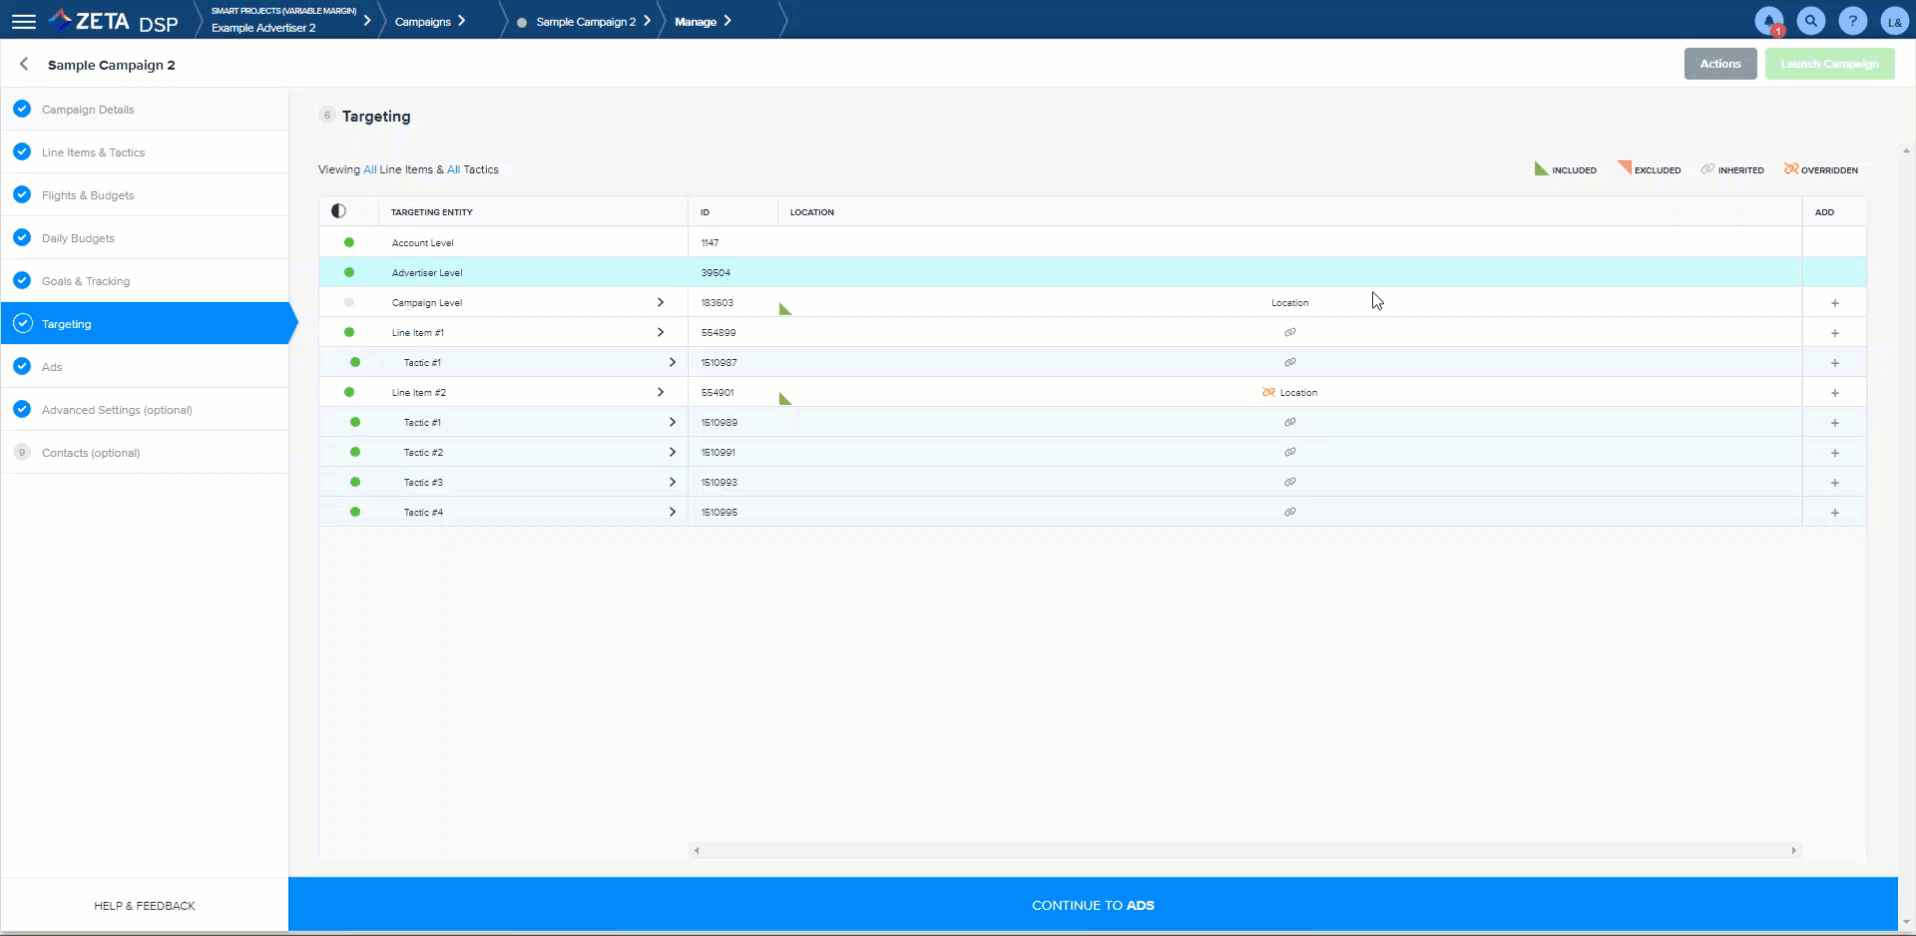
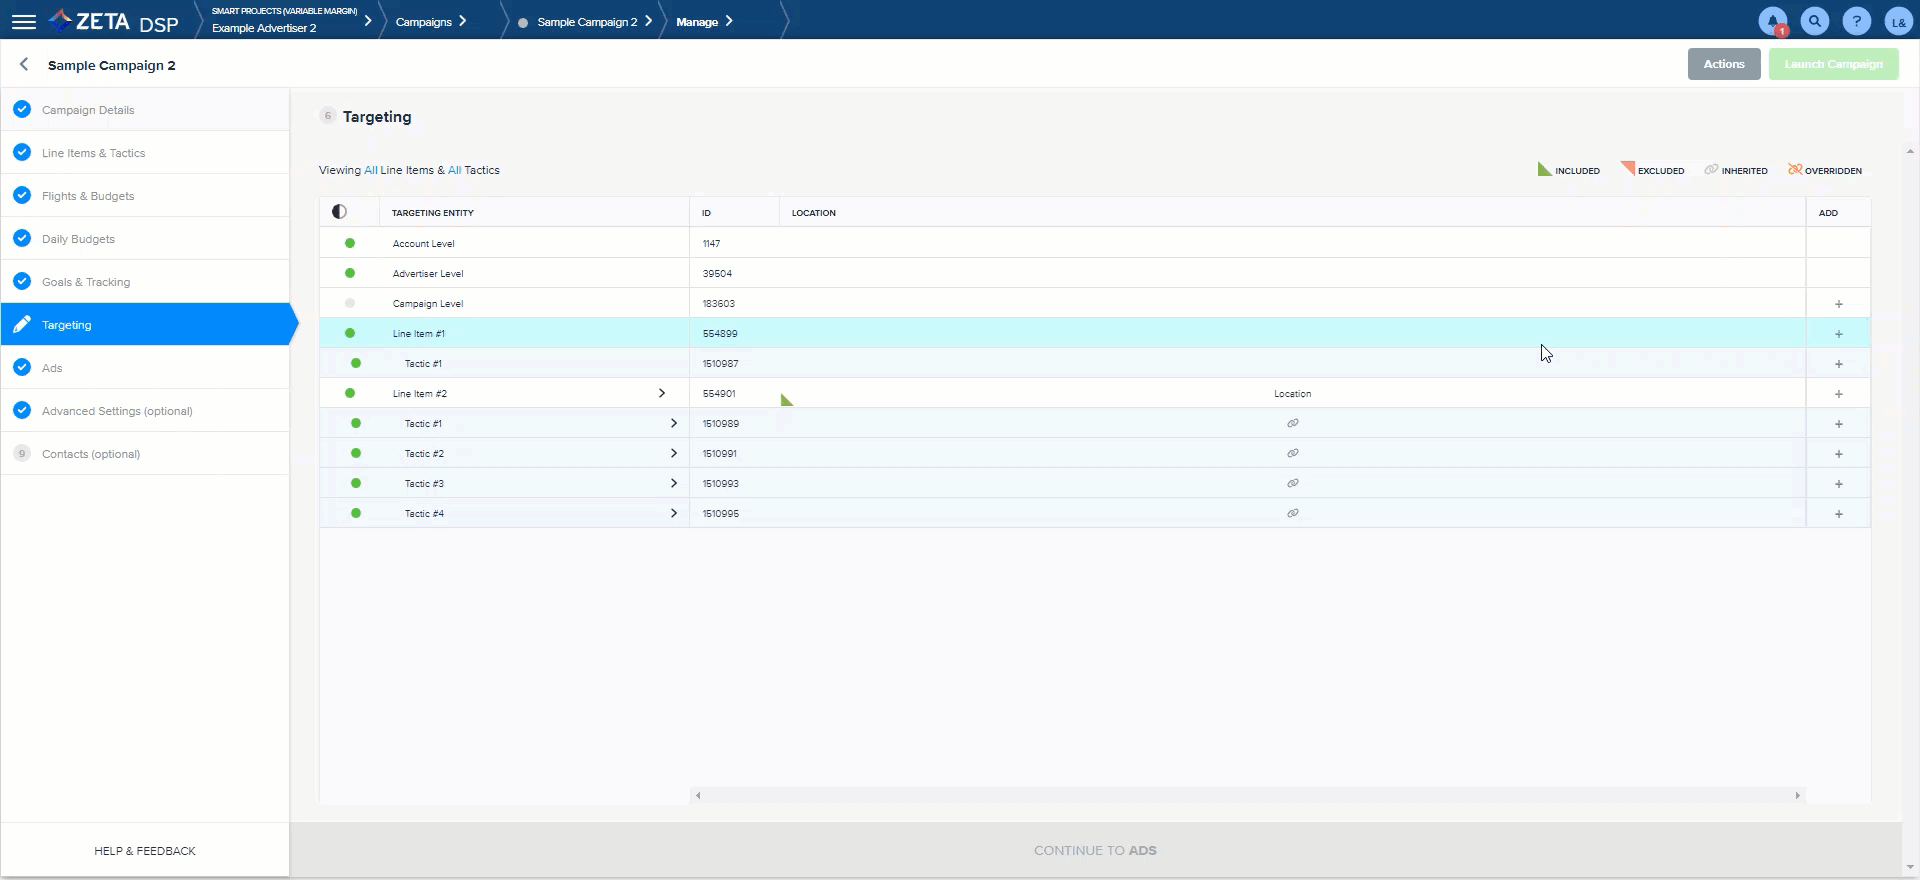
Targeting by Geography (also known as location targeting) allows you to restrict where your Ads are shown by country, state, city, postal code, DMA, geofence, and United States Congressional District.
When using Geography targeting, make sure to target just the locations the campaign needs to deliver to.
For example, if you need to deliver to just Miami, FL (city), do not include Florida (state) or United States (country). Doing so will result in delivery to all of the larger location range.
(This is different from geofence targeting, which does need a country selected as part of the targeting setup. More information on geofence targeting below)
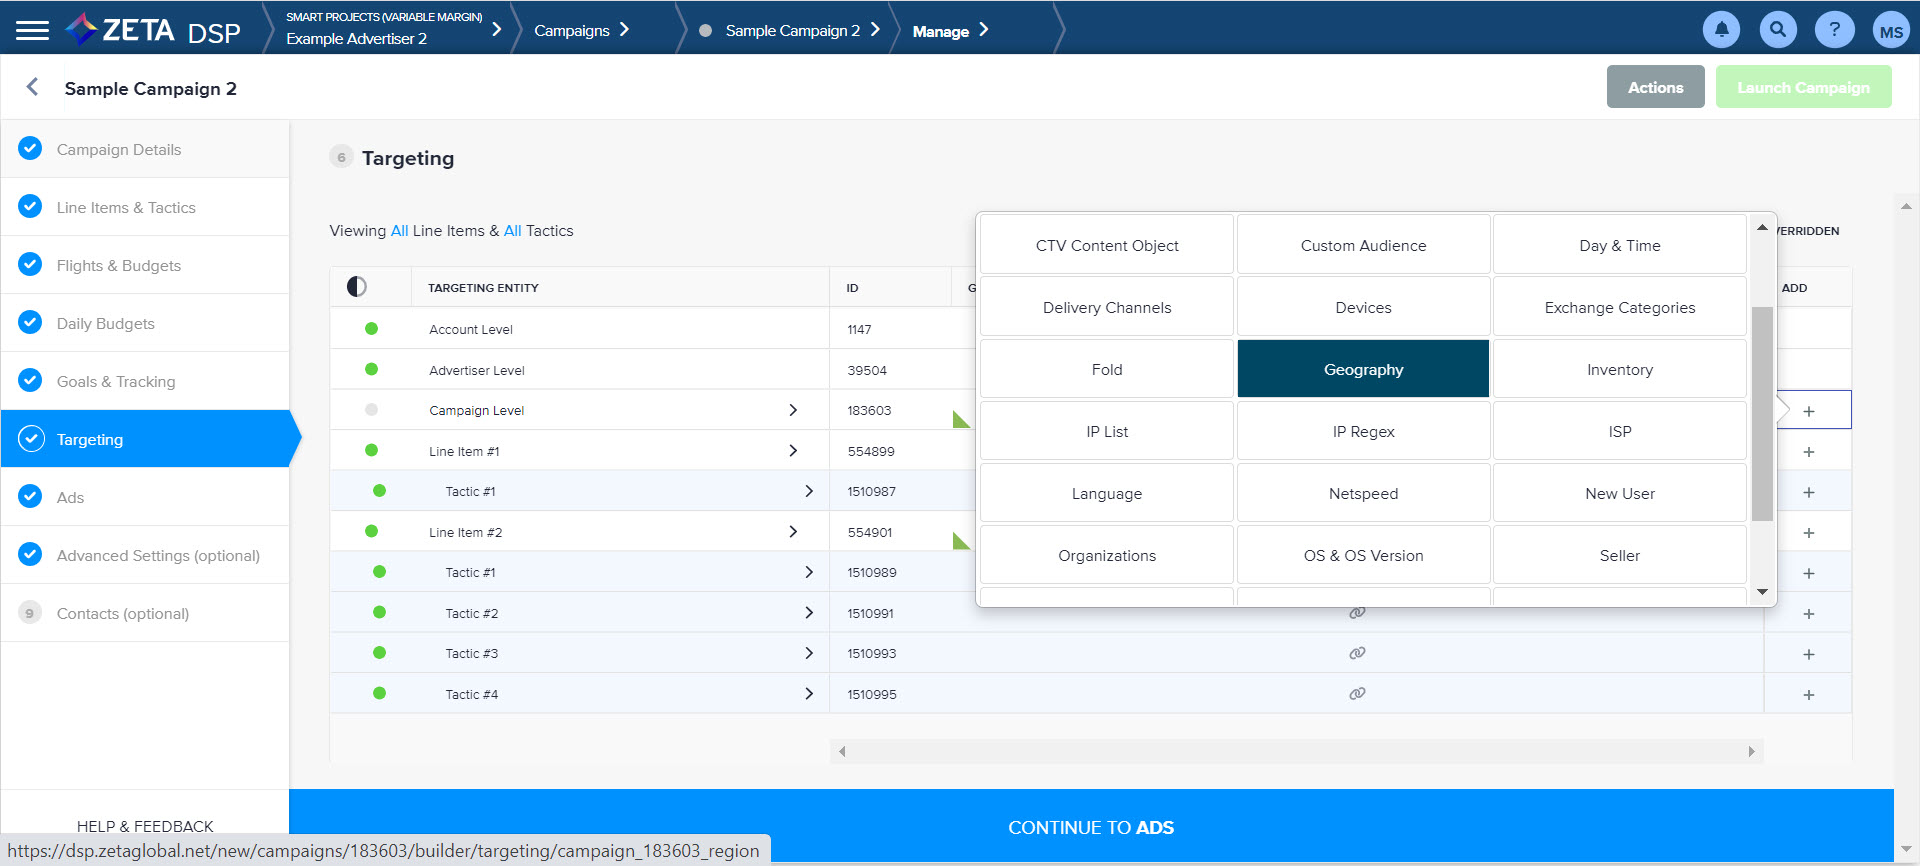
1. Navigate to Campaign Settings > Targeting > Geography.
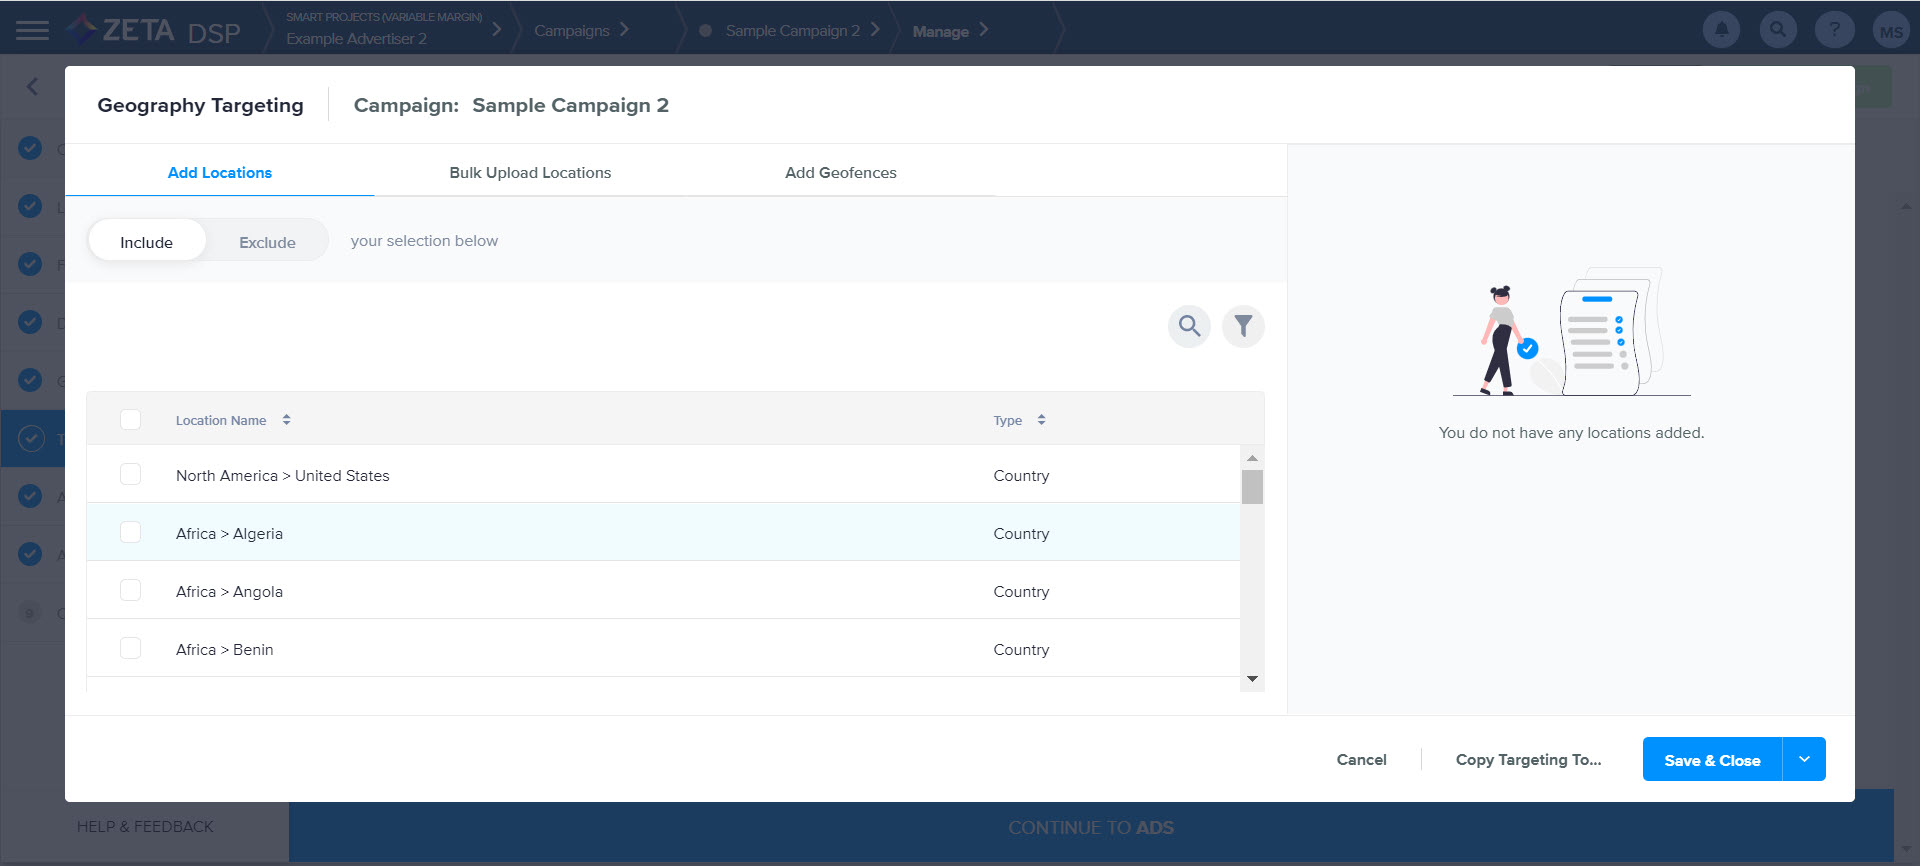
2. After selecting the Geography targeting option, you will be shown the Add Locations section by default.
-
Here, you will be able to find and select the following location types: City, Continent, Country, County, DMA, Postal Code, Providence/Region, State, US Congressional District
3. Use the Include/Exclude toggle to indicate whether you'd like to include or exclude your selected locations:
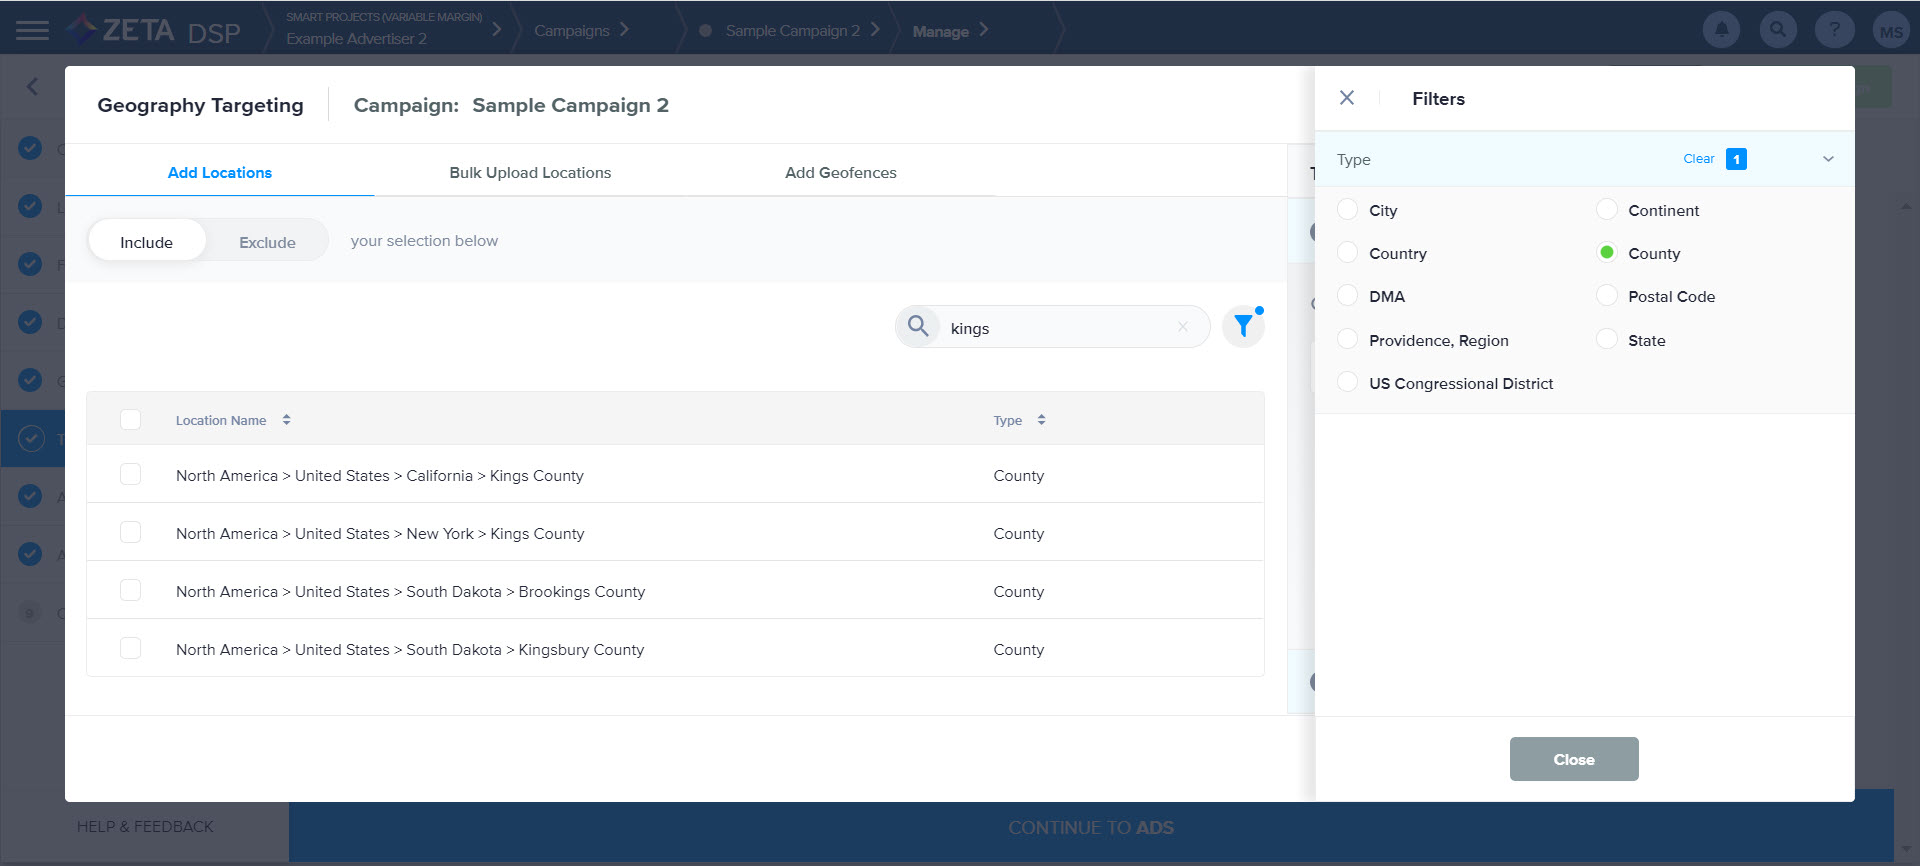
4. Click on the magnifying glass, type in the location name, then hit Return/Enter on your keyboard to search through all the available locations.
-
You can also click the filter icon to narrow down your search results or available locations by location type
5. Use the checkboxes to the left of each location name to add them to the restriction.
-
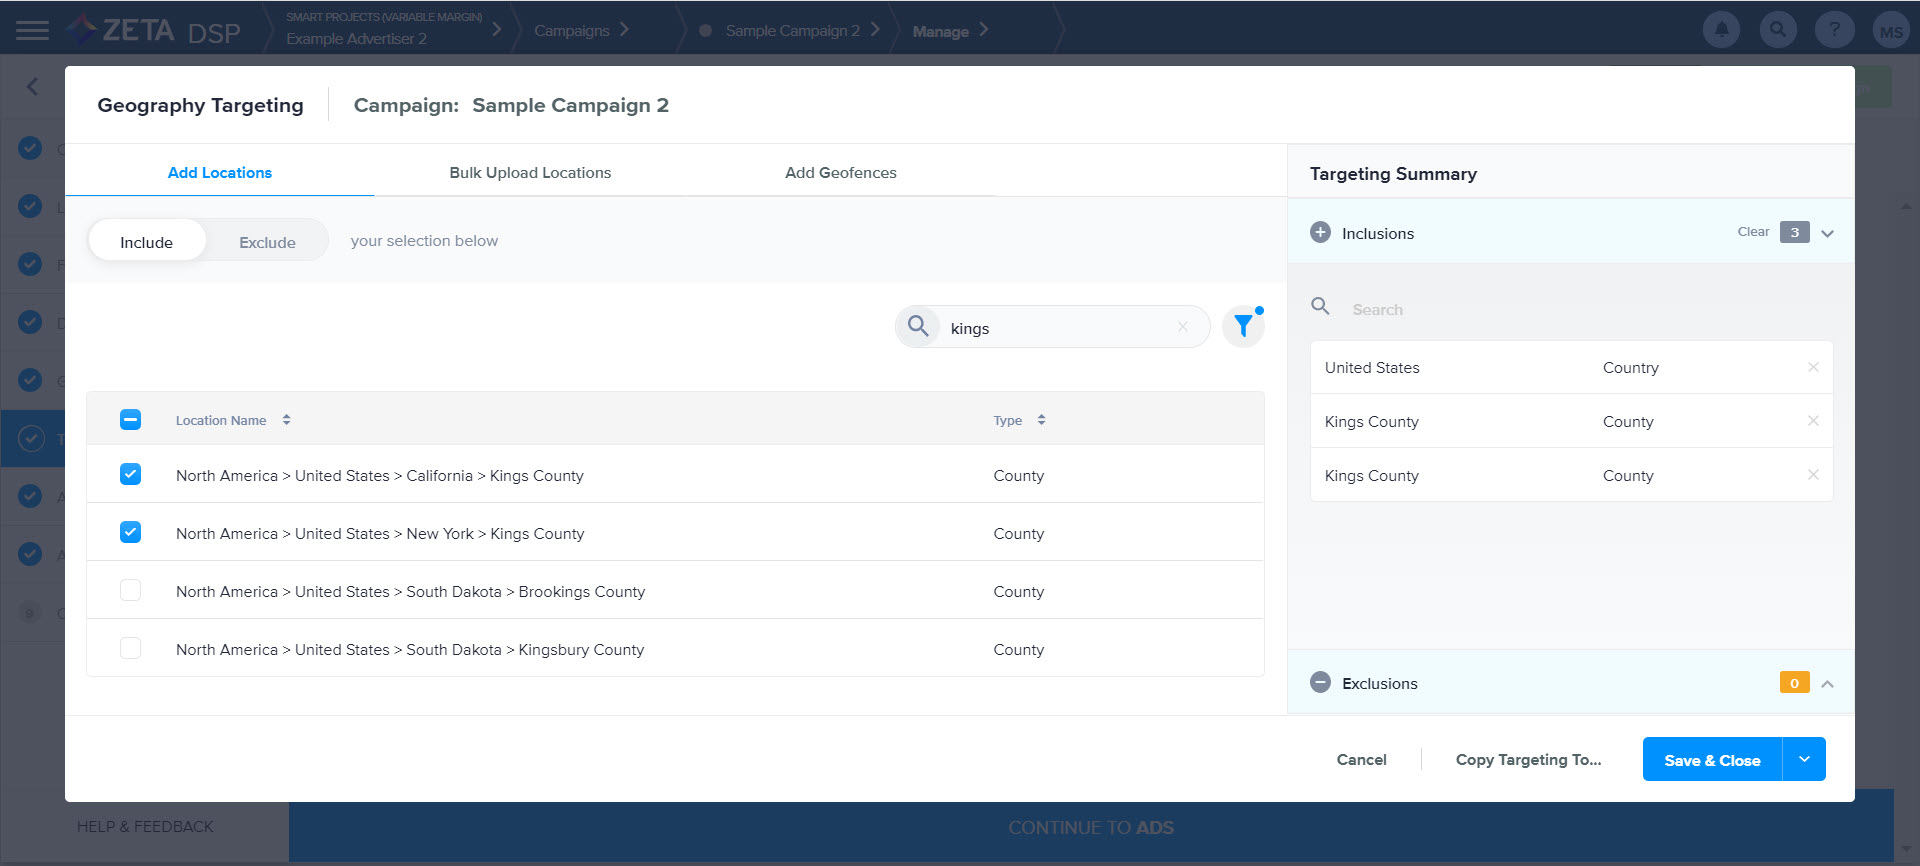
The Targeting Summary on the right side of the screen will update as you make your selections.
-
Within the Targeting Summary, you can also search, remove individual locations, or clear all Inclusions or Exclusions.
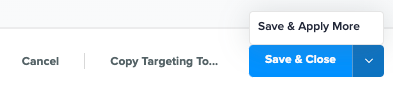
6. Click on Save & Close to save your changes and exit the screen, or use the split button and select Save & Apply More to save and stay on the screen.
-
Click on Copy Targeting To... if you'd like to apply the restriction to other objects within the campaign, or click on Cancel to exit without saving changes.
-
The DSP bases Congressional targeting on postal codes. We do not recommend Congressional targeting for mobile device campaigns. Create and target Geofences instead.
-
DMA targeting is consolidated to one line entry rather than listing out each matched entry. e.g. New York (Connecticut, New Jersey, Pennsylvania) will now be displayed as North America > United States > New York (NY)
-
The two letter state abbreviation in parentheses will be the state that contains the majority of a given DMA.
-
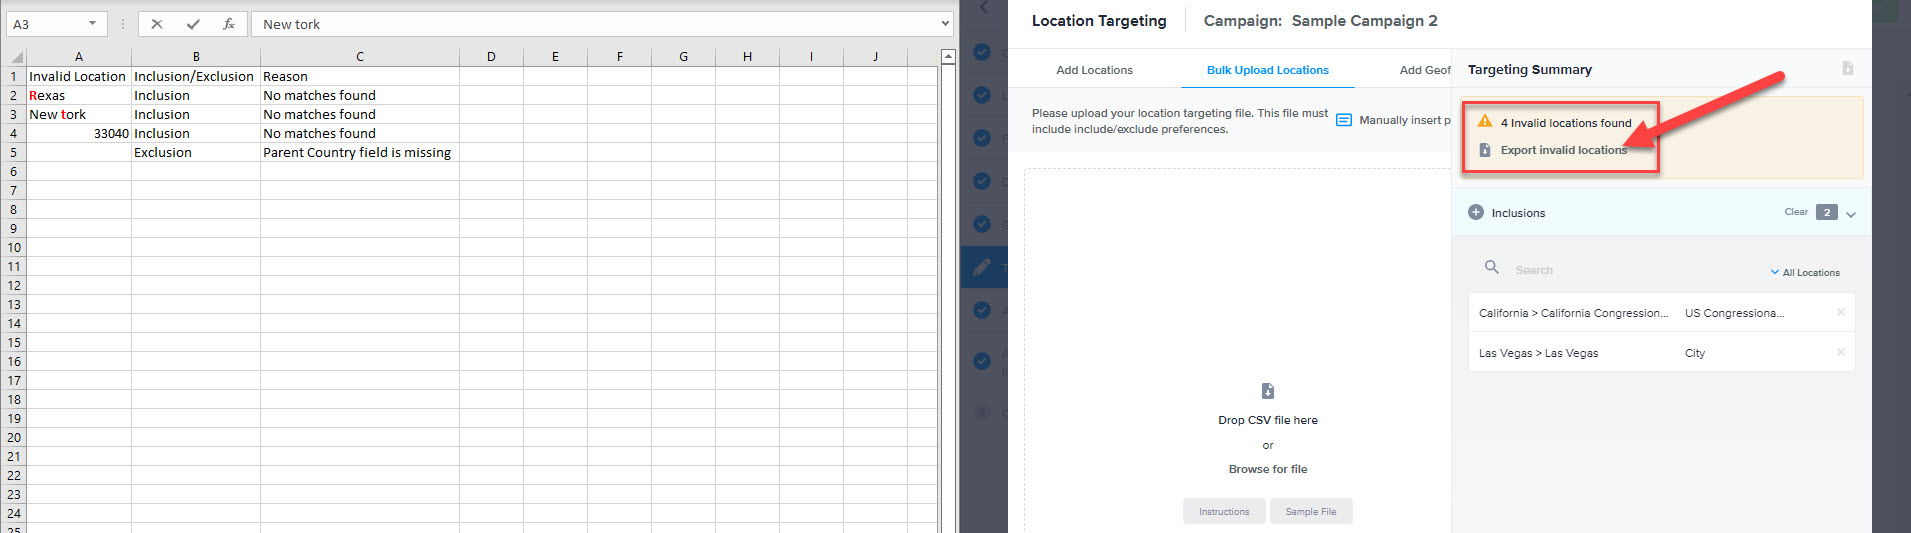
Bulk Upload Locations
Location types supported are State, DMA, US Congressional District, City, Postal Code.
-
The default would be to drag and drop or browse for a .csv file.
-
When using the default upload with a .csv file containing a list of location types: The file must include/exclude preferences
-
-
In the campaign Targeting > click on the
> select Geography > choose the Bulk Upload Locations option > Download the Sample file fill-in fields and upload.
Required Fields in upload file: Include/Exclude, Location Type, Location Name/Postal Code, Parent Country
Manually Insert Postal Codes
-
If using the Manually insert postal codes option, you will need to select Include/Exclude
-
When using the Manually insert postal codes option, you are able to copy and paste a list of Postal Codes into the text box on the page.
-
-
Once complete, click on the Add Postal Codes button below the box to add the Postal Codes to the restriction.
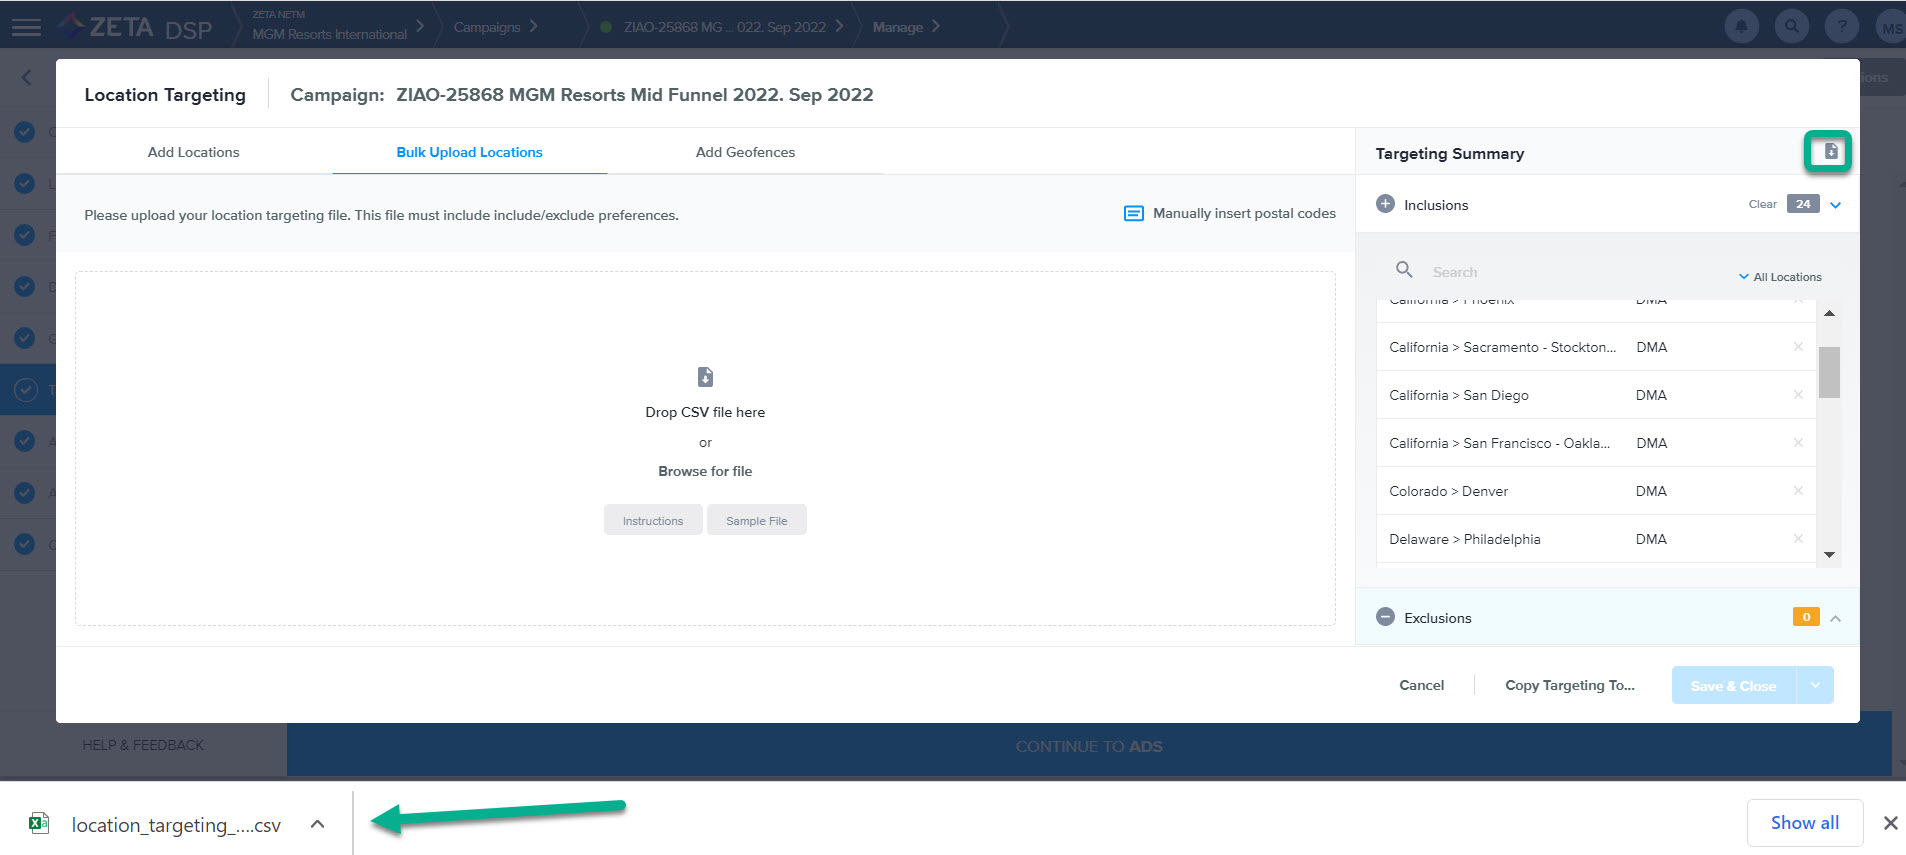
Targeting Summary
The Targeting Summary on the right side of the screen will update as you add in your Location Types and indicate the number that could not be found or incorrect if any.
-
Entries are validated during the upload from the excel template.
-
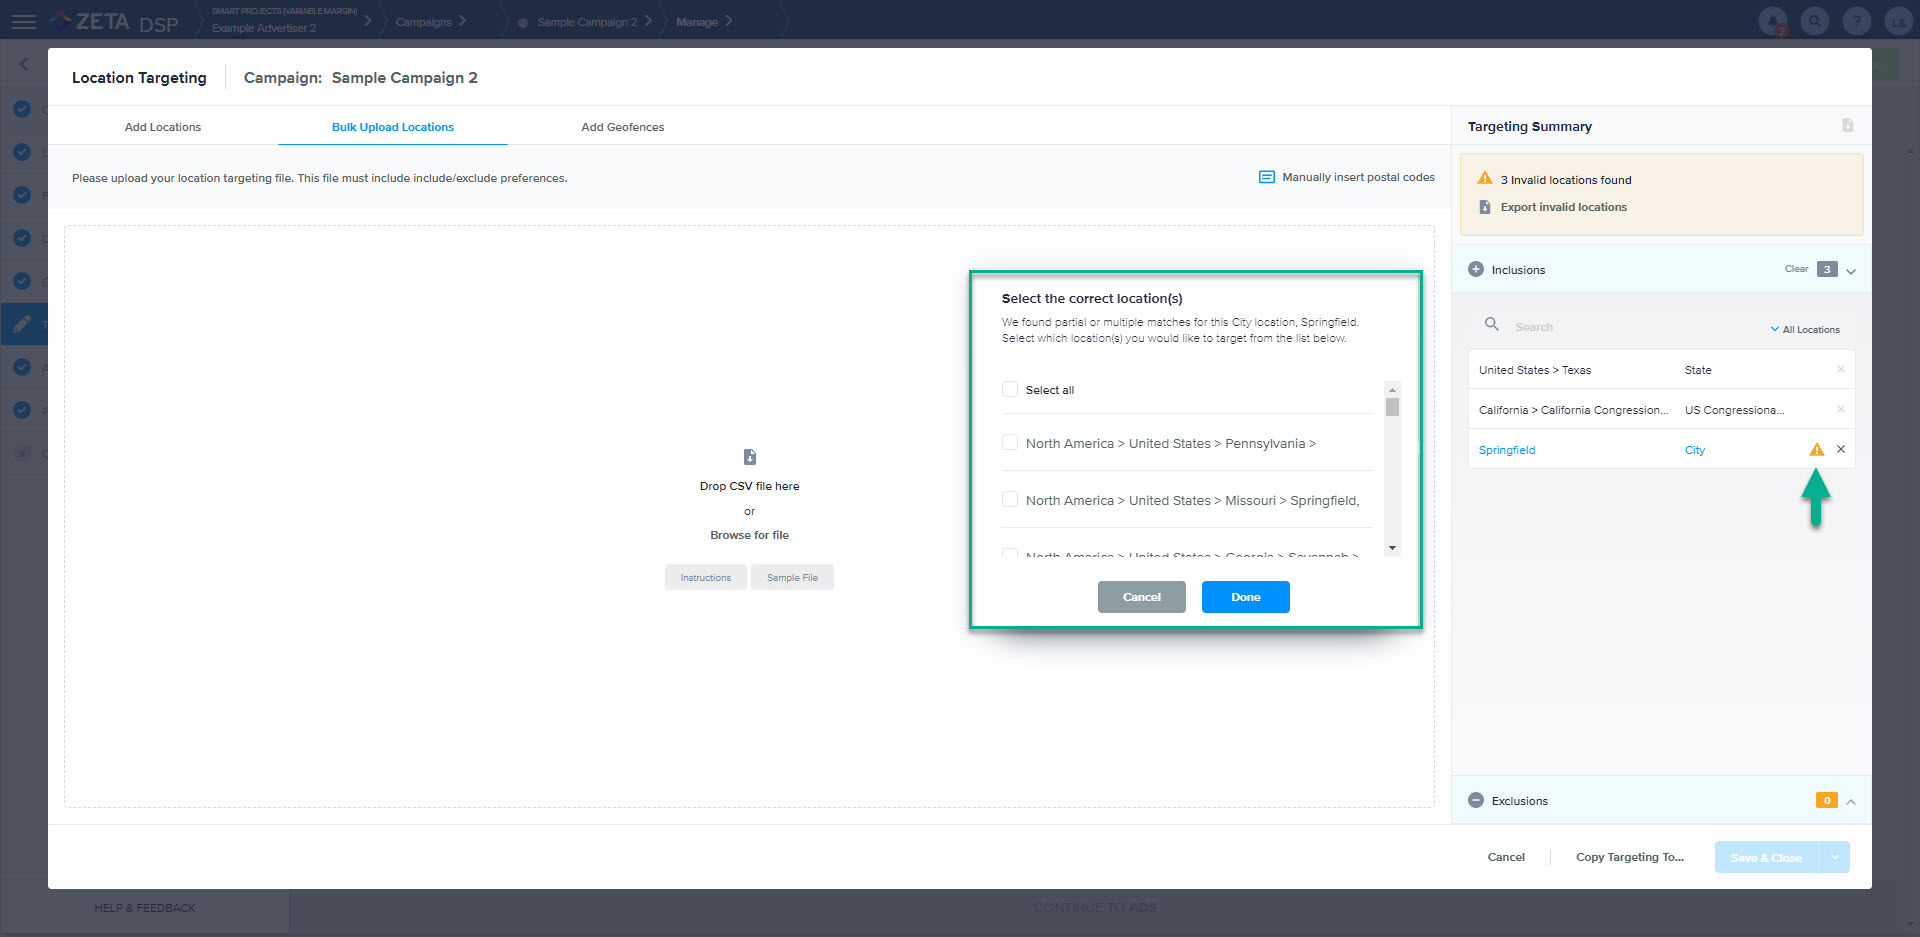
The UI will flag a ⚠️ sign and the total number of Invalid locations found (if any).
-
You can export invalid locations to correct the errors.
1. Click on the Export Invalid locations button to download a file containing the full list of locations that could not be found.
-
Within the Targeting Summary, you can search, remove individual locations, or clear all Inclusions or Exclusions.
2. Click on Save & Close to save your changes and exit the screen, or use the split button and select Save & Apply More to save and stay on the screen.

-
Click on Copy Targeting To... if you'd like to apply the restriction to other objects within the campaign, or click on Cancel to exit without saving changes.
Within the Targeting Summary under Inclusions/Exclusions that were accepted but may still need manual intervention, the UI will display a ⚠️ sign when more than one option is found for a targeted location that wasn’t explicitly defined on the upload template. These alerts allow for in-line edits in the UI to select the specific available options, in order to complete the upload.
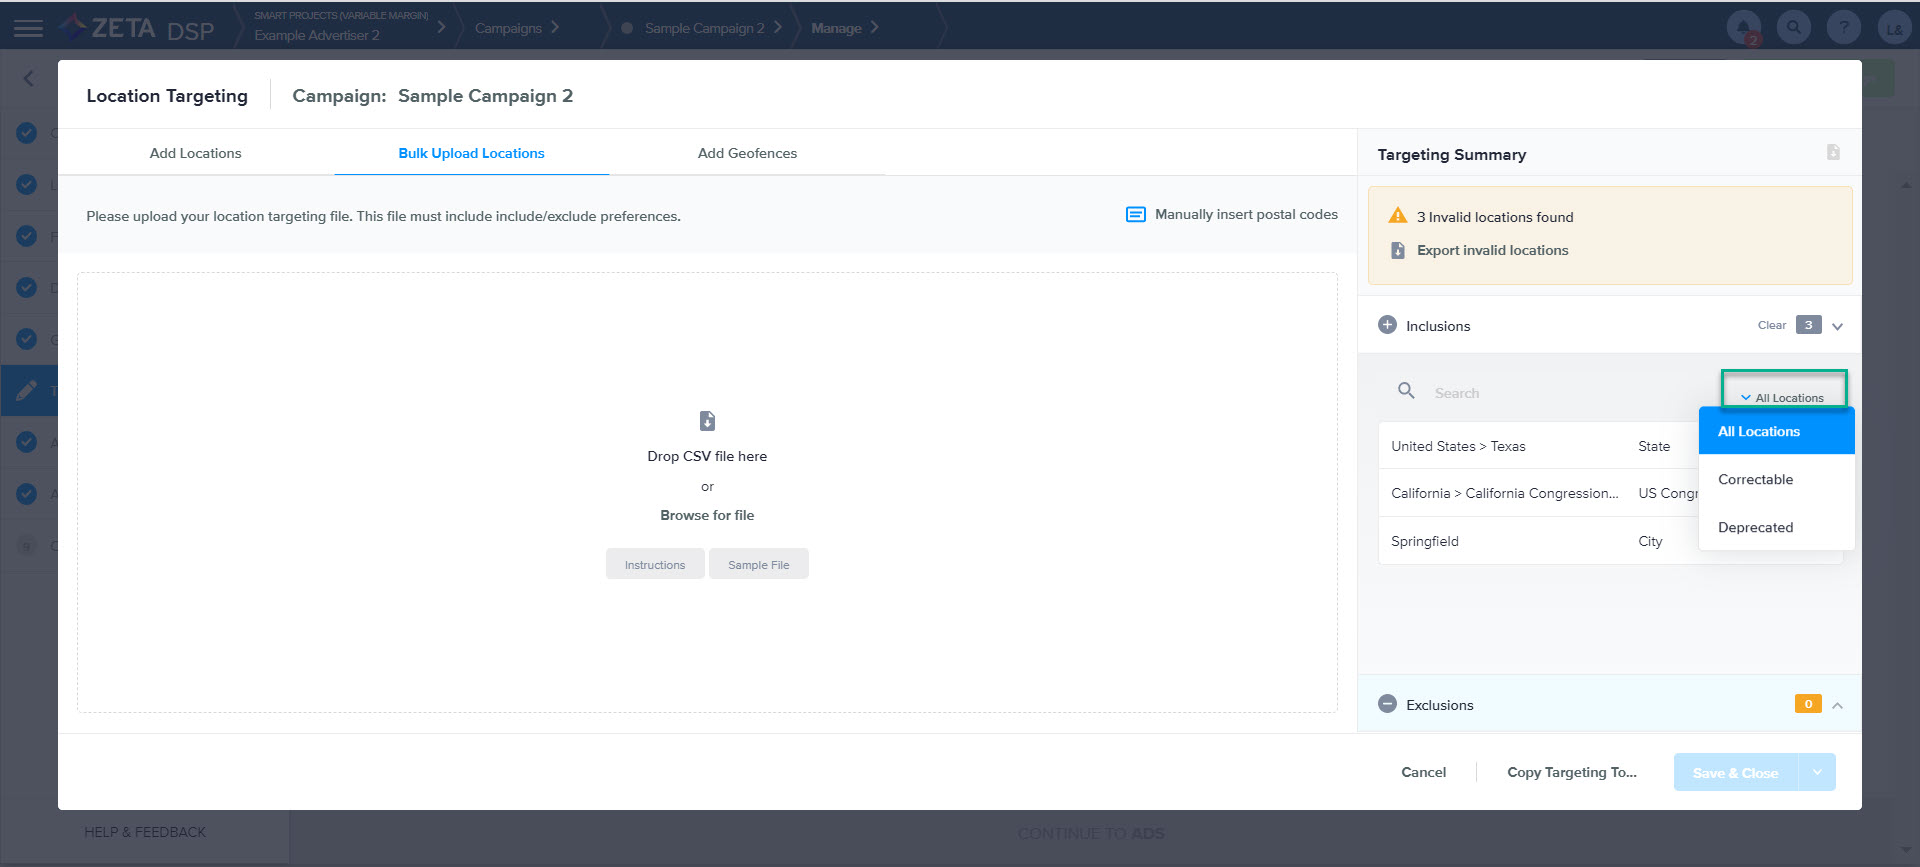
3. Additionally, you can filter through targeted after upload with the following options:
-
All Locations: All targeted Location types that have been applied to the targeting
-
Correctable: All targeted Location types with partial or multiple matches that require the user to correct in order to resolve and save
-
Deprecated: All Location types which are no longer supported by the platform
4. Lastly, within the Targeting Summary, you can export a summary of your targeted Inclusion/Exclusion.
Learn more about targeting Geofences.