

Non-guaranteed Direct-Sold campaigns compete against the LiveIntent exchange for impressions. They represent one of two main types of Direct-Sold campaigns you can run (the other is a Guaranteed Direct-Sold/House campaign). For Non-Guaranteed Direct-Sold/House campaigns, you can choose between two types of goals – branding or performance. Branding campaigns will bid on a flat CPM, while CPMs for performance campaigns will fluctuate.
In this article, we will walk you through how to set up performance and branding Direct-Sold/House campaigns.
-
Click the ‘Create Campaign’ Button from the desired Advertiser page
If you have yet to create an advertiser, check out our article on Creating a Direct-Sold or House Advertiser.
-
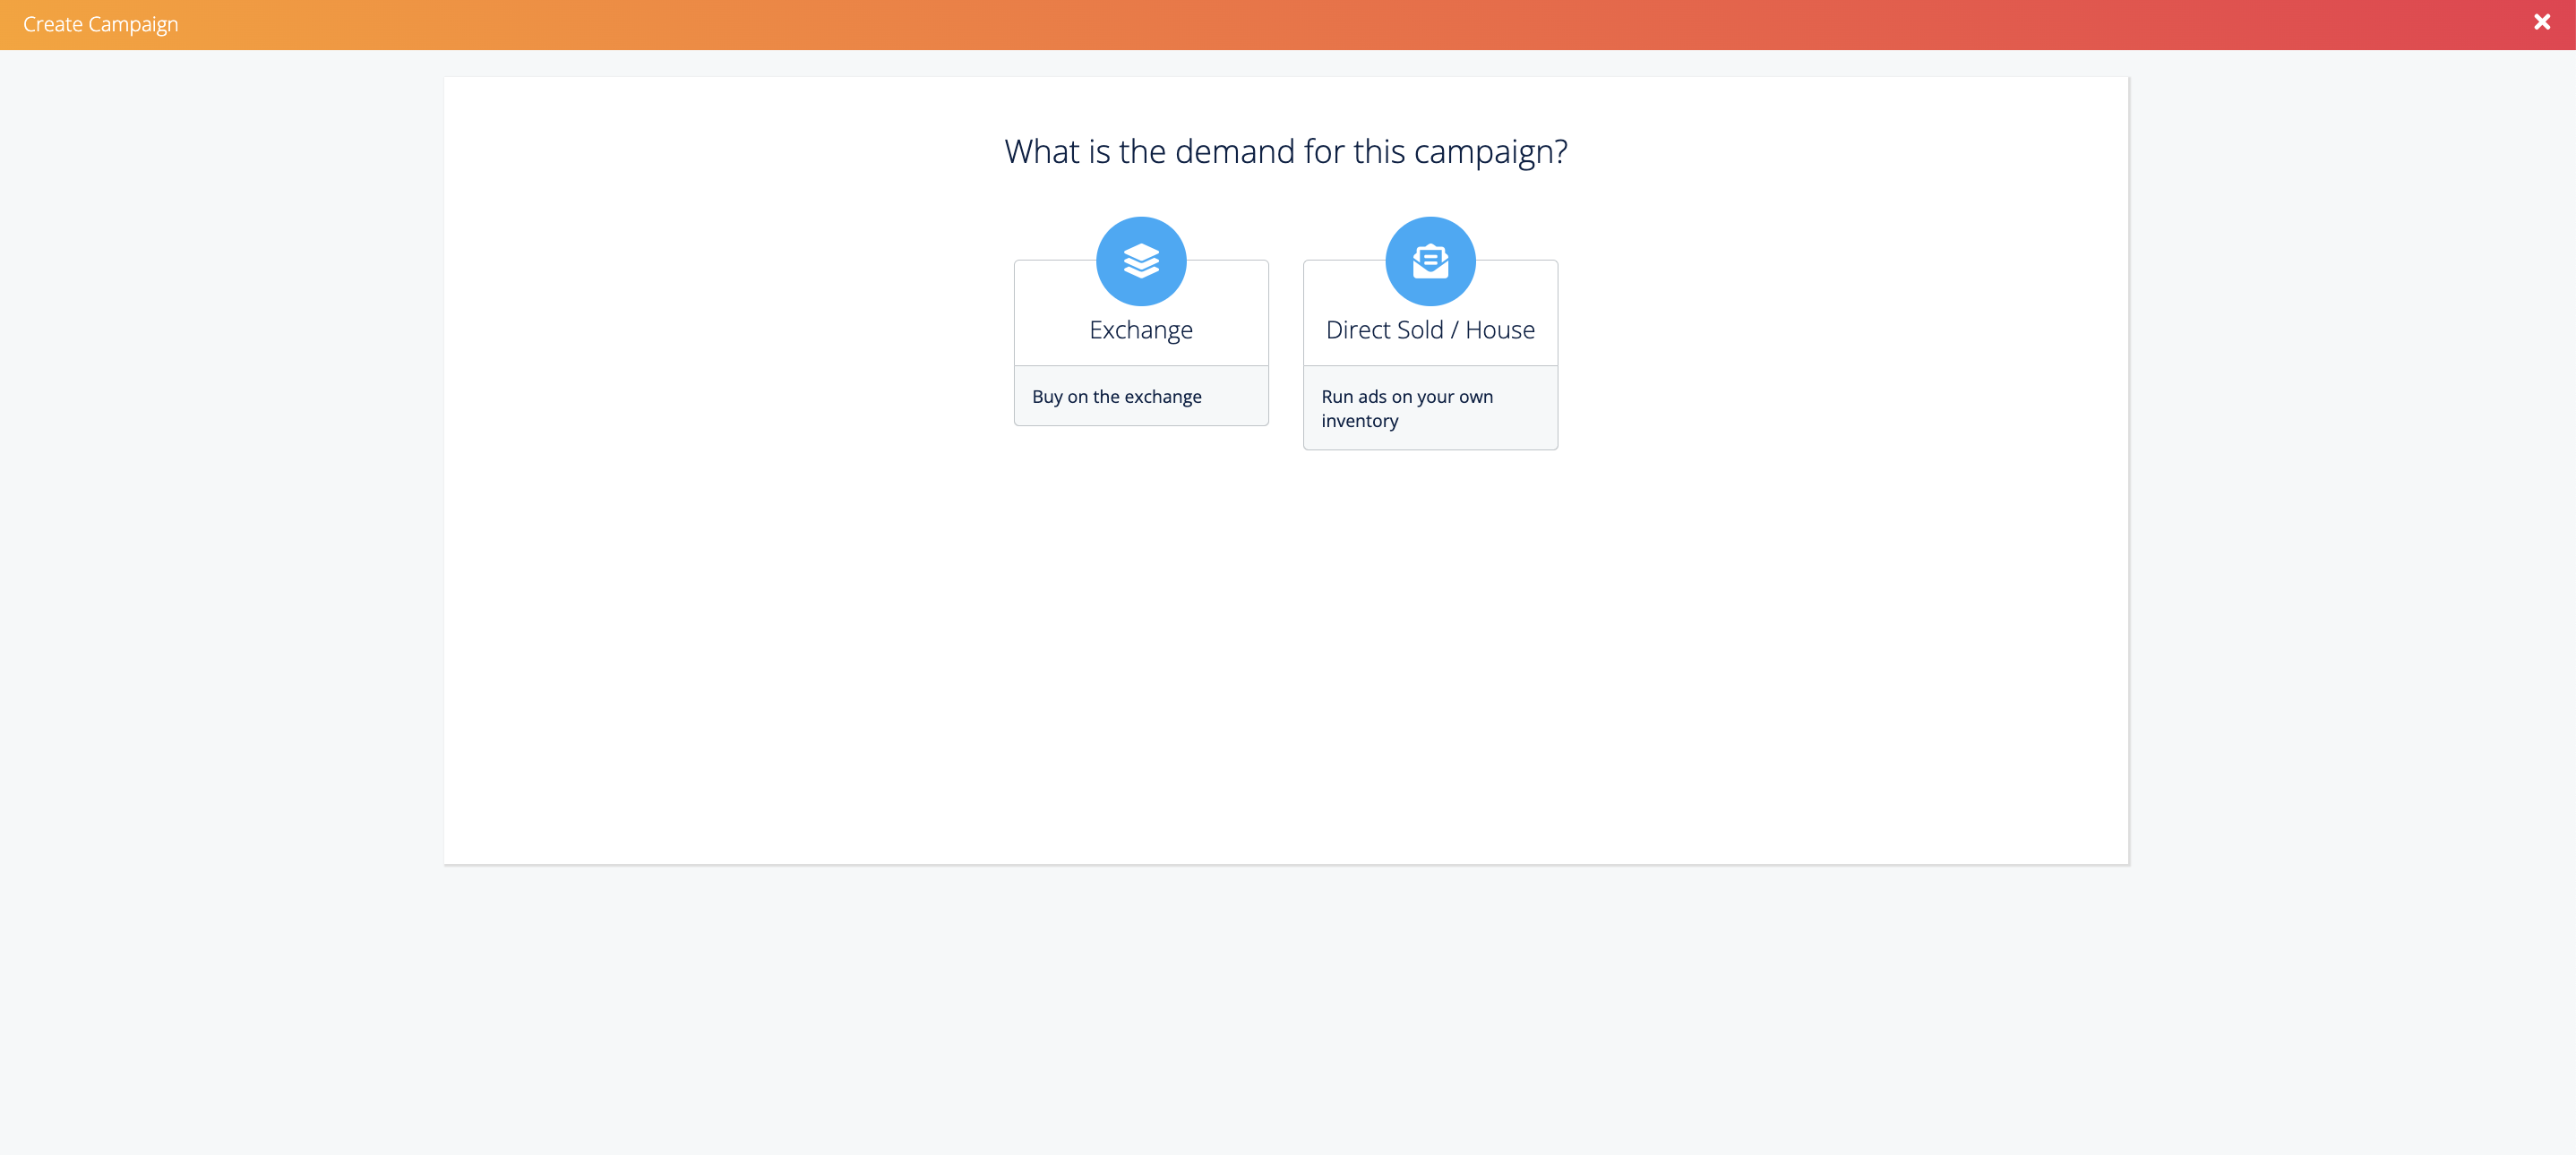
Select the ‘Direct-Sold/House’ Option
-
Select the goal of your campaign: Branding or Performance
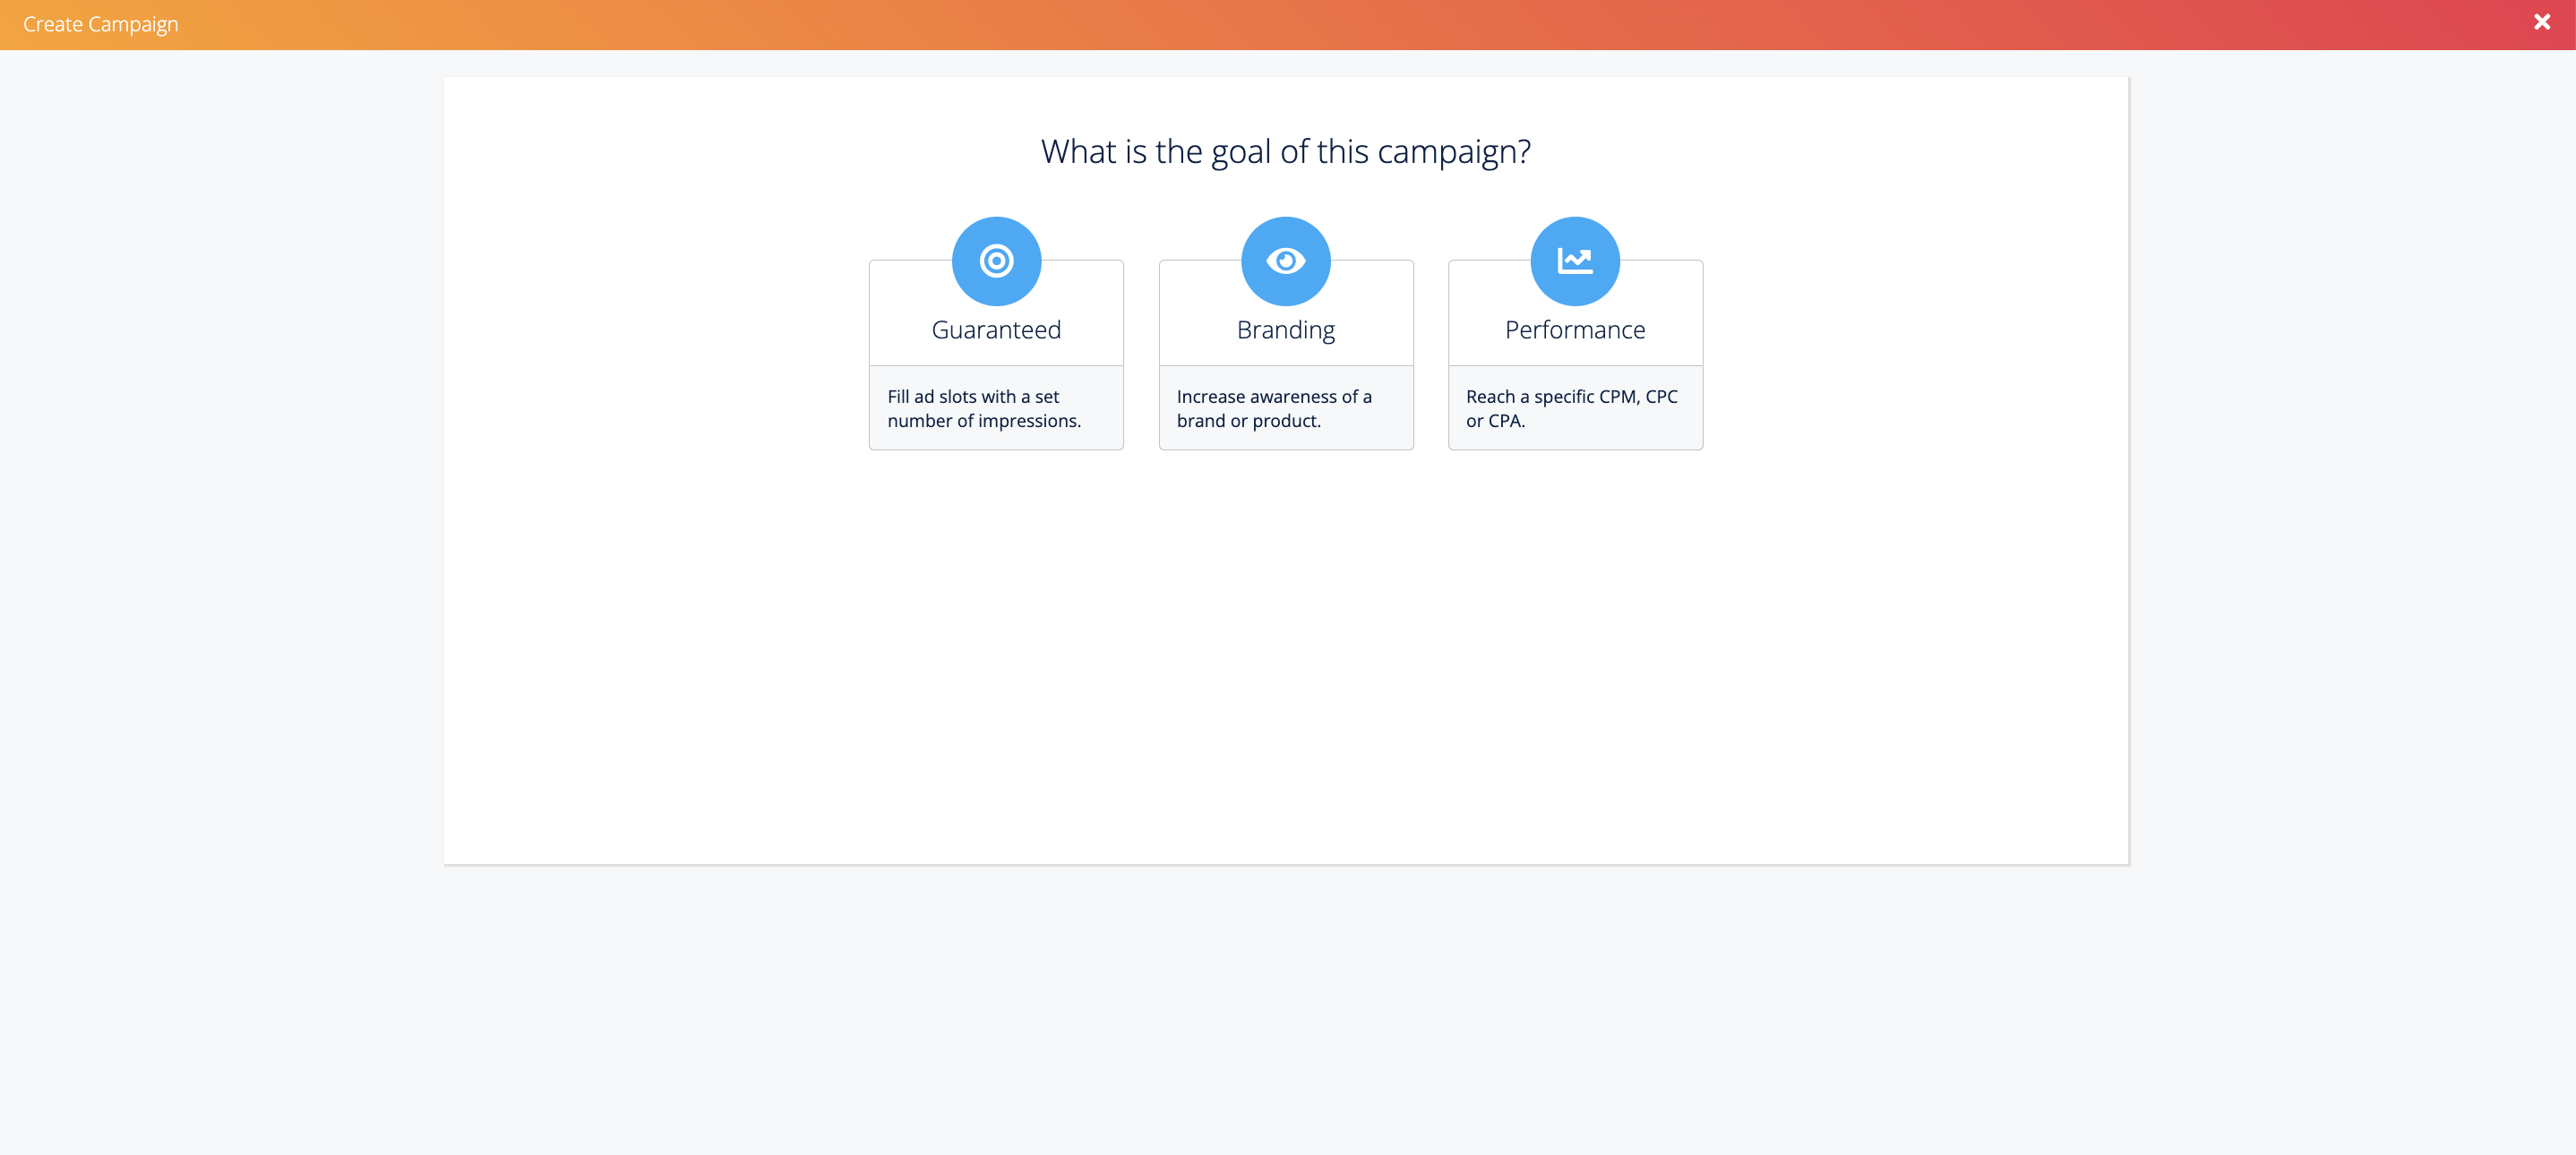
Select Branding if:
-
You would like to increase awareness of a brand or product
-
Branding campaigns are helpful to hit a predetermined impression goal based on your optimization.
Select Performance if:
-
You want to reach a specific CPM, CPC, or CPA goal.
-
Performance campaigns are helpful if you would like to optimize your bids based on the predicted value of an impression.
-
Performance campaigns do not have a predictable impression goal.
-
NOTE: You can ignore “Guaranteed” unless you want to set up a Guaranteed Direct-Sold Campaign
Performance campaigns can only be set up by LiveIntent. If you would like to run a performance campaign, please reach out to your account owner.
-
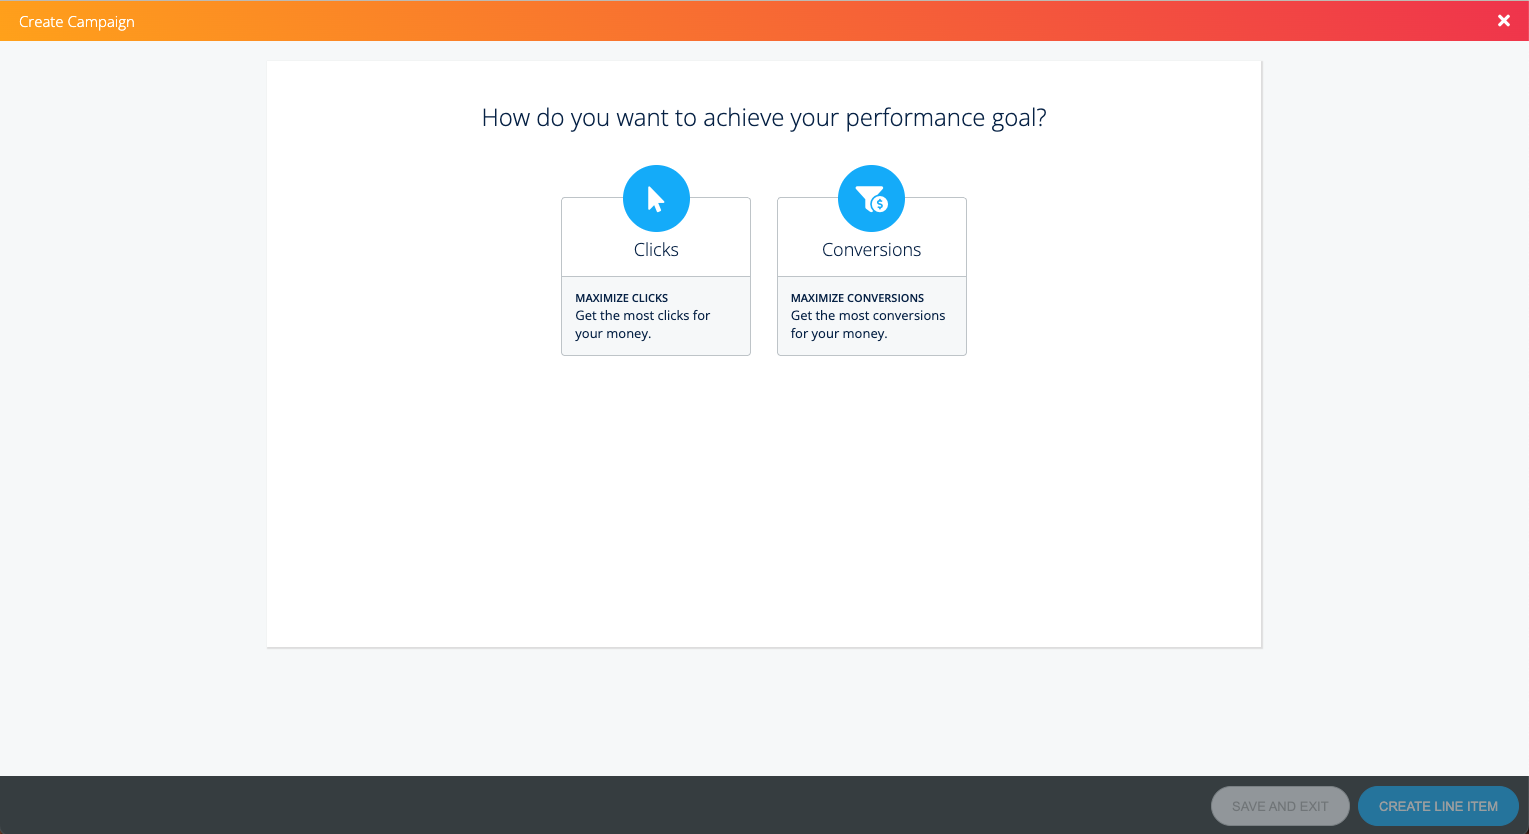
Select your optimization goal: Impressions, Clicks, or Conversions
If you are running a branding campaign, you can set a goal to optimize outcomes:

-
Impressions: Put your message in front of the right people.
-
Clicks: Increase site traffic by driving clicks.
-
Conversions: Drive users to take actions and convert.
If you are running a performance campaign, you can set a goal to optimize your bids against:
-
Clicks: Maximize clicks to get the most for your money.
-
Conversions: Maximize conversions to get the most conversions for your money.
You’ll notice that the goal descriptions in the images above vary slightly depending on the type of campaign selected. That is because performance campaigns bid on a second-price strategy, which allows them to maximize reach, clicks, or conversions. Branding campaigns, on the other hand, bid on a flat CPM (hence the reason you can hit a predictable impression goal for branding campaigns).
-
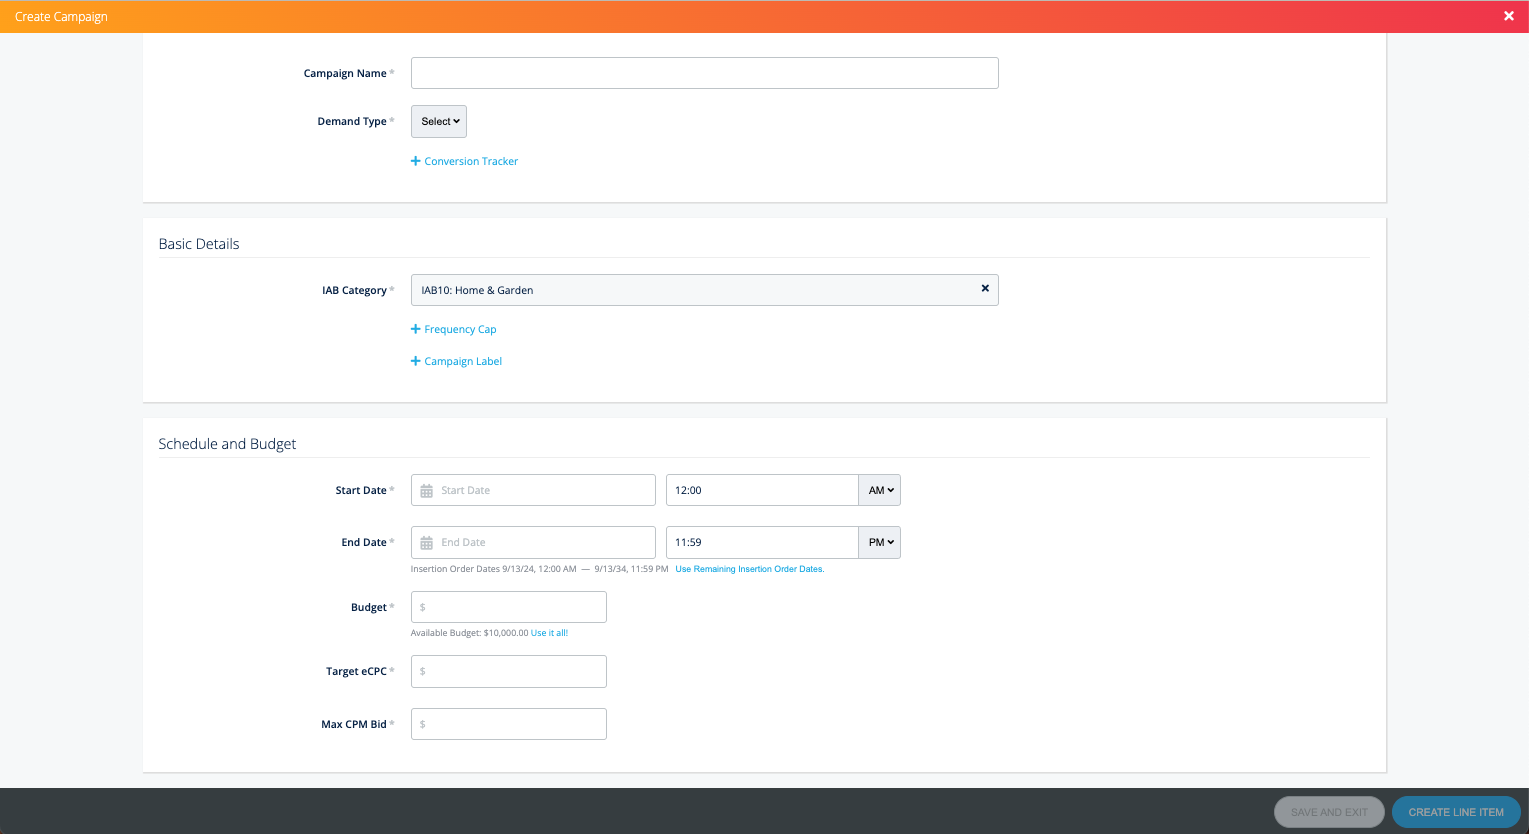
Fill out the required campaign fields.
-
Campaign Name: Enter the name of your campaign.
-
Demand Type: Choose either Direct Sold or House.
-
Conversion Tracker: Add any conversion trackers you’ve generated if you would like to track conversions.
-
Primary IAB Category: Choose the primary IAB category that best describes your company.
-
Frequency Cap: Determines the number of times an ad will be shown to a given person during an hour, day, week, or month. Frequency caps generally do not apply to House Campaigns, given that ads serve as a “fallback” when there is no other demand available.
-
Campaign Label: This is a non-searchable field that you can use to label details about your campaign.
-
Start Date: Set the start date of your campaign. Any strategies under your campaign will have to start on or after this date.
-
End Date: Set the end date of your campaign. Any strategies under your campaign will have to end on or before this date.
-
Budget: Select Impressions, Adjusted Impressions, or Currency (Ad Spend) and enter your desired value. Click here for more information on Adjusted Impressions and MPP.
-
Target CPM [Branding Campaigns only]: Enter a CPM goal. The CPM should reflect the value of the advertisement.
-
Target eCPC [Performance Campaigns only]: Enter an eCPC goal for the campaign.
-
Max CPM Bid [Performance Campaigns only]: Enter a CPM ceiling — your bid CPM will not exceed this amount.
Please note: If your CPM is below $0.03 for the campaign, the below message will appear:
The LiveIntent DSP has a global floor to prevent bidding on low-value ad requests, in particular from machine opens due to Apple MPP.
If you proceed with your current CPM, this campaign may spend more on these low-value ad requests.
If you prefer to compete directly with LiveIntent’s DSP, we recommend raising the CPM to $0.03 or higher.
If the targeted inventory isn’t open to LiveIntent’s DSP, disregard this message.
You can choose to edit the CPM for the campaign or create the line item.
-
Click Create Line Item (or ‘Save and Exit’, if you don’t want to create a Line Item at this time) and fill out the required fields.
There are four sections: Basic Details, Schedule and Budget, Targeting, and Linked Creatives.
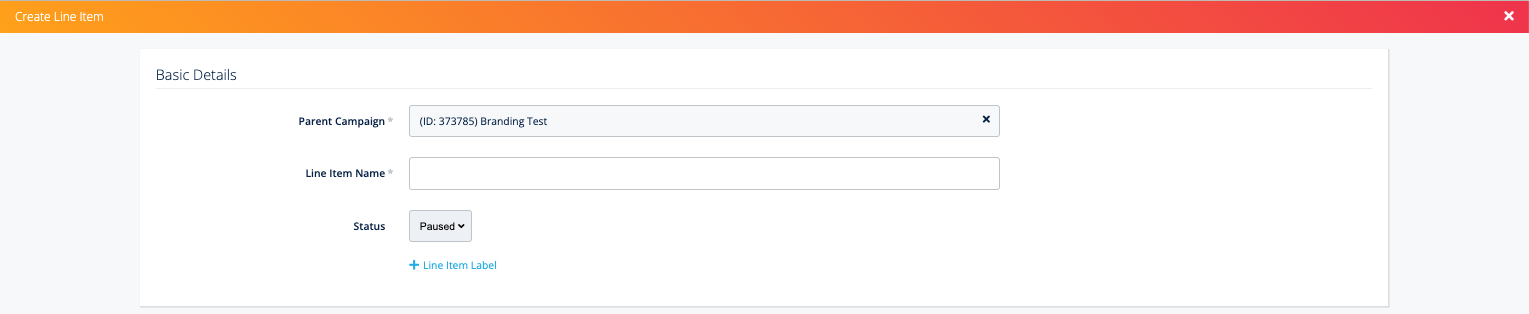
Basic Details
-
Parent Campaign: If you “create a line item” from the campaign setup page, this section will automatically populate with the campaign you just created.
-
Line Item Name: Choose a name for your line item
-
Status: Choose from three options: Active, Inactive, or Paused.
-
Active – This Line Item will run during the specified flight dates, and data will be available in the Reporting section of Campaign Manager.
-
Paused – This Line Item will no longer run during the specified flight dates. Reporting data will be pulled into the Reporting section.
-
Inactive – This Line Item will no longer run during the specified flight dates. Reporting data will not be pulled into the Reporting section.
-
Inactive vs Paused: The difference between the two is only relevant once a campaign has begun to serve. Once it has, setting your campaign to “inactive” will ensure that no residual impressions (impressions from users who open a newsletter from a forward) are served. These residual impressions can occur if your campaign is set to “paused.”
-
-
-
Line Item Label: This is a non-searchable field that you can use to label details about your line item.
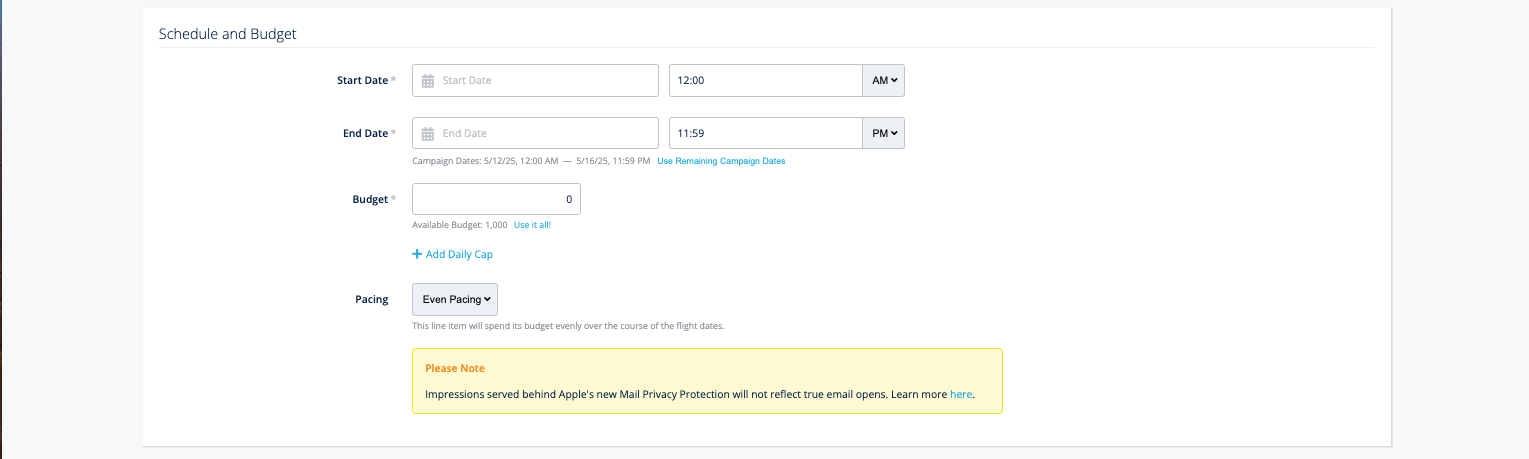
Schedule and Budget
-
Start Date: Choose the start date for your line item. The line item will start at 12 AM unless otherwise specified.
-
End Date: Choose the end date for your line item. The line item will end at 11:59 PM unless otherwise specified.
-
Budget: Enter your line item budget.
-
Daily Cap: Set a daily budget limit for your line item.
-
Pacing [Branding Campaigns only]: For branding campaigns, you have two pacing options — even or ASAP.
-
Even pacing will spend the budget evenly over the duration of a campaign, while ASAP pacing will try to spend the budget as quickly as possible while trying to achieve your optimization goal.
-
Targeting

-
Custom Audience: Target or exclude your custom audience segments.
-
LiveRamp: Target or exclude your LiveRamp 1st-party segments.
-
Location: Select US-only or Global targeting.
-
You can select Targeting by country, metro, state or city OR by postal code (you cannot select by both). Then, search locations to target or exclude.
-
Note: The targeting option defaults to US-only. If you’d like to select Global targeting, you’ll need to move the radio button to the Global targeting option.
-
-
Age: Target or Exclude Age groups
-
Best Practice: If you wish to target a specific age, we’d suggest excluding all unwanted ages by utilizing the “Exclude” feature; this will allow for greater scale.
-
-
Gender: Target or Exclude by Gender
-
Best Practice: If you wish to target a specific gender, we’d suggest excluding all unwanted genders by utilizing the “Exclude” feature; this will allow for greater scale.
-
-
Device: Target or Exclude by Device
-
Advanced Targeting: You can target or exclude by the following:
-
Browser
-
Bundle
-
Category
-
Day & Time
-
Device Maker
-
ISP
-
OS
-
Placement ID
-
List ID
-
Key Value Pairs
-
Linked Creatives

You now have the option to add either creatives or ad slots to your Direct-Sold campaign. You must add both in order for the line item to run, but you have the flexibility to add whichever you prefer first.
Please note: The creative(s) must match one of the ad sizes supported by the ad slot in order for the line item to run.
-
To check which ad sizes the ad slot supports, refer to the “Linked Ad Slots” section on the line item page and look at the “Display Size” column.
Before you add any creatives to your campaign, you may want to check out our Ad Specs and Creative Requirements or learn how to create an ad in our platform. If your creative already exists in the platform, you will be able to link it to the strategy from the “Use Existing Ads” section of the Ad Builder.
-
Upload Images: You can upload any images and gifs from your computer as long as the file size is less than 250kb.
-
Add Third-Party Tags: Use creatives hosted by yourself or another service outside of LiveIntent. There are three required fields if you are to upload creatives using the “Add Third Party Tags” option: ad name, source URL, and click URL.
-
Use Existing Ads: Add a creative from your existing ad library in the platform.
-
Bulk Tag Uploader: You can download an Excel template (in the upper right corner when the “Bulk Tag Uploader” option is selected) and upload multiple third-party tags at once.
-
Click ‘Review’
Review your Campaign and Line Item setup. To confirm creation, click ‘Save’.