
This tool is currently in beta. If you are interested in being a beta partners, please reach out to your LiveIntent account manager.
Creative Hub is a self-service tool that gives advertisers the ability to manage their creatives for email campaigns. This interface provides direct control to upload, manage, and organize ad creatives, streamlining the process so campaigns go live faster.
This article will cover how to set up display and native creatives in Creative Hub.

Get Started
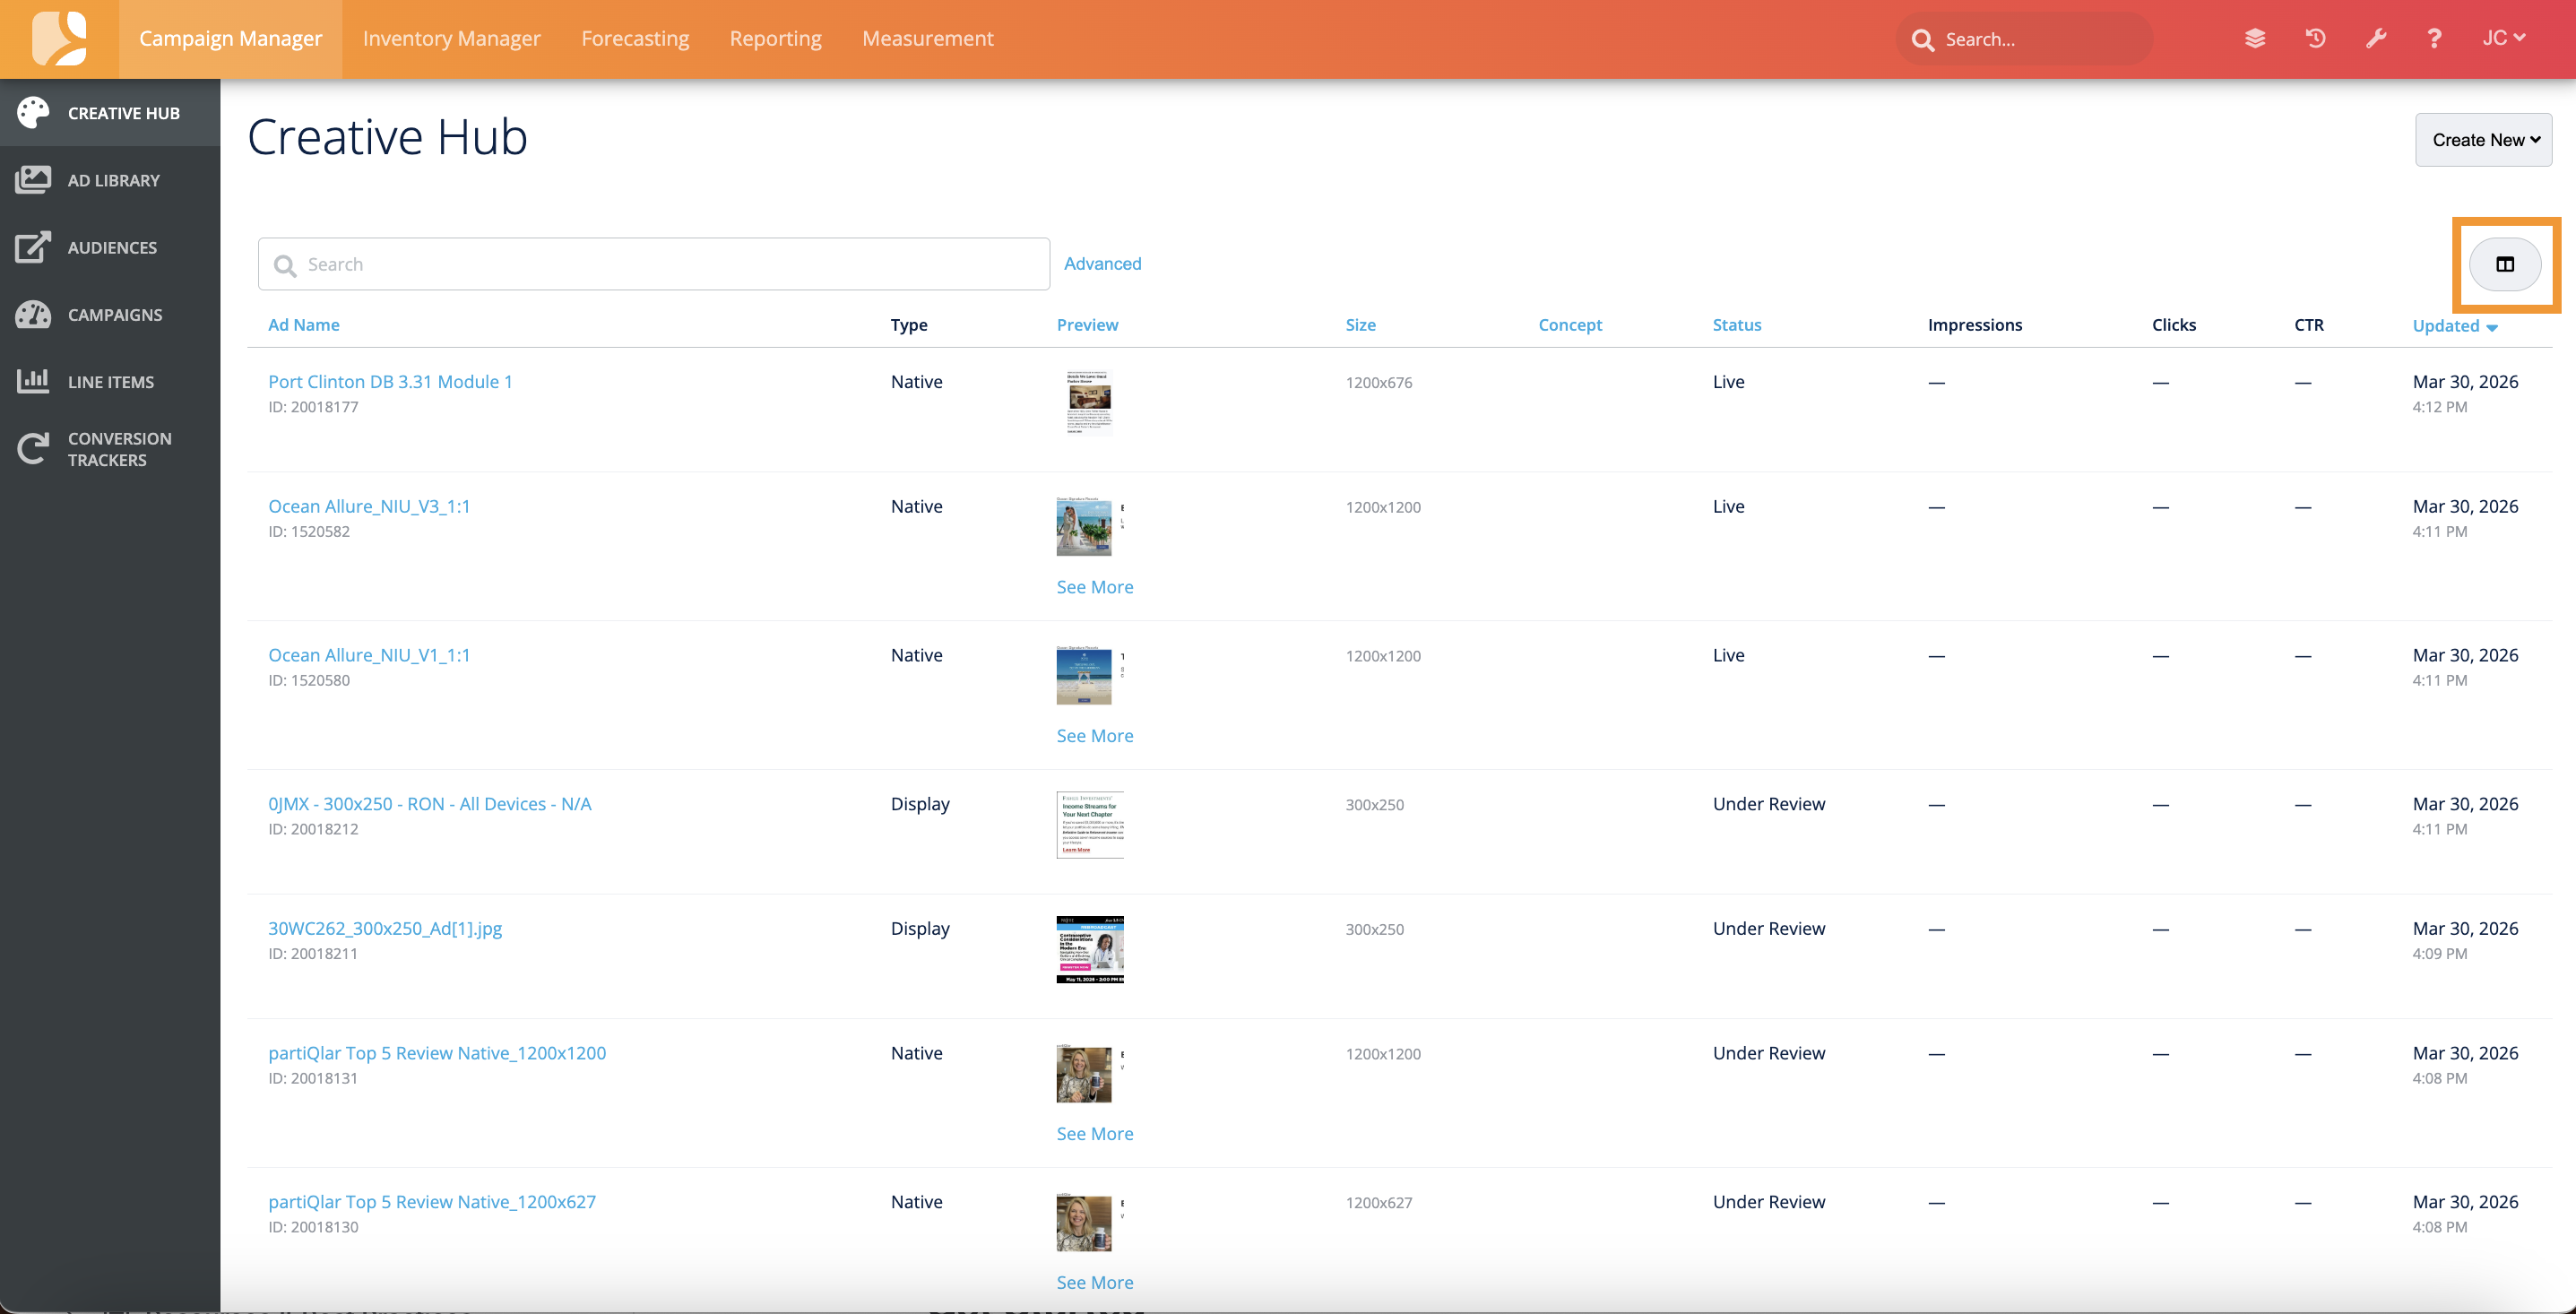
When you first log into the Creative Hub, you will see a table view of all your creatives and supporting information that includes -
-
Ad Name: The name given to your creative.
-
Type: Ads can either be Display or Native.
-
Preview: A thumbnail preview of the ad.
-
Size: Size of the creative.
-
Concept: An optional campaign type label that you can give your creative to group it under a particular messaging strategy, such as “Customer Acquisition,” or “Black Friday.”
-
This can be helpful for a quick glance at the campaign type the creative was used for, or if you are uploading multiple creatives that fall under the same strategy.
-
-
Status
-
Under Review: All creatives are automatically set to this status until the compliance team can review them.
-
Active: The compliance team has approved the creative and it is ready to be used in a campaign.
-
Live: The creative is part of a live campaign.
-
Once a campaign ends, the creative’s status automatically goes back to ‘Active.’
-
-
Rejected: The compliance team has rejected the creative and a new version should be uploaded.
-
-
Performance Metrics: Separate columns for Impressions, Clicks, and CTR for the last seven days (for Live creatives).
-
Updated: When the creative was last updated.
You can add or remove columns by clicking the column button on the upper right hand corner.
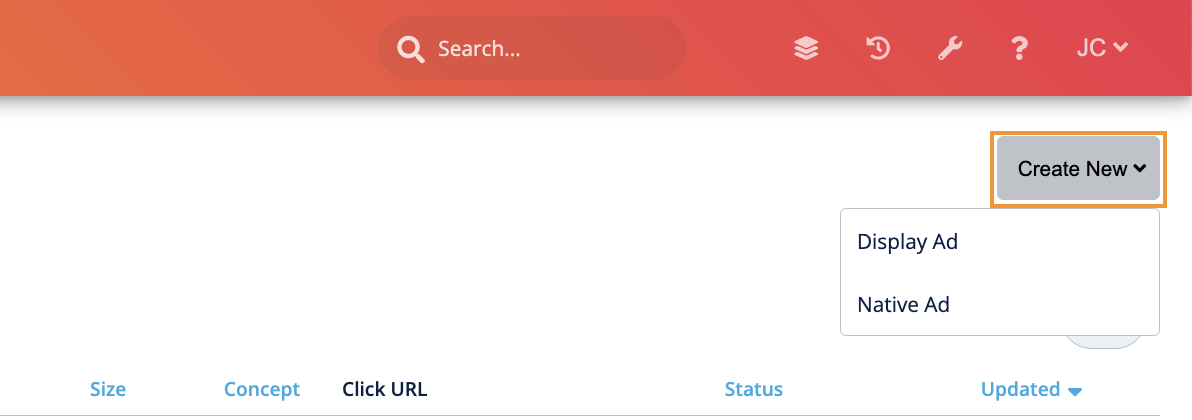
To create a new creative, click on “Create New” in the upper right-hand corner and select either “Display Ad” or “Native Ad.”
Create a Display Ad
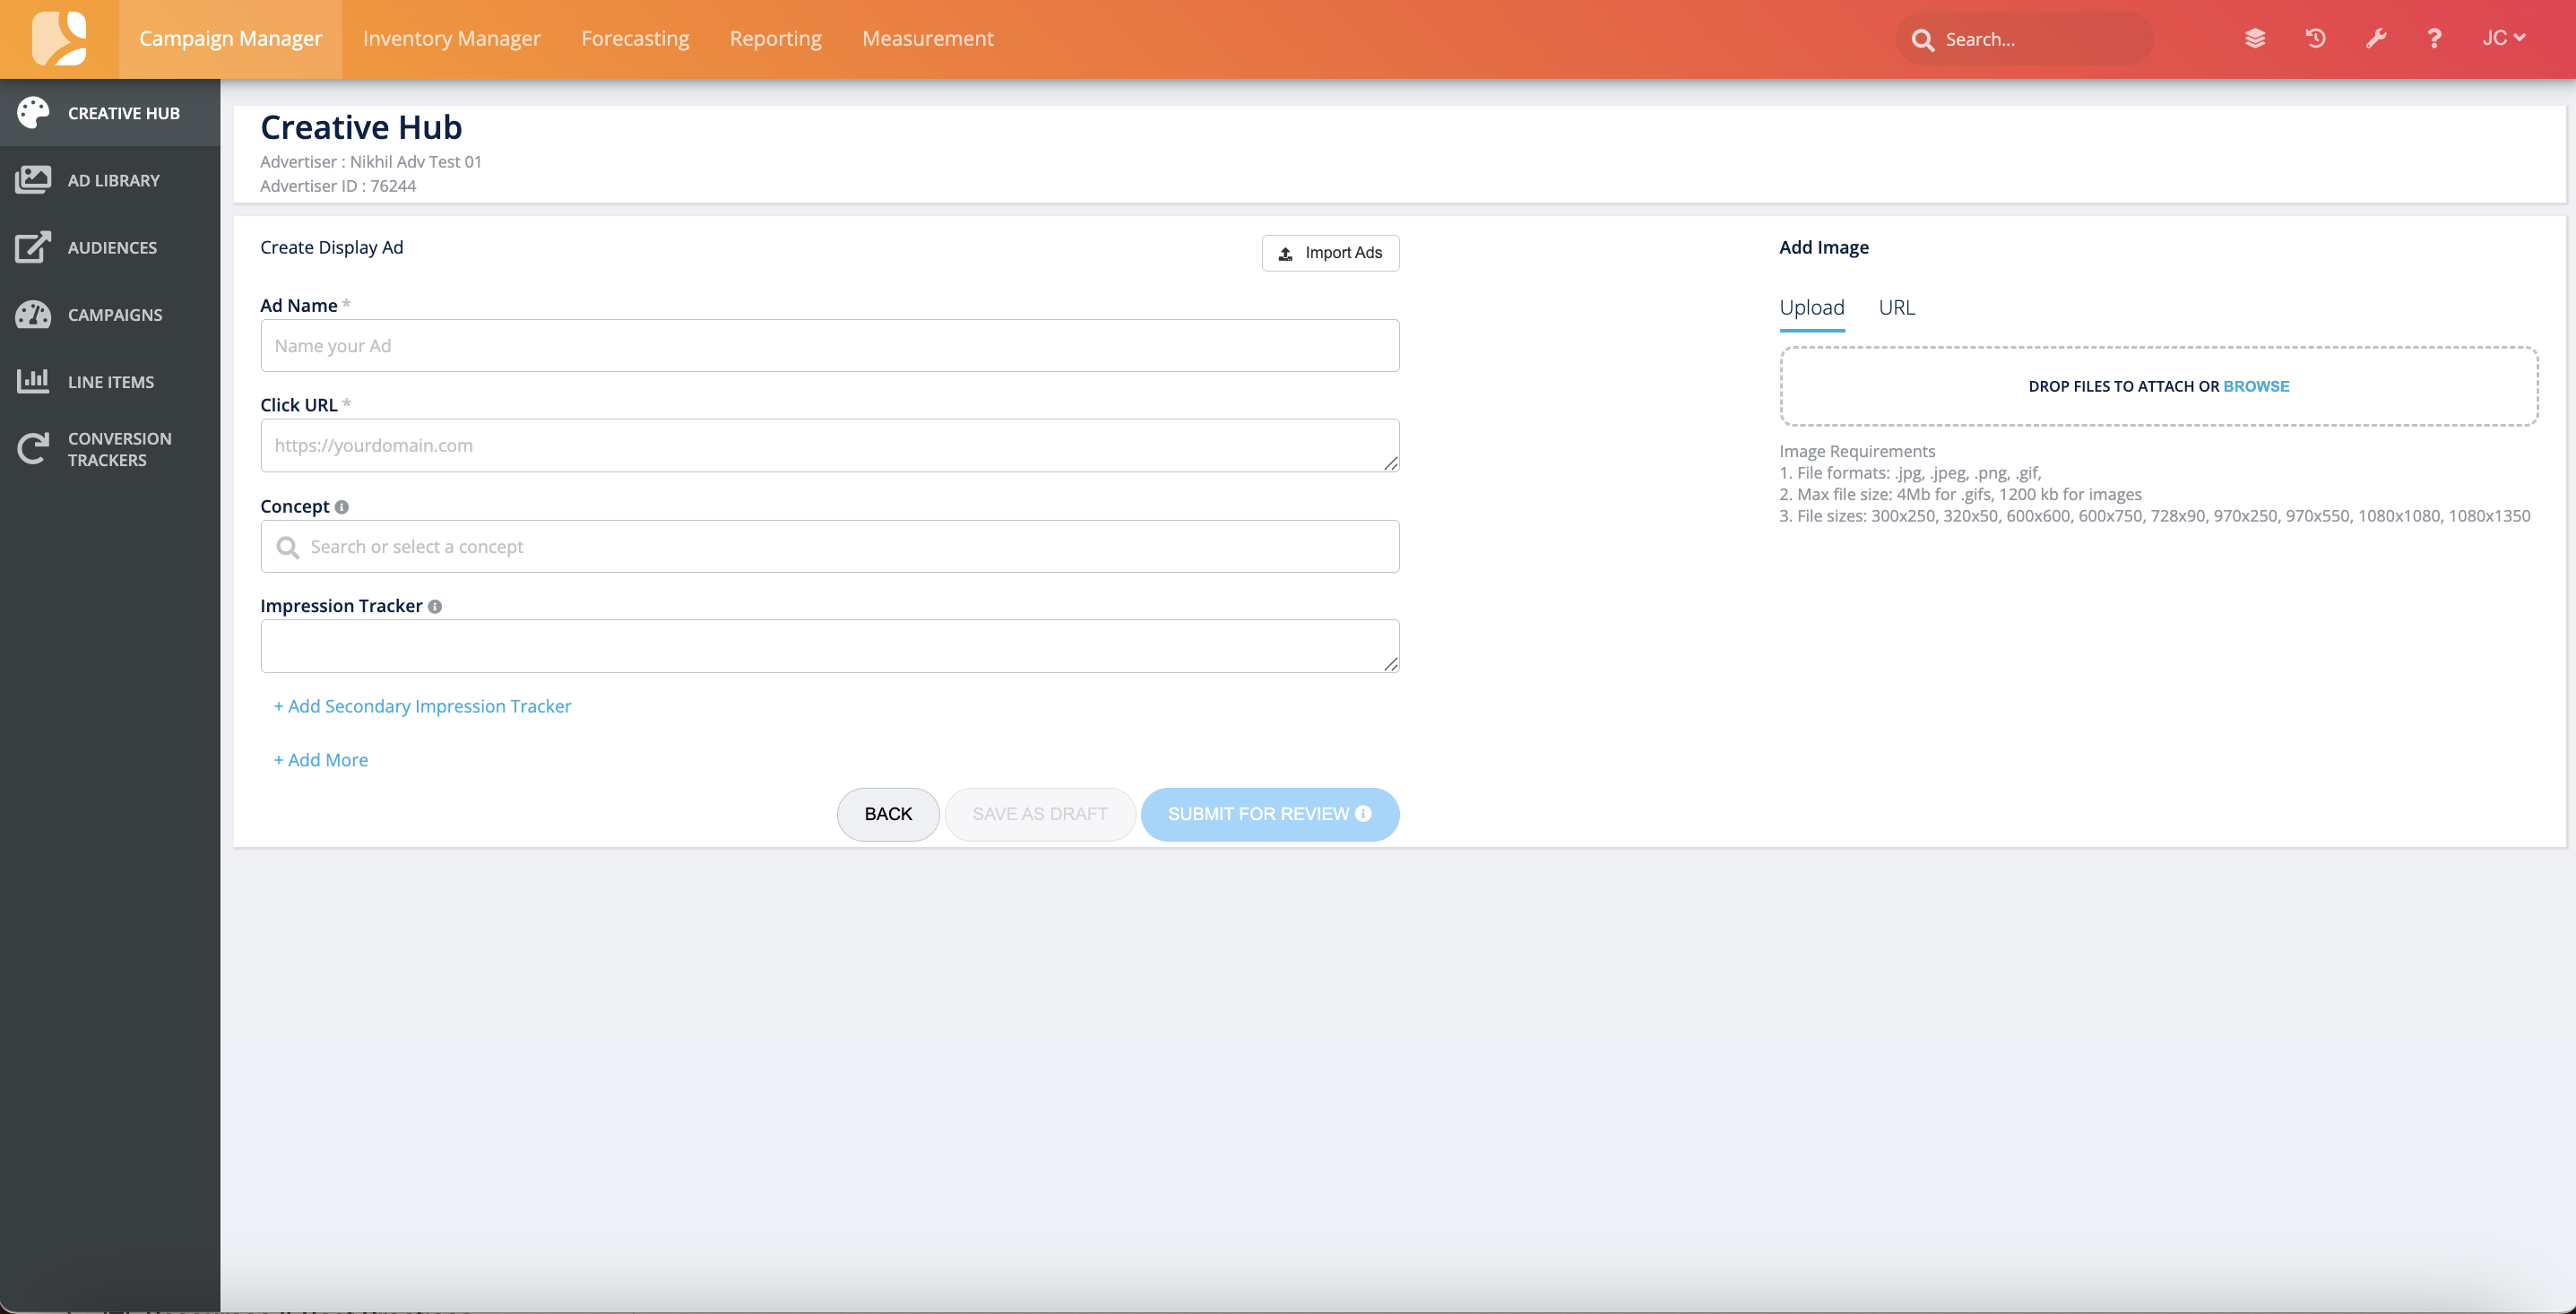
When you click ‘Display Ad,’ you will be brought to the “Create Display Ad” page. Here you will fill out the below fields or click “Import Ads” to download a template that you can fill in with your creatives' details to create ads in bulk. For more information on creating ads in bulk, go to the Create Display Ads in Bulk section.
-
Ad Name*
-
Click URL*
-
Concept: An optional campaign type label that you can give your creative to group it under a particular messaging strategy, such as “Customer Acquisition,” or “Black Friday.”
-
This can be helpful for a quick glance at the campaign type the creative was used for, or if you are uploading multiple creatives that fall under the same strategy.
-
-
Impression Tracker
-
Secondary Impression Tracker
-
Add Image*: Either drag and drop an image or upload from your computer.
-
Accepted file formats: .jpg, .jpeg, .png, .gif
-
Accepted file sizes: 300x250, 320x50, 600x600, 600x750, 728x90, 970x250, 970x550, 1080x1080, 1080x1350
-
Max file size: 1200kb for images, 4MB for .gifs
-
*required
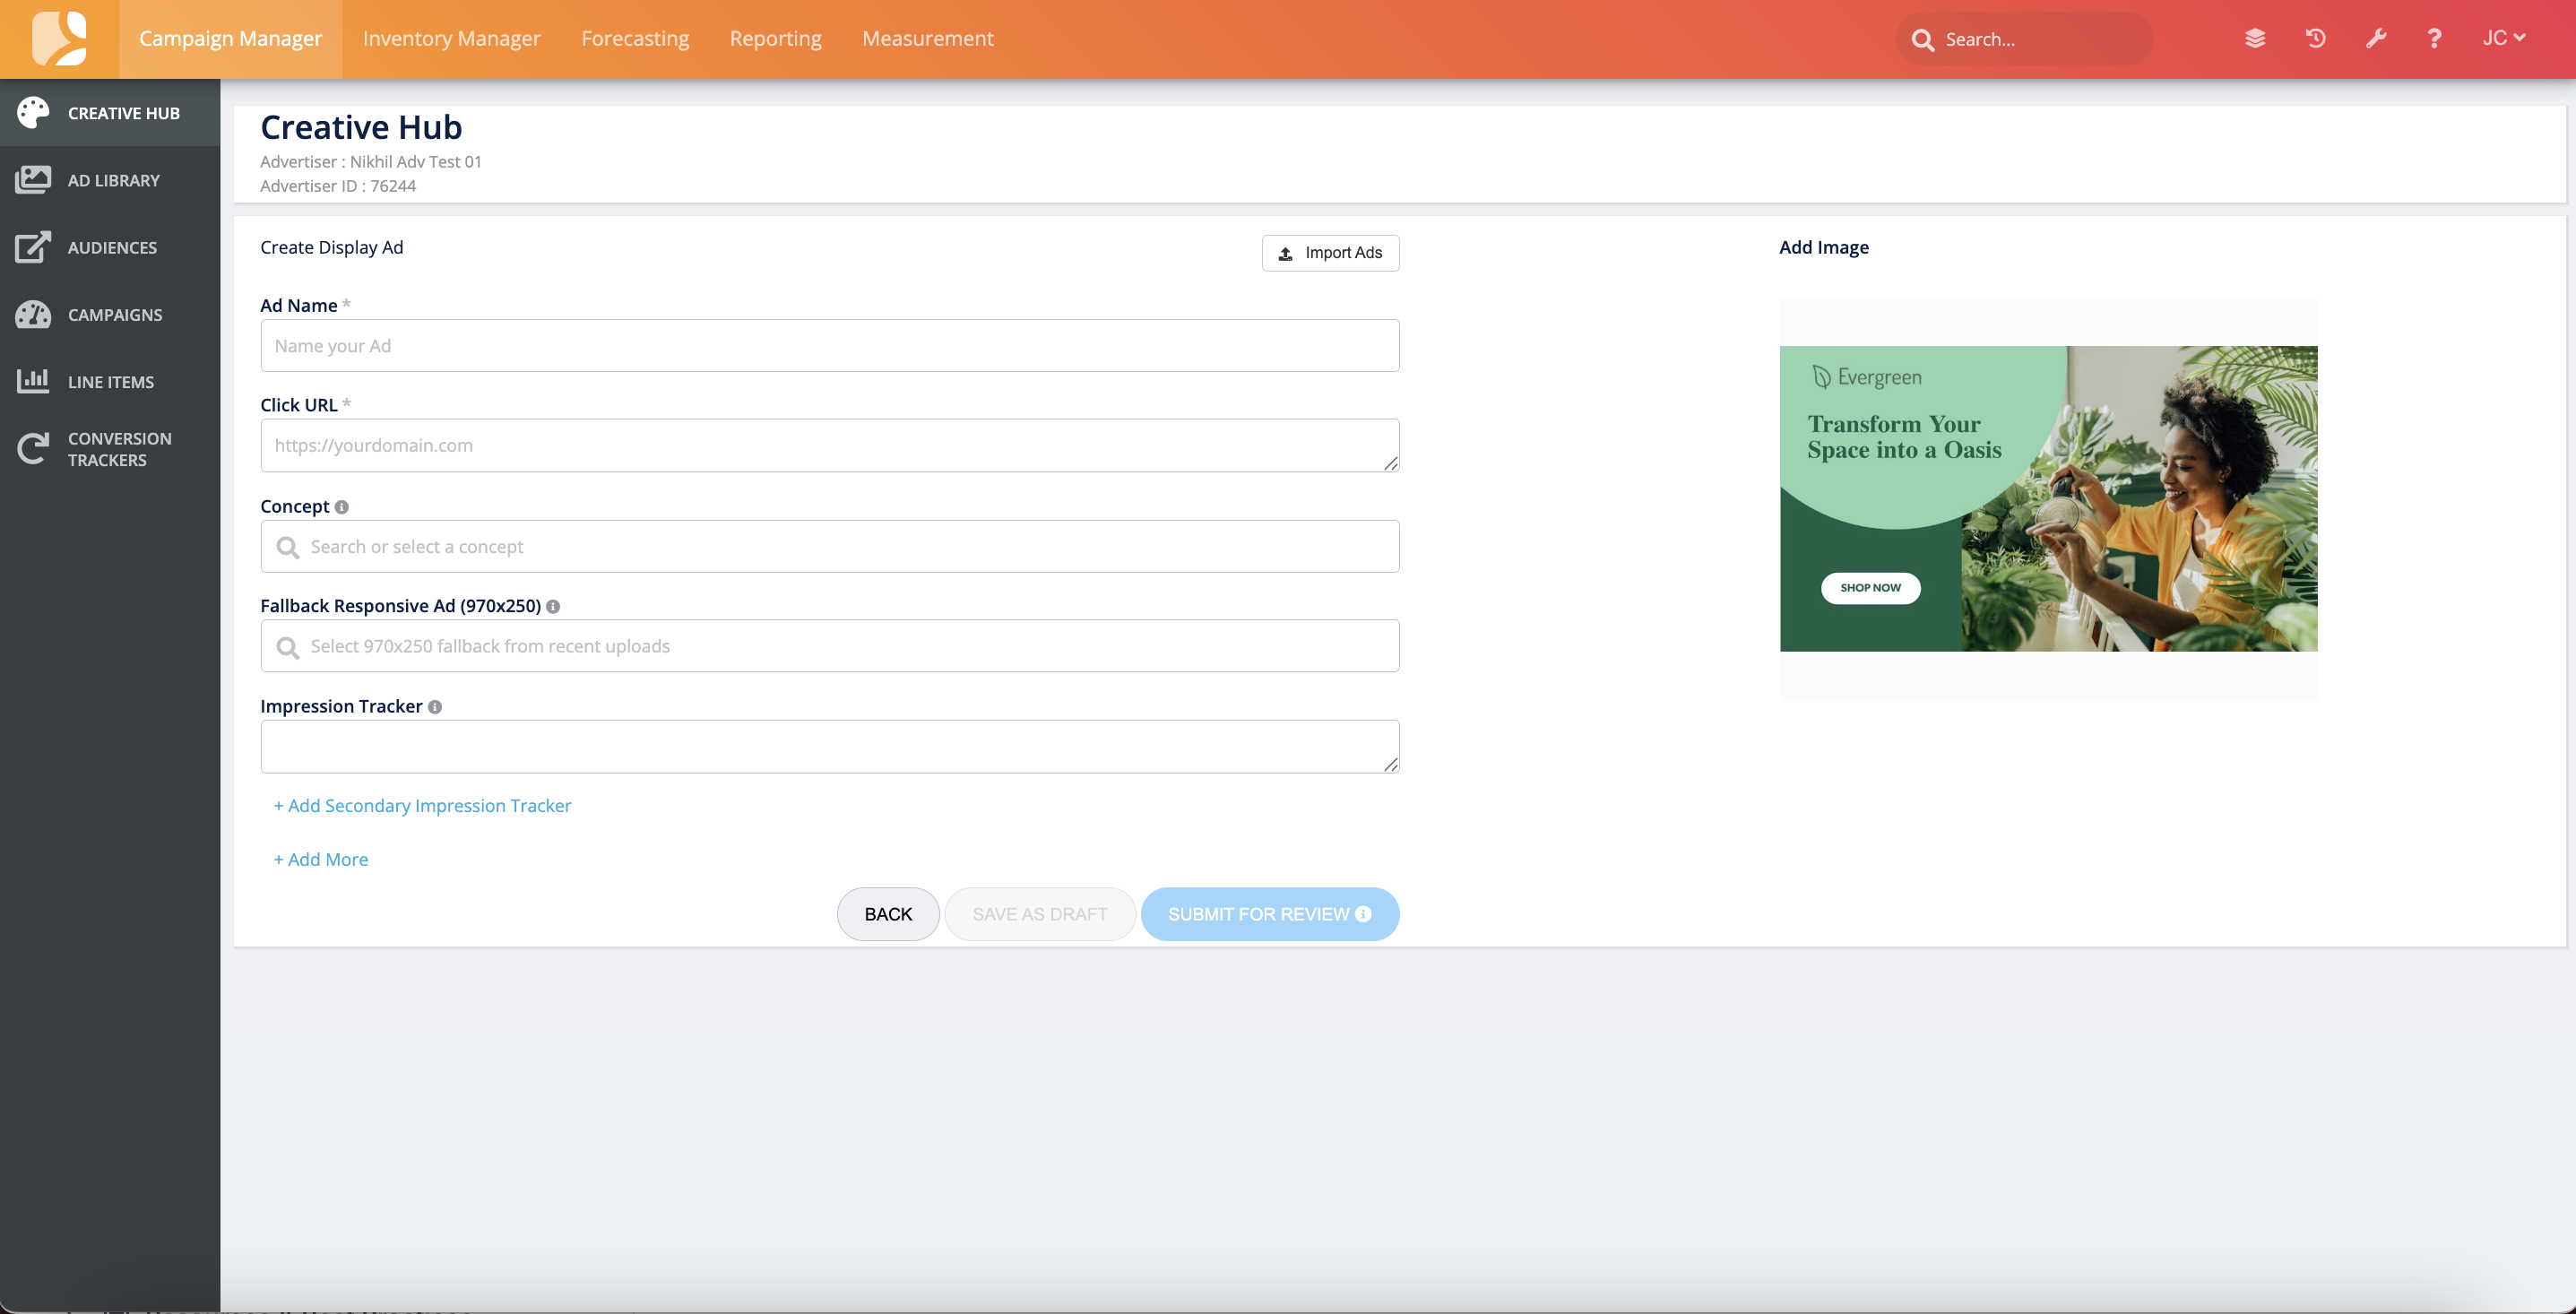
If the image meets the above requirements, it will upload successfully and a preview image will appear on the screen.
Auto-Resize
If your image is within 10% variance of one of the accepted file sizes, you will see an option to Auto Resize.
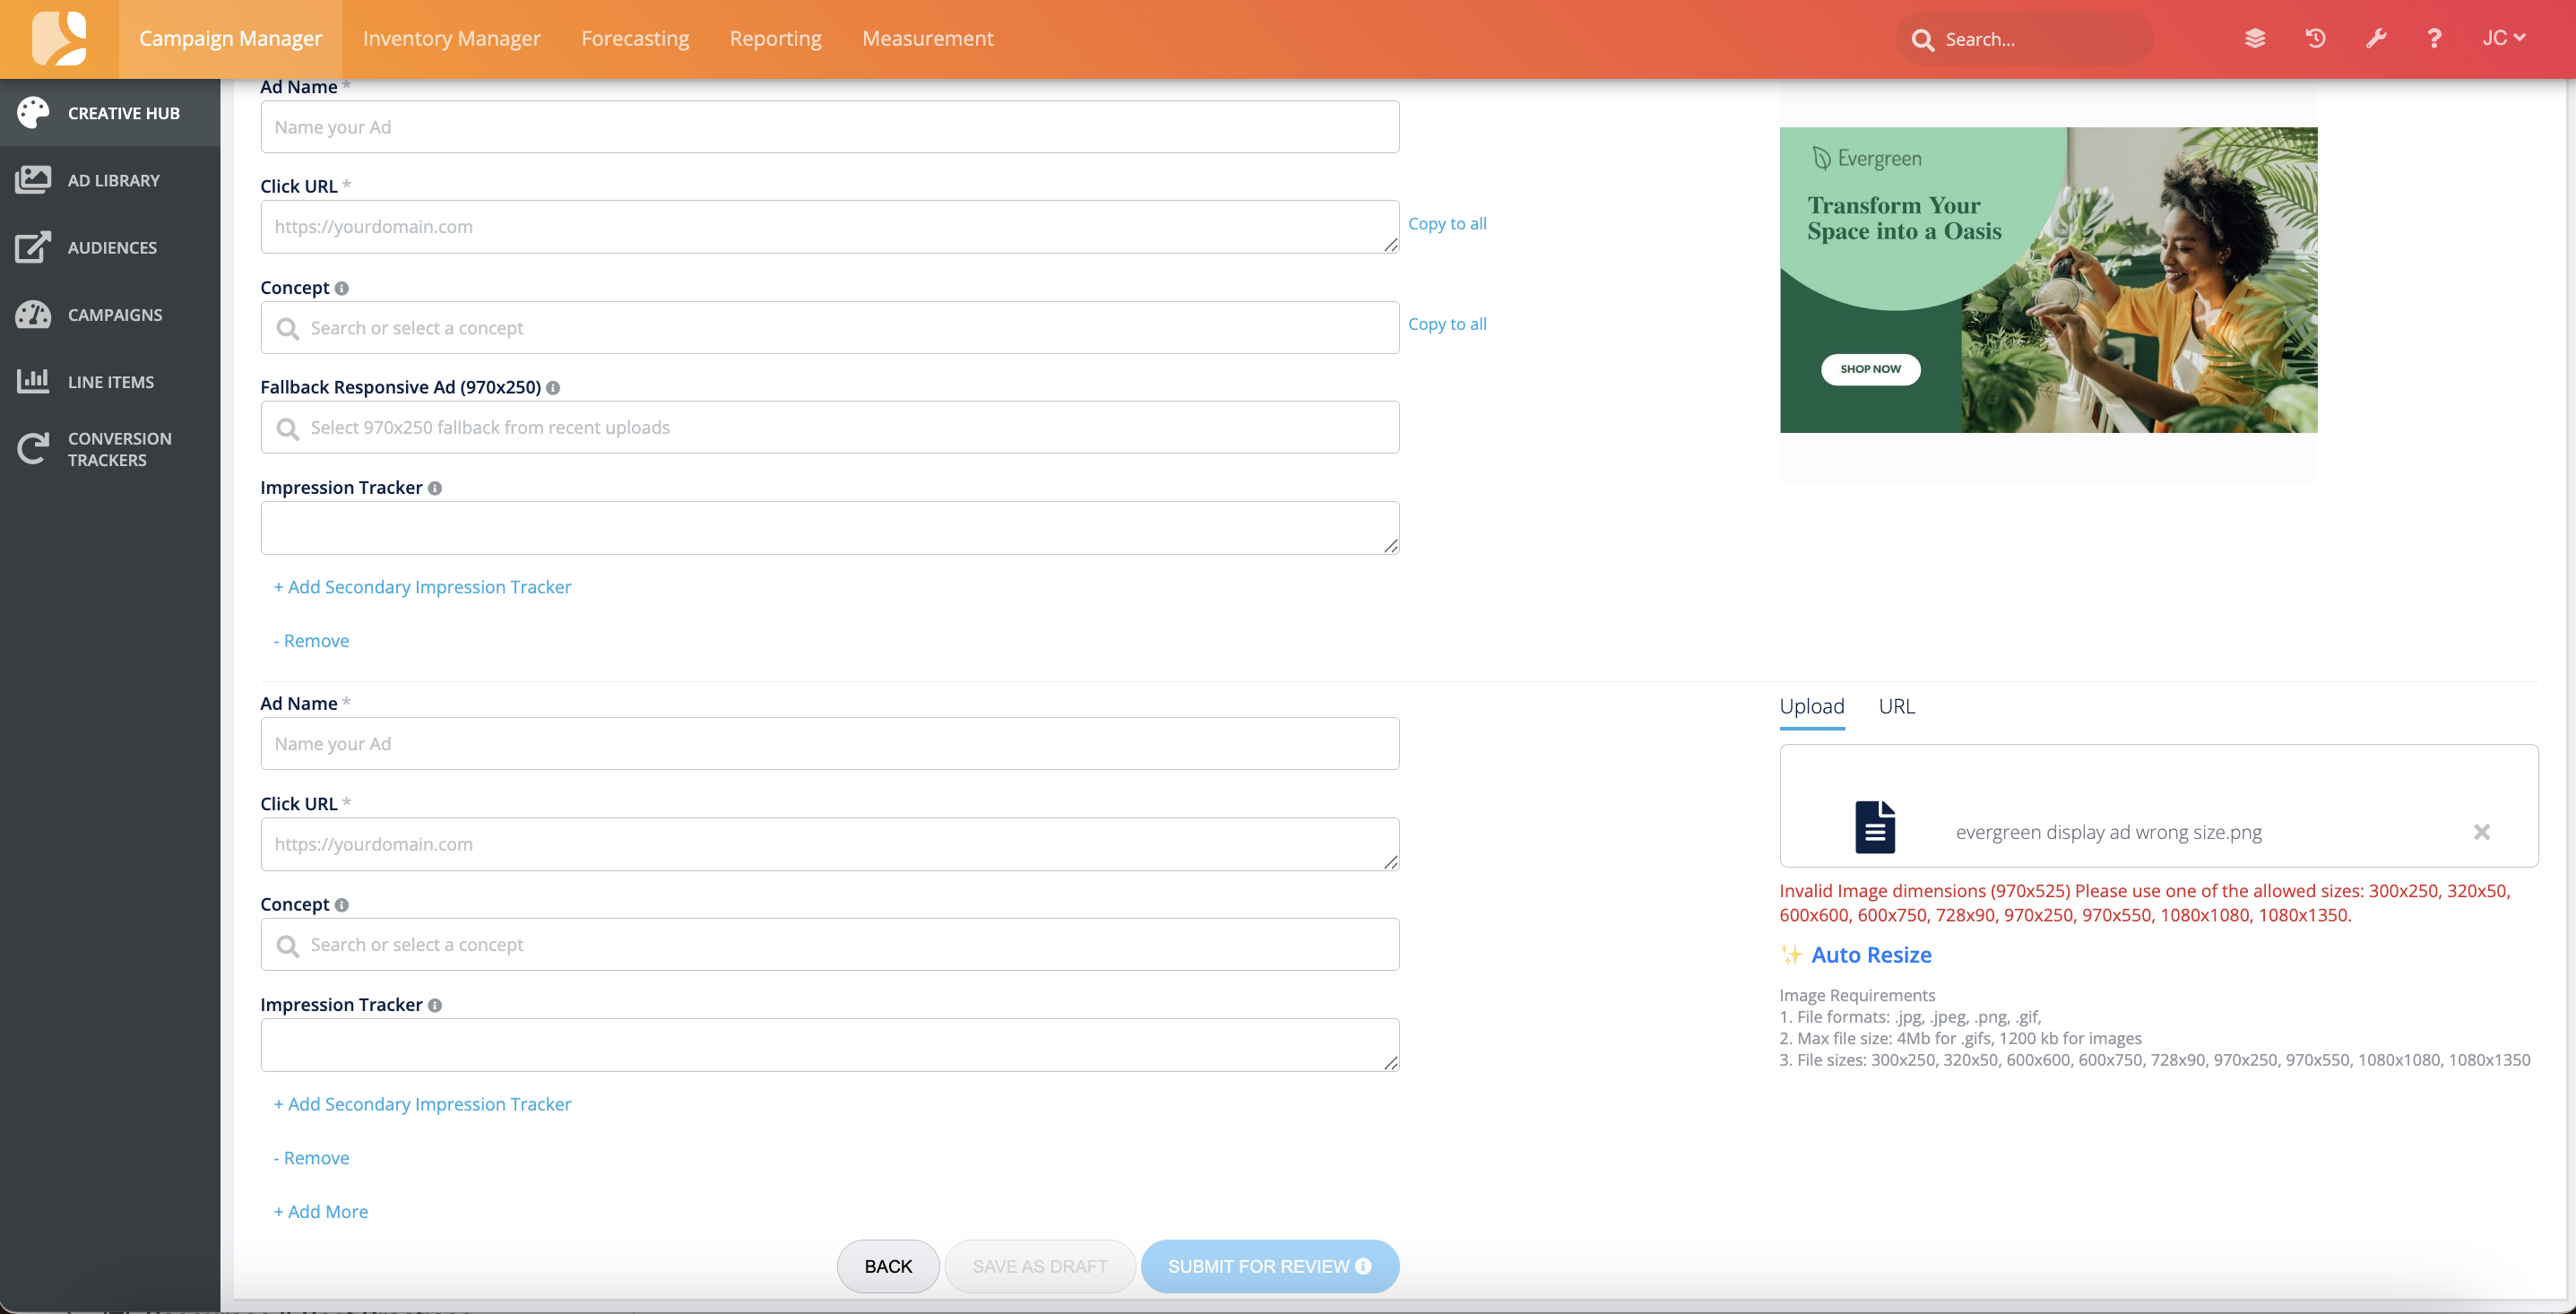
-
Click Auto Resize
-
If the AI-resized image looks good, click Approve
-
Click Compared Original vs Resized to view the two versions of the creative side by side to ensure the resized version meets your brand quality standards.
You also have the option to create multiple display ads by clicking ‘+Add More.’ This will copy the form so you can upload up to 10 creatives at a time. If you want the same Click URL and Concept for all your creatives, click on ‘Copy to all’ next to those inputs.
If you don’t have all your assets, click ‘Save as Draft’ to come back and finish creating your ad at a later date.
Once your creatives are ready for a campaign, click ‘Submit For Review.’ Each creative’s status will automatically be “Under Review” while our compliance team reviews the creative. You will be able to check the status of the creative on the homepage.
While the creative’s status is “Under Review,” you can click on the Ad Name on the homepage to be brought back to the edit screen to make changes, if needed.
Create Display Ads in Bulk
You can also create ads in bulk by clicking on ‘Import Ads’ on the “Create Display Ad” page. This will launch the below modal where you can import up to 10 display ads.
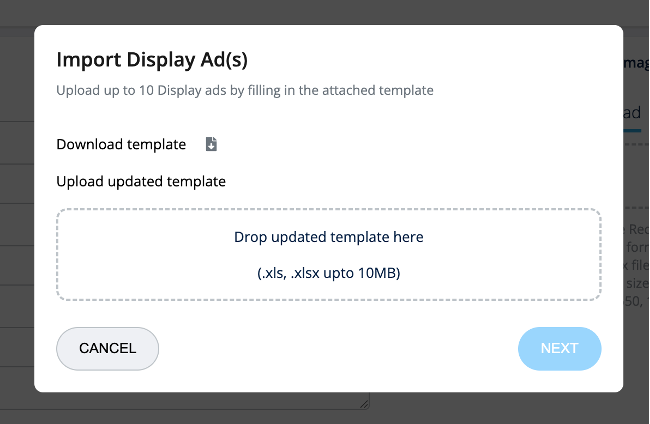
Click ‘Download template’ to get the sheet that you can fill in with your ad details. Once all the information is filled in, upload the template into the modal to start the import process.
After the information has been uploaded, you will see the data filled in on the ‘Create Display Ads’ screen. If any required data is missing from your spreadsheet, it will be flagged here so you can make changes. You can also add more ads to this screen before saving.
After clicking ‘Submit for Review,’ all ads without errors will be created and sent to the compliance team for review. While the creative’s status is “Under Review,” you can click on the Ad Name on the homepage to be brought back to the edit screen to make changes, if needed.
Create a Native Ad
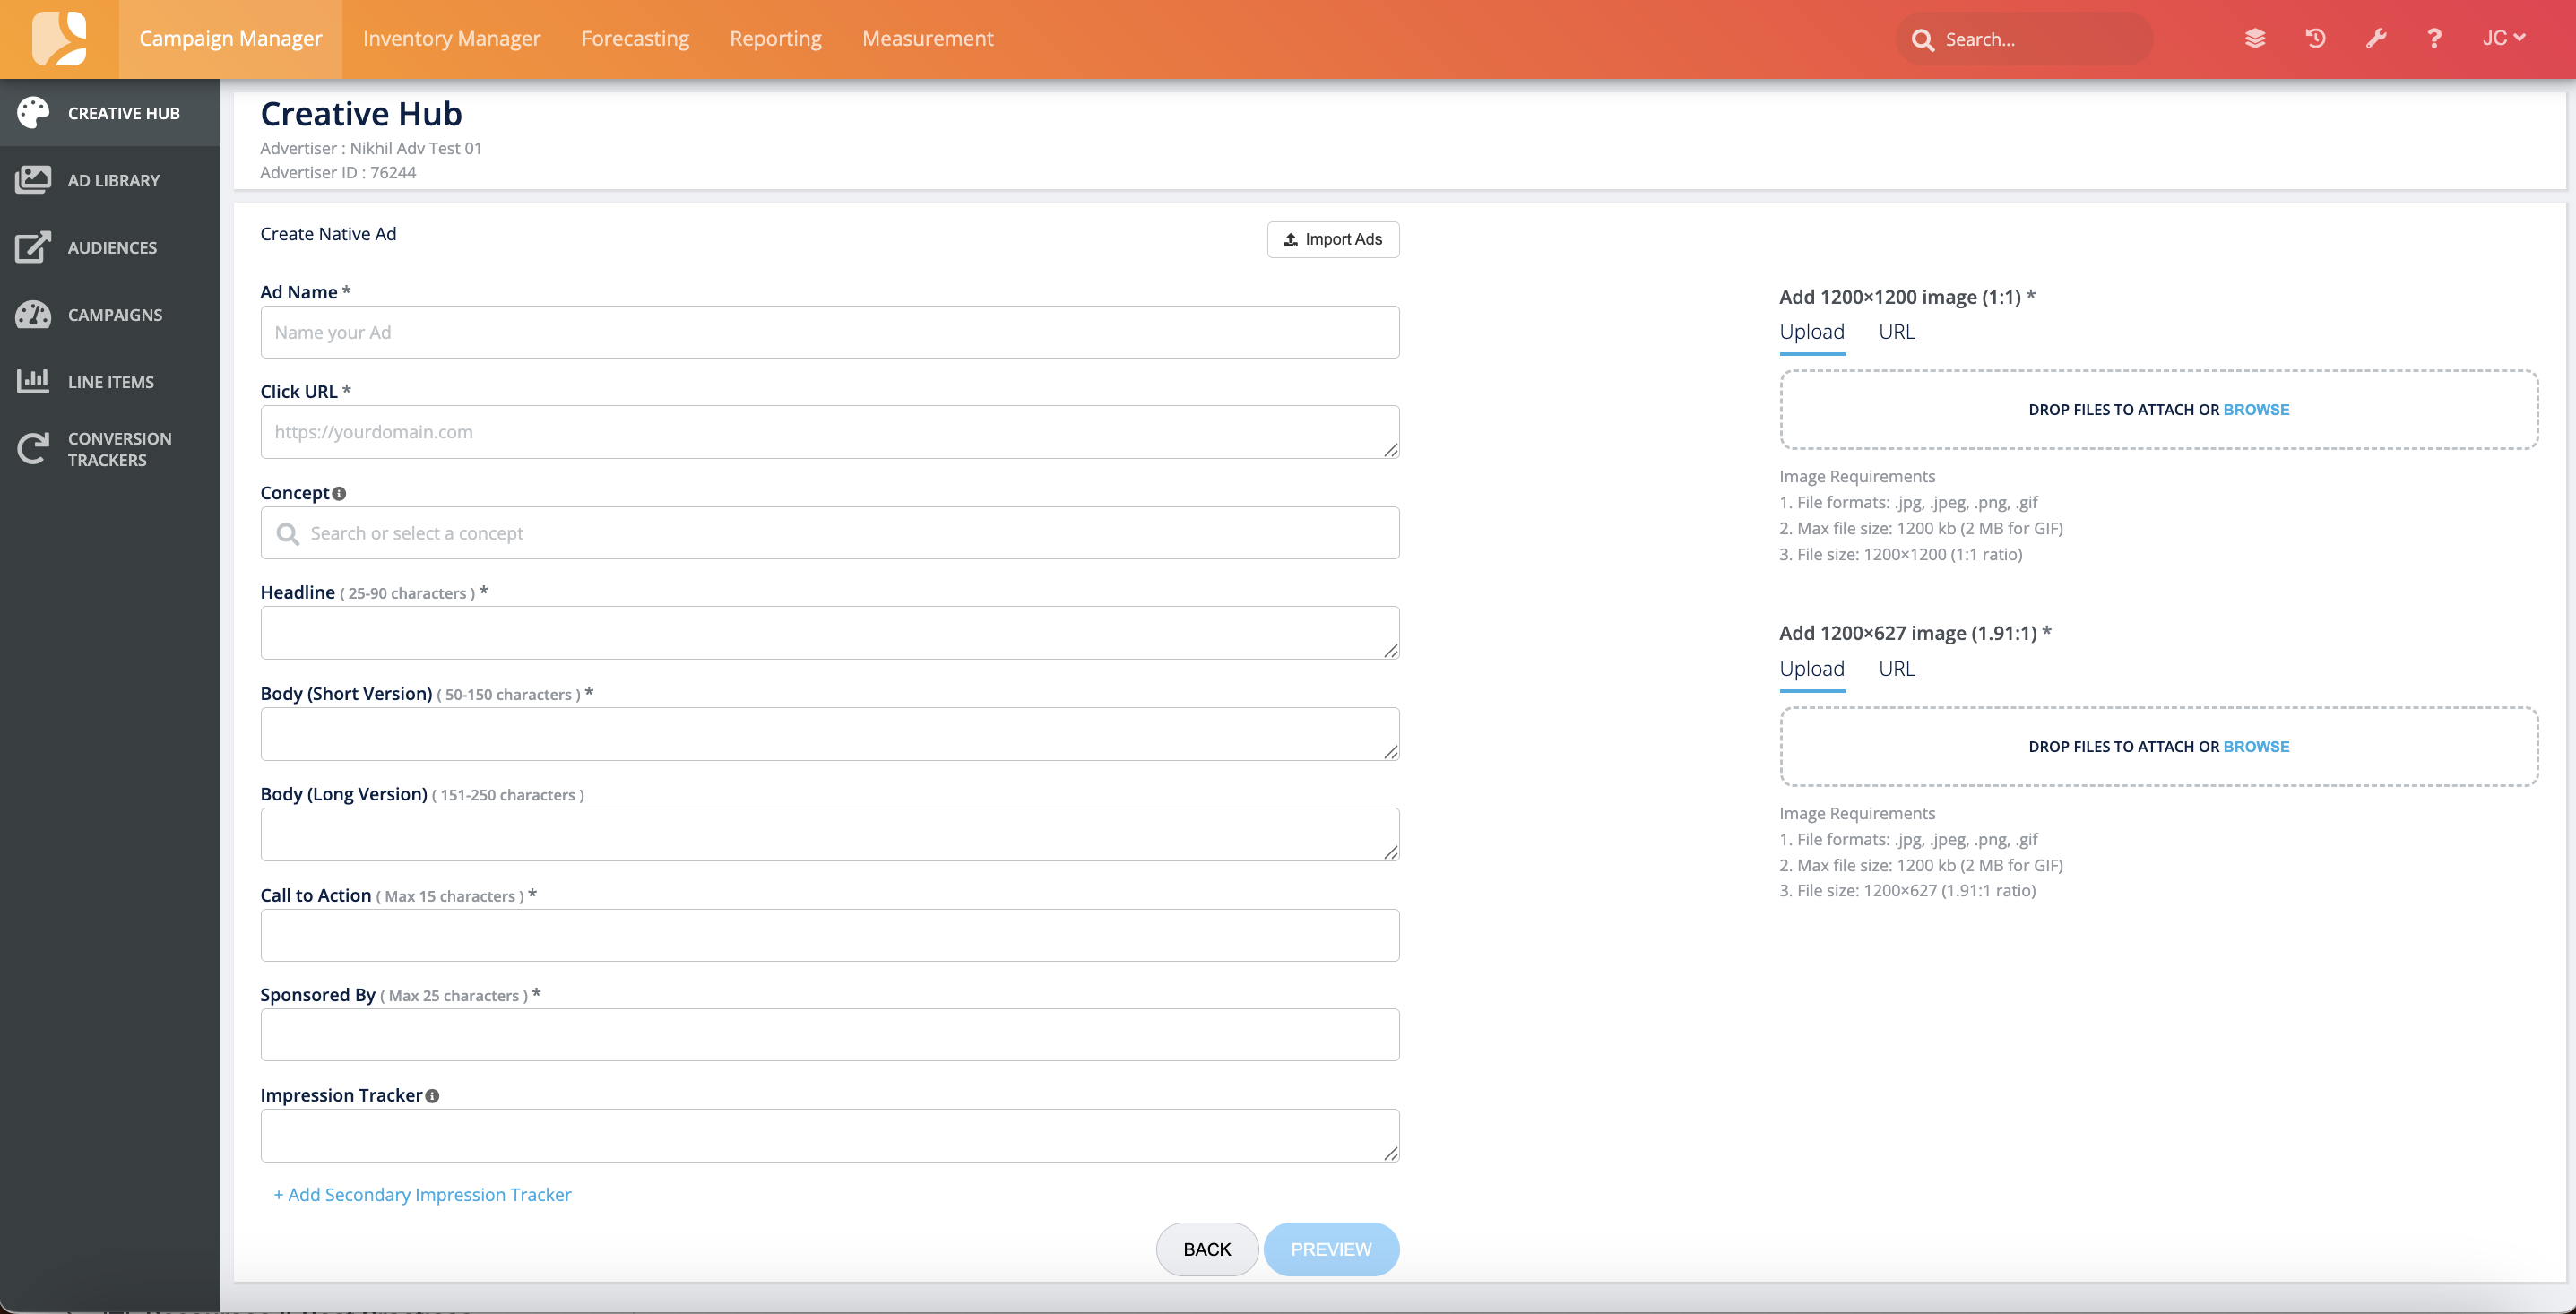
When you click ‘Native Ad,’ you will be brought to the 'Create Native Ad” page. Here you will fill out the below assets or click “Import Ads” to download a template that you can fill in with your creatives' details to create ads in bulk. For more information about creating ads in bulk, head to Create Native Ads in Bulk section.
-
Ad Name*: The name given to your creative.
-
Click URL*
-
Concept: An optional campaign type label that you can give your creative to group it under a particular messaging strategy, such as “Customer Acquisition,” or “Black Friday.”
-
This can be helpful for a quick glance at the campaign type the creative was used for, or if you are uploading multiple creatives that fall under the same strategy.
-
-
Headline*: 25-90 characters
-
Body (short version)*: 50-150 characters
-
Body (long version): 200-250 characters
-
Call to action*: Max 15 characters
-
Sponsored by*: Max 25 characters
-
Impression Tracker
-
Secondary Impression Tracker
-
Add Image*: Either drag and drop images or upload from your computer.
-
Accepted file formats: .jpg, .jpeg, .png, .gif
-
Accepted file sizes: 1200x1200 (1:), 1200x627 (1.91:1)
-
You must upload two images that support both file sizes to save your native creative.
-
-
Max file size: 1200kb for images, 2Mb for .gifs
-
If your images are within 10% variance of one of the accepted file sizes, you will see an option to Auto Resize.
-
*required
You also have the option to create another set of native ads by clicking ‘+Add More.’ This will copy the form so you can upload more images. You can create up to two sets of native ads at a time. If you want the same Click URL and Concept for all your creatives, click on ‘Copy to all’ next to those inputs.
Once you’ve set up all your creatives, click the ‘Preview’ button to review your native creatives in sample blueprints.
Preview Ads
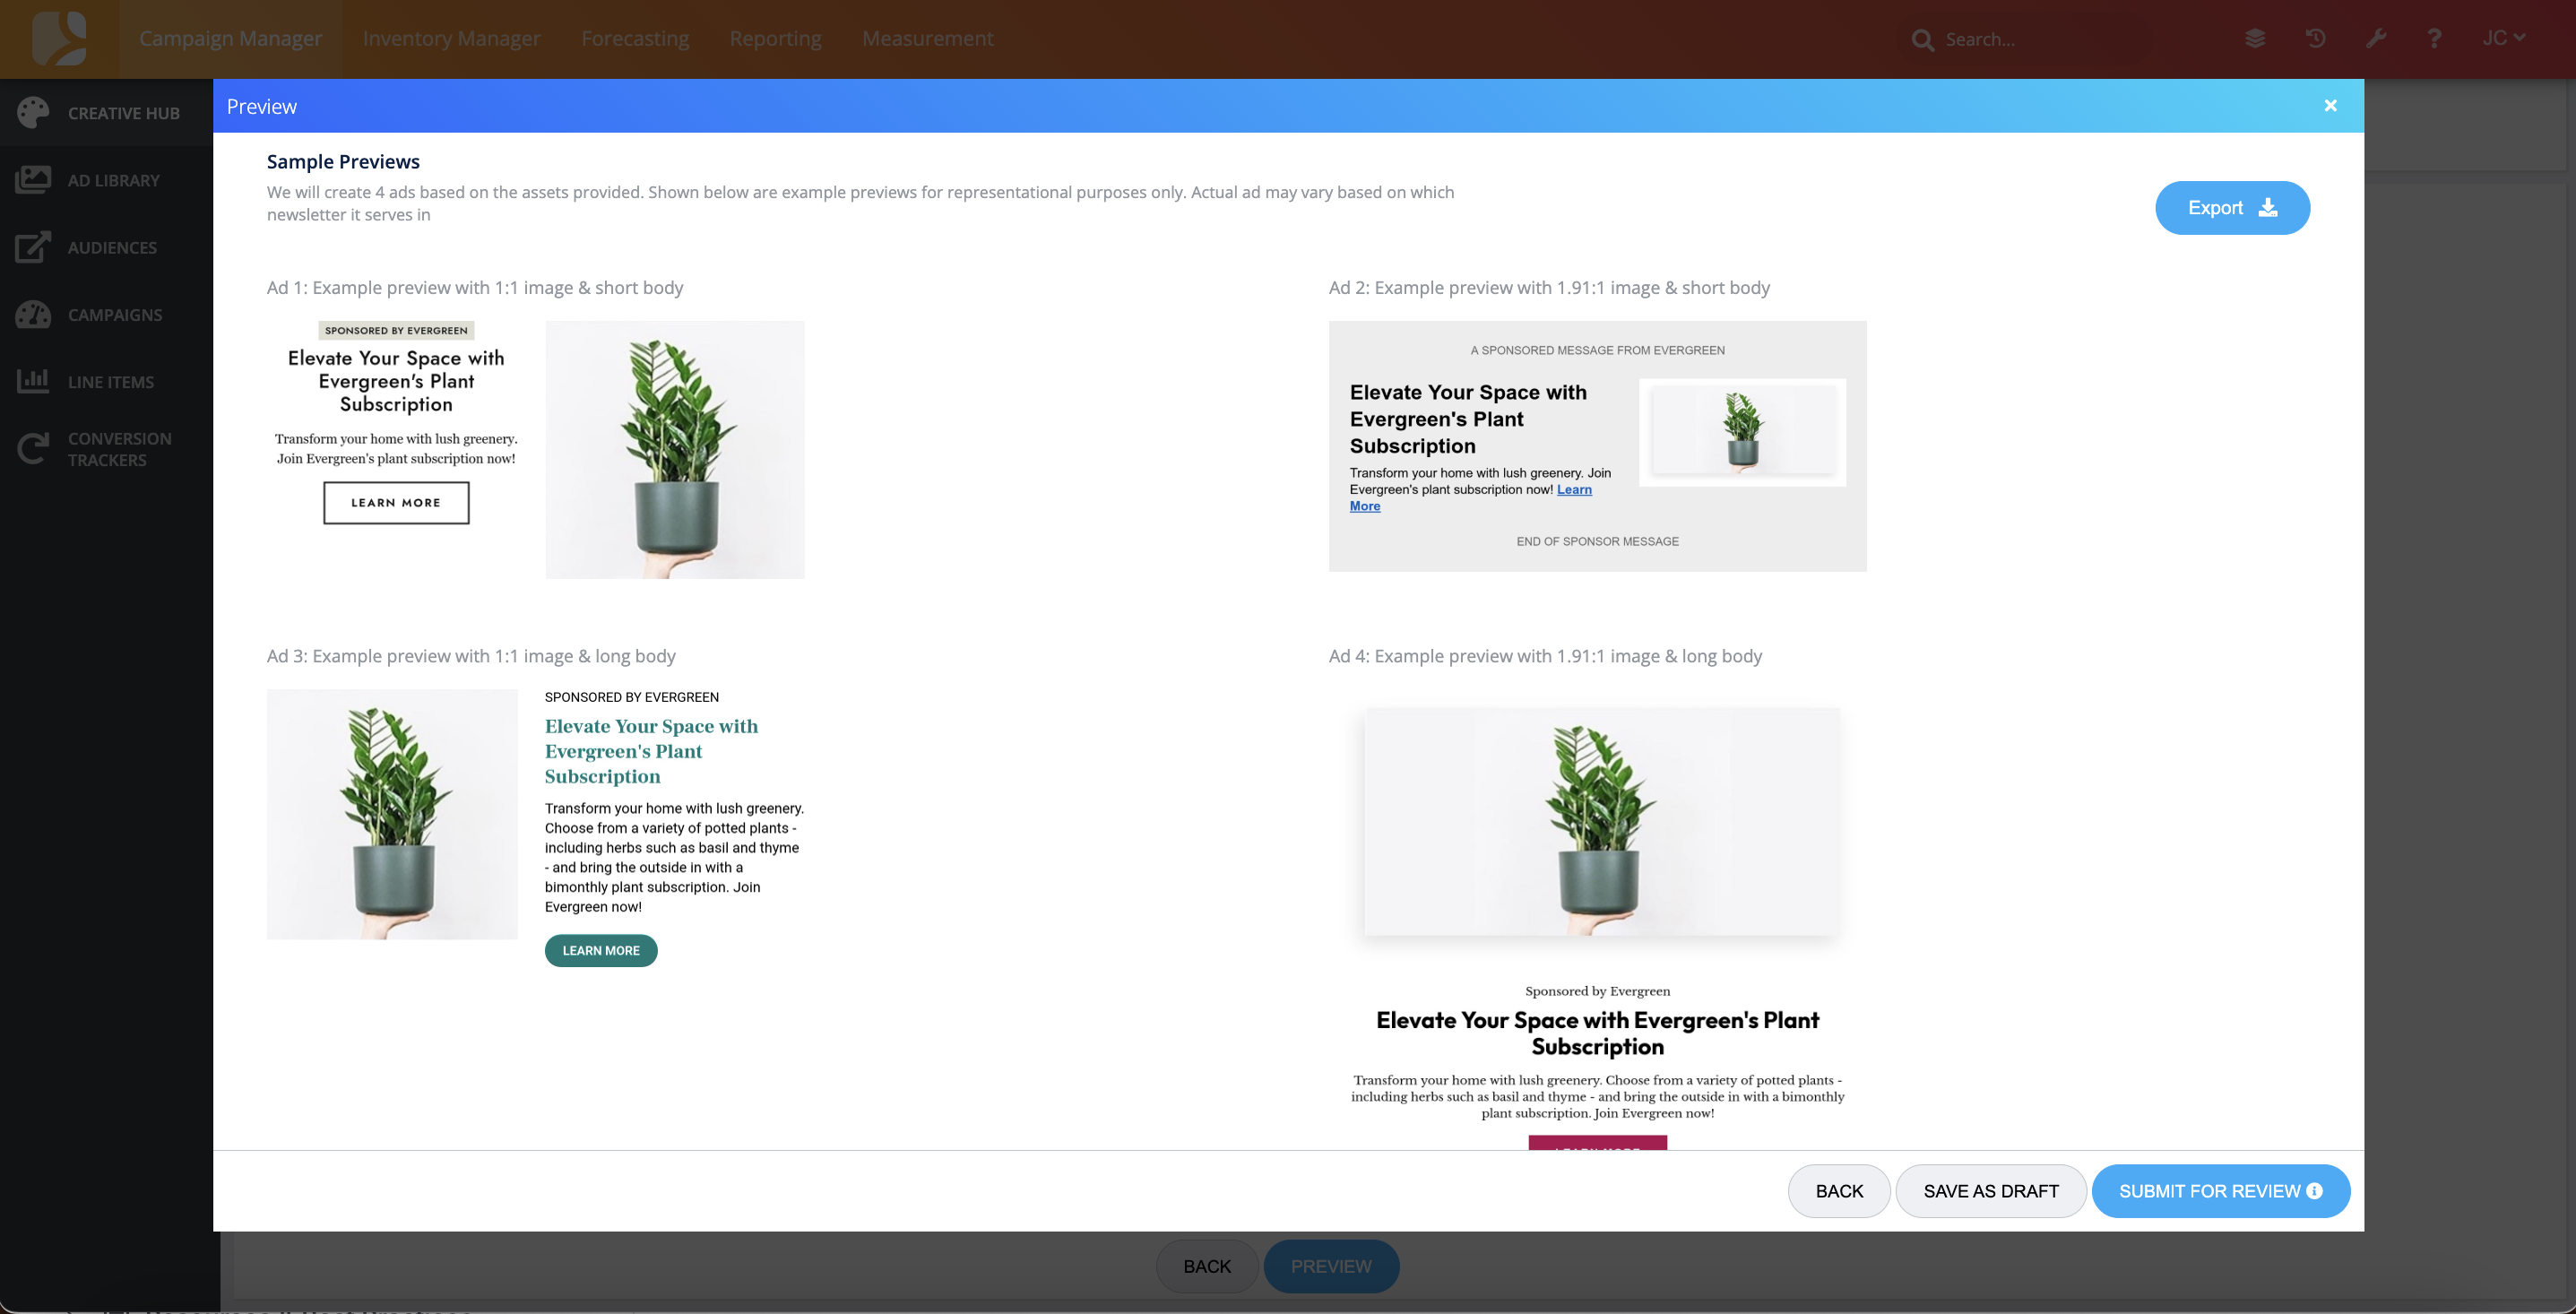
On this page you will see sample ads based on the assets you uploaded. If you just uploaded short body copy, there will be two sample ads on this page; if you uploaded short and long body copy, there will be four sample ads shown here.
Click ‘Back’ to make any changes to your native creatives, or ‘Save as Draft’ if you’d like to come back to edit them later.
Once you’re satisfied with your creatives, click the ‘Save’ button. The creatives will automatically be sent to our compliance team for review and their status will be “Under Review.” You’ll be able to check the status of the creative on the homepage. While the creative’s status is “Under Review,” you can click on the Ad Name on the homepage to be brought back to the edit screen to make changes, if needed.
You can also download zipped image files of the previews shown here by clicking ‘Export.'
Create Native Ads in Bulk
You can also create ads in bulk by clicking on ‘Import Ads’ on the “Create Native Ad” page. This will launch the below modal where you can import up to 10 rows of assets. Each row can create up to four native ads.
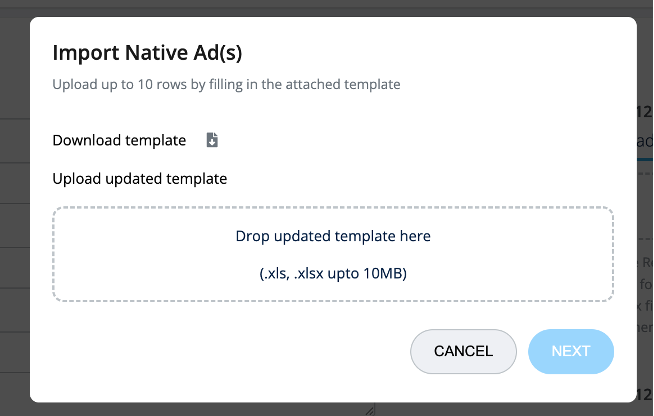
Click ‘Download template’ to get the sheet that you can fill in with your ad details. Once all the information is filled in, upload the template into the modal to start the import process.
After the information has been uploaded, you will see the data filled in on the “Review” screen. If there are errors in the uploaded data, those will be noted in the ‘Remarks’ column. Make corrections in your template, then click ‘Re-Import Ads’ to upload the updated spreadsheet.
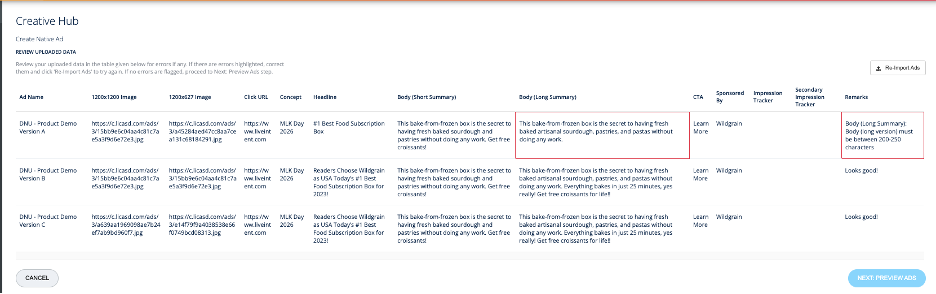
If there are no errors identified, you can review previews of the ads by clicking on the 'Next: Preview Ads” button. This will bring you to the same Preview Ads screen we reviewed in the previous section.
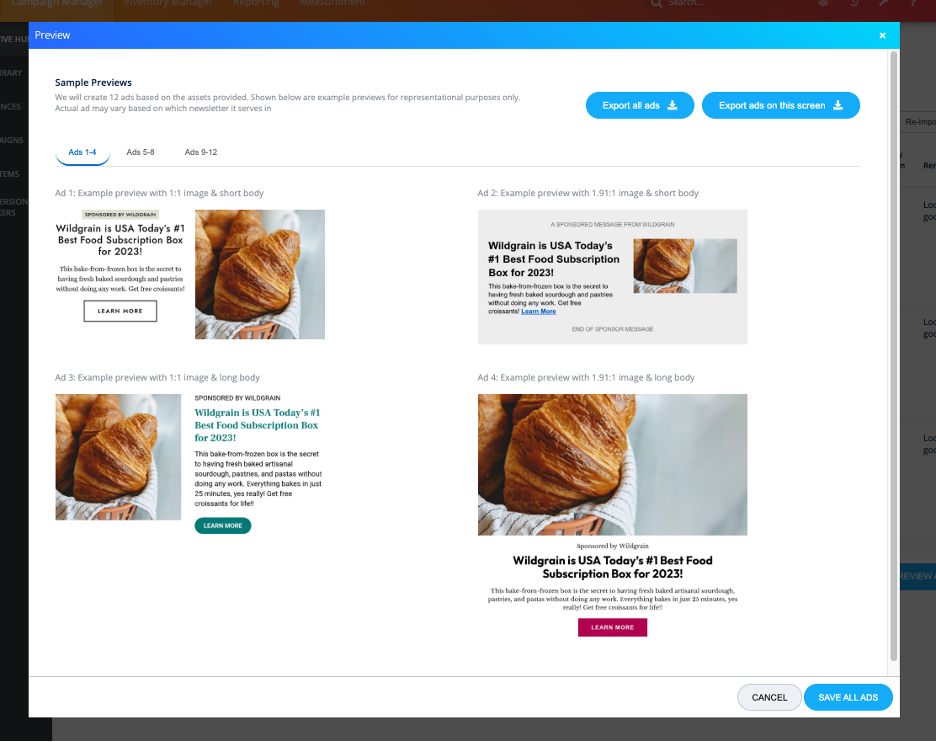
If your spreadsheet included more than one row of ads, you will see tabs at the top where you can navigate to other ad previews. Click ‘Cancel’ to make any changes to your native creatives.
Once you’re satisfied with your creatives, click the ‘Save’ button. The creatives will automatically be sent to our compliance team for review and their status will be “Under Review.” You’ll be able to check the status of the creative on the homepage. While the creative’s status is “Under Review,” you can click on the Ad Name on the homepage to be brought back to the edit screen to make changes, if needed.
You can also download zipped image files of the previews shown here by clicking ‘Export.'
Now your creatives are ready to serve in your email campaigns! If you have any questions about the Creative Hub, please reach out to your account manager.