Step 5: Goals and Tracking

Once you’ve set up the Daily Budgets for the Line Items and Flights of your campaign, move on to the Goals & Tracking tab within the Campaign Builder to apply the campaign goals, set up and prioritize any tracking mechanisms, and assign pixels to the campaign.
Client Objective
As you land on the Goals & Tracking tab within the Campaign Builder, set the Client Objective within the pop-up that appears, and click on Next.
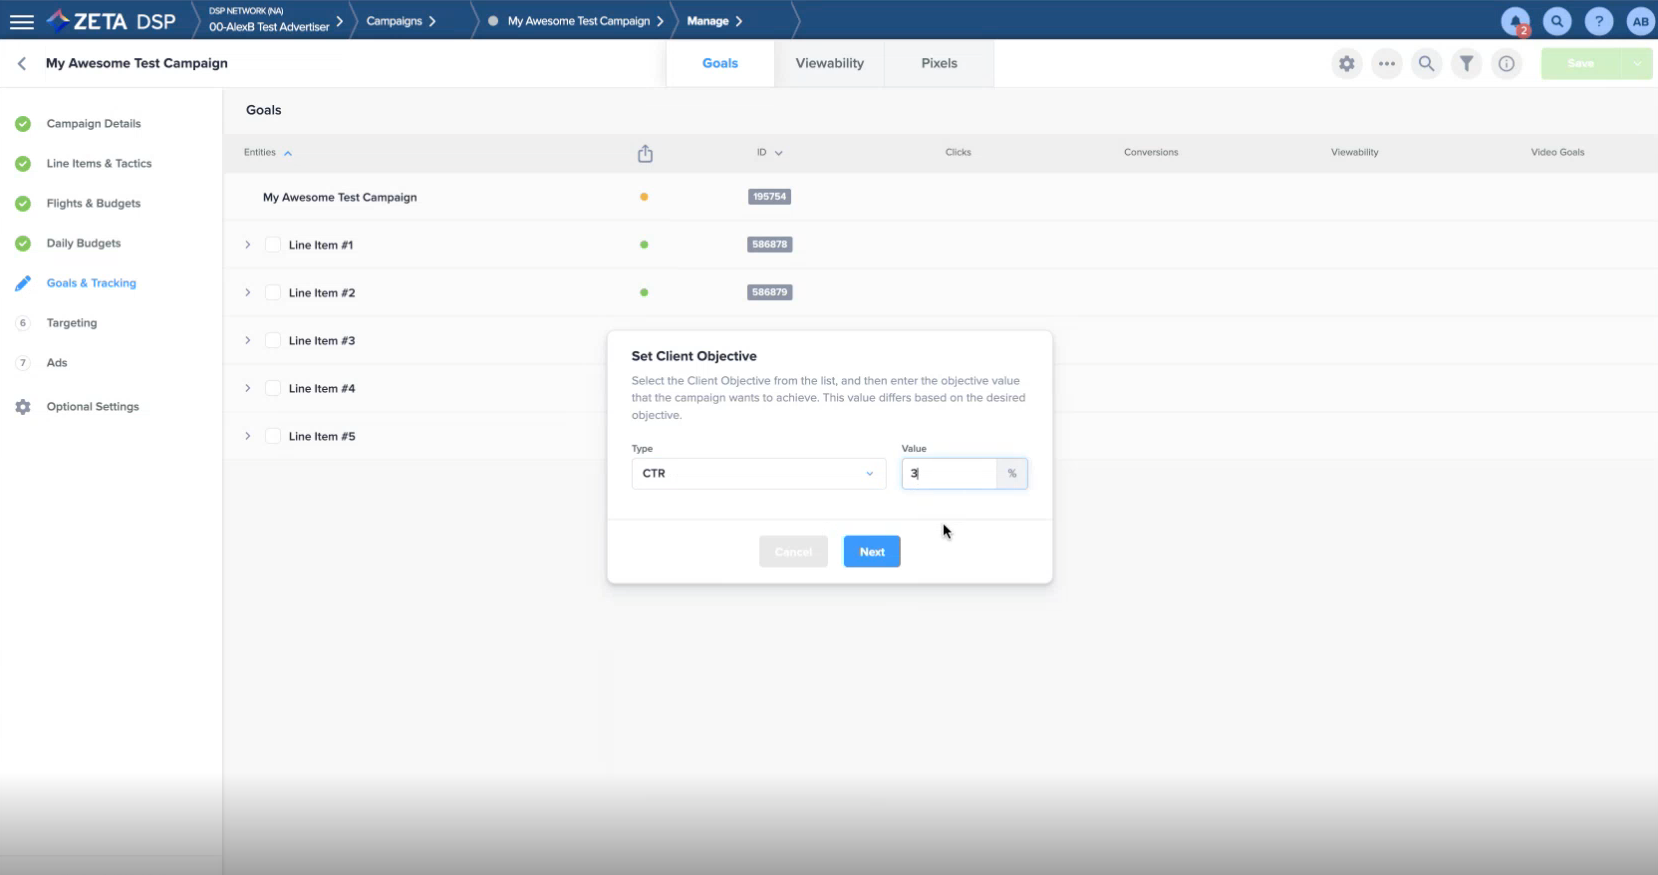
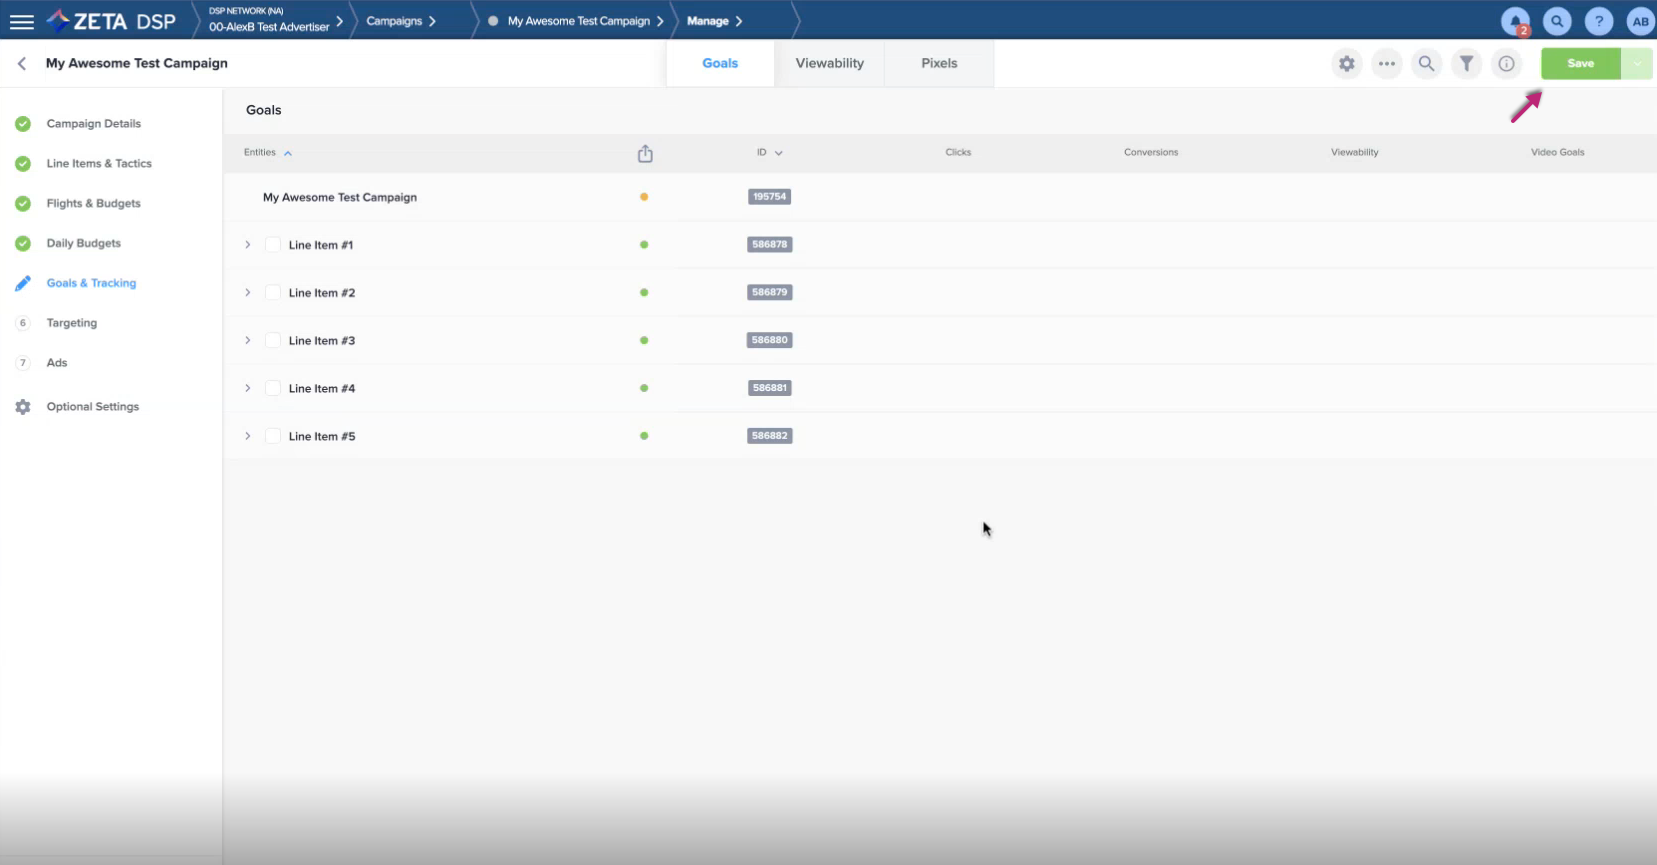
Once the Client Objective has been saved, you can directly click on Save to complete Step: 5.
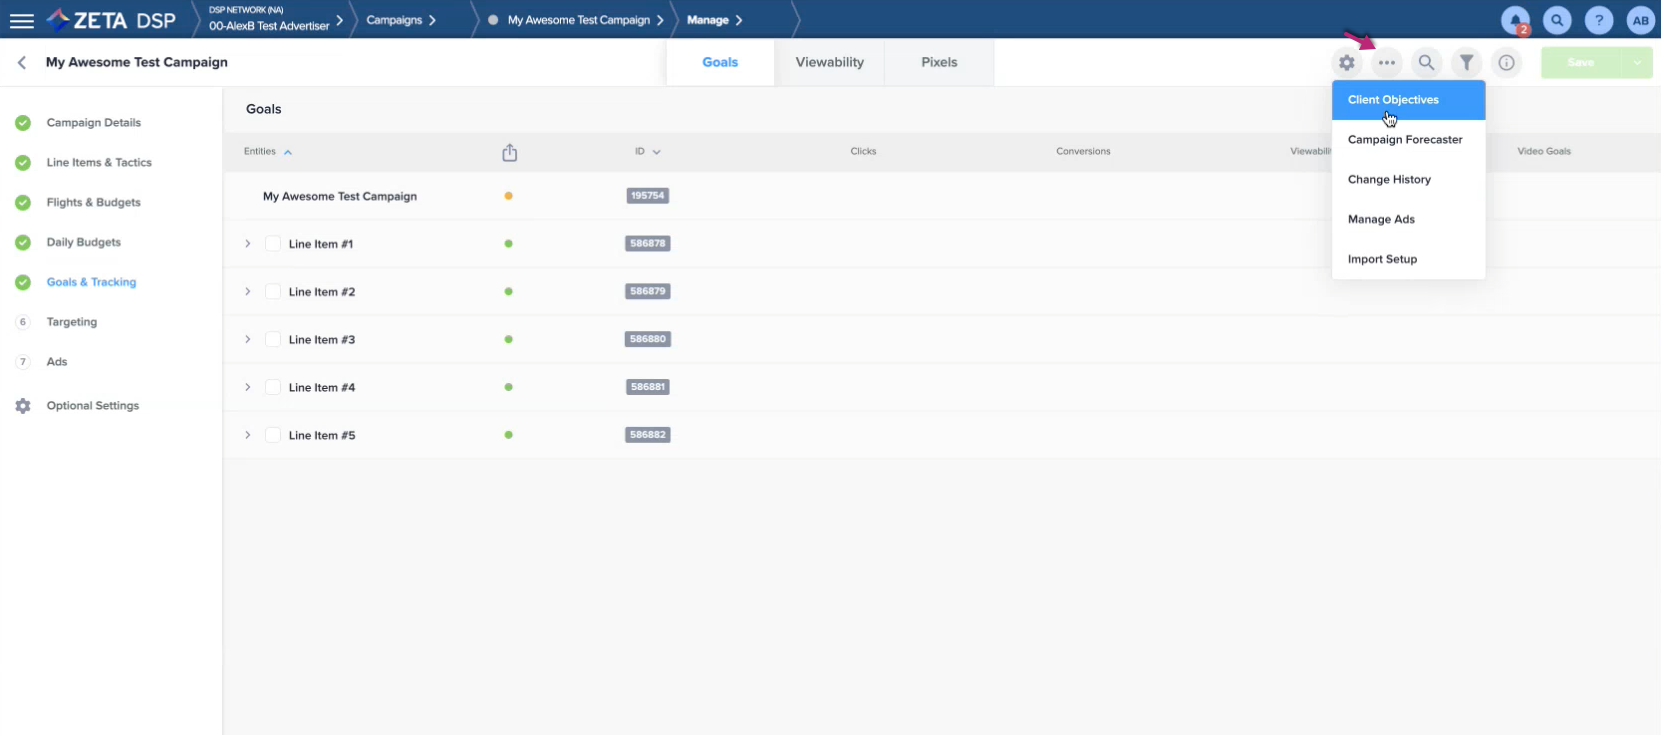
You can also click on the Action menu (…) at any point to change the Client Objective.
Campaign Goals
Zeta offers the ability to apply multiple goals to your campaigns, line items, or tactics. This feature allows you to optimize against two or more goals. While achieving all of your goals is an ideal state, this feature allows you to ensure your most important goals are secured first.
The benefits of applying multiple goals include:
Less manual monitoring of campaign delivery is necessary
Greater reach, value, and effectiveness over data segments
After setting a Client Objective, you can assign specific Goals to campaigns and line items. These direct the DSP AI technology. Considerations to keep in mind when setting goals:
If your Client Objective was not CPA or CTR, click on at least one goal that matches the Client Objective.
When you use multiple goals, the DSP AI pursues each goal separately. You may sometimes find that one goal dominates another. In this case, you can adjust the value of the dominant goal to make it less aggressive; this gives other goals more opportunity.
When you change elements during a campaign, the change is immediate, but the AI learning process can take time. It is wise to refrain from making further changes for a week or even longer to understand the full extent of the results.
When your campaign or line item has multiple goals, you can set the priority of these goals.
Set Goals on Line Items and Tactics
Individually
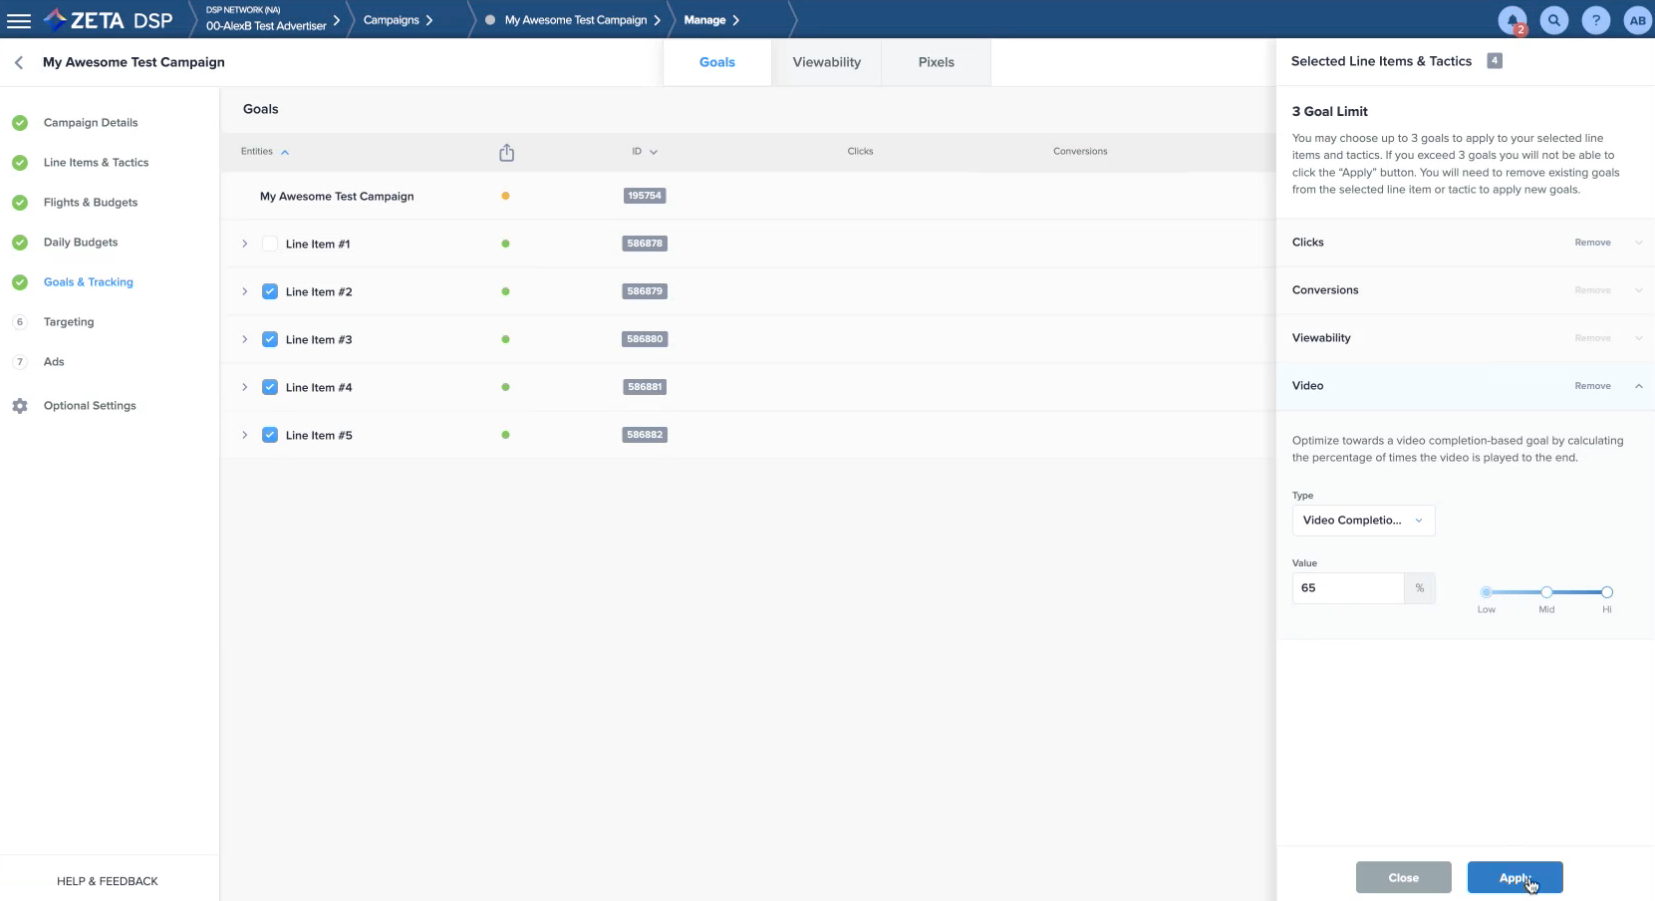
Within the Goals tab, click on the Line Item you want to set a Goal for. As the 3 Goal Limit tab slides open from the right, set your desired goal and click on Apply.

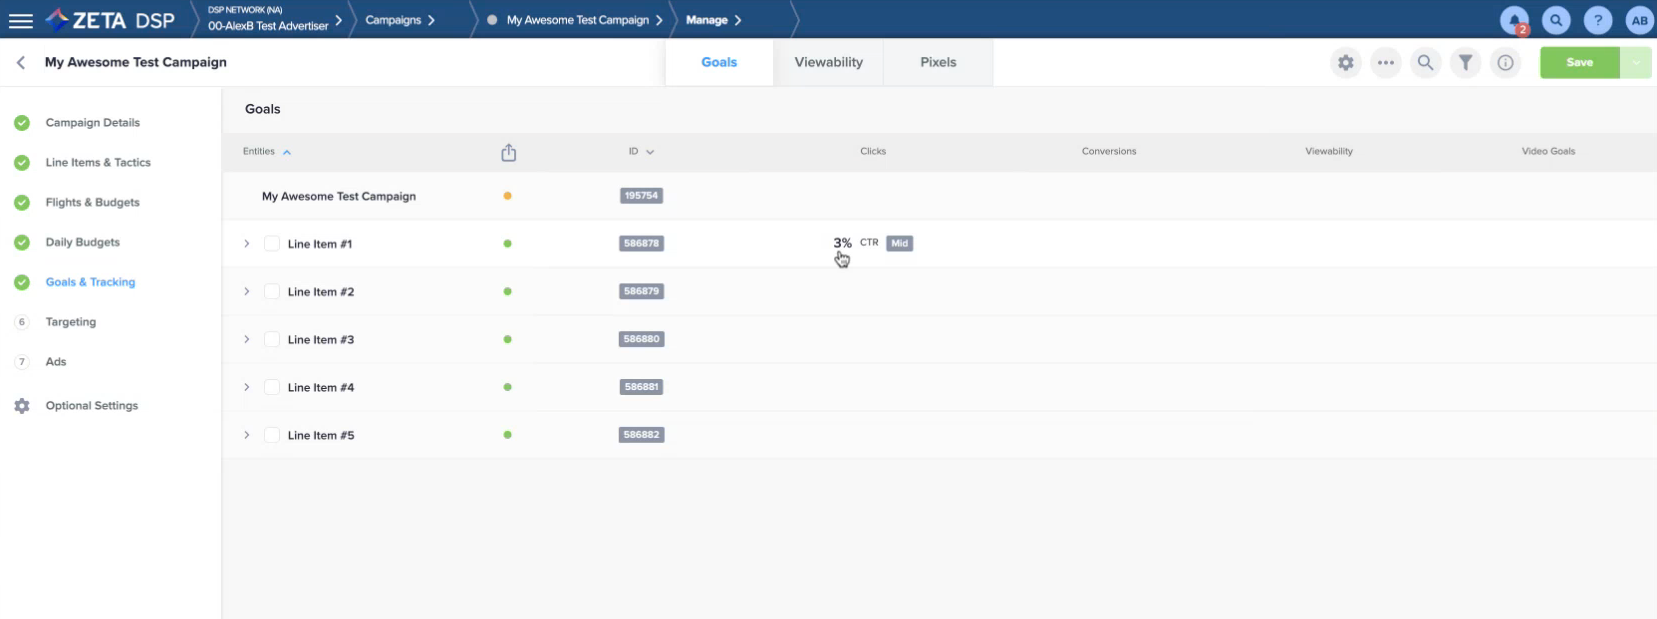
Clicking on the set goal will allow you to remove the goal.
-20230720-104930.gif?inst-v=f7905c56-c1a1-40b2-b54b-3fb55a8a0385)
In Bulk
Within the Goals tab, click on the checkboxes against all Line Items you want to set Goals for. Click on the Action menu (…) and select Set Goals. As the Goals tab slides open from the right, set your desired goals and click on Apply.
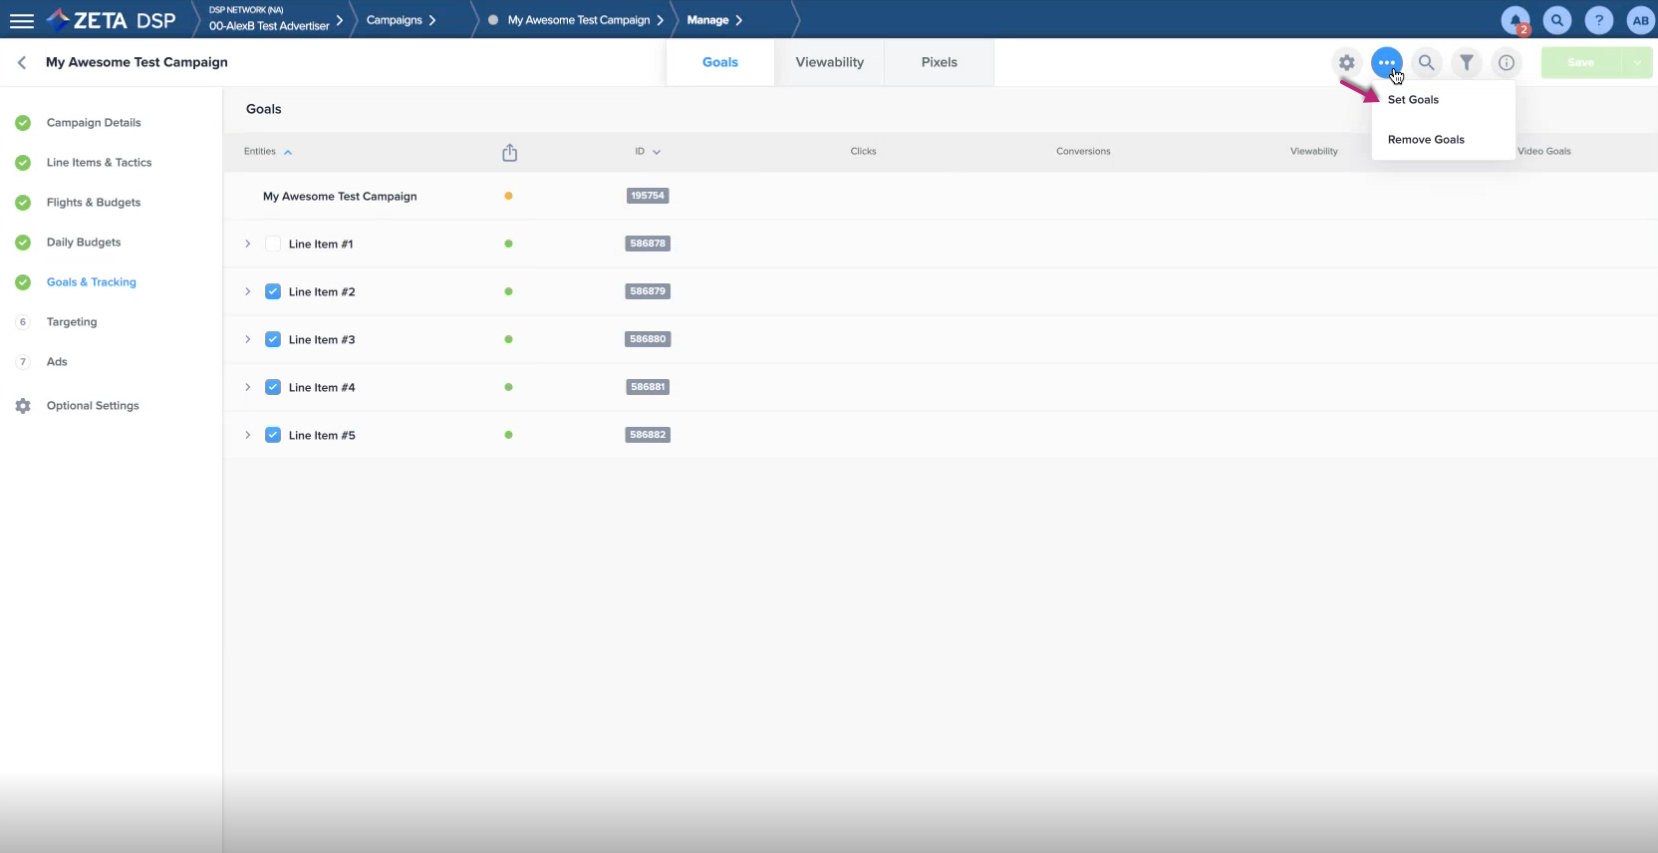
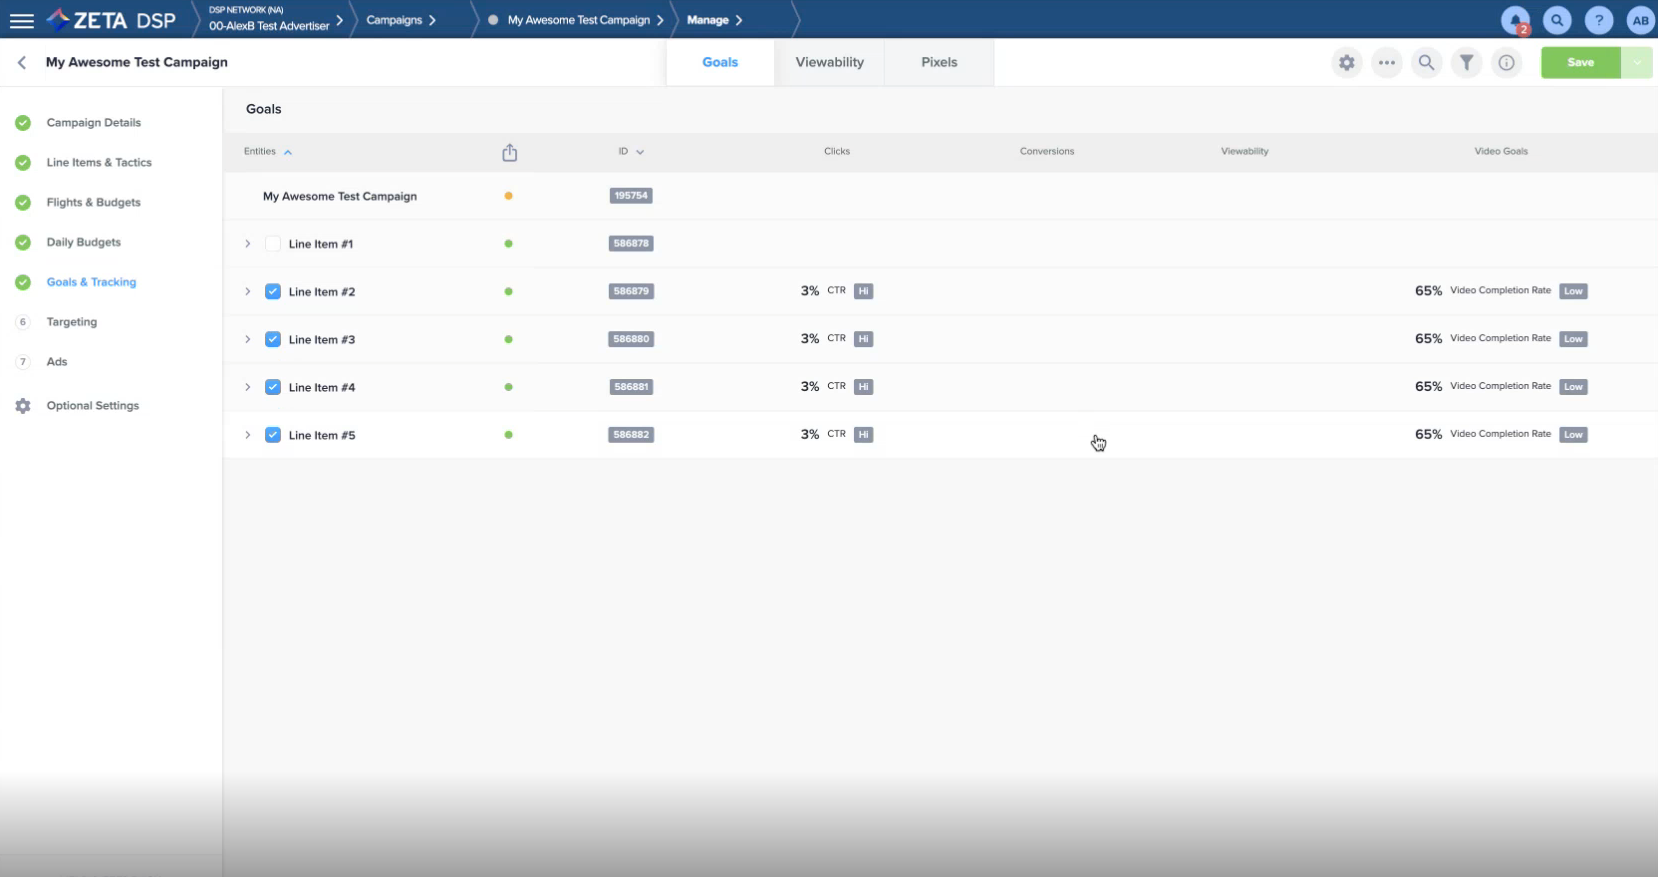
You can also remove the goals in bulk in a similar way:
-20230720-105317.gif?inst-v=f7905c56-c1a1-40b2-b54b-3fb55a8a0385)
Multi-Goal Campaign Recommendations
Objective | Suggested Primary Goal | Suggested Secondary Goal |
|---|---|---|
Improve Brand Awareness | Viewability | Video Completion Rate |
Drive Engagement | CTR or CPA | Viewability |
For optimal performance, two goals are recommended. Do not add more than three goals.
Only one goal can be selected from each goal group (for example, CPC & CTR).
Viewability
If you want the DSP AI to optimize for Viewability, you must add a Viewability goal (not a Client Objective). For more information, refer to the Viewability Setup page.
1. Click on the campaign name within the Goals tab. As the 3 Goal Limit tab slides open from the right, set your Viewability value and click on Apply.
-20230720-110038.gif?inst-v=f7905c56-c1a1-40b2-b54b-3fb55a8a0385)
2. Navigate to the Viewability tab to set the Viewability Measurement for all line items.
-20230720-110408.gif?inst-v=f7905c56-c1a1-40b2-b54b-3fb55a8a0385)
For each of the line items, set the desired Format Type, Source, and Vendor. Click on Set.
Format Type | Select Display or Video. The DSP reacts to your selection to display only valid vendors for this source. This option identifies the type of the line item. |
Source | Select Zeta Integrated or Advertiser Reported. Zeta suggests using Zeta Integrated vendors, which allows for advanced viewability checks, and ensures incorrect ad types appear on the line. |
Vendor | Select a Vendor. The list of available vendors is dependent on the selections of a Format Type and Source. |
3. Alternatively, you can set Viewability measurement for line items in bulk by clicking on the action menu and selecting Set Viewability Measurement.
3. You can also remove the Viewability measurements in bulk by clicking on the action menu and selecting Remove Viewability Measurement.
-20230720-111044.gif?inst-v=f7905c56-c1a1-40b2-b54b-3fb55a8a0385)
Once you remove the Viewability measurements for the individual line items, only the overall Viewability value for the campaign will stay.
Pixels
Every Pixel the campaign uses must be associated with a particular consumer activity.
Pixels are required with all Conversion goals.
1. Navigate to the Pixels tab. Click on Assign to open the Pixel Assignment window.
-20230720-111926.gif?inst-v=f7905c56-c1a1-40b2-b54b-3fb55a8a0385)
2. Add the pixel from the list of the ones available. If you have many Pixels to choose from, type a few letters from the name of the one you want to search from the list.
3. You can further filter and sort by Pixel Type to view Third-Party Pixels.
4. Once you’ve selected the pixel(s), click on Assign.
5. You can override a pixel's view and click attribution at the campaign level. To do so, click on the desired pixel from within the Pixels tab and make your changes within the Edit Pixel tab that slides open on the right.
-20230720-112616.gif?inst-v=f7905c56-c1a1-40b2-b54b-3fb55a8a0385)
5. Modify the click/view attribution values and click on Save.
Finally, after you’ve set the Client Objective, Campaign Goals, and Pixels, click on the Save button in the upper-right corner to save your campaign as a draft.
Click on Continue to Targeting at the bottom of the screen to continue building your campaign.
