Implementing Pixels

There are a few key concepts related to the implementation of DSP Pixels. Let’s have a look:
How to Implement?
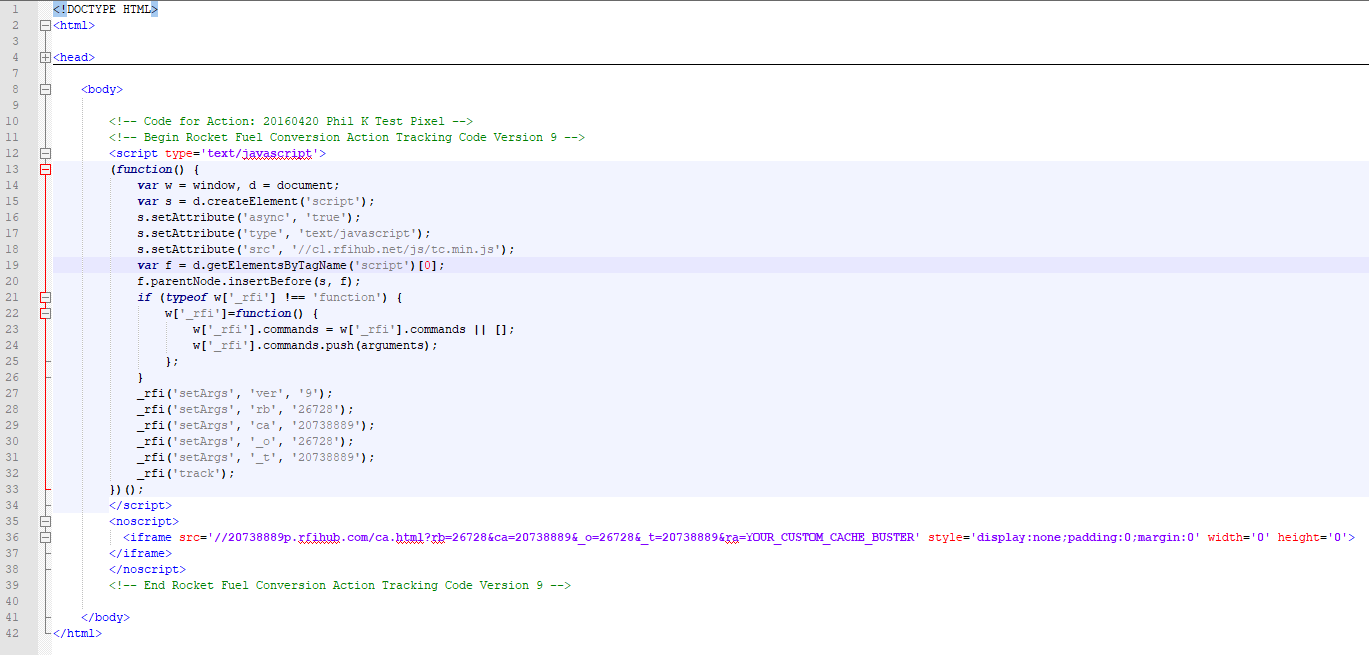
Pixels can be implemented directly into the HTML of the webpage by placing the pixel code exactly as it was provisioned between the <body> and </body> tags. However, if the site is using container tags (i.e. DART Floodlight or Atlas UAT) or Tag Management Platforms (i.e. Signal or Google Tag Manager), then pixels should be implemented into their respective receptacles. Containers and Tag Management Platforms typically utilize templates that facilitate the specific needs of a campaign.
Refer to the Common Implementation Methods section below for more information.
Where to Implement?
In order to facilitate the correct setup, pixels should only be placed once (1x) on the pages they were designed to be placed on. For instance, a coupon download pixel should only be placed once on the coupon download page, a home page pixel should be placed once on the home page, and a landing page pixel should be placed once on the landing page. Most importantly, the conversion pixel should only be placed once (1x) on the intended user conversion action and nowhere else.
How to Load?
Pixels need to be loaded either securely or non-securely.
Secure pixels should be used on all HTTPS pages and nonsecure pixels should be used on HTTP pages. The main difference is that secure pixels go through an extra step of encoding information so the message being sent is only readable by the sender and intended reader of the message. Nonsecure pages can support both secure and nonsecure pixels, but secure pages can only use secure pixels.
For optimal load time, we recommend that secure pixels only be used on secure pages. Zeta DSP JavaScript pixels are protocol agnostic, meaning they adjust based on the protocol of the page it is implemented on, but Image pixels will need an explicit HTTP or HTTPS declaration.
Cache Busting
Common Implementation Methods
It is important that pixels are set up correctly in order to ensure that DSP is accurately receiving data in order to optimize the campaign. The correct setup ensures that every user that loads the page will fire the DSP pixel. We recommend against using frequency capping or conditional firing rules as they may provide an incomplete understanding of your audience.
DoubleClick Floodlight
Default cachebuster macro: %n

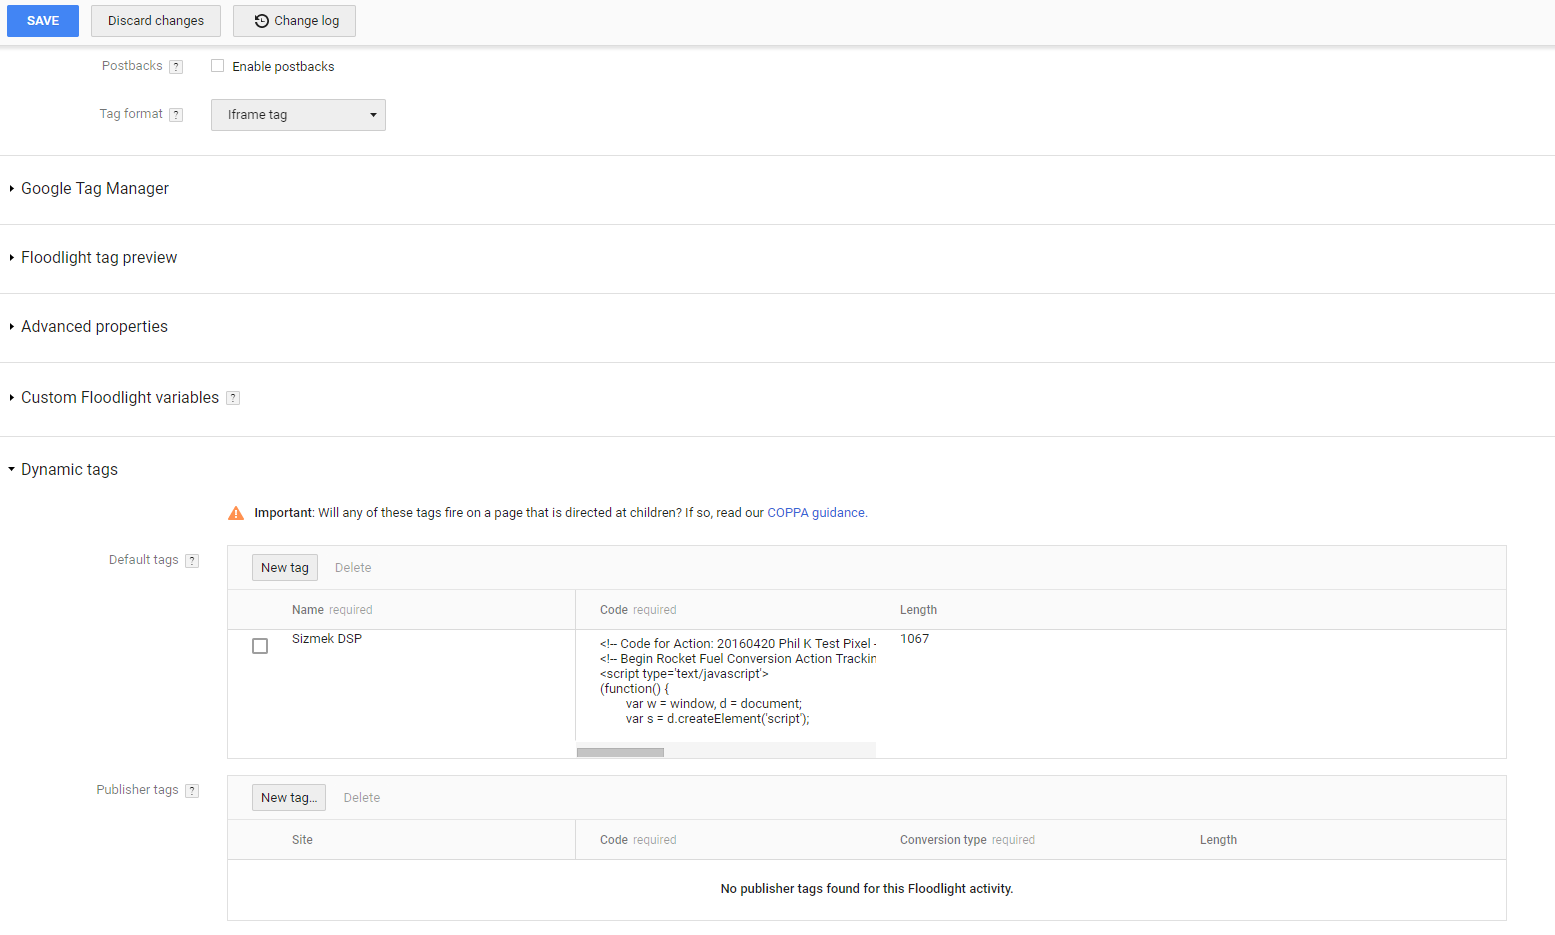
Setup as a Default Pixel under Dynamic Tags.
Do not place the DSP pixel as a Publisher tag unless instructed. Placing the DSP pixel as a Publisher tag would cause the pixel to conditionally fire on an Attributed Conversion, which gives us an incomplete view of an audience.
Ensure Floodlight is implemented in HTML as an iFrame or global site Floodlight, not an image Floodlight.
Image Floodlights do not support piggybacking.
Refer to Third-Party Tracking with Dynamic Tags for more information.
Ensure the correct Floodlight is being modified. Every Floodlight can be uniquely identified by its Category ID, which is visible in the Floodlight URL as cat=
Google Tag Manager
Default cache buster macro: {{Random Number}}

Depending on whether the GTM account is V1 or V2, use the chart below to confirm that the {{Random Number}} cache bust macro is set up correctly.
Google Tag Manager Version | Access URL | To Enable {{Random Number}} |
|---|---|---|
V1 | Create a new user-defined variable (macro) of type Random Number. | |
V2 | Activate the Random Number Built-in Variable. |
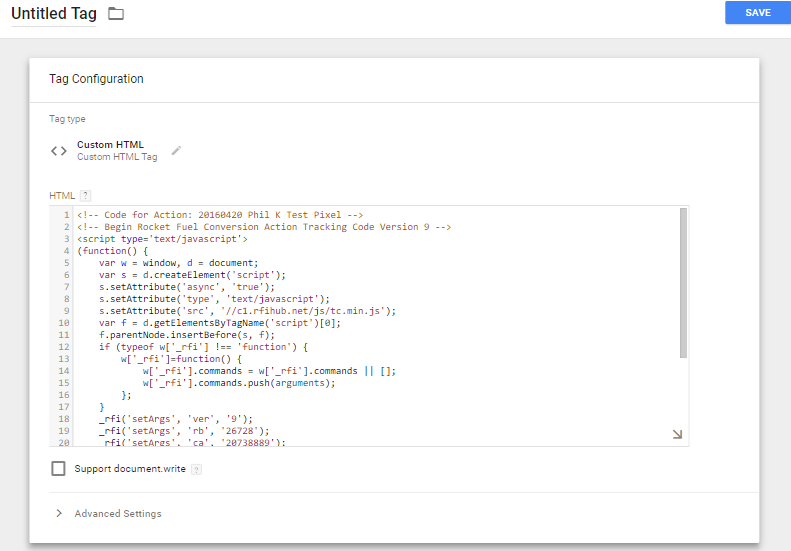
The Zeta DSP Pixel should be set up as a Custom HTML Tag within GTM with support document.write checked on.
Ensure firing rules (called Triggers) are correctly set up. If incorrectly set up, this can lead to unexpected conditional firing.
Confirm most recent changes have been published to the live container.
Sizmek
Default cache buster macro: [%Random%]
Sizmek has many settings that may conditionally fire pixels (deduplication, last entry in the path, etc). Please ensure all these settings are disabled.
Direct to HTML
Default cache buster macro: None

The default cache buster macro is unique to each Advertiser.
Our pixels should go between the <body> and </body> tags.
Please work with your web developer to ensure pixels are implemented with best practices and guidelines in mind.
JavaScript vs Image Functionality
Functionality | JavsScript | Image |
|---|---|---|
Page Load Performance | The Zeta DSP pixel and piggybacked pixels load asynchronously, in a non-blocking manner. | The Zeta DSP image and piggybacked pixels load asynchronously, in a blocking manner. |
Cooke Matching | Higher match rate because cookie matching piggybacks load asynchronously resulting in more partner calls being completed. | Lower match rate because cookie matching piggybacks load synchronously so one partner call must complete before the next can begin. |
Protocol | Protocol agnostic based on the page on which it fires. Zeta DSP takes care of the secure (https) or non-secure (HTTP) automatically. | The client is responsible for properly declaring either secure (https) or non-secure (http). |
Timeout | Global timeout of 15 seconds. |
Cookie Matching
In order to buy inventory efficiently and programmatically, the Zeta DSP utilizes pixels from our exchange partners to match their user IDs with our internal user IDs. With this cookie matching strategy, we are able to have more insight into the user's actions and determine which user is more likely to convert. This is standard programmatic practice and an effective strategy that we have always had in place.
With that being said, we do have the ability to turn off these piggybacked pixels. However, the disabling of cookie matching would negatively impact campaign performance. Below is the current list of cookie match partners:
