

Zeta’s in-house marketing experts have created Experience Builder Templates to leverage best practices and the ZMP’s omnichannel capabilities to help users generate automation ideas and optimize setup time. For more advanced marketers in a Super User role, you can take advantage of this feature to provide templates for your teams and family of accounts, flexibly scaling your automation tactics across your business.
Create Experience Builder Templates
The next several sections cover creating Experience Builder Templates from scratch. Skip through to directly refer to the Convert an Experience to a Template section below.
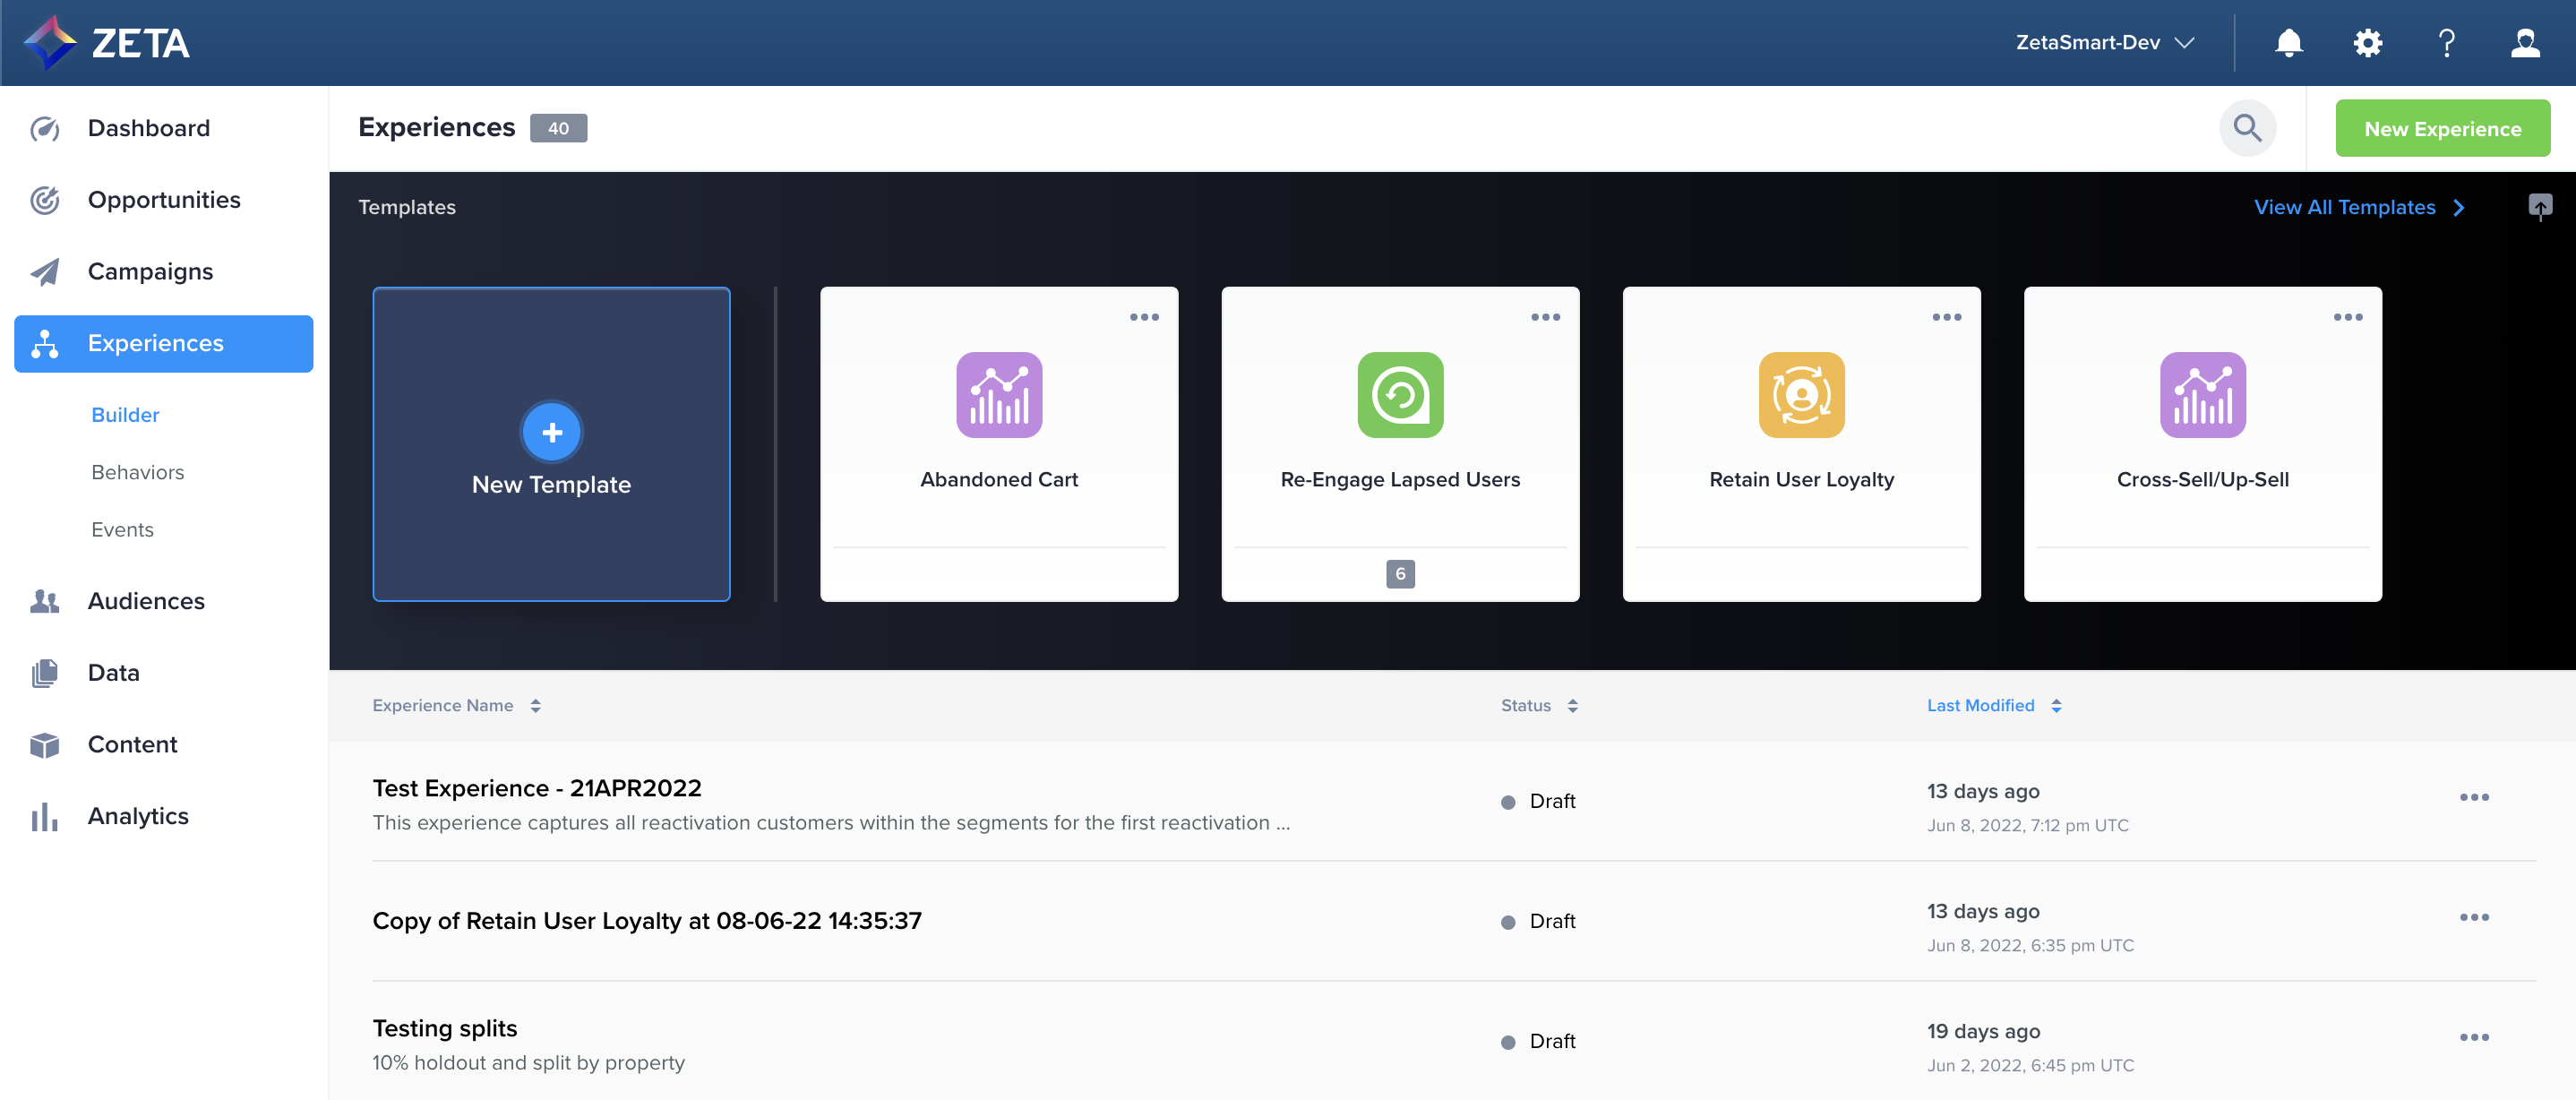
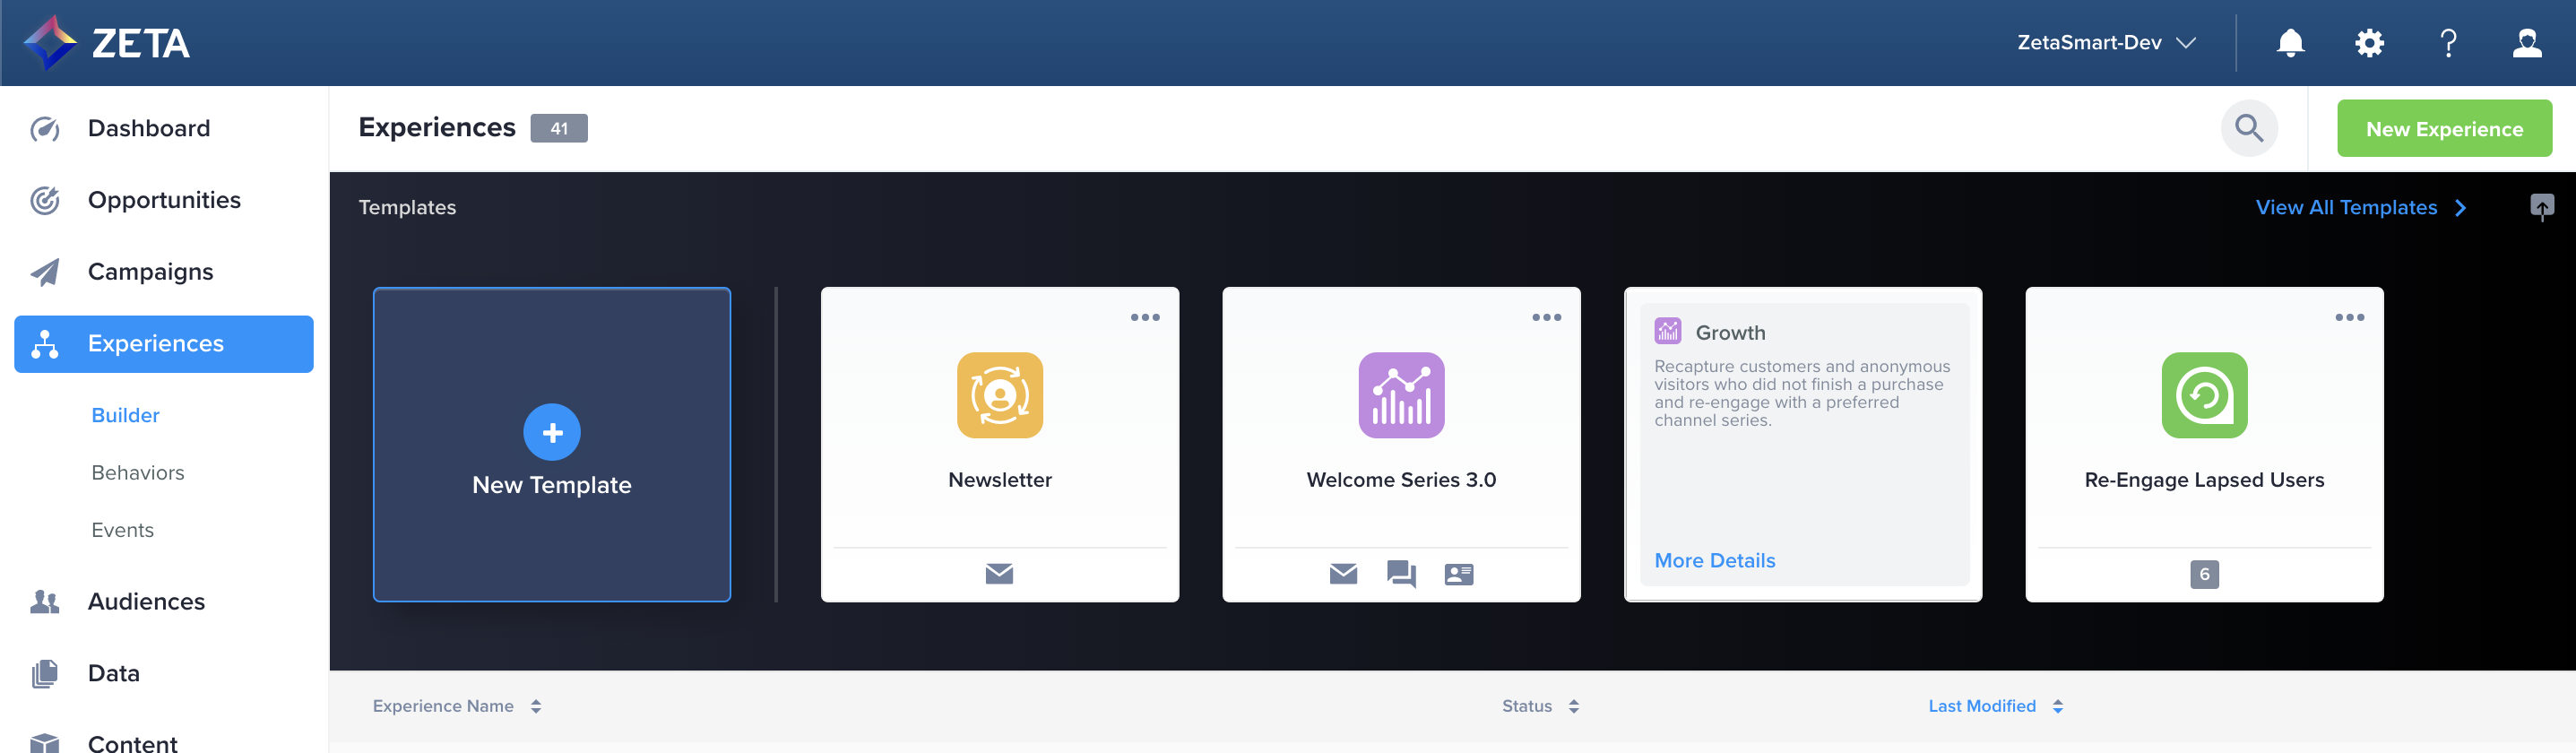
1. From the menu on the left, navigate to Experiences > Builder to open the main Experience Builder library.
-
The panel above your list of experiences shows the templates available in your account.
2. Click on + New Template at the left to get started.
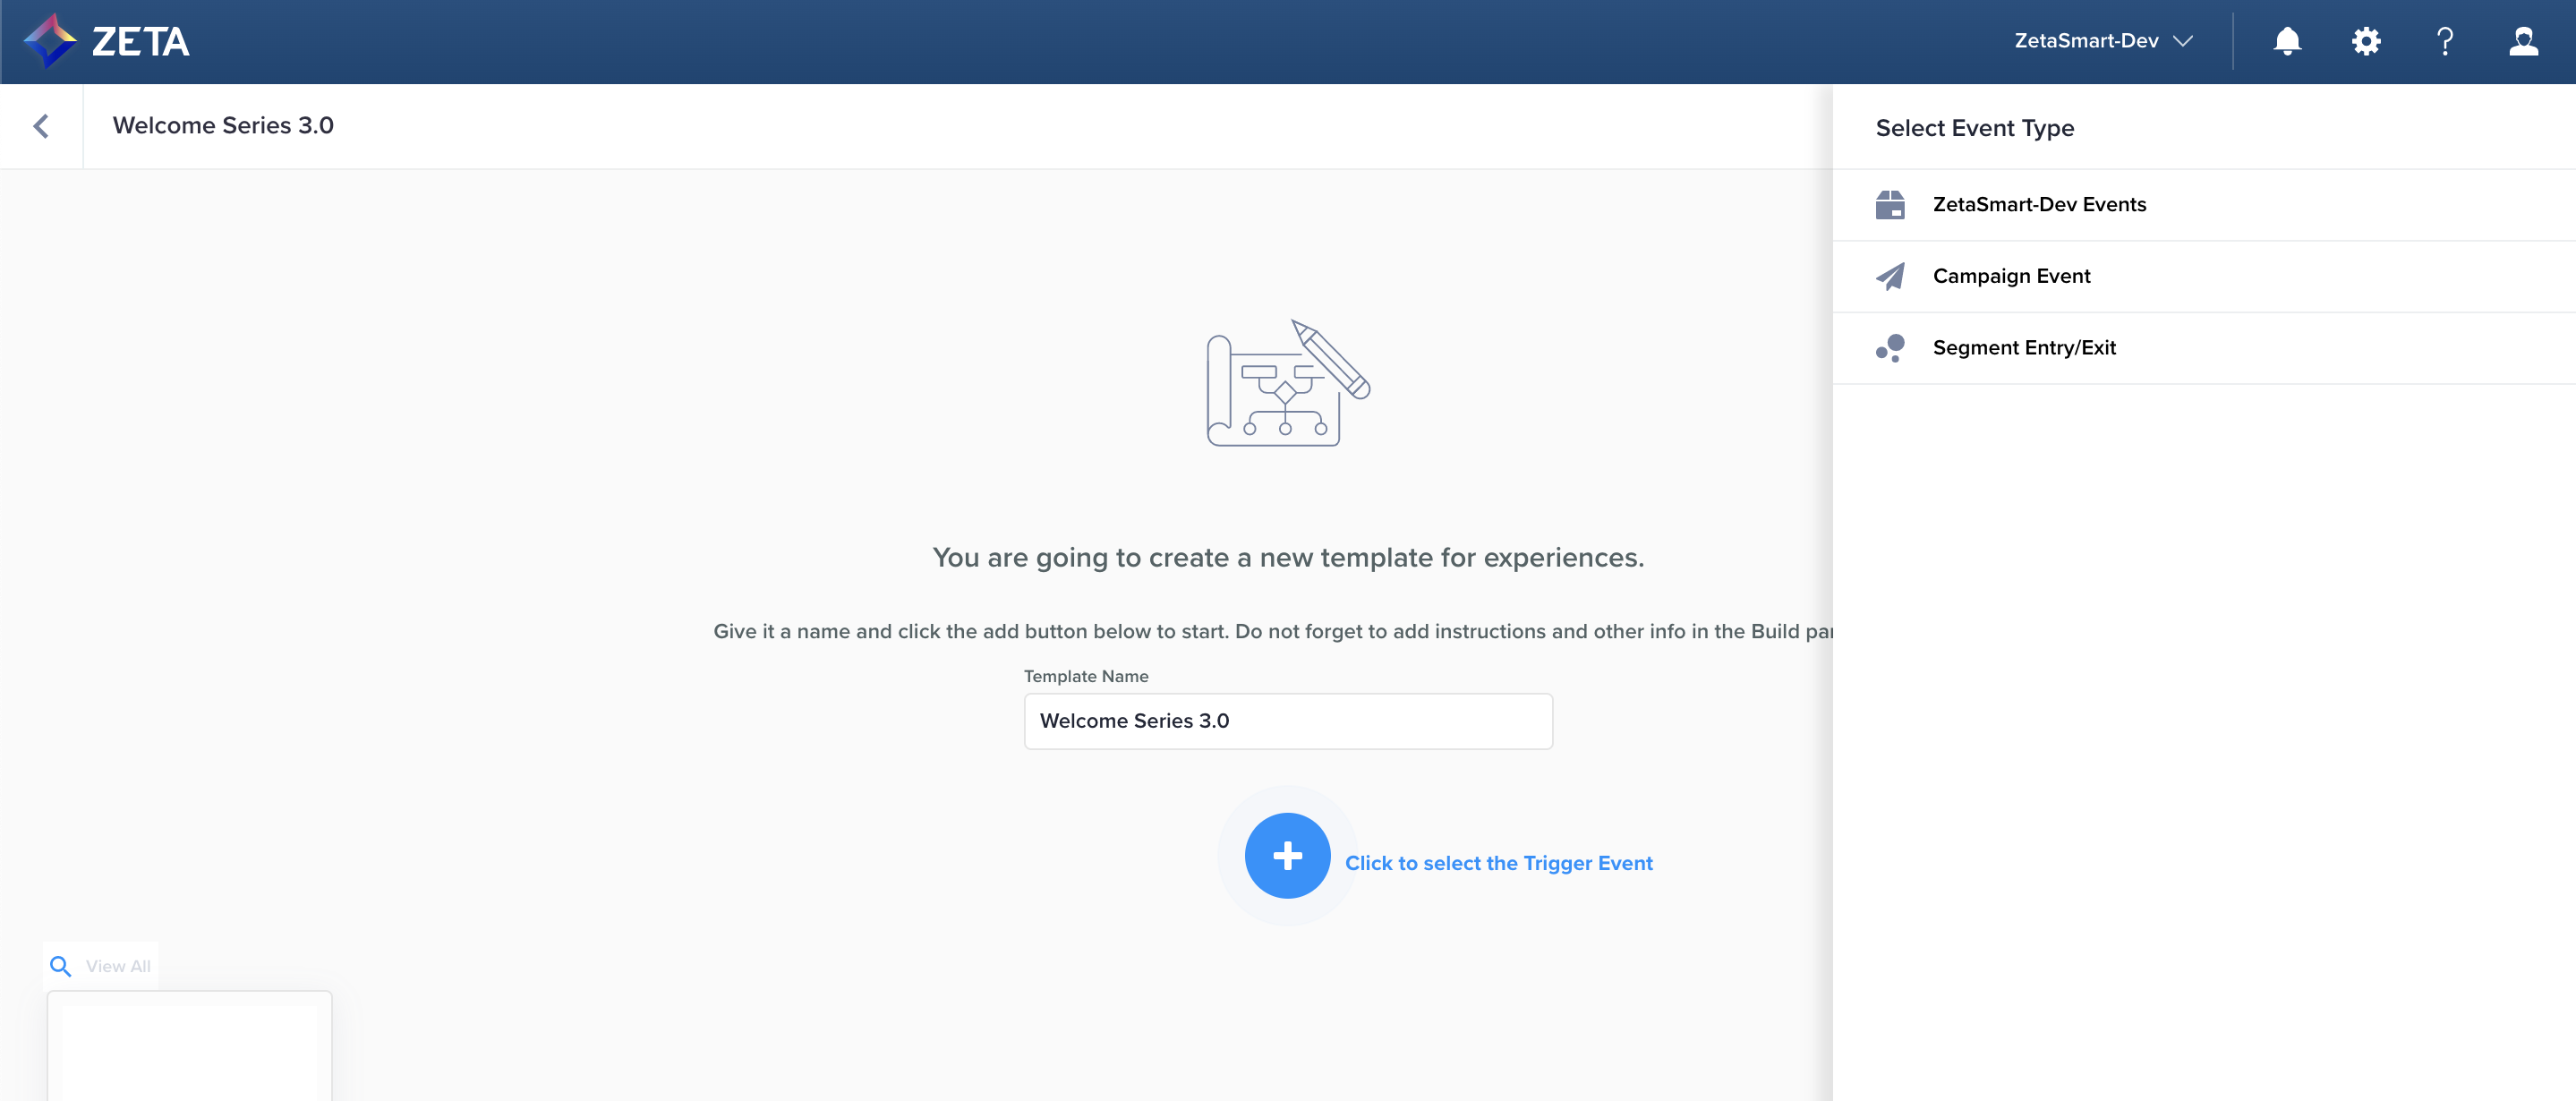
3. Give your template a name and select a trigger event to move forward and create the template.
Adding Nodes to your Canvas
Building a template is very similar to building an experience, as they follow the same flow. However, there are some key differences to note in creating and editing templates.
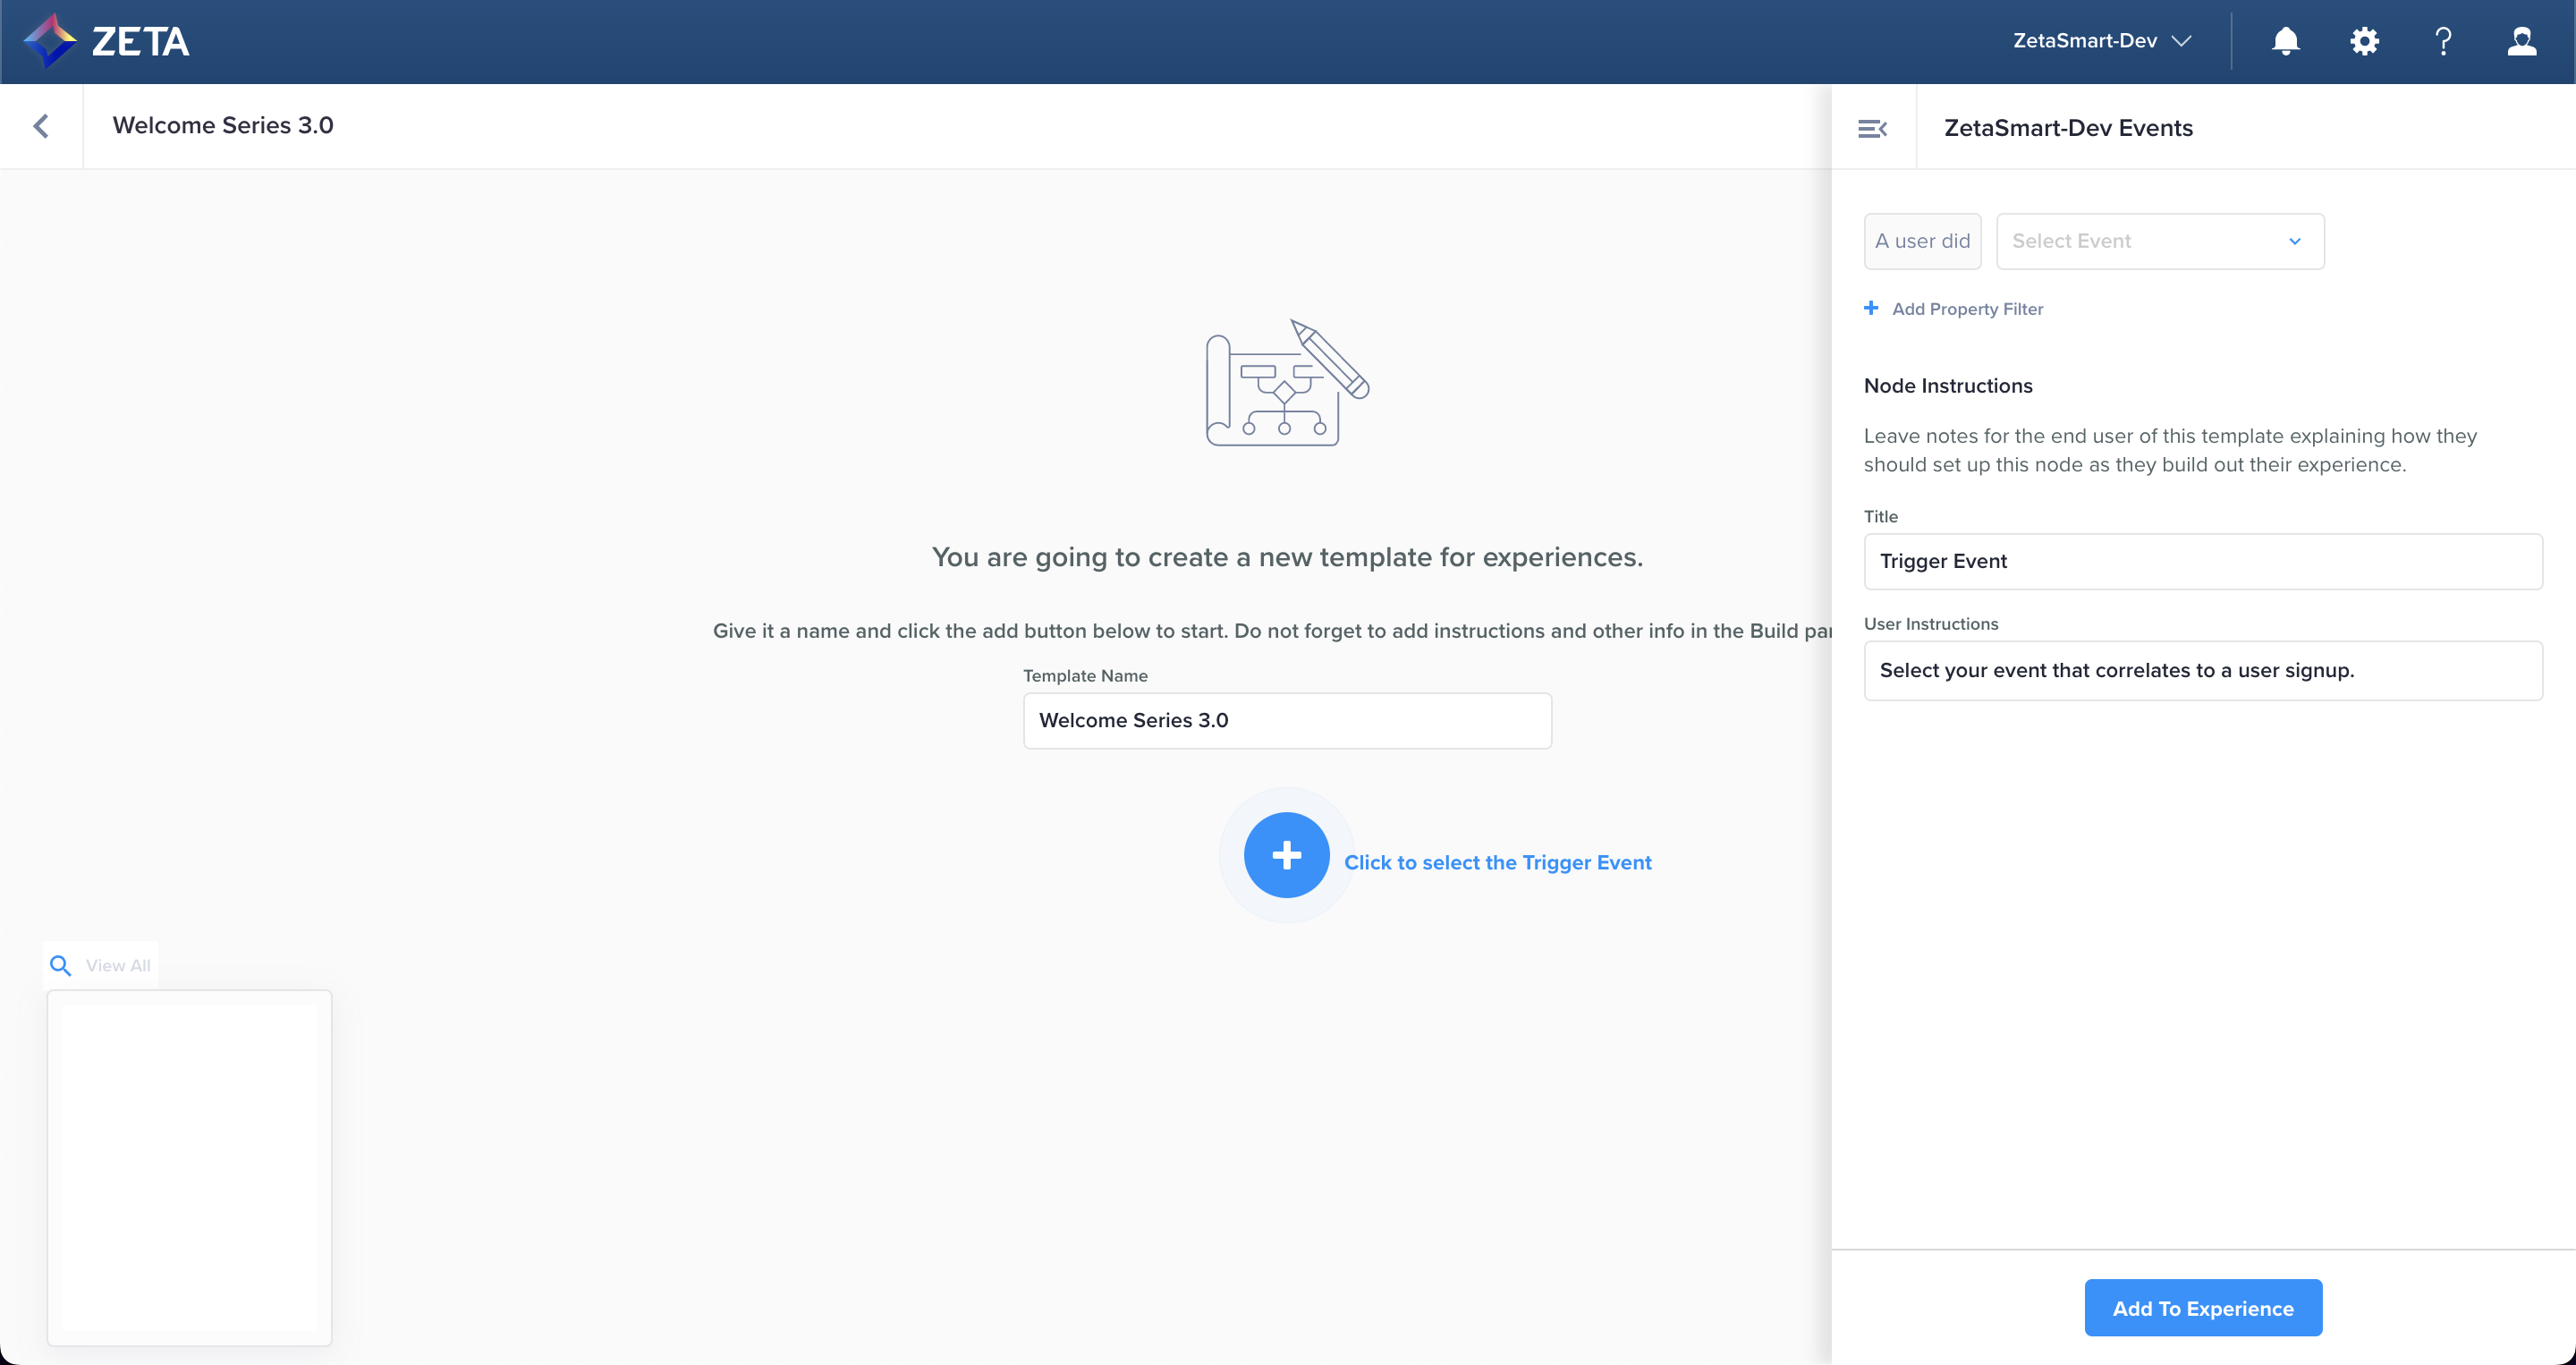
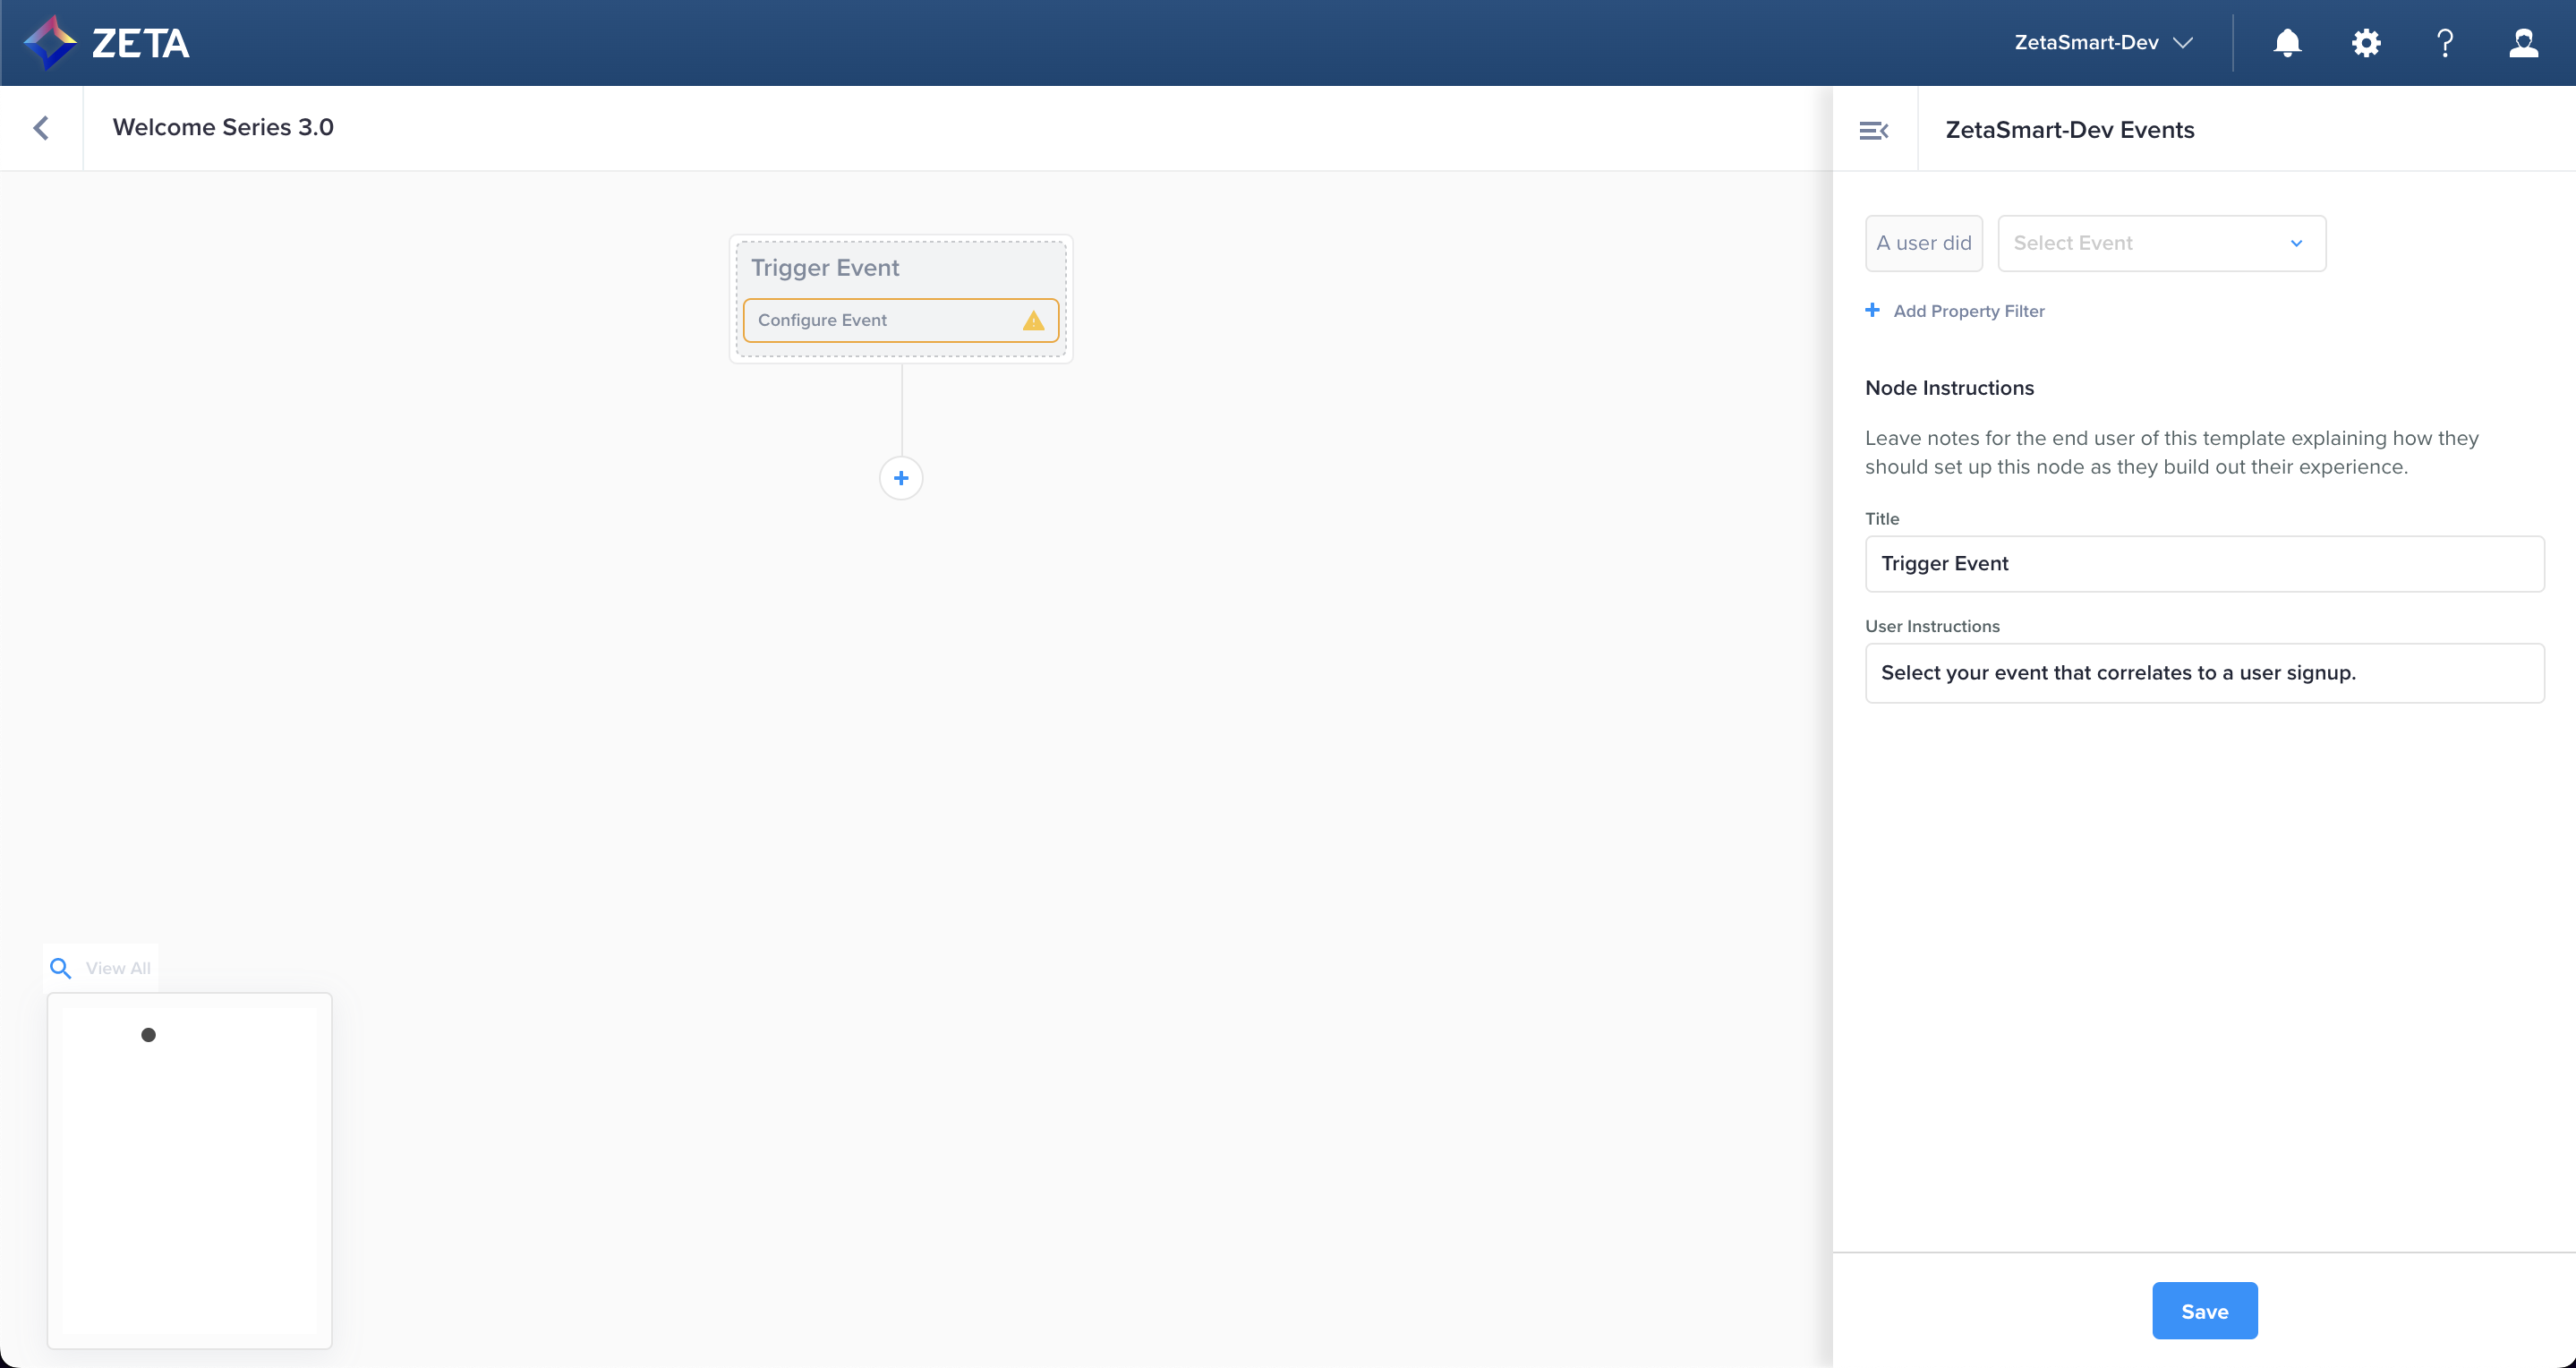
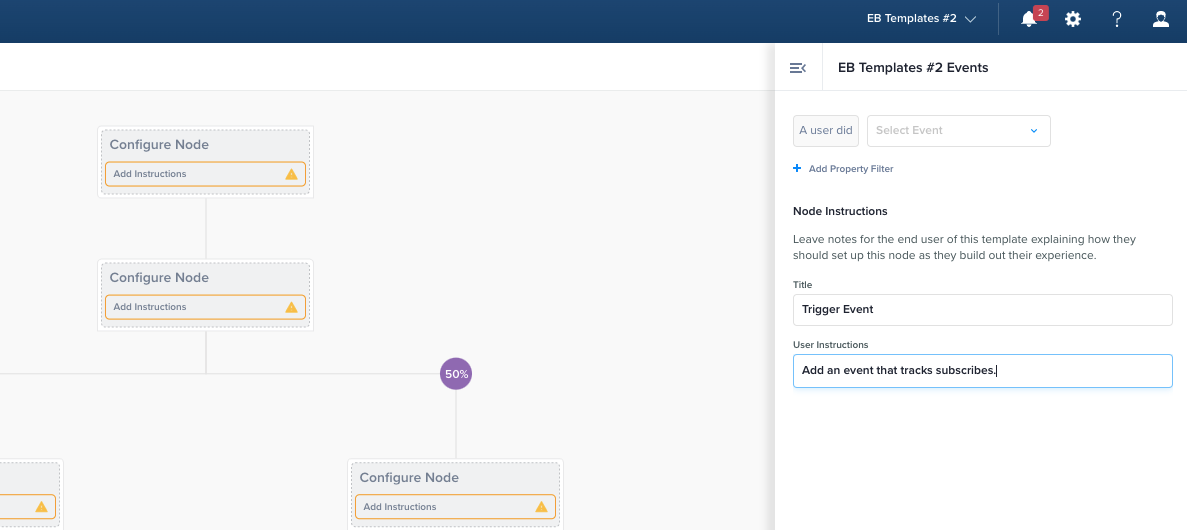
1. While you must start the template with a trigger event node, the input (specific event) is not required. What is required is Node Instructions which will correspond to what the user sees as Recommendations when they create their experience from your template.

2. Upon adding to trigger event to the template, your template will officially be created. While you may see the Template Details panel open, you don’t necessarily need to fill this information out first. We’ll cover that in the next section. All changes to the canvas will be saved automatically so you don’t need to click a button to save your work (much like building a regular experience).
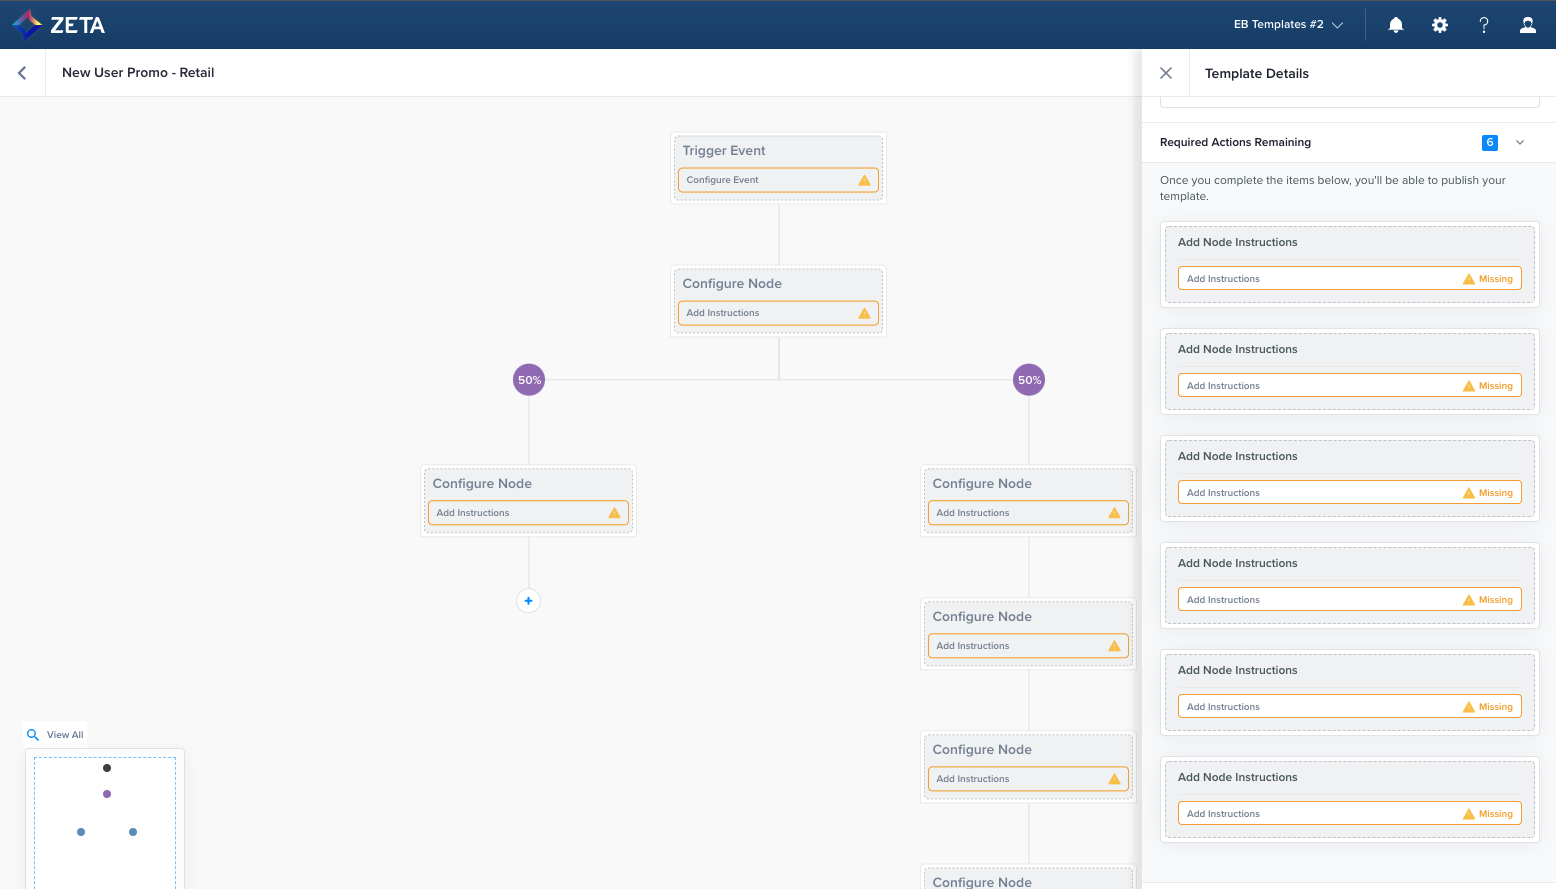
3. Once you add a node to your canvas, it will have a yellow warning indicator that will persist until the end-user takes the action required (ie, fill in the appropriate data from their account) in order to activate their experience. Your template will always have the yellow warning indicator in each node while you build or edit it.
To edit a node, select the card menu and click on Edit.
4. Even if you pre-select an input in a node, the end-user can still edit the node since all regular Experience Builder functionality will be available to them.
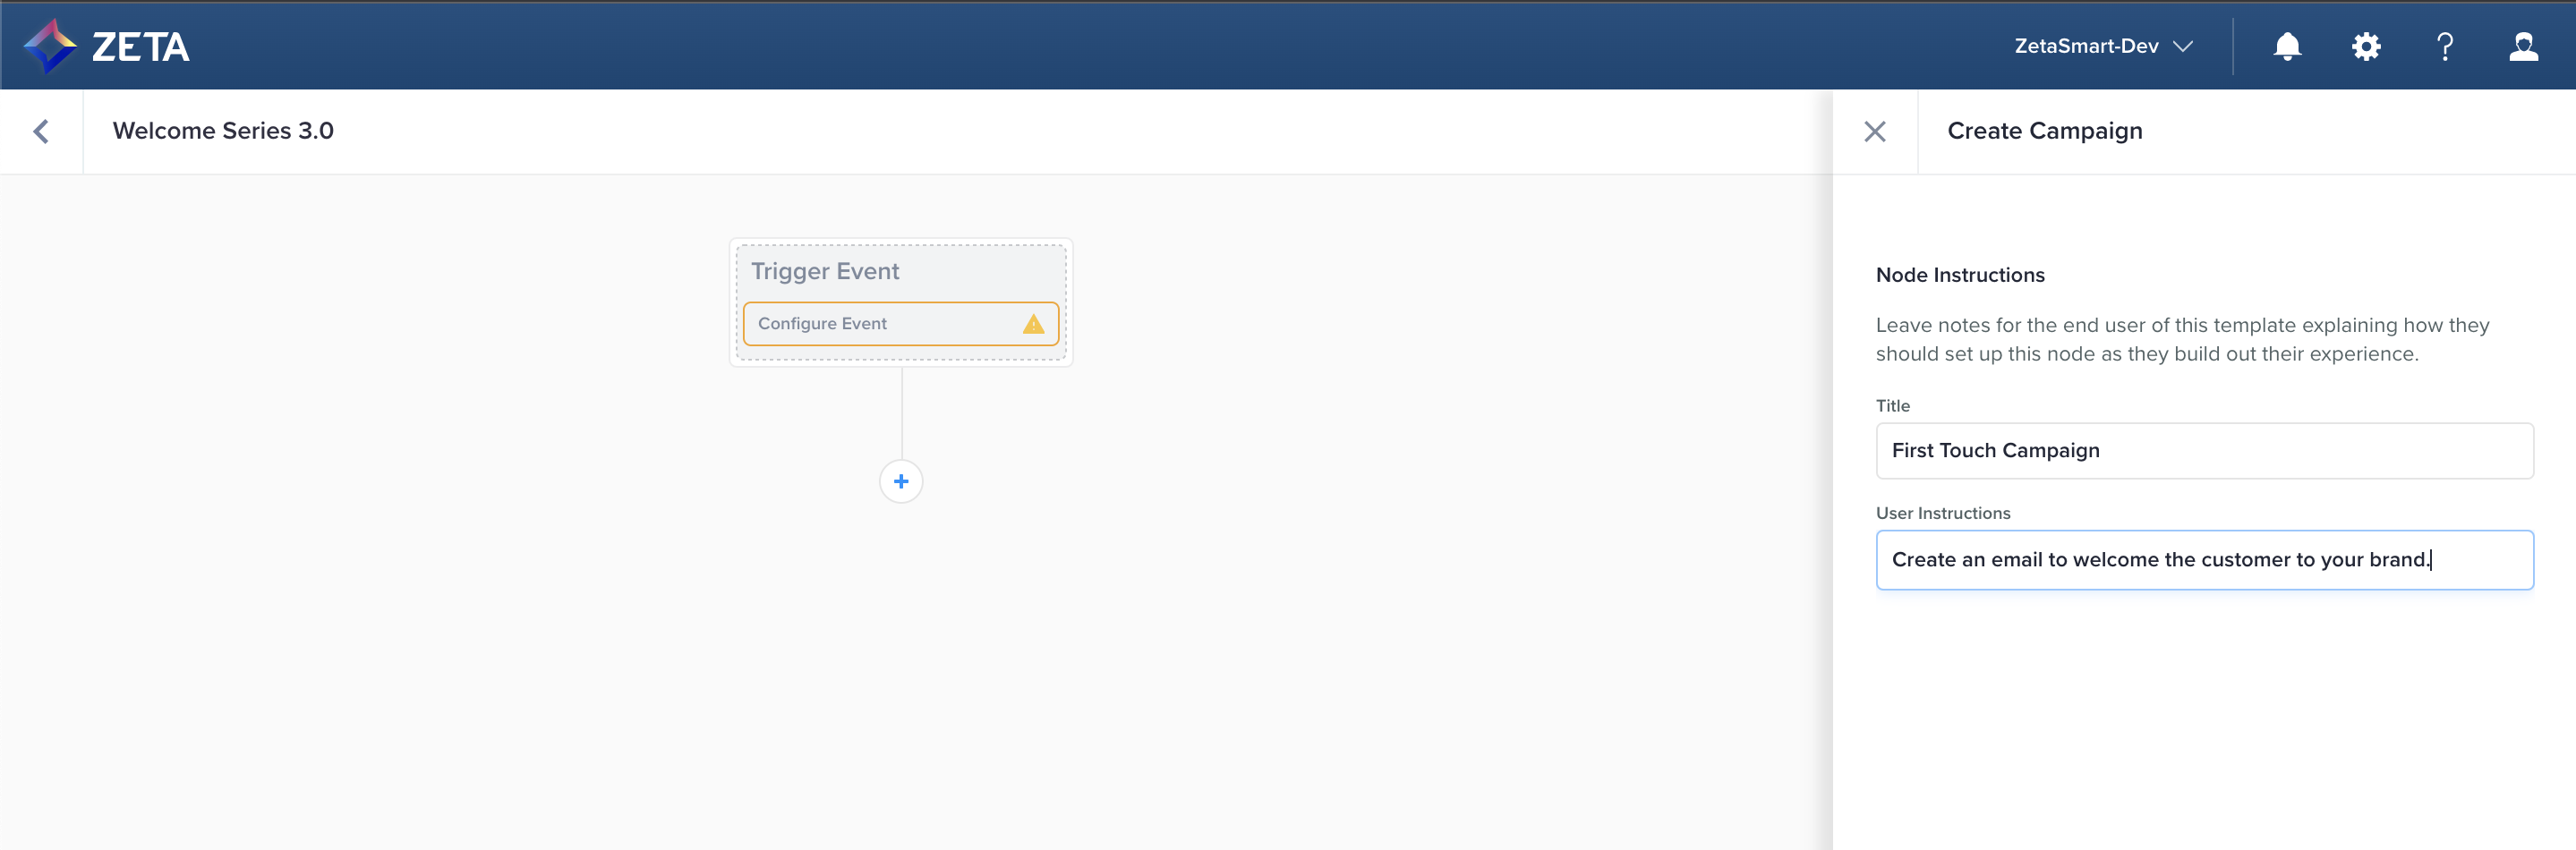
5. The one exception to the rule is the Create New Campaign action. Since the ZMP doesn’t support reusing campaigns, all we allow you to do in this step is to create a placeholder with node instructions for the end-user to follow. You cannot pre-select anything for them.
6. Continue adding nodes until your experience is complete.
Required Actions
For every node that requires action, the CTA will change depending on the type of node. The end-user will see the same design and CTA.
Adding Details to your Template
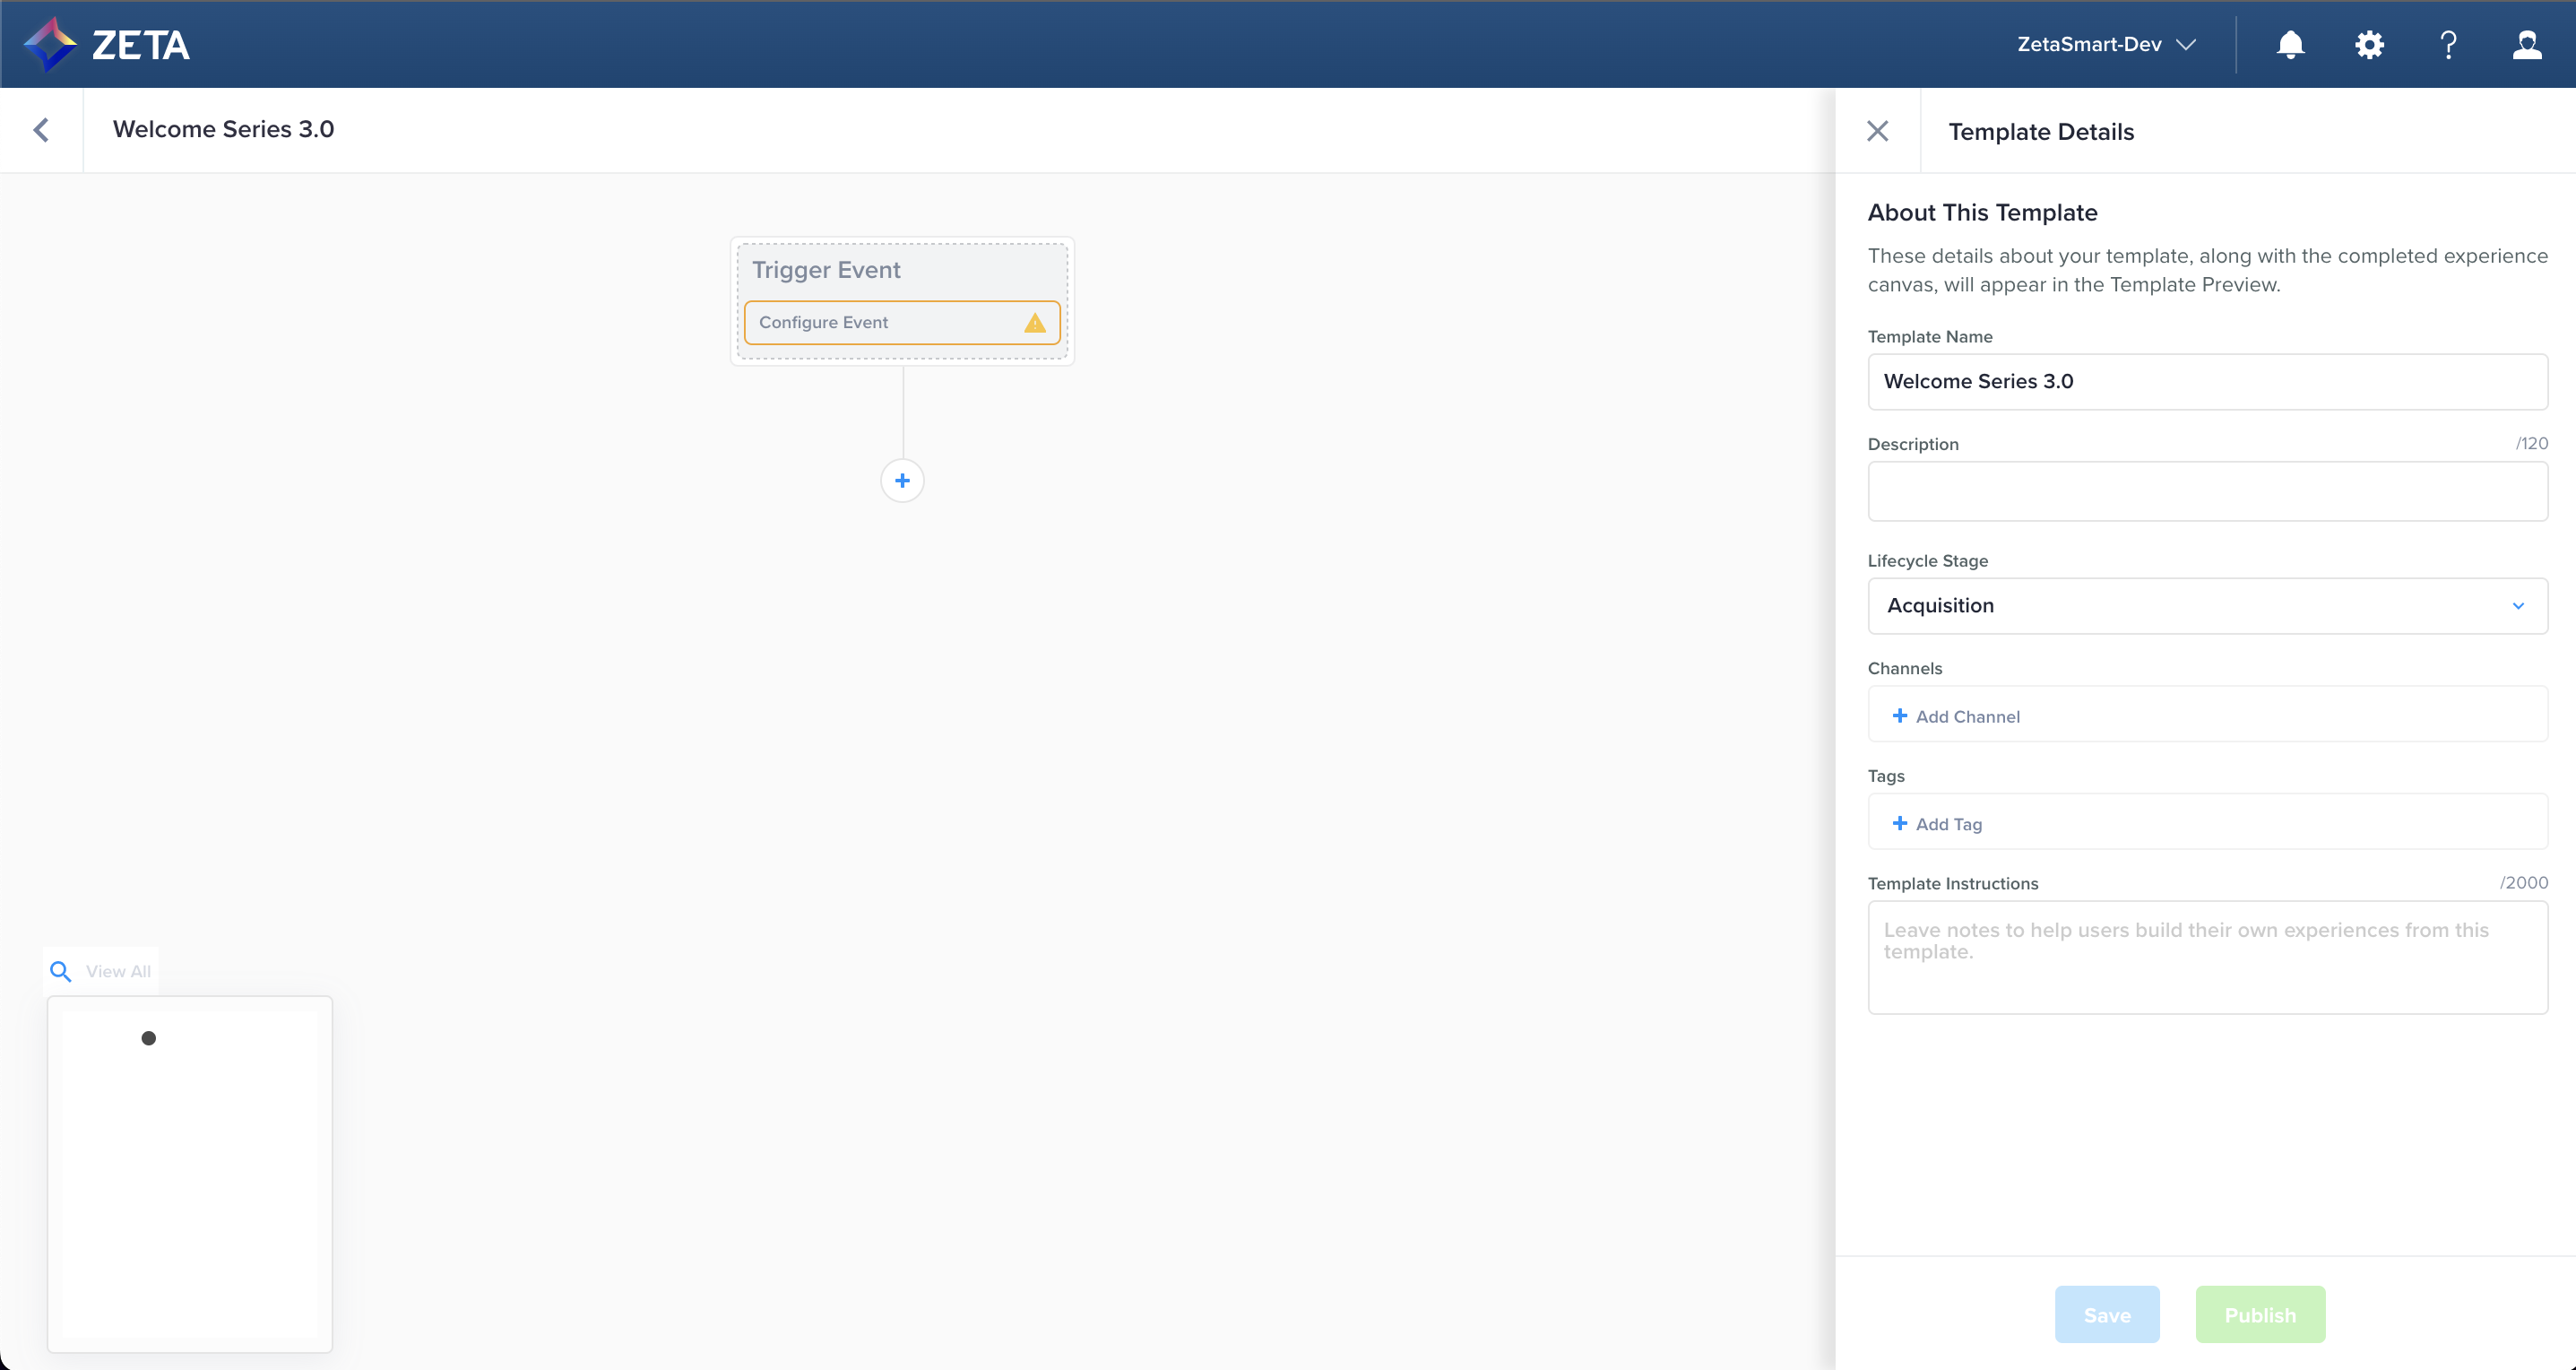
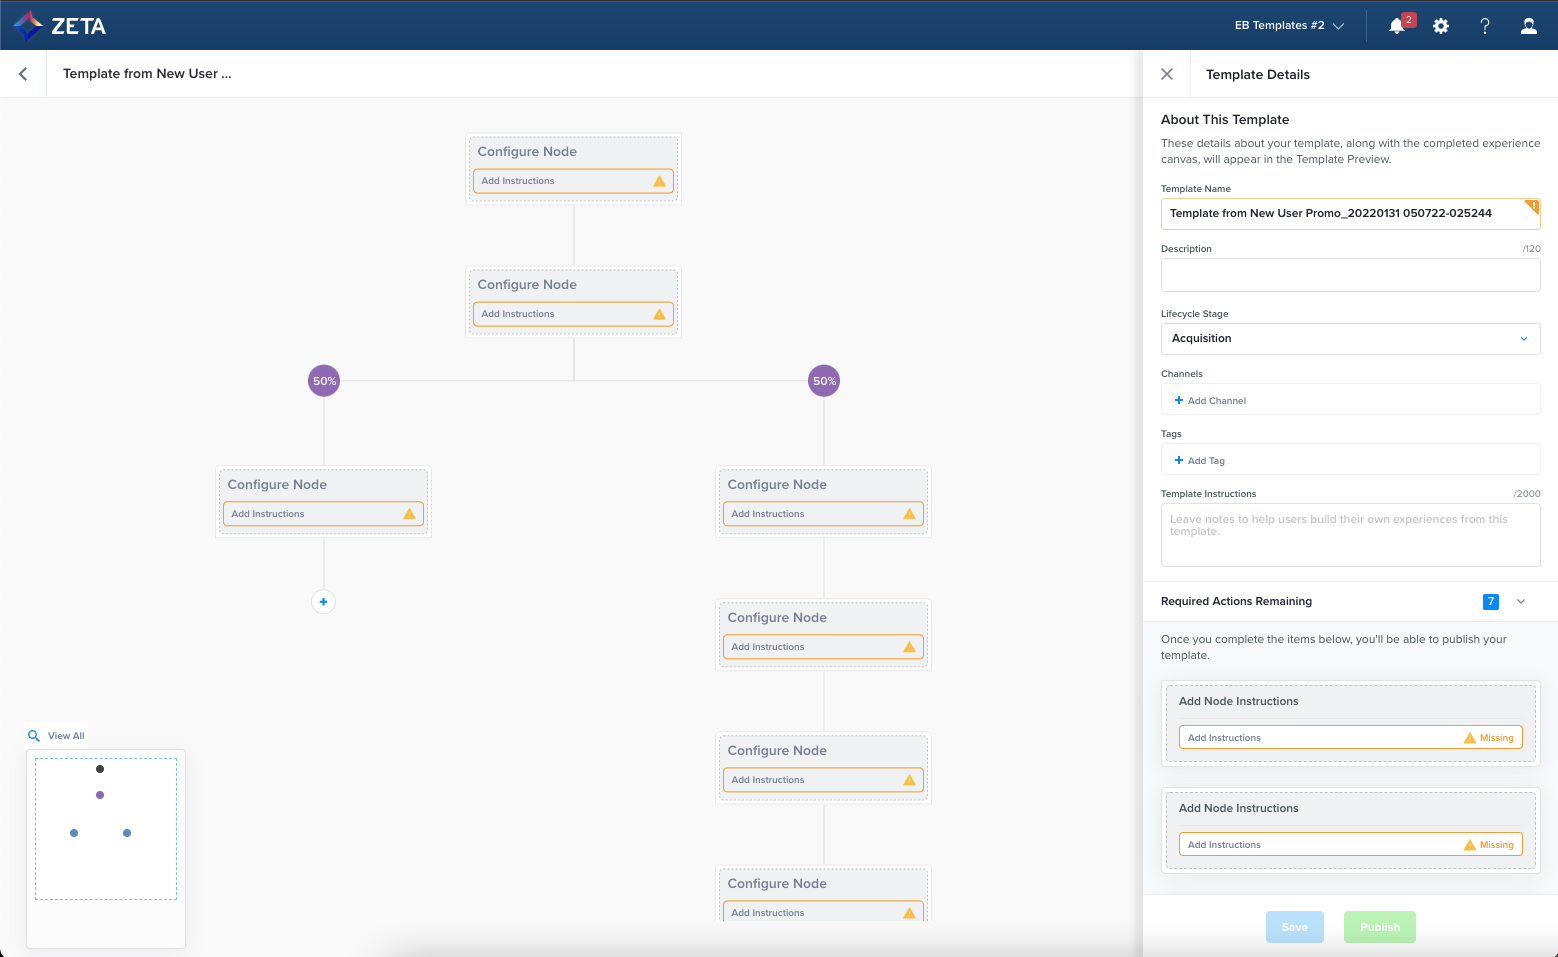
1. After you save your trigger node, the Template Details panel will open. While completing this section is required to publish the template, you can continue building your nodes and come back to it later. Make sure you click on Save in order to preserve changes to this section.
This is the only place in Experience Builder that doesn’t auto-save.
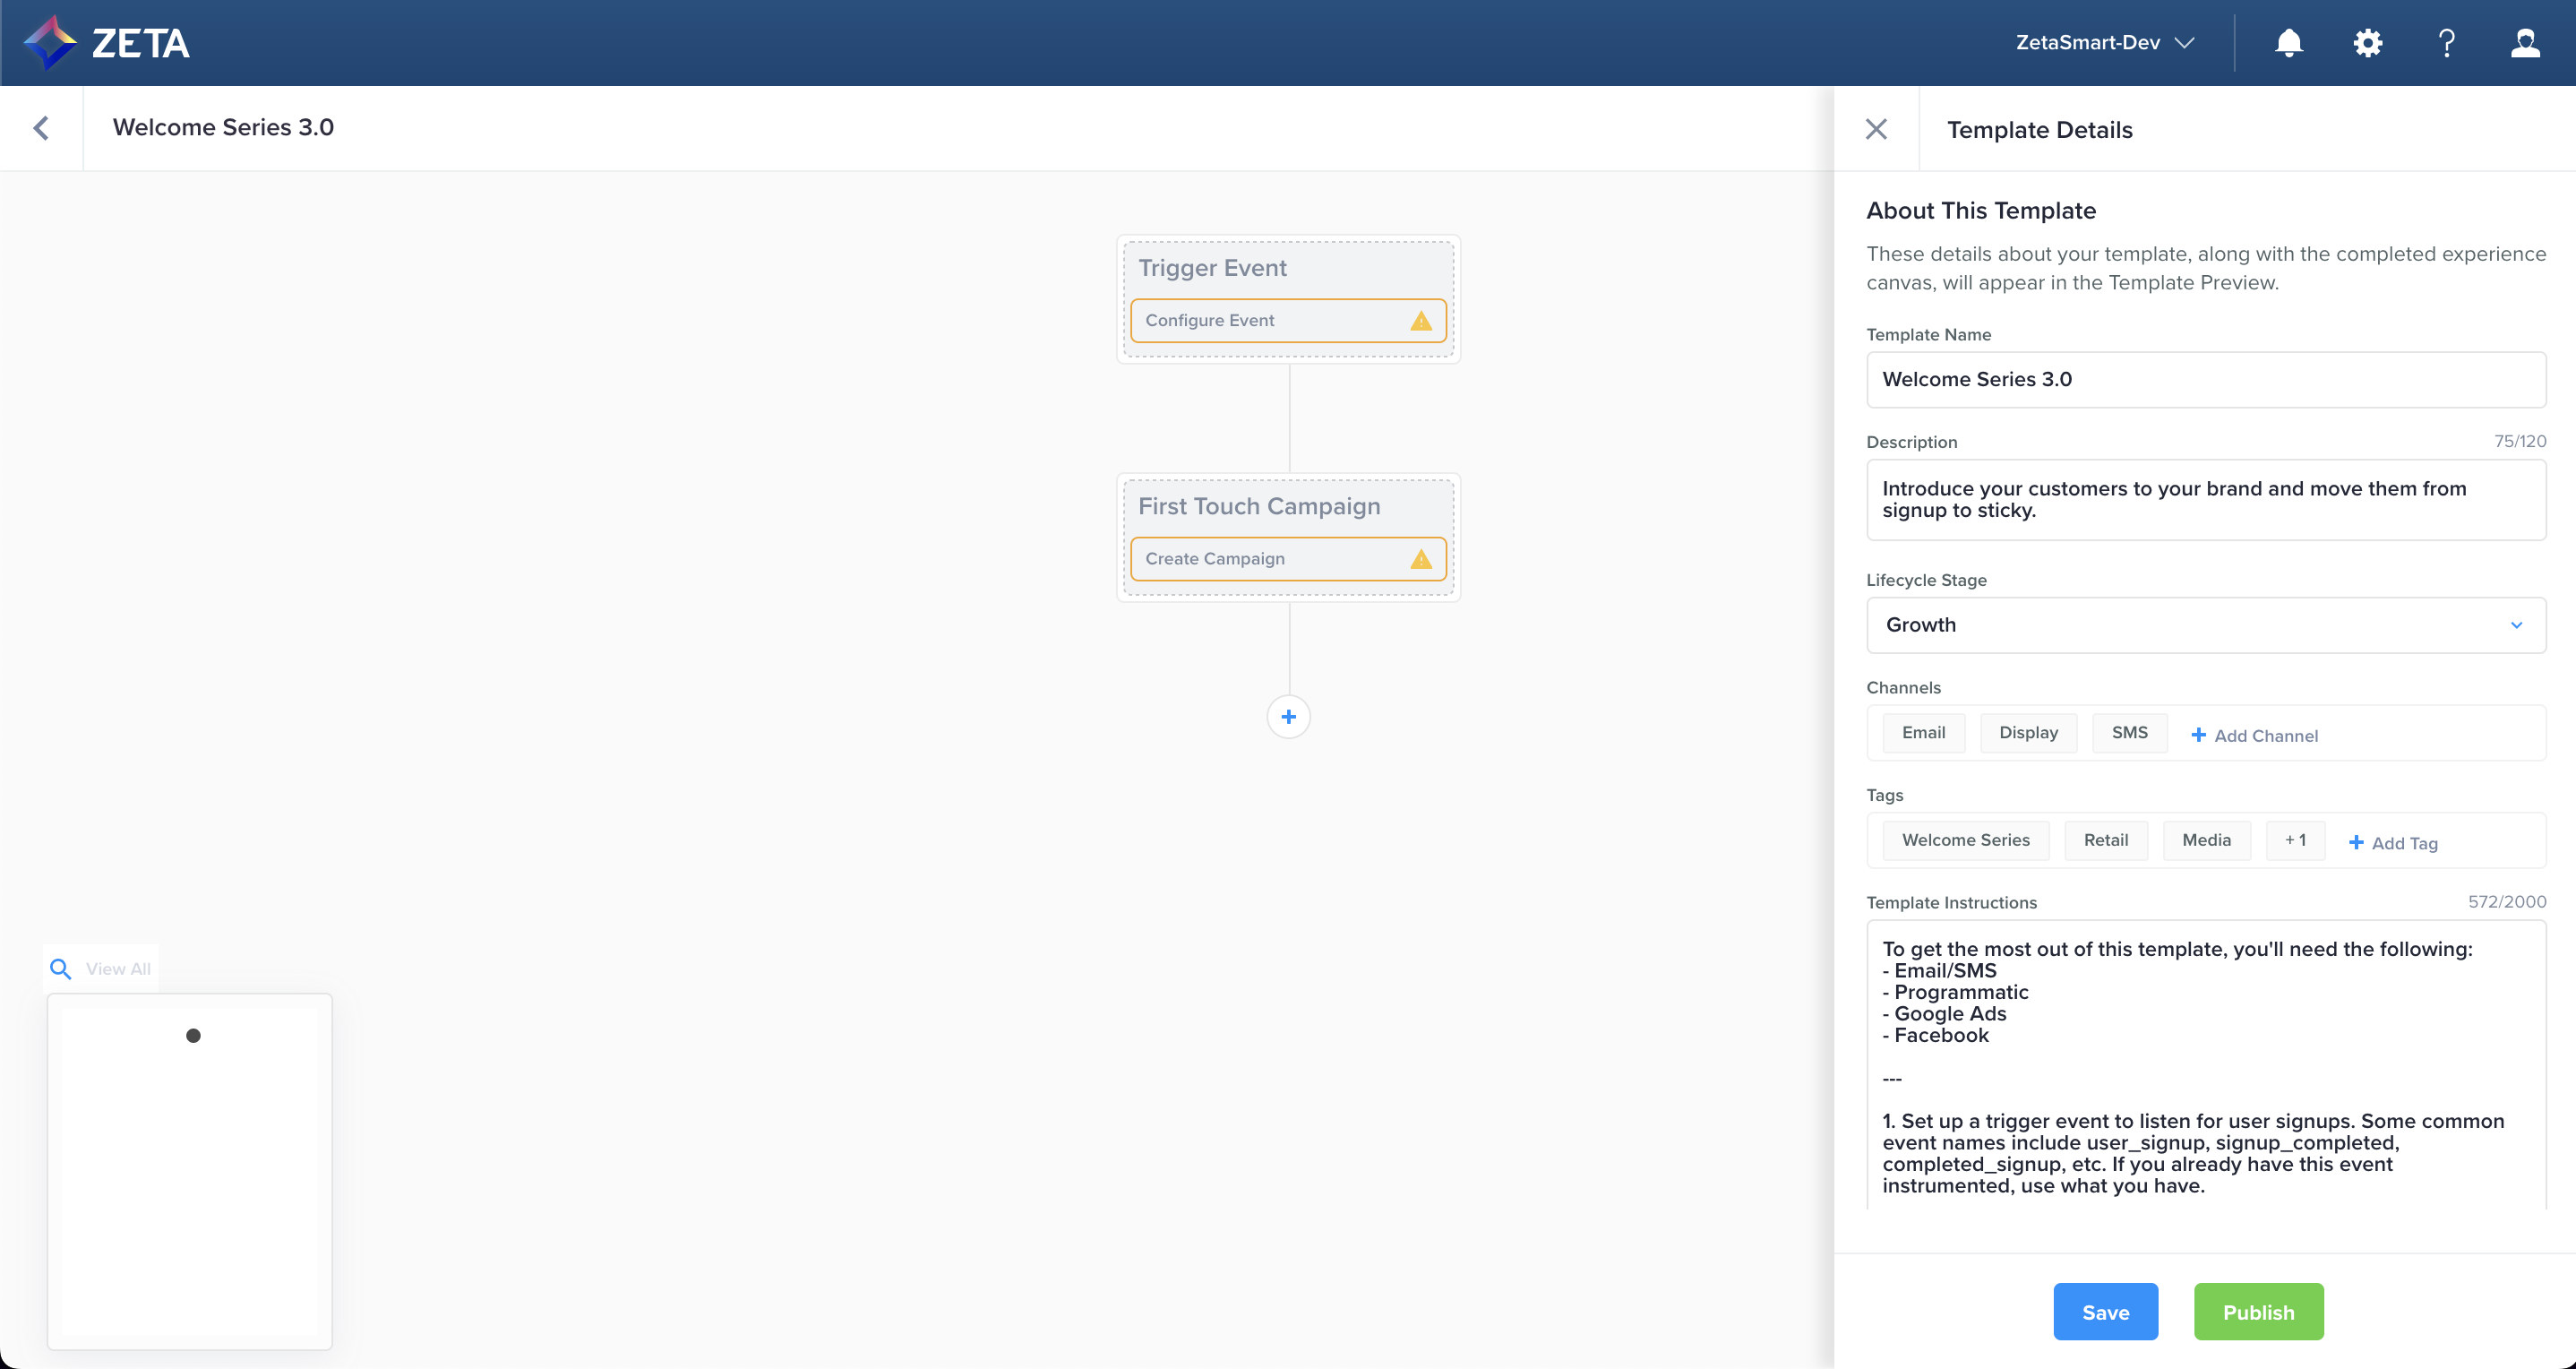
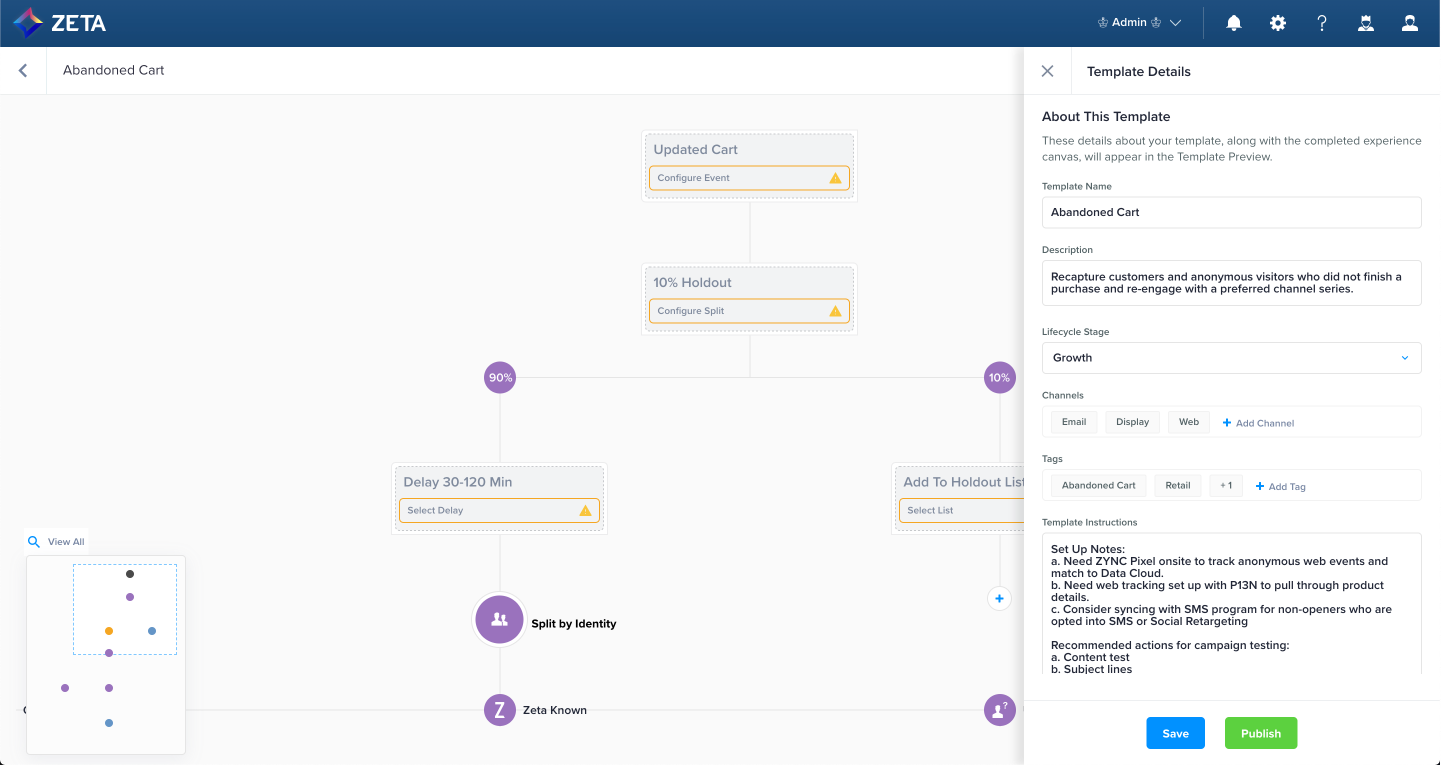
2. The fields in the Template Details panel will provide the content for the template cards and template preview page, which tell an end-user what your template intends to do. There are 6 required fields:
|
Template Name |
Auto-populates from your first step |
|
Template Description |
A brief overview of your template (120 characters) |
|
Lifecycle Stage |
What part of the funnel your template is targeting |
|
Channels |
|
|
Tags |
|
|
Template Instructions |
An in-depth list of requirements, context, goals, and more to help the end user leverage the template to its full potential (2000 characters) |
3. As a reminder, if you make any changes to the Template Details fields, click on Save at the bottom of the panel to retain your selections.
Definitions & Icons
Definitions and Icons
Lifecycle Stage
|
Icon |
Lifecycle Stage |
Definition |
|---|---|---|

|
Acquisition |
Attracting prospects to become users |

|
Growth |
Maturing a user from first action to sticky activity |

|
Retention |
Deepening loyalty among current users |

|
Winback |
Convincing churned users to return |
Channels
|
Icon |
Channel |
Examples |
|---|---|---|
|
|
|
ZMP campaign |
|
|
SMS |
ZMP campaign |
|
|
Push |
ZMP campaign |
|
|
Display |
Programmatic, Google Ads, Yahoo DSP |
|
|
Social |
|
|
|
In-App |
ZMP campaign |
|
|
Web |
Overlays, banners |
|
|
Other |
Anything that doesn’t fit in the above categories |
Publishing your Template
You cannot edit or delete a published template.
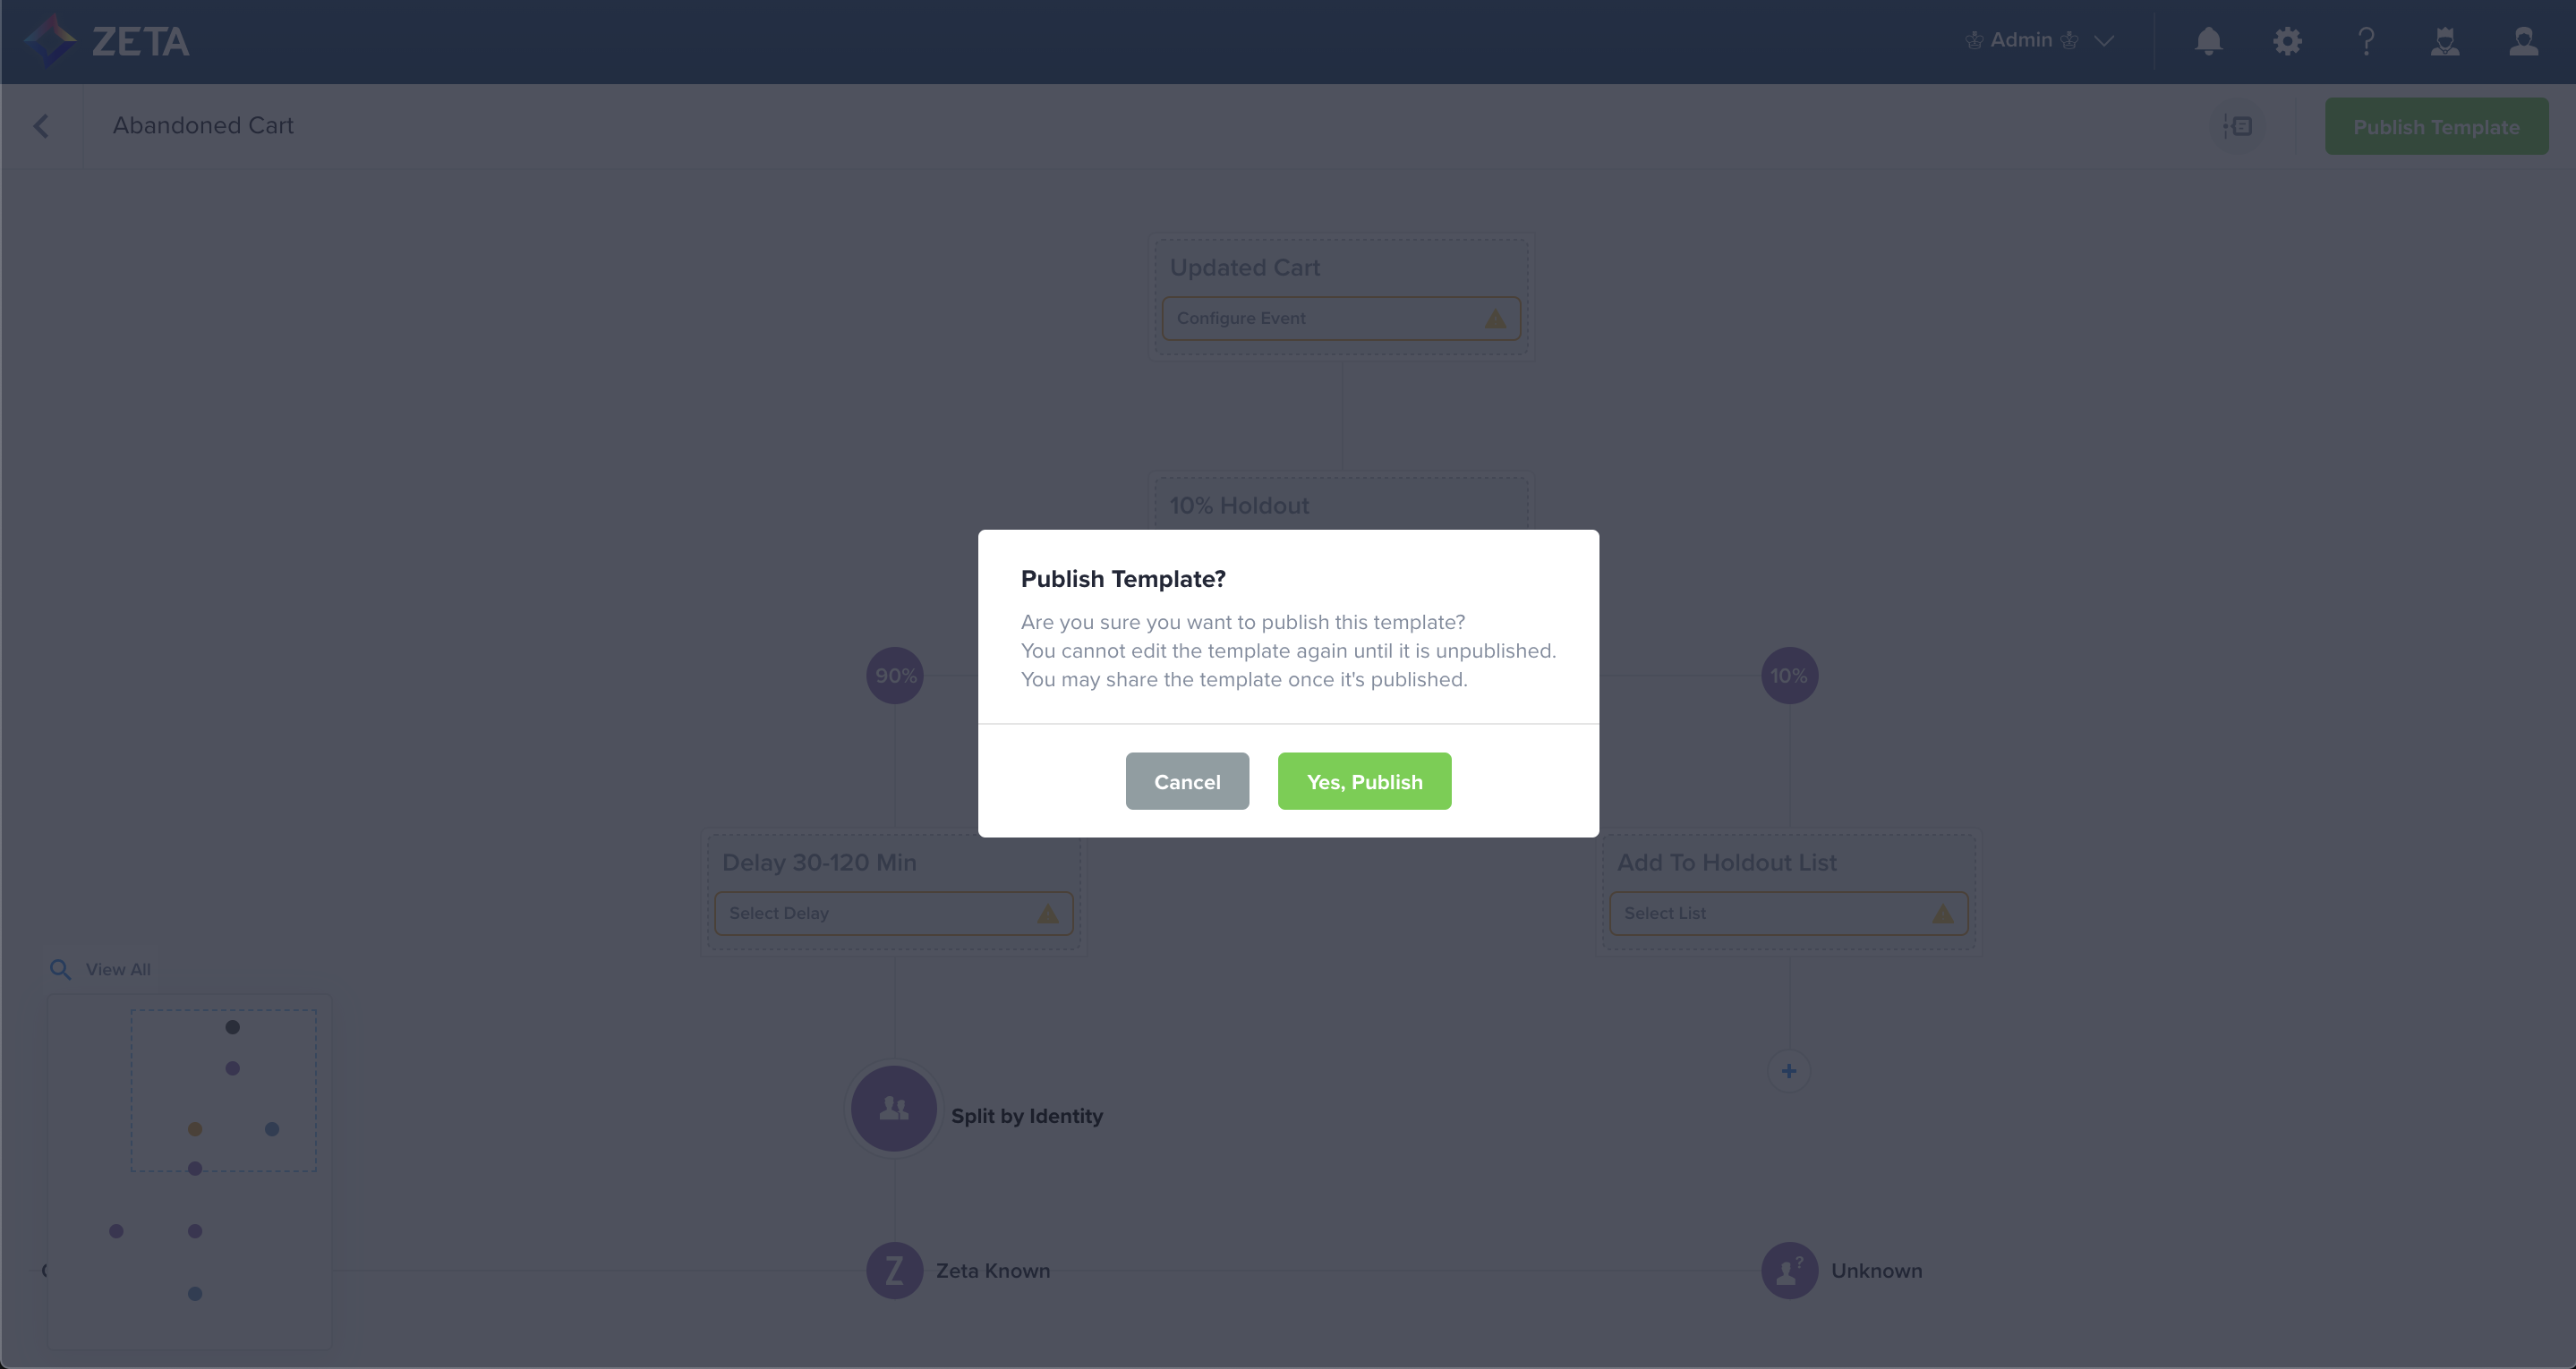
1. When you have configured all your nodes and completed the Template Details section, you can click on Publish. Note that you cannot edit anything in the template while it’s in the published state.
2. You’ll need to confirm your selection one last time by clicking on Yes, Publish.
3. Your template is now published and ready to be shared. Your required action nodes are filled so that the canvas looks how the completed experience is intended to look.
Viewing your Published Template
1. Once published, you can immediately view the card and preview the account it was created in. All content is pulled directly from the Template Details panel and is the same flow as the end-user.
.gif?cb=cffe2e07f1f06012aa5bb678f5367da9)
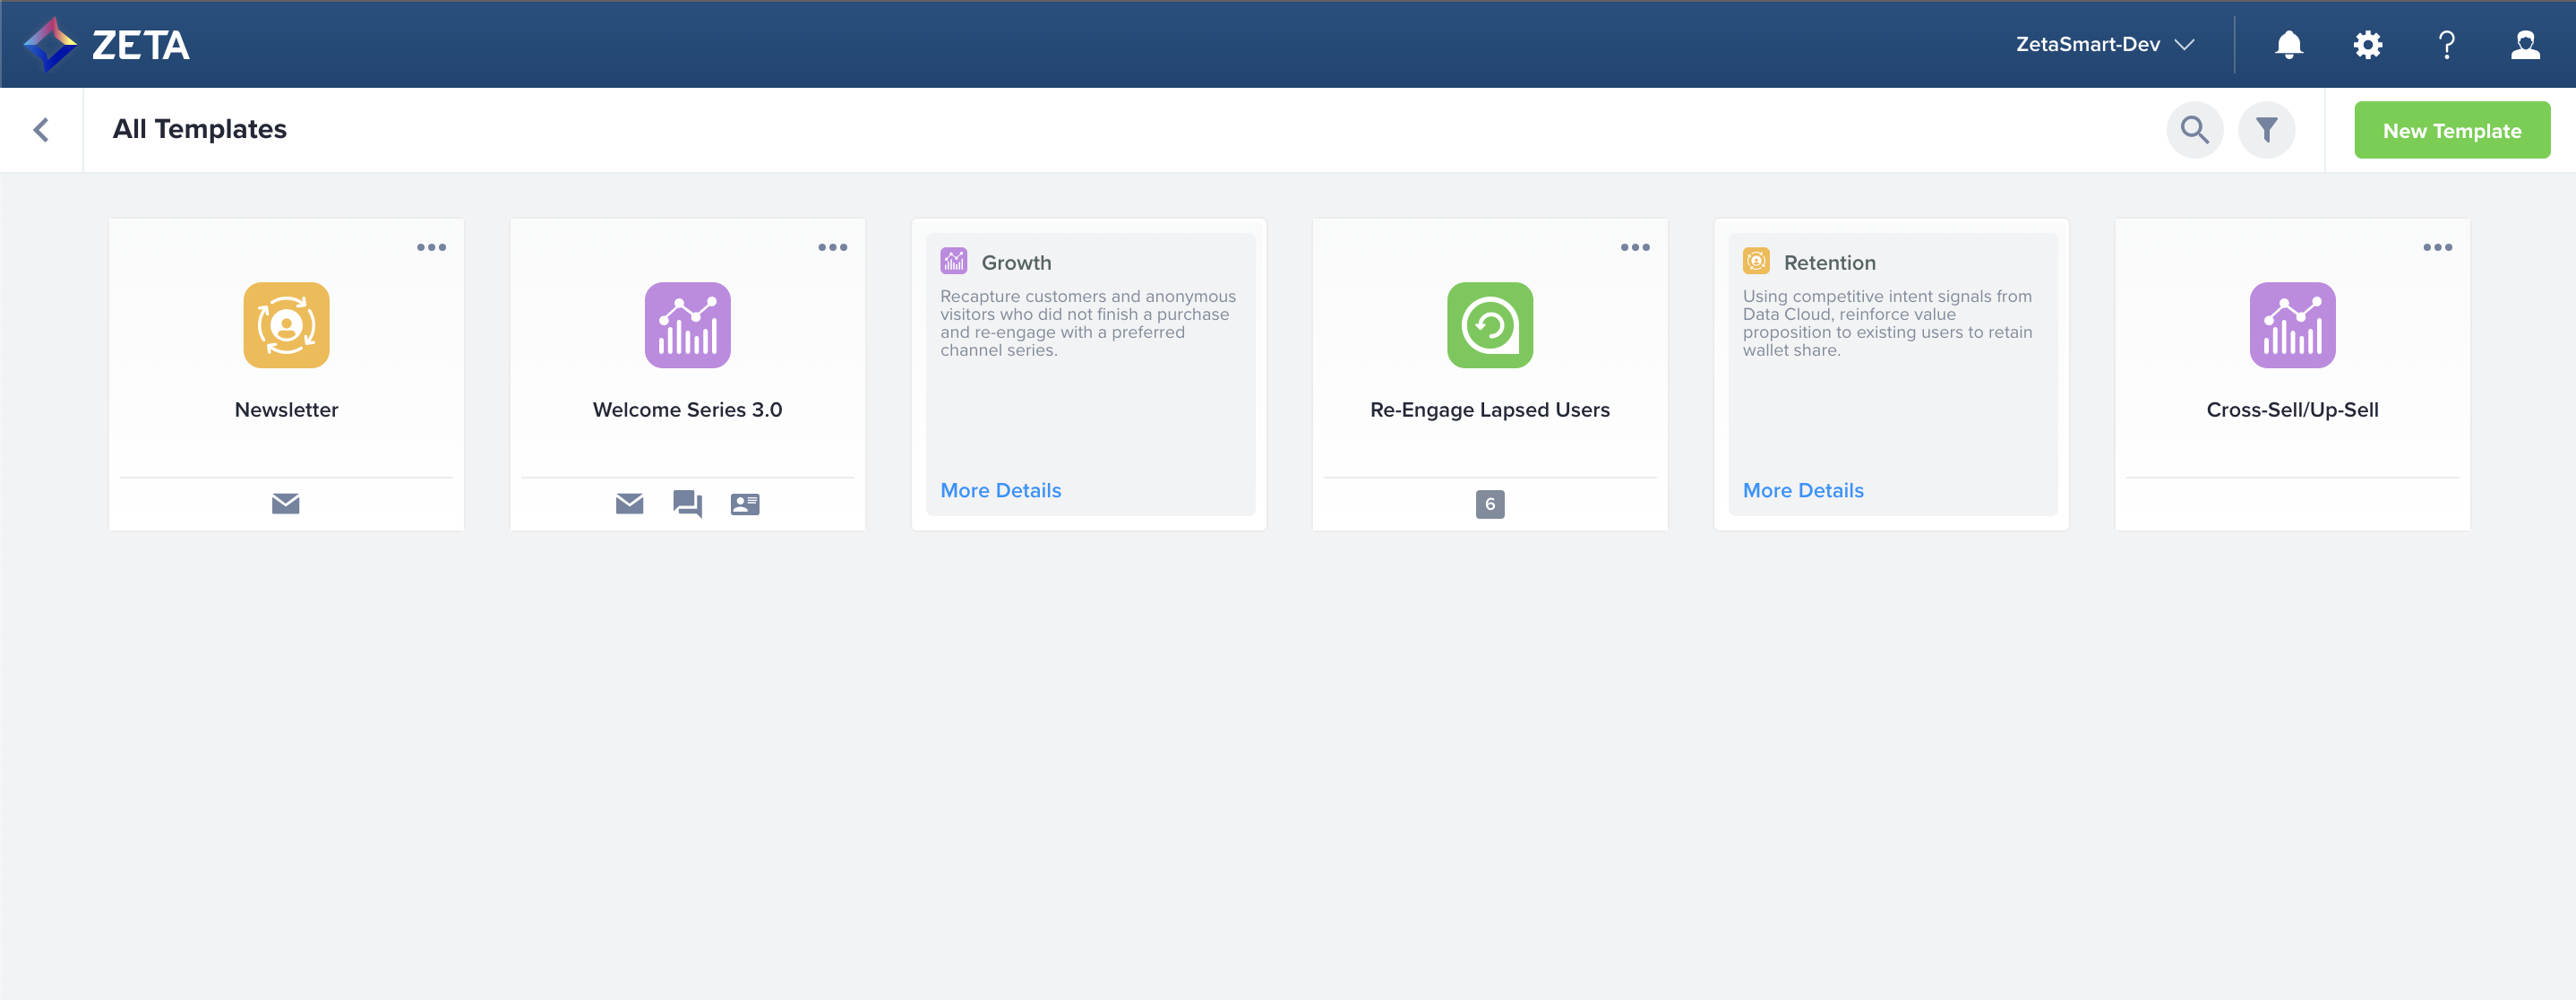
2. The front of the template card features the template name, lifecycle stage icon, and channel icons. It can be flipped over to reveal the lifecycle stage name, description, and CTA link. The cards can be accessed from the Template Panel or Template Library pages.
3. Clicking on More Details brings you to the Template Preview, featuring a completed version of the experience and a panel with the template details you created.

Converting an Experience to a Template
In some cases, you might have an experience that performed well and want to scale that for future automation in your account or other accounts in your family. You can convert experiences into templates in a few steps:
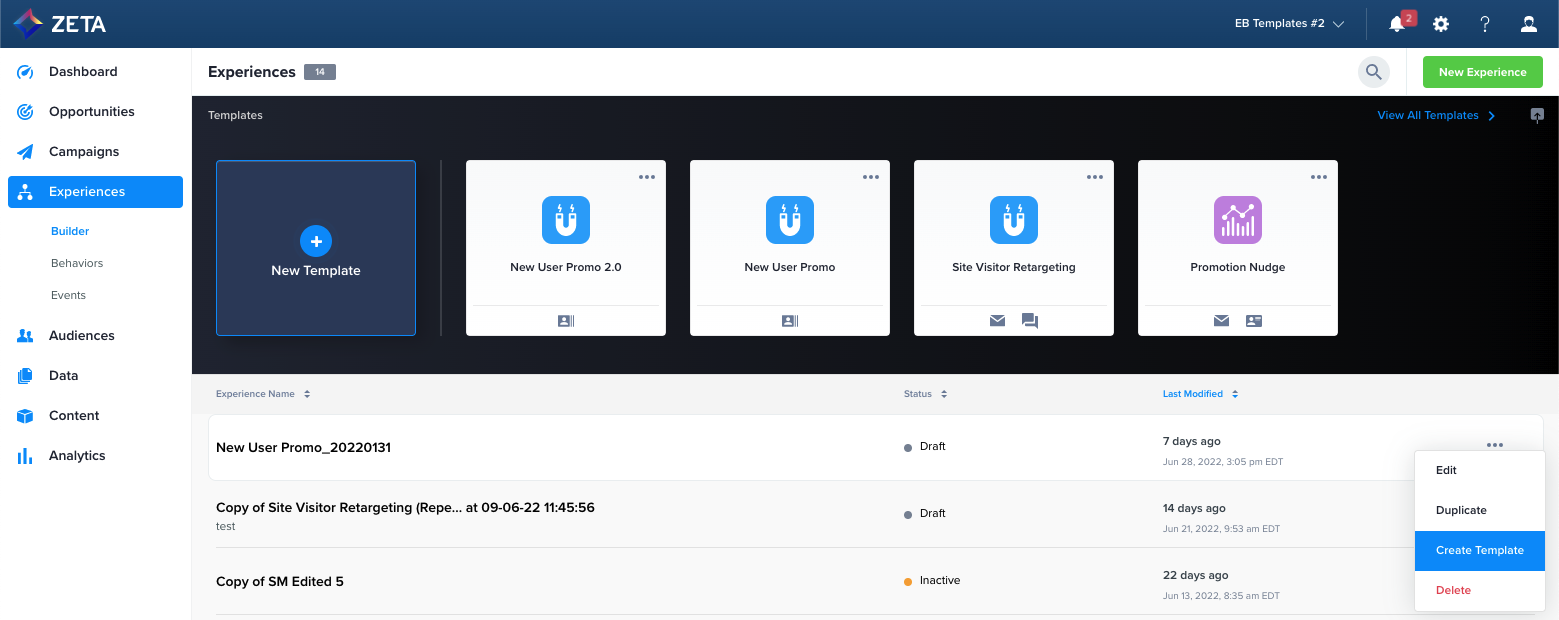
1. In the Experiences list, select the experience you want to convert. Click on Create Template from the menu.
2. Once in editing mode, give the template a new name and add Template Details.
3. Update each node with user instructions and click on Save.
4. Continue adding instructions to your node until you have no items in your Required Actions Remaining list.
5. Make sure you add all template details and publish as you normally would. There is no difference between templates that were created from scratch and those that were created from experience; neither the editor nor the end-user will be able to distinguish between the two.
Share your Template
A template must be published and shared to be visible to an end-user.
As a Super User, you can share your published template in two places—the template card and the template canvas.
Template Card
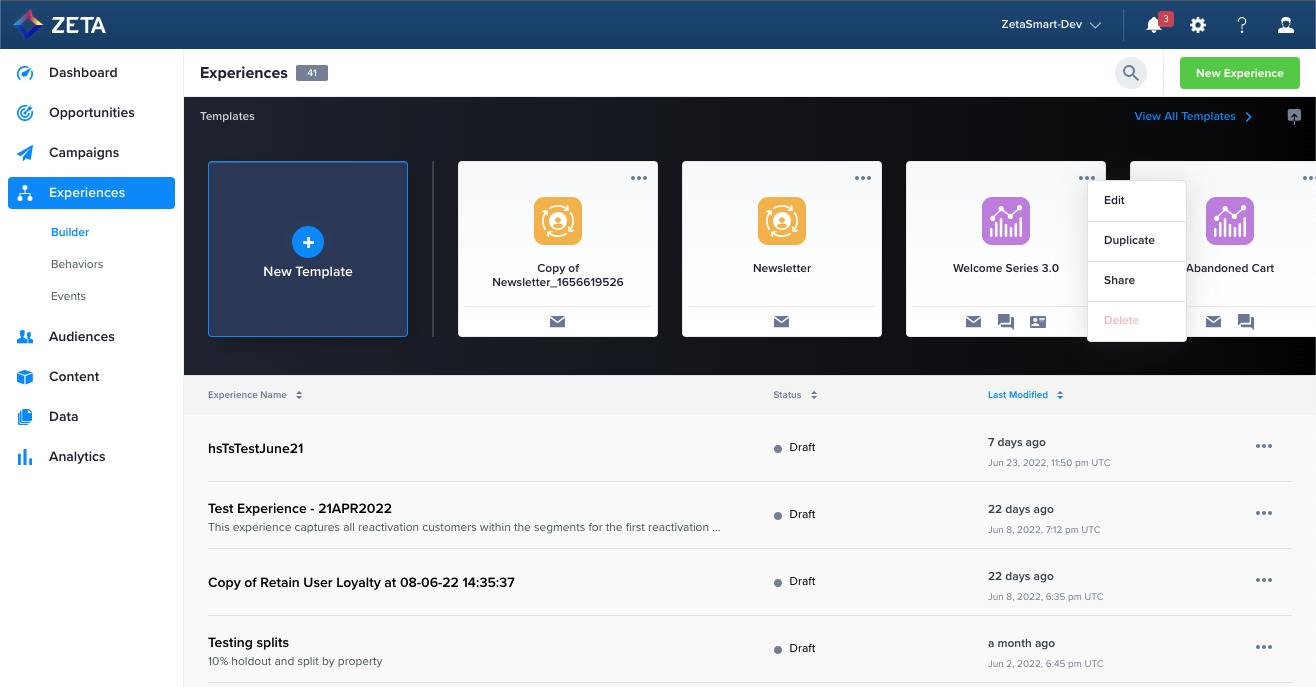
1. Only Super Users can see the card menu icon on a template card. Click on this icon to reveal the menu and select Share.
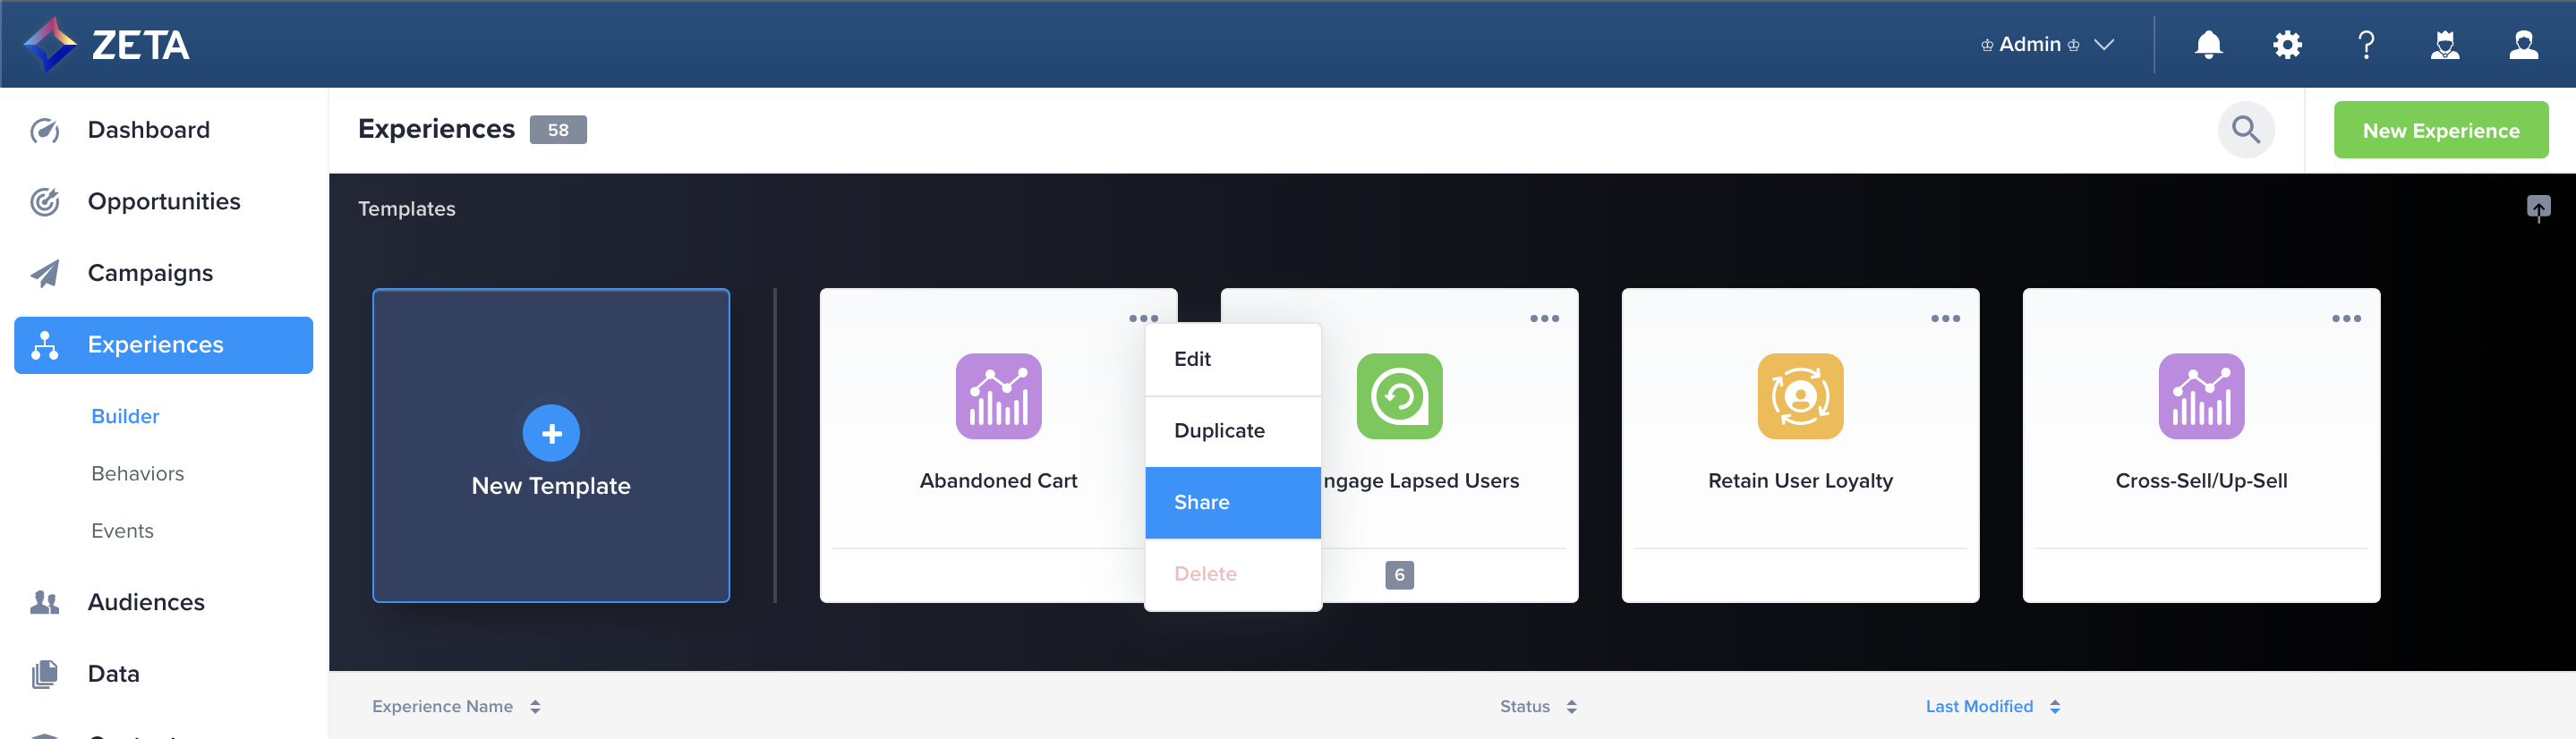
2. Clicking on Share opens the Share panel for that template. You can see all parent and child accounts of which you are a member.
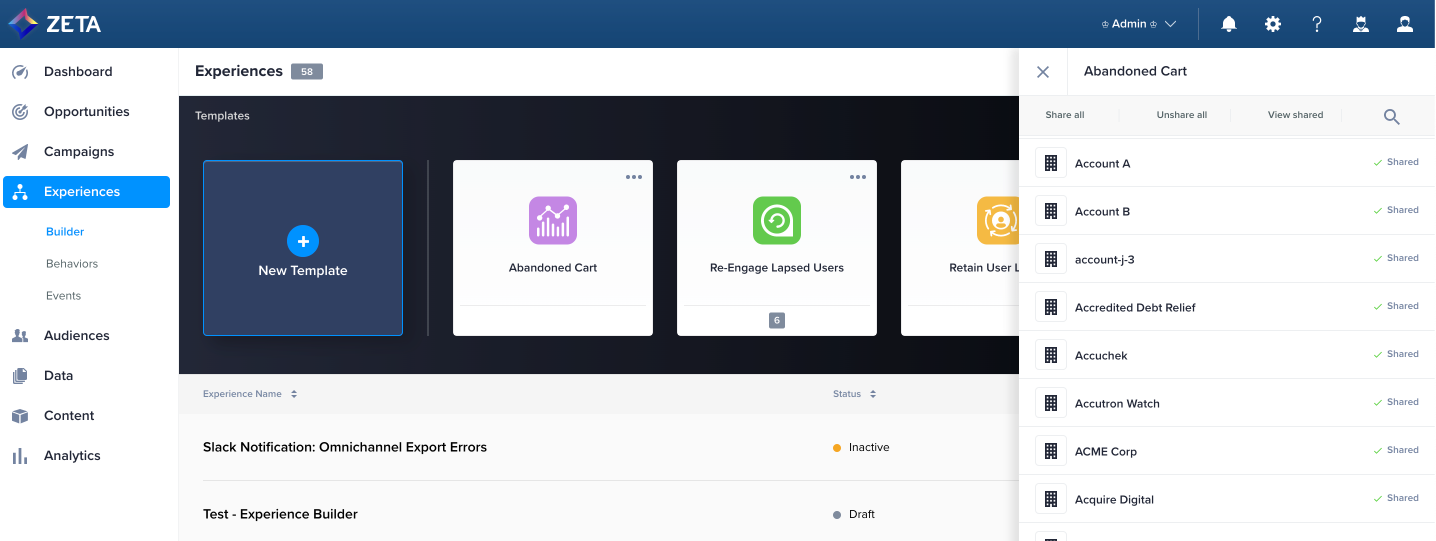
-
You can share between accounts in the following relationships, so long as you are also a member of the destination:
-
Parent to child
-
Child to parent
-
Child to child
-
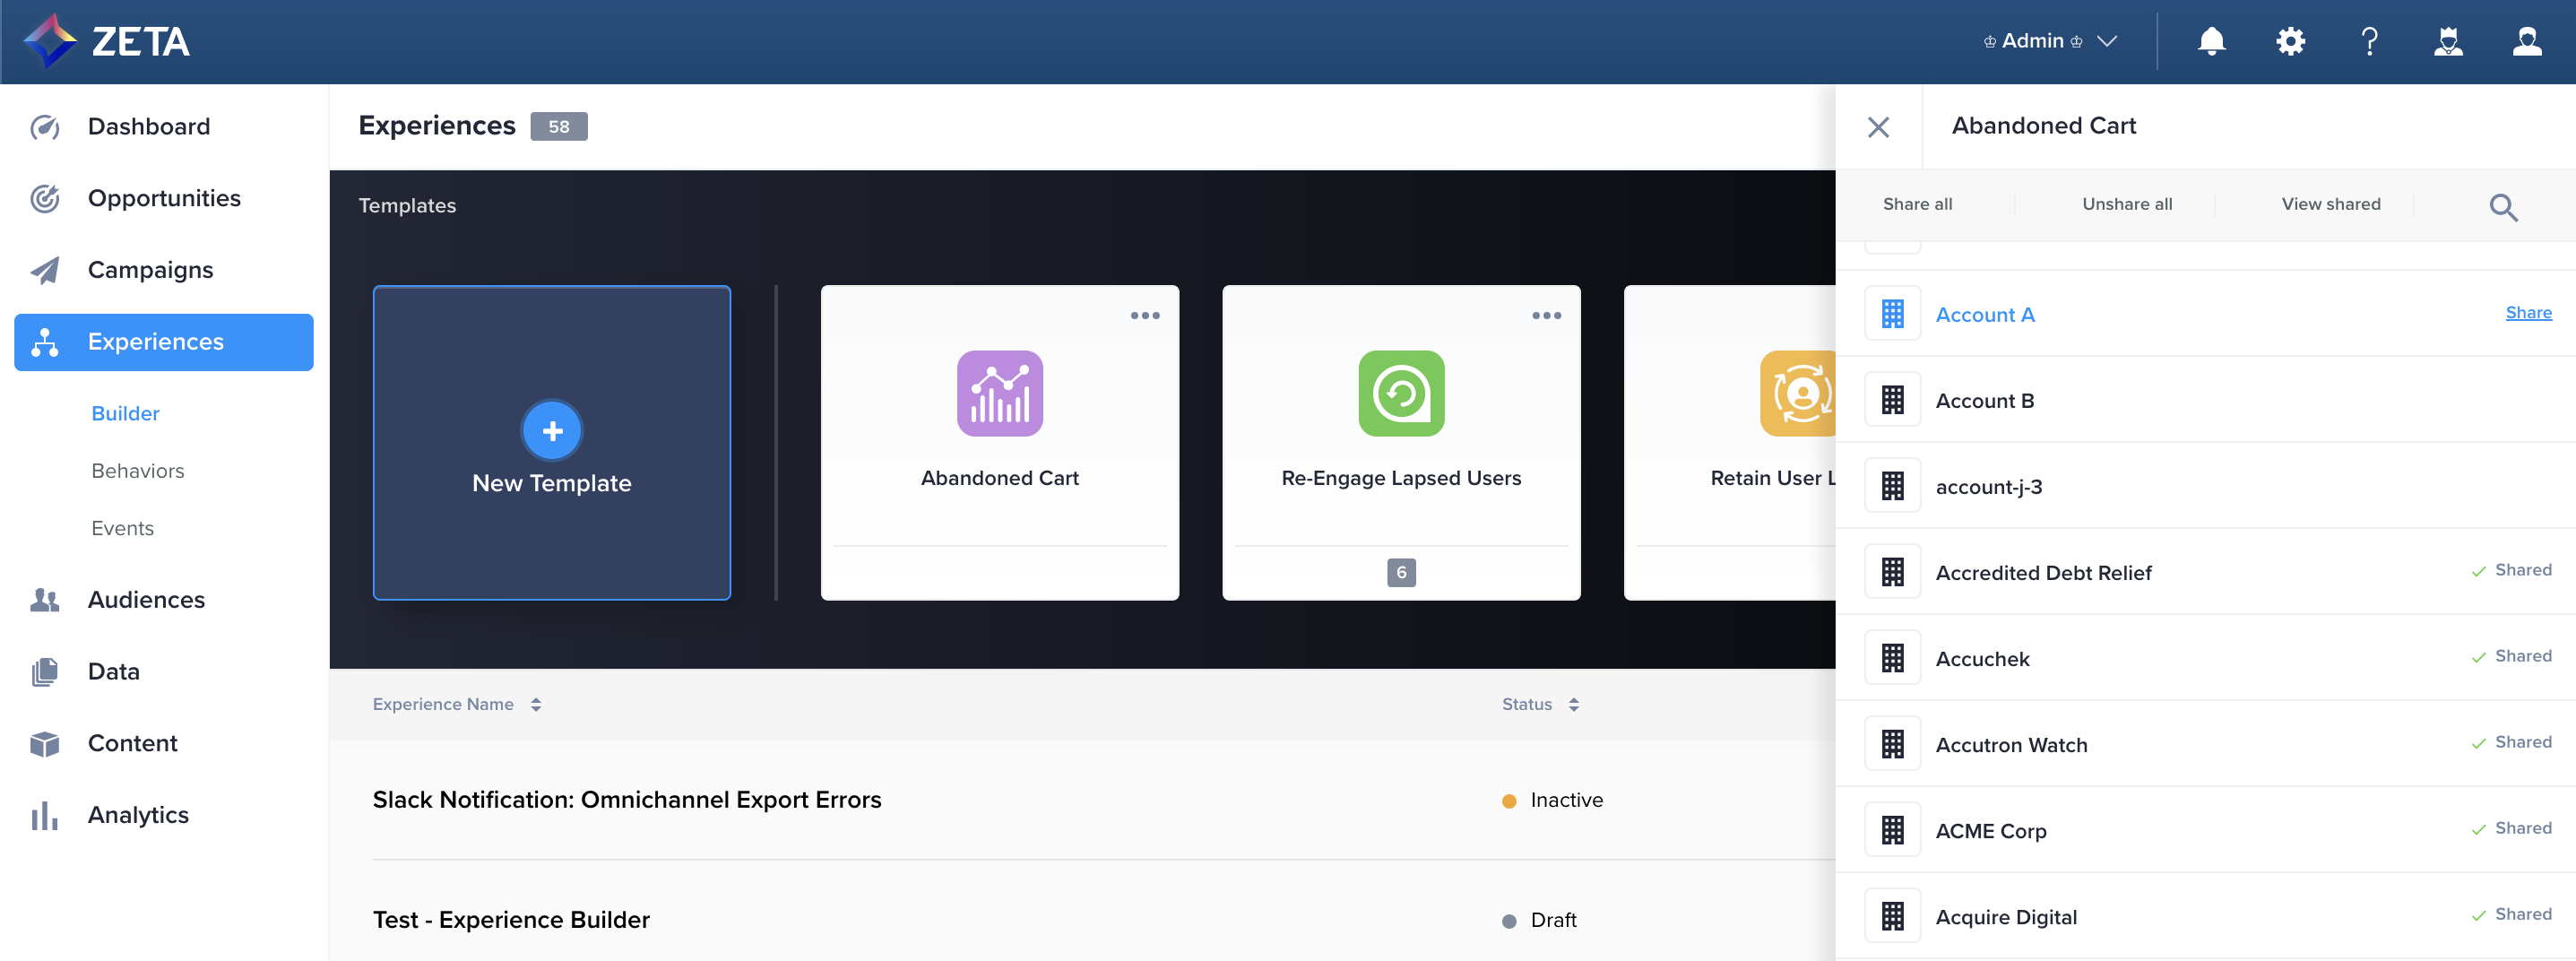
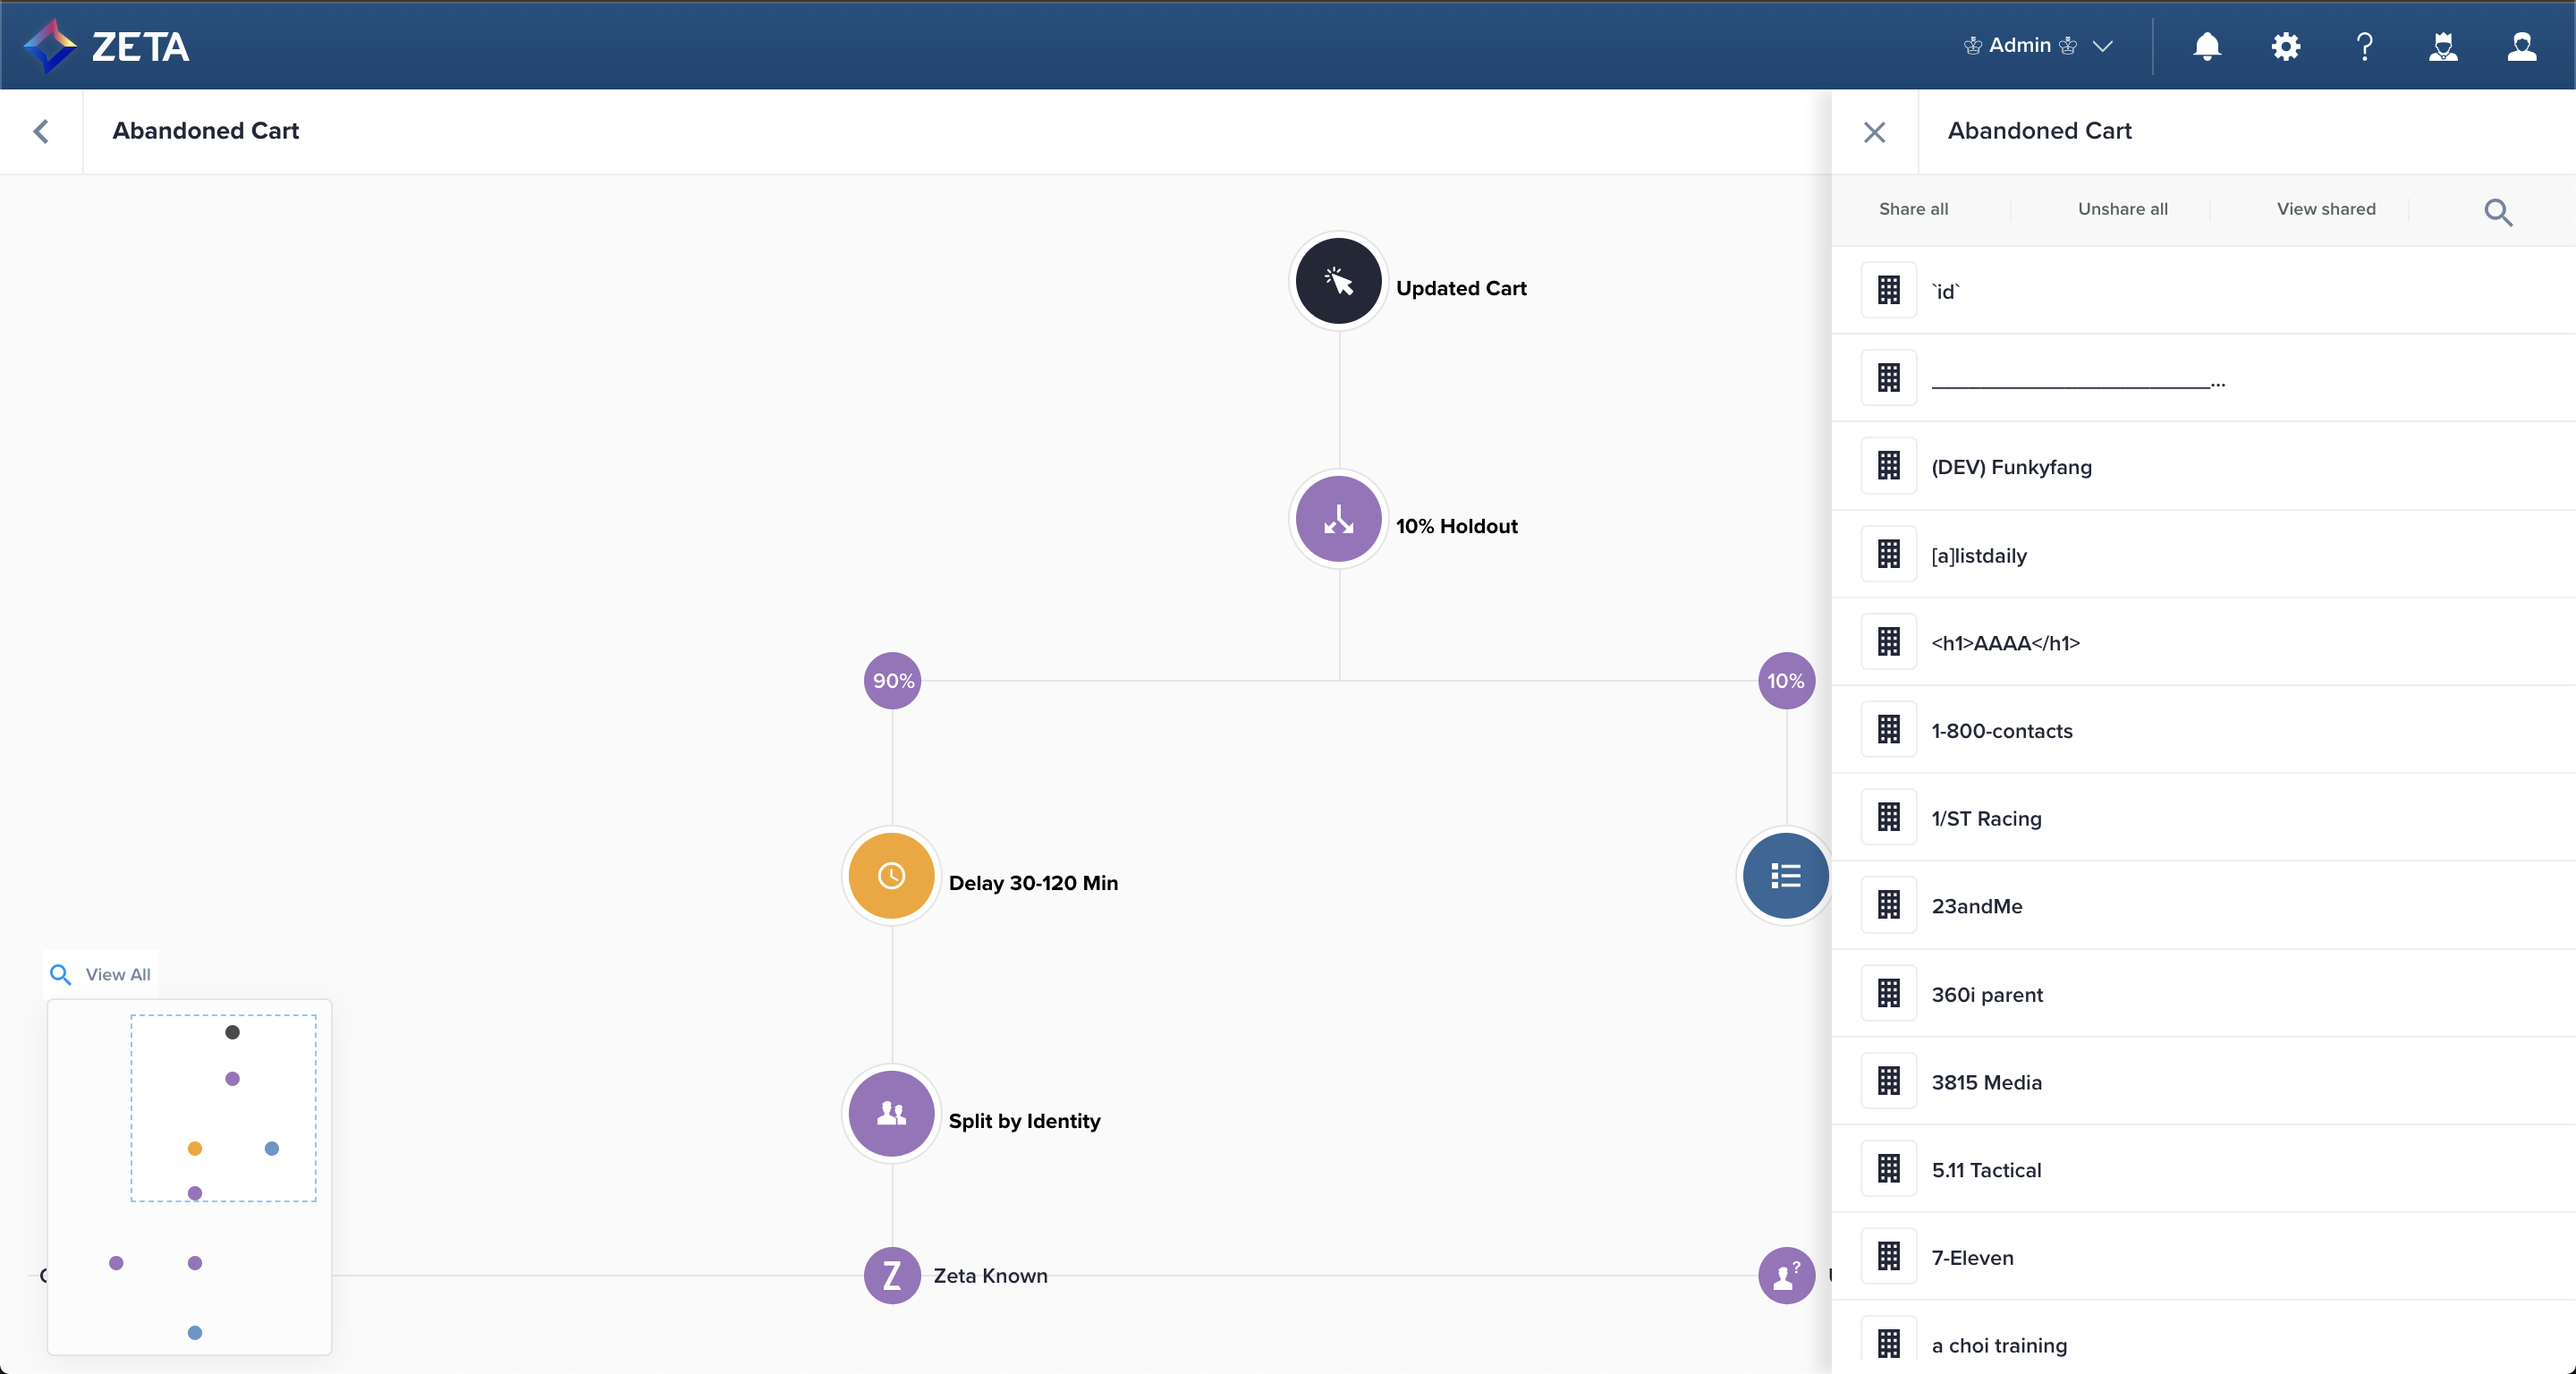
3. You can choose to Share all, Unshare all, or share to a selected account by hovering over it to reveal the Share button.
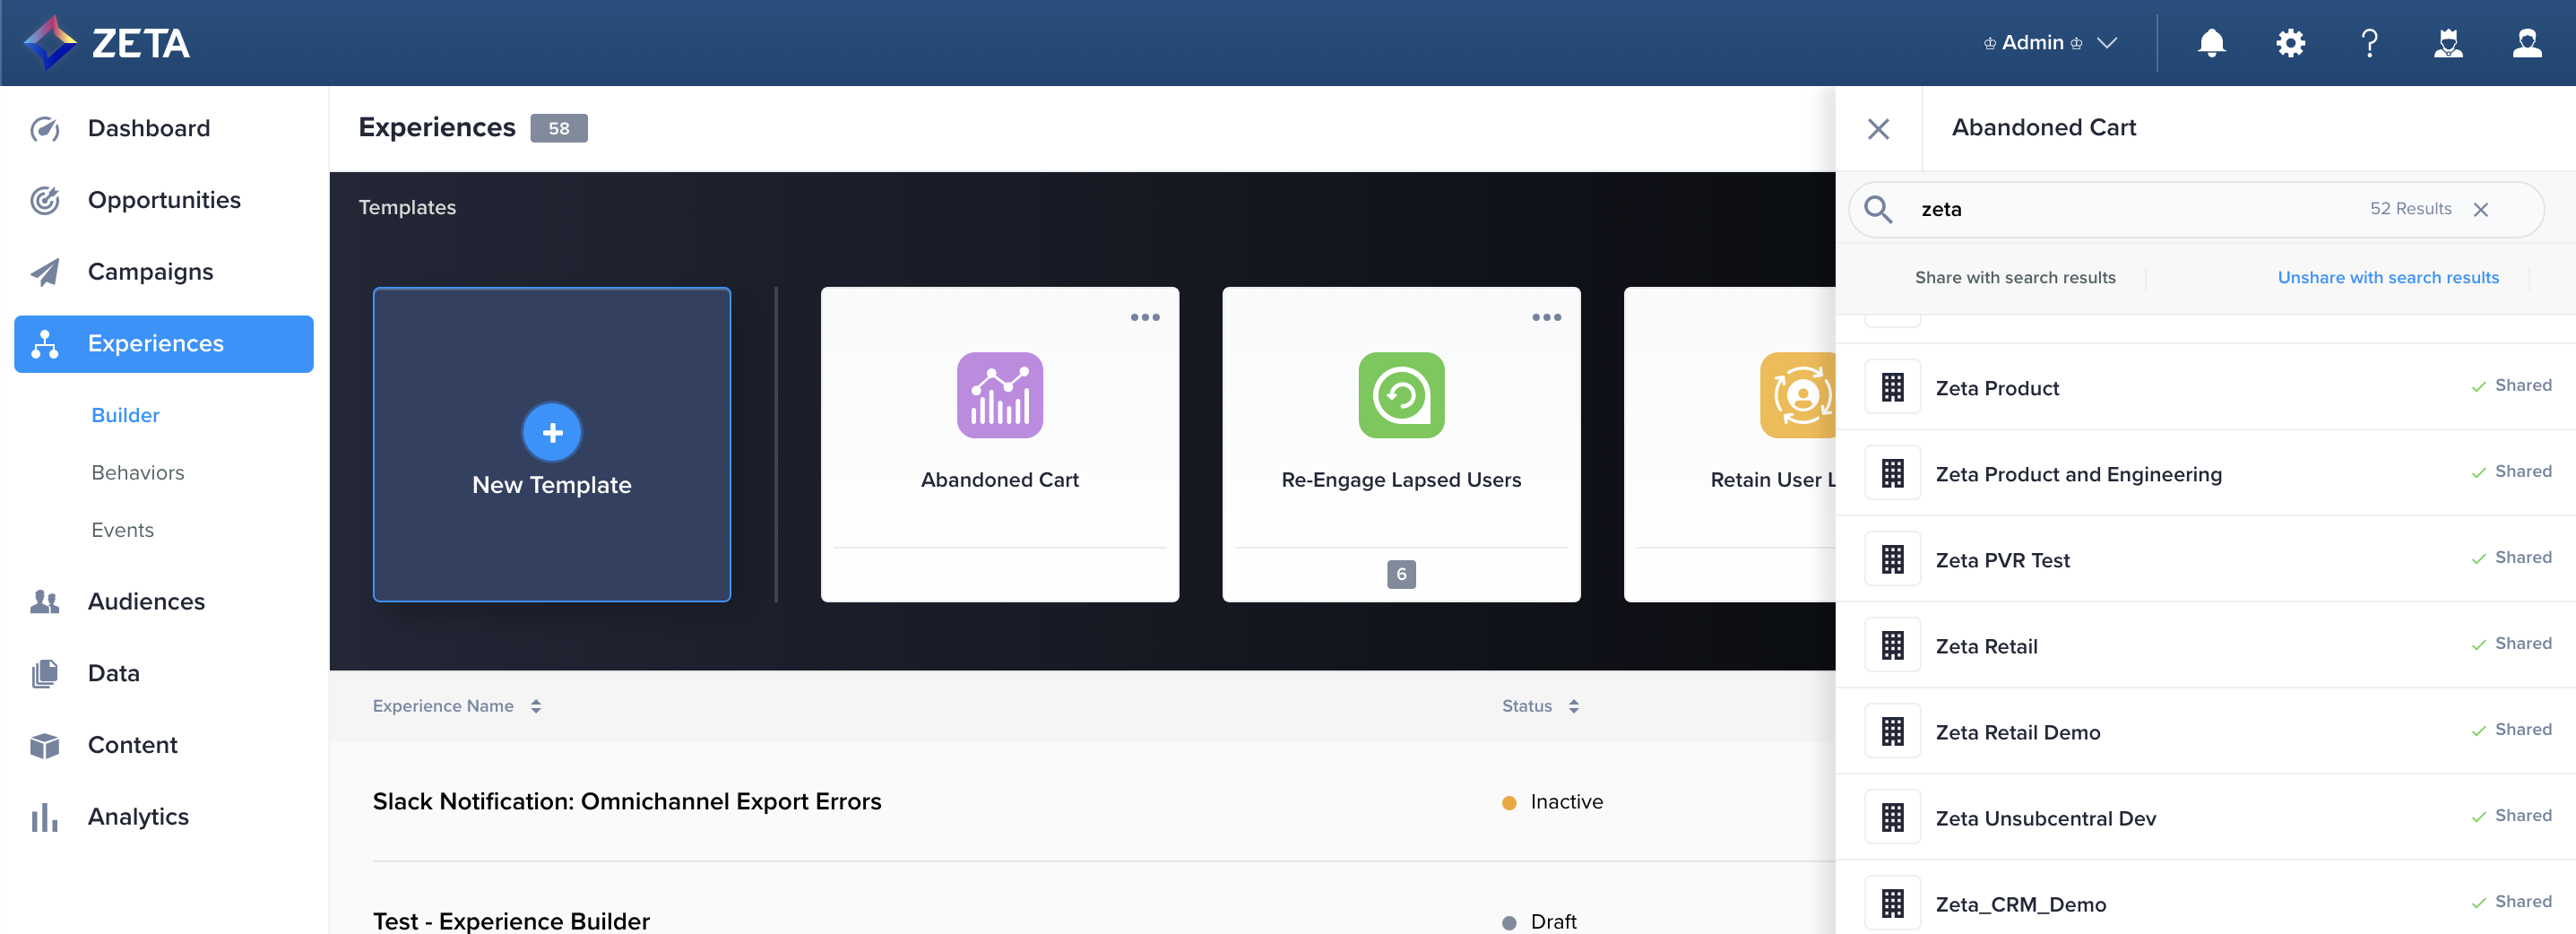
4. You can also use the search bar to narrow the accounts and choose to Share with search results, Unshare with search results, or share to a selected account by hovering over it to reveal the Share button.
5. Once you share the template, there will be visual confirmation. You can also find a list of the accounts you’ve shared to by selecting View shared on the main view of the panel.

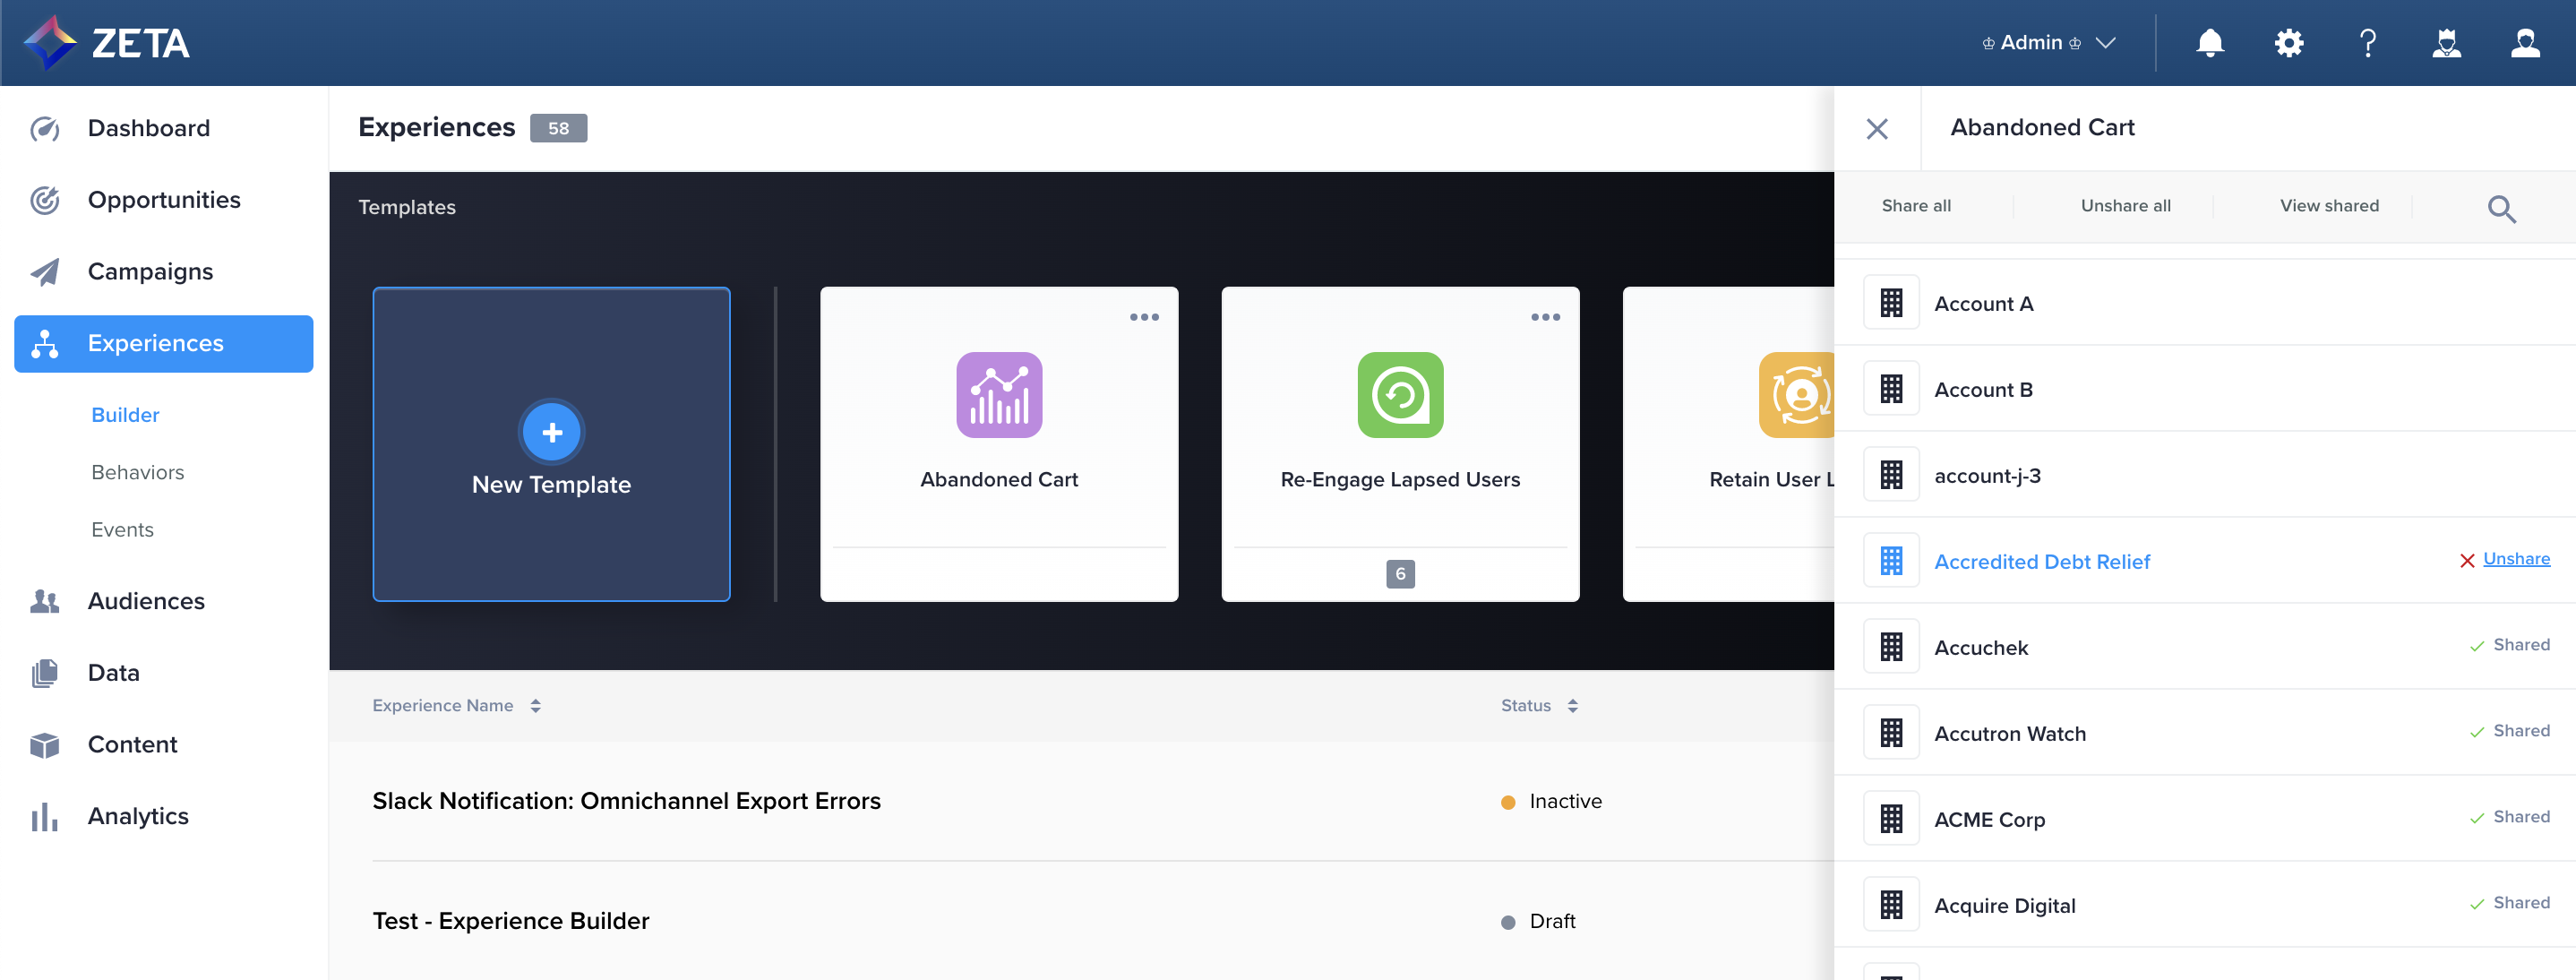
6. To unshare, simply hover over the Shared text to reveal the Unshare button and click on it.
7. If an account does not have the Experience Builder Templates feature enabled, then they simply won’t see it until it is turned on. If you need to make edits, you can unpublish the template without unsharing since both things need to be true in order for the template to be visible to an end-user in a shared account.
Template Canvas
1. To share from the canvas, click the share icon next to the Unpublish Template button at the top-right to open the panel.
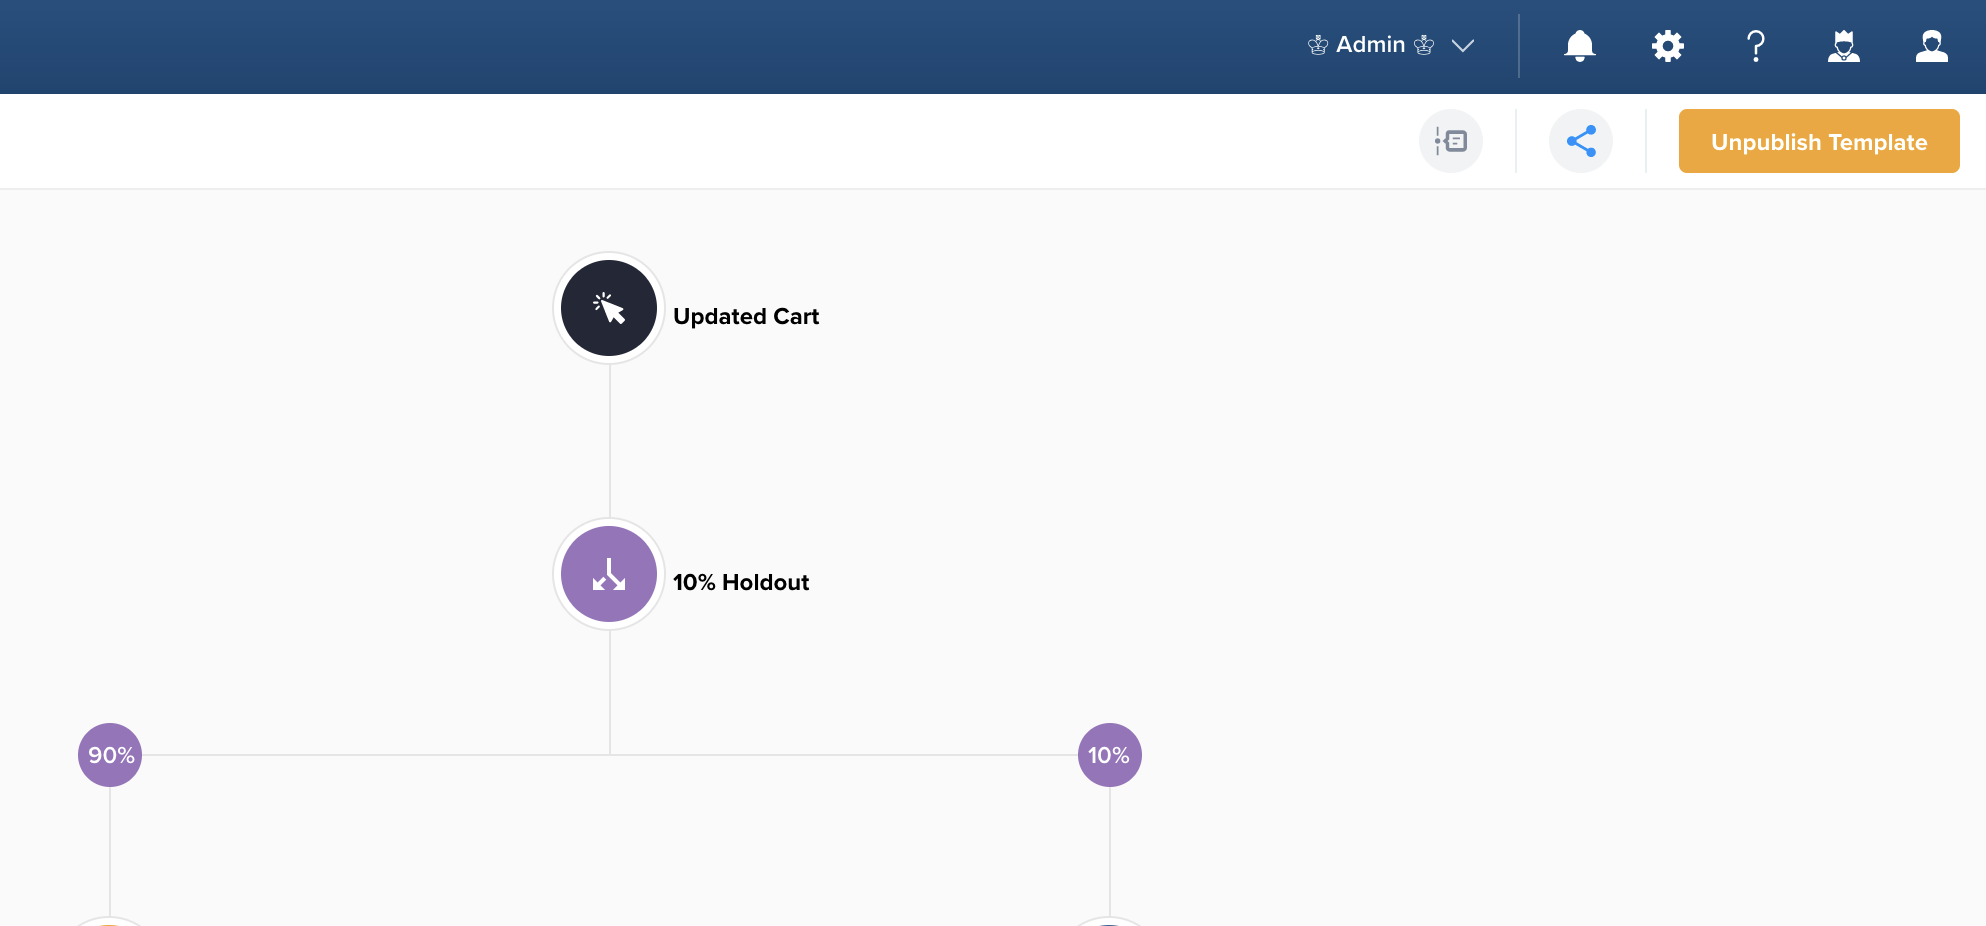
2. The share panel and its functionality are identical to the template card in the section above.
Duplicate your Template
You can duplicate both published and unpublished templates.
1. Only Super Users can see the card menu icon on a template card. Click on this icon to reveal the menu and select Duplicate.
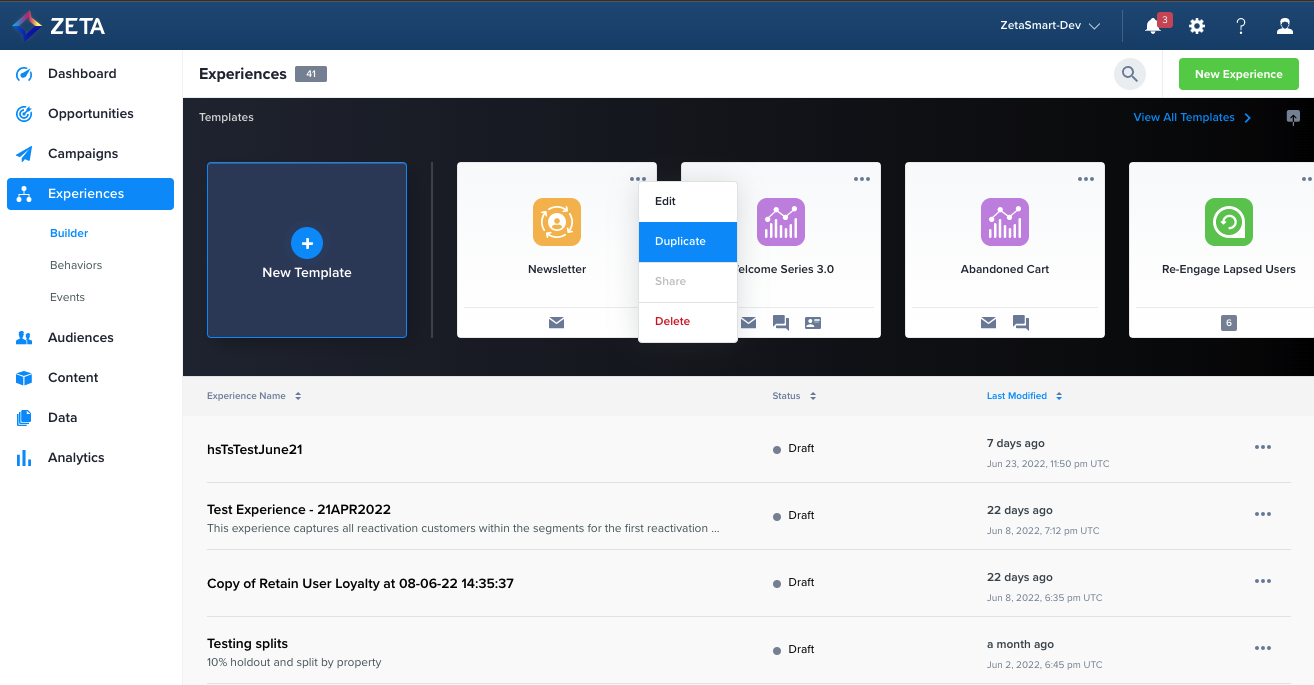
2. Clicking on Duplicate will immediately create a copy of the template in the furthest left position on the template card panel. The panel is ordered by most recently modified.
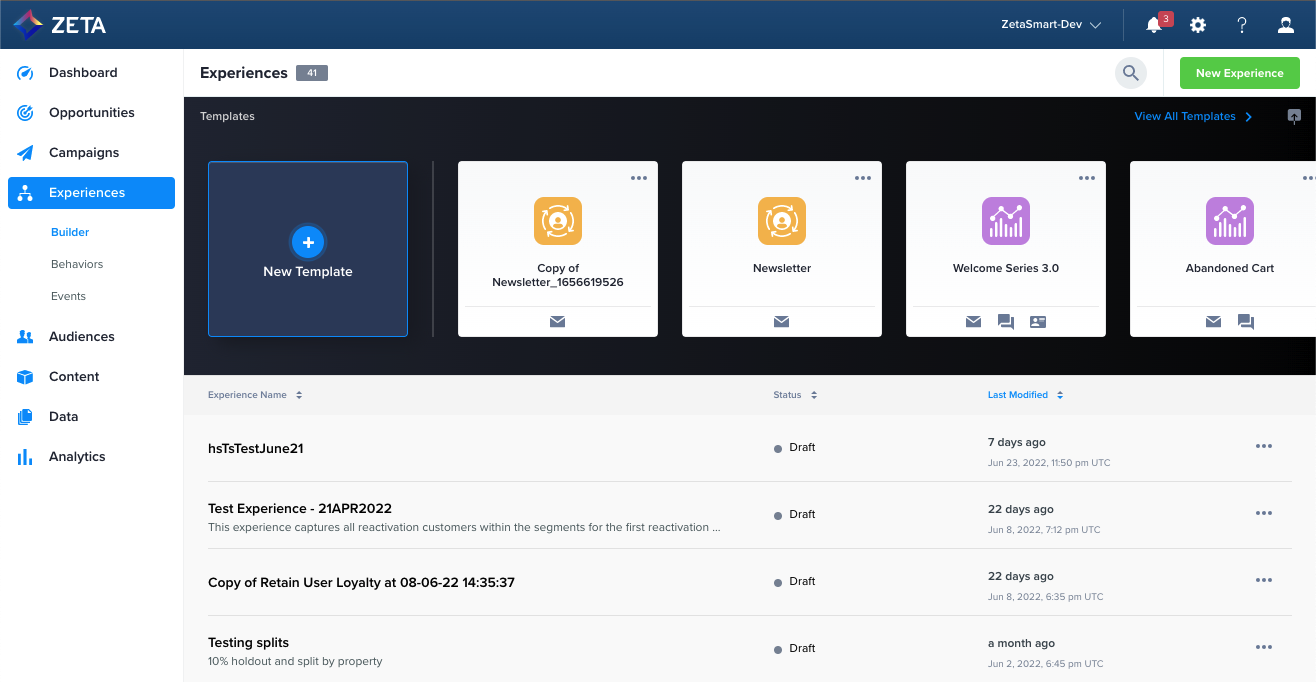
3. Select Edit from the action (…) menu to begin modifying your new template. It is completely independent of the original template it was duplicated from so you don’t need to worry about your changes affecting either template. Don’t forget to give it a new name.
Delete your Template
You cannot delete a published template
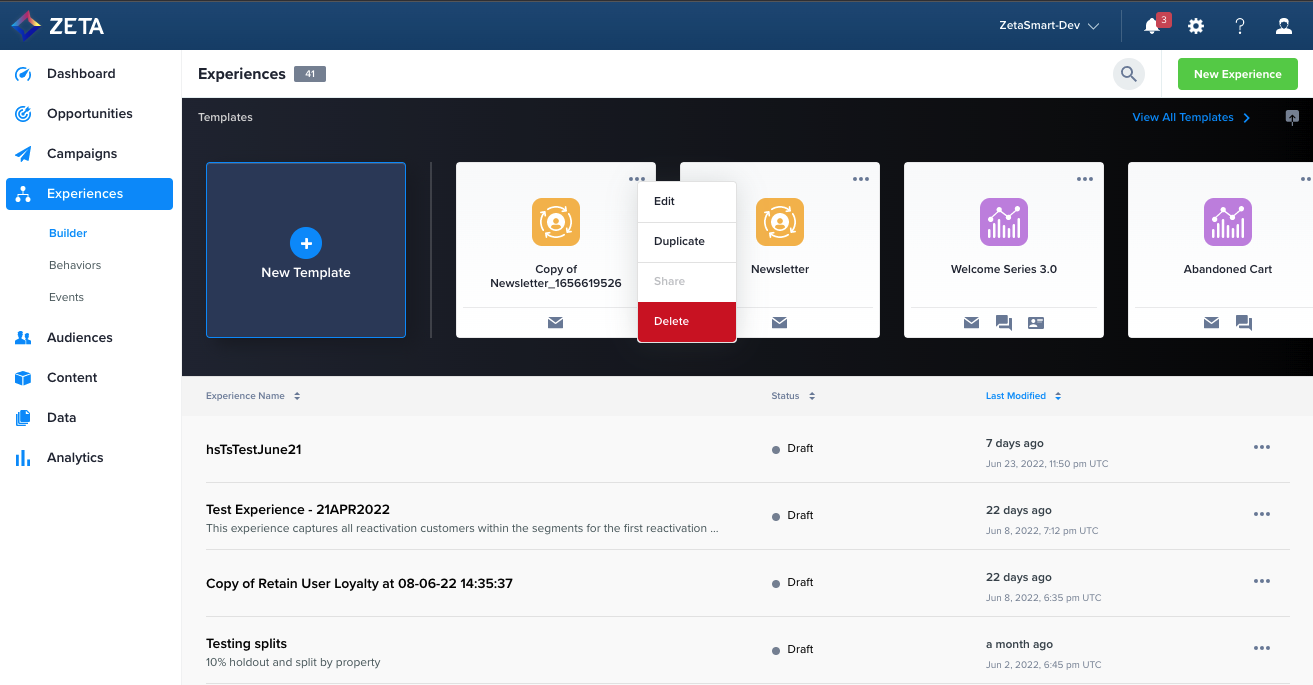
1. Make sure your template is unpublished. The Delete icon will remain disabled within the card menu so long as the template is published.
2. On an unpublished template, click on the Delete button from the card menu.
3. You’ll need to confirm your selection one last time by clicking on Yes, Delete.

4. The template card will disappear immediately after deleting

5. You do not need to unshare a template before deleting it because unpublishing the template will remove it from shared accounts first. Experiences disconnect from their templates upon creation, so deleting or unpublishing a template has no downstream effect.