Learn more about the ZMP Experience Builder.
Among the few spheres where design can make or break your relationship with customers, marketing takes the first spot. Experiences in the form of emails or campaigns that look plain and are not designed beautifully enough end up straight in the customer’s bin, ouch! Needless to say, well-designed campaigns can elevate customer interest in more ways than one. However, creating compelling content is difficult, especially when you’re short on time and resources, and you’ve got a monster of a project on your hands. While the process of creating a campaign can take up several hours with edits and testing, the use of templates can shorten it down to half an hour. Predesigned templates further allow brands to maintain consistency across the design.
Enabling marketing automation, the ZMP Experience Builder unlocks significant capabilities for building campaigns. However, it can sometimes be overwhelming for a marketer to start from scratch on a white canvas. To help lower the barrier to entry, ZMP now has Experience Builder Templates, which are prebuilt workflows based on common scenarios that you can customize in the ZMP. By leveraging the ZMP’s omnichannel capabilities, these templates can help you get a headstart on automated campaigns by providing ideas and optimizing setup time.
-
You will be able to preview and learn more about the experience before selecting it as a base.
-
Once you decide to build an experience from a template, a full canvas will open where you can see which nodes need to be customized to your account’s specifications.
-
You can continue to build as usual - editing or deleting nodes that don’t make sense for you. When ready, you can activate it.
Viewing Available Templates
1. From the menu on the left, navigate to Experiences > Builder to open the main Experience Builder library.
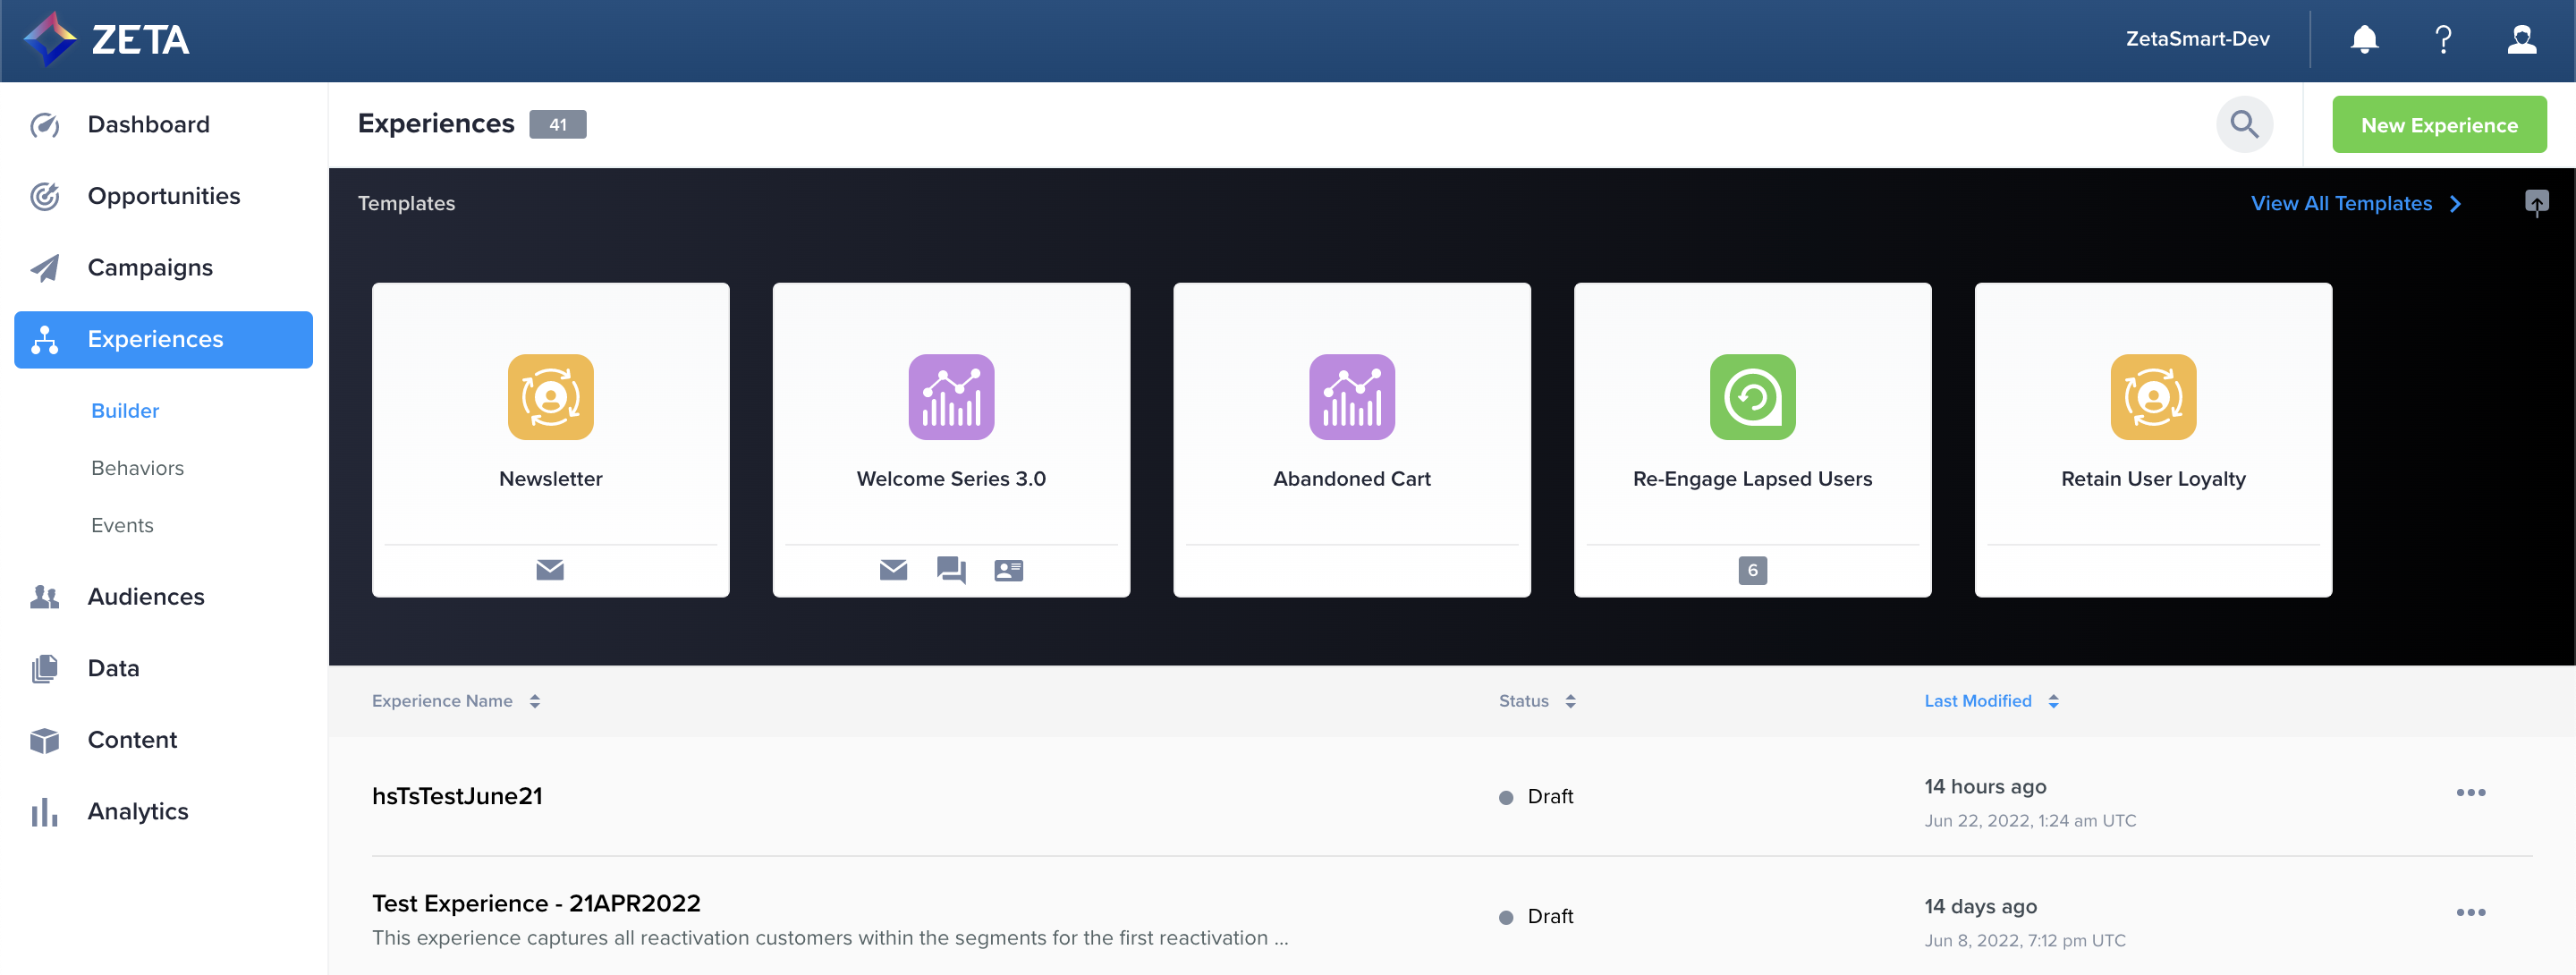
-
The panel above your list of experiences shows the templates available in your account.
While templates can help you save time and increase efficiency, you can still always choose to create an experience from scratch by clicking on New Template.
2. Each card displays the template name, lifecycle stage, channels, and a short description. Click on the card to flip it over for more information.
Each icon represents a distinct lifecycle stage.
|
Icon |
Lifecycle Stage |
|---|---|
|
Acquisition: Attracting prospects to become users |
|
Growth: Maturing a user from first action to sticky activity |
|
Retention: Deepening loyalty among current users |

|
Winback: Convincing churned users to return |
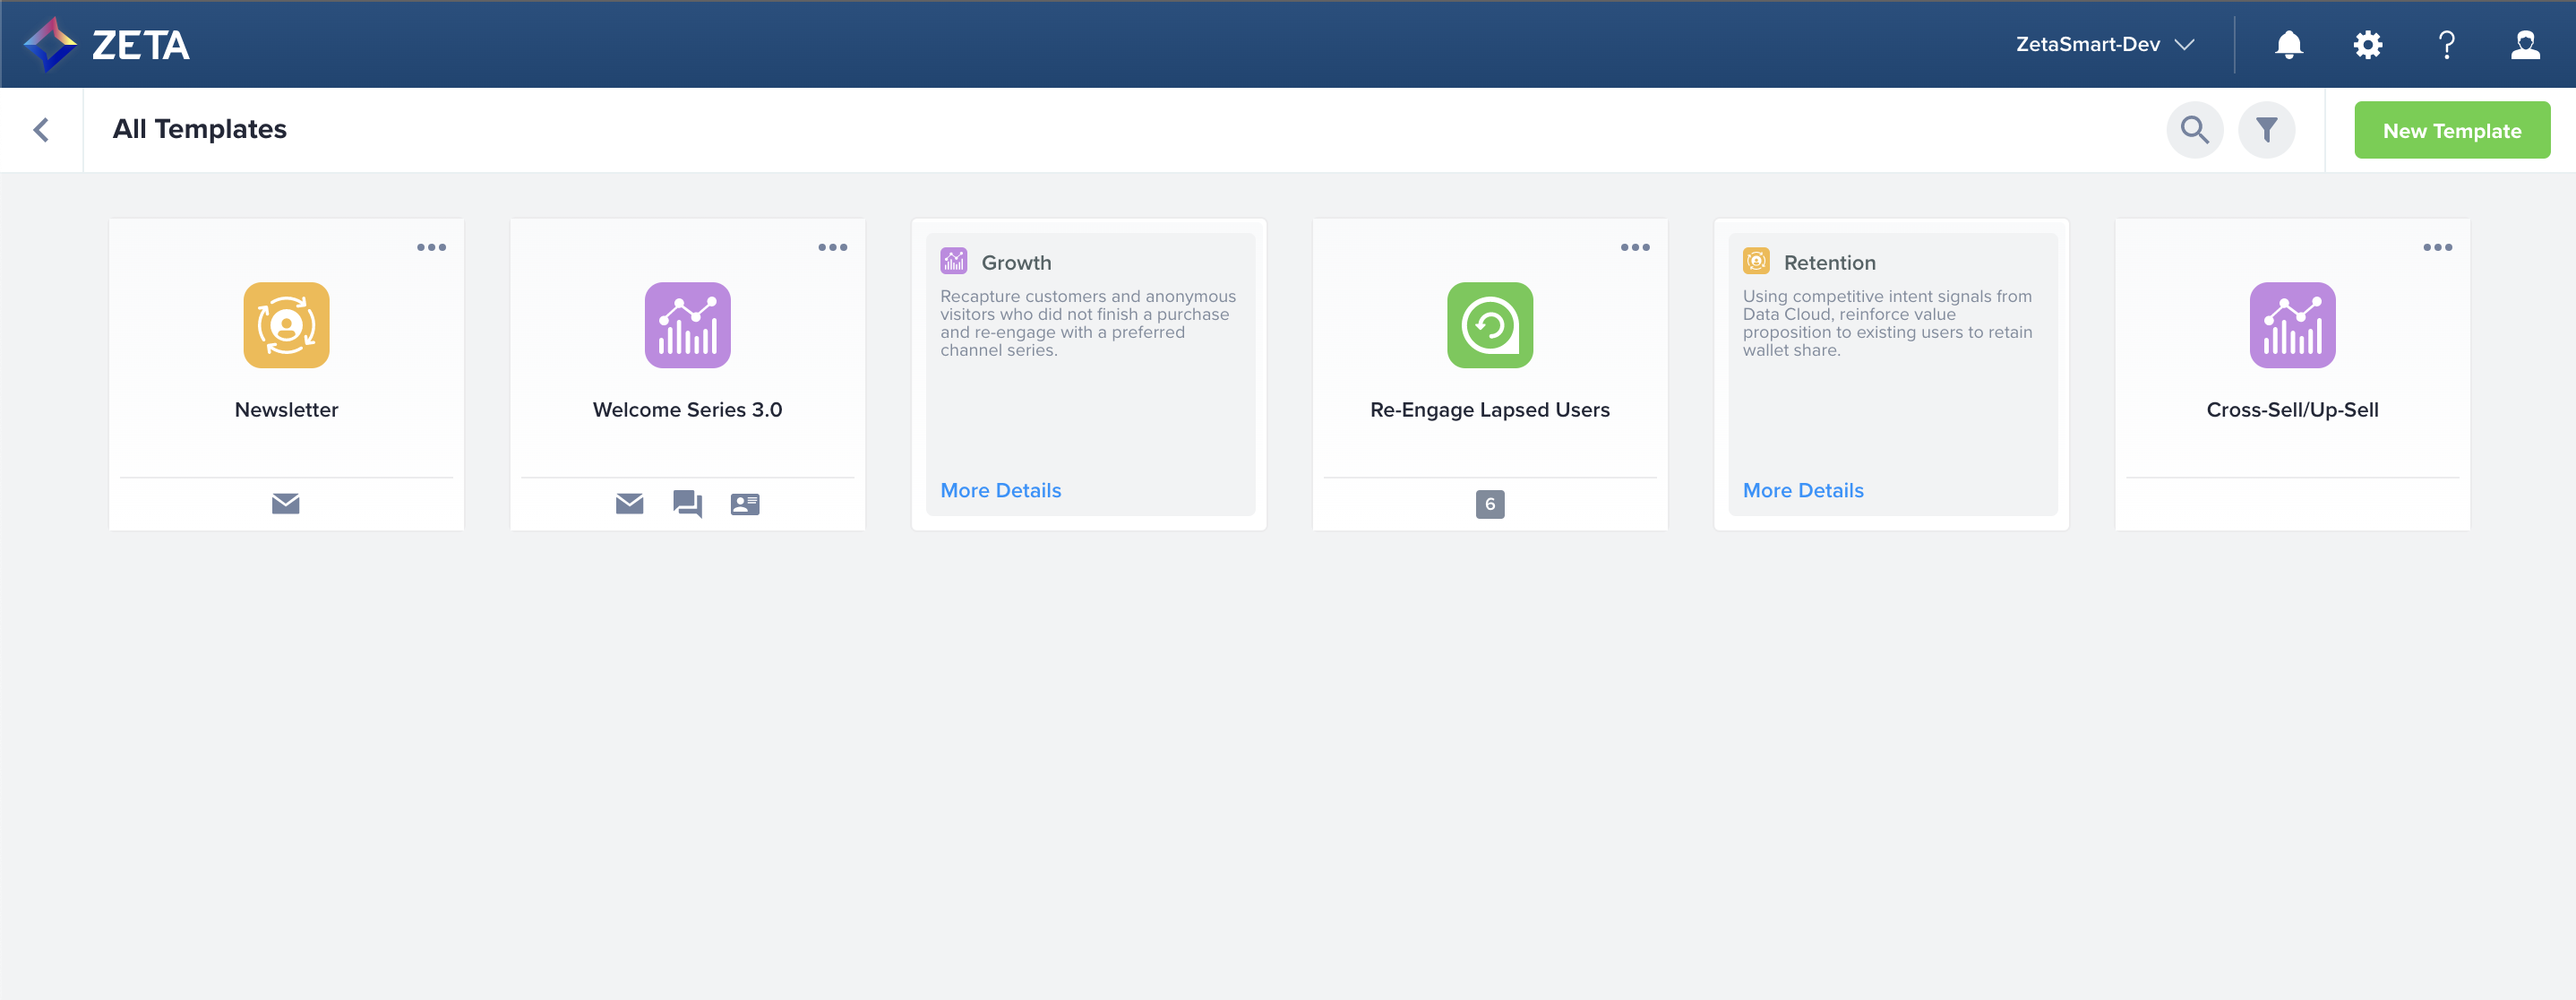
Discovering Templates
From the Template Library, you can sort, search, and filter templates to find the templates that fit your use case. There is no limit to the number of templates that can be created and shared with your account.
You can combine sorting, filtering, and searching to find the right template for your next experience.
Sorting Templates
1. By default, templates are sorted by Last modified, which corresponds to the last time a template was modified by someone with editing permissions so you can see the latest updates first.
2. To sort, click on the filter icon to open the panel and use the dropdown list under Sort by. You do not need to click on Apply Filters for the sorting to take effect.
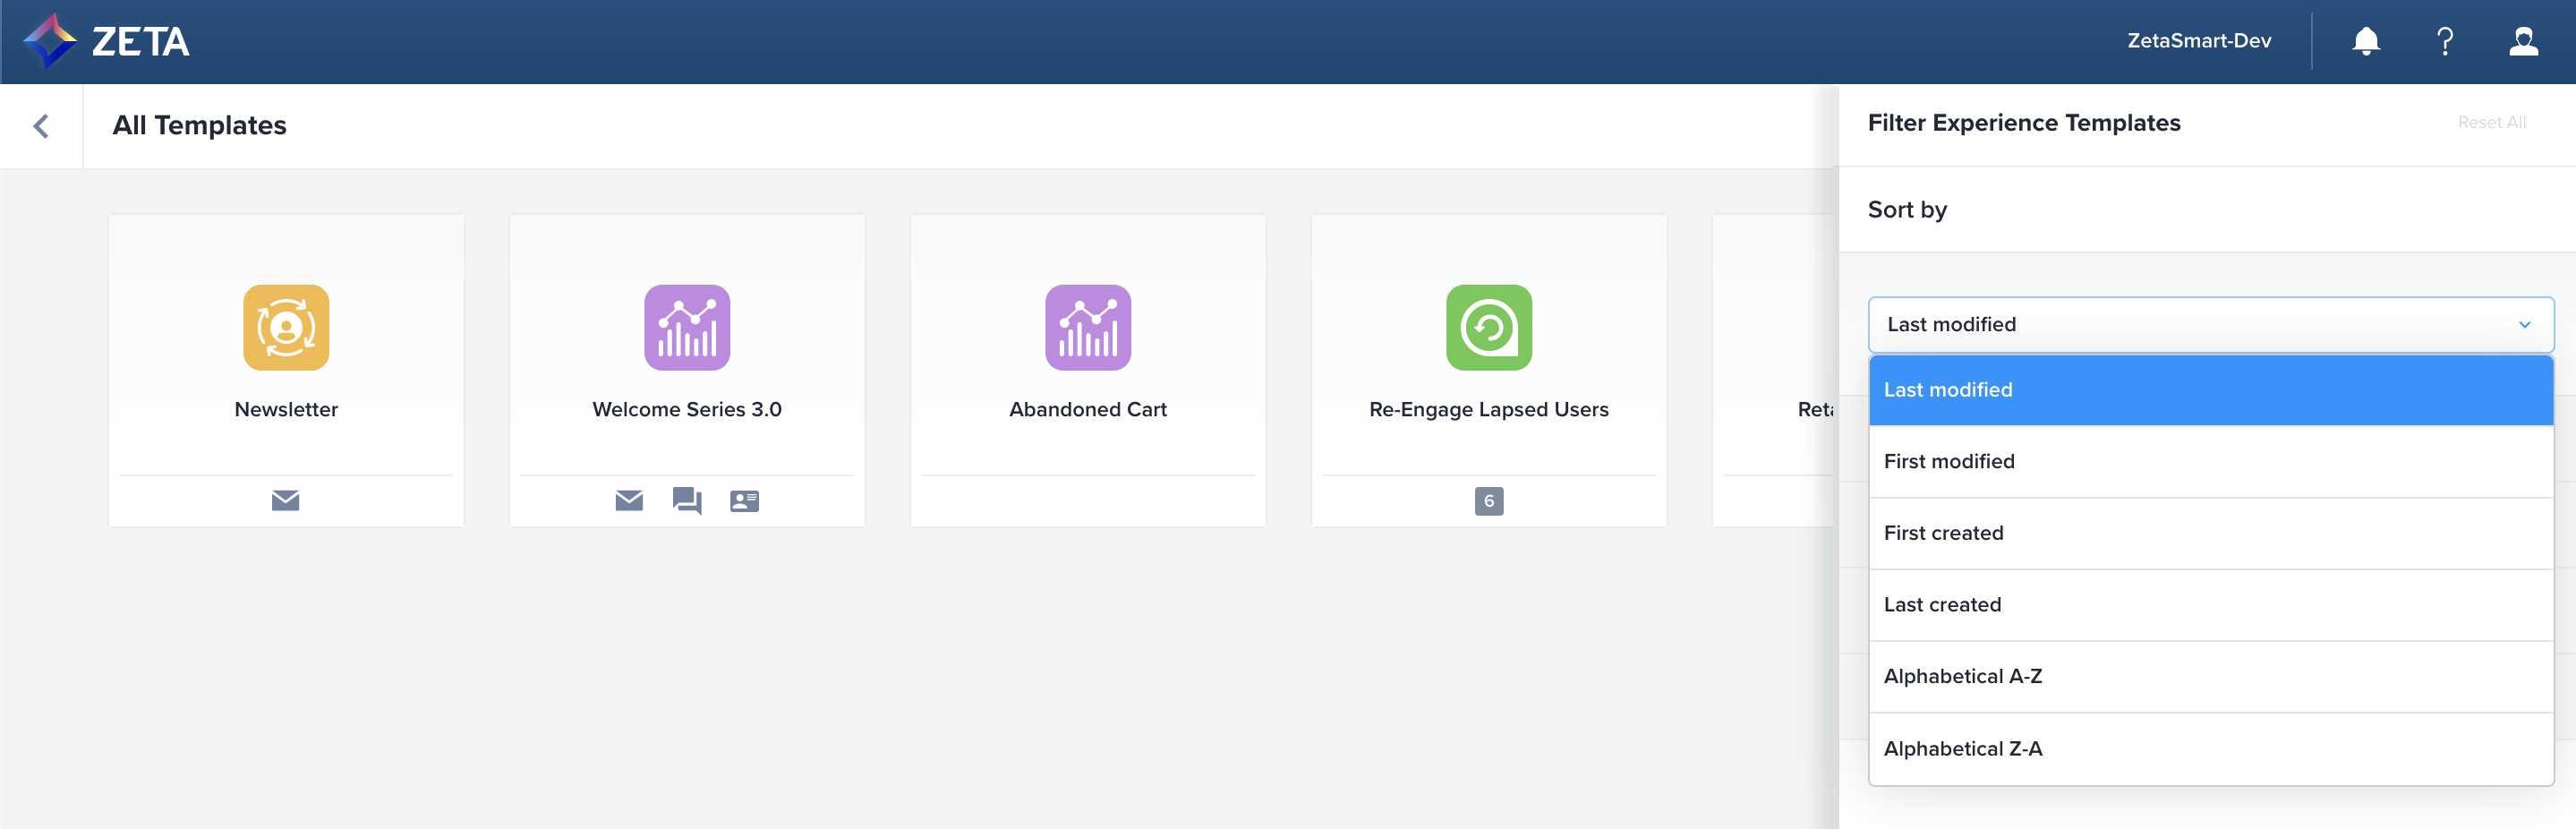
3. There are six options you can select to sort your templates. Keep in mind that a template that’s shared across accounts will update based on a created/modified action by any user with permission to edit that template. If you mostly use your own account’s templates, then the changes should correspond to only your account.
|
Last modified (default) |
Sorts by the most recently modified template |
|
First modified |
Sorts by the least recently modified template |
|
Last created |
Sorts by the most recently created template |
|
First created |
Sorts by the least recently created template |
|
Alphabetical A-Z |
Alphabetized by template name |
|
Alphabetical Z-A |
Reverse-alphabetized by template name |
Filtering Templates
1. Click on the filter icon to open the panel, which will show you four sections of filters.
2. Each section can be expanded to select filters. The template details are selected by the user who created it. For more information, visit the creator documentation.
|
Created by |
|
|
Who originally created the template |
|
|
Create by Zeta |
Created by the Zeta team and shared across accounts |
|
Create by me |
Created by the user who is logged in |
|
Create by my team |
Created by other team members in my account |
|
Lifecycle Stage |
|
|
The target audience for the experience captured in the template |
|
|
Acquisition |
Attracting prospects to become users |
|
Growth |
Maturing a user from first action to sticky activity |
|
Retention |
Deepening loyalty among current users |
|
Winback |
Convincing churned users to return |
|
Channels |
|
|
The channels that are recommended to be used in this template |
|
|
|
|
|
SMS |
|
|
Push |
|
|
Display |
|
|
Social |
|
|
In-App |
|
|
Web |
|
|
Other |
|
|
Tags |
|
|
Flexible keywords that can map to anything, such as industry, theme, use case, etc. |
|
3. Once you select all the checkboxes that match your criteria, click on Apply Filters to execute the query and return the templates that are relevant to you.
4. To clear your filters, you can uncheck individual boxes, click on Clear to reset all checkboxes in a single section or click on Reset All to clear all sections. You must select Apply Filters in order to save your criteria and change the results returned
Searching for Templates
1. Click on the search icon to open the search field and enter your keywords. This search engine will return template names that match your query.
2. Hit the Enter key to execute your query.
3. The template names that match your keywords will be returned. There will be a count of results in the search bar.
To further refine your search criteria, add filters or sorting from the Filter panel. It can be done before or after you execute your search.
Creating an Experience from a Template
1. Flip the template card you want to use, and click on More Details.
.gif?cb=9a3d26e37ca4a237cb0116aef318958b)
-
The template preview shows the completed version of the canvas (this is what you want your experience to end up like), the description, tags, channels, lifecycle stage, and template instructions.
The template instructions should give you an overview of the features required to make the most of this template (eg, Data Cloud, SMS, display, etc). You do not necessarily need these features to still use the template.
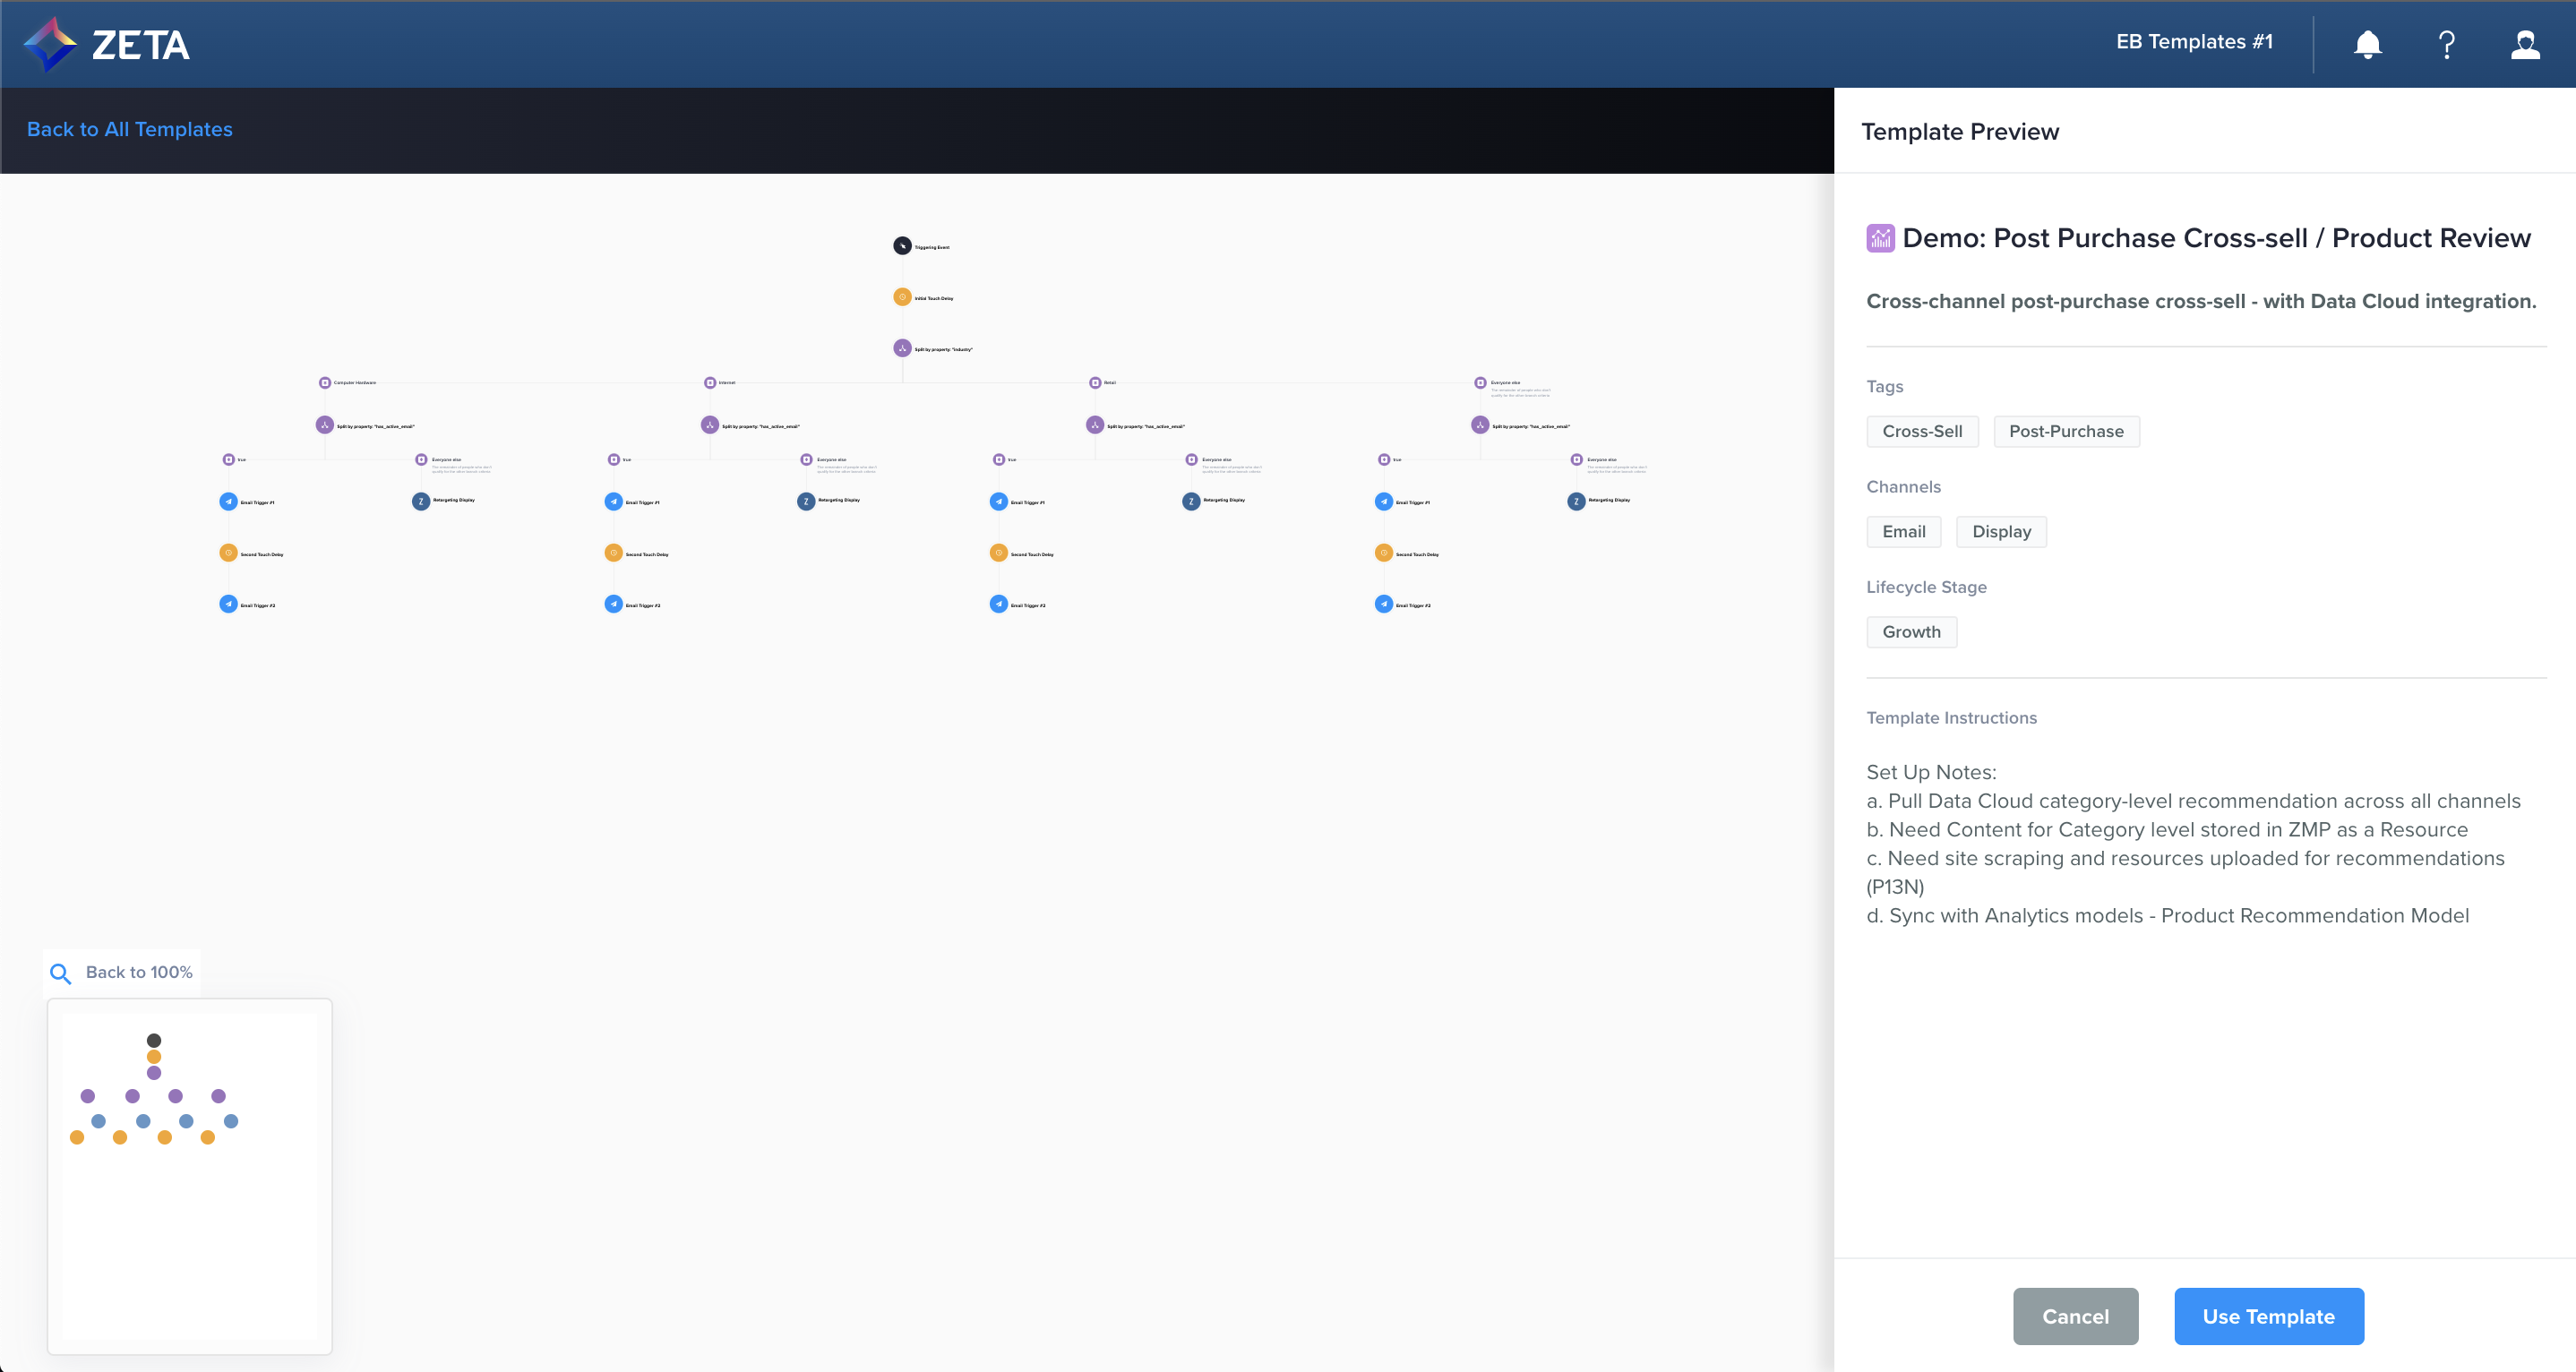
2. If you like what you see, click on Use Template to open up a new canvas. The canvas will have a series of nodes that require customization in order for you to complete the experience and activate it.
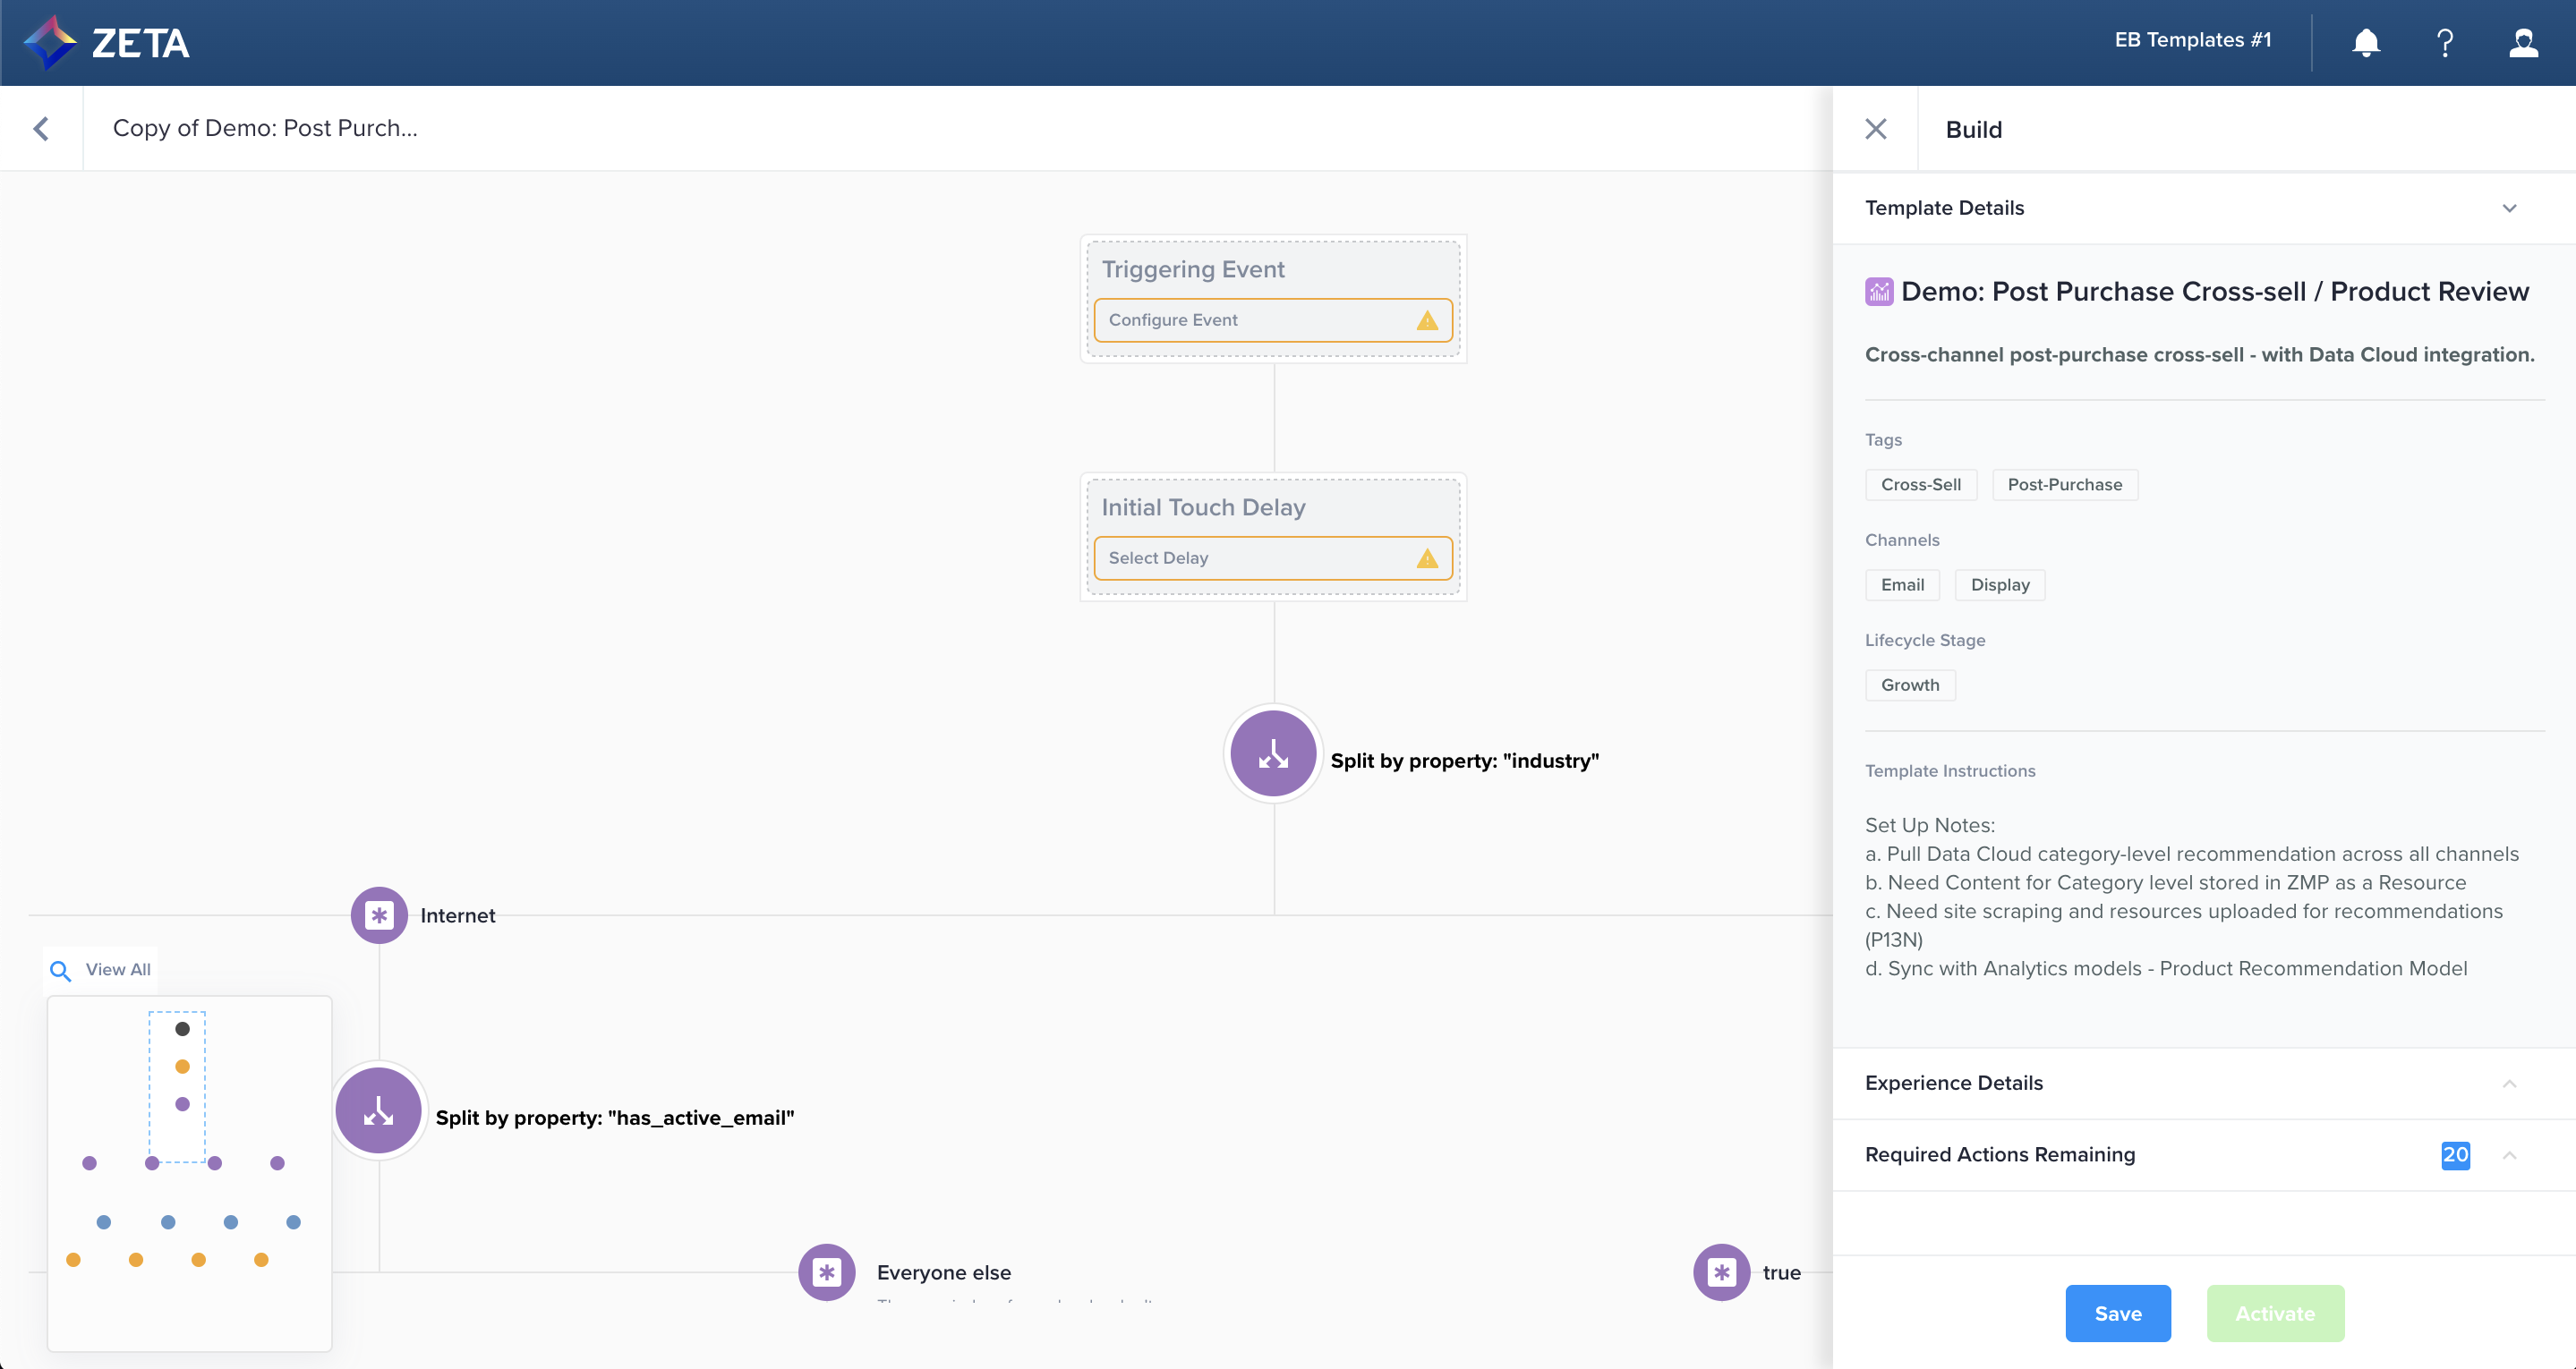
3. If you need to return to the template instructions, you can expand the Template Details section of the Build panel at any time.
Building an Experience from a Template
You can leverage templates even if some of the intended actions aren’t relevant to you. We want to make sure you can cut down on the time spent building experiences. Deleting unnecessary nodes can often be much faster than building from scratch.
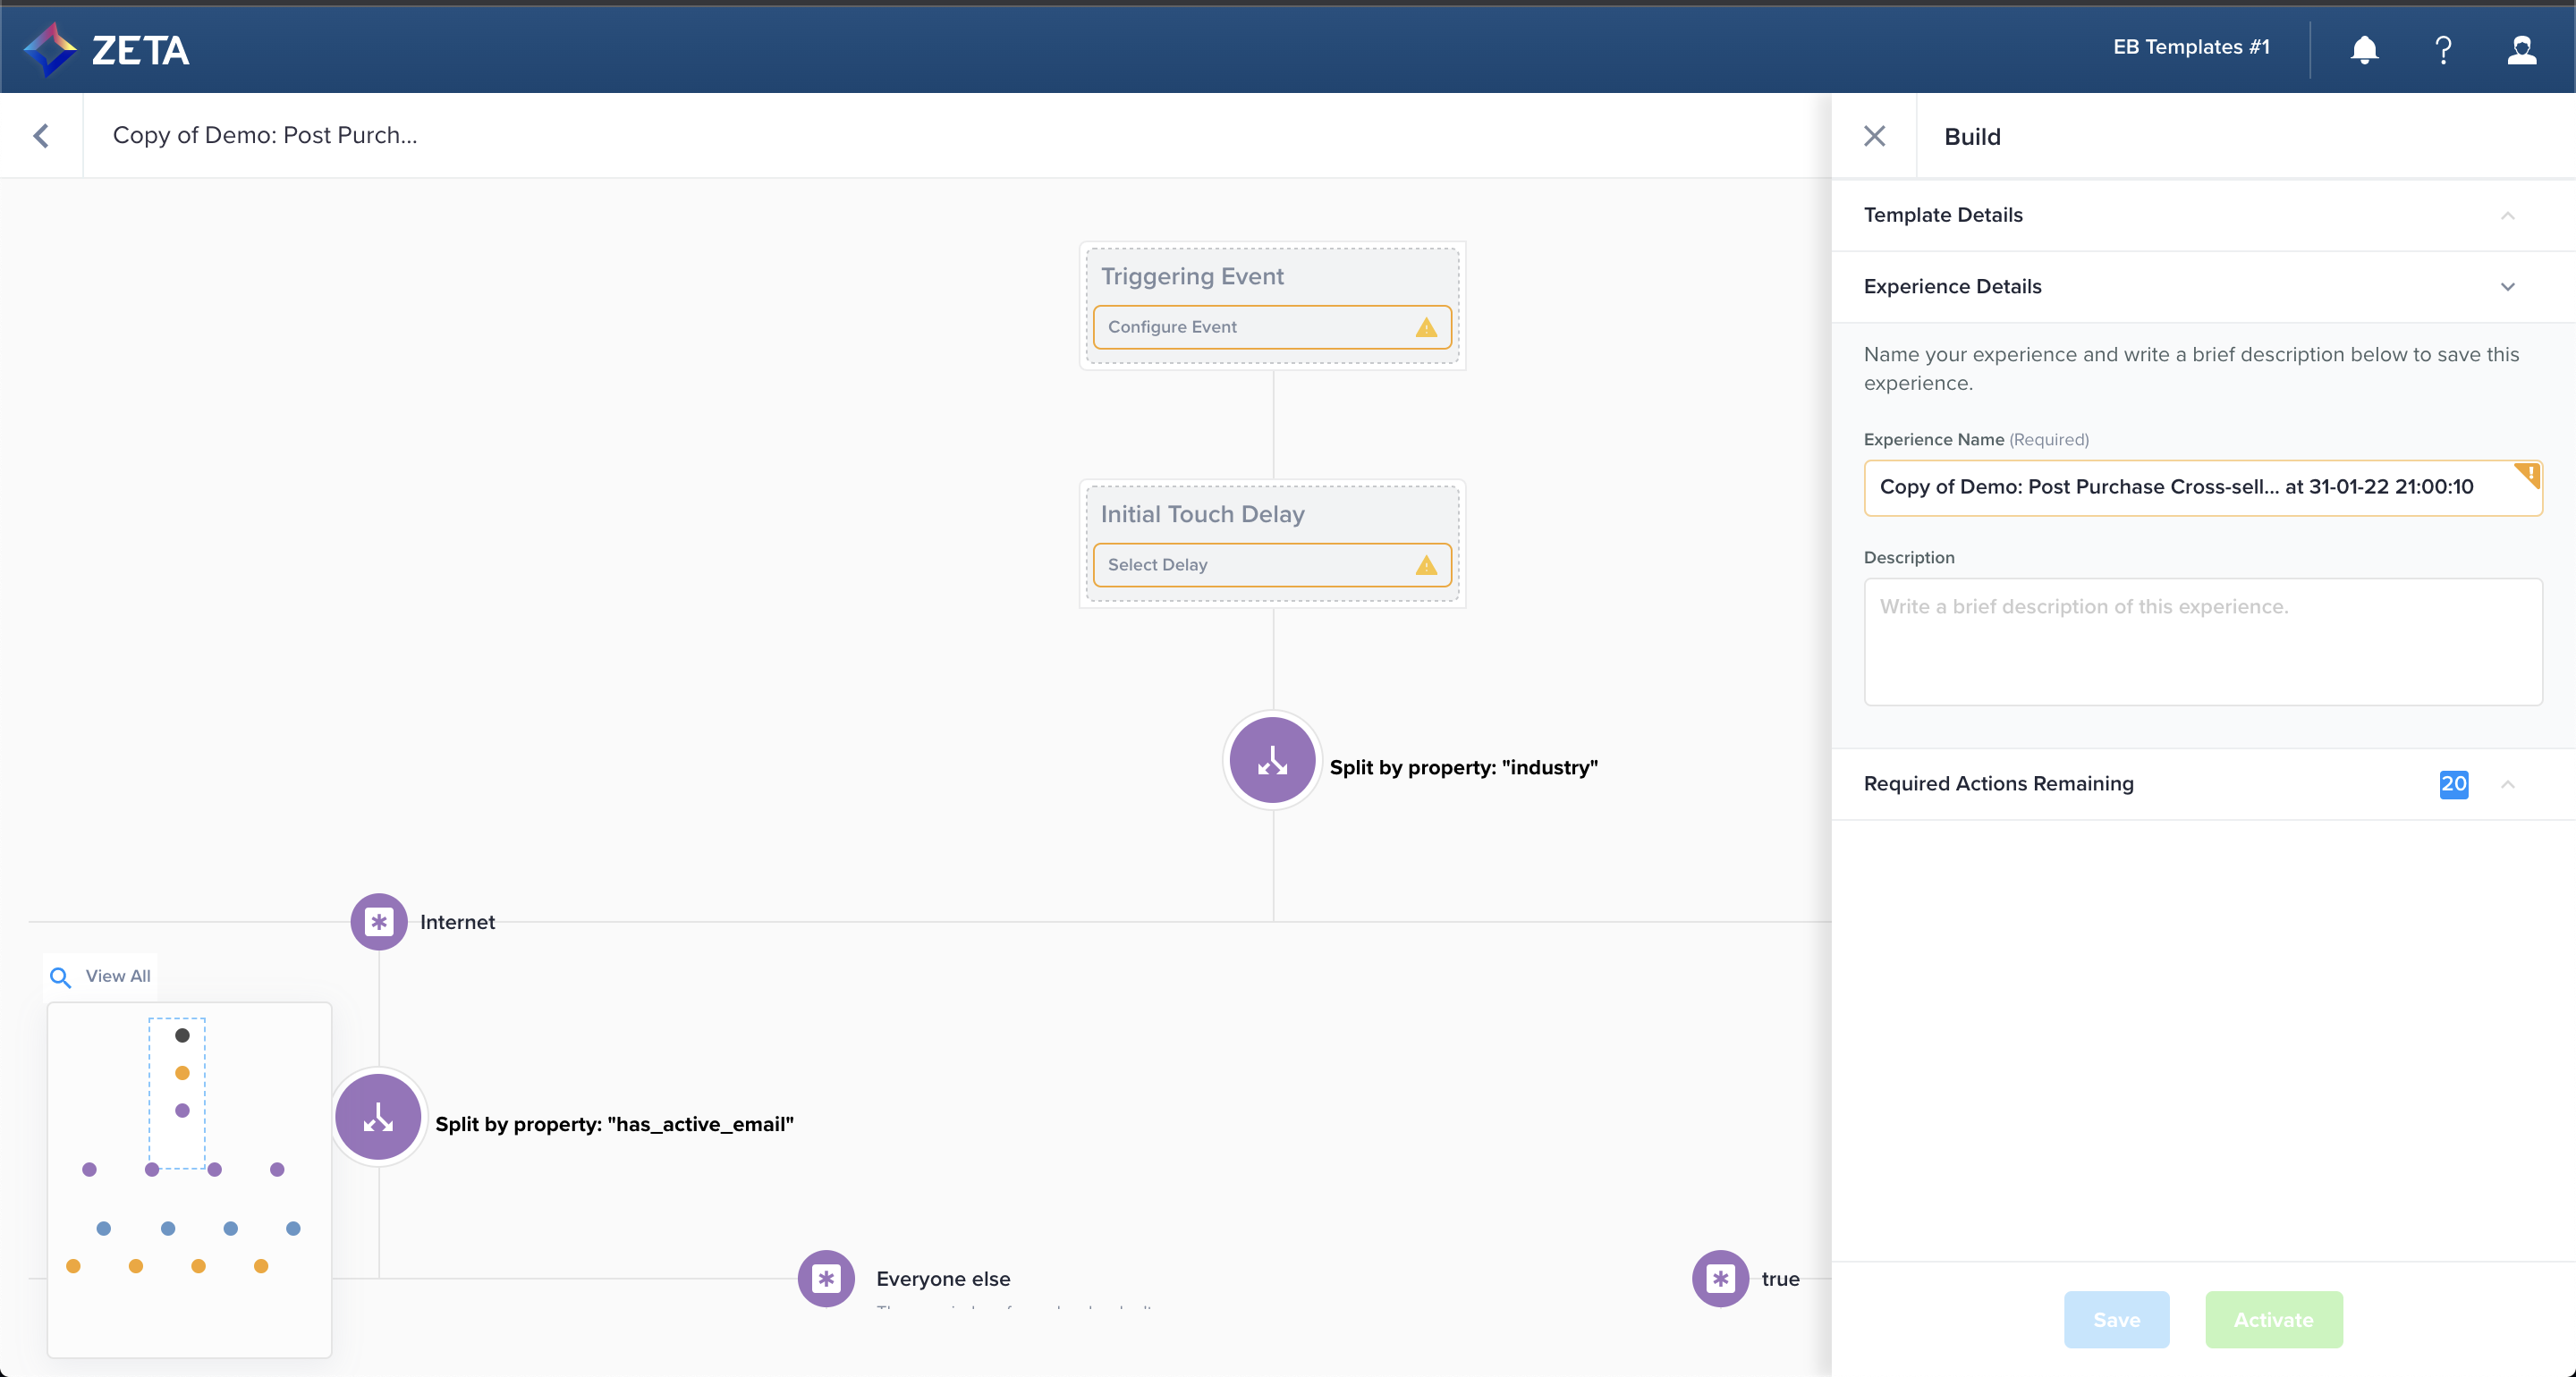
1. From the Build panel, give your experience a name of your choice so you can easily find it later. The description is optional, but it can help give context to your team members.
.gif?cb=a874137ad2b175e1d48c09be4fffd45d)
-
Click on Save to update the Experience details.
-
The experience auto-saves after every node is updated
2. Since every ZMP account is different, data can’t necessarily be transformed to the relevant format recommended in each node. This means that the template will require customizing nodes to fit your account’s data.
|
For example, a trigger event called updated_cart in one account may be called added_to_cart in another account, or signup_started in a non-retail industry. These need to be added to an Account Events node manually. |
3. The Required Actions Remaining section of the Build panel keeps a running list of all nodes that require customization. These nodes are also marked specifically on the canvas with yellow warning icons and a CTA. Nodes that require customization are clearly marked, and the counter has 20 required actions:
.gif?cb=765dbe7dc960c7fd801baf54ae2dd5f7)
4. Clicking on any of these nodes in the Build panel (or selecting edit on the canvas) will open up the action panel, which has recommendations and, in some cases, preconfigured logic so that you only need to fill in a few data points that are unique to your account.
.gif?cb=db247af30994c29733d46b357813dc8b)
.gif?cb=f2e124b18875a16ac7c3a8988e255af4)
5. Once saved, the node reverts to a standard event icon and reopens the Build panel for the next item. The Required Actions Remaining counter has decreased to 17 to signify that you’re one step closer to finishing your experience.
You should review every required action node to read the recommendation and determine the data needed to fit your account.
How Much Can I Deviate from the Template?
We designed Experience Builder Templates to help you save time and be more efficient, but they are first and foremost a tool for your workflow. You know your business and customers best, so you have complete control over how you want to modify your workflow.
Once an experience is created from a template, it is effectively disconnected from that template, save for the Template Details section that is generated at the time the experience is created. Other than the required actions, it should behave as any other experience. This means you can add, edit, and delete nodes as you wish.
Adding more nodes
There is no limit to the number of nodes you want to add to an experience created from a template. Once you select the template, it is a regular experience and has all the regular functionality.
Editing pre-configured nodes
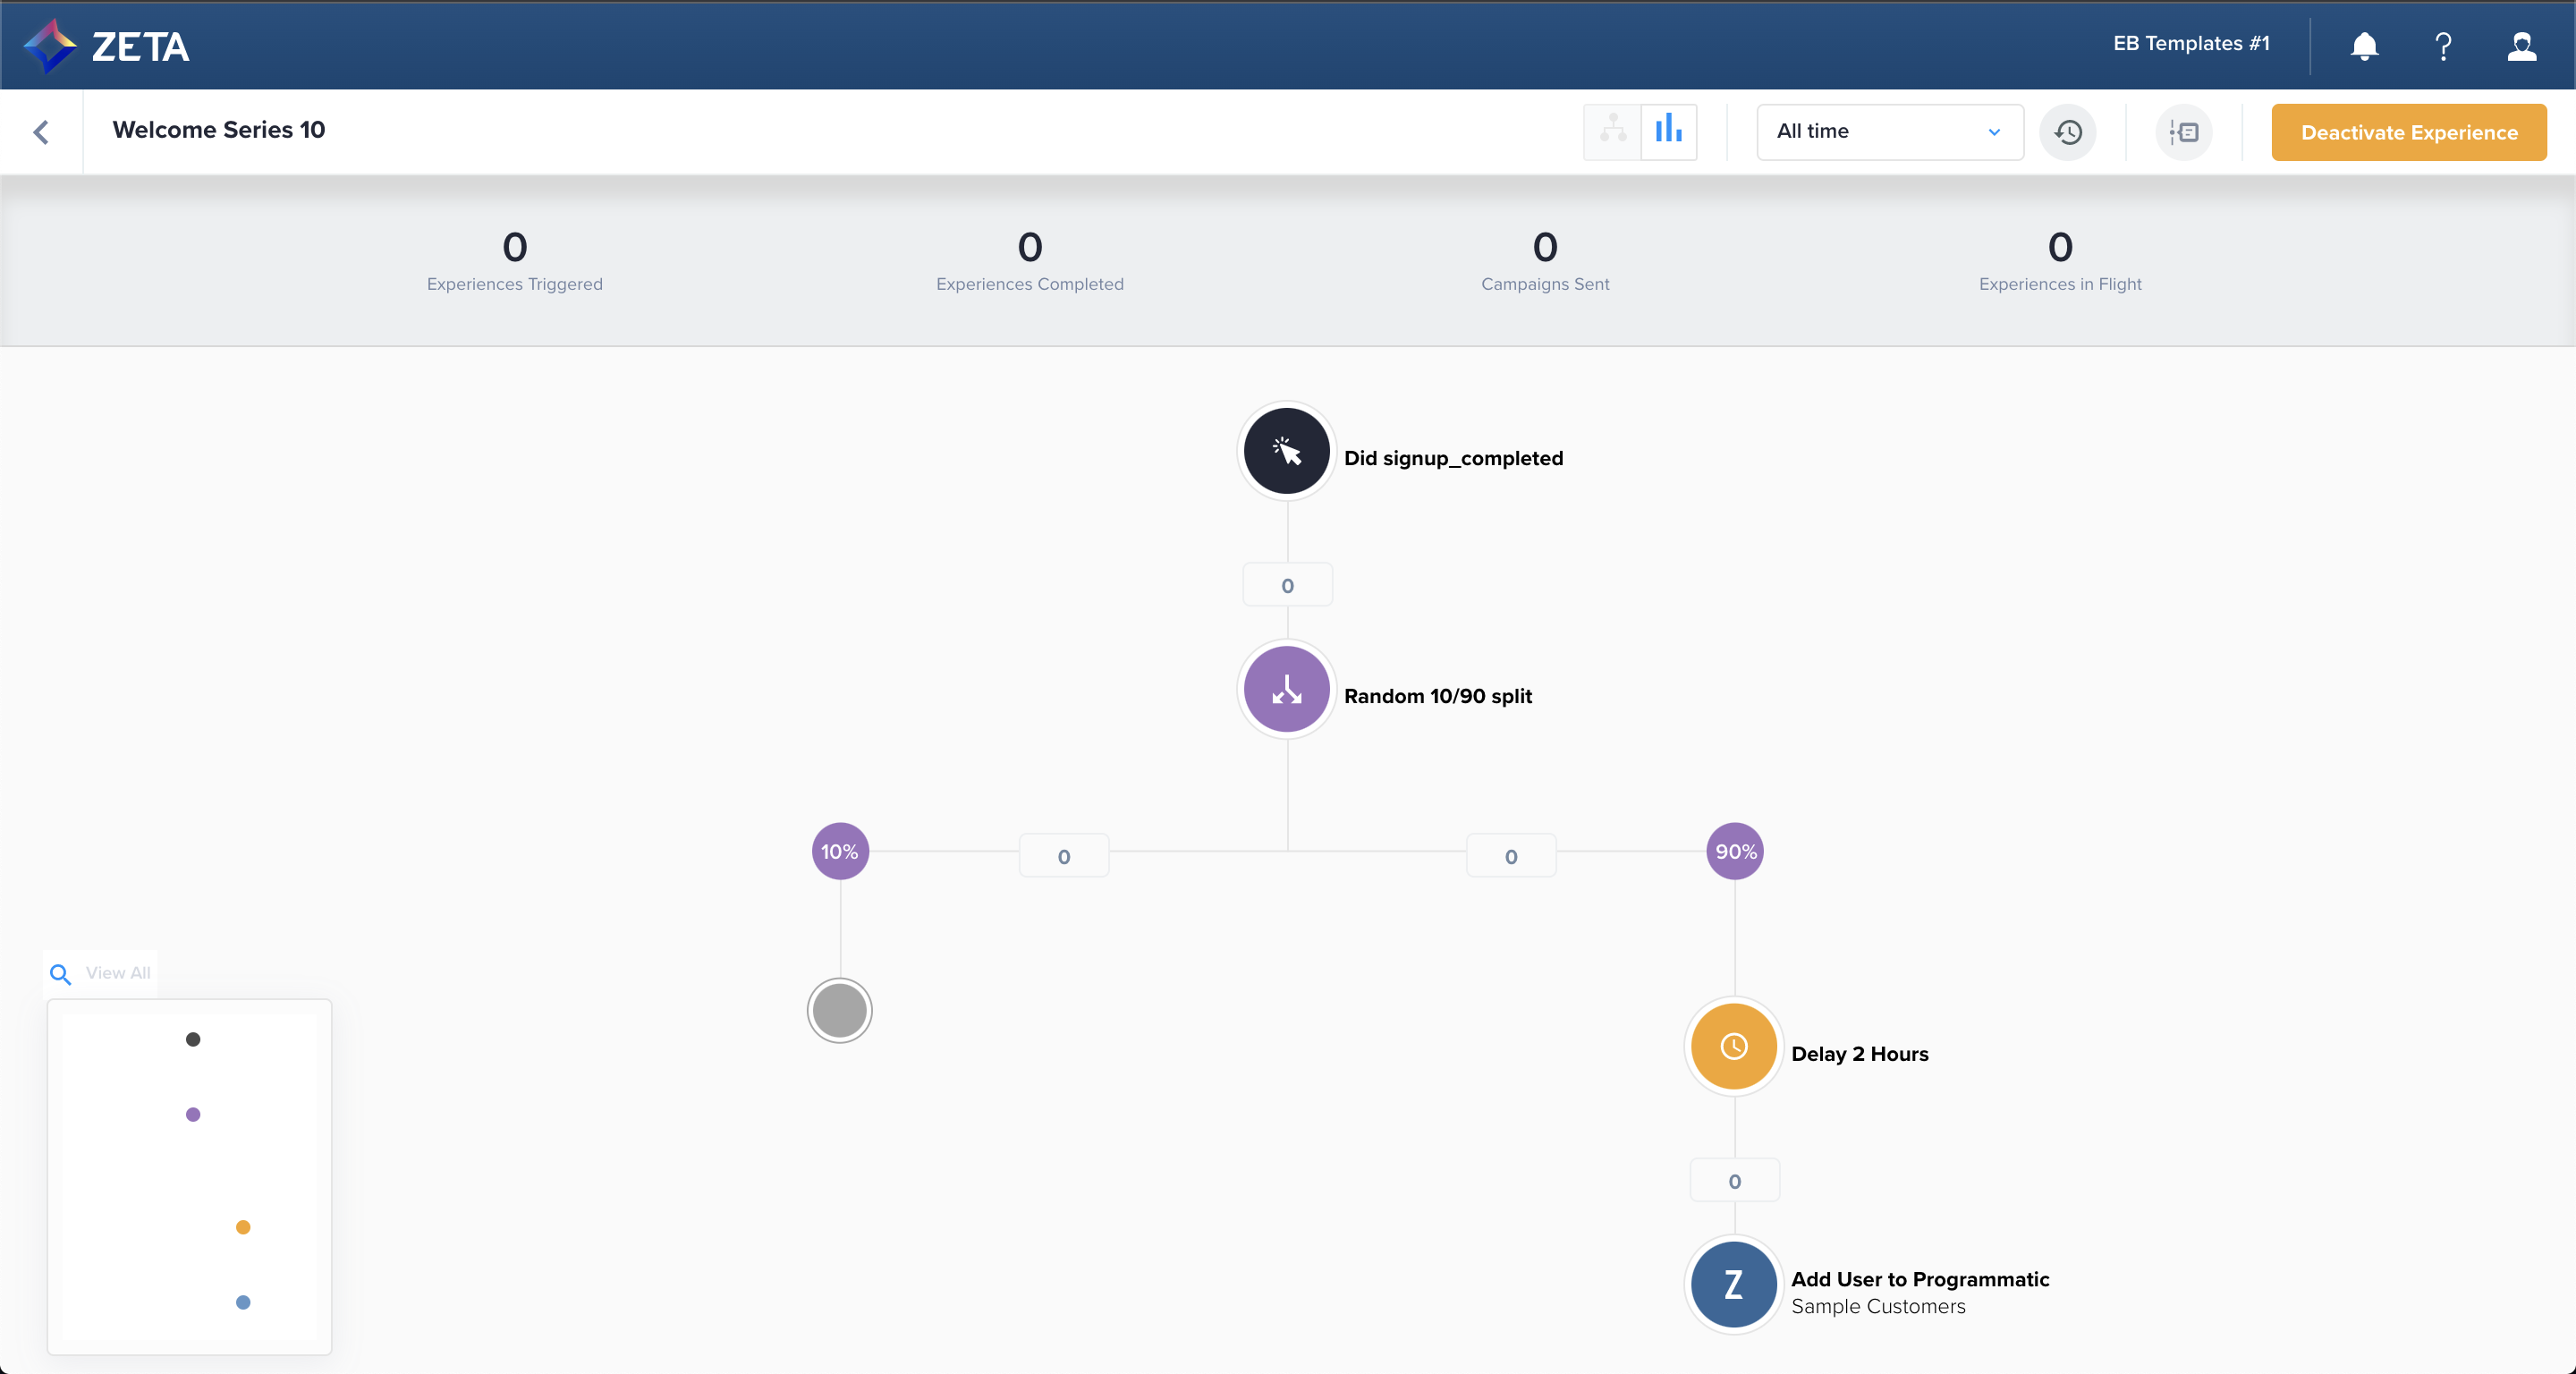
In some cases, a node may make sense without specific recommendations. If this is the case, the node will look like a regular node and won’t have any “required action” cues, despite being part of the template:
-
If the template intends to do a 10% holdout, a Split Randomly node can be automatically configured to split 10/90 into two branches.
-
If the template intends to do a 3-hour delay, a Delay for a set amount of time node can be automatically configured to delay 3 hours.
In either of these cases, you can select Edit in the node menu to open it in the panel and change the inputs.
Deleting pre-configured or required action nodes
If you find that some nodes in a template aren’t relevant to you (eg, the feature isn’t enabled or it’s not a channel you typically use), feel free to delete the node.
Be careful when deleting entire branches of a split (eg, Unknown in Split By Identity). Instead, simply delete the individual nodes below that branch so your other branches stay intact.
Activating an Experience
The process for activating an experience is the same across all automation, whether created from a template or not.
1. When all your nodes are filled, and the Required Actions Remaining counter reaches 0, your experience will be eligible to activate.
.gif)
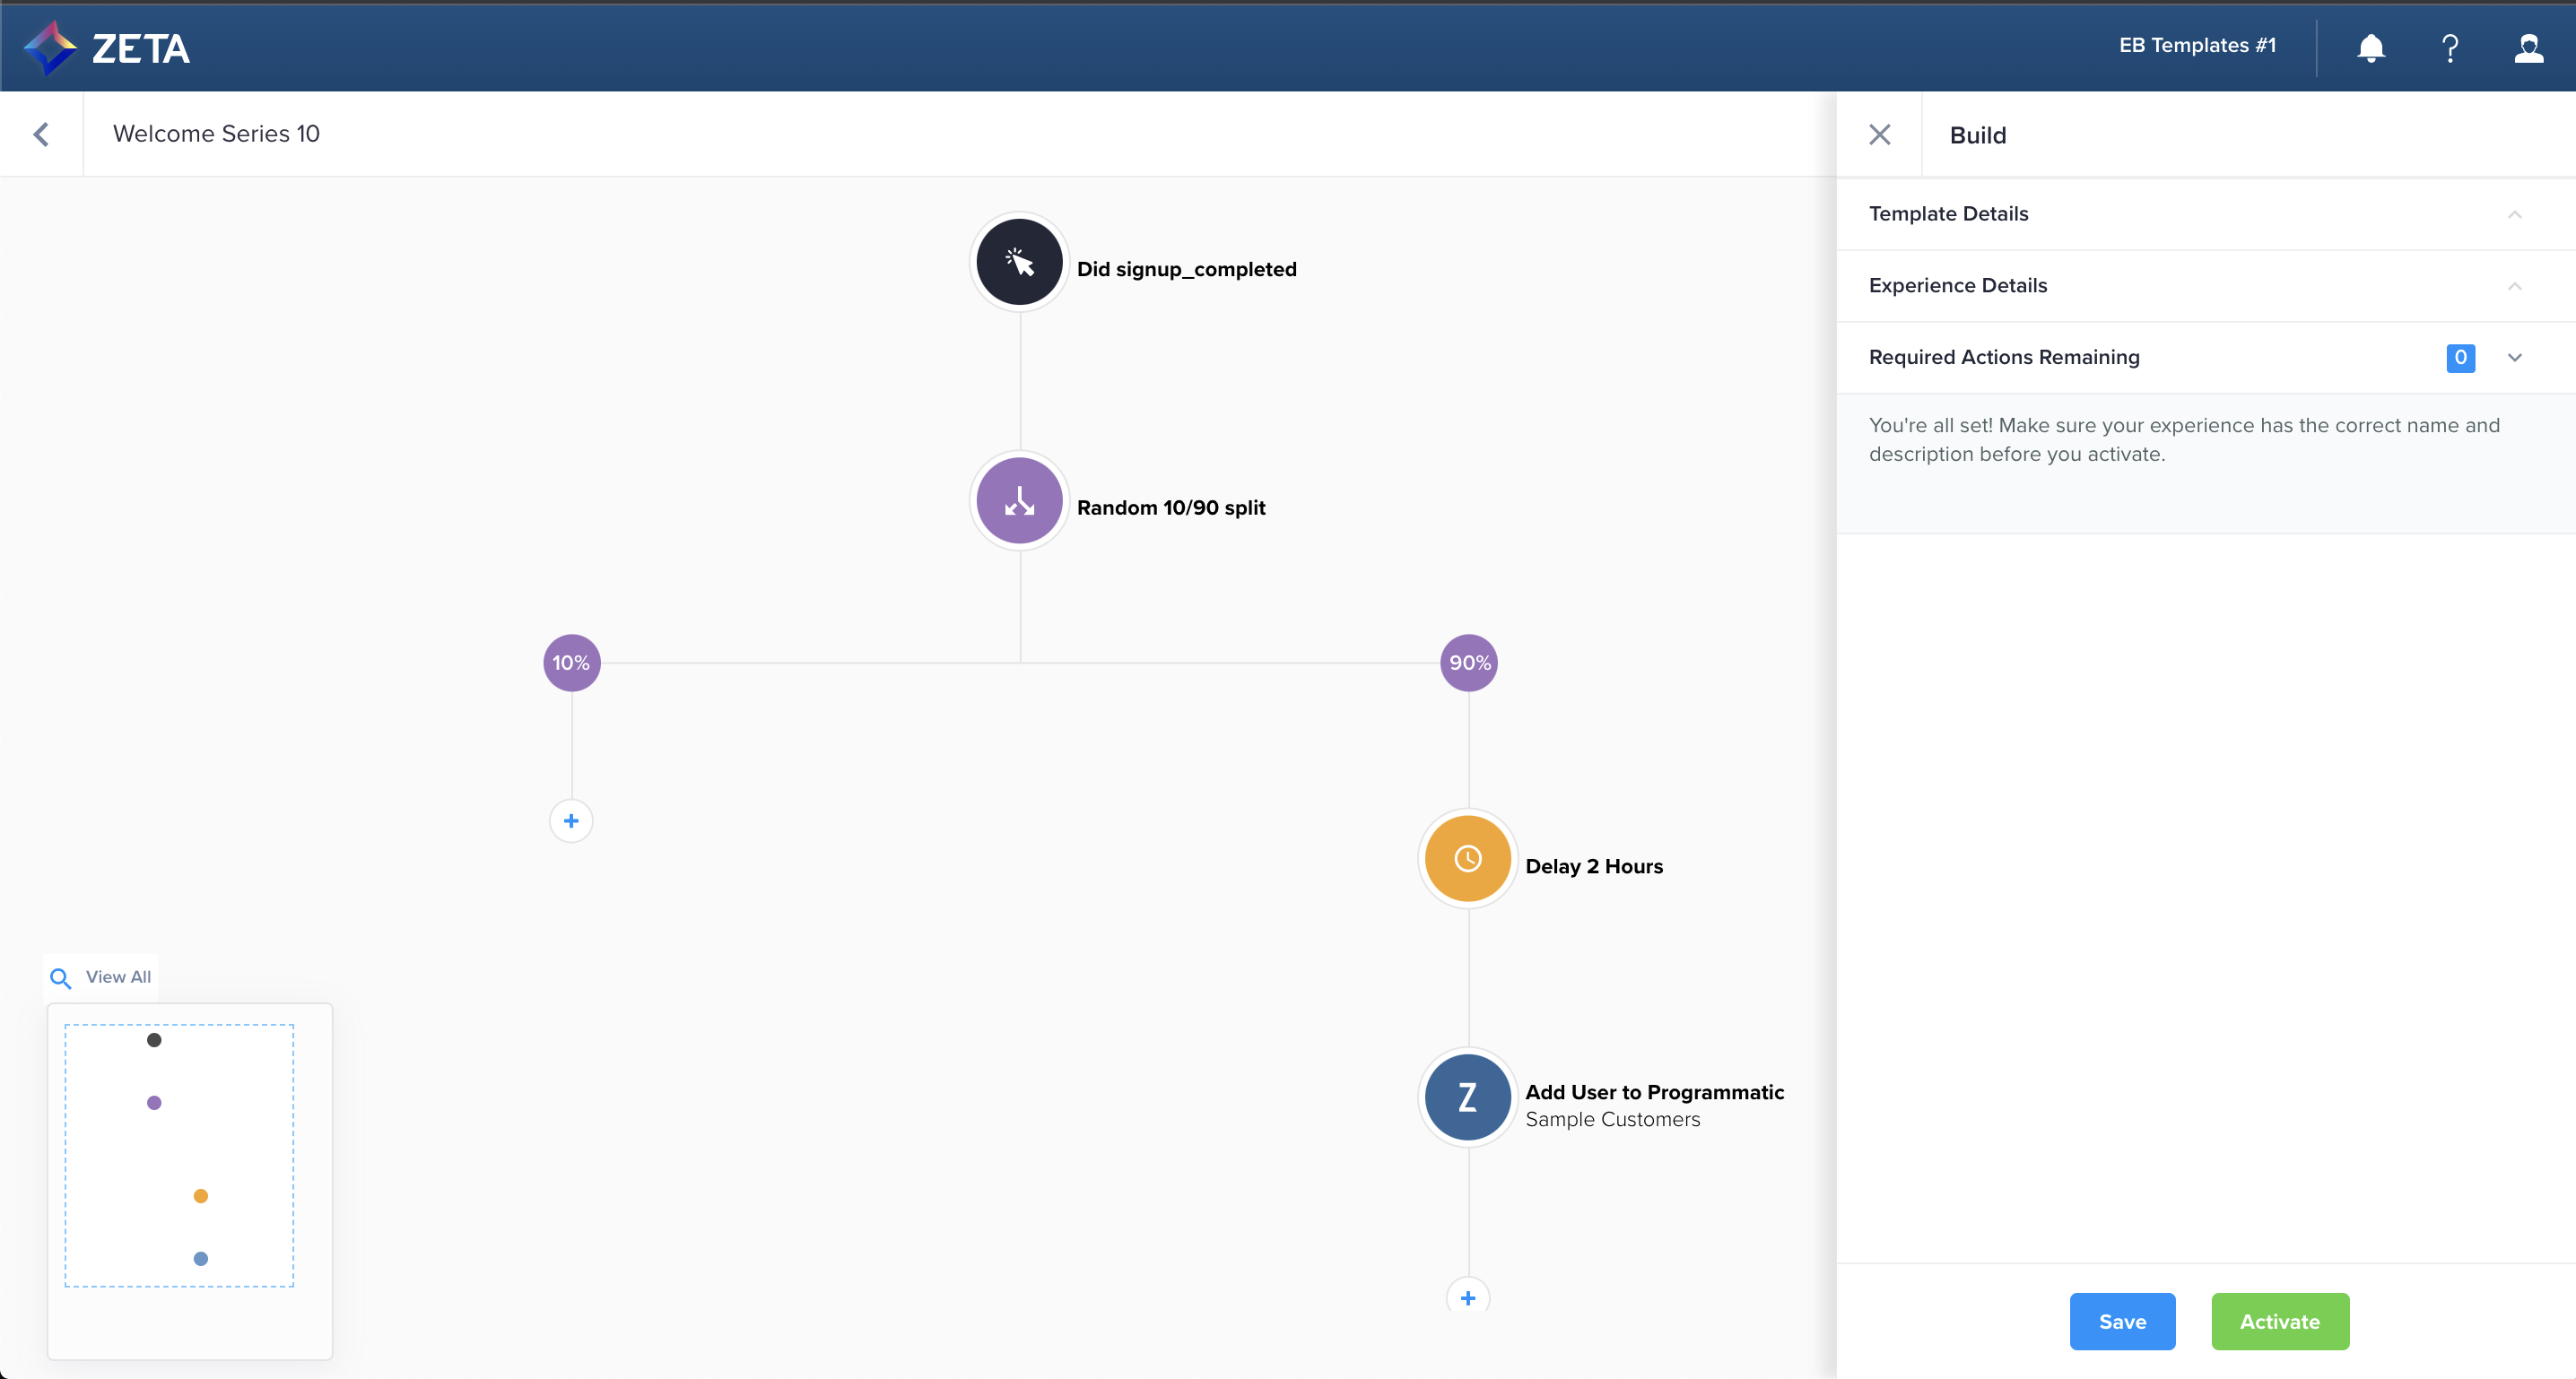
2. Before you click on Activate, review your experience as you normally would by checking your nodes, experience name, and description (if any). These nodes will begin listening for criteria immediately after you turn it on, so it’s important that everything is correct.
3. You’ll need to confirm your selection one last time.
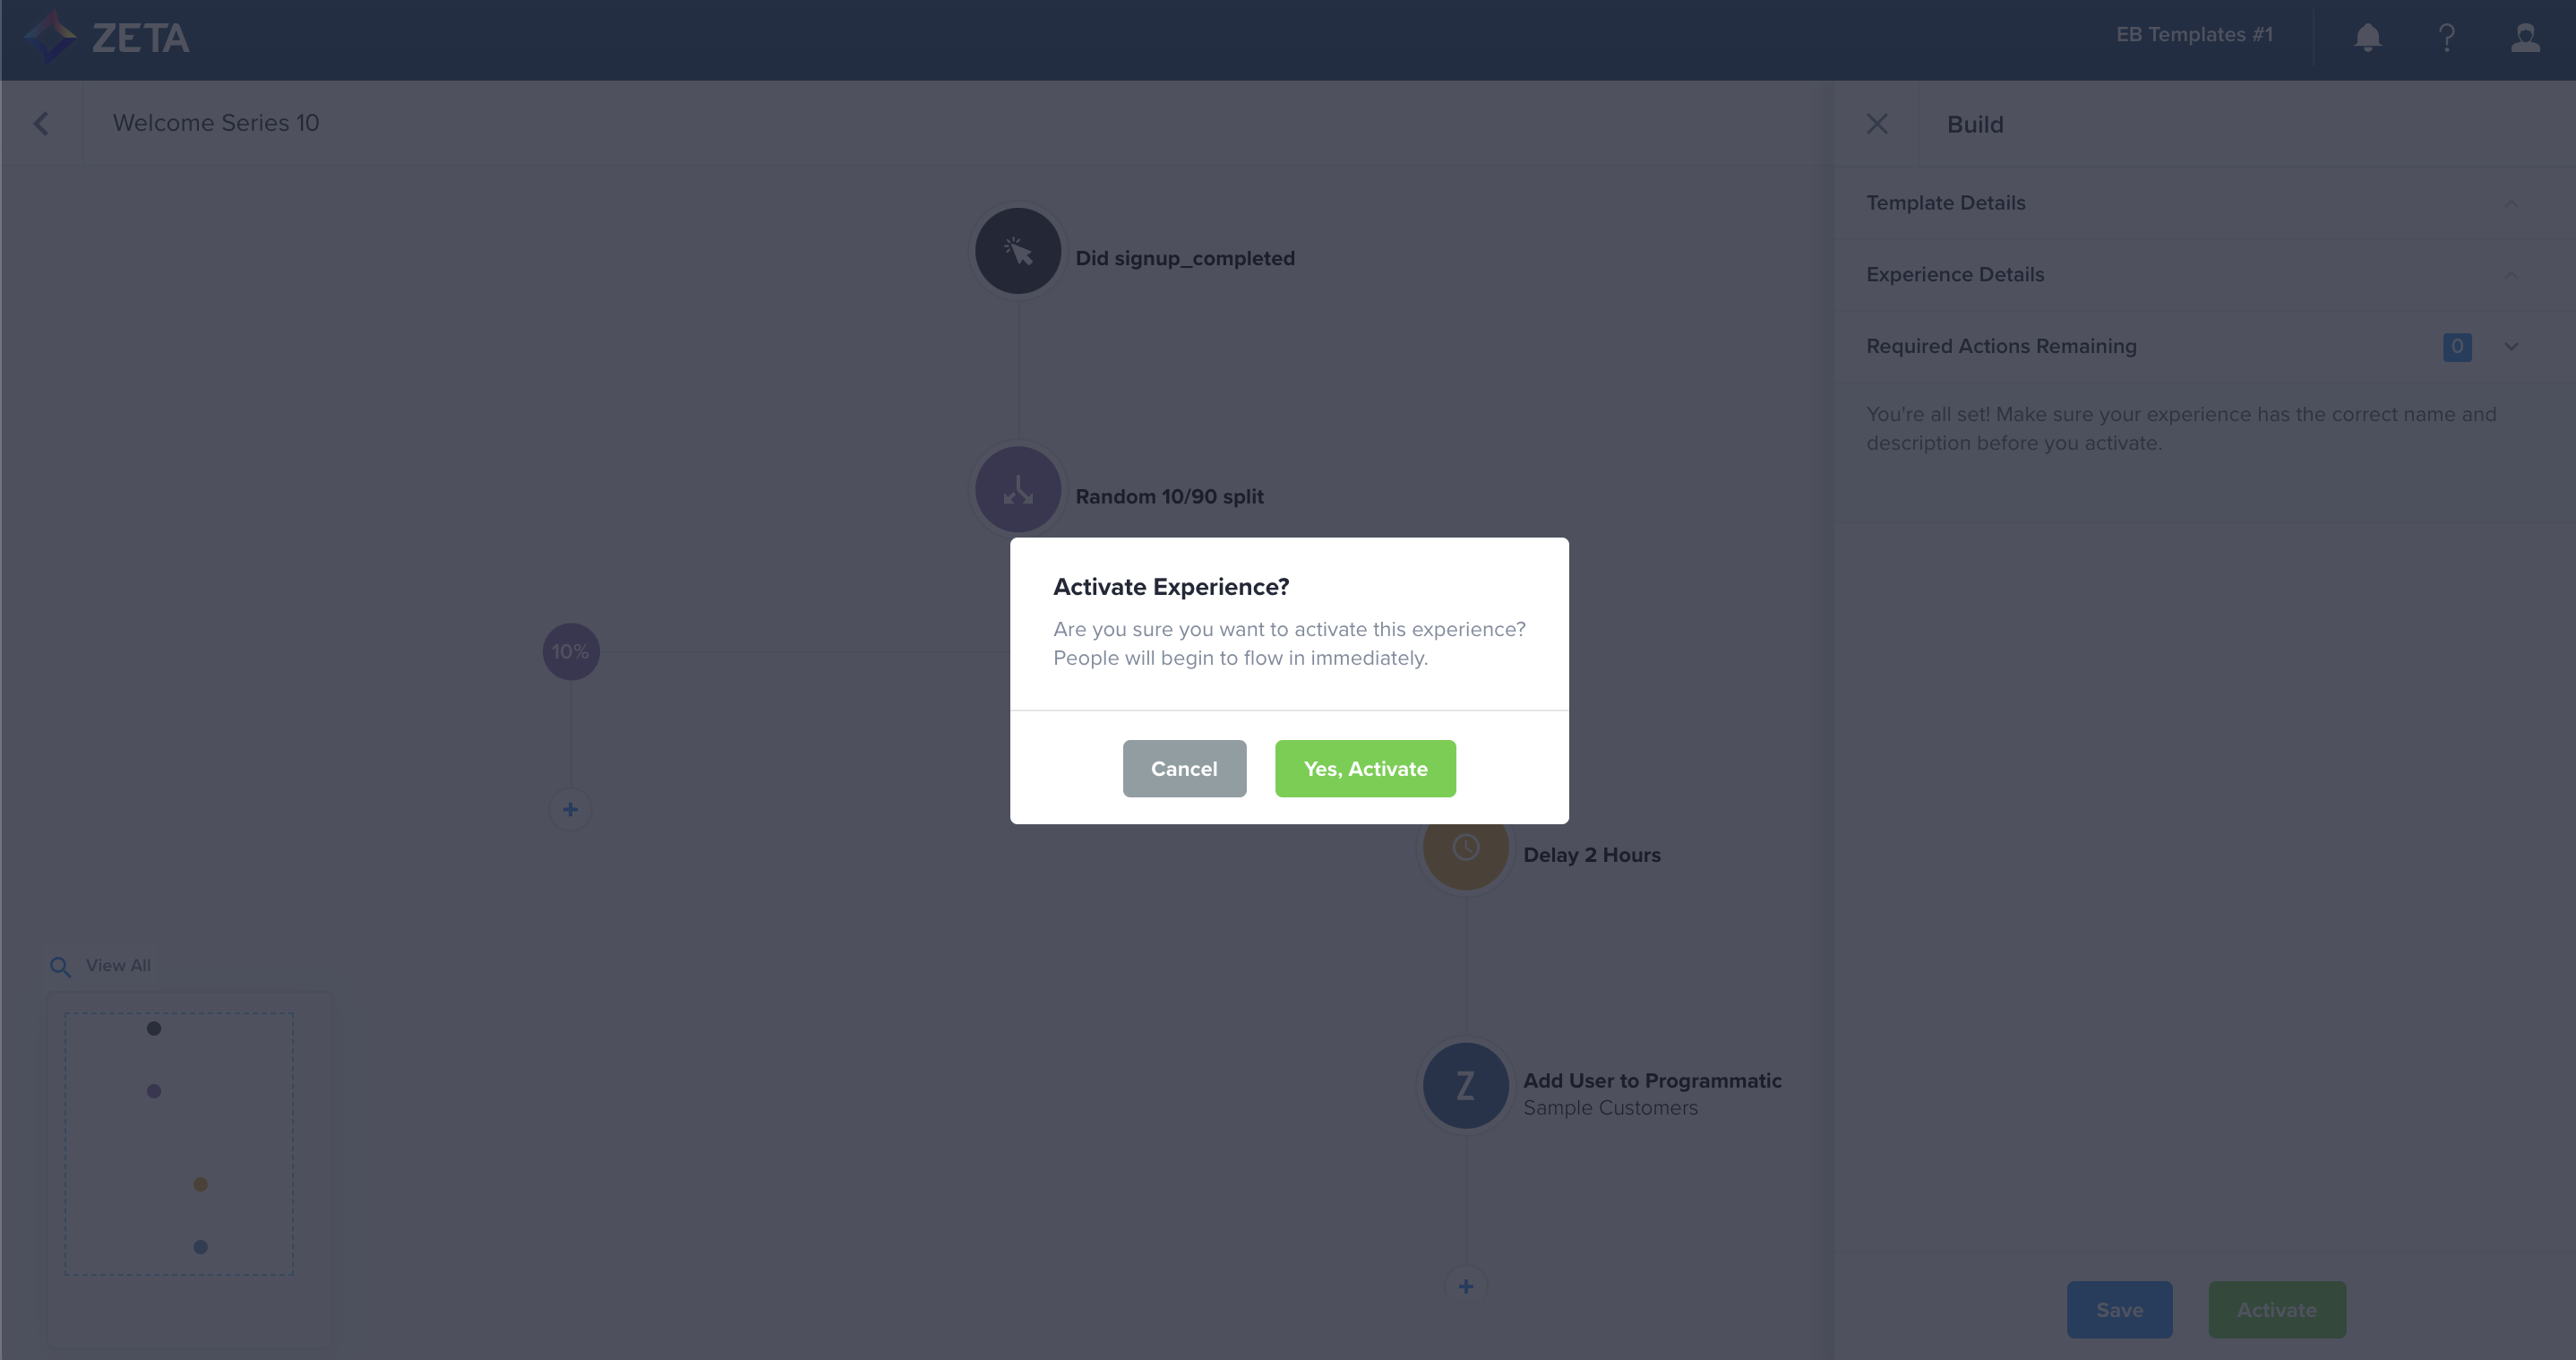
4. Once you confirm, your experience will be in flight, and you can monitor stats as people enter and pass through the nodes.