
You can access the ZMP platform using one of two methods:
-
Traditional URL login with a username and password
-
Single Sign-On (SSO) via an identity provider such as Okta, Microsoft Entra (Azure AD), or OneLogin.
If you opt for the traditional login method, you may also enable Multi-Factor Authentication (MFA) for an added layer of security.
Traditional URL login
Password Configuration
All users logging in via the traditional method must configure a secure password. Your password must meet the following criteria:
-
Minimum of 8 characters
-
At least one uppercase and one lowercase letter
-
At least one number
-
At least one special character (e.g., !, @, #, $)
Multi-Factor Authentication (MFA)
To enhance security, users can enable MFA. Once activated, users will be prompted to enter a verification code during login. This code is typically generated by an authenticator app such as Google Authenticator or Authy on their device.
Single Sign-On Configuration
The ZMP has integrated and enabled Single Sign-On (SSO) with a variety of identity provider,s including Okta, Microsoft Entra/Azure AD, and OneLogin.
SSO works by transferring the user’s identity from the client’s Identity Provider to ZMP. This is done via the exchange of digitally signed XML documents. Clients should check with their identity provider to begin the app setup process, which will yield the necessary information Zeta requires to configure SSO.
Reference links to the various Identity Providers are listed below. If the identity provider being used is Microsoft Azure AD, Zeta prefers a direct app integration:
SSO via Microsoft Azure Active Directory
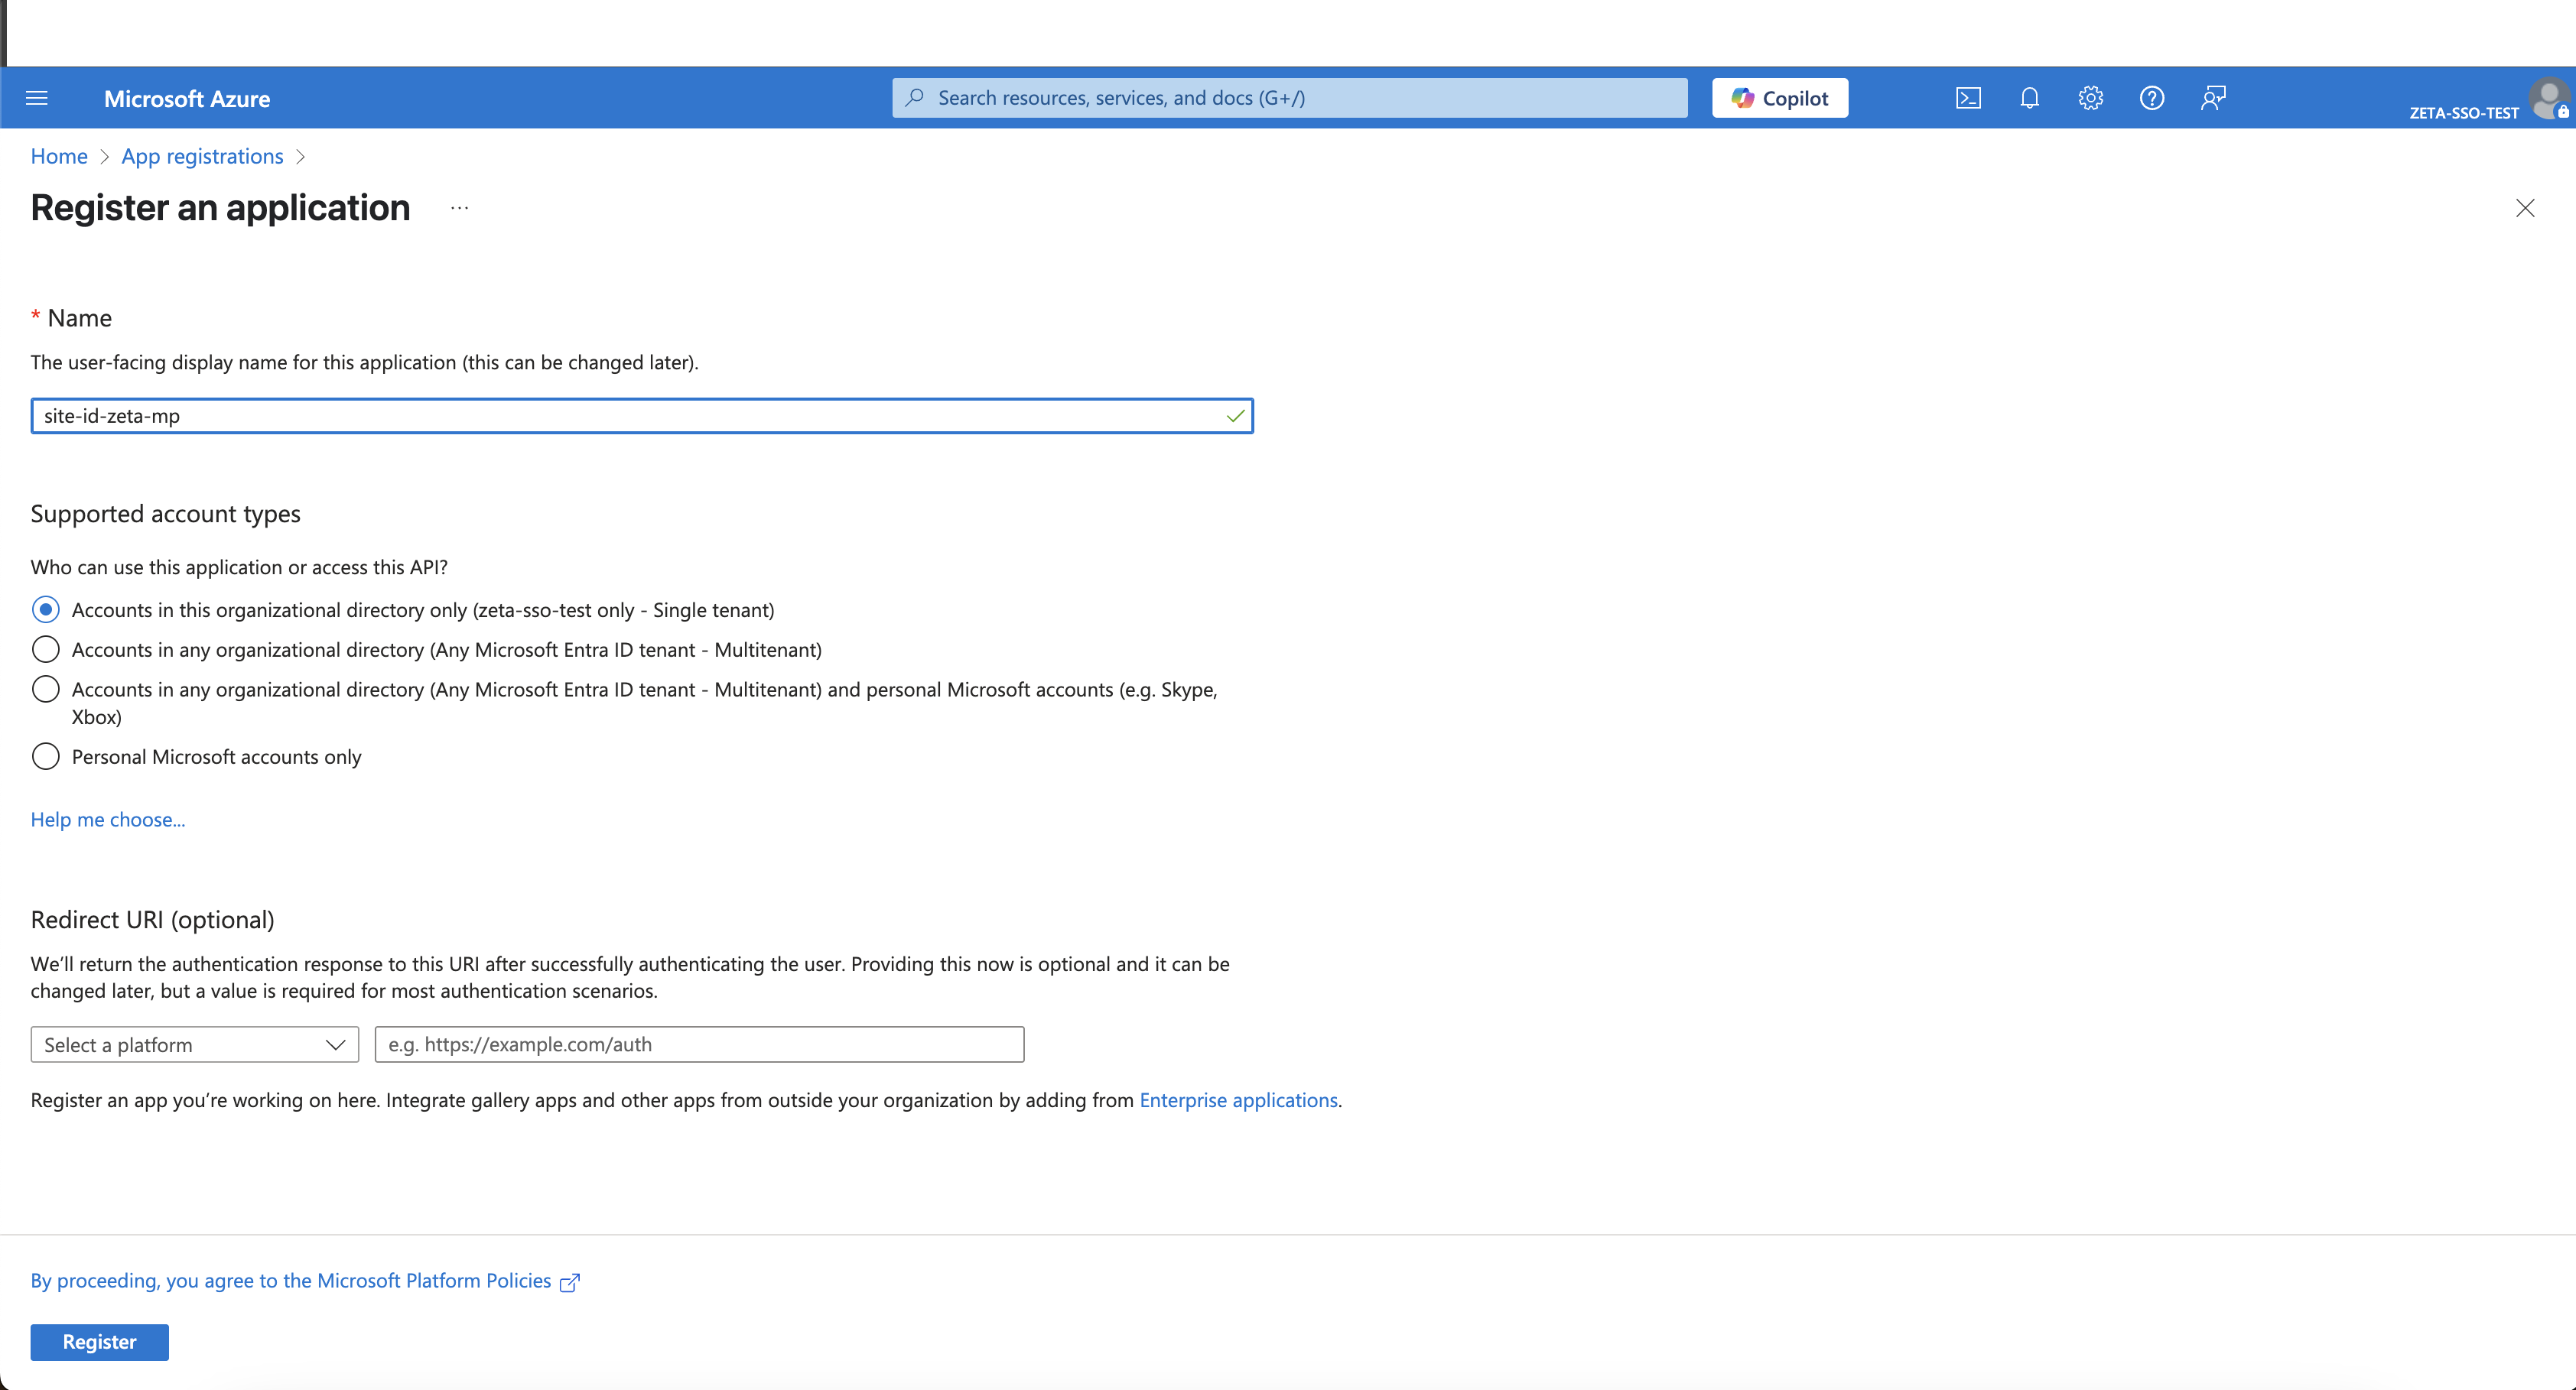
Step 1: Create a New App Registration
-
Navigate to Azure Portal > Azure Active Directory > App registrations.
-
Click on New registration.
-
Enter a name for the application:
-
Recommended format:
<CLIENT>-zeta-mp -
Example:
clientA-zeta-mp
-
-
Choose the appropriate Account Type based on your organization's needs.
-
Leave the Redirect URI field blank for now.
-
Click Register.
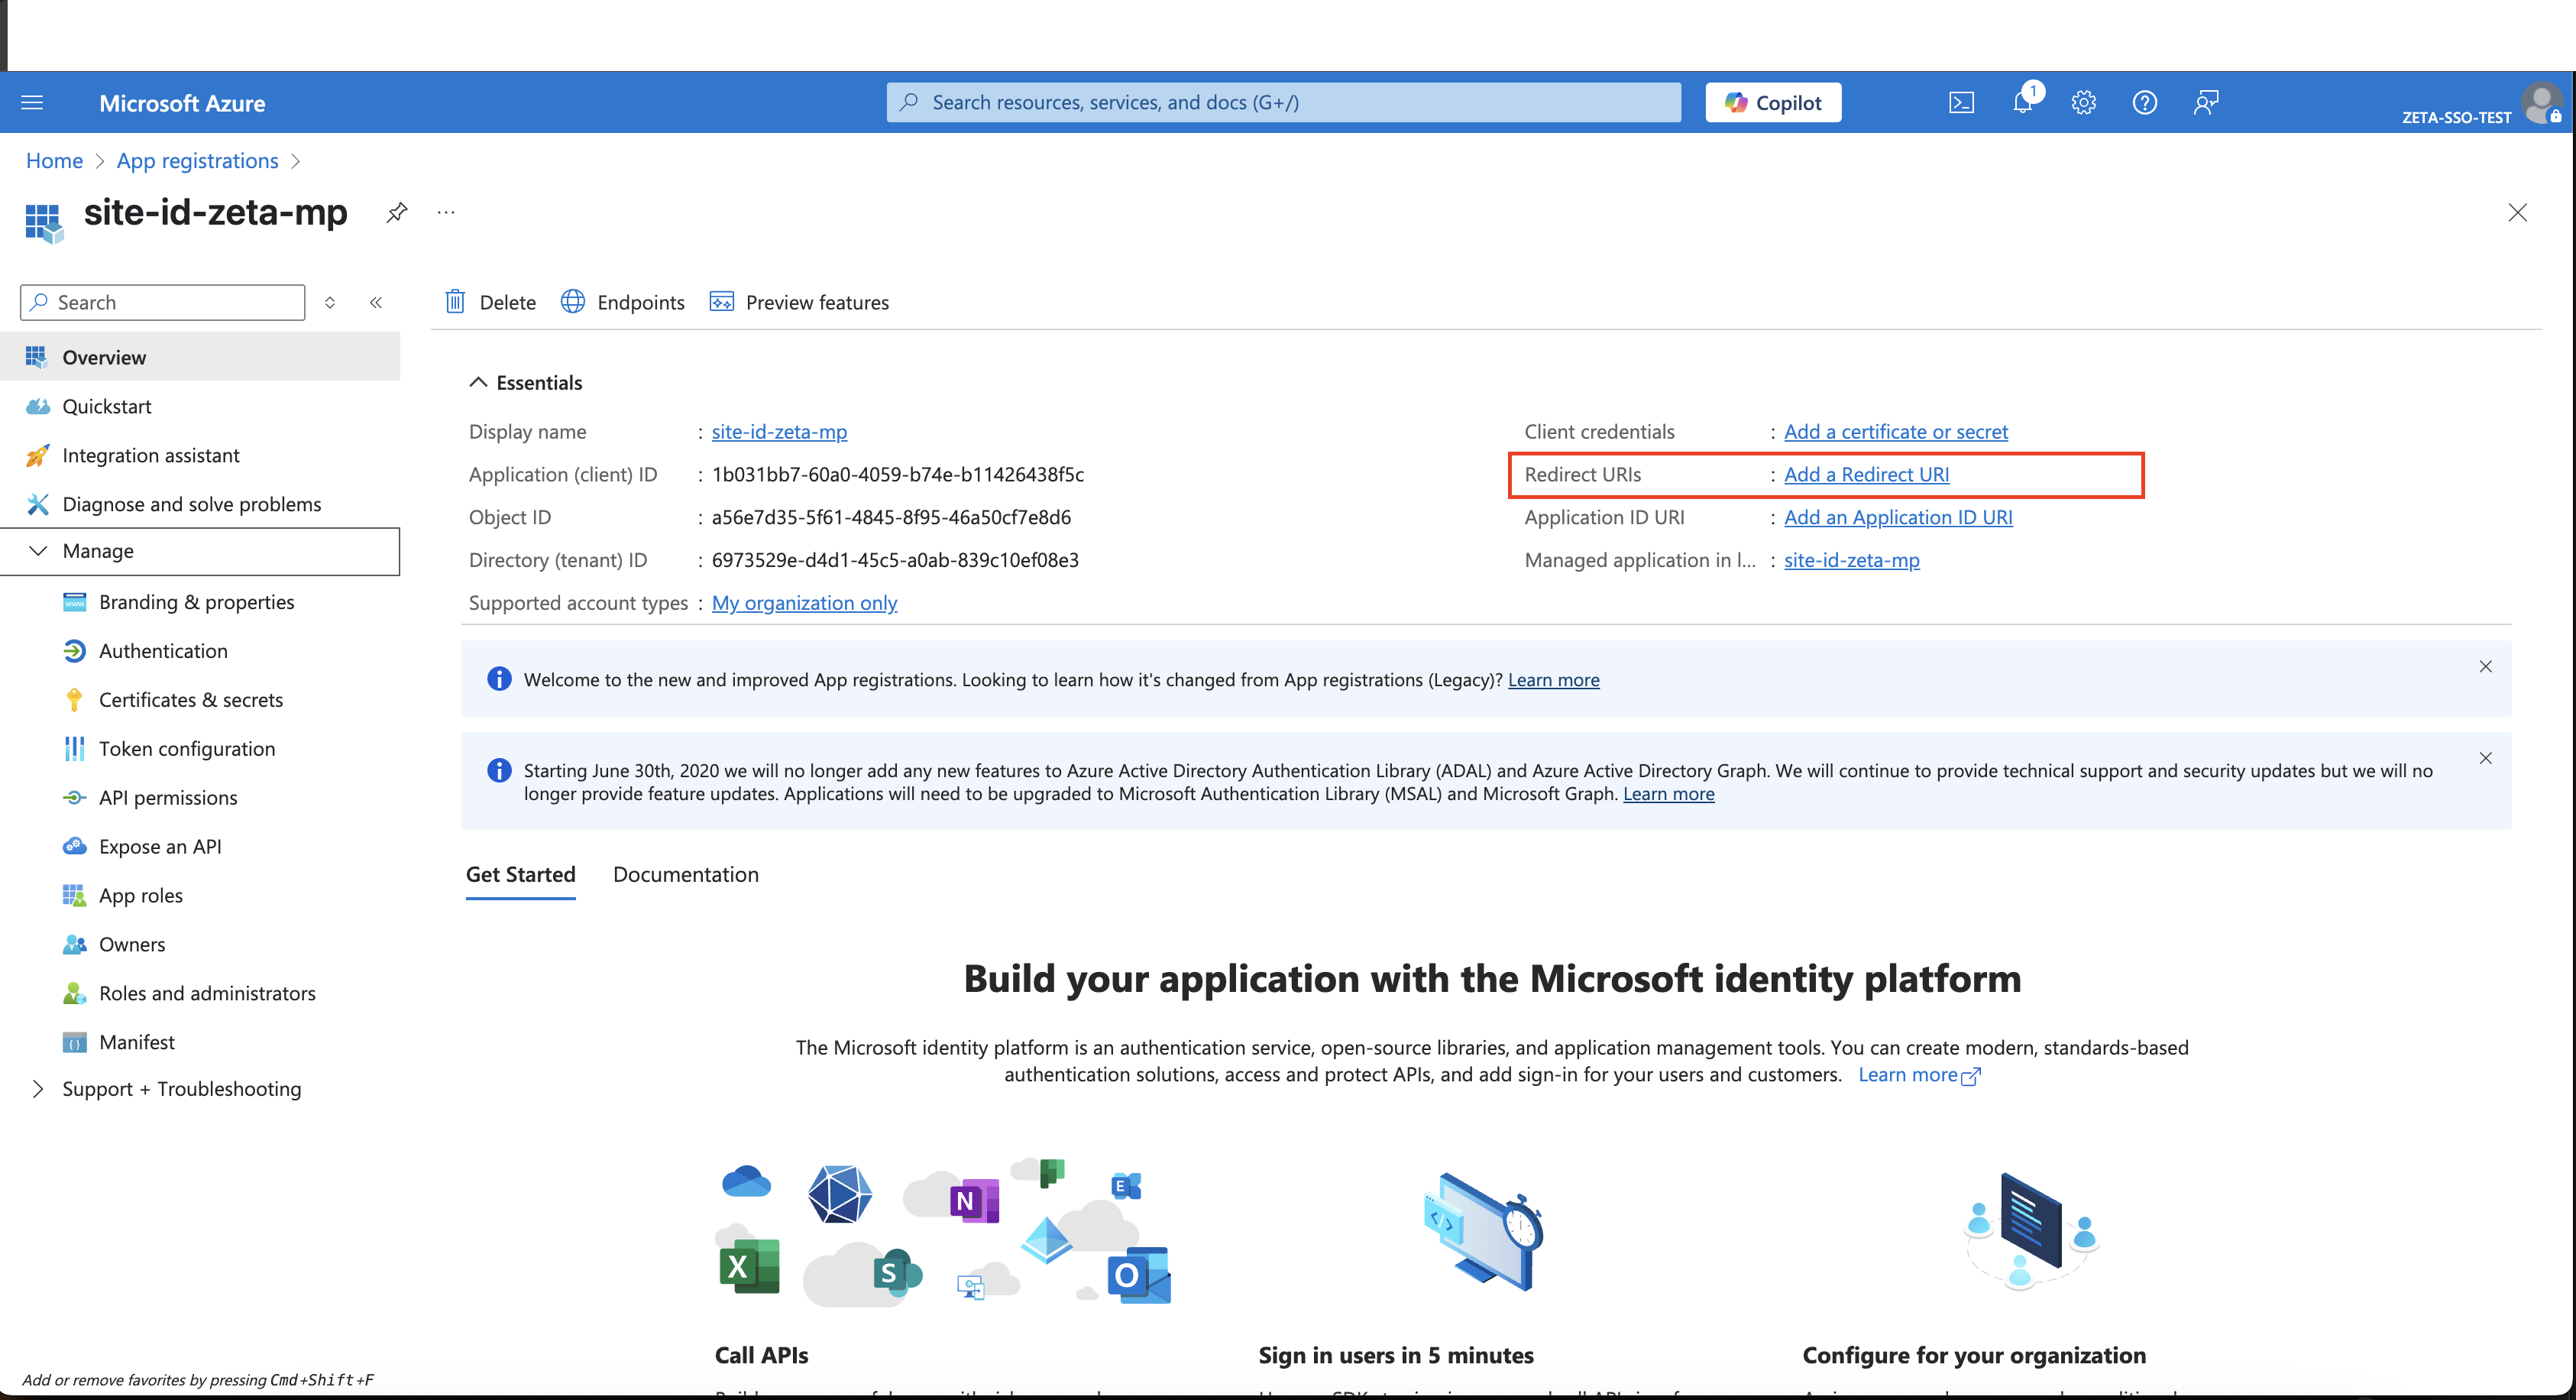
Step 2: Configure the Application
-
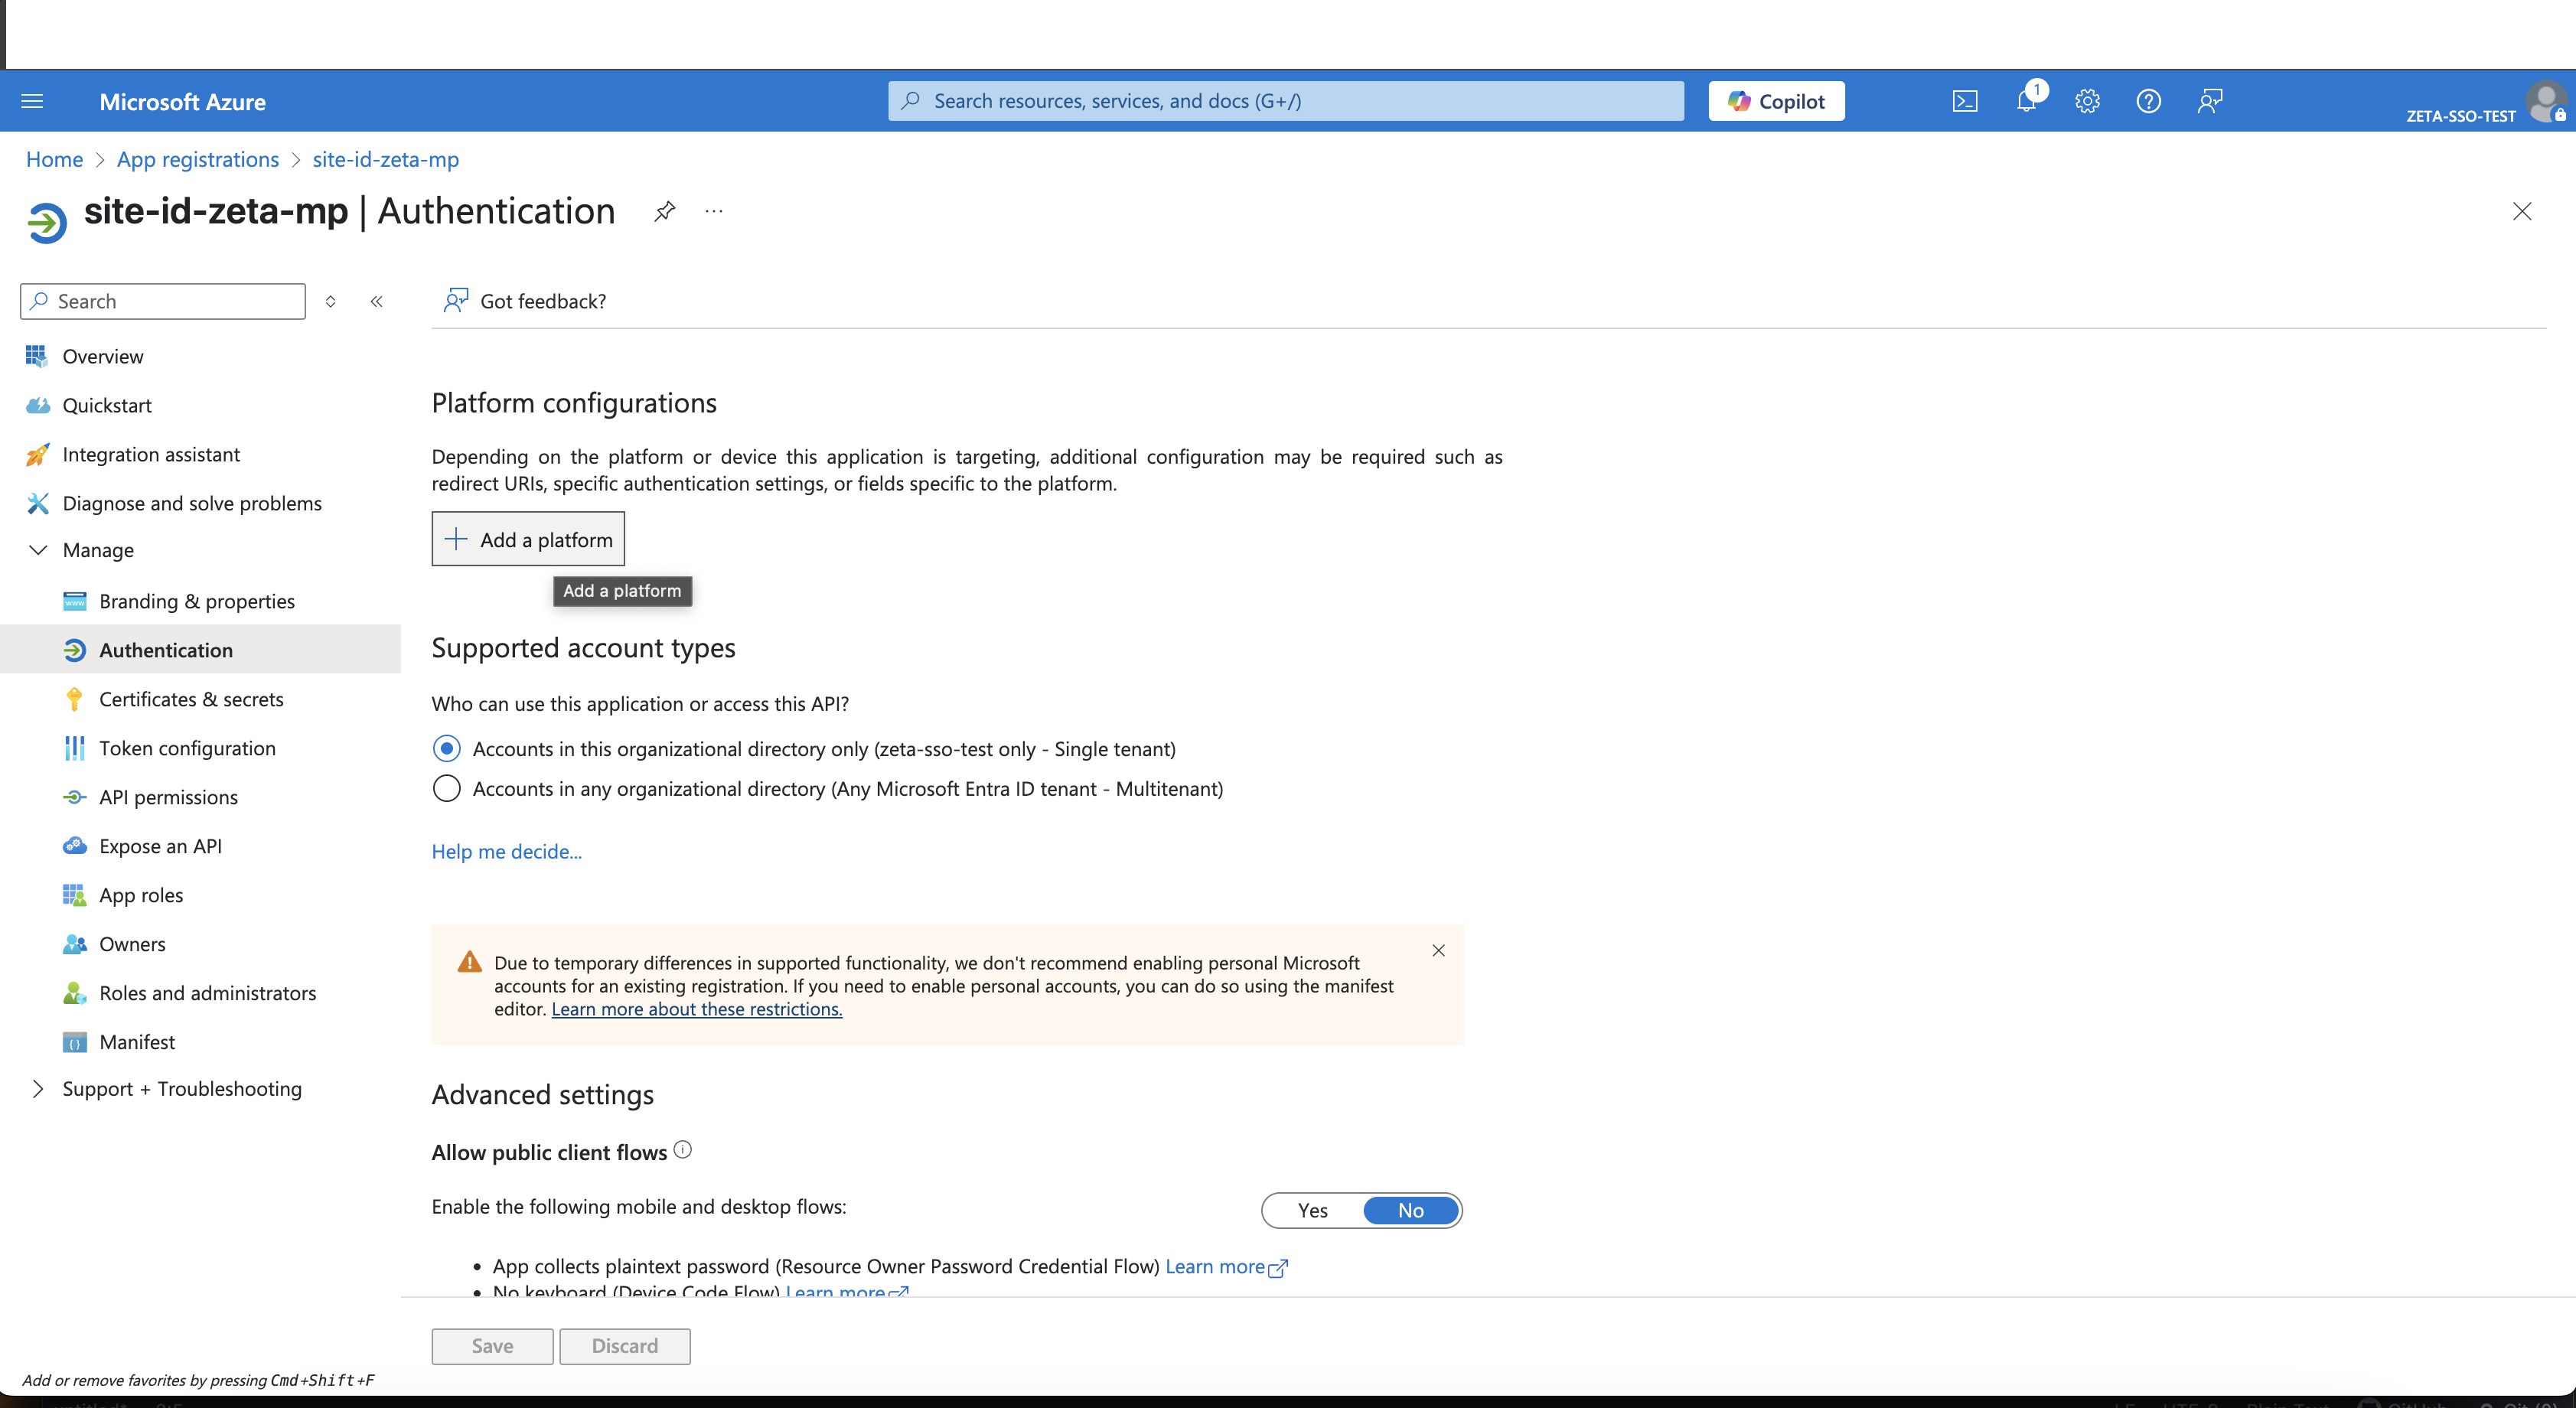
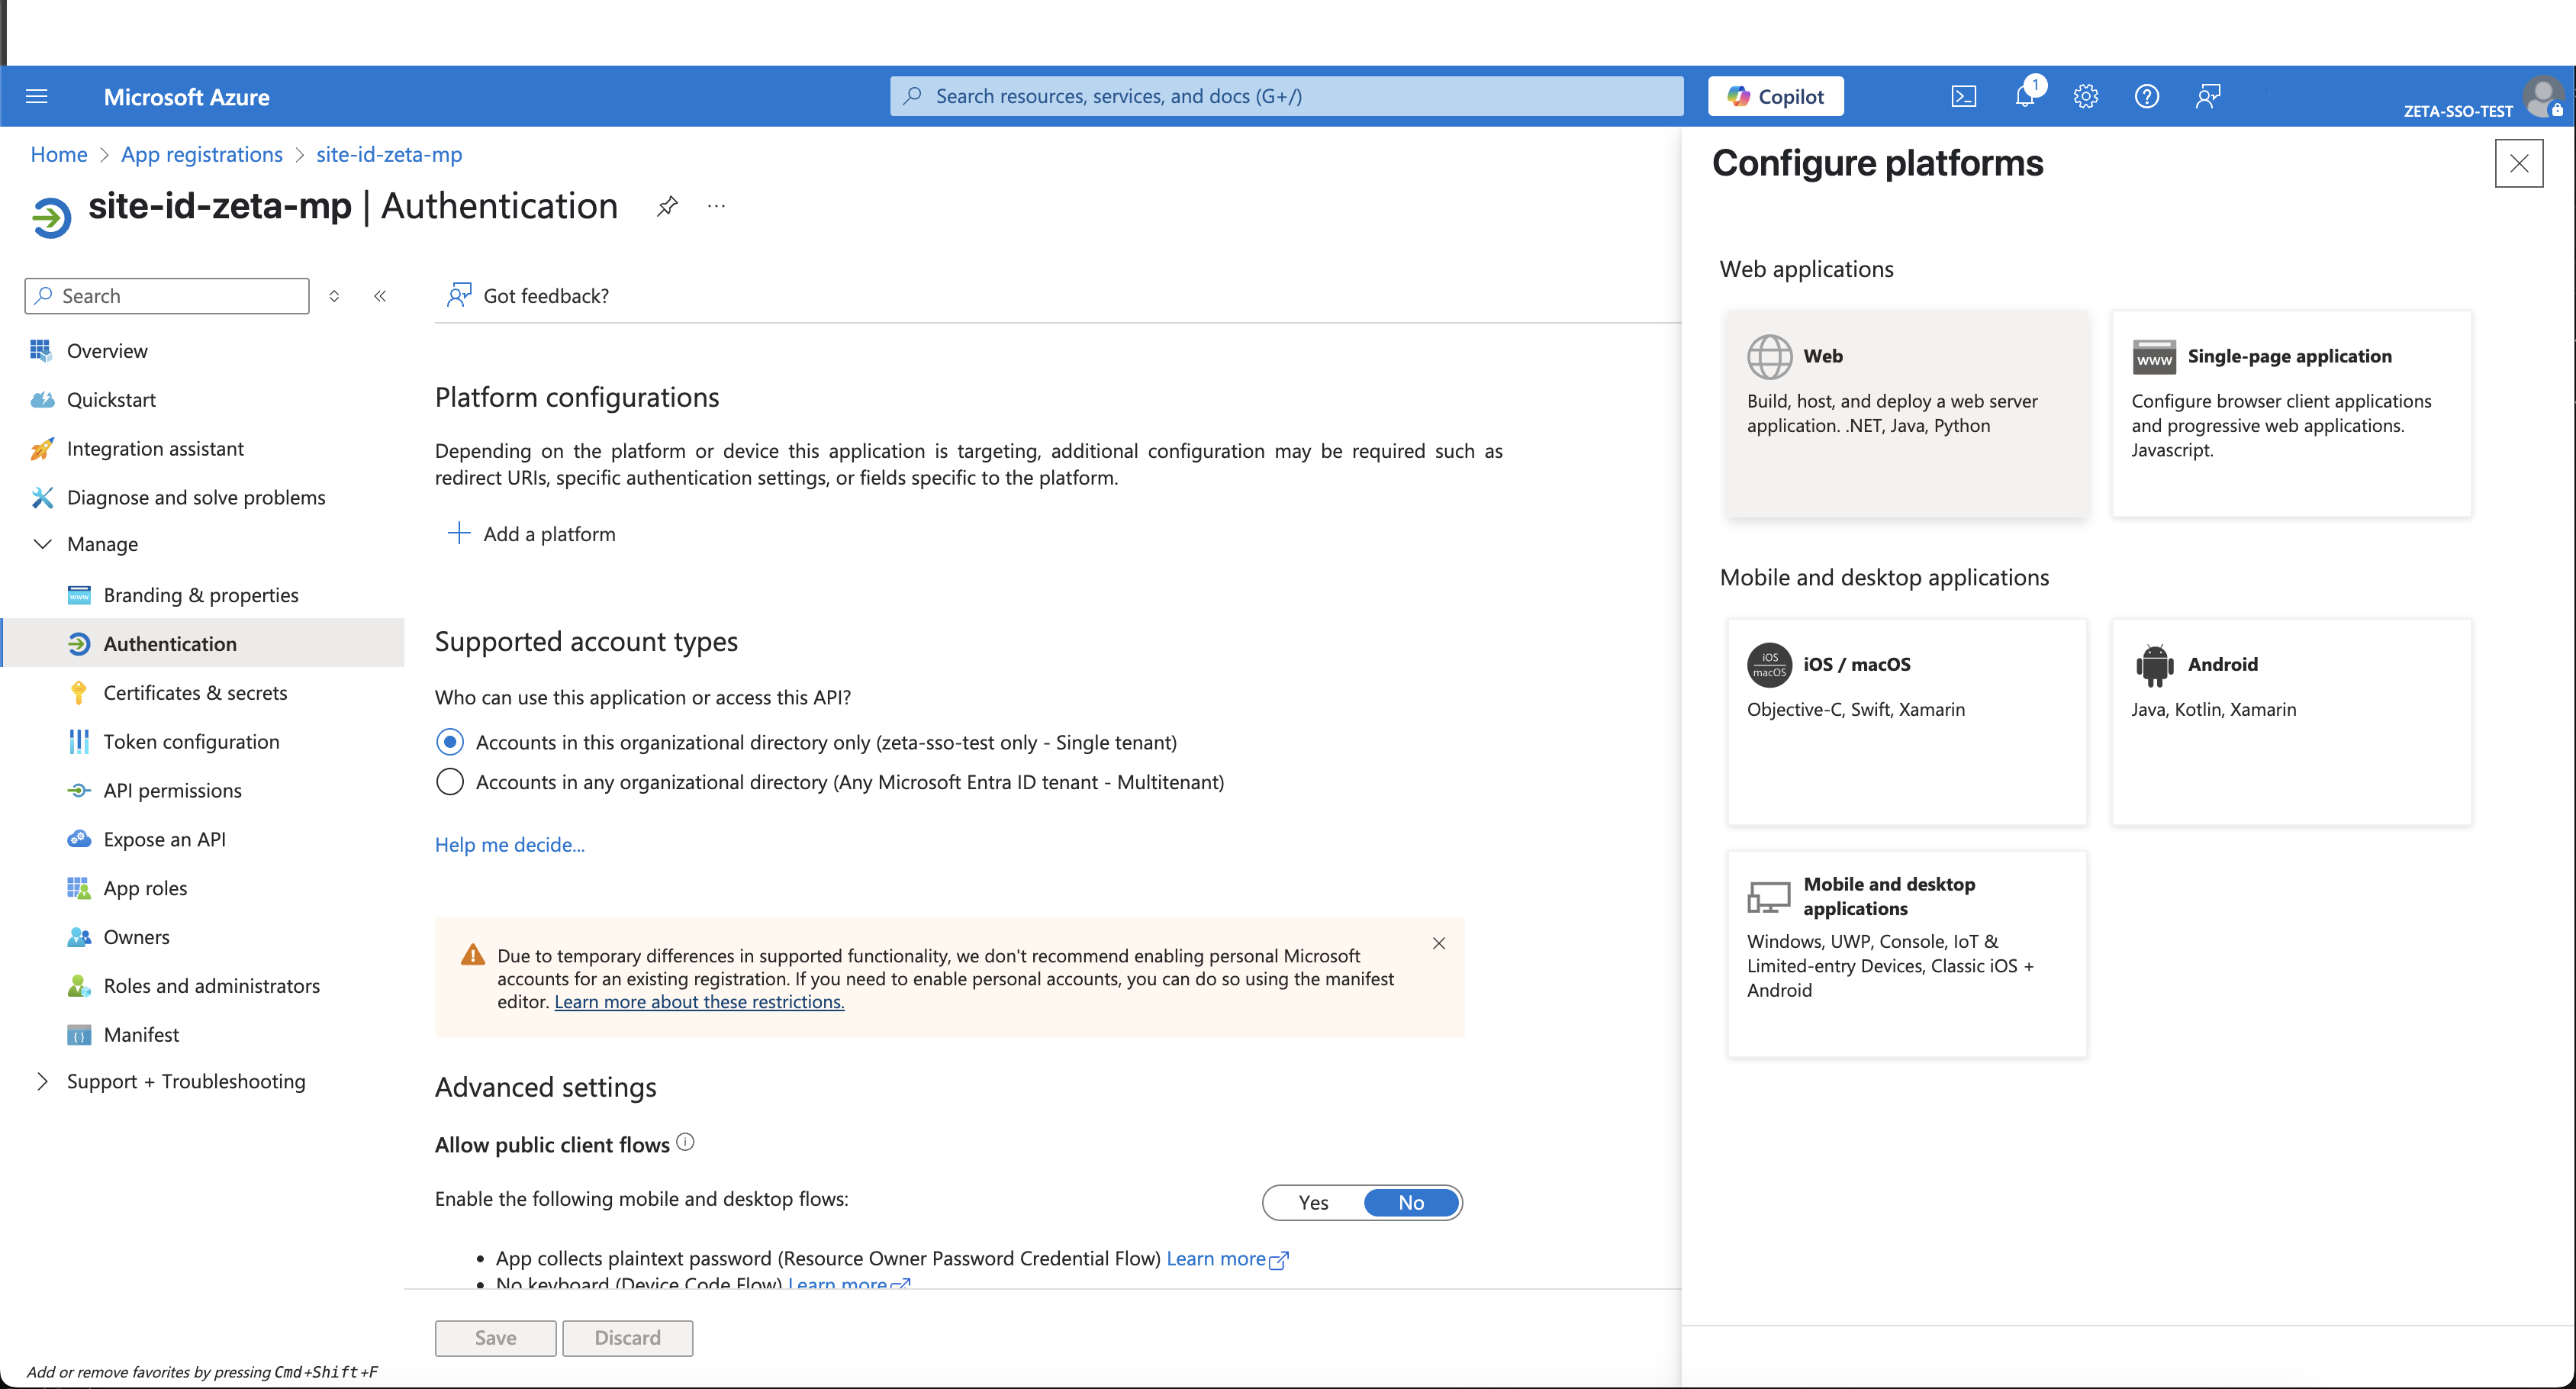
Click on the Add a Redirect URI link
-
Select Add a platform > Web.
-
Enter the following Redirect URIs:
-
https://auth.app.zetaglobal.net/login/callback?connection=<CONNECTION_NAME> -
https://auth.app.zetaglobal.net/login/callback -
https://auth.app.eu.zetaglobal.net/login/callback?connection=<CONNECTION_NAME> -
https://auth.app.eu.zetaglobal.net/login/callback
-
Recommended connection name: <CLIENT>-zeta-mp
Example: https://auth.app.zetaglobal.net/login/callback?connection=clientA-zeta-mp
-
Enable ID Tokens as part of the response type.
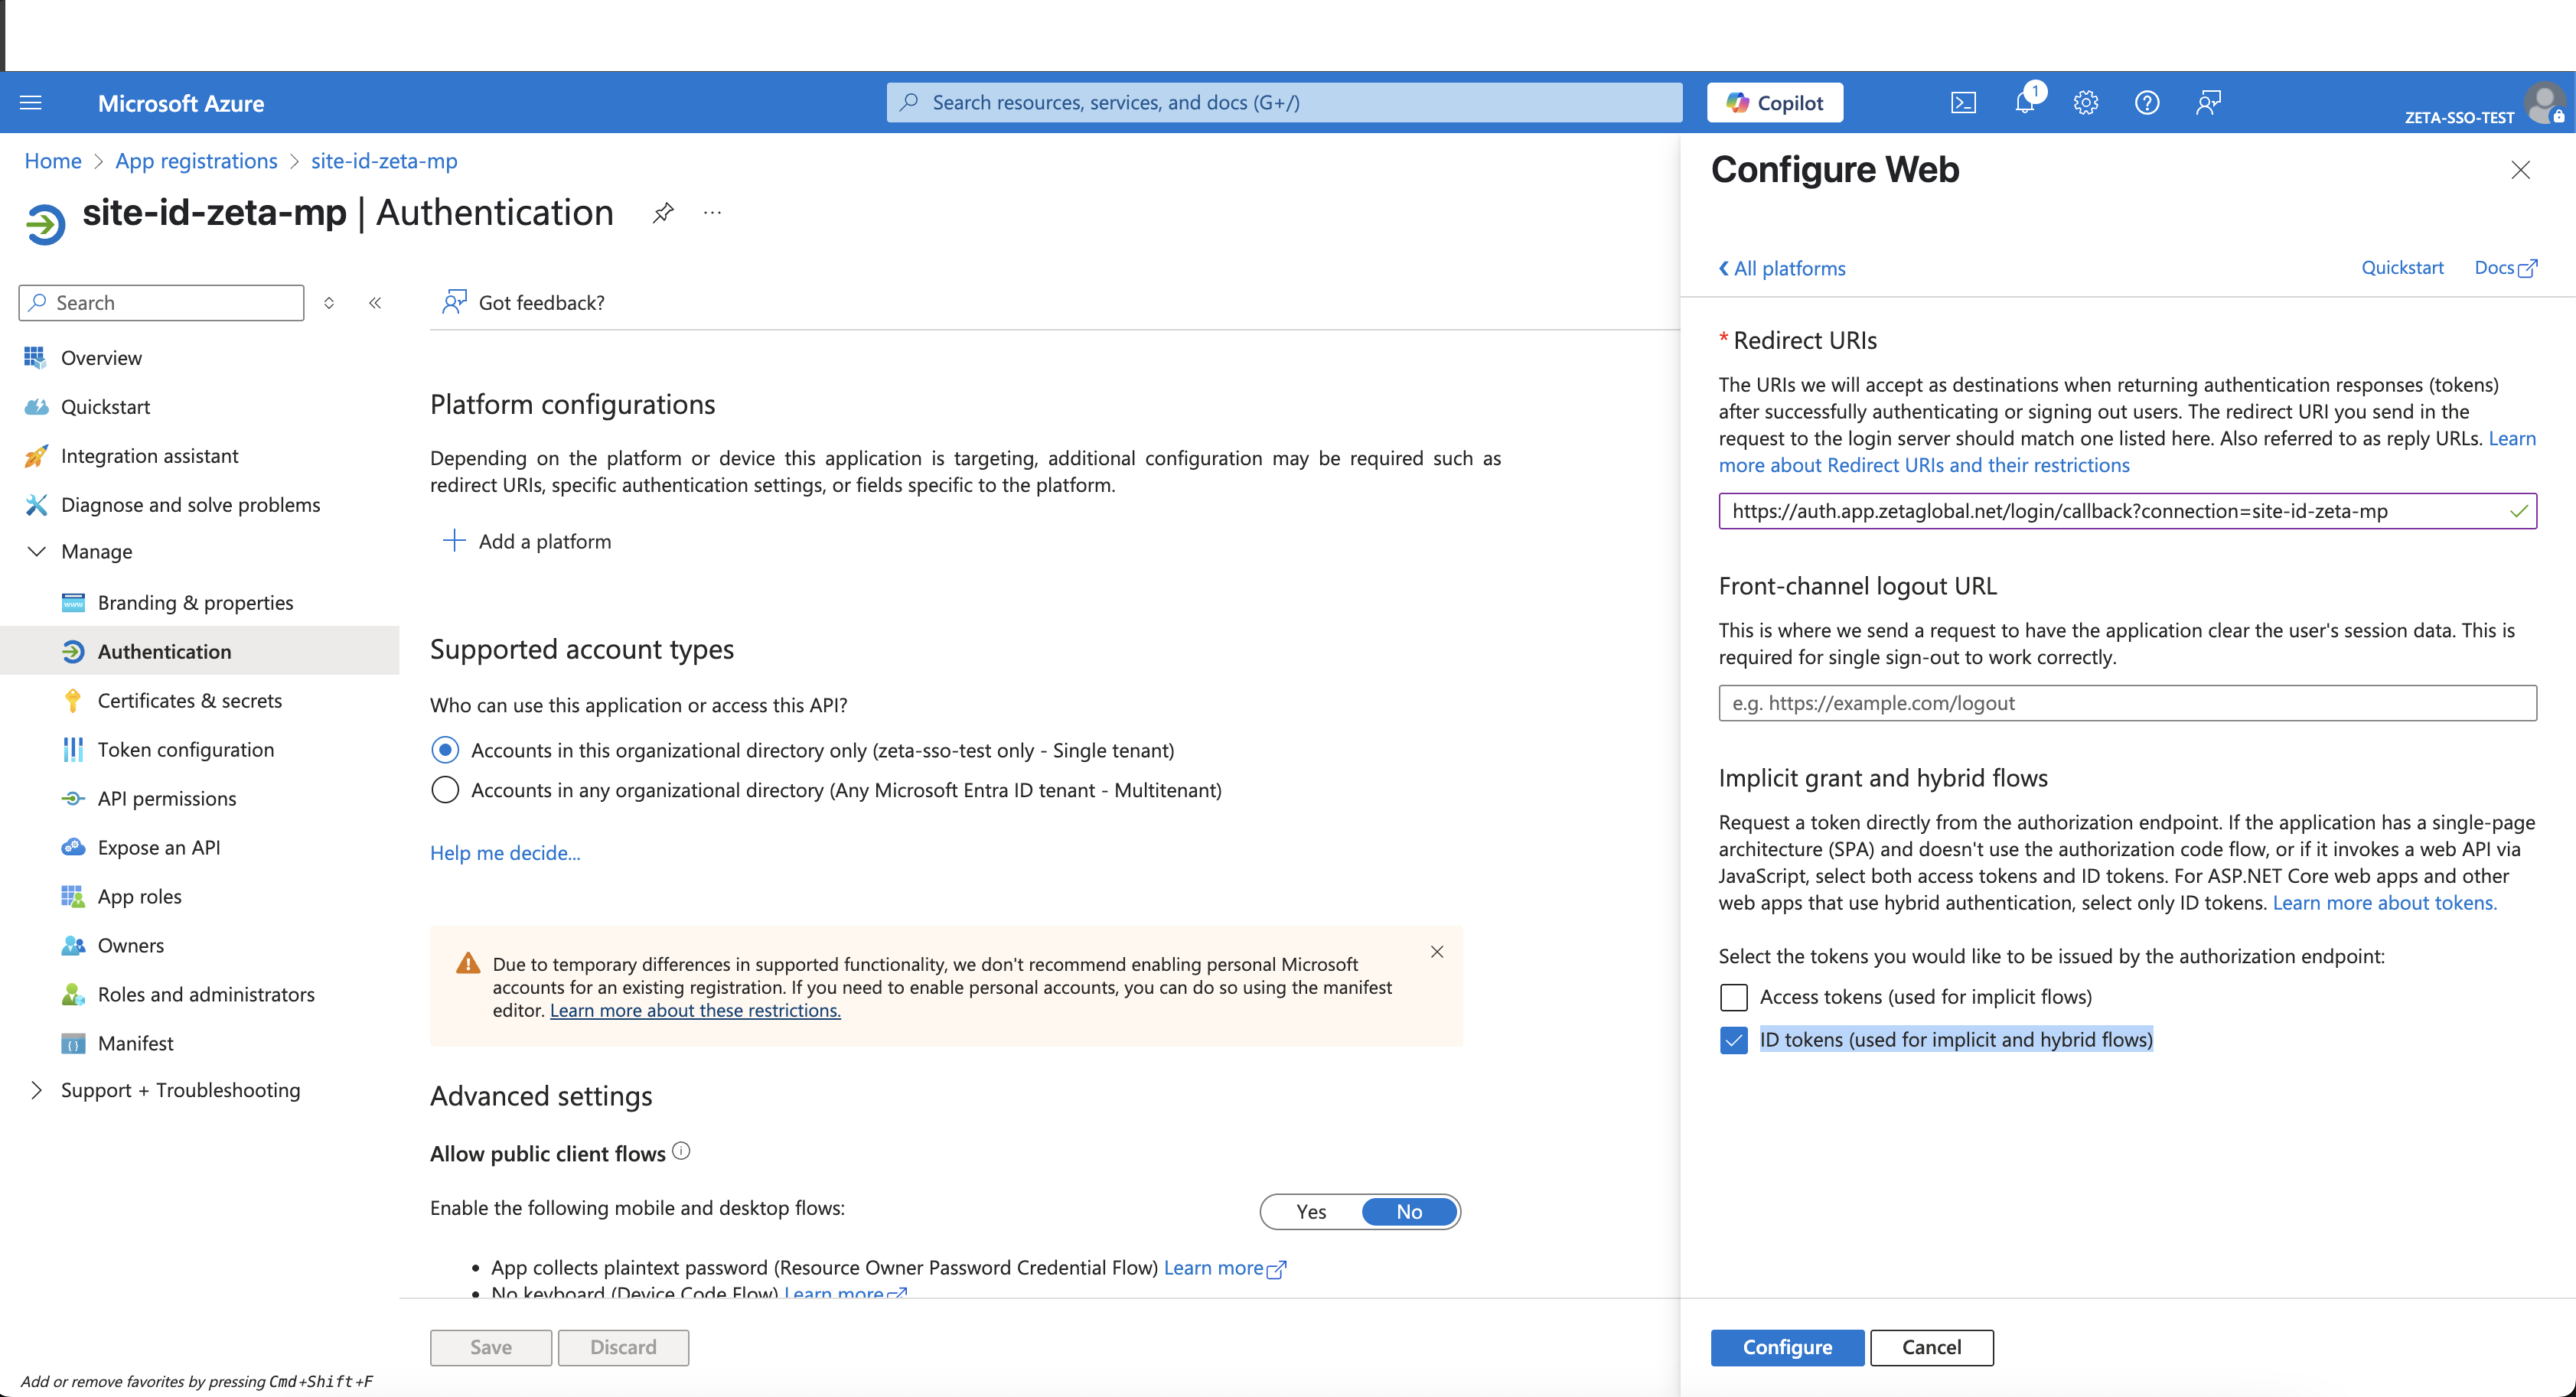
-
Click Configure.
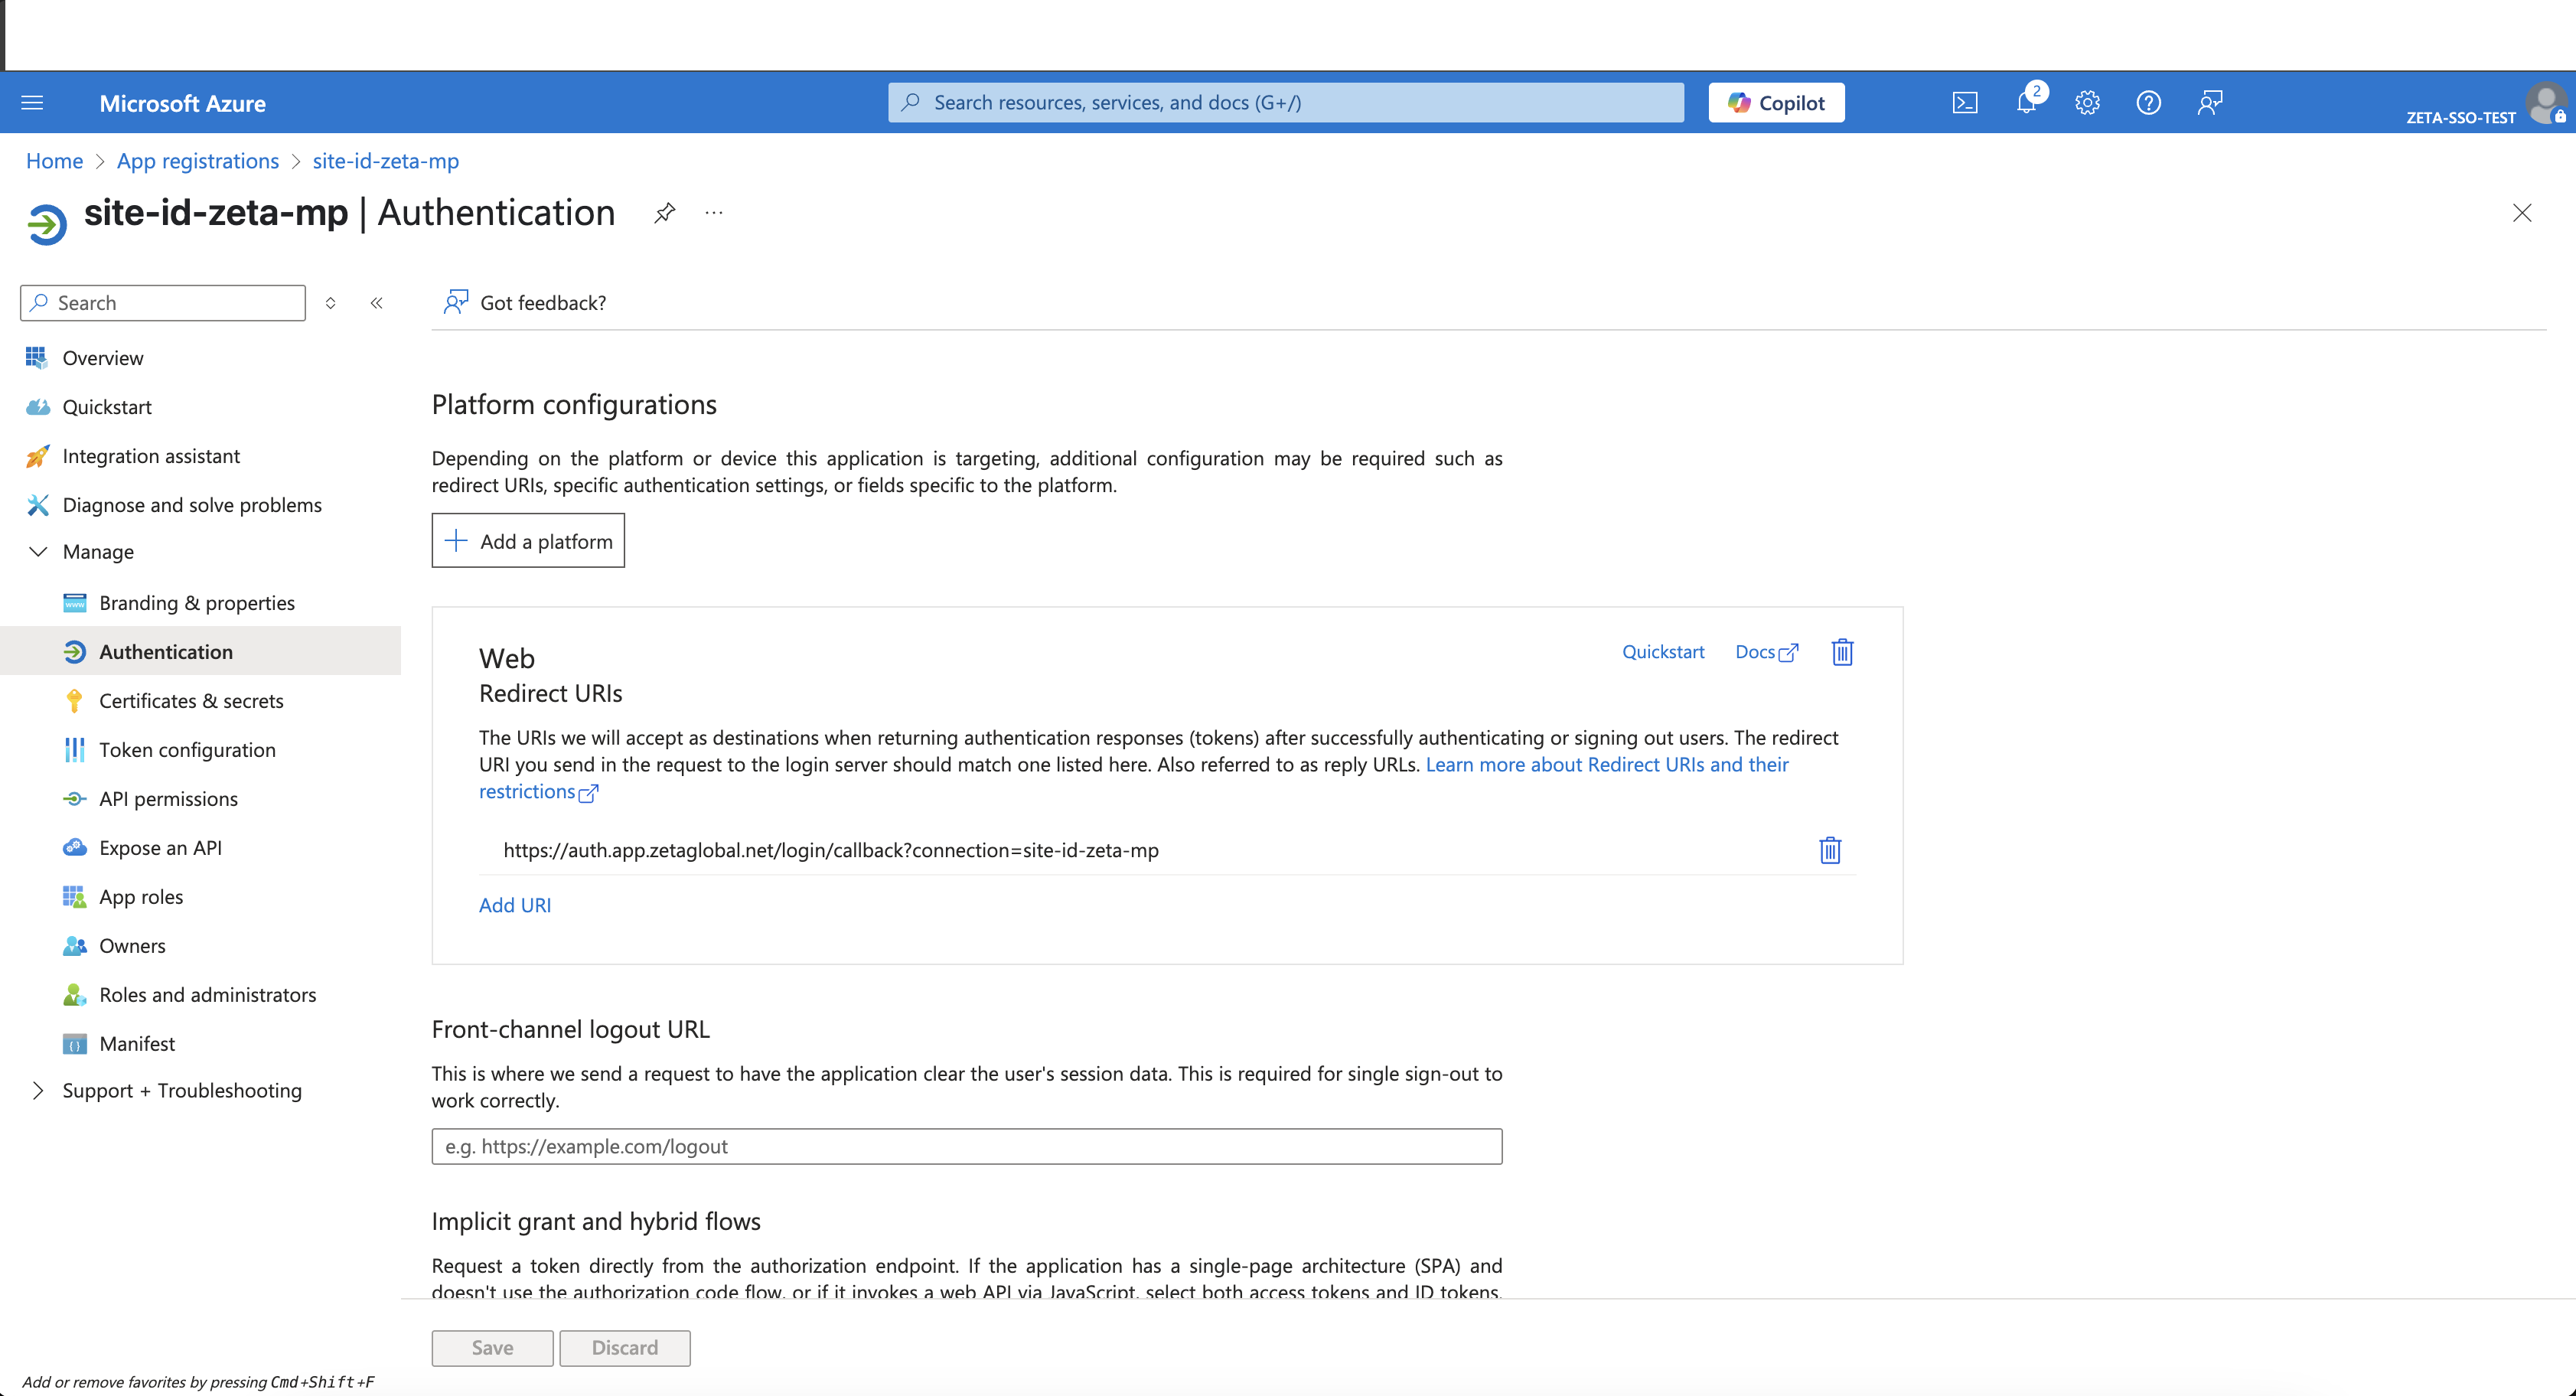
-
You can choose to add more URIs by clicking on the Add URI button.
-
Go to Certificates & Secrets > New client secret.
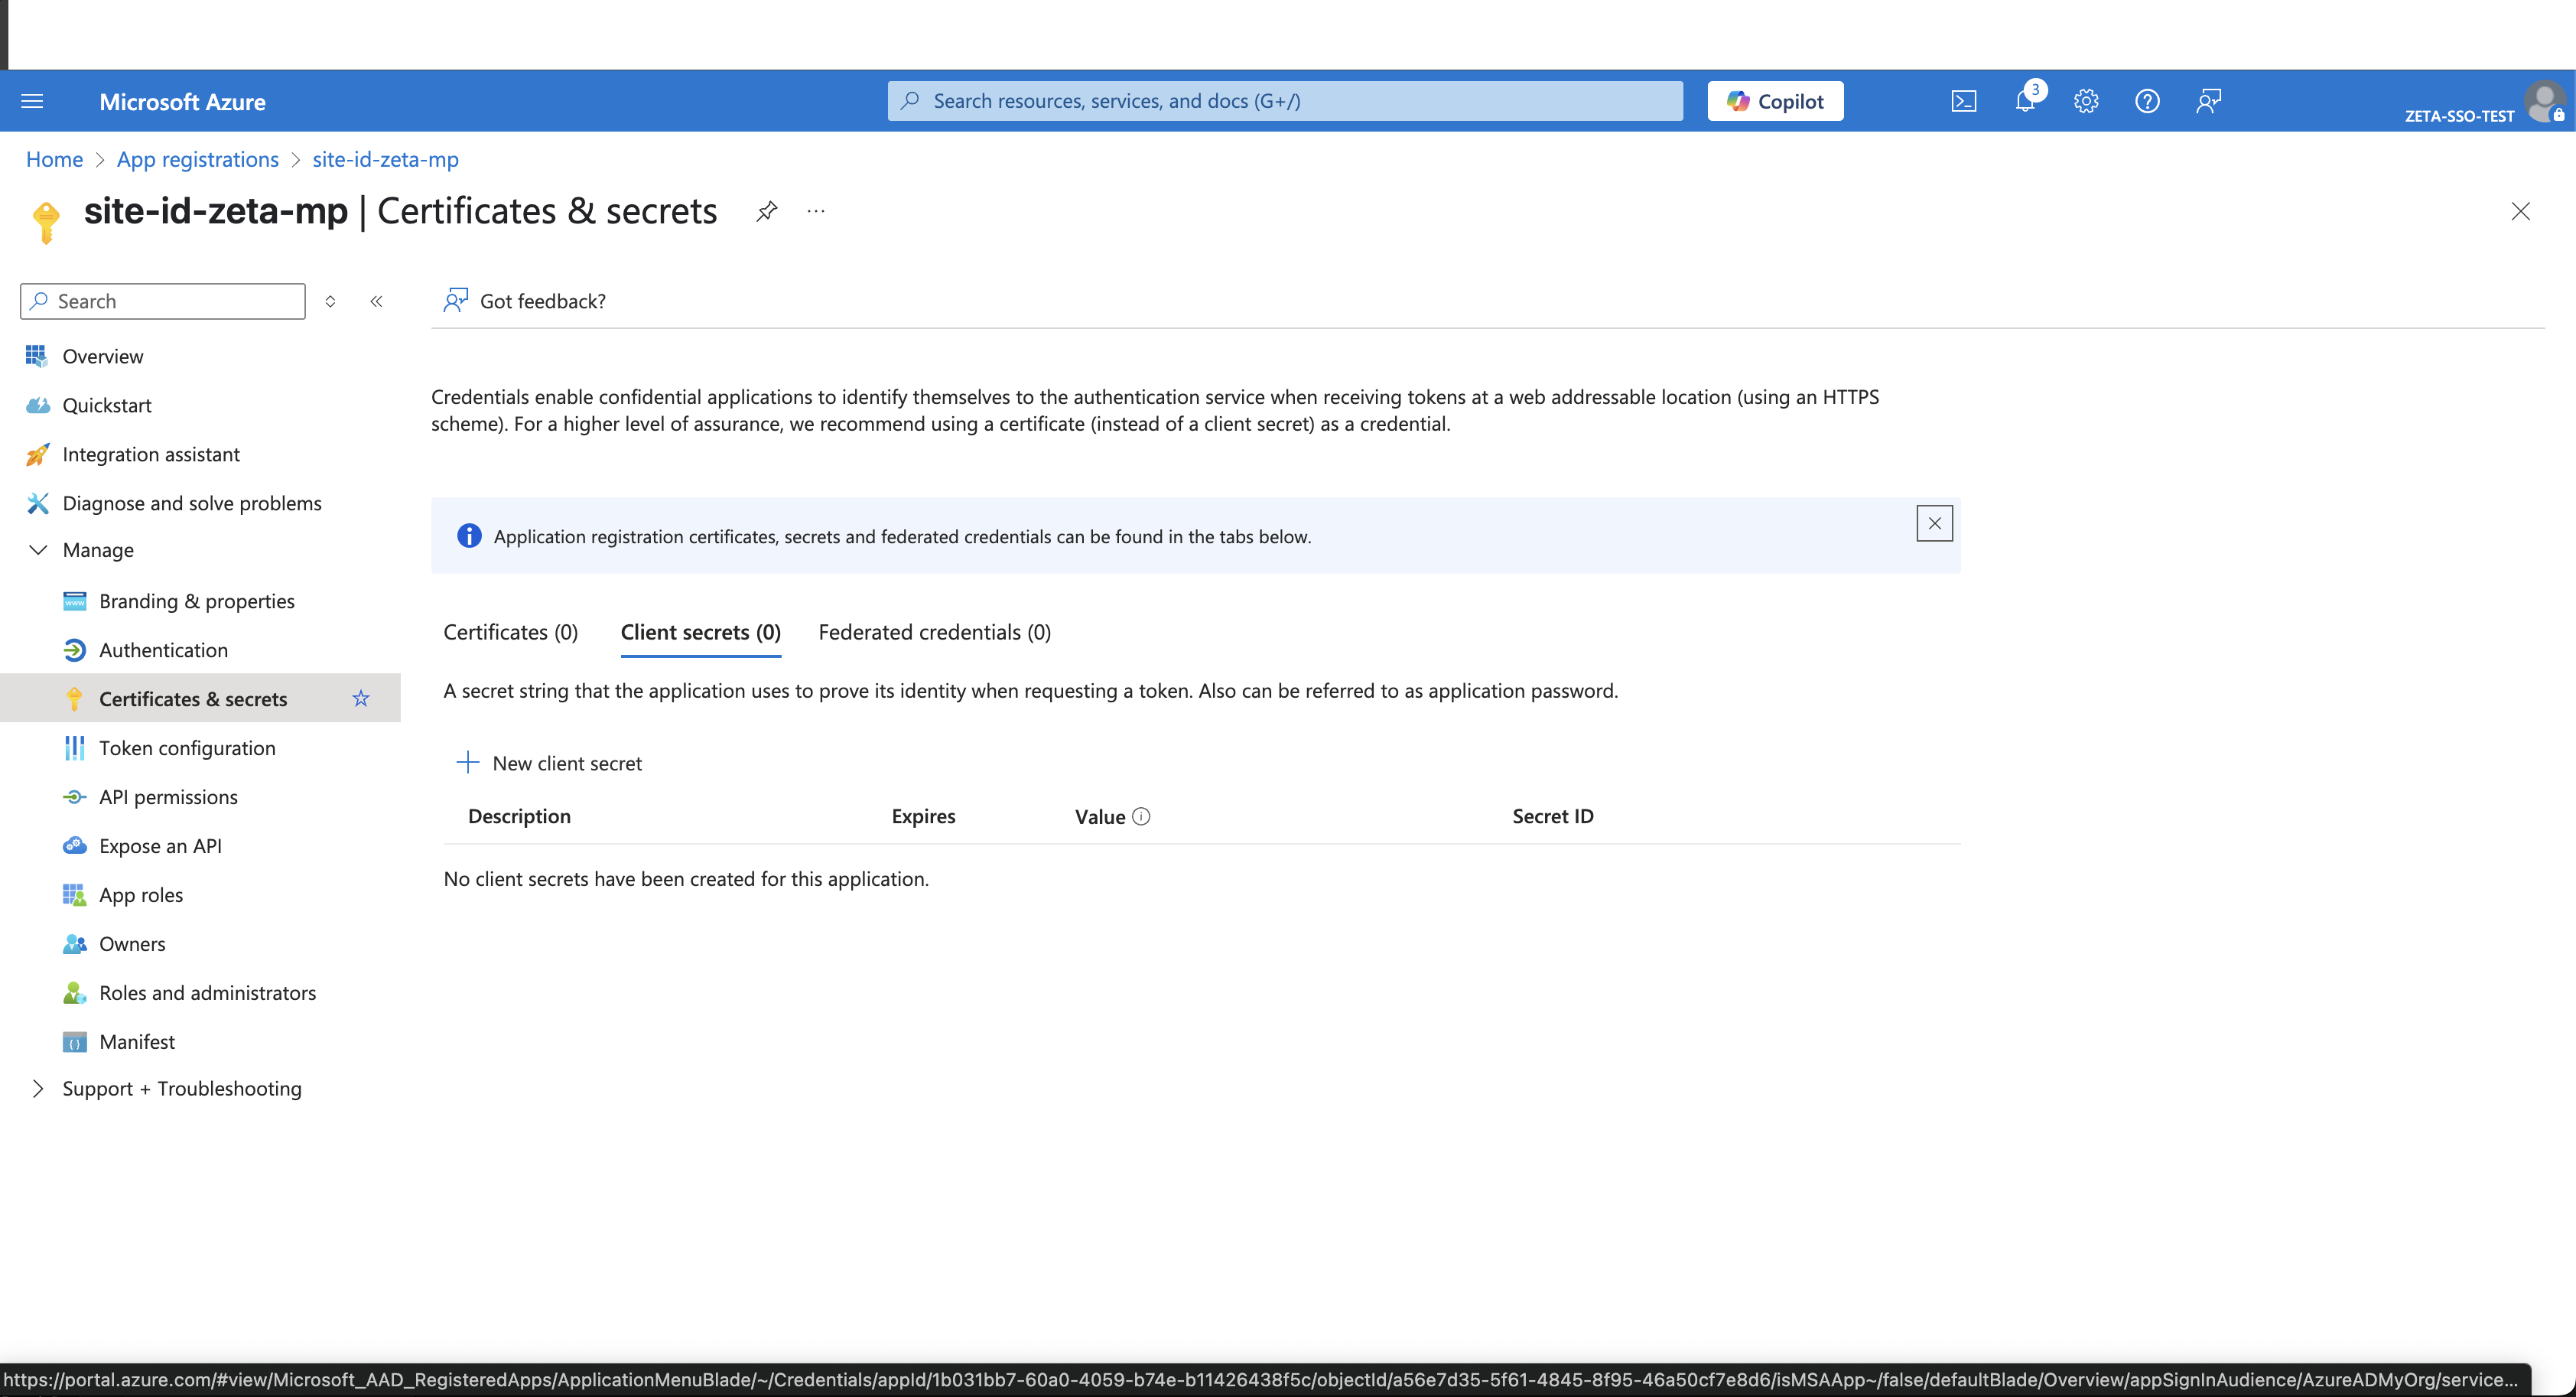
-
Choose an expiry duration and click on Add.
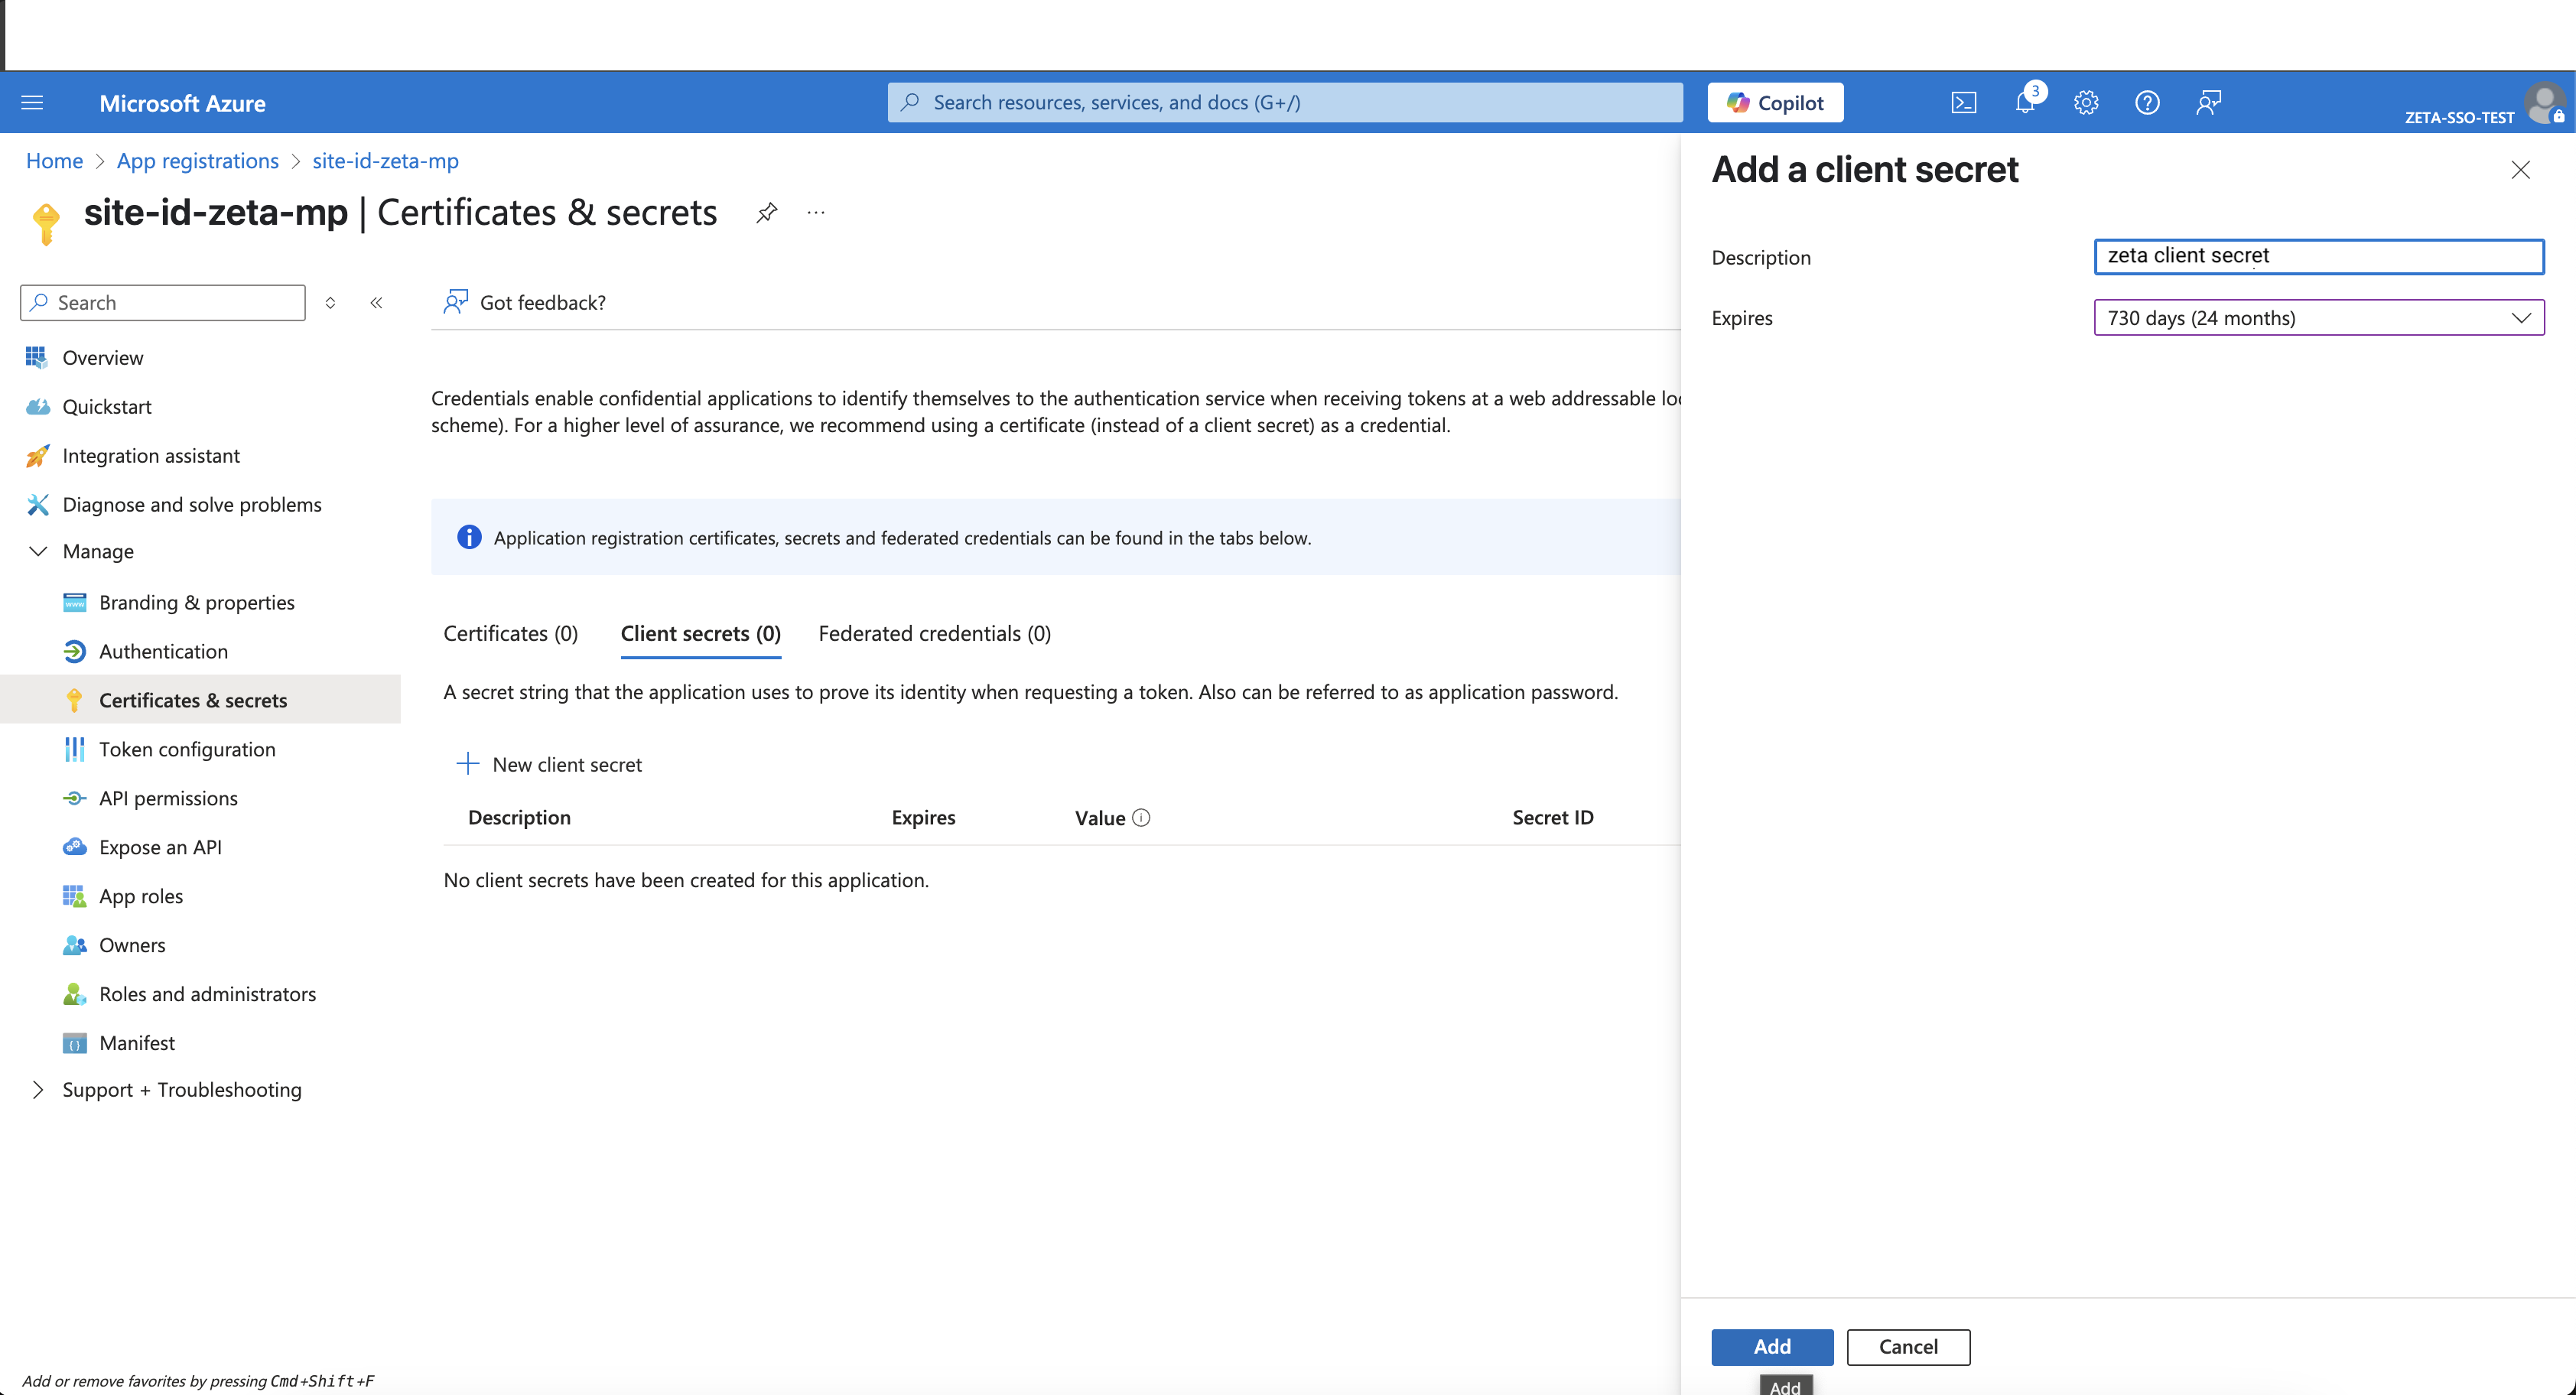
Note the generated secret value — this will not be retrievable later.
Contact your Support team to update the new certificate upon expiry
Step 3: Configure API Permissions
-
Navigate to API permissions and click on Add a permission.
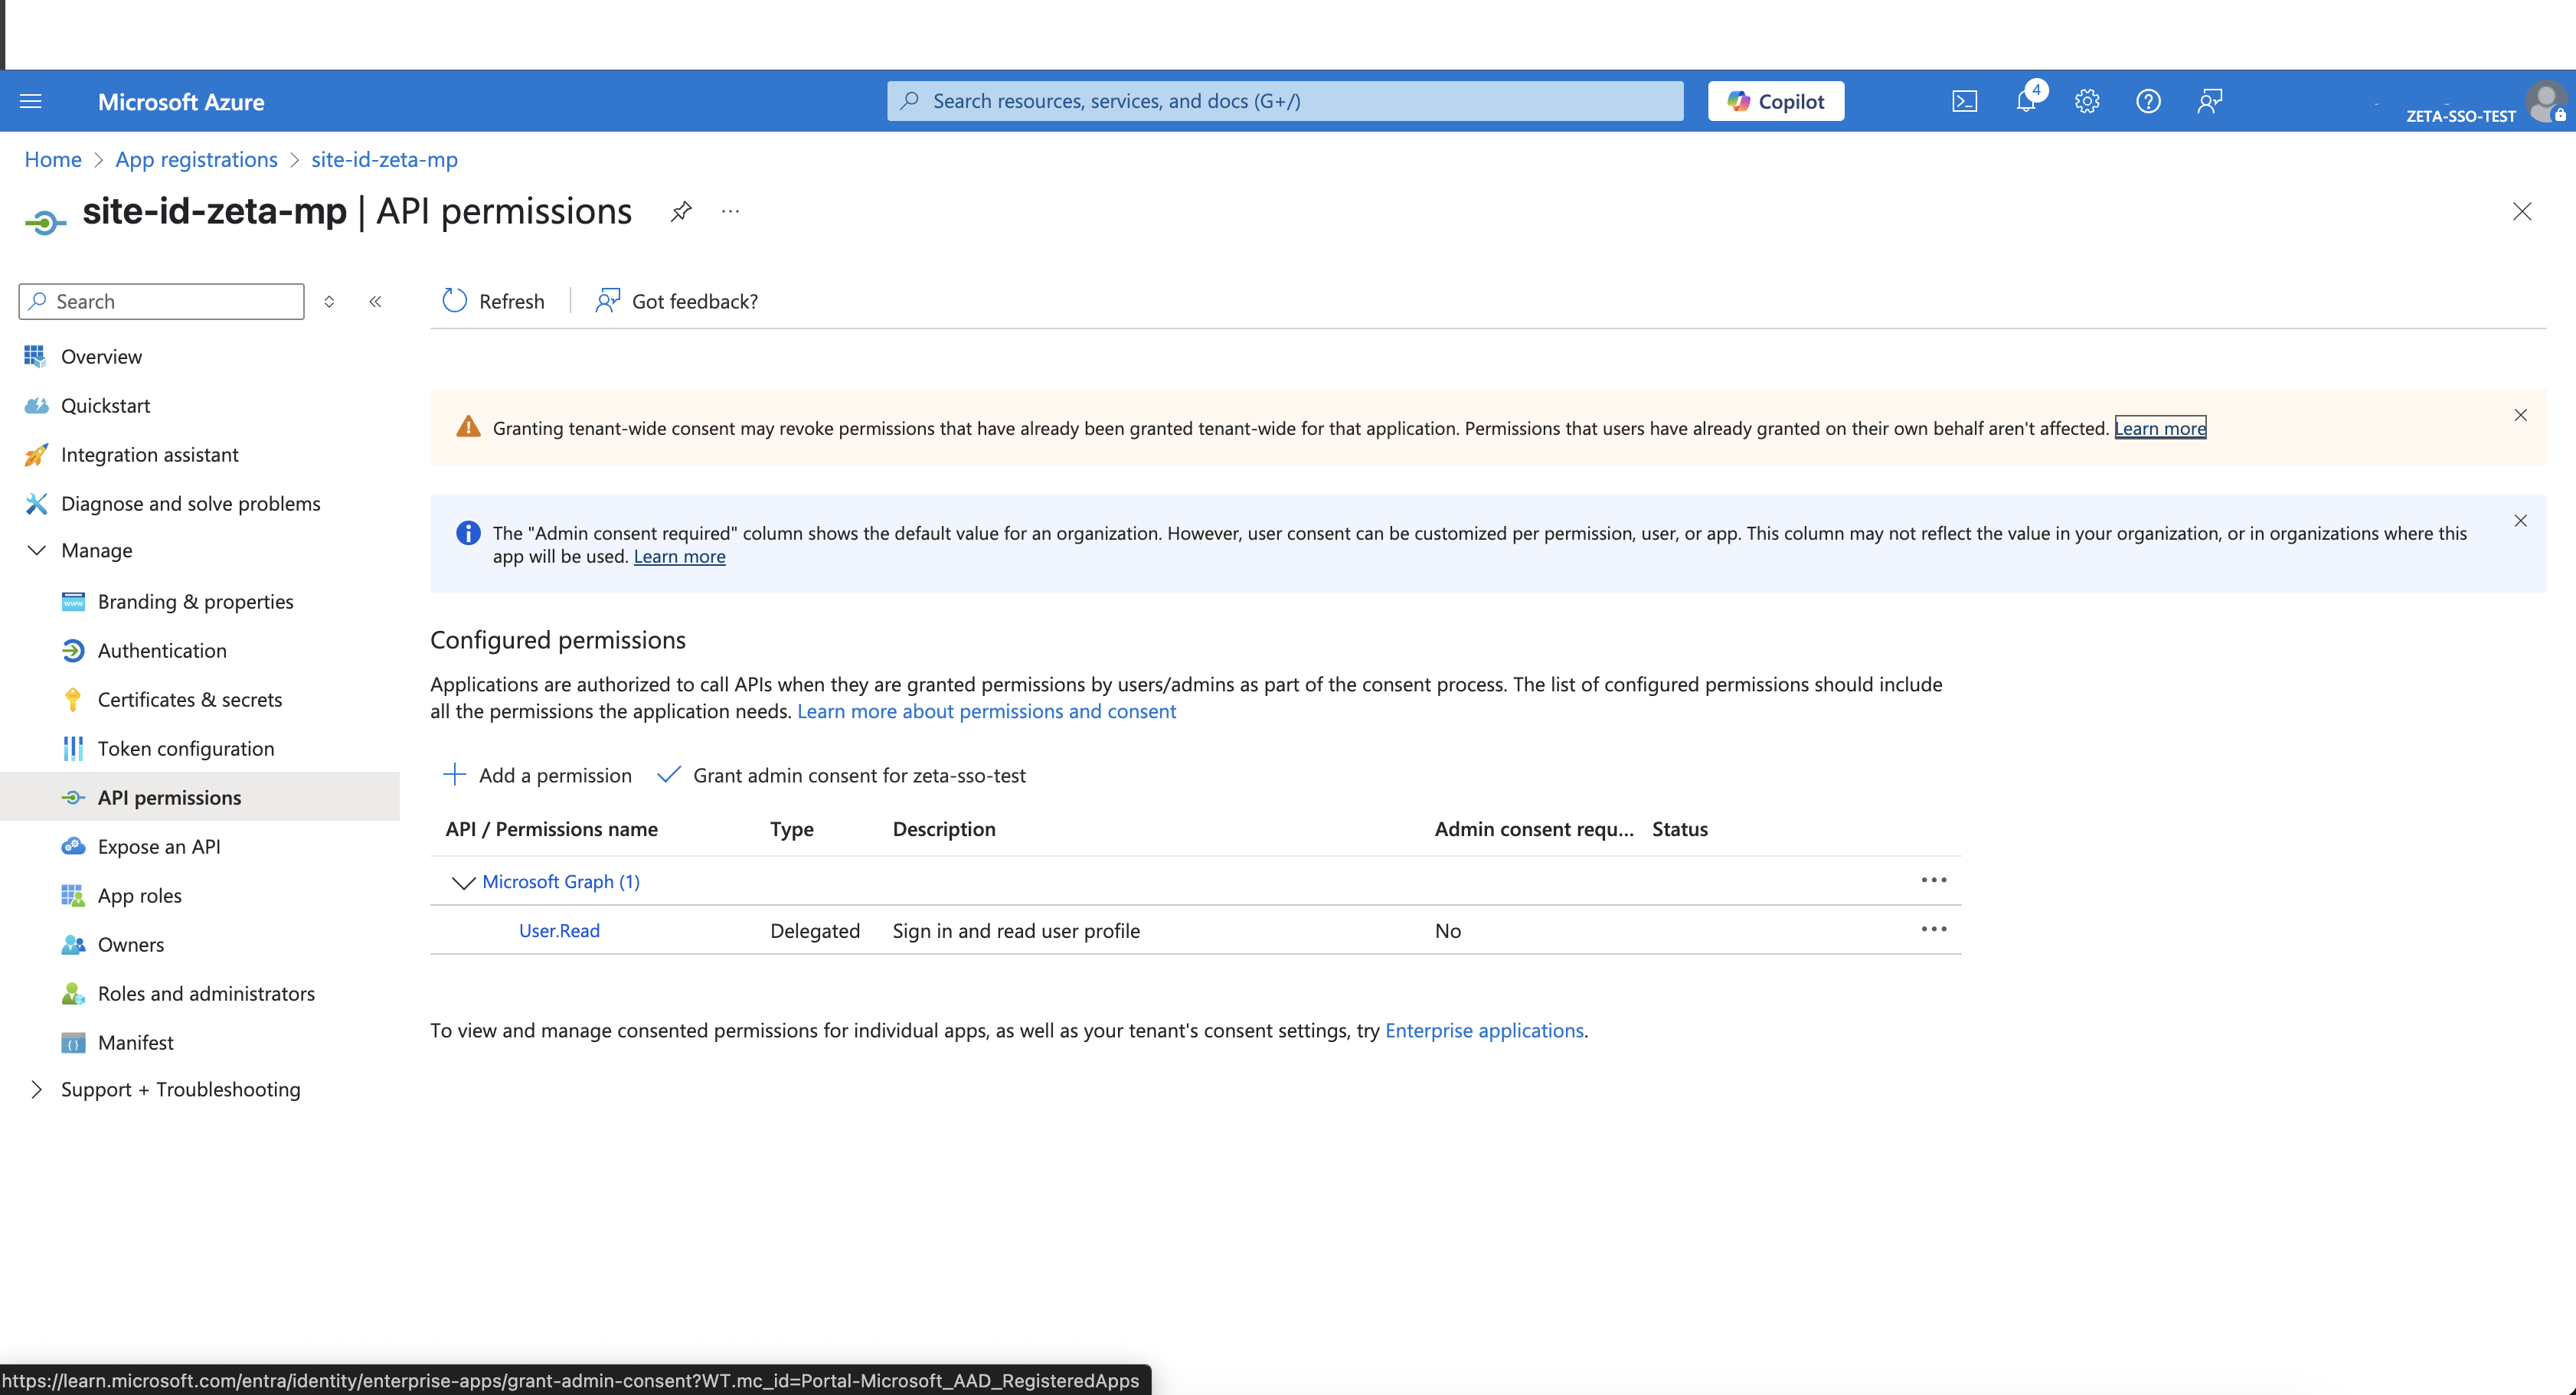
Ensure User.Read permission is added.
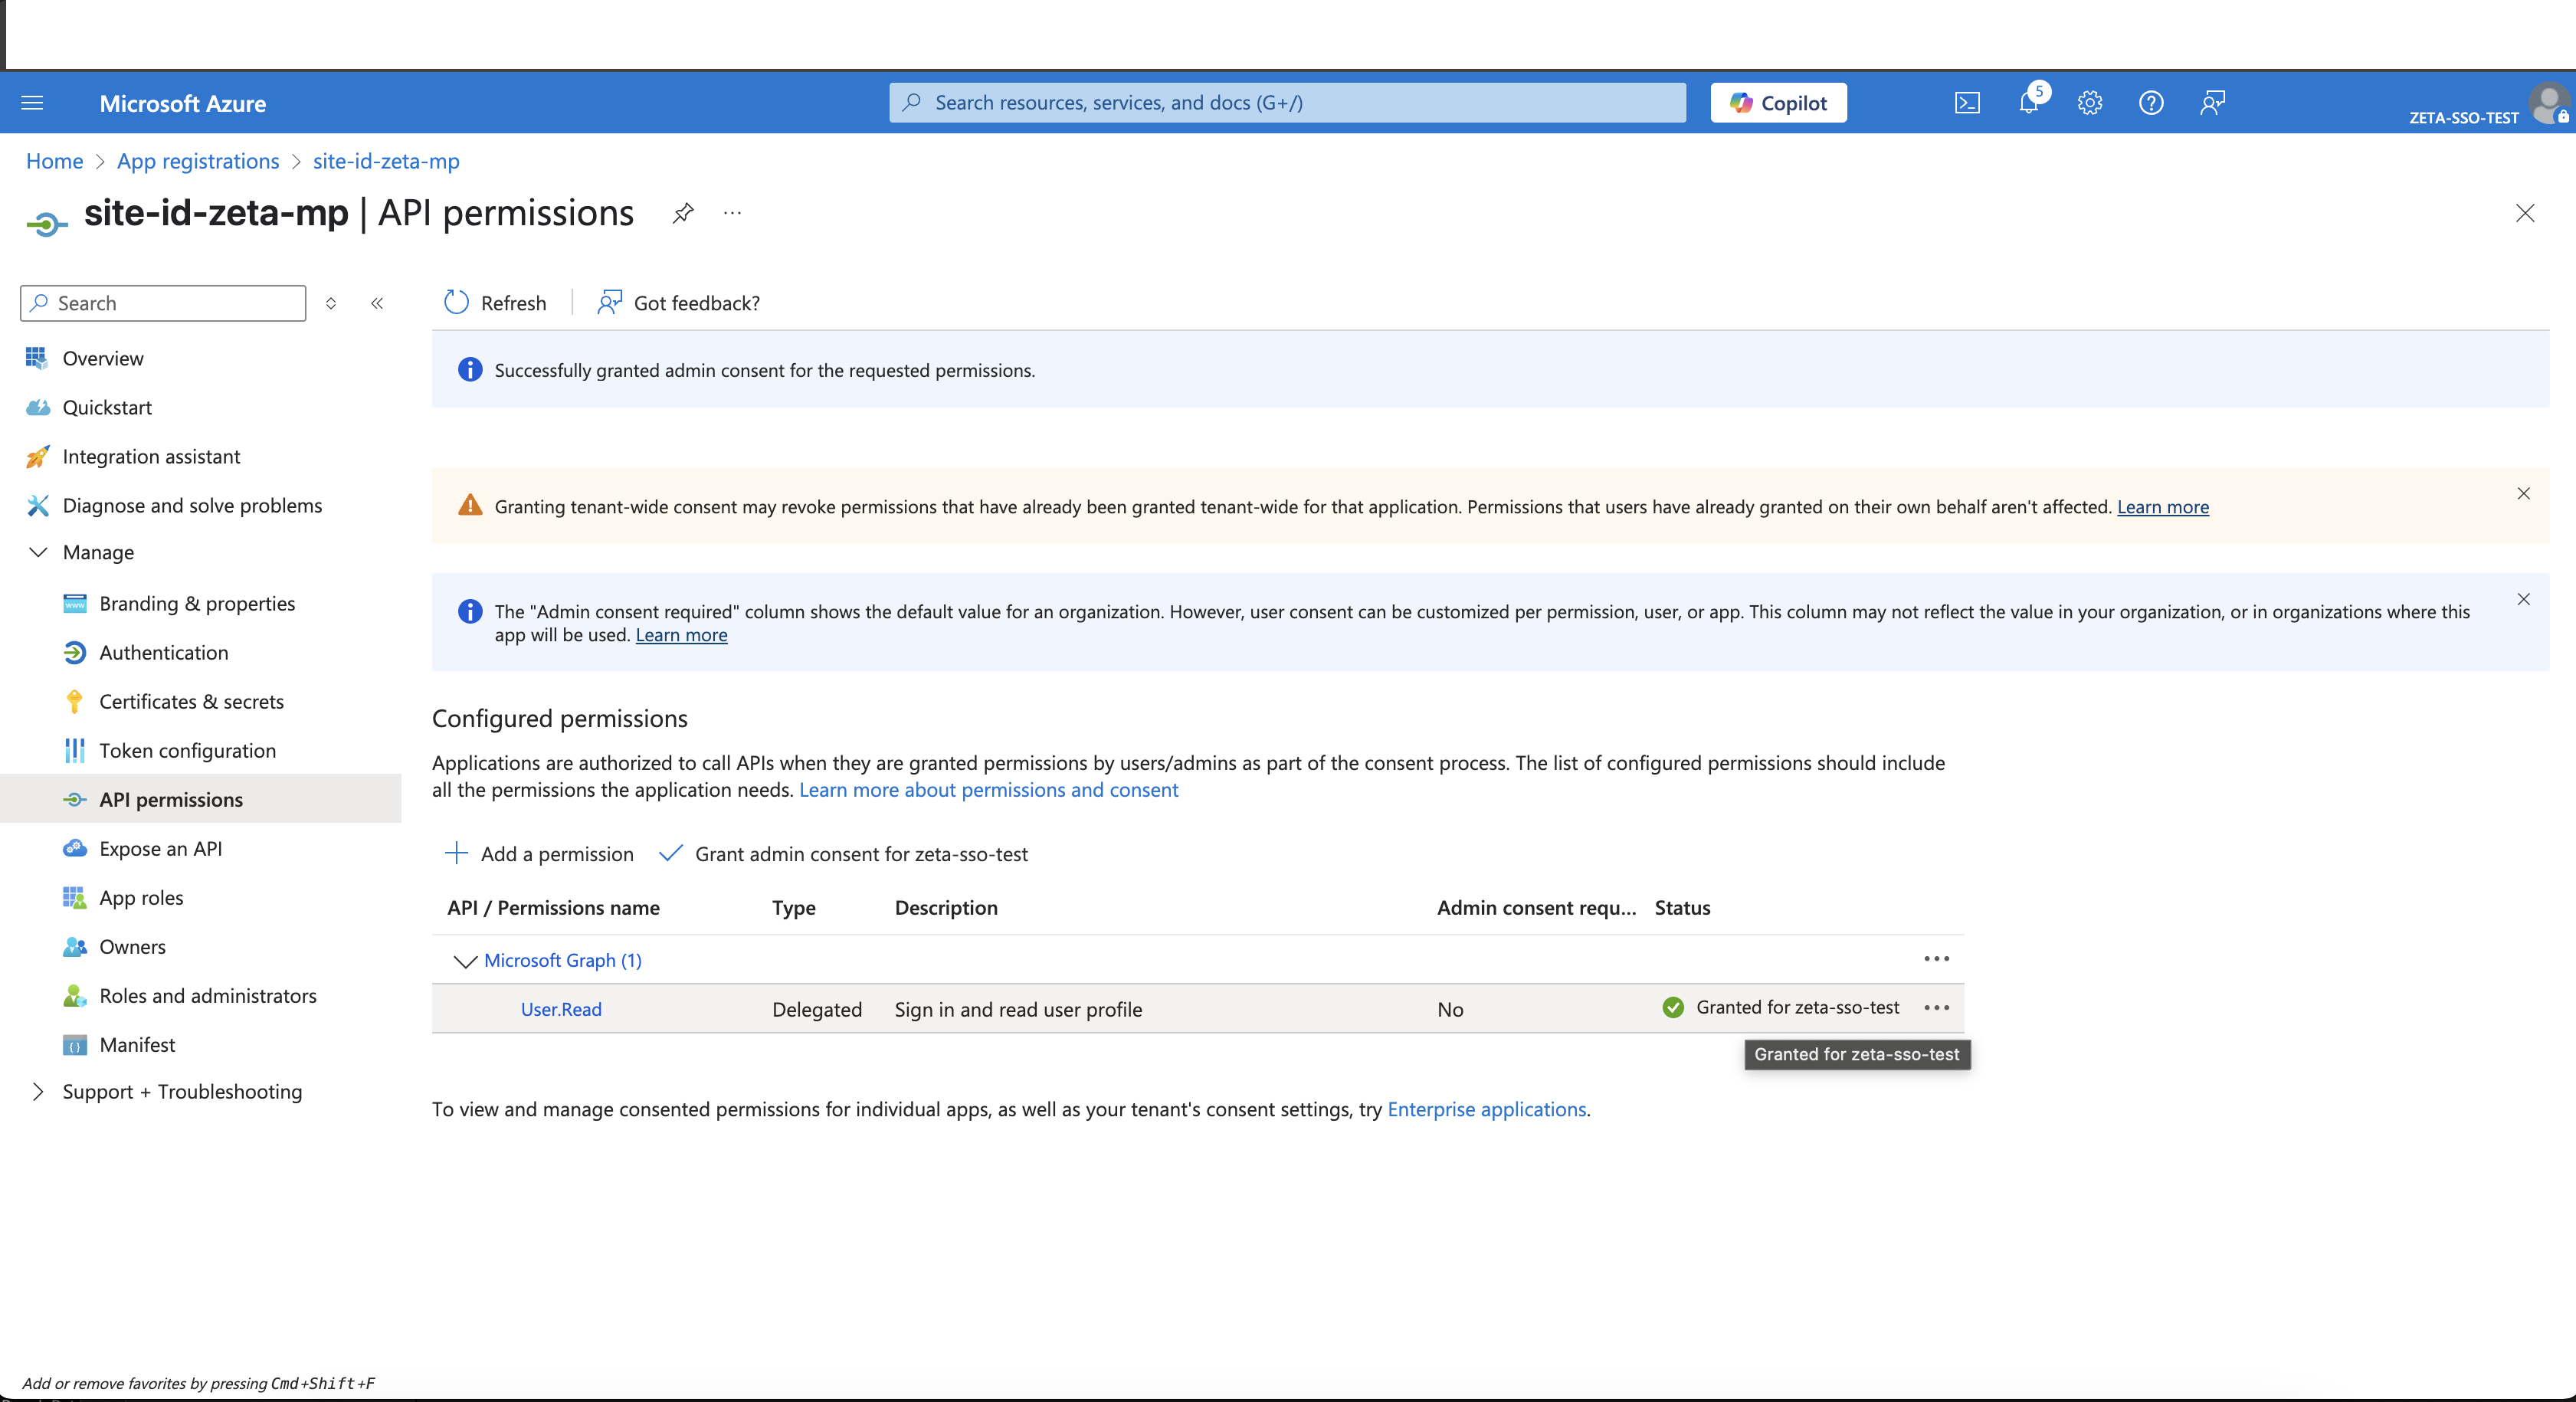
-
Click Grant admin consent to authorize the permissions.
When the client secret is nearing expiration, please contact your Support team to update the certificate accordingly.
Step 4: Share Configuration Details with Zeta
Provide the following details to Zeta to complete the setup:
-
Connection name (e.g.,
clientA-zeta-mp) -
Azure AD domain name
-
Application (Client) ID
-
Client Secret (value from the Certificates & Secrets section)
|
Copy Application ID from the page below: 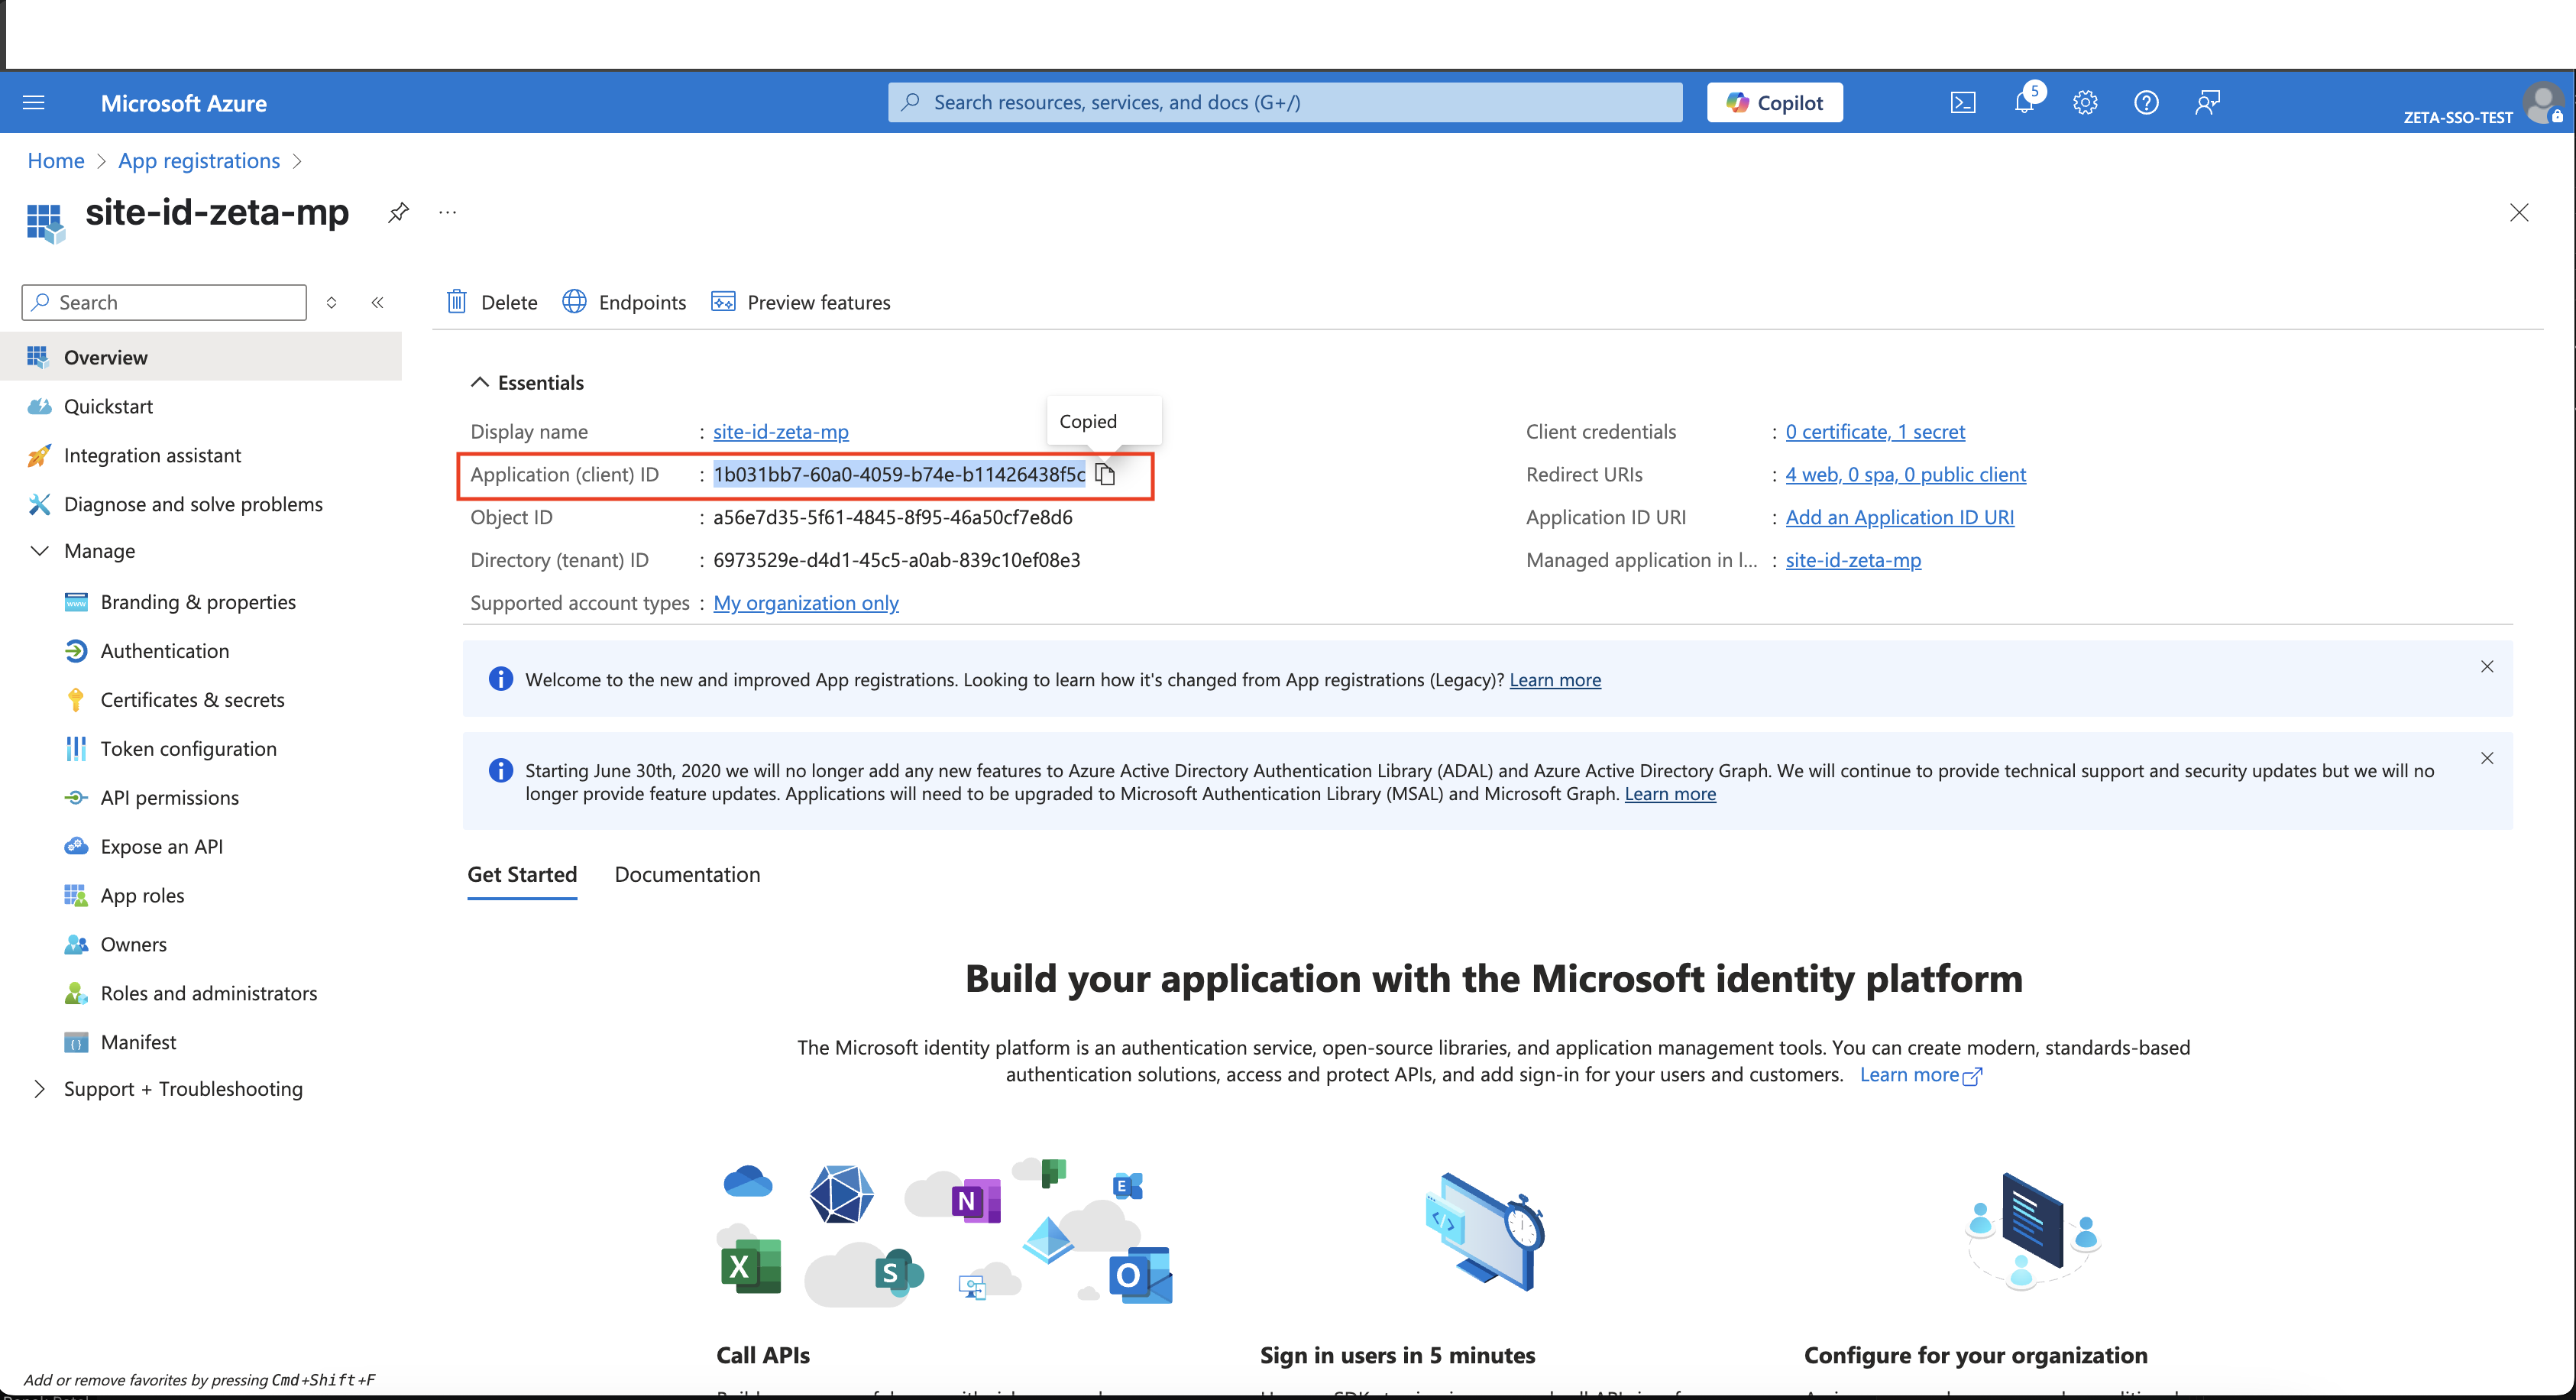
|
|---|
|
Copy Client secret > value from the page below: 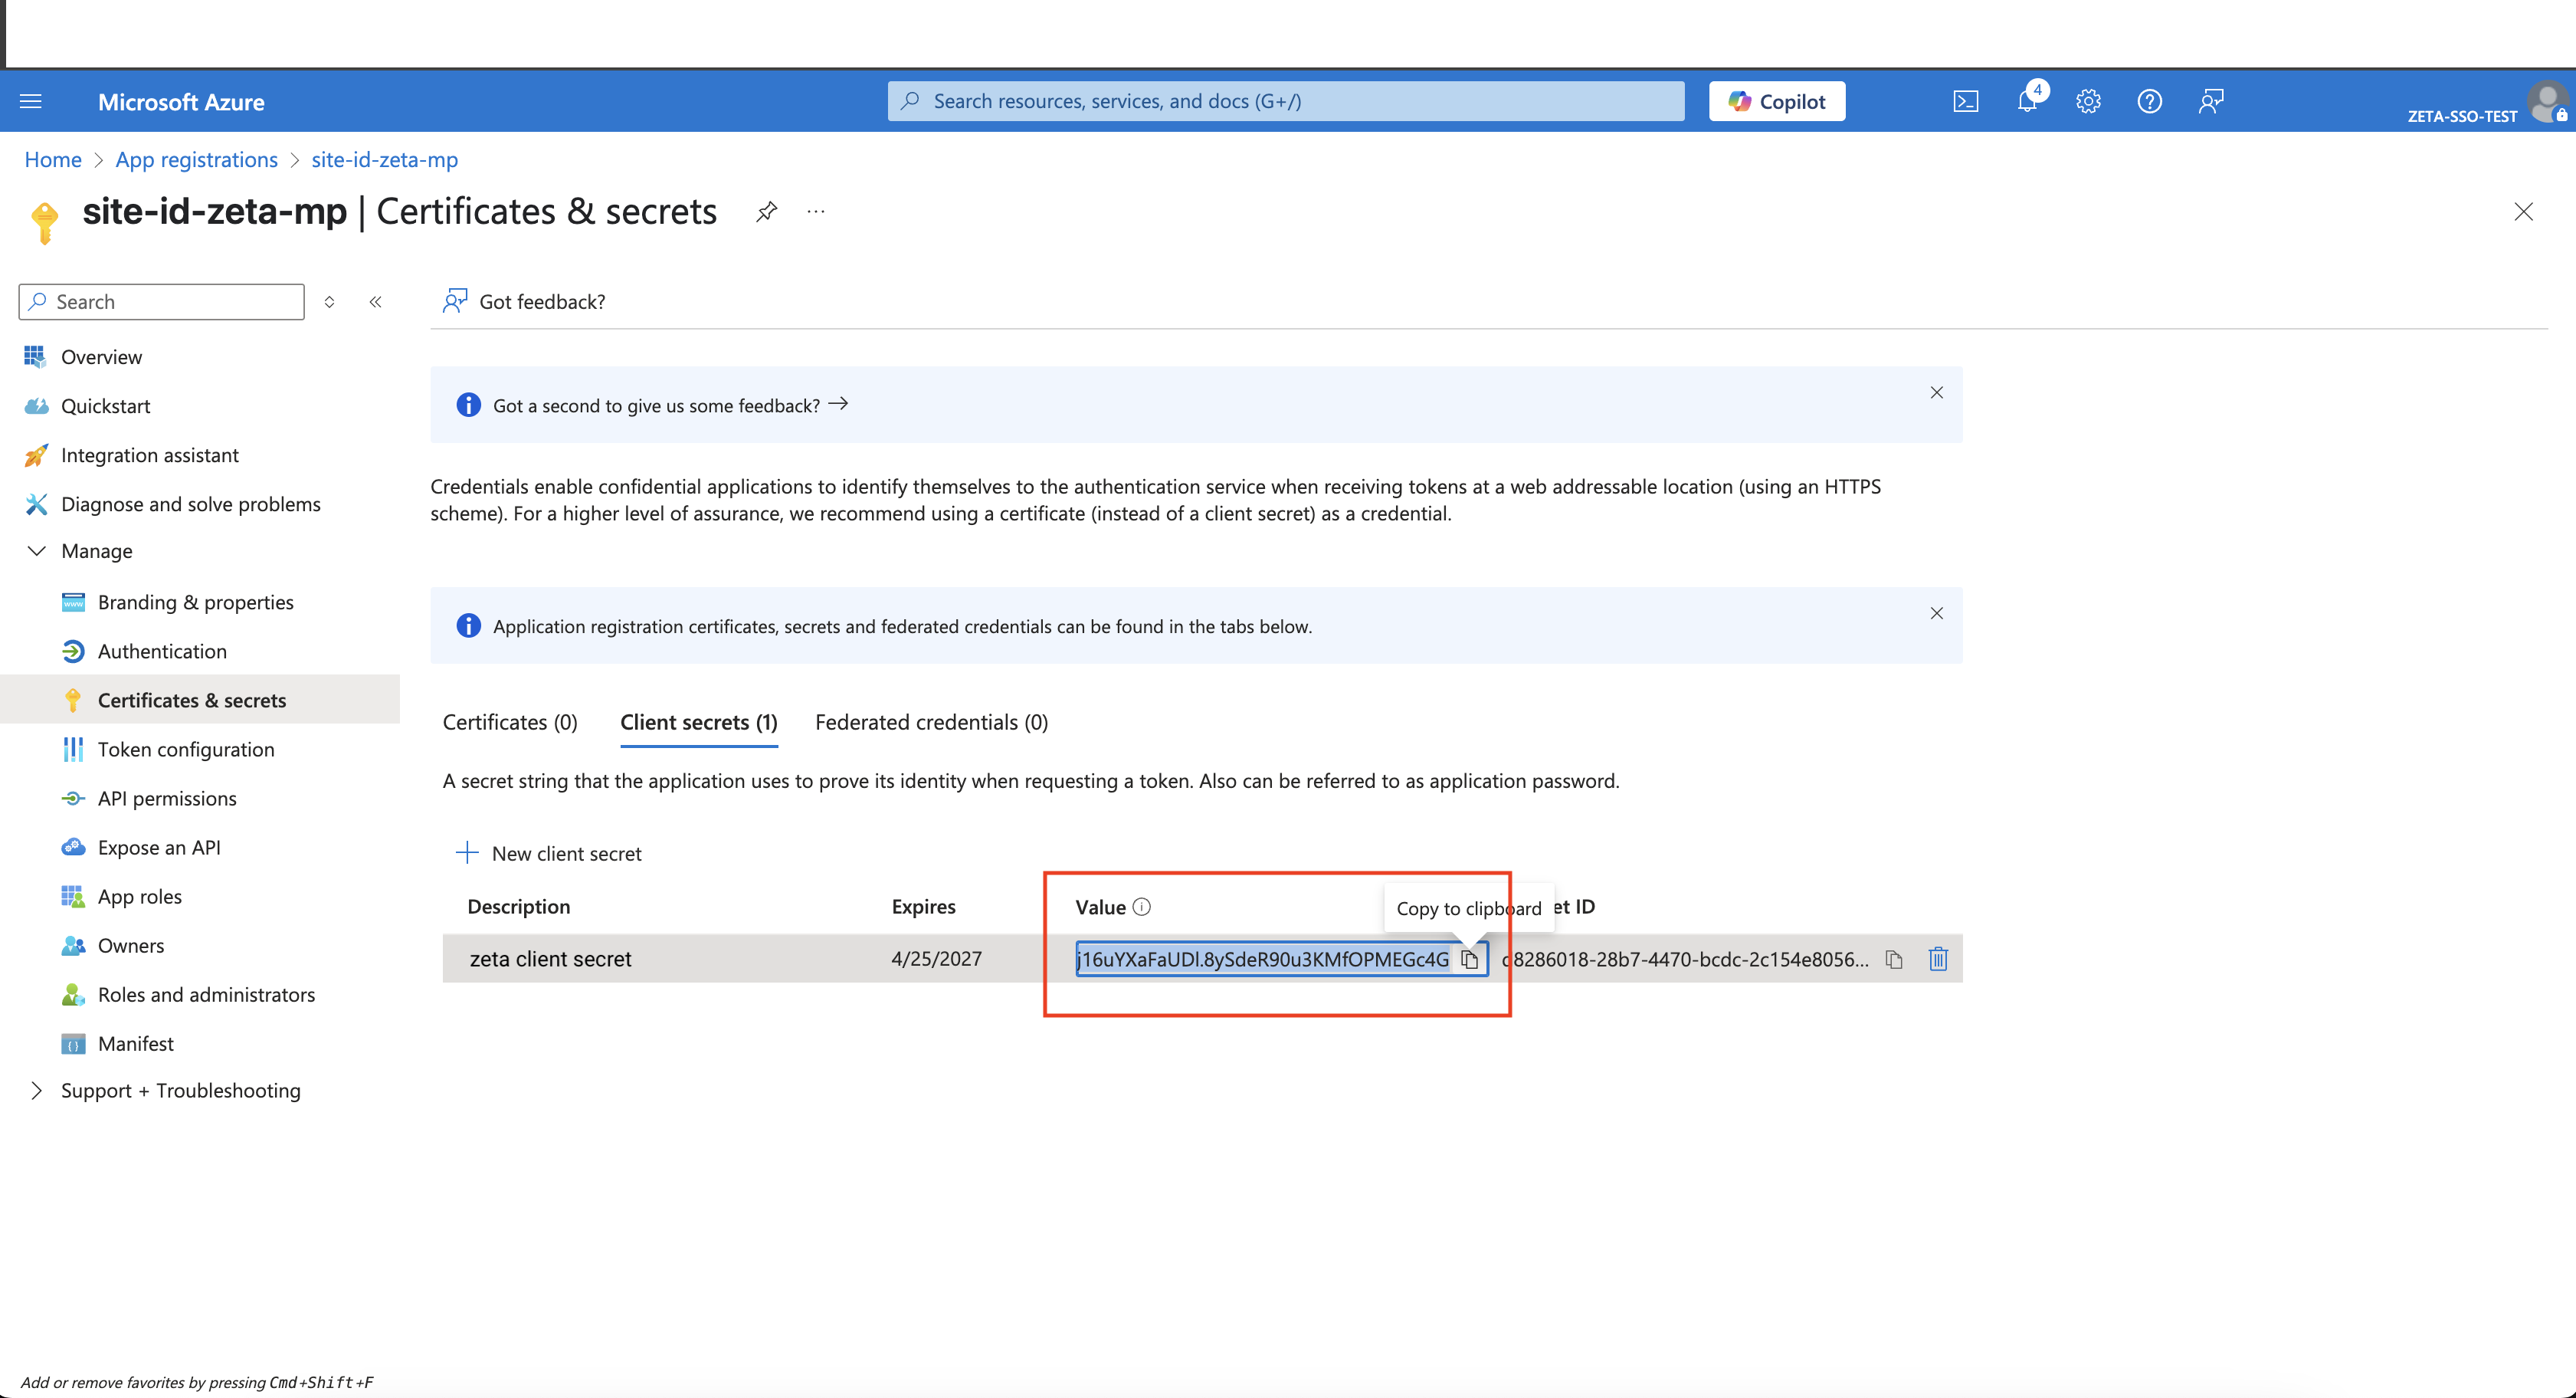
|
|---|
Post Setup
After the entire setup is done, users will be able to sign in to the Zeta app using the below URL:
https://app.zetaglobal.net/users/sso/<site_id>
SSO via Okta Integration for ZMP
Pre-Setup Requirements
Start by creating a new app in Okta using the SAML 2.0 integration method. When prompted to name the application, use the following naming convention for consistency:
-
Recommended format:
<CLIENT>-zeta-mp -
Example:
clientA-zeta-mp
Configuration Details
On the Settings page of the newly created app, provide the following SAML parameters:
-
Enter the Single Sign-On URL in this format:
https://auth.app.zetaglobal.net/login/callback?connection=<CONNECTION_NAME>
For example,
https://auth.app.zetaglobal.net/login/callback?connection=clientA-zeta-mp
-
Enter the Audience URI (SP Entity ID) in this format:
urn:auth0:boomtrain:<CONNECTION_NAME>
For example,
urn:auth0:boomtrain:clientA-zeta-mp
-
In Attribute statements, enter:
Name: email
Name format (optional): Unspecified
Value: ${user.email}
Share Configuration Details with Zeta
After configuring the app in Okta, share the following information with the Zeta team to complete the backend integration:
-
Your organization’s SSO URL
Example:https://<DOMAIN_NAME>.okta.com/app/<APP_ID>/sso/saml -
The connection name used during the setup (e.g.,
clientA-zeta-mp) -
Signing certificate associated with the app (downloadable from Okta)
Post Setup: Logging in via Okta
Once the setup and validation are complete, users in your Okta environment will be able to access the ZMP platform using their corporate credentials. Authentication will be routed through Okta, ensuring seamless and secure login.
Users can access ZMP directly via: https://app.zetaglobal.net/users/sso/<site_id>