

Email is still one of the most reliable and effective ways to reach your audience. With the Zeta Marketing Platform (ZMP), you can build campaigns that are fast, scalable, and customized to your goals.
This guide walks you through the steps to set up a simple, single-version broadcast campaign, perfect for getting started quickly.
Prerequisite: Before you dive in, make sure your segments and content are ready to go. Setting up reusable segments and master templates ahead of time helps you launch faster and reduces repetitive work down the line.
Building your Campaign
1. From the menu on the left, navigate to Campaigns > Broadcast. Click on Create Campaign.
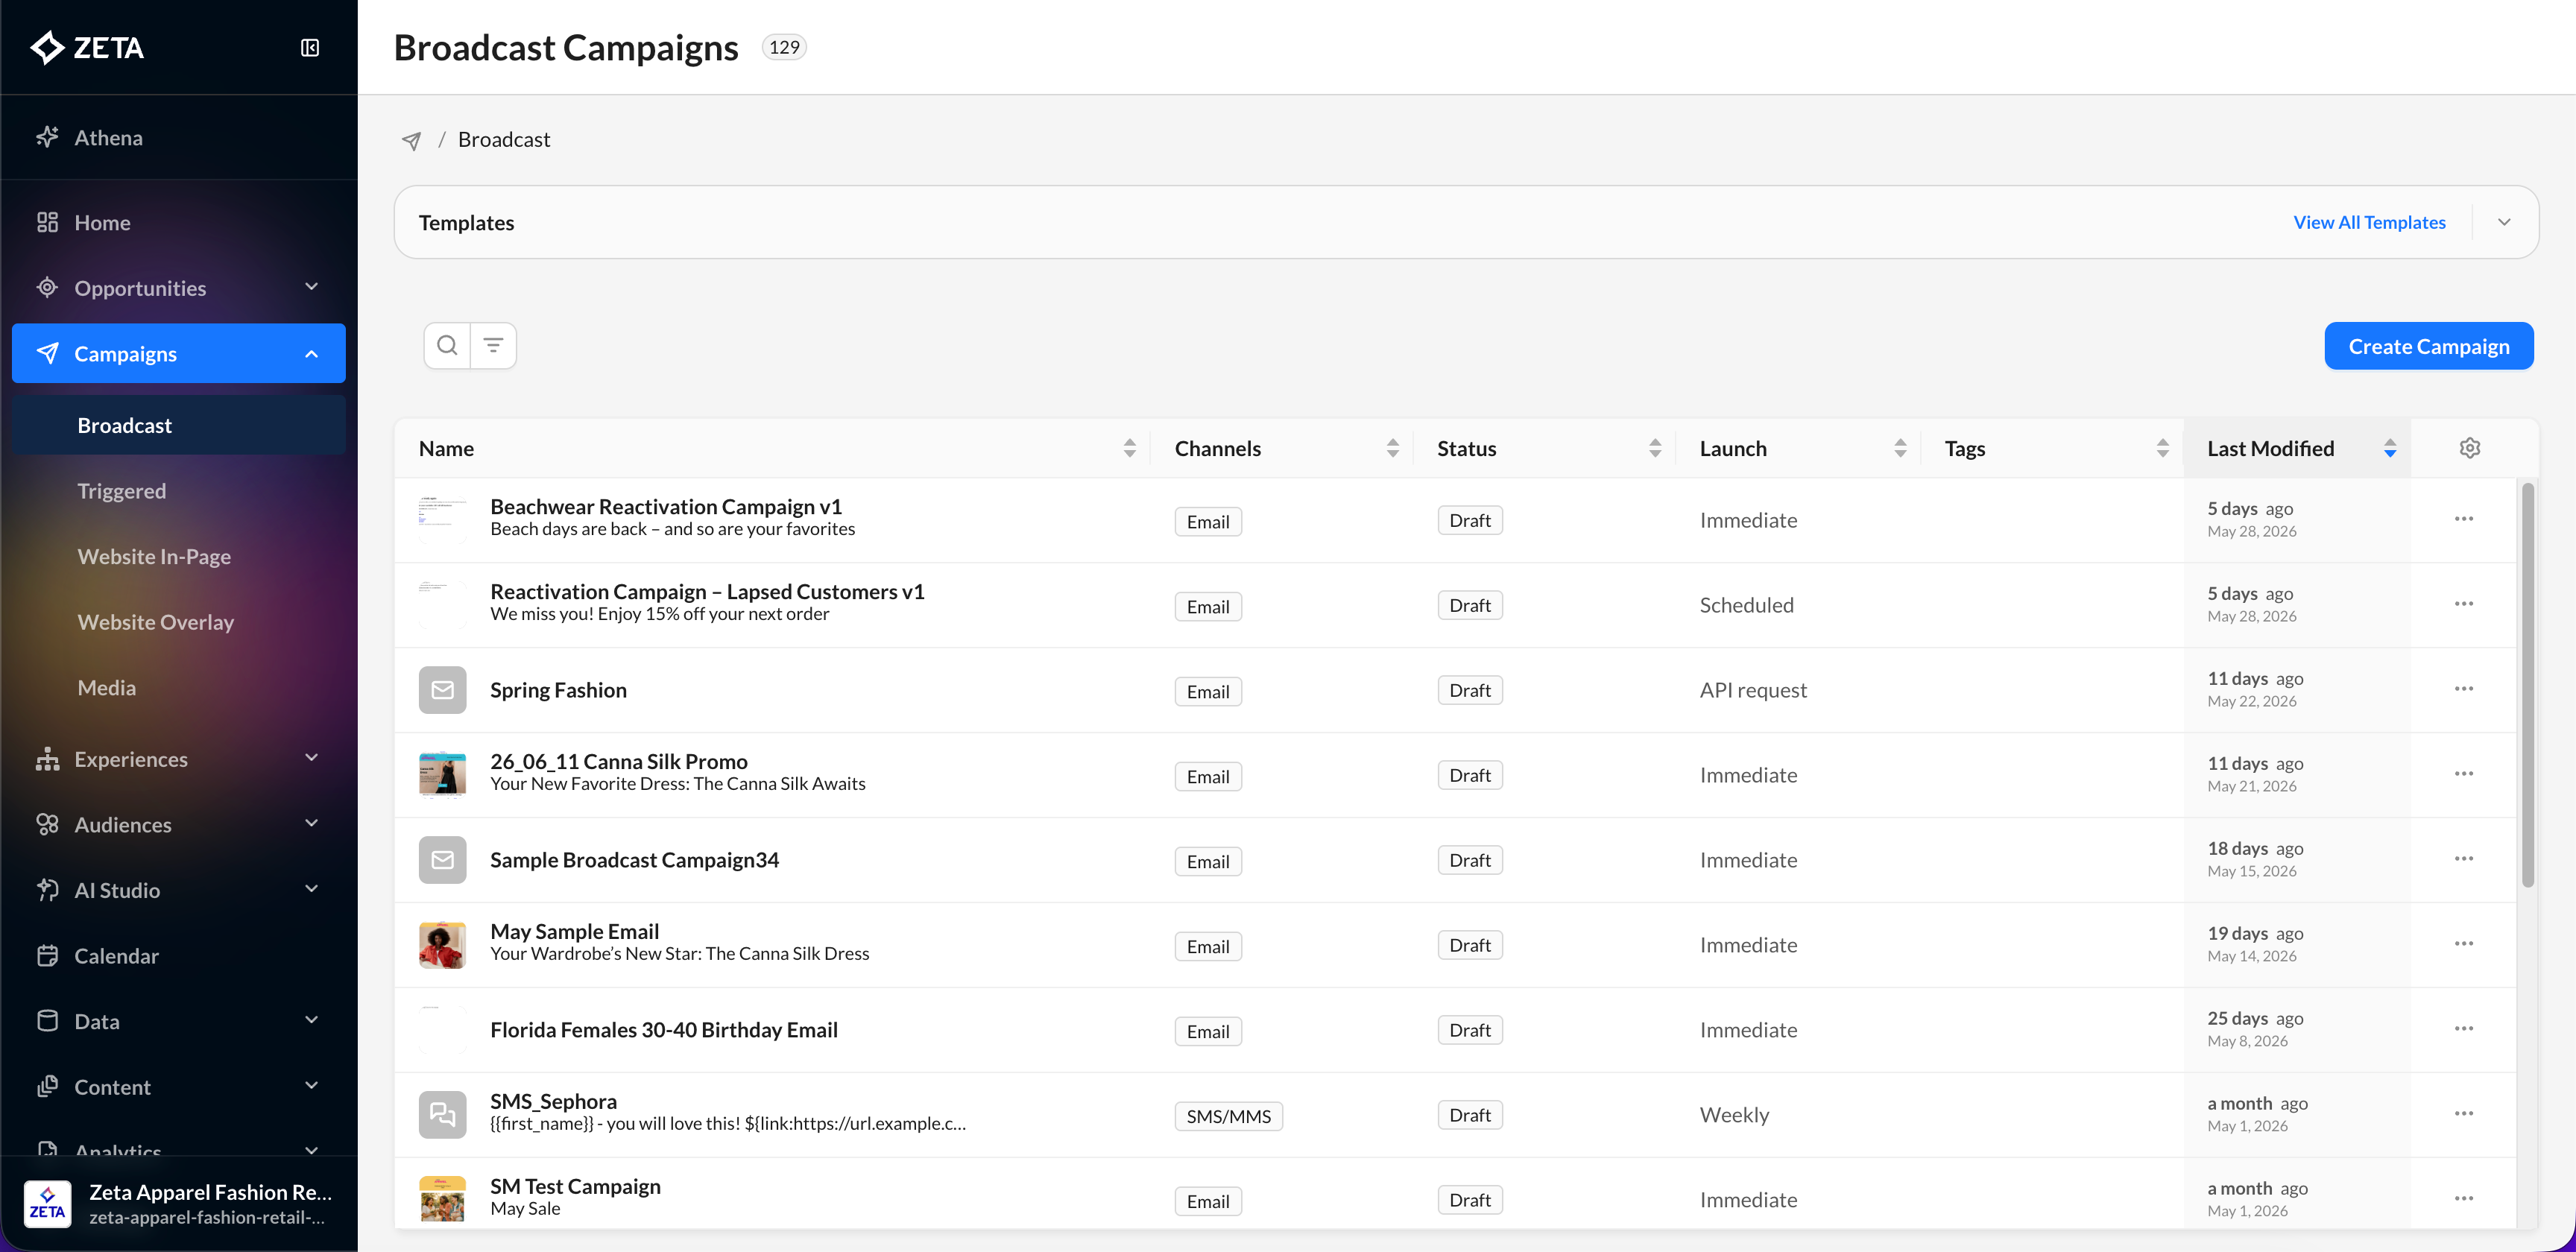
2. Enter a campaign name and an optional description, and then click on Next to continue to the campaign builder.
-20250825-083121.gif?cb=f1991af8f5c9a5b530b8749bd9fcaac6)
Content & Audience Tab
3. Within the Content & Audience tab, choose Email from the Channel dropdown.
-20250825-093213.gif?cb=ed5123a71e2a98702cf15aca223db188)
-
Click + A/B/n Test if you want to compare campaign versions or run tests by defining your variants and split. If you’re keeping it simple, skip this.
4. Enter the required sender and receiver details, then click Add/Edit to select an existing email template or build one from scratch.
-20250825-093456.gif)
5. Enter a compelling subject line and a short preheader to complement the overall message.
-20250825-094429.gif?cb=a382006391f537bd7ceee2ba8e938c09)
6. Add CC/BCC recipients, enable link tracking for analytics, and enter a campaign code if required by your reporting system.
-20250825-094457.gif?cb=1712e3c2fe5f5684db6eaa73b9c766f1)
-
CC/BCC: Add internal stakeholders or compliance teams who should receive a copy of the email.
-
External Link Tracking: Toggle this on to automatically append UTM parameters to all external links in your email.
-
External Campaign Codes (Optional): Turn this on if your analytics or CRM system requires a specific campaign code to track performance.
7. Choose audiences and groups to determine who receives your campaign, who doesn’t, and who helps track results.
-20250825-095309.gif)
-
Include: Choose who should receive your campaign.
-
Exclude: Remove specific users or segments from the included audience.
-
Control Groups: Withhold a portion of your audience to measure lift/performance.
-
Seed Recipients: Add internal stakeholders who should receive a copy of the email.
Launch & Options Tab
This section lets you finalize when and how your campaign is delivered. Here's how to fill it out:
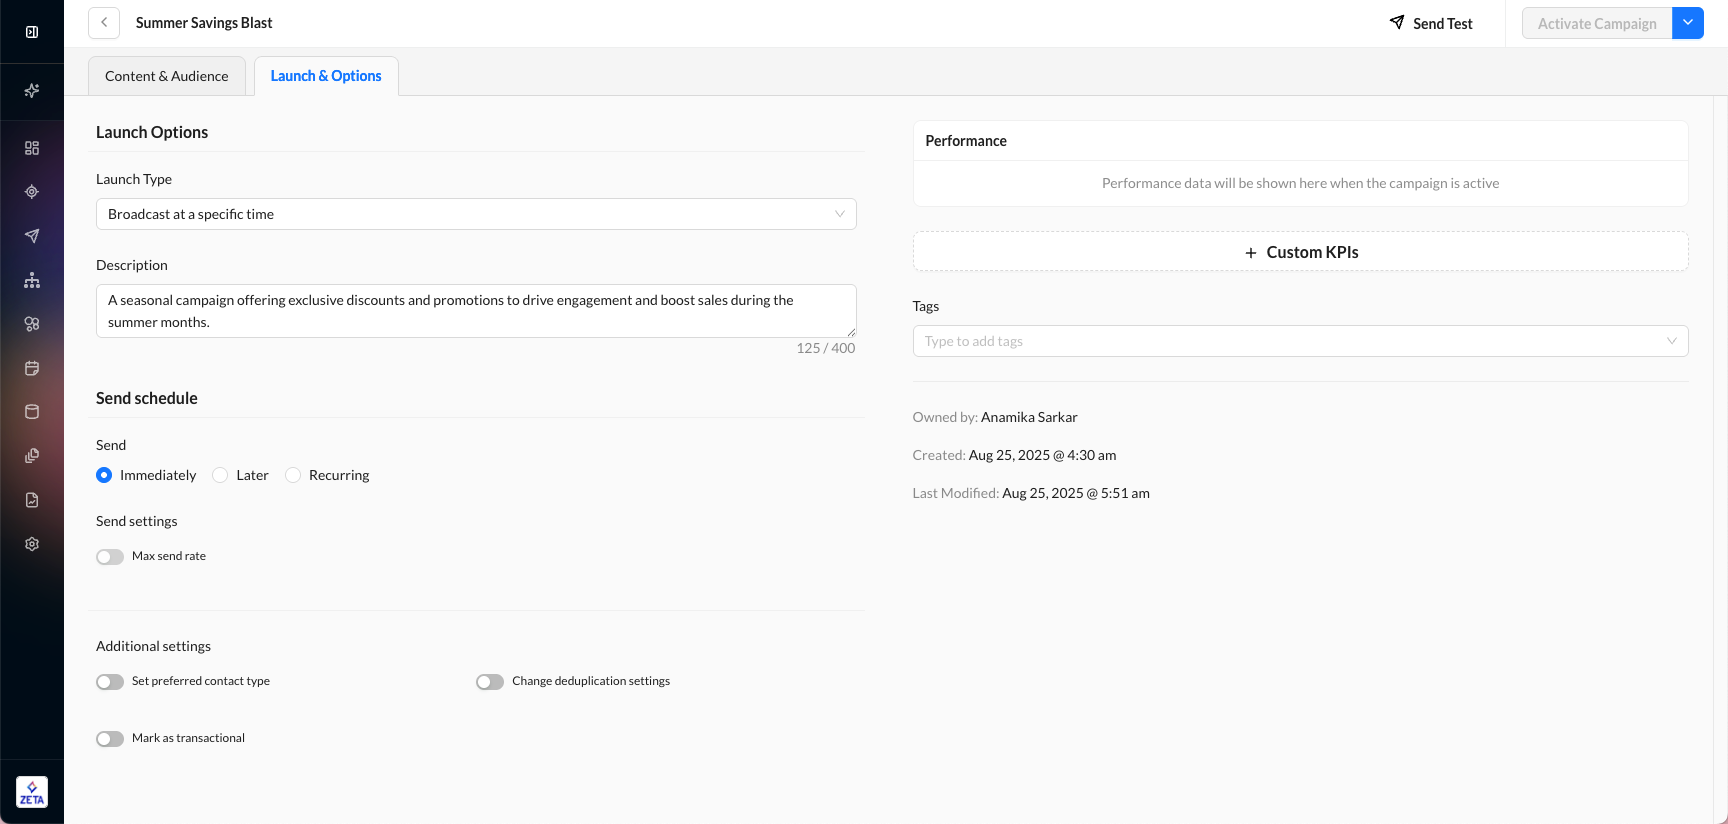
8. Select the Launch Type to choose how and when your campaign will be sent.
-
Broadcast at a specific time: Schedule your campaign to launch at a defined date and time.
-
Broadcast on API request: Campaign is triggered by a connected API call.
-
Broadcast when a file is dropped to a server: Launches when a file lands in a specific server location (typically FTP/SFTP).
-
Broadcast based on a file: Launch is triggered based on the content or structure of a file.
9. Set a Send Schedule to determine when the campaign should go out.
-
Immediately: Send as soon as the campaign is activated.
-
Later: Schedule a specific date and time.
-
Recurring: Set the campaign to repeat at defined intervals.
10. Play around with the additional settings as per your requirements:
-
Max send rate:
Toggle this ON if you want to throttle the number of emails sent per minute/hour.
Useful for large audiences or minimizing load on backend systems. -
Set preferred contact type:
Toggle ON if this campaign should respect user contact preferences (e.g., email vs. SMS). -
Change deduplication settings:
Controls whether recipients who appear in multiple segments will receive the campaign more than once.
Toggle ON if you need to customize deduplication rules. -
Mark as transactional:
Toggle ON only if this email is non-promotional (e.g., receipts, alerts).
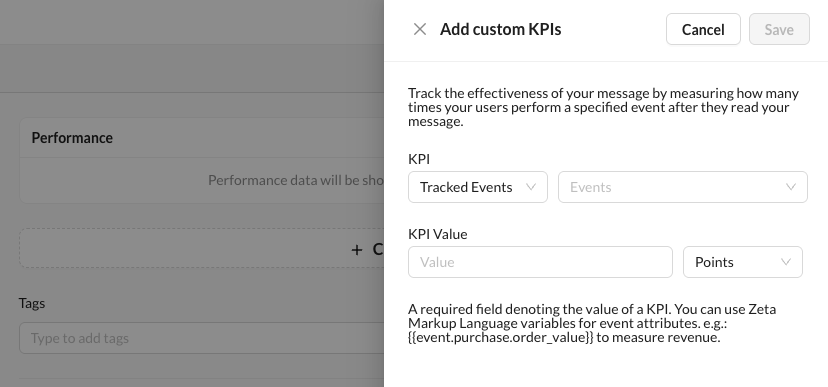
11. Click + Custom KPIs to set goals to track campaign performance.
12. (Optional) Enter Tags to organize your campaigns.
13. Once your campaign is fully configured and ready, click Activate Campaign (top-right corner) to launch or schedule it based on your settings.
-20250825-101453.gif?cb=048b494ad80b71989d9cf3eda085fa1d)
-
Click on the arrow next to Activate Campaign and select Save as Template if you want to reuse this setup later without sending it now.