The Experience Builder, a core component of CDP Plus, is a powerful automation tool in the ZMP, unlocking triggered campaigns that are contextually relevant to a given person. It makes it easy to build, deploy, and analyze one-to-one experiences for customers. It has an advanced set of tools within the visual interface to create experience chains quickly.
1. To navigate to the Experience Builder, click on Experiences > Builder from the taskbar on the left of the screen.
.png?cb=97d3660884b3dd3790436c00ce73ace0)
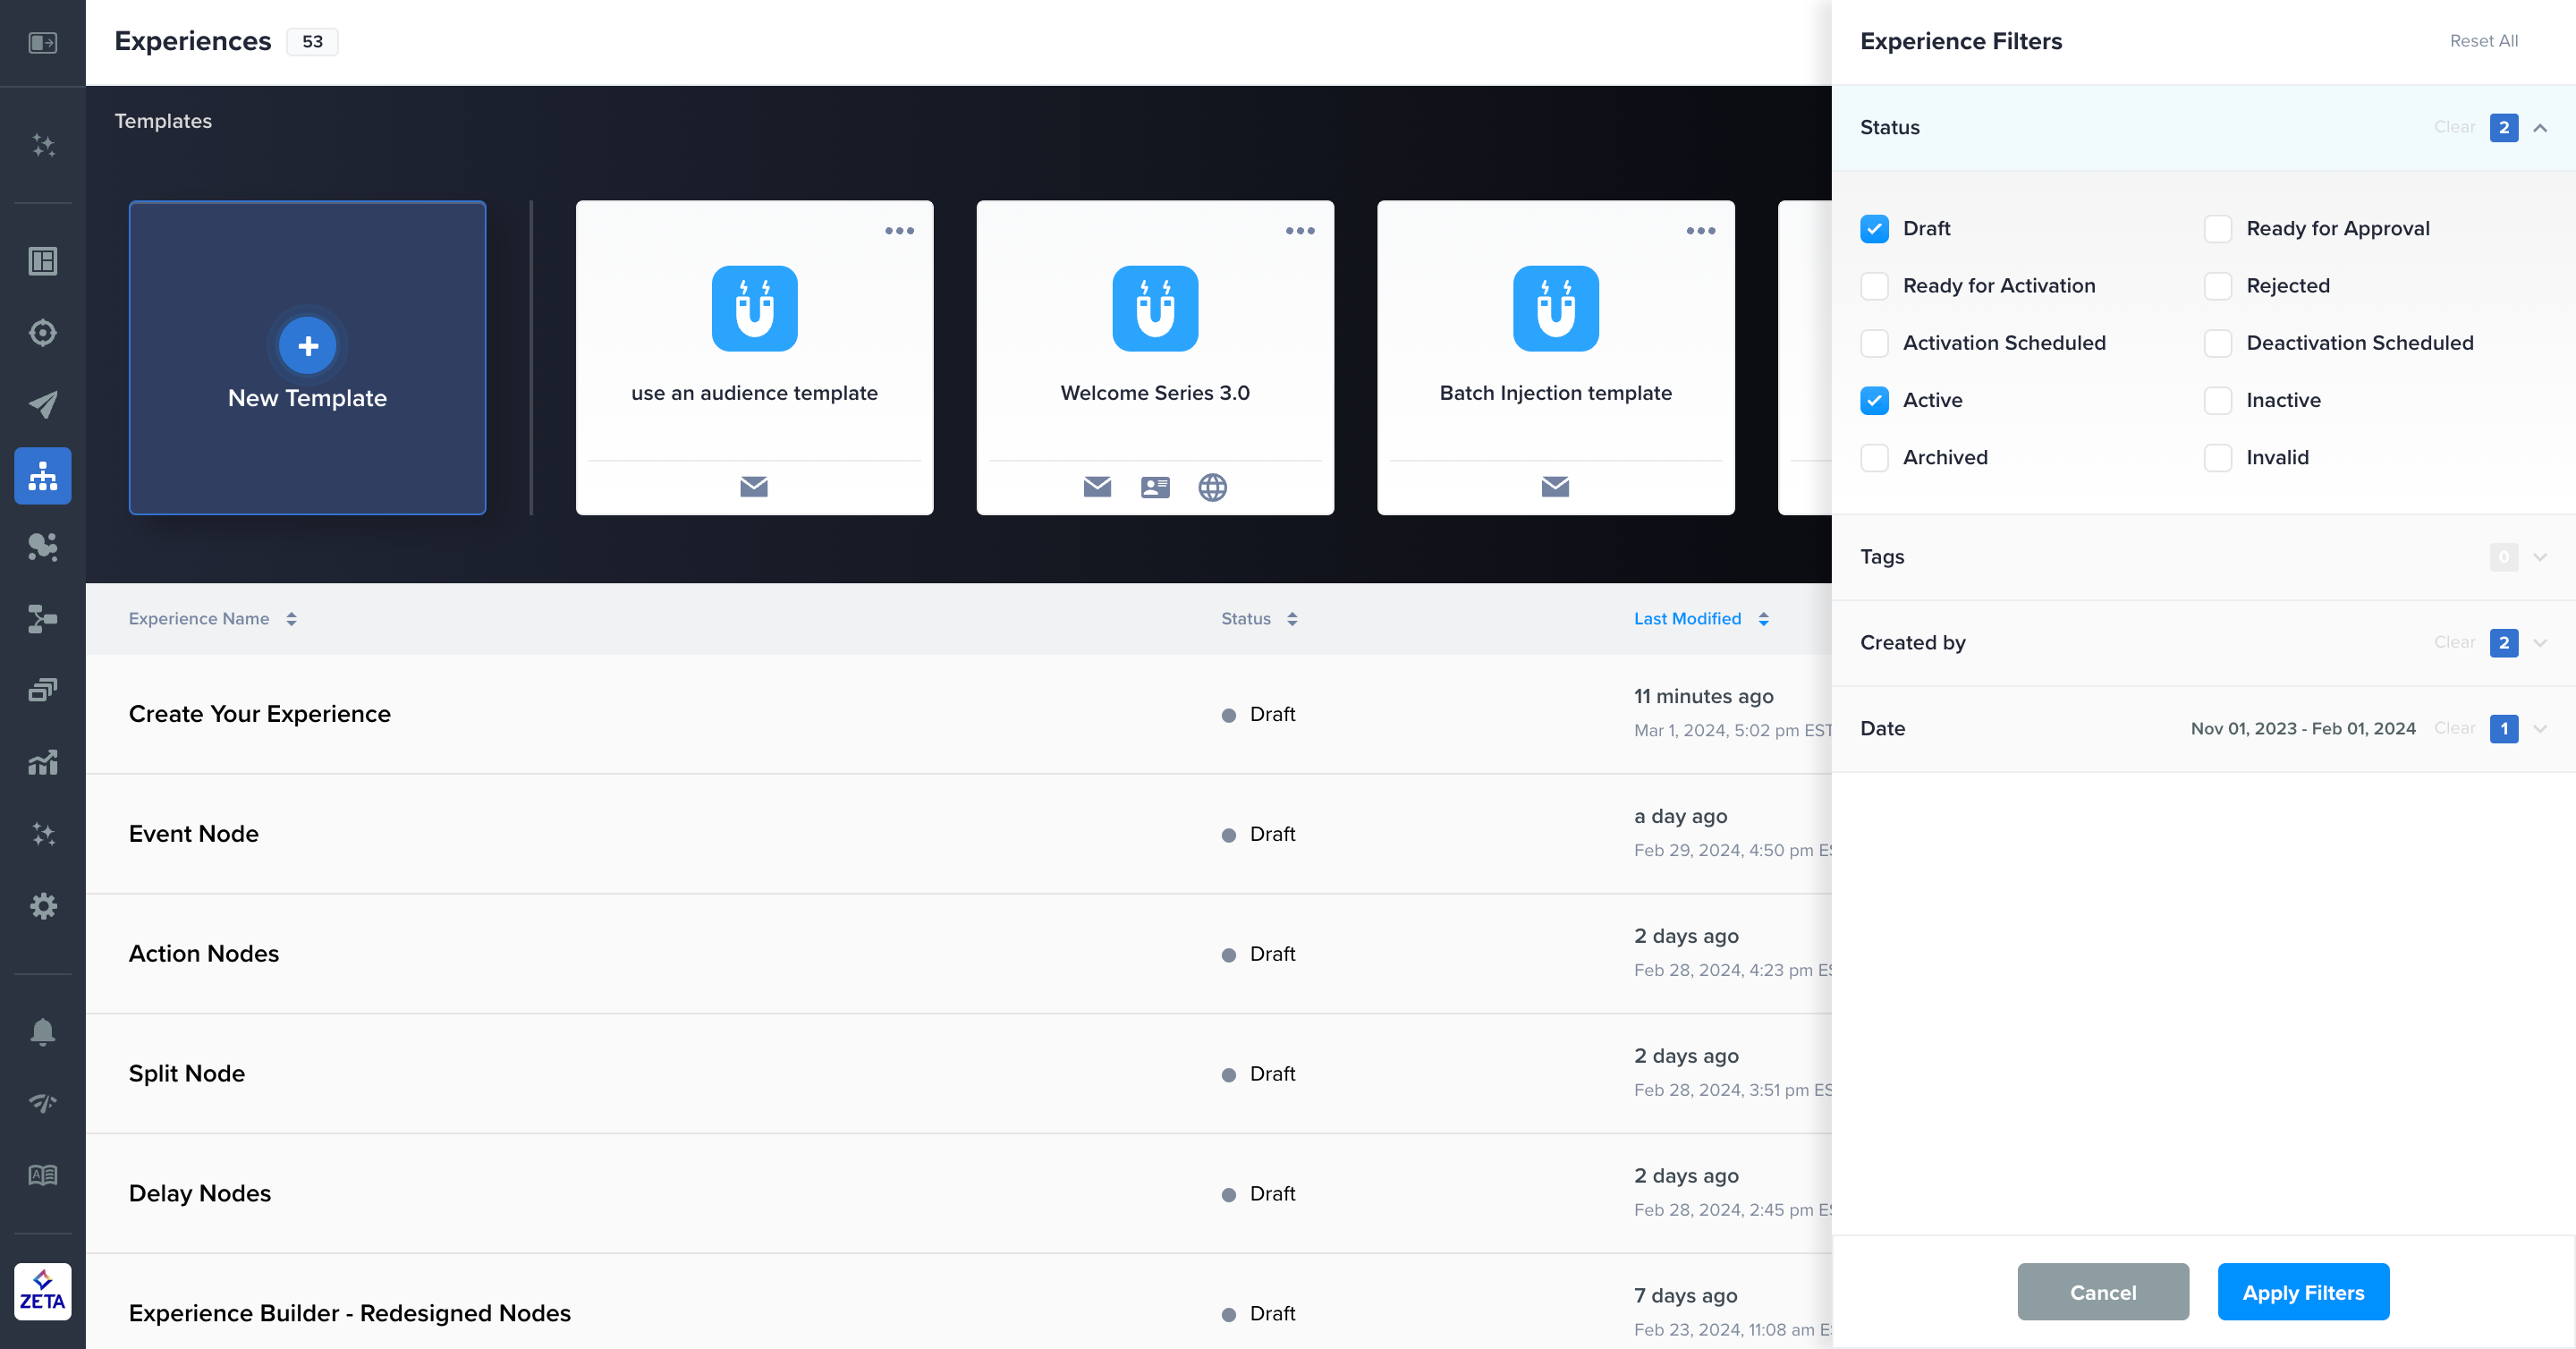
2. The list of existing experiences (Experiences Library) gives you a quick insight into the status of the experience as well as some options on the right to modify, duplicate, share, archive, or delete the experience. You can also convert your experience into a template to be used by your team or another account. These templates appear in the panel above the experiences list.

3. To find experiences more easily, you can click on the search icon at the top-right of the screen, which allows you to search for experiences by name. Clicking on the filter icon will open a panel for you to narrow by Status, Tags, Creator, and Date. You can combine the search and filter criteria to yield more specific search results. These filters will stay active until you clear them.
Note: Search and filters can only be applied to experiences, not versions. If an experience qualifies, it will be returned with all its versions.
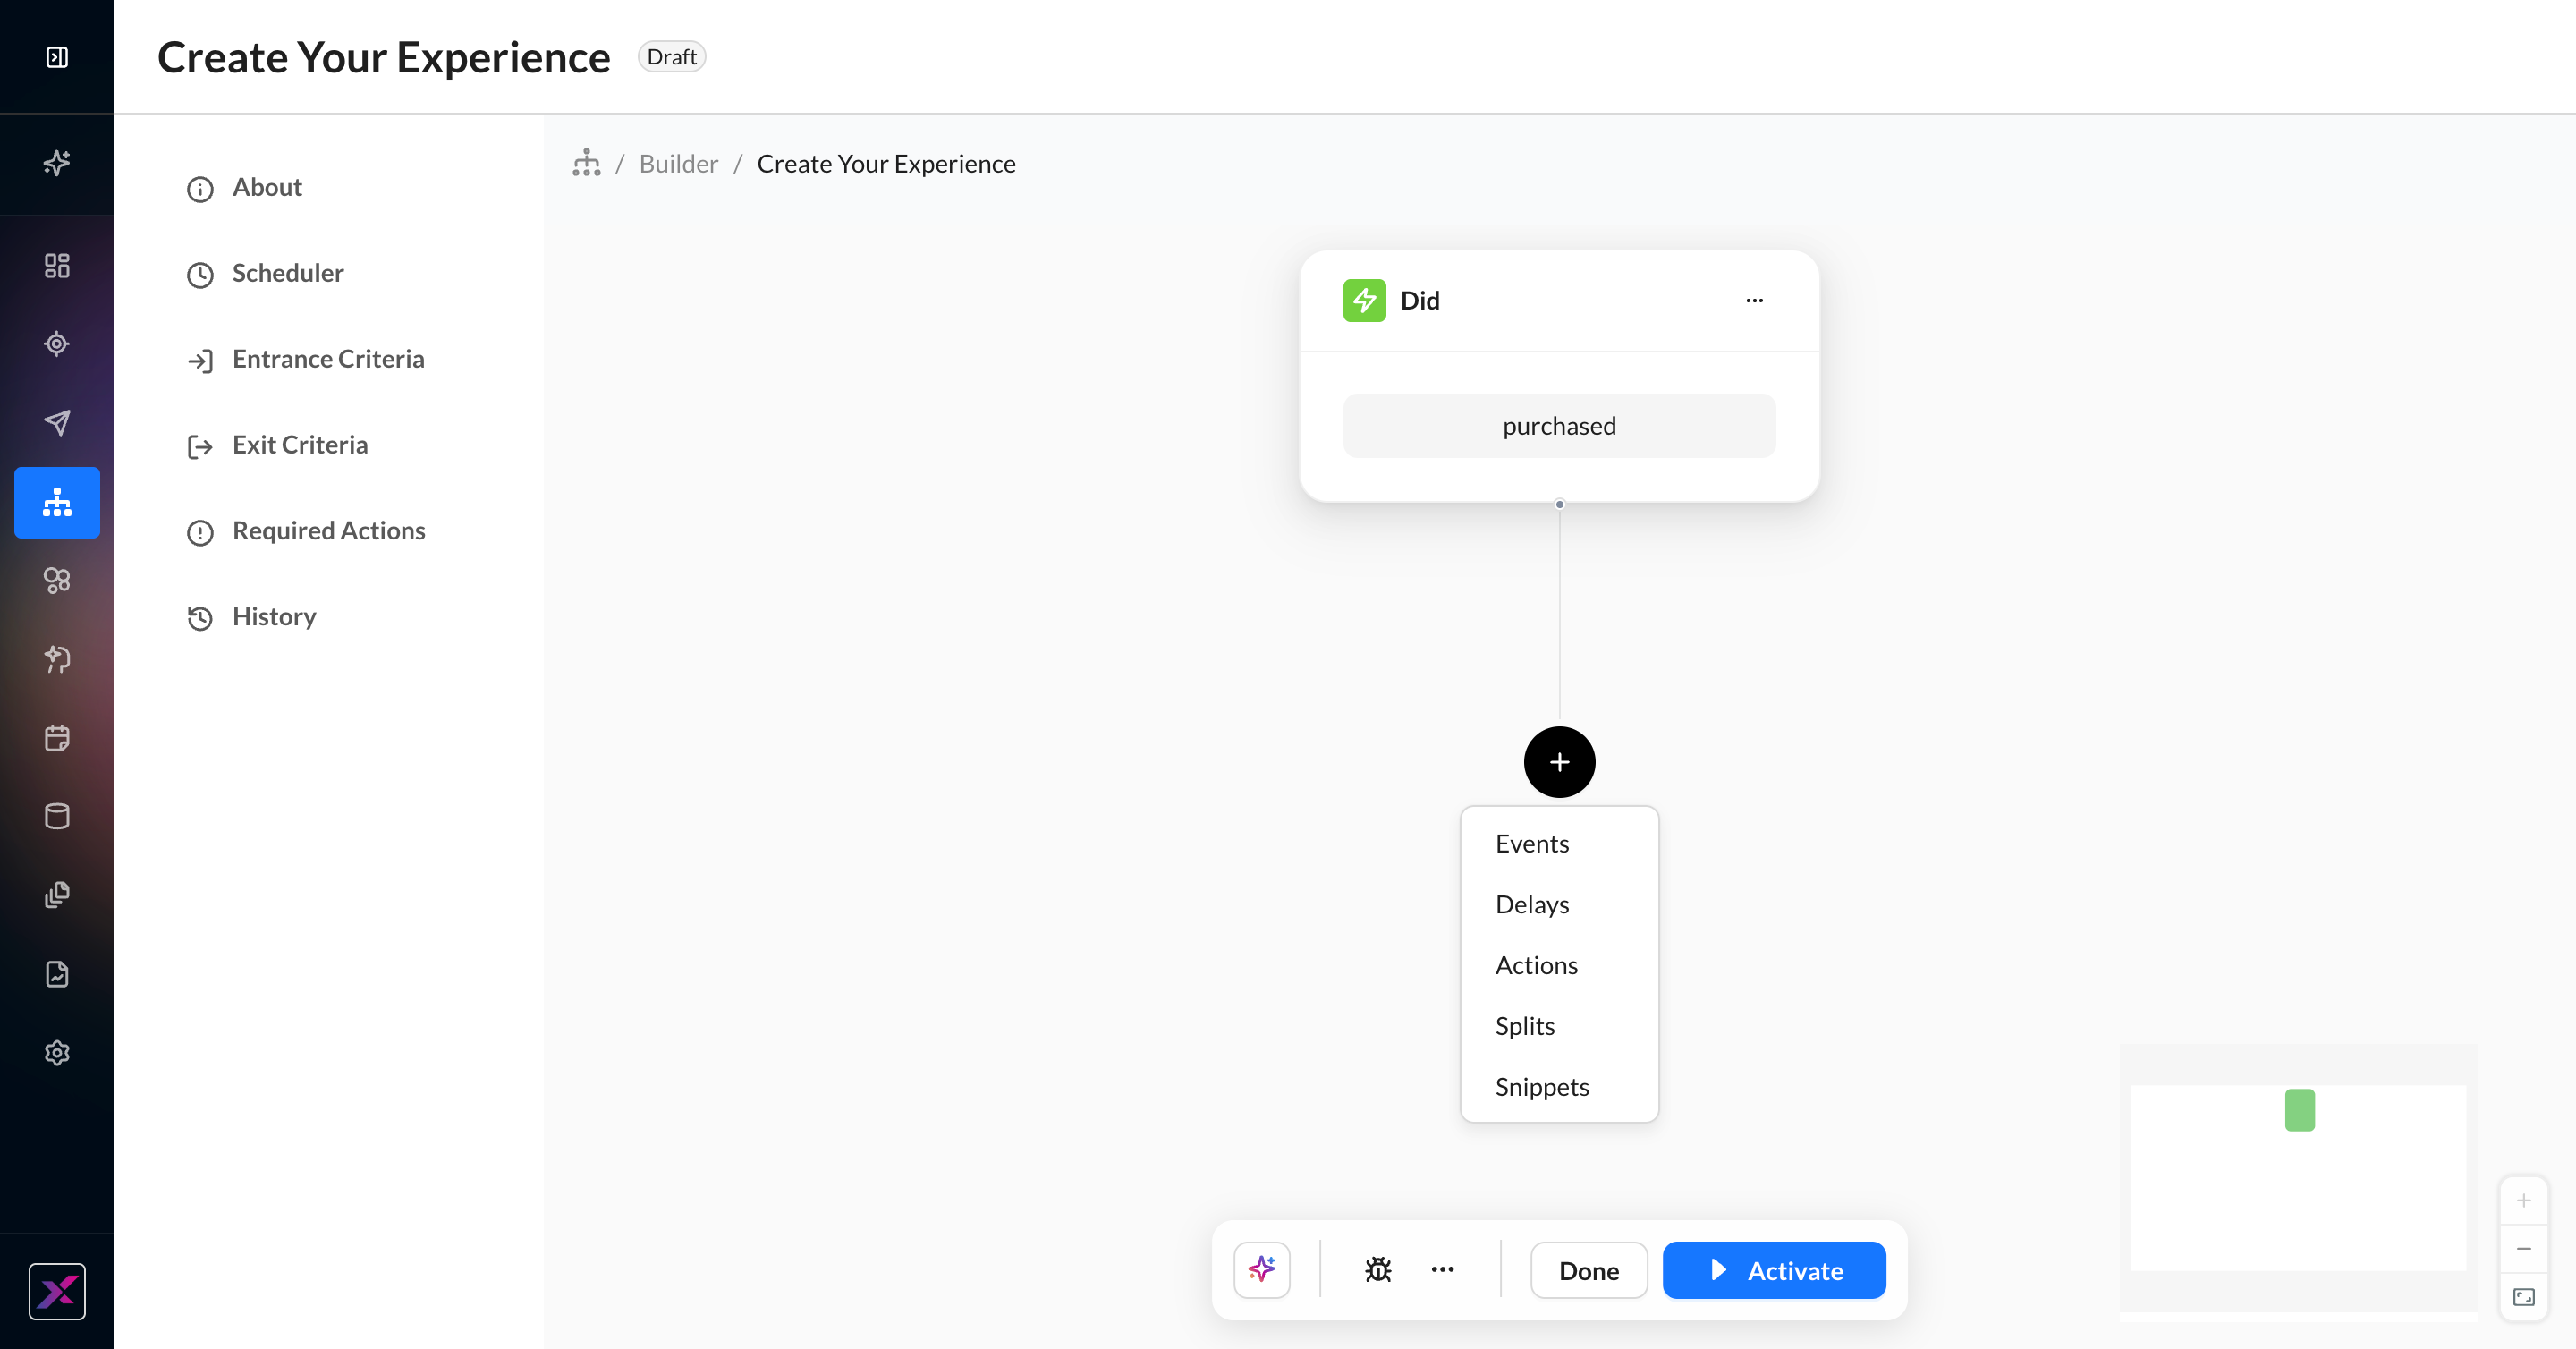
4. You can create a new experience by selecting the New Experience button at the top right of the screen.
Learn more about creating experiences in our Quick Start Guide.
Build Panel
As you create your experience, the Build panel acts as a central hub for you to keep track of experience-level data and settings. It is visible on the left side of the canvas.
|
Section Name |
Details |
|---|---|
|
About |
Add experience details, including a description, to let other teammates know your objectives for each automation. You can see the description in the Experiences Library page. |
|
Scheduler |
Schedule activation or deactivation for this experience |
|
Entrance Criteria |
Besides doing the trigger event, what other things must be true for a user to enter the experience across multiple entrances and segmentation criteria. |
|
Exit Criteria |
If a user raises one of these events, exit them from the experience, no matter what node they’re located. |
|
Approvals |
If approvals management is enabled, it lists the latest approval/rejection comments. |
|
Required Actions Remaining |
See what actions are required in order to activate an experience. If something is missing, the platform will highlight what to do next. |
|
History |
Status changes began to be recorded in the History panel upon the release of the feature in early May 2026. You can now see a timeline of every status change for an experience by clicking the History button in the Build panel. The changes appear in reverse-chronological order and include details such as status, timestamp, initiator, and an optional comment. |
|
Settings (experience must be active) |
|
For more details about Entrance and Exit Criteria, visit Experience Options.
Scheduling
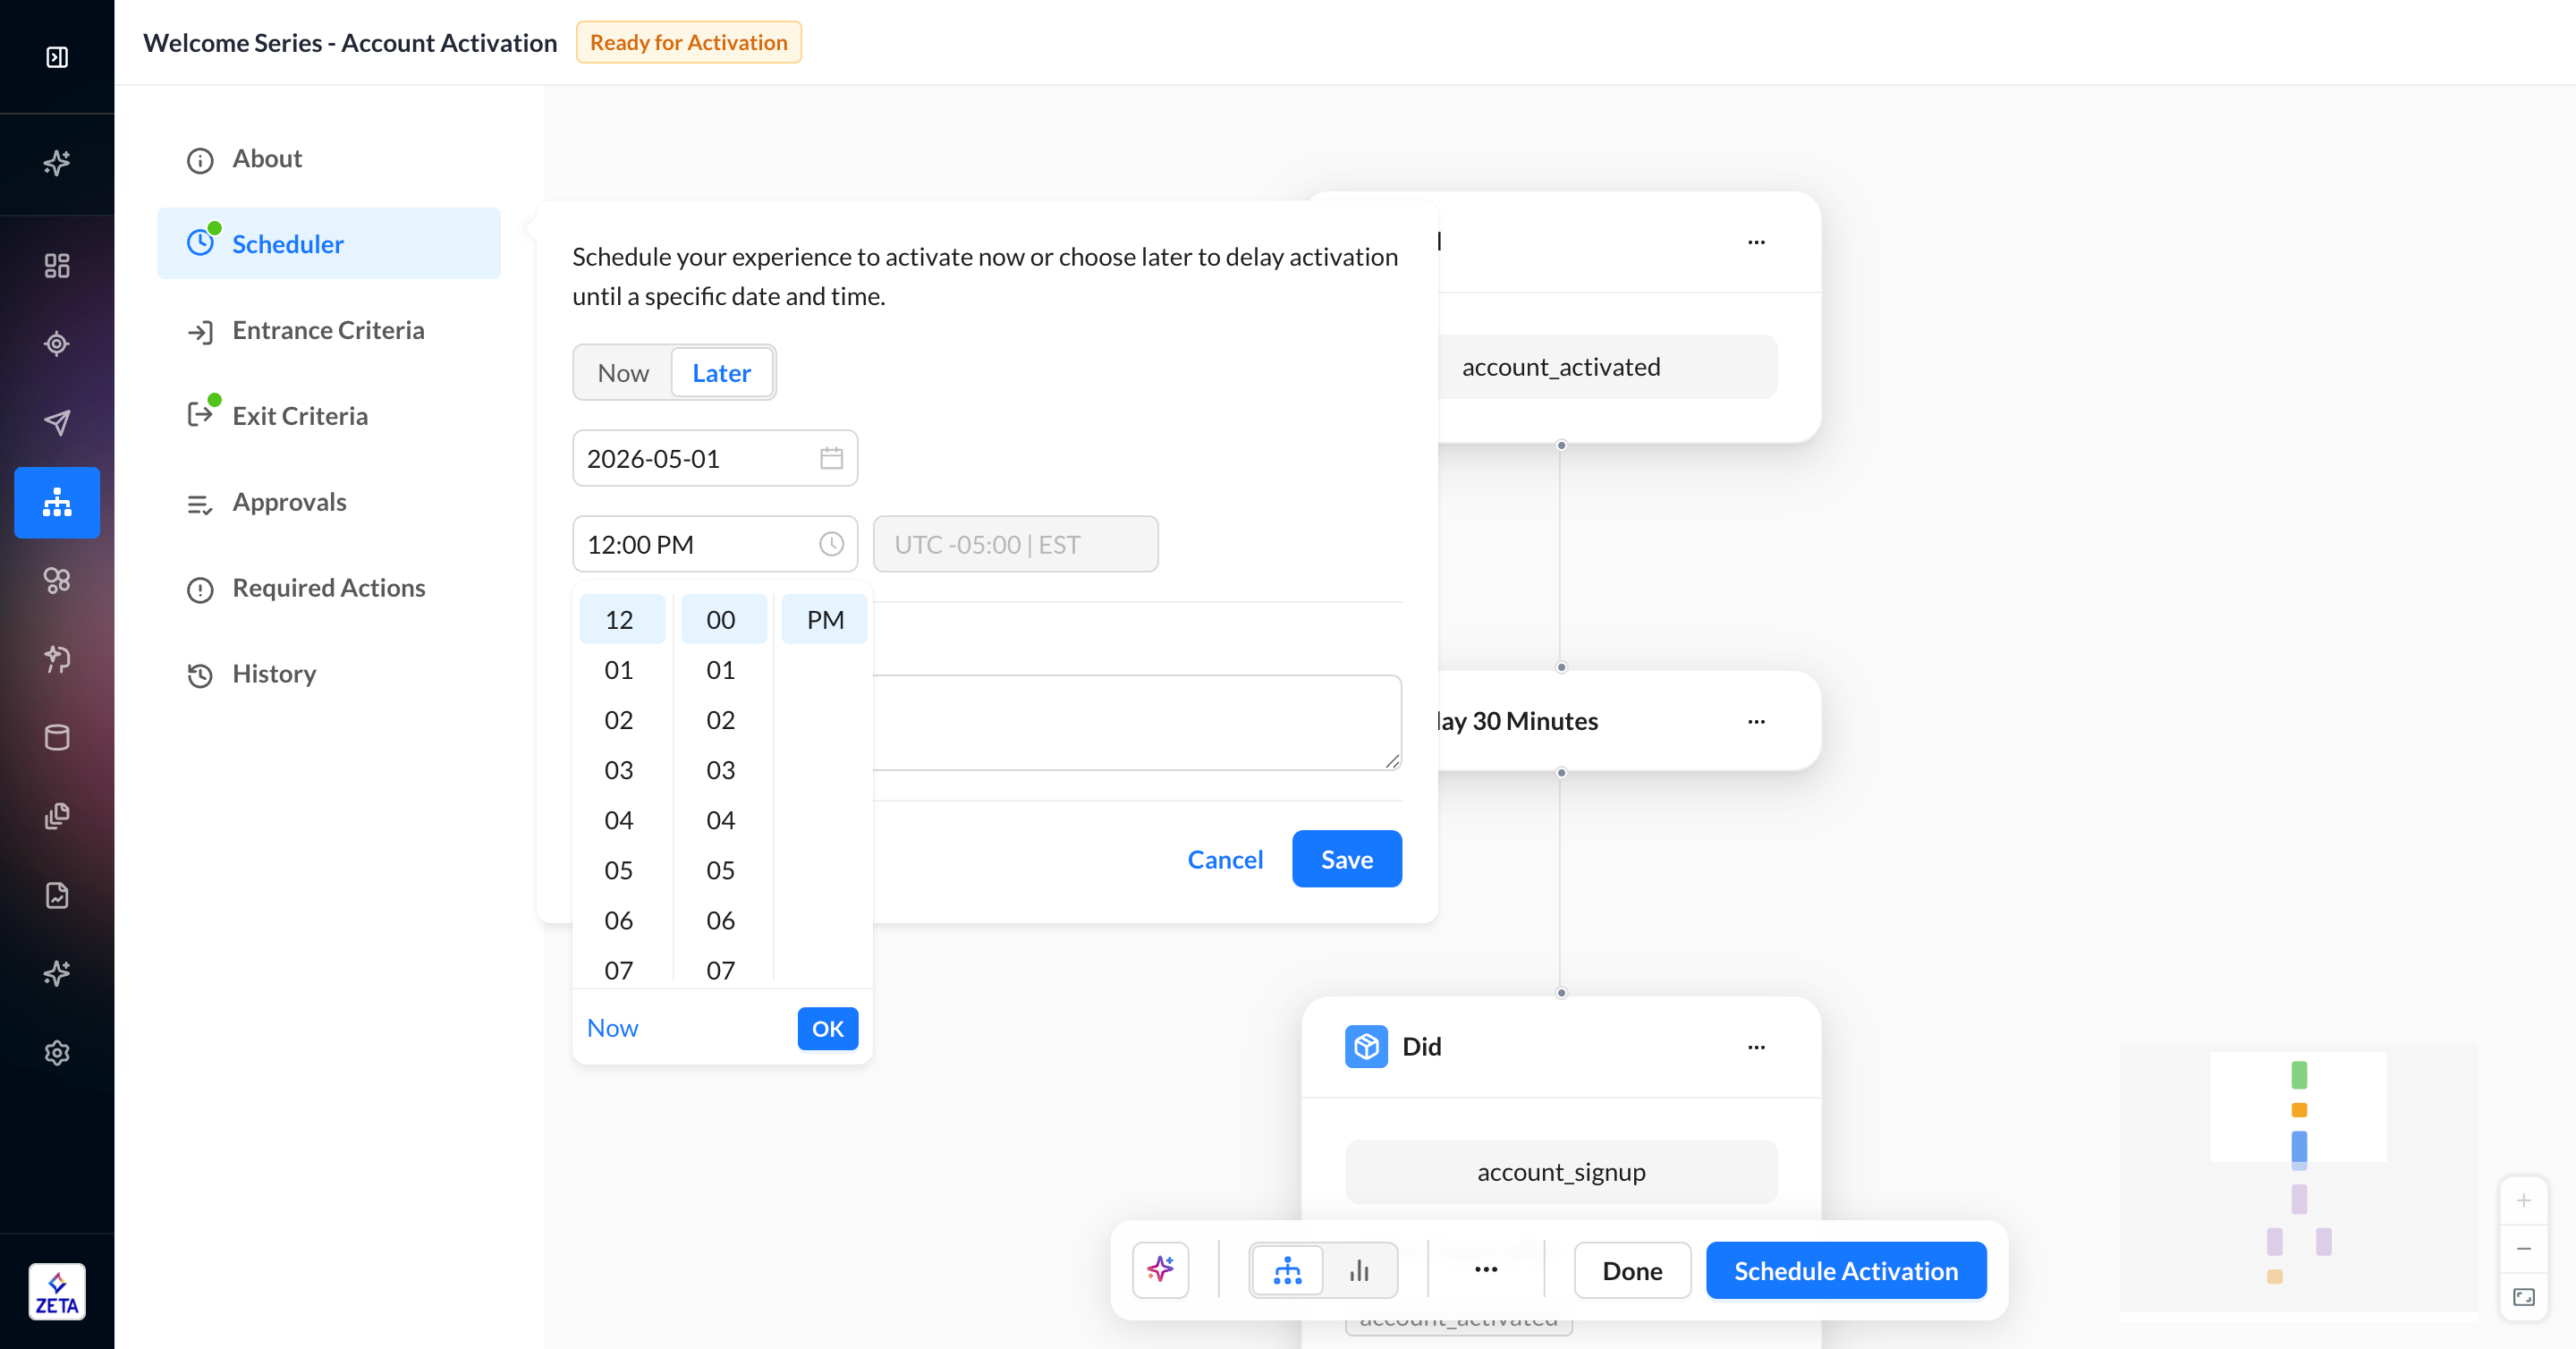
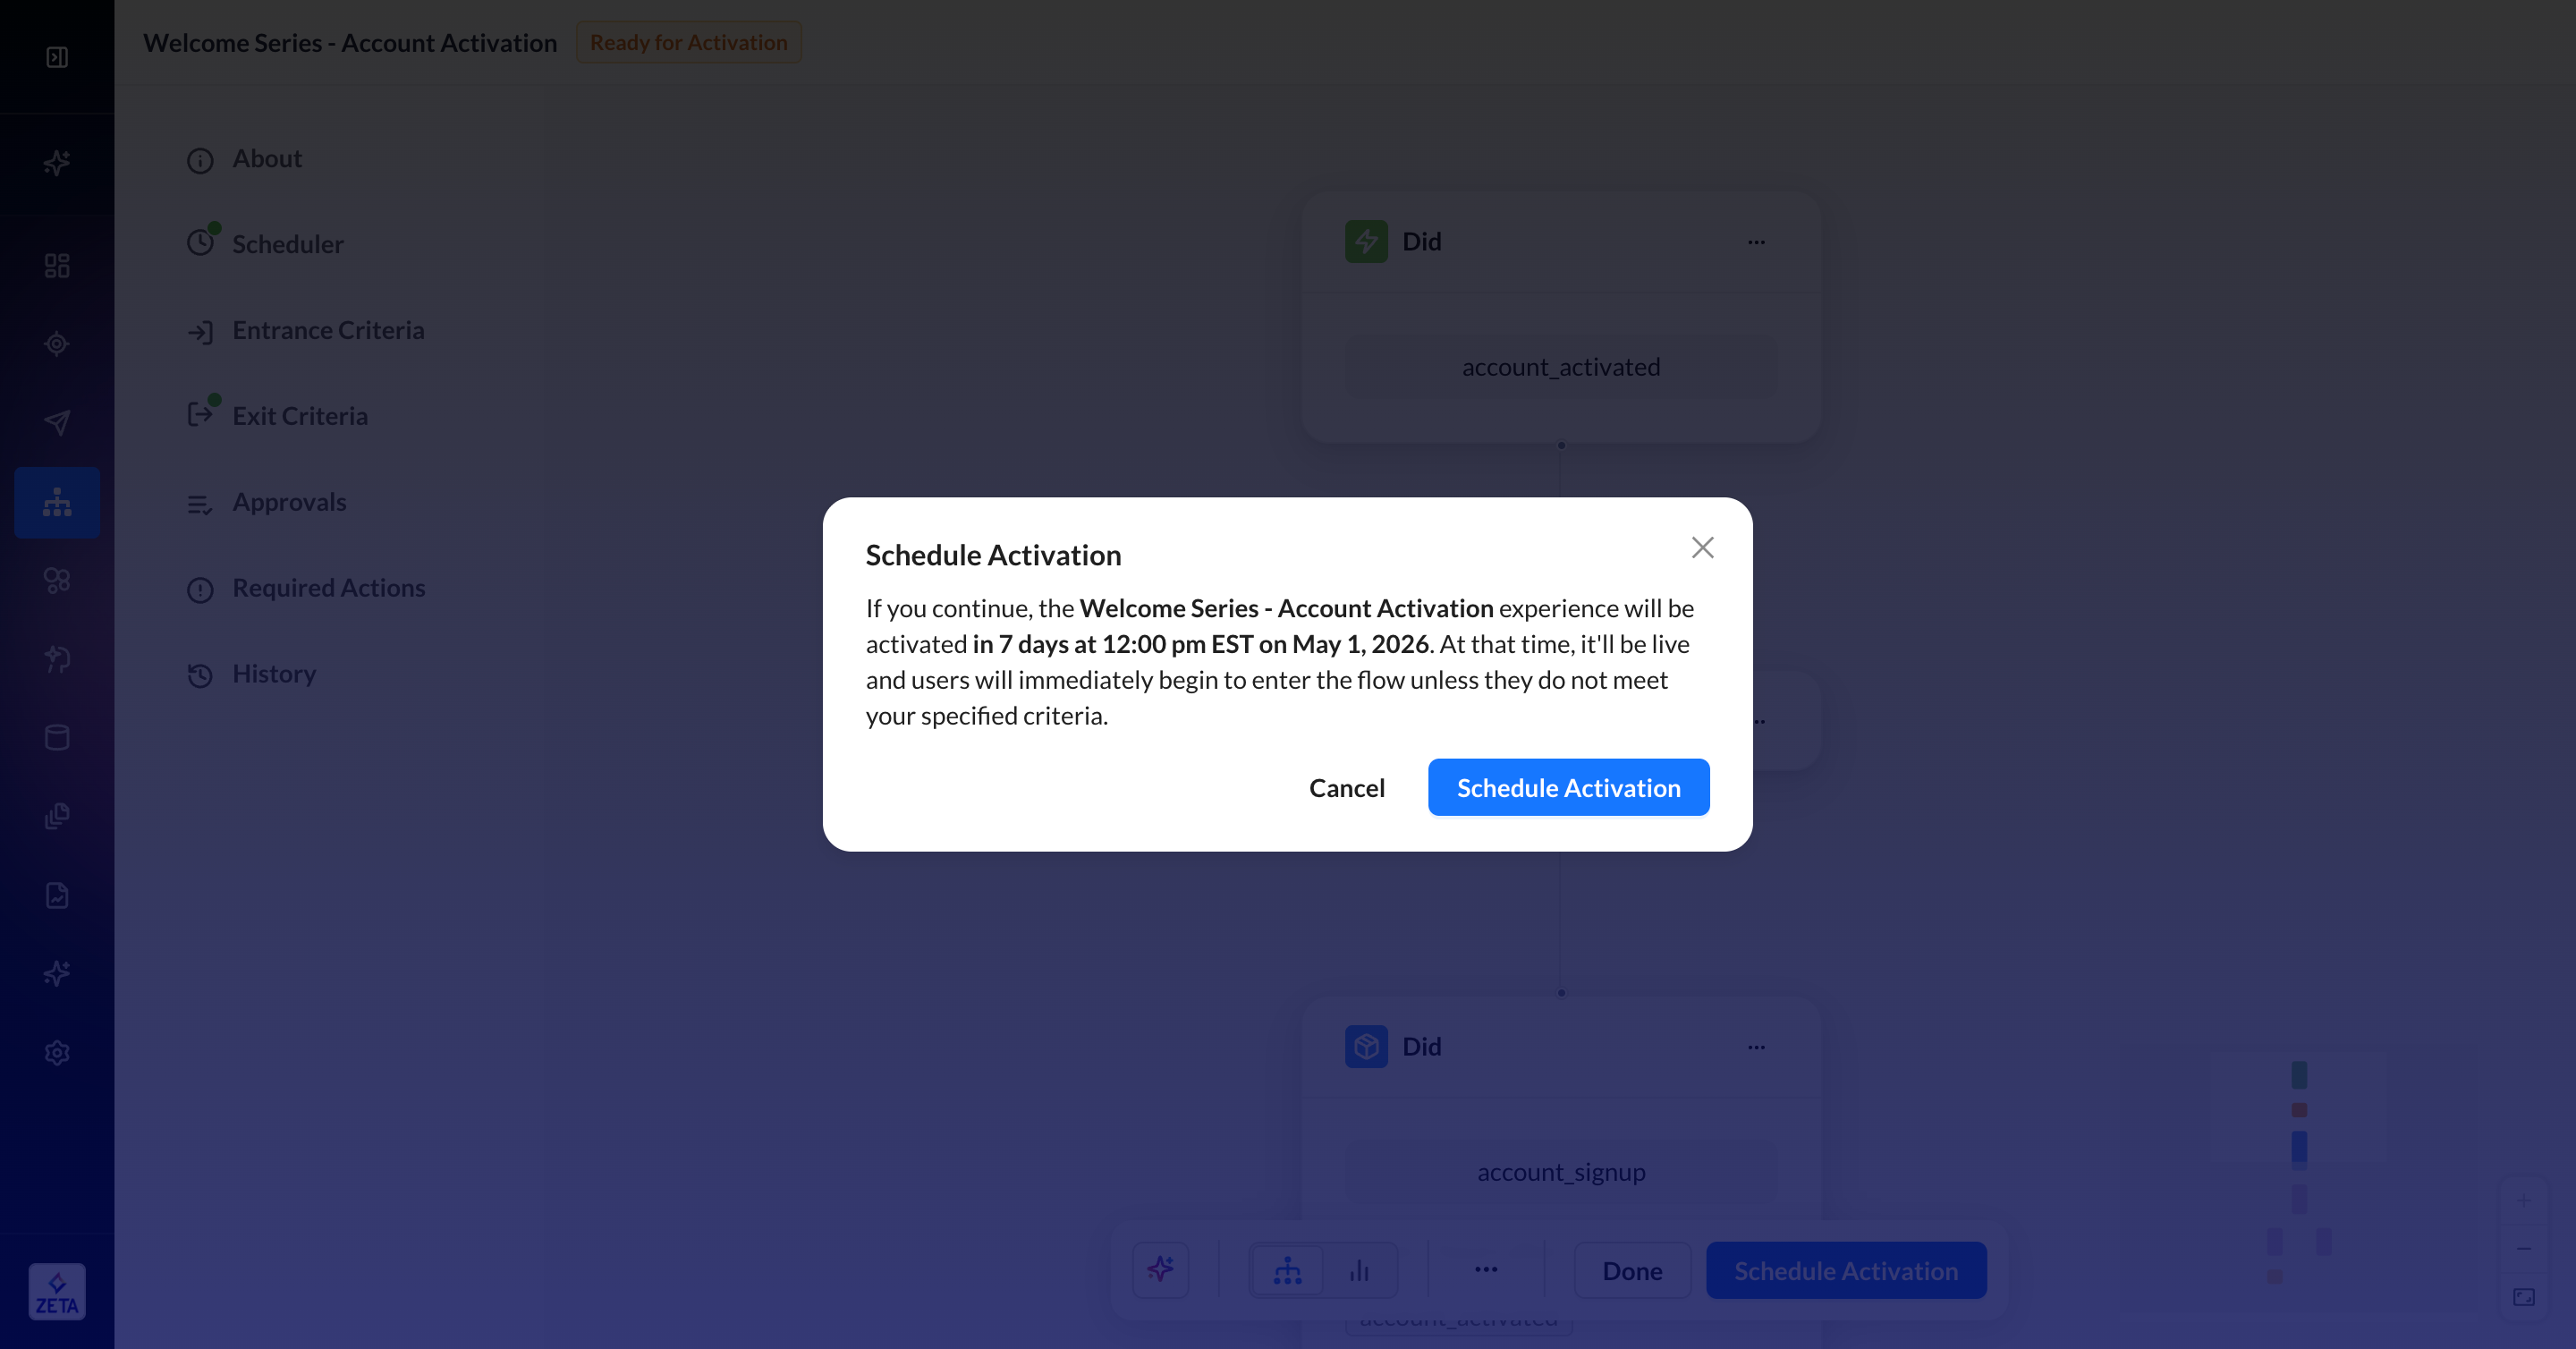
Finished with your experience but you’re still a few days from launch day? Schedule your activation instead of waiting until the moment you’re ready to accept people into your workflow before clicking Activate Experience. On the Build panel, navigate to the timer icon to find the Scheduler configuration. Select your date and time and add an optional comment to give your teammates extra context. Once saved, you can click Schedule Activation to confirm your selection.
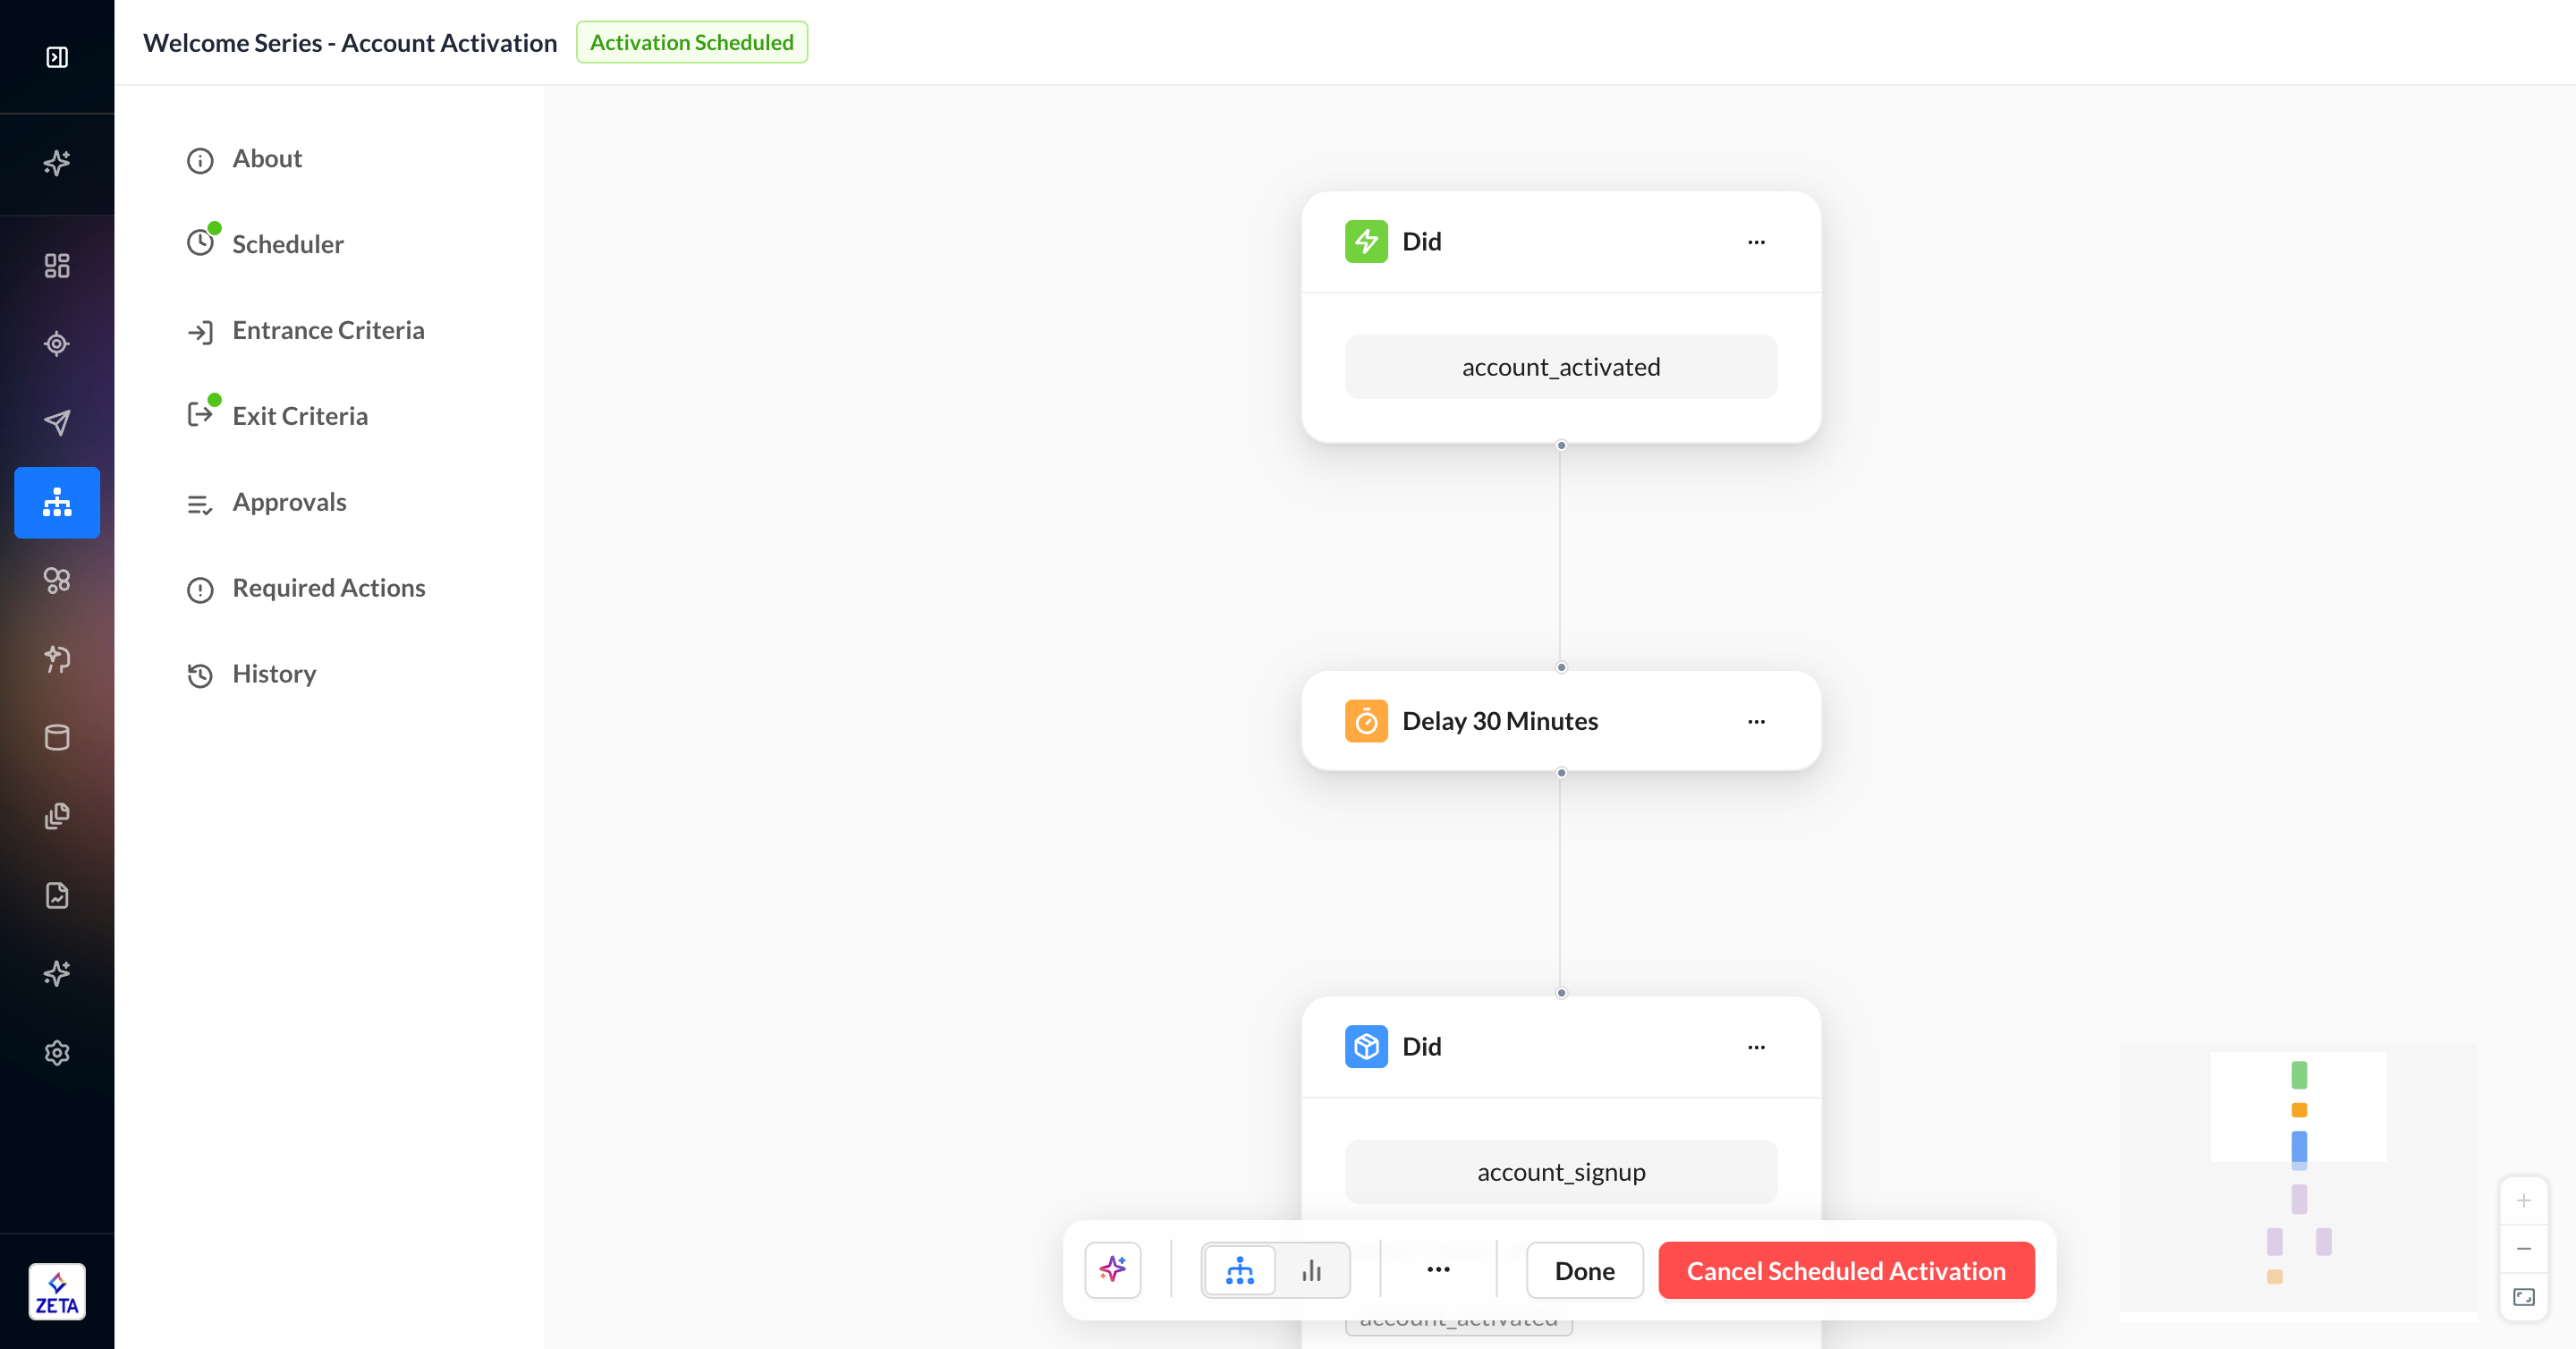
Experience activations still default to “Now” and you can always change your scheduling date later by clicking Cancel Scheduled Activation in the top navigation. A green dot on the Scheduler button indicates that the experience is scheduled for activation or deactivation.
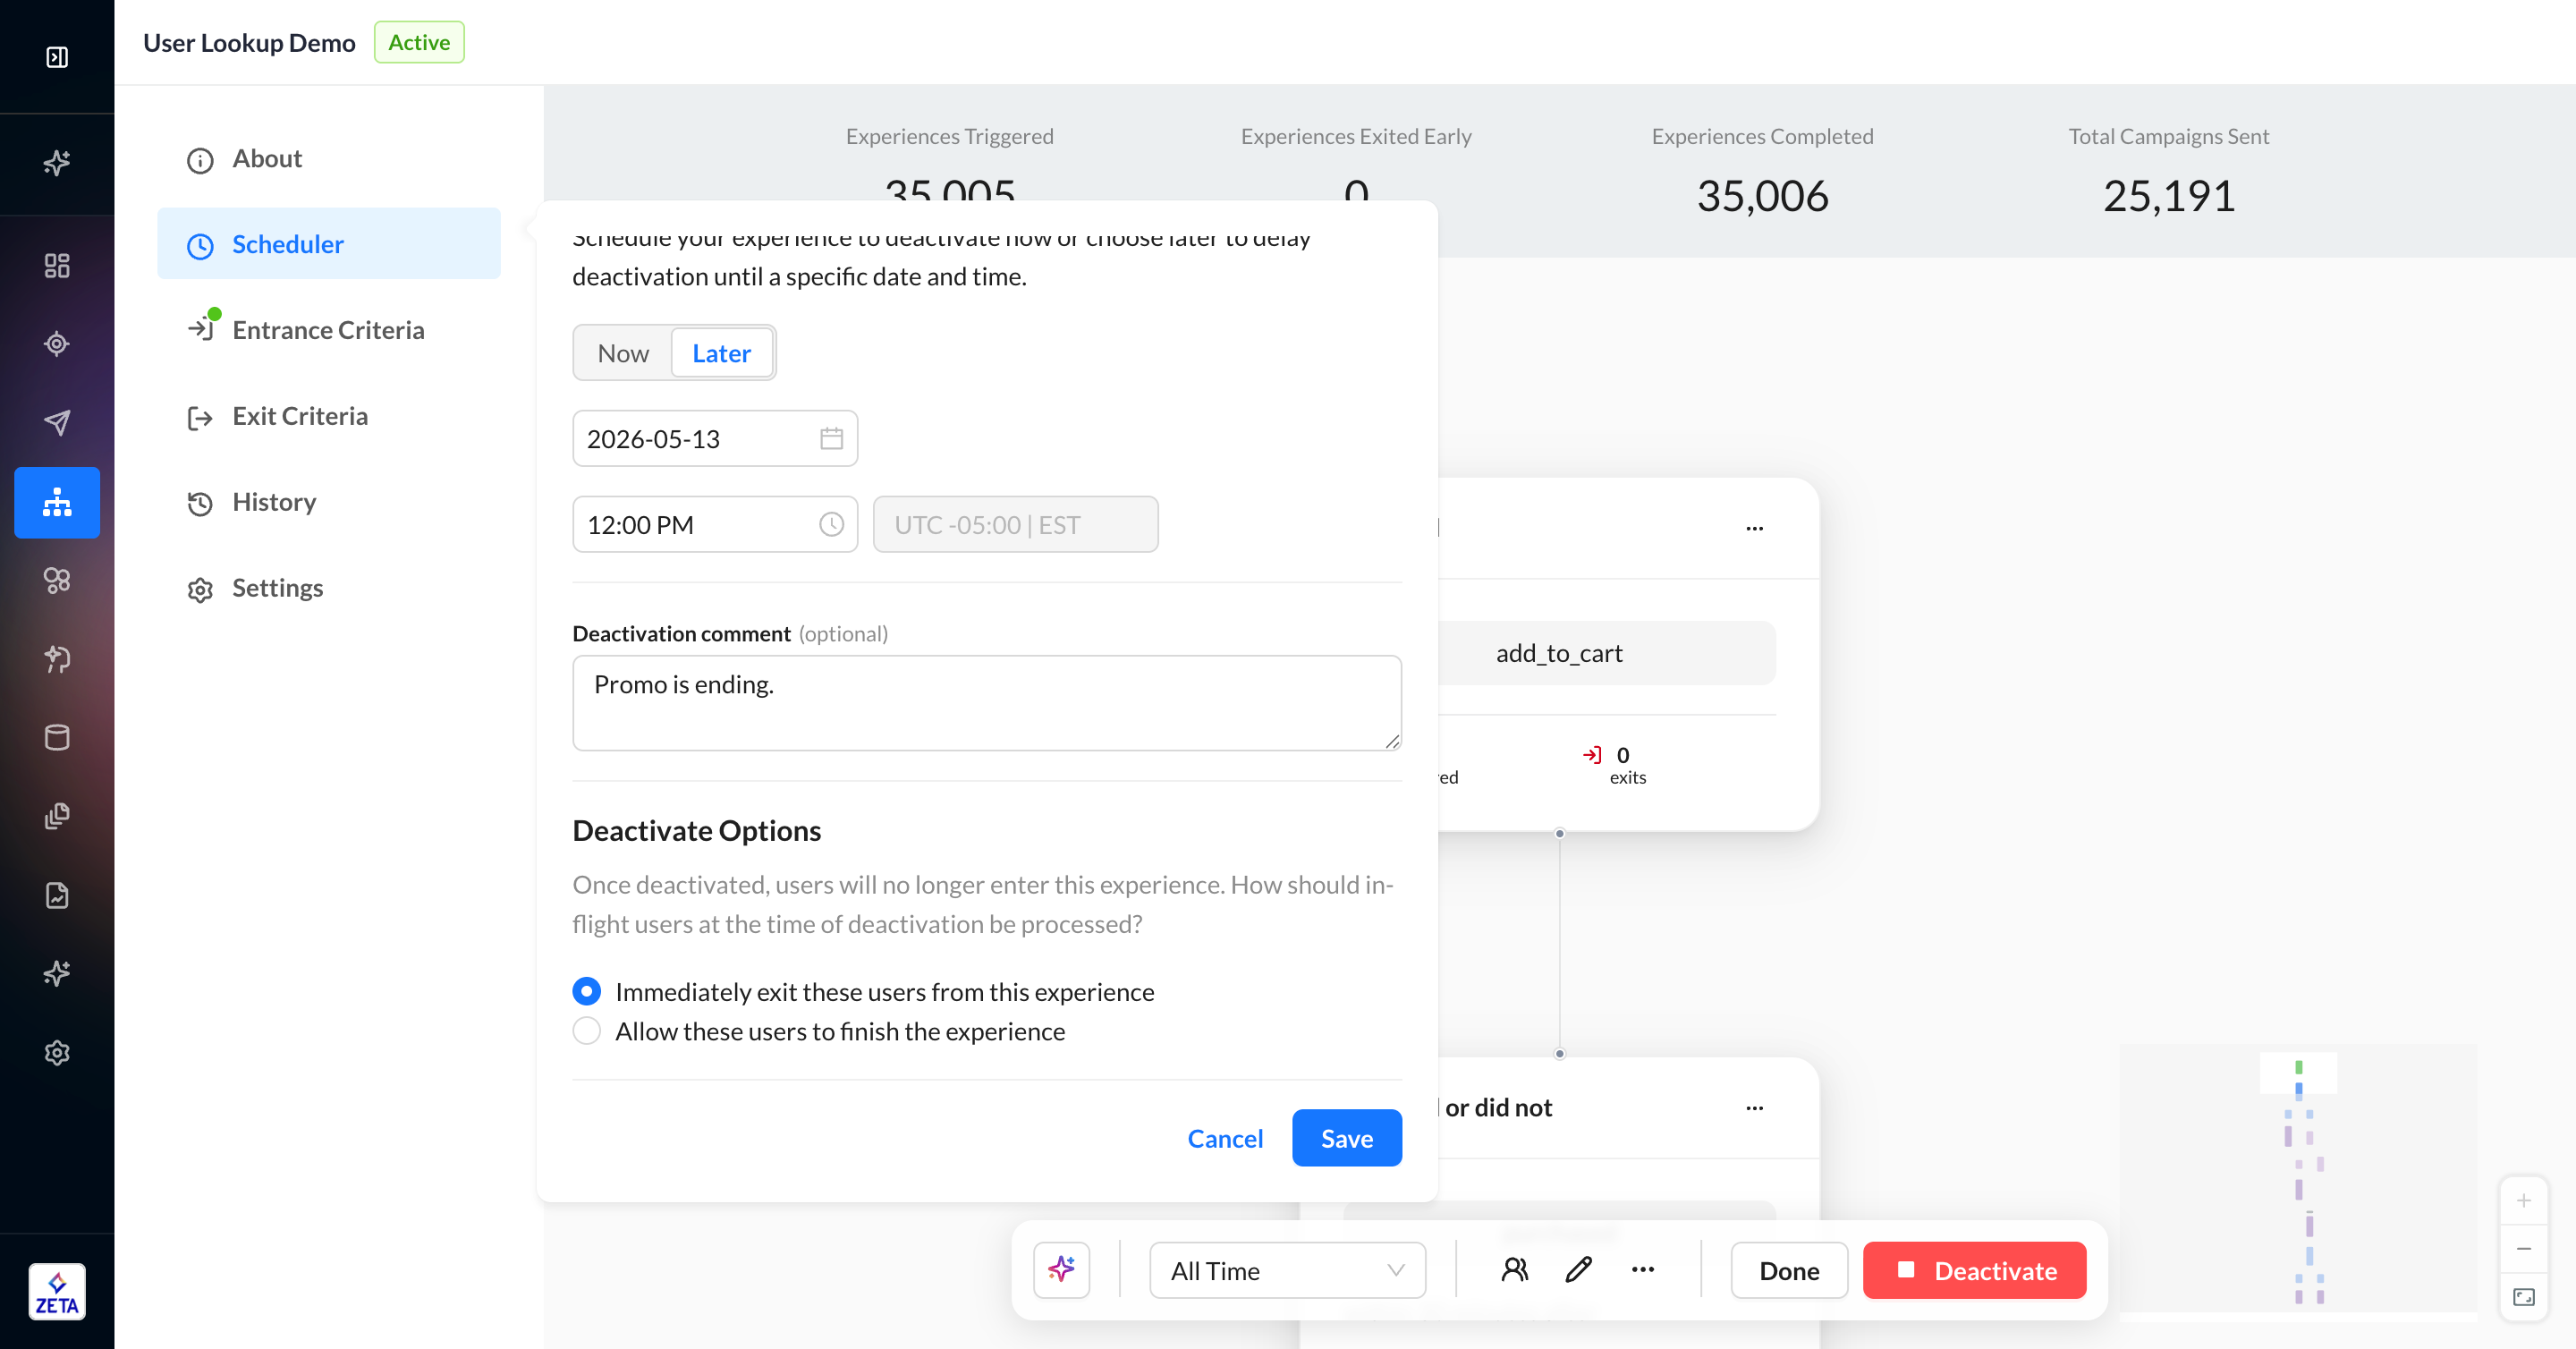
Once your experience is live, you can use the same steps to schedule deactivation. If you schedule your deactivation, you’ll need to select whether you want in-flight users at the time of deactivation to be purged or to continue until exiting. You can always change your scheduling date later by clicking Cancel Scheduled Deactivation in the actions toolbar.
Activation History
Status changes began to be recorded in the History panel upon the release of the feature in early May 2026.
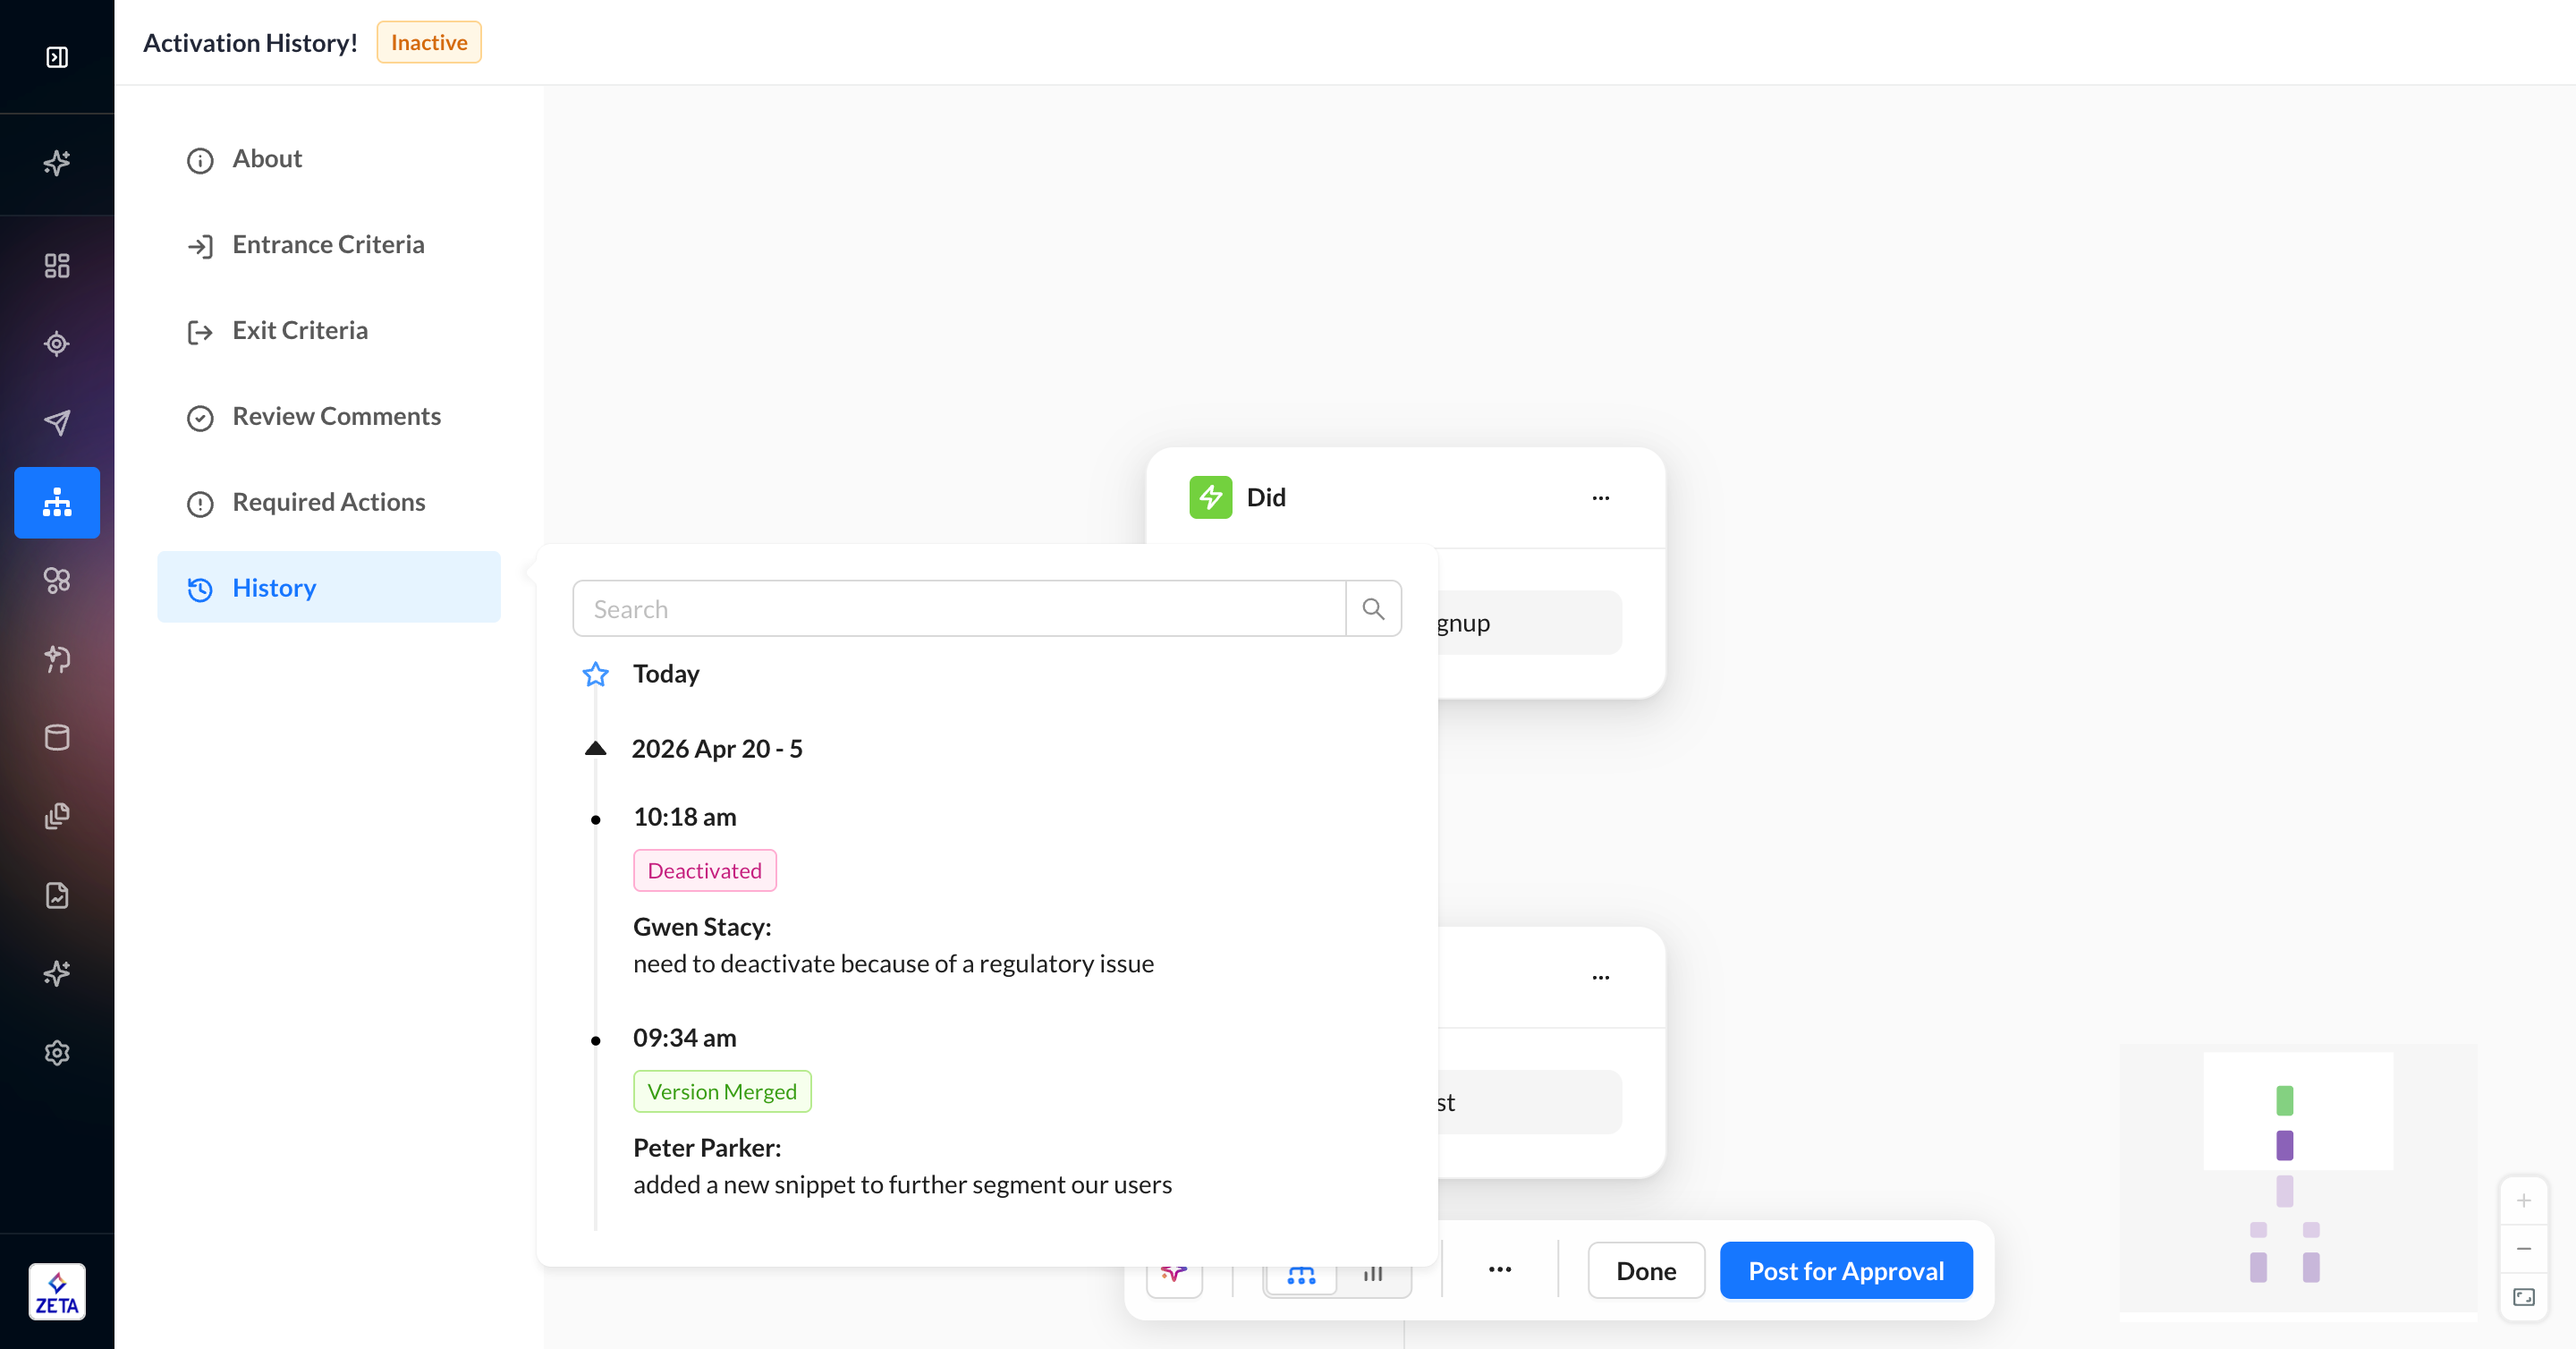
You can now see a timeline of every status change for an experience by clicking the History button in the Build panel. The changes appear in reverse-chronological order and include details such as status, timestamp, initiator, and an optional comment. Search by status, initiator, date, or comment by typing your keywords into the search field and hitting your Enter key.
If there are more multiple changes on a single date, they are grouped and collapsed by default with a number to indicate how many changes are included. You can expand the date by clicking the arrow button — up is expanded and down is collapsed. A change that occurred on a single date will appear with a circle icon (no arrows) in the timeline.
Status changes include:
-
Created
-
Activated
-
Deactivated
-
Activation Scheduled
-
Deactivation Scheduled
-
Version Merged
-
If the Experience Approvals Management feature is enabled, these status changes will also appear: Posted for Approval, Approved, Rejected
The history log can only be accessed for versions while they exist. If a version is merged into a live experience, this status change will appear in the main experience as Version Merged. If a version is deleted, you won’t be able to access its history.
Testing State
Need some extra confidence before activation? You can move your experience to Testing status to check volume and actions for a small set of specified test users. An experience or version must first be in draft status to be tested this way.
1. Click the bug icon in the actions toolbar to open the testing state.
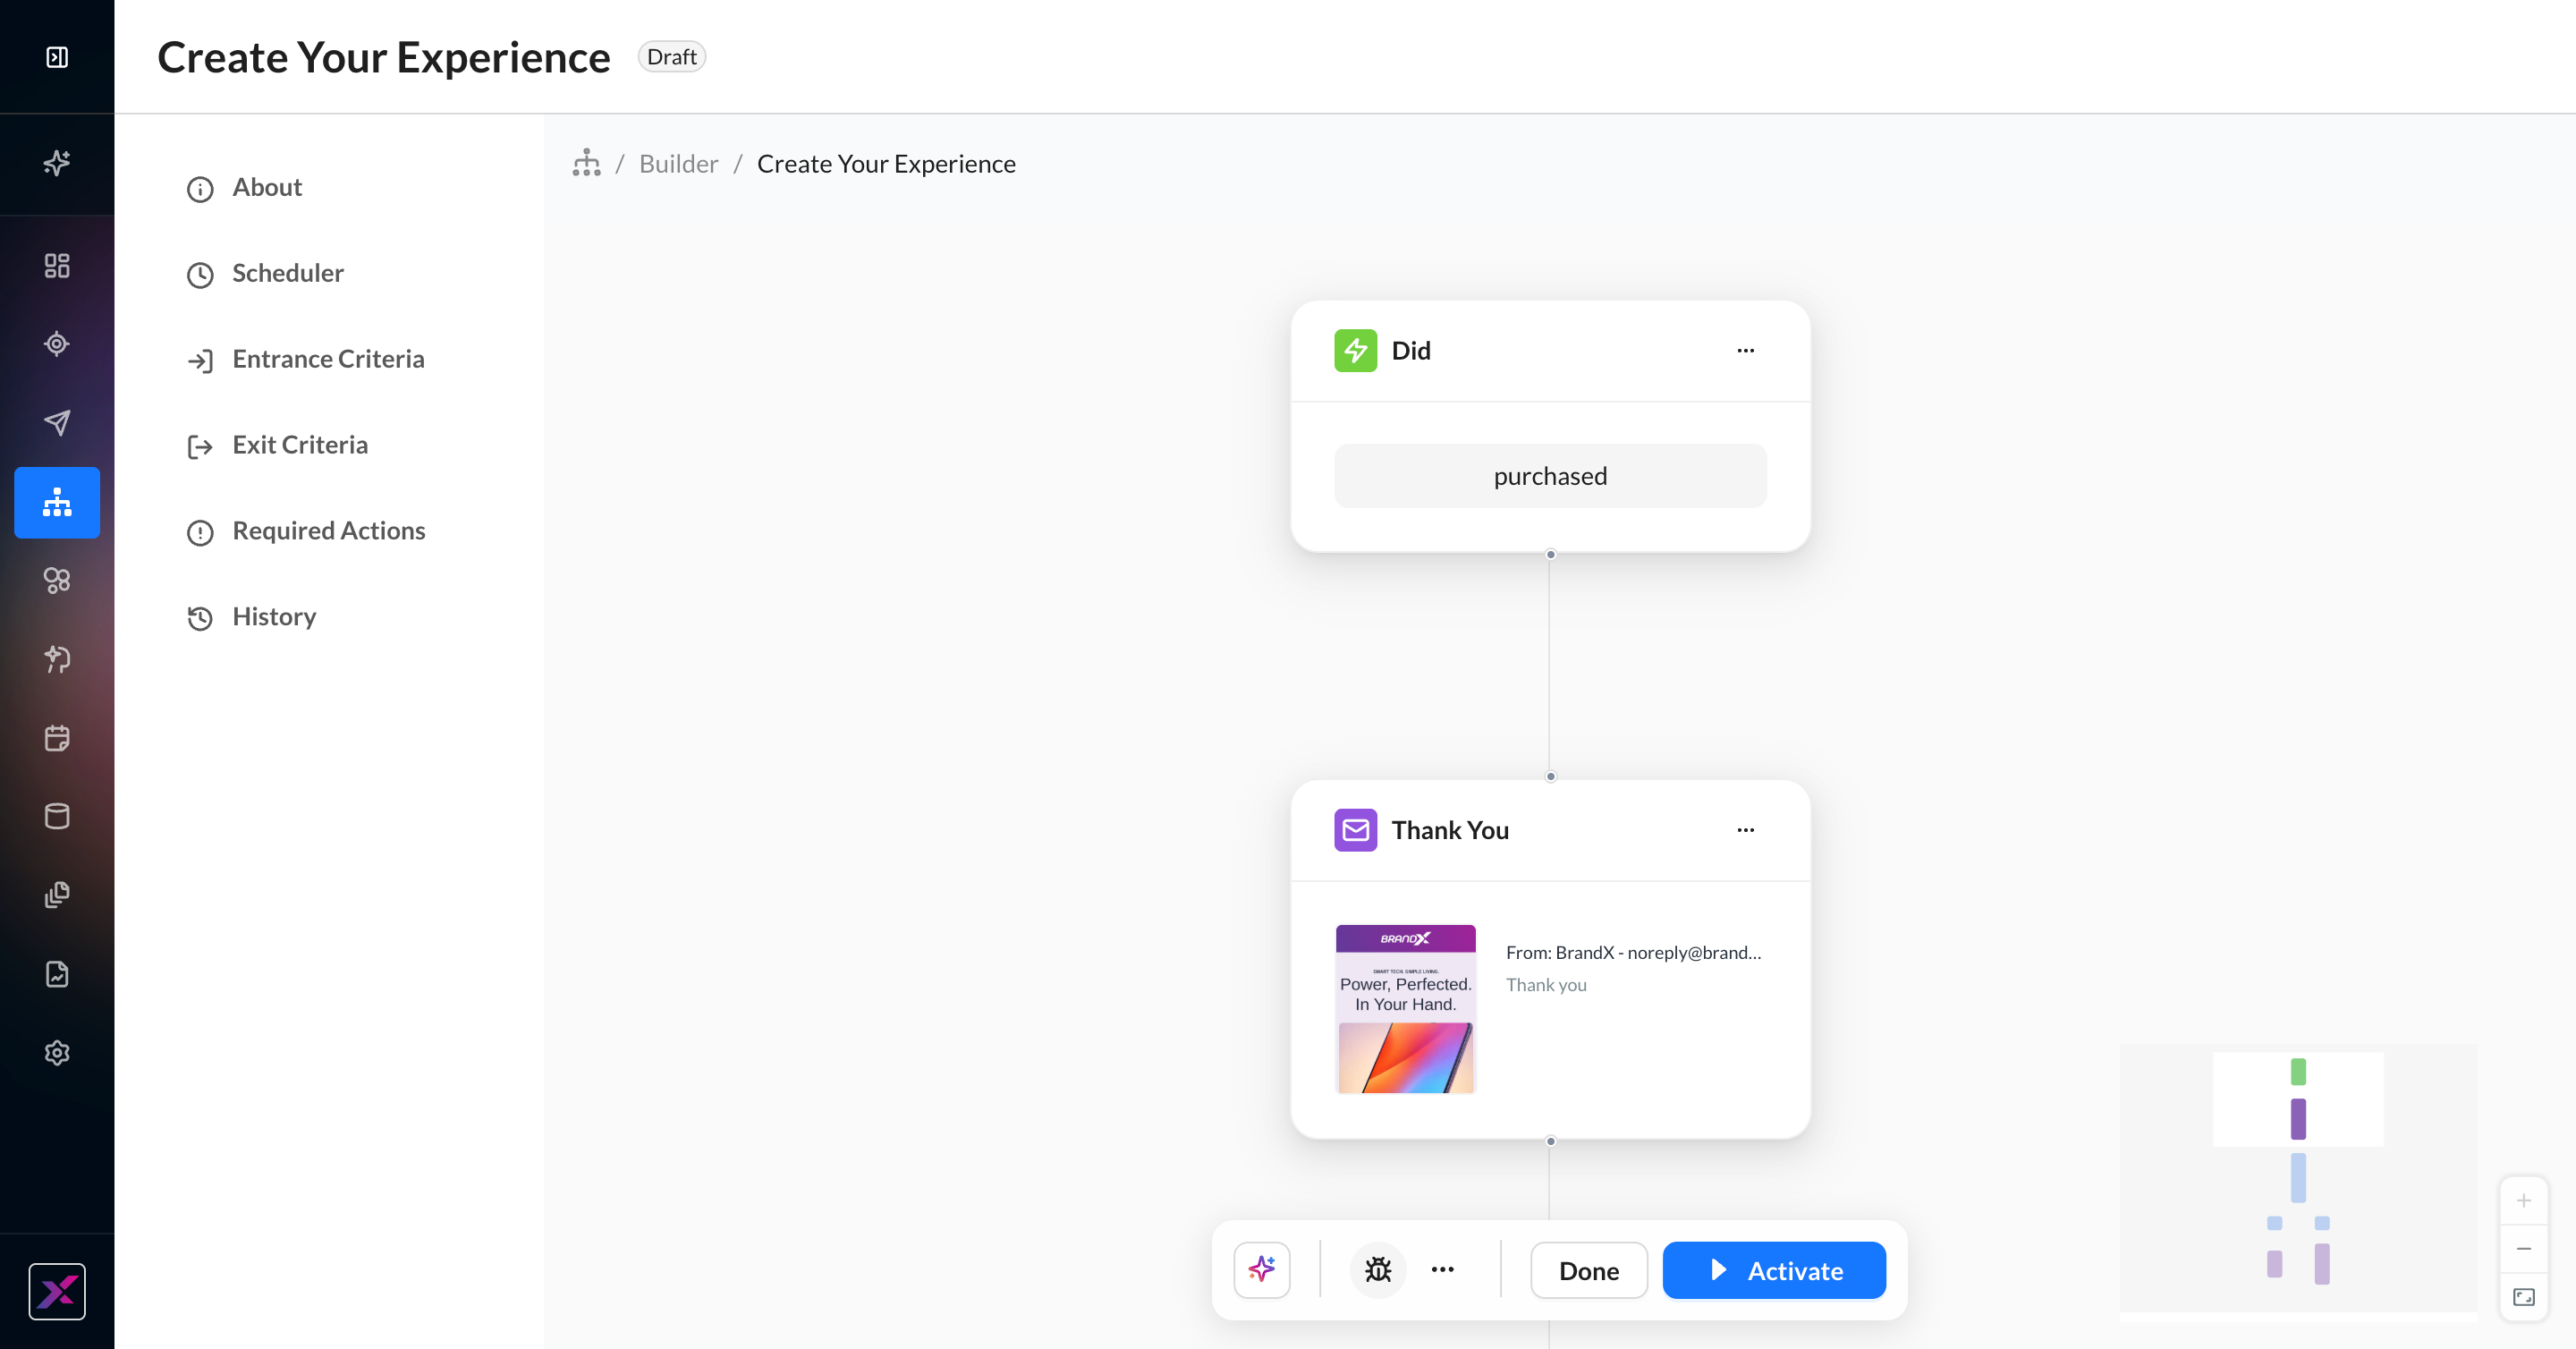
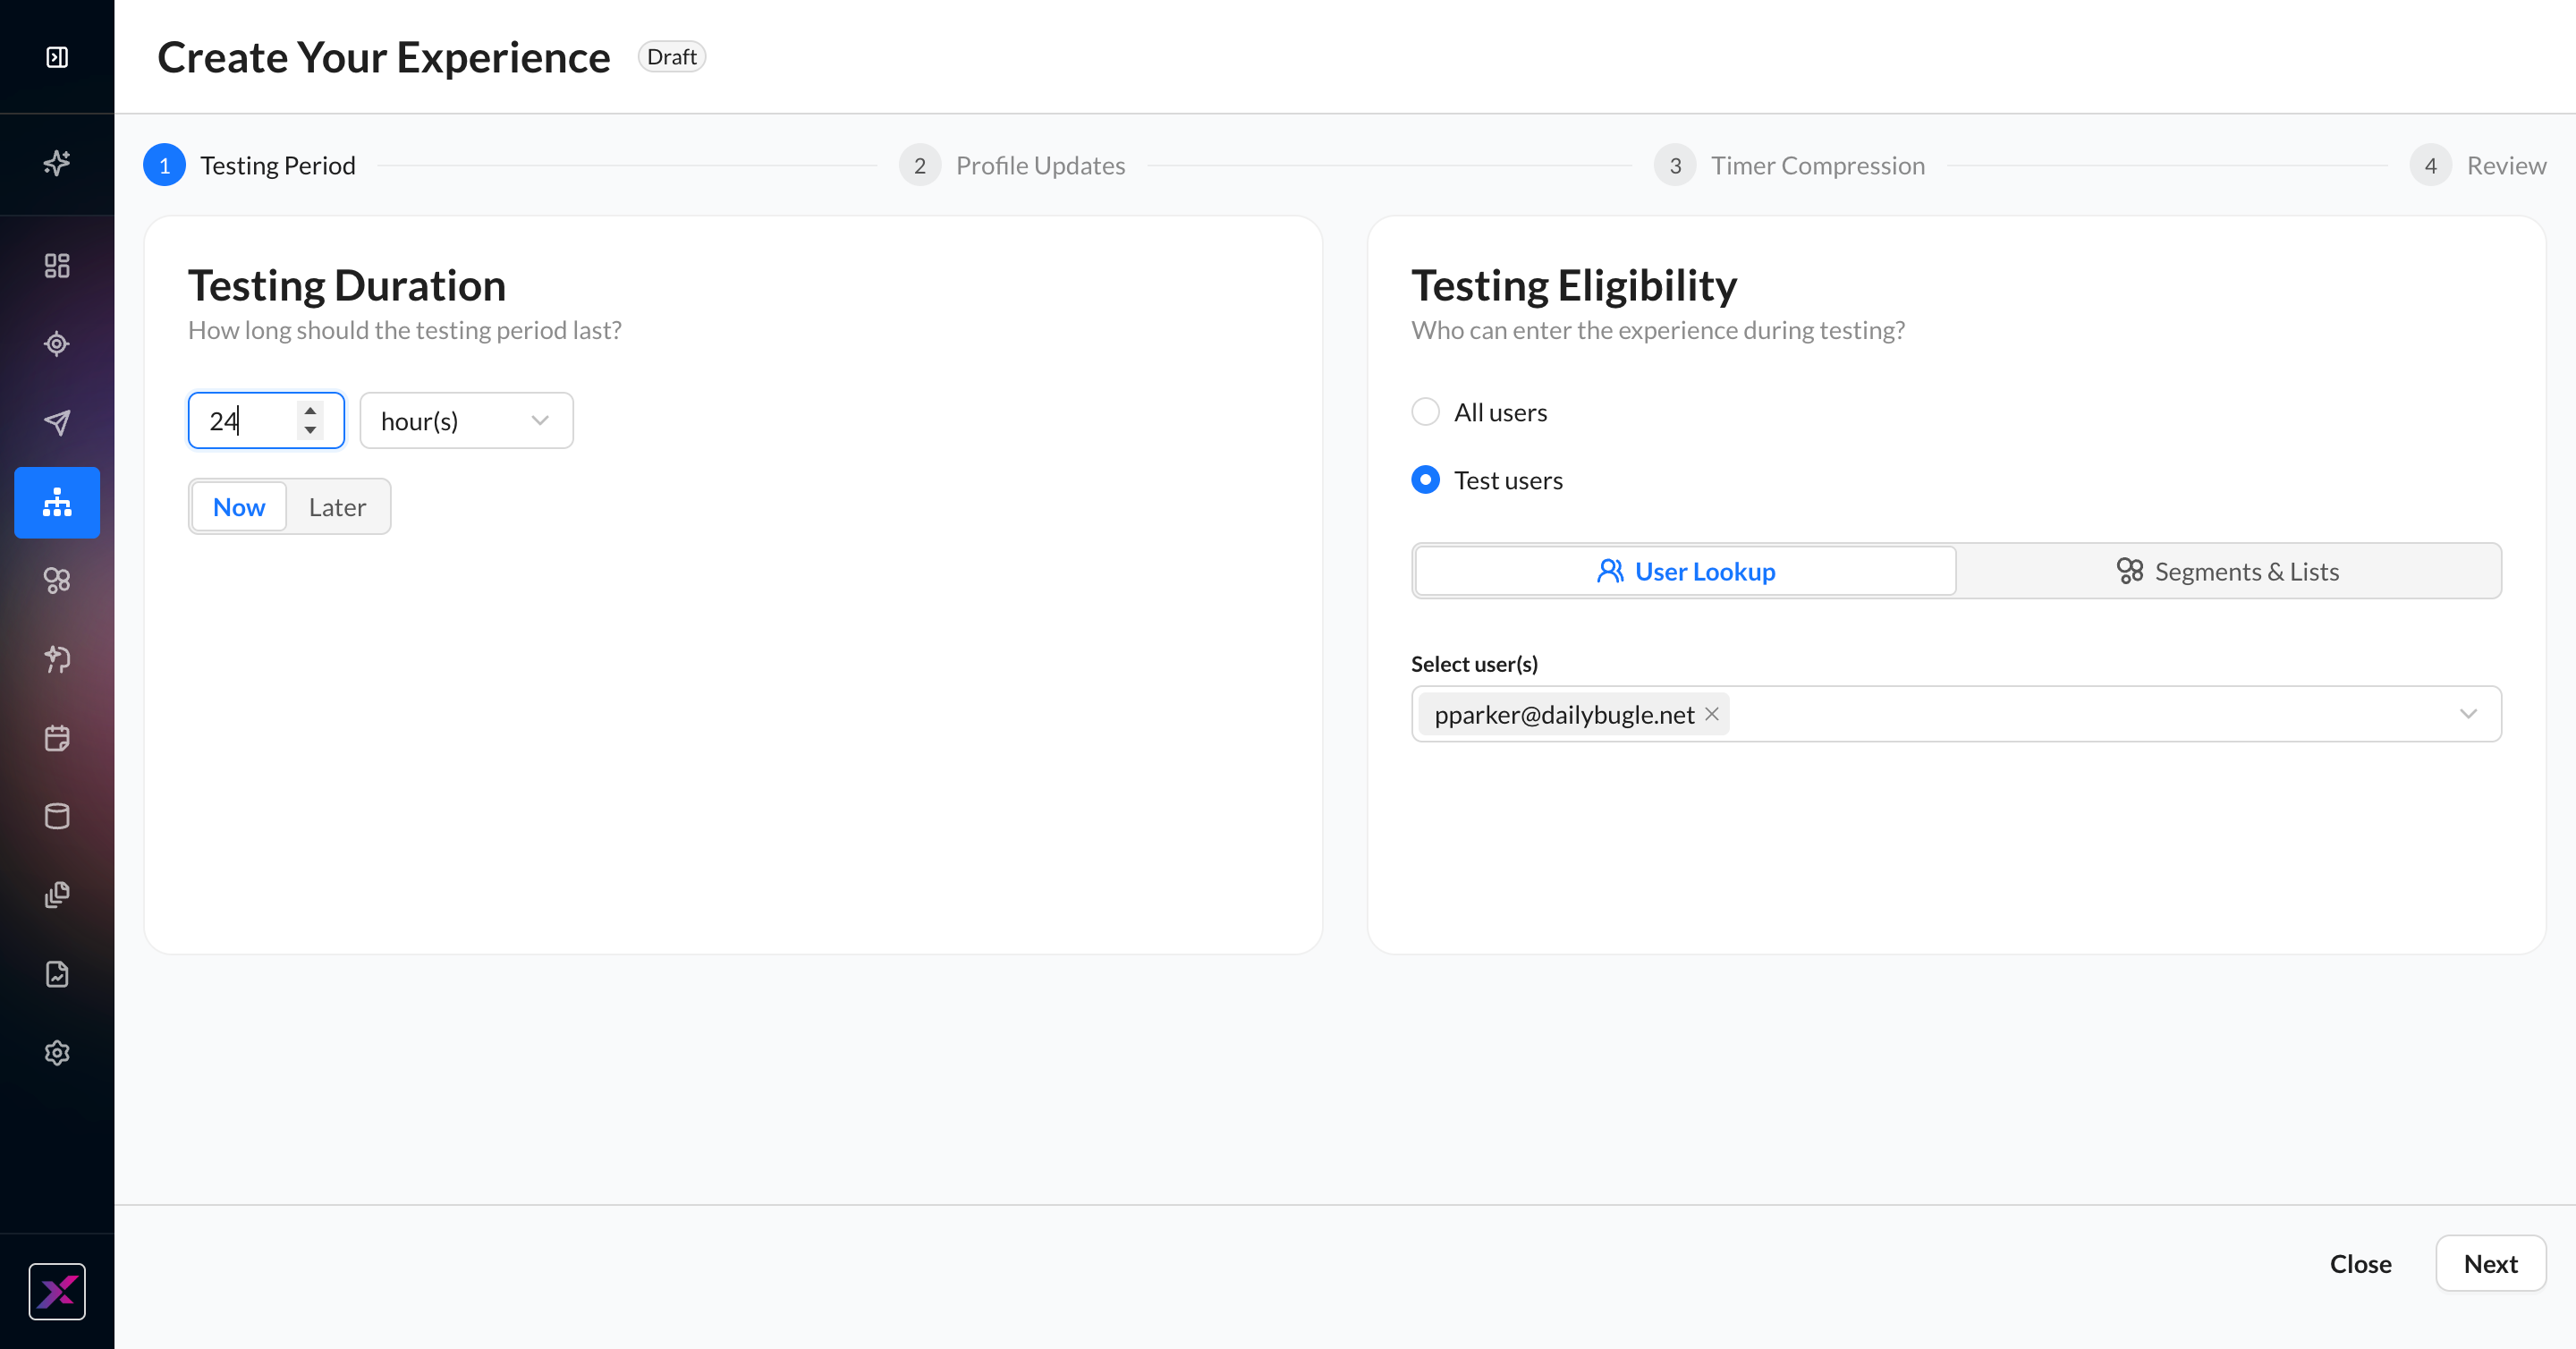
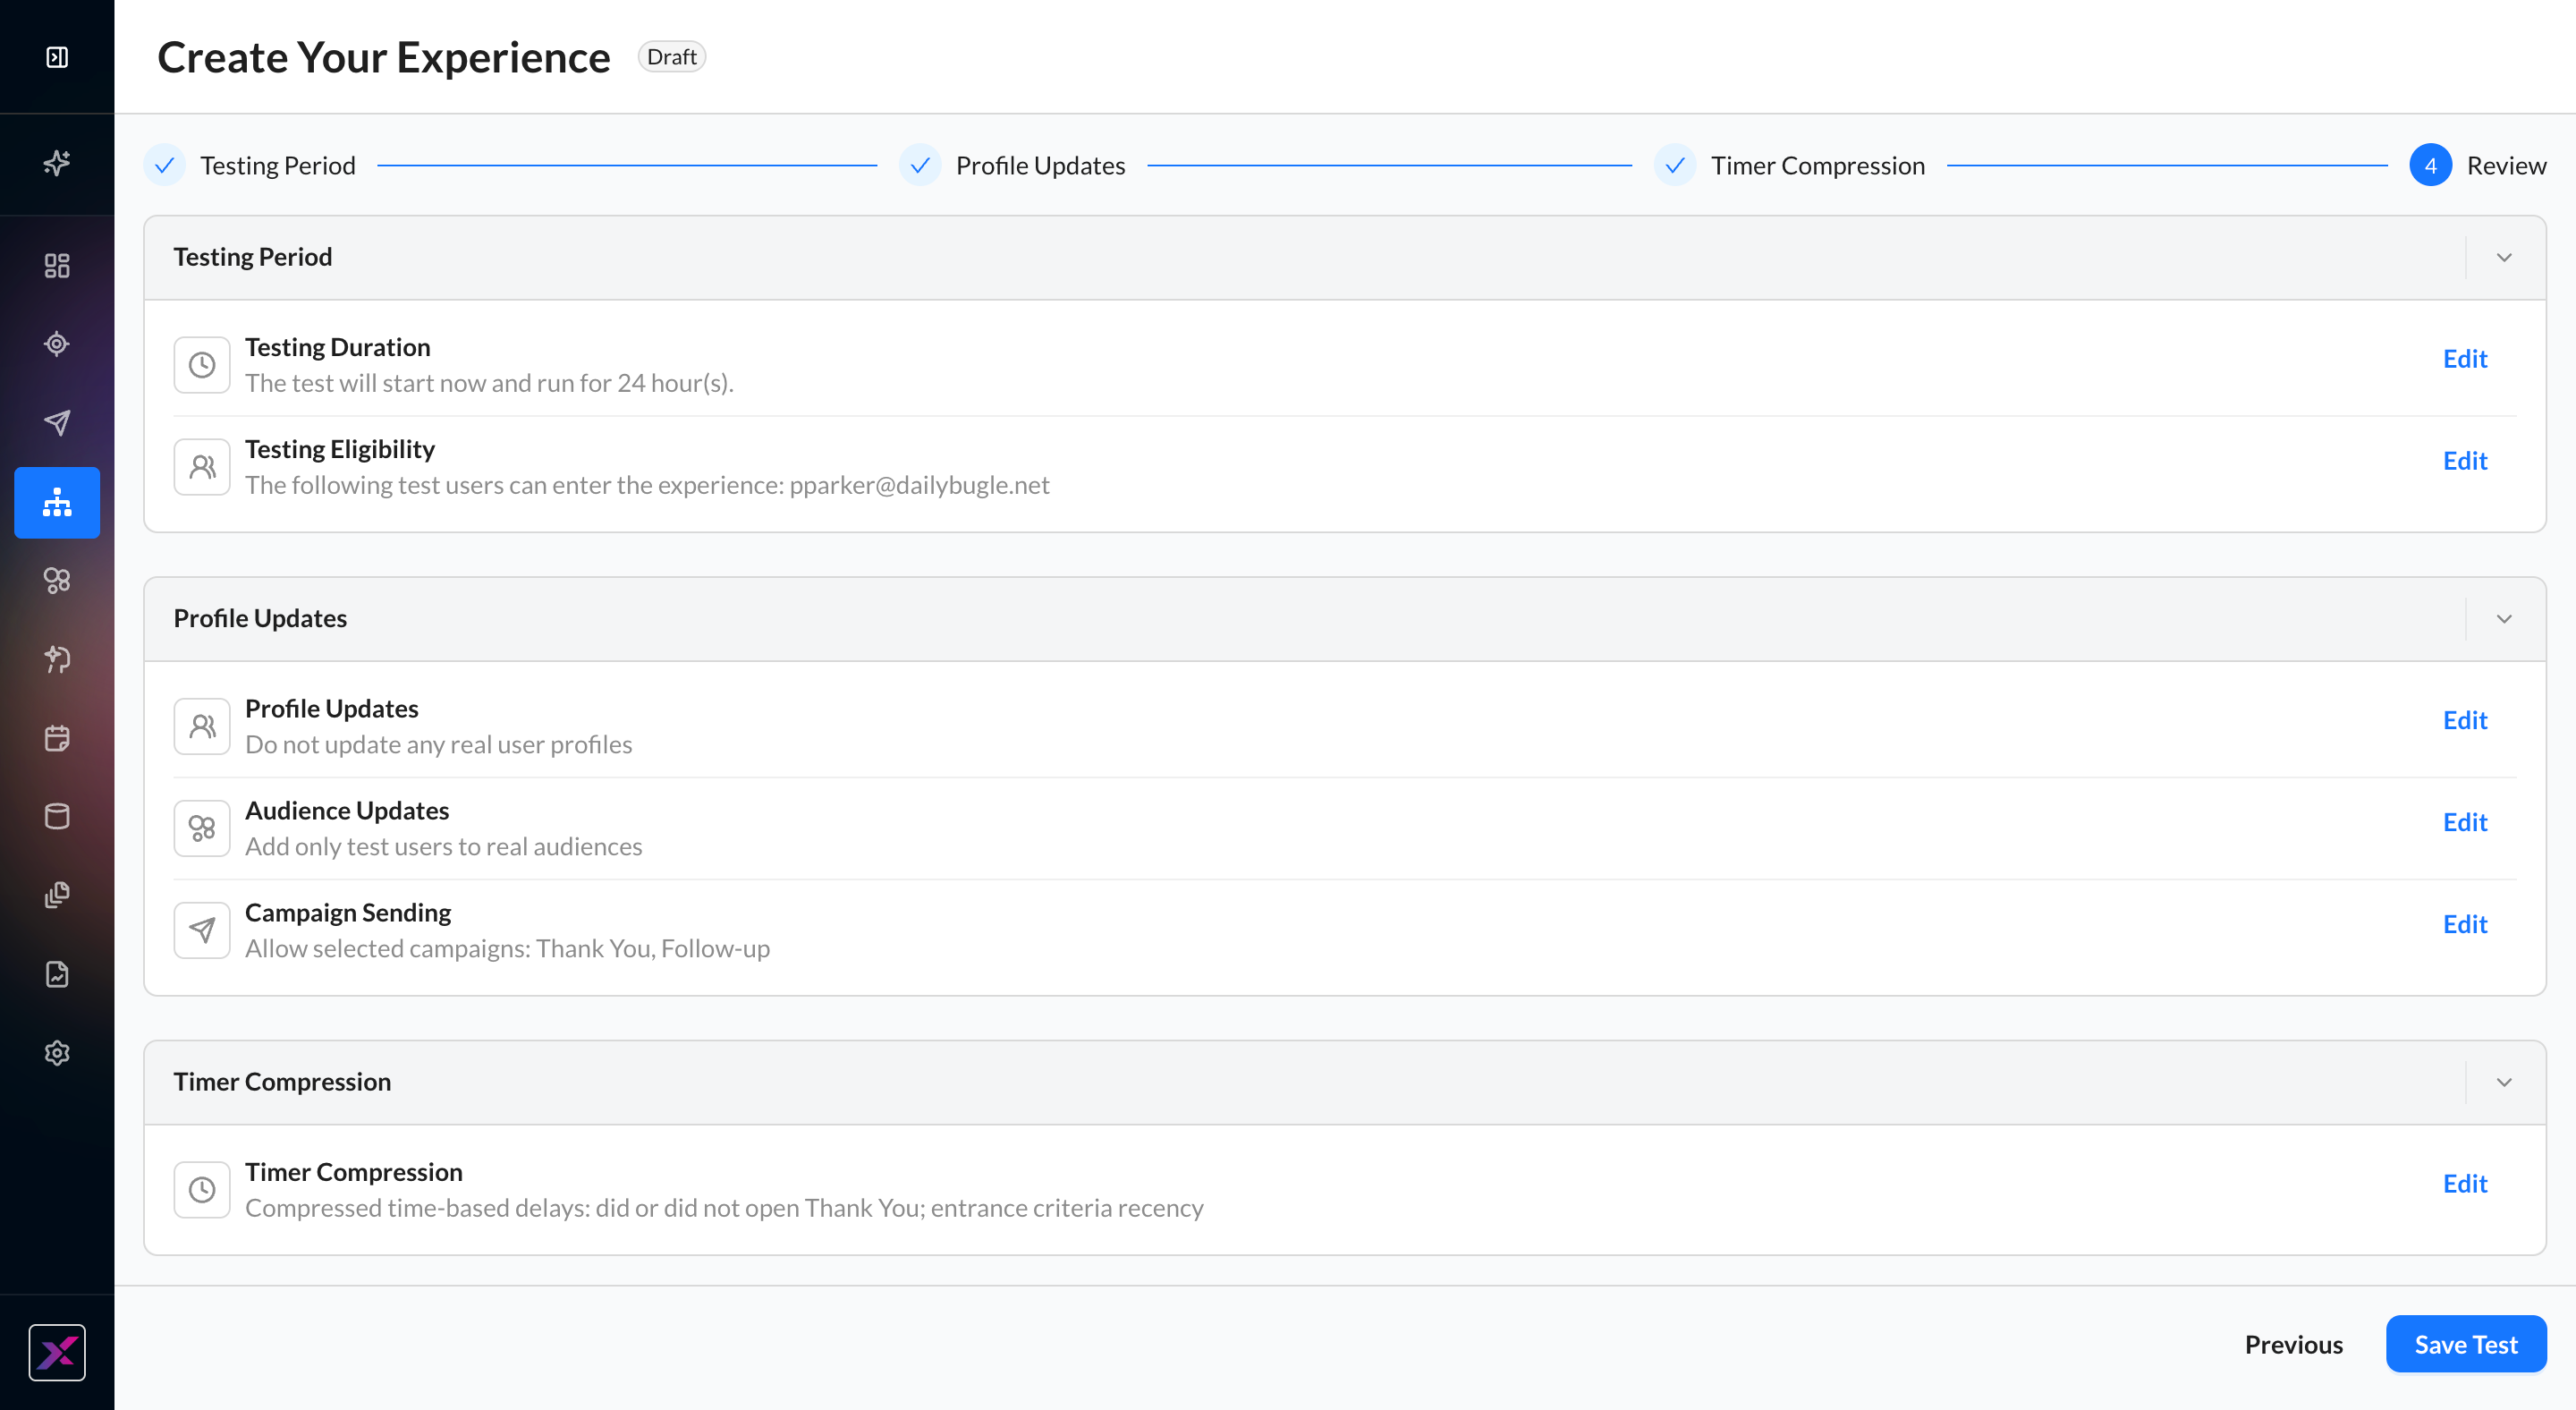
2. Set the testing duration and eligibility. A test can be active up to 24 hours at a time, and it can be scheduled. Testing eligibility will determine if you want any eligible user to enter the experience during the test or only specified users, so that you can further customize if you want actions to be applied to these test users.
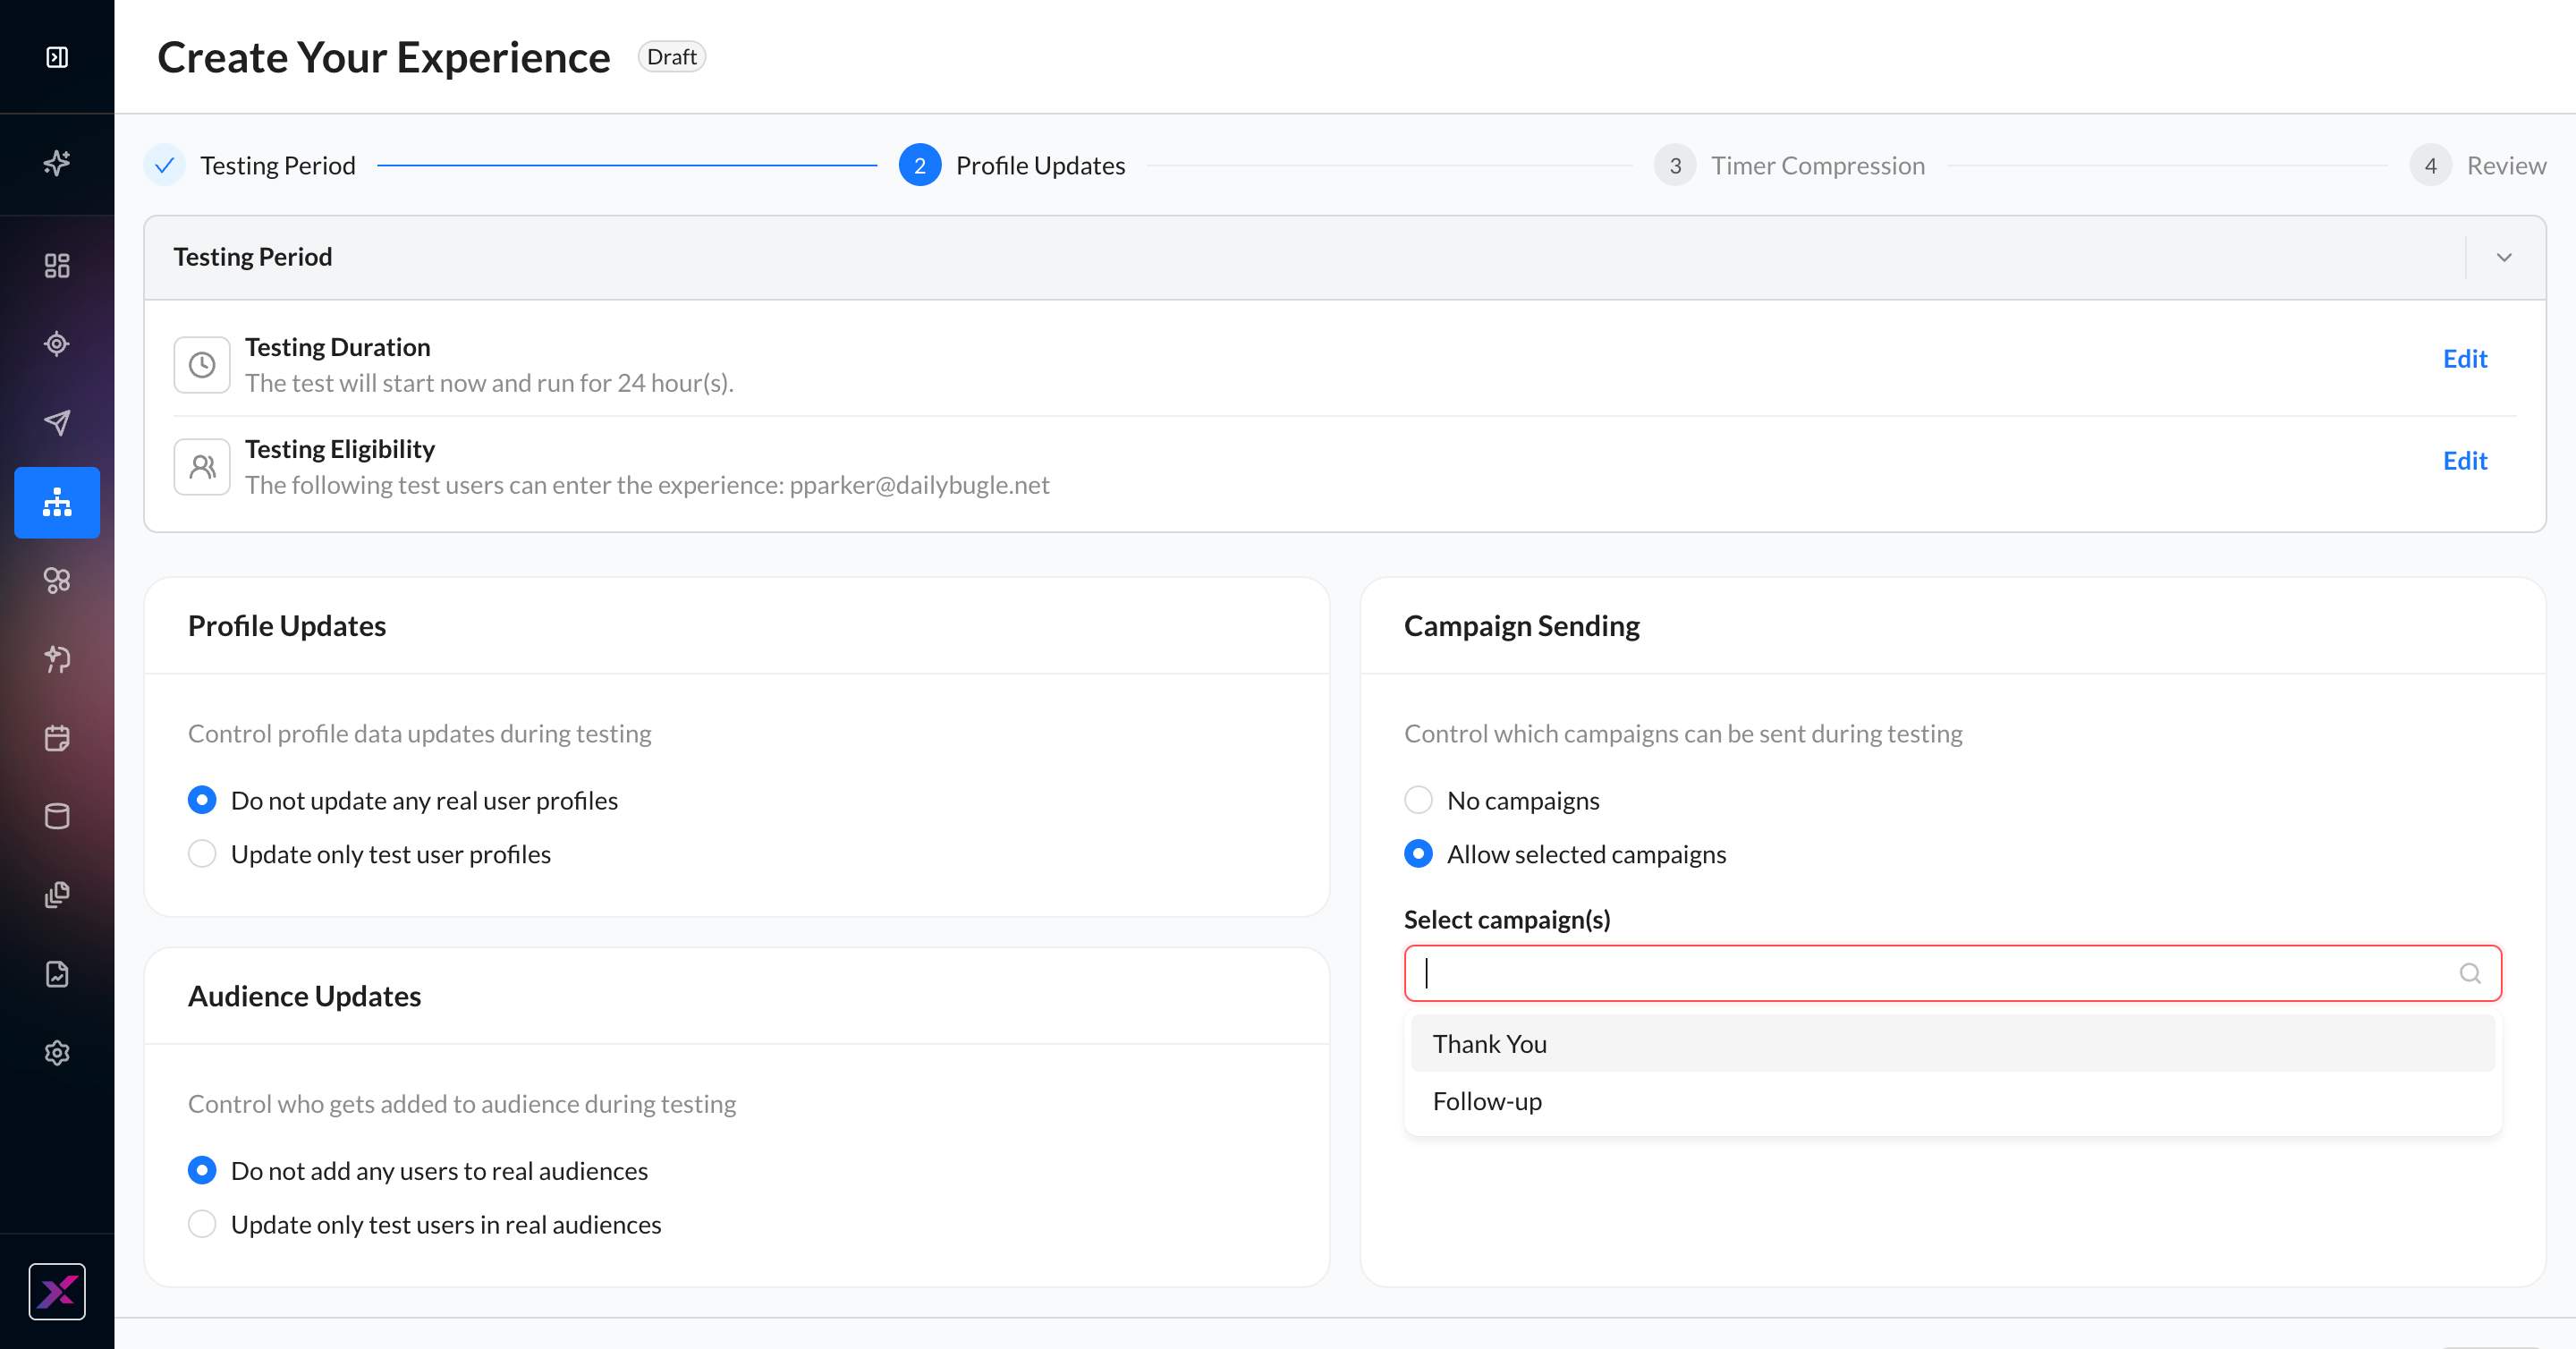
3. Next, select which profile updates you want applied to the specified test users. You can choose from user profile updates, audience updates, and campaign sends. If you selected “All users” on the previous screen, then this step is skipped because we don’t want regular end-users to get profile updates reserved for active experiences.
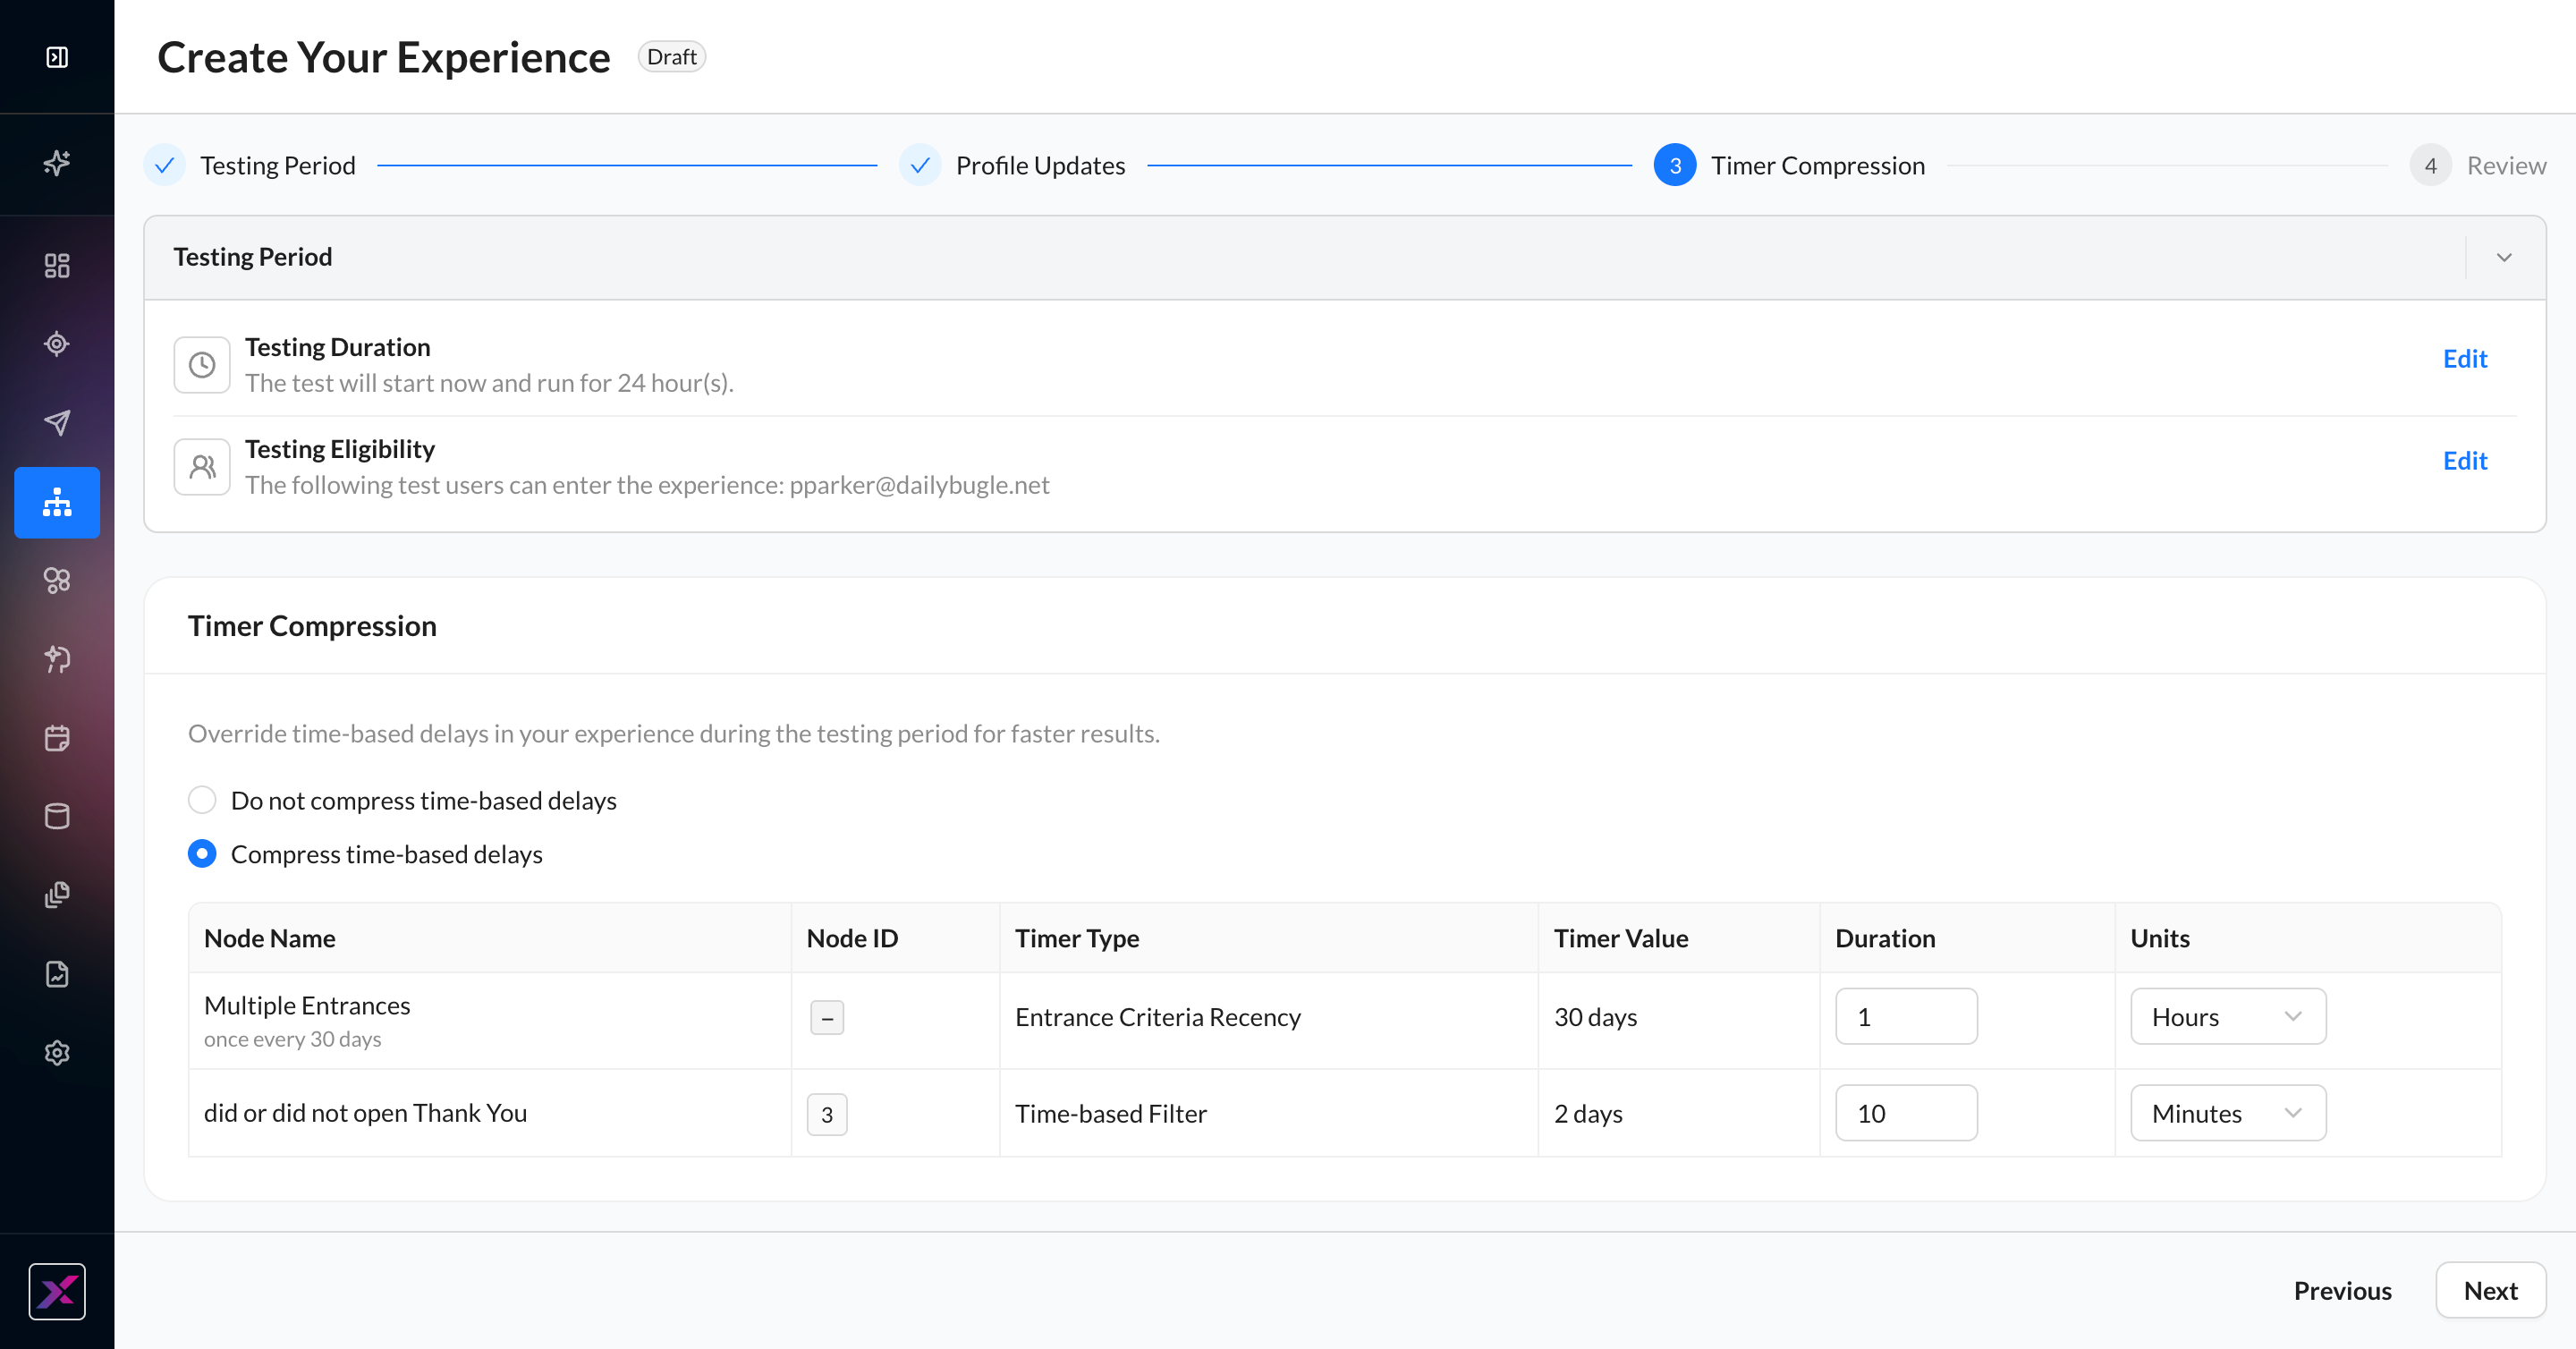
4. In the Timer Compression step, you will see all time-based delays from the experience, including entrance criteria. You can choose to override each timer individually so that they can fit into the 24-hour test period, and you don’t have to wait for days, weeks, or months for the full-length experience to complete. Changing the timers here will not affect the actual timers in the main experience.
5. Review your settings and click Save Test to begin.
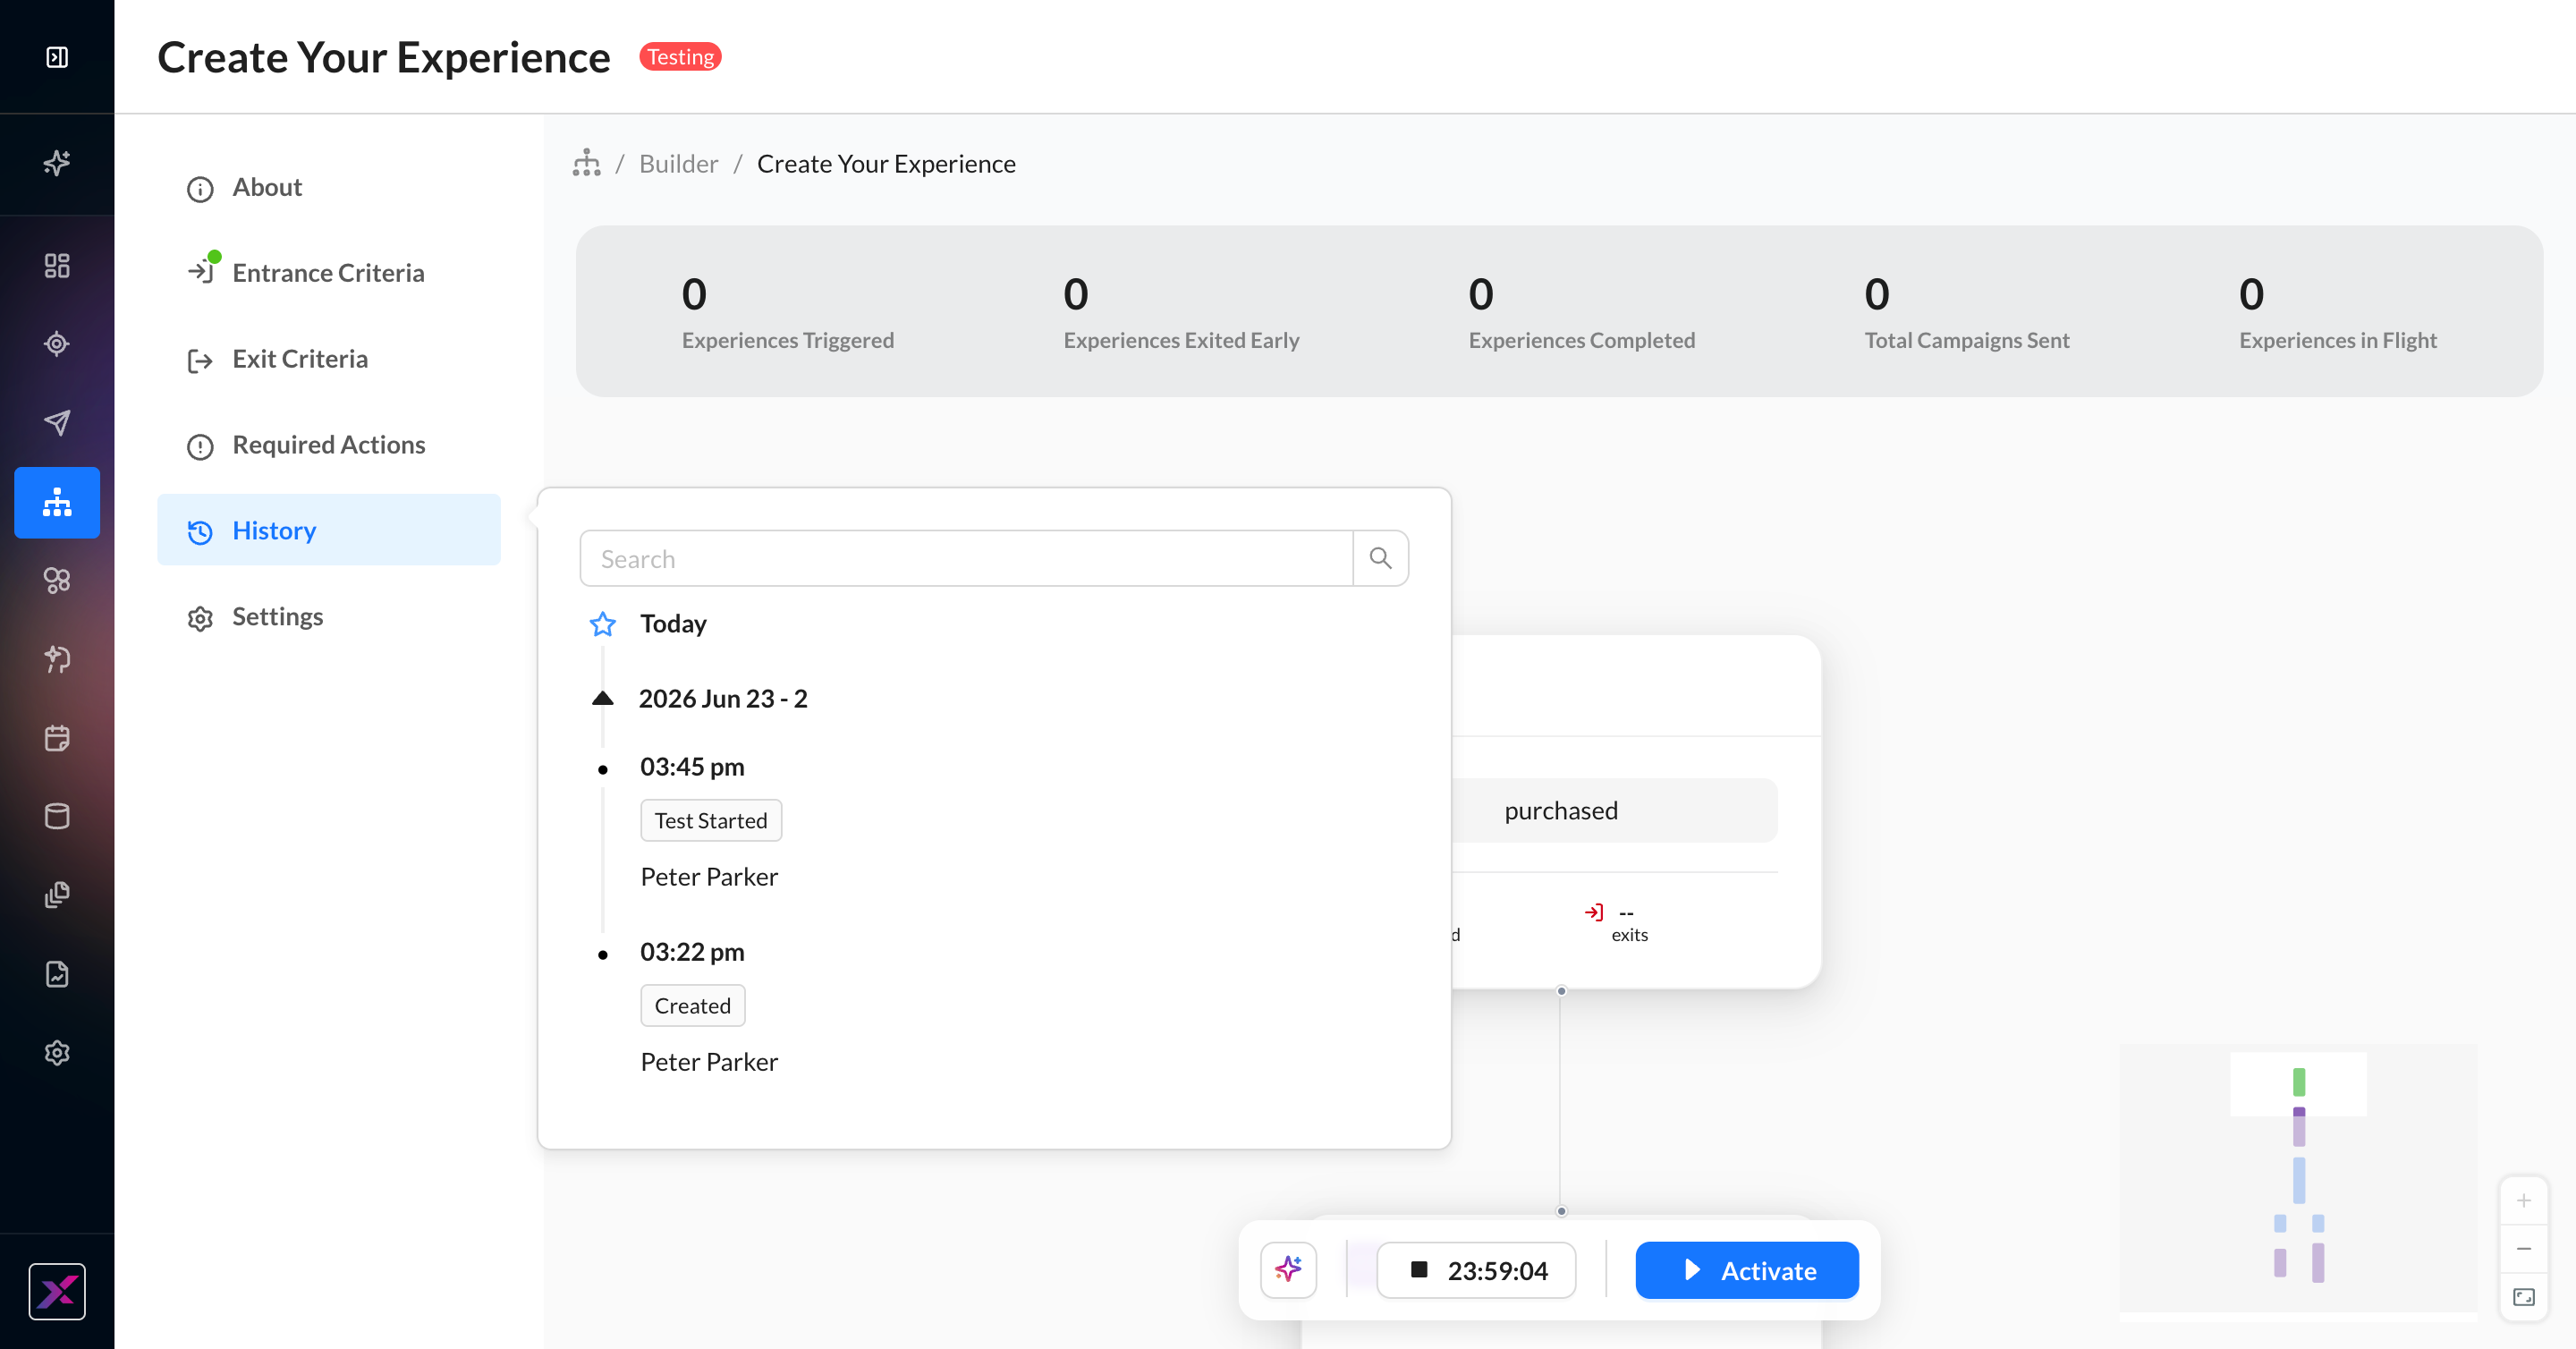
6. You will be returned to the canvas to see the status changed, Testing in the top bar, as well as the countdown to the end of the test in the actions toolbar. Starting and ending a test appear in the History panel.
7. For tests with “All users” allowed, any end-user who does the trigger event will enter the experience, but nothing will happen to them — no campaign sends, no profile updates, etc. However, the top bar and node-level metrics will still update. This is helpful to verify volume and user movement through the experience before activation. For tests where these actions are enabled, you can look up these test users via the regular user lookup tool and see a testing_run_id in the profile-level events.
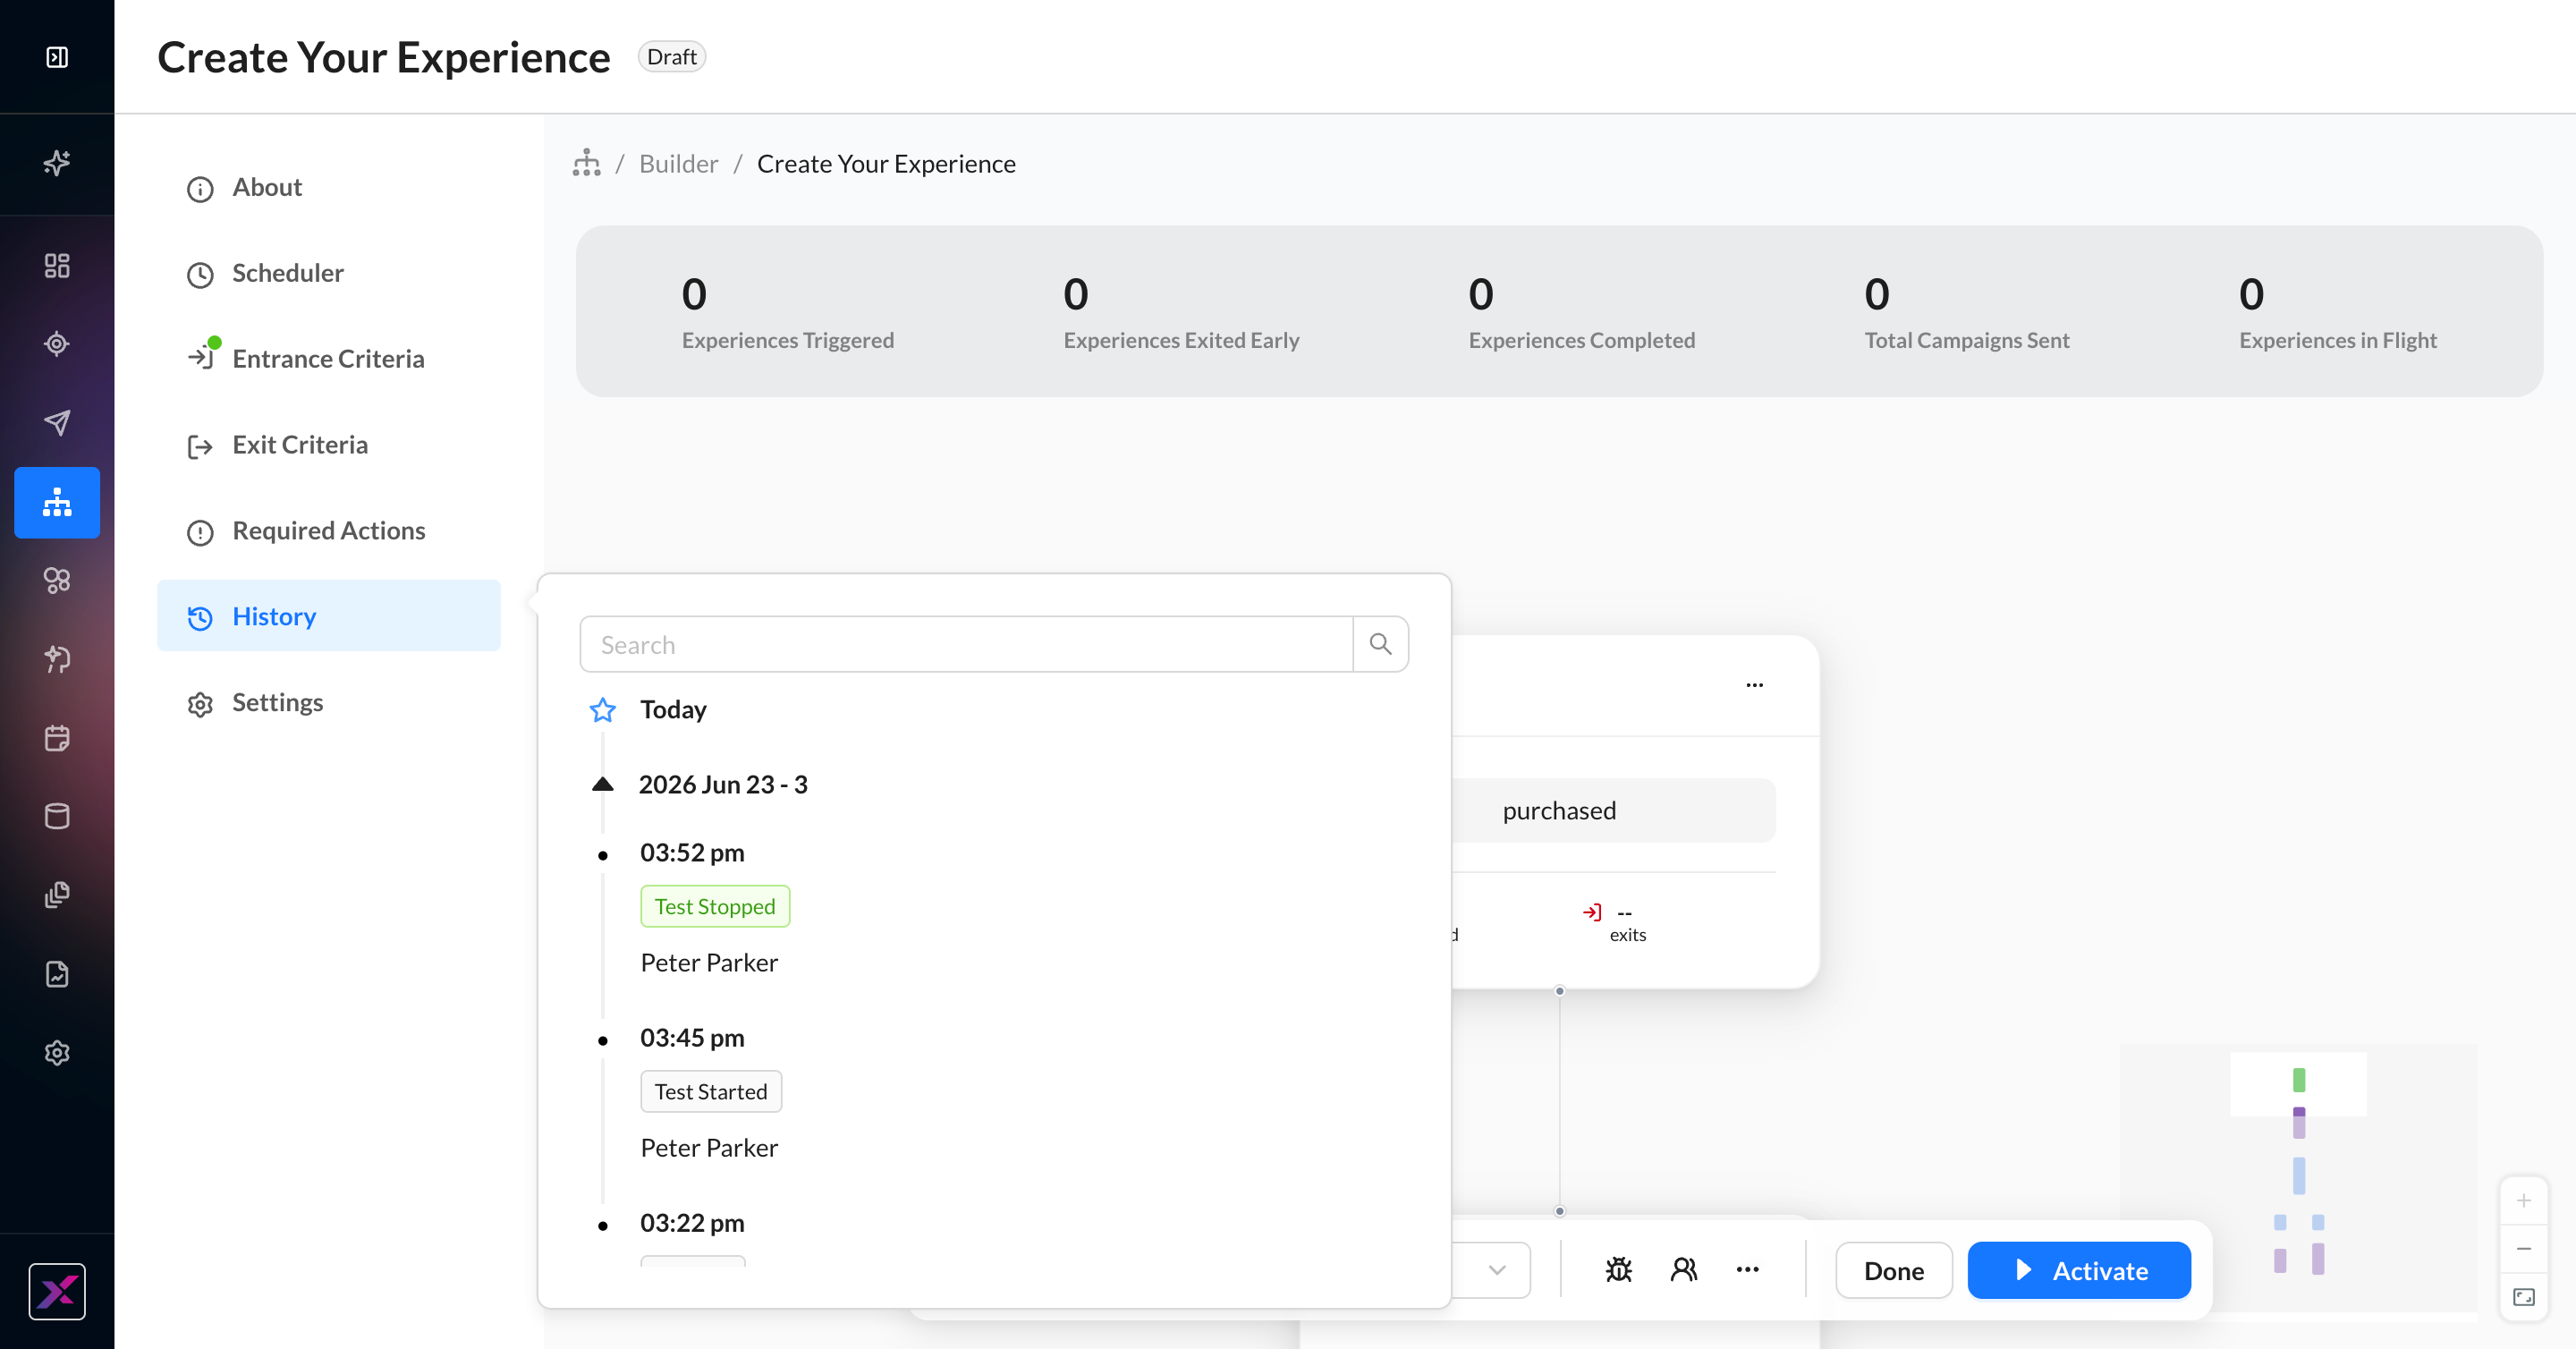
8. To stop a test early, simply click the stop button in the actions toolbar to open the confirmation modal.

9. When you stop a test, the log is recorded in the History panel.
10. Upon activation, the analytics will reset to 0, and the test user data will be cleared.
Deactivation and In-Flight Users
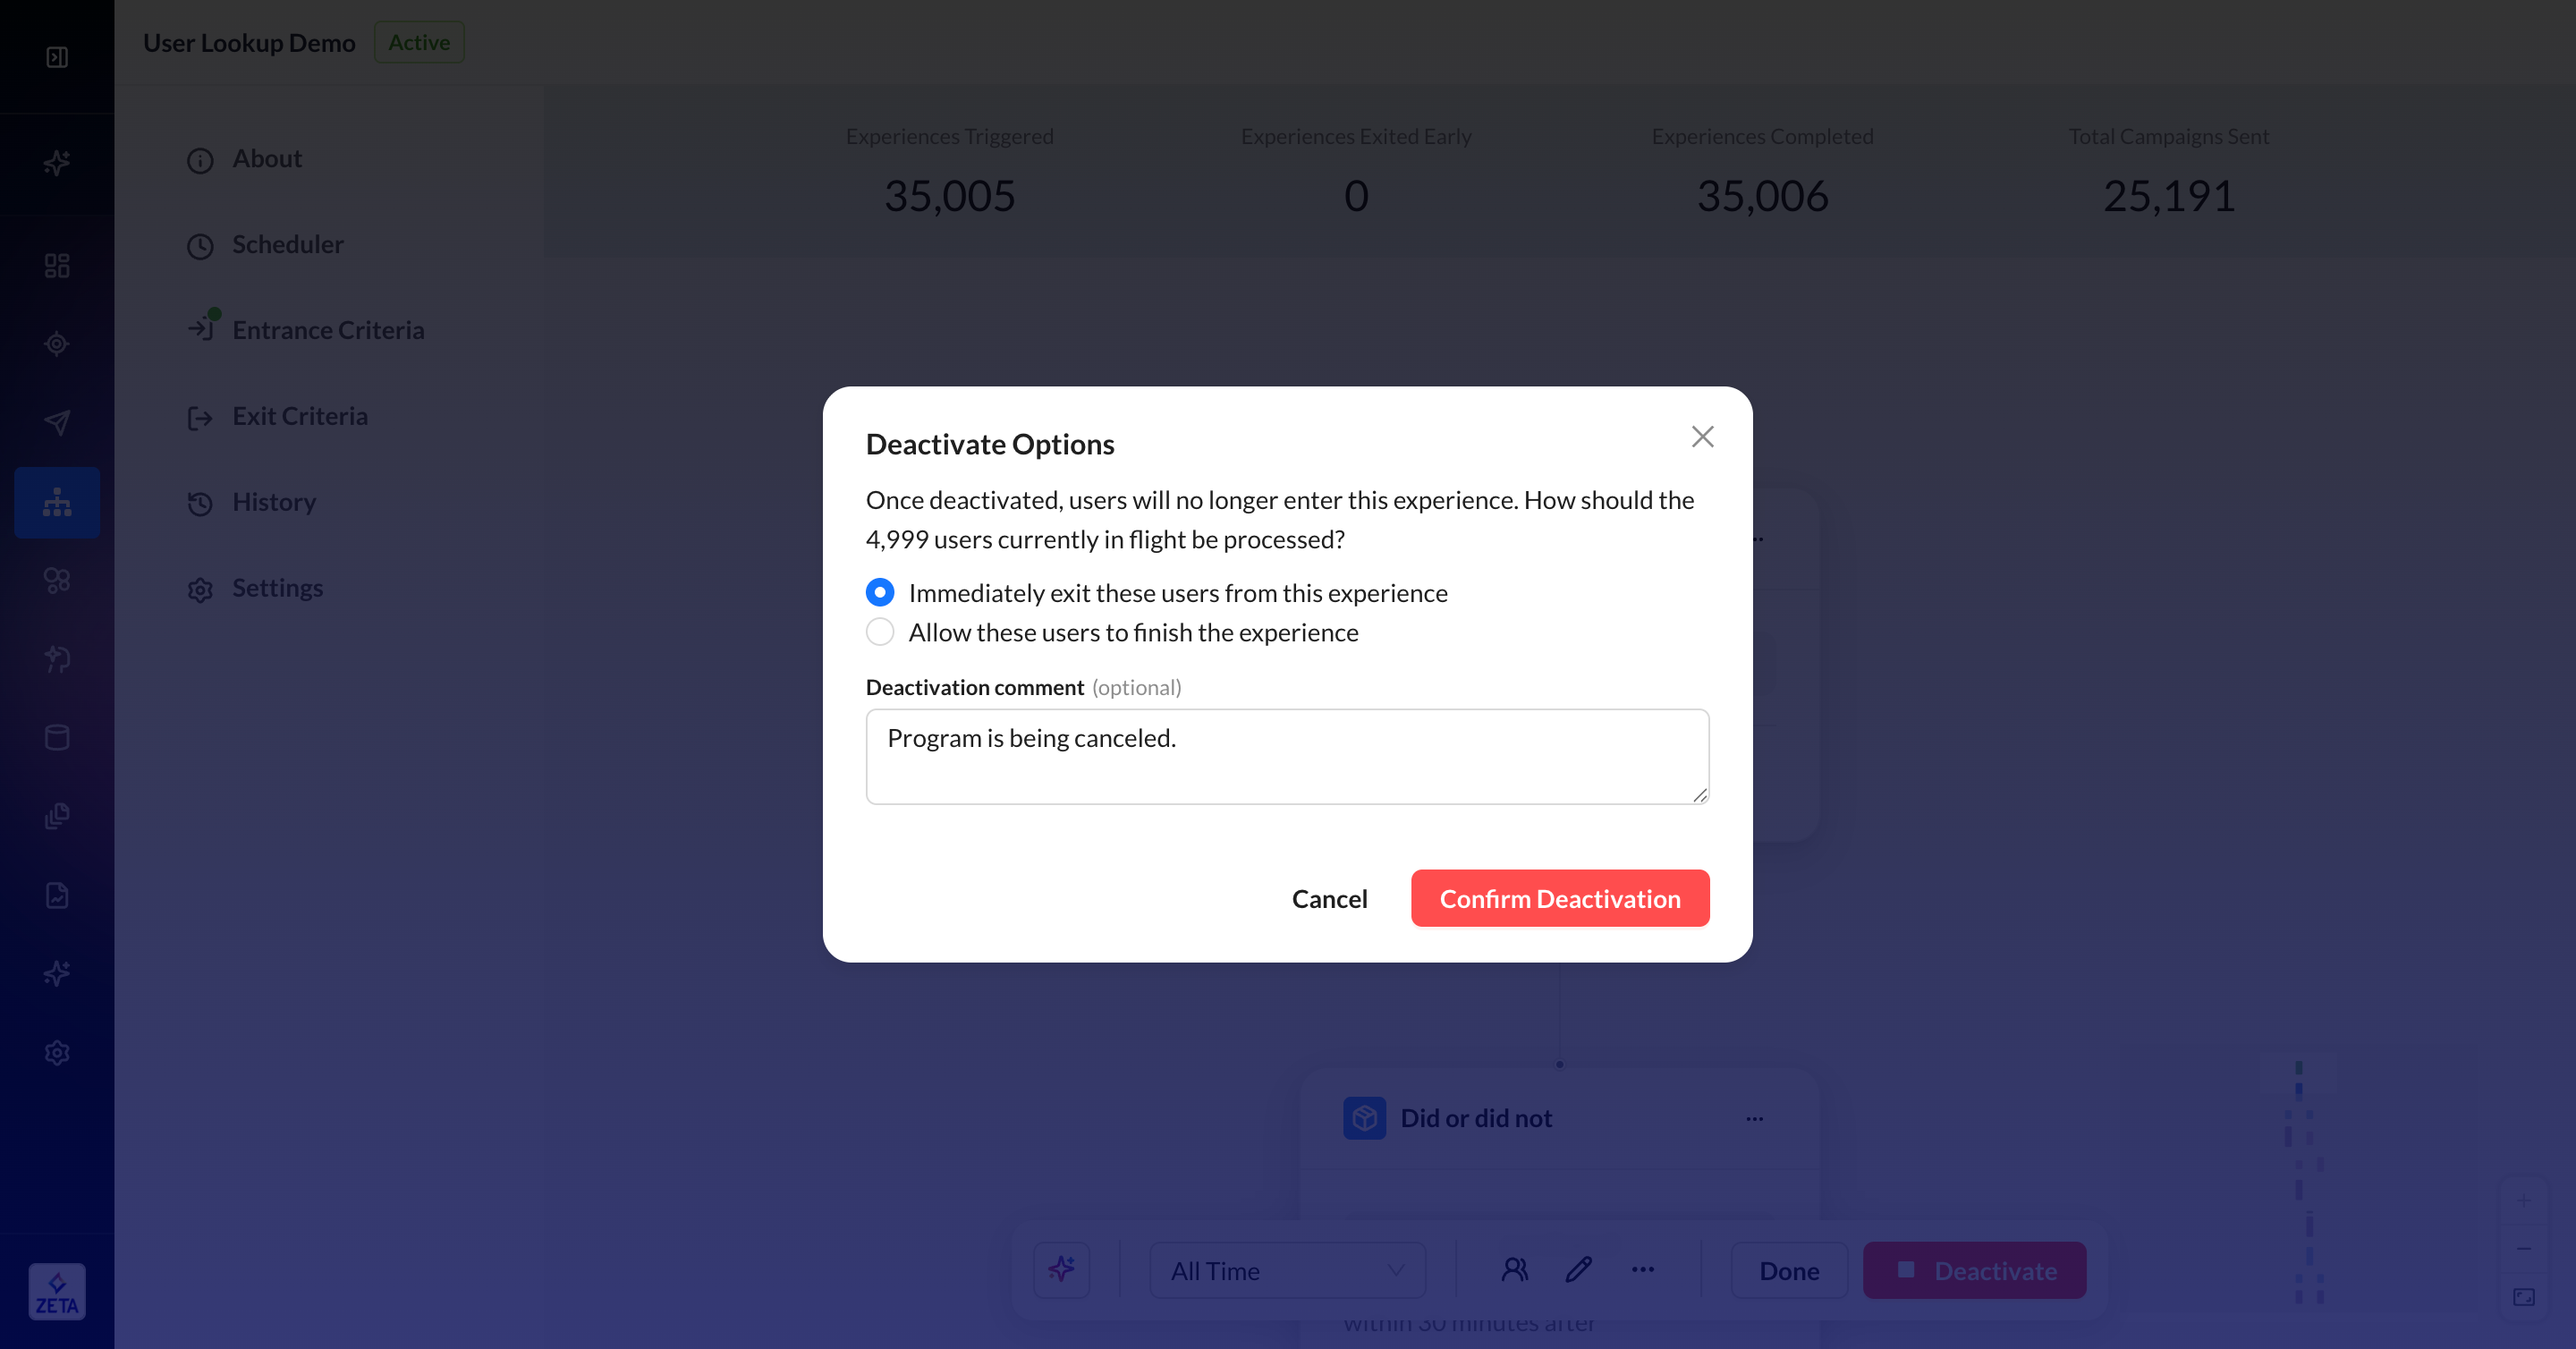
When you deactivate an experience, you are closing a version of the experience so that no users can ever enter that version again. For users who are currently in the experience at the time of deactivation, you have two options for handling them:
-
Immediately exit these users from this experience
-
Allow these users to finish the experience
If you allow in-flight users to finish the experience, then they will continue on in this version of the experience as if there were no deactivation. However, if you reactivate this experience, a new version will be active, so any users who are finishing a previous version of the experience will start at the beginning of the new one if they’re eligible again (ie, meet the trigger node criteria). If you don’t want these in-flight users to re-enter an experience, you can use Entrance Criteria to limit multiple entrances or configure segmentation requirements. You can also choose to immediately exit them, which will ensure they’re not in a previous version of the experience.
Use the optional commenting feature to provide more context to your teammates or any other user who may check later. The status change and comment will be stored in the History panel.
Some live experiences can be edited, but these are limited to certain nodes. Learn more at Portable Experiences.
Using Canvas Controls
As your experience gets more complex, you can use a few tools to help you navigate to the correct part of your workflow quickly.
MiniMap
Every node you add to the canvas will show up in the MiniMap in your lower left-hand screen. You can use the MiniMap to drag the canvas or zoom in and out using your scroll gestures.
Zooming
To zoom in and out of the canvas, you can use the following features:
-
Scrolling in and out on the MiniMap
-
Clicking the + and - buttons in the top left-hand corner
-
Using the 100% fit in the top left-hand corner