Standalone reusable code pieces, also known as Snippets, have forever been the source of added functionalities for coders across all spheres. Reducing the time it takes to type in repetitive information while coding, snippets also help you to not add an unnecessary layer of complexity to the workflow. The Zeta Marketing Platform has its own reusable content snippets that you can use across multiple templates to make changes to content in one location and have those changes reflected across all templates in which the snippet is referenced.
There are three types of content snippets:
-
HTML Snippets are built using raw code with significant flexibility to fine-tune exactly what you want.
-
Visual Snippets are single rows from the Visual Editor that utilize the full drag-and-drop capabilities of that tool, no code required.
-
Visual Composer Snippets combine both the flexibility and drag-and-drop capabilities of the existing tools with AI-powered generation and codeless personalization.
Using Snippets
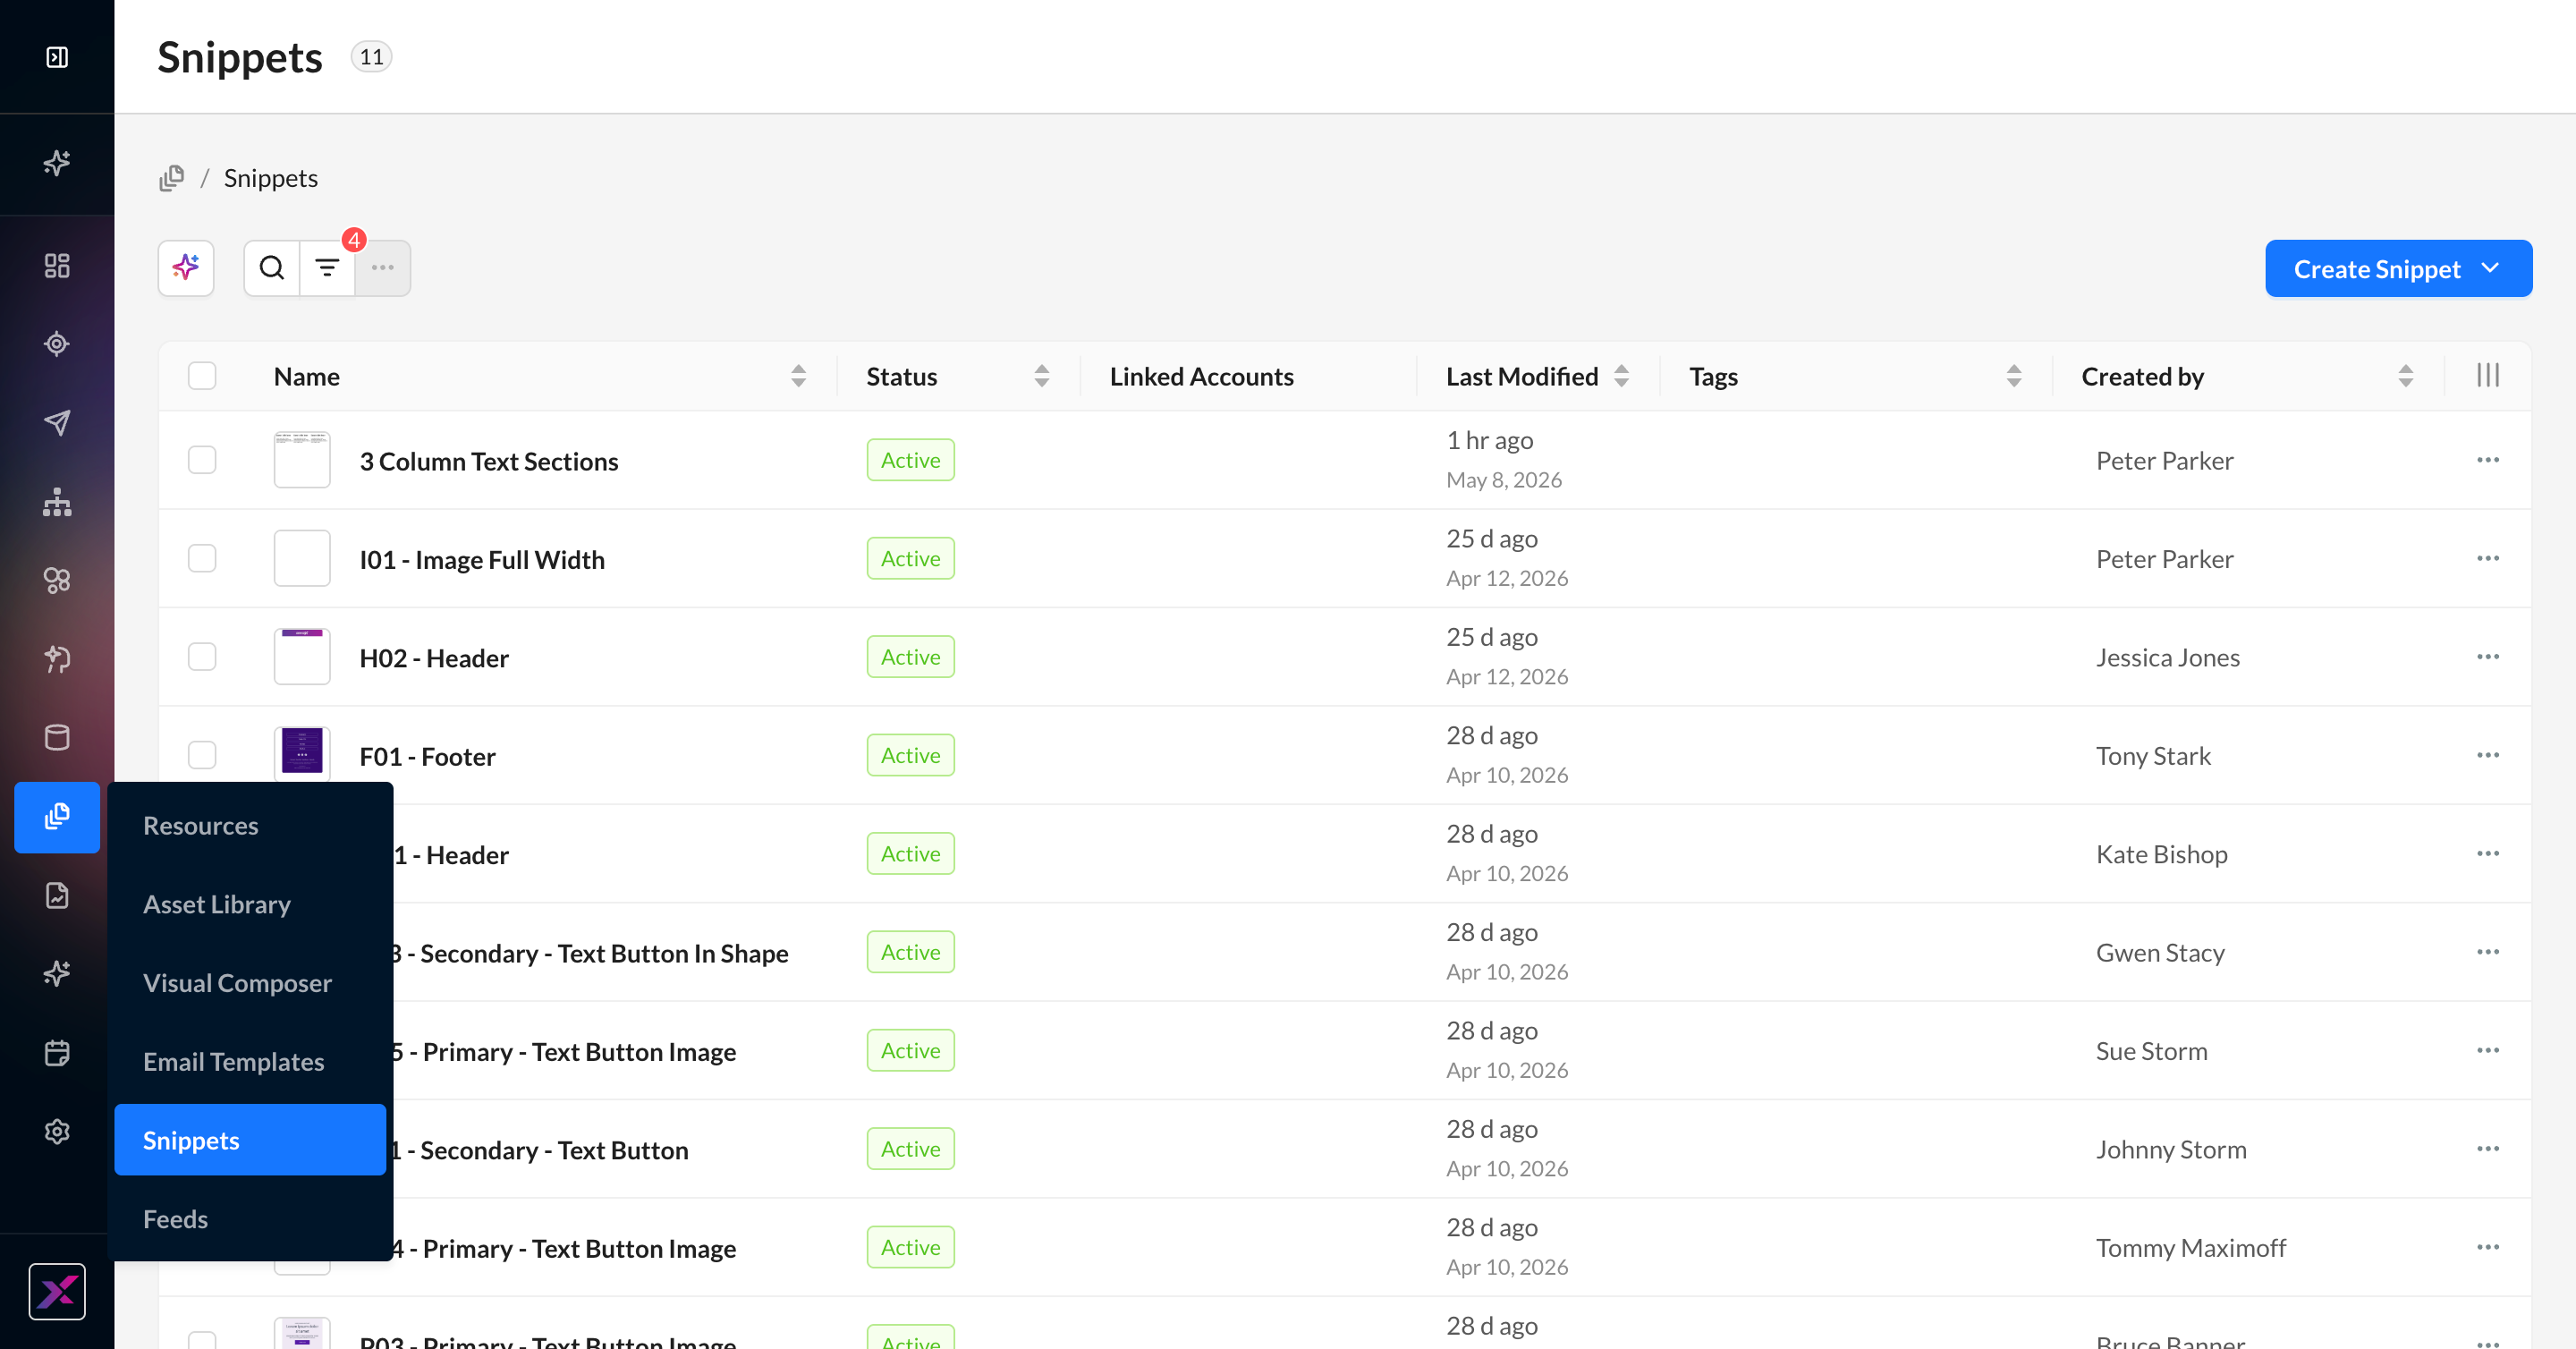
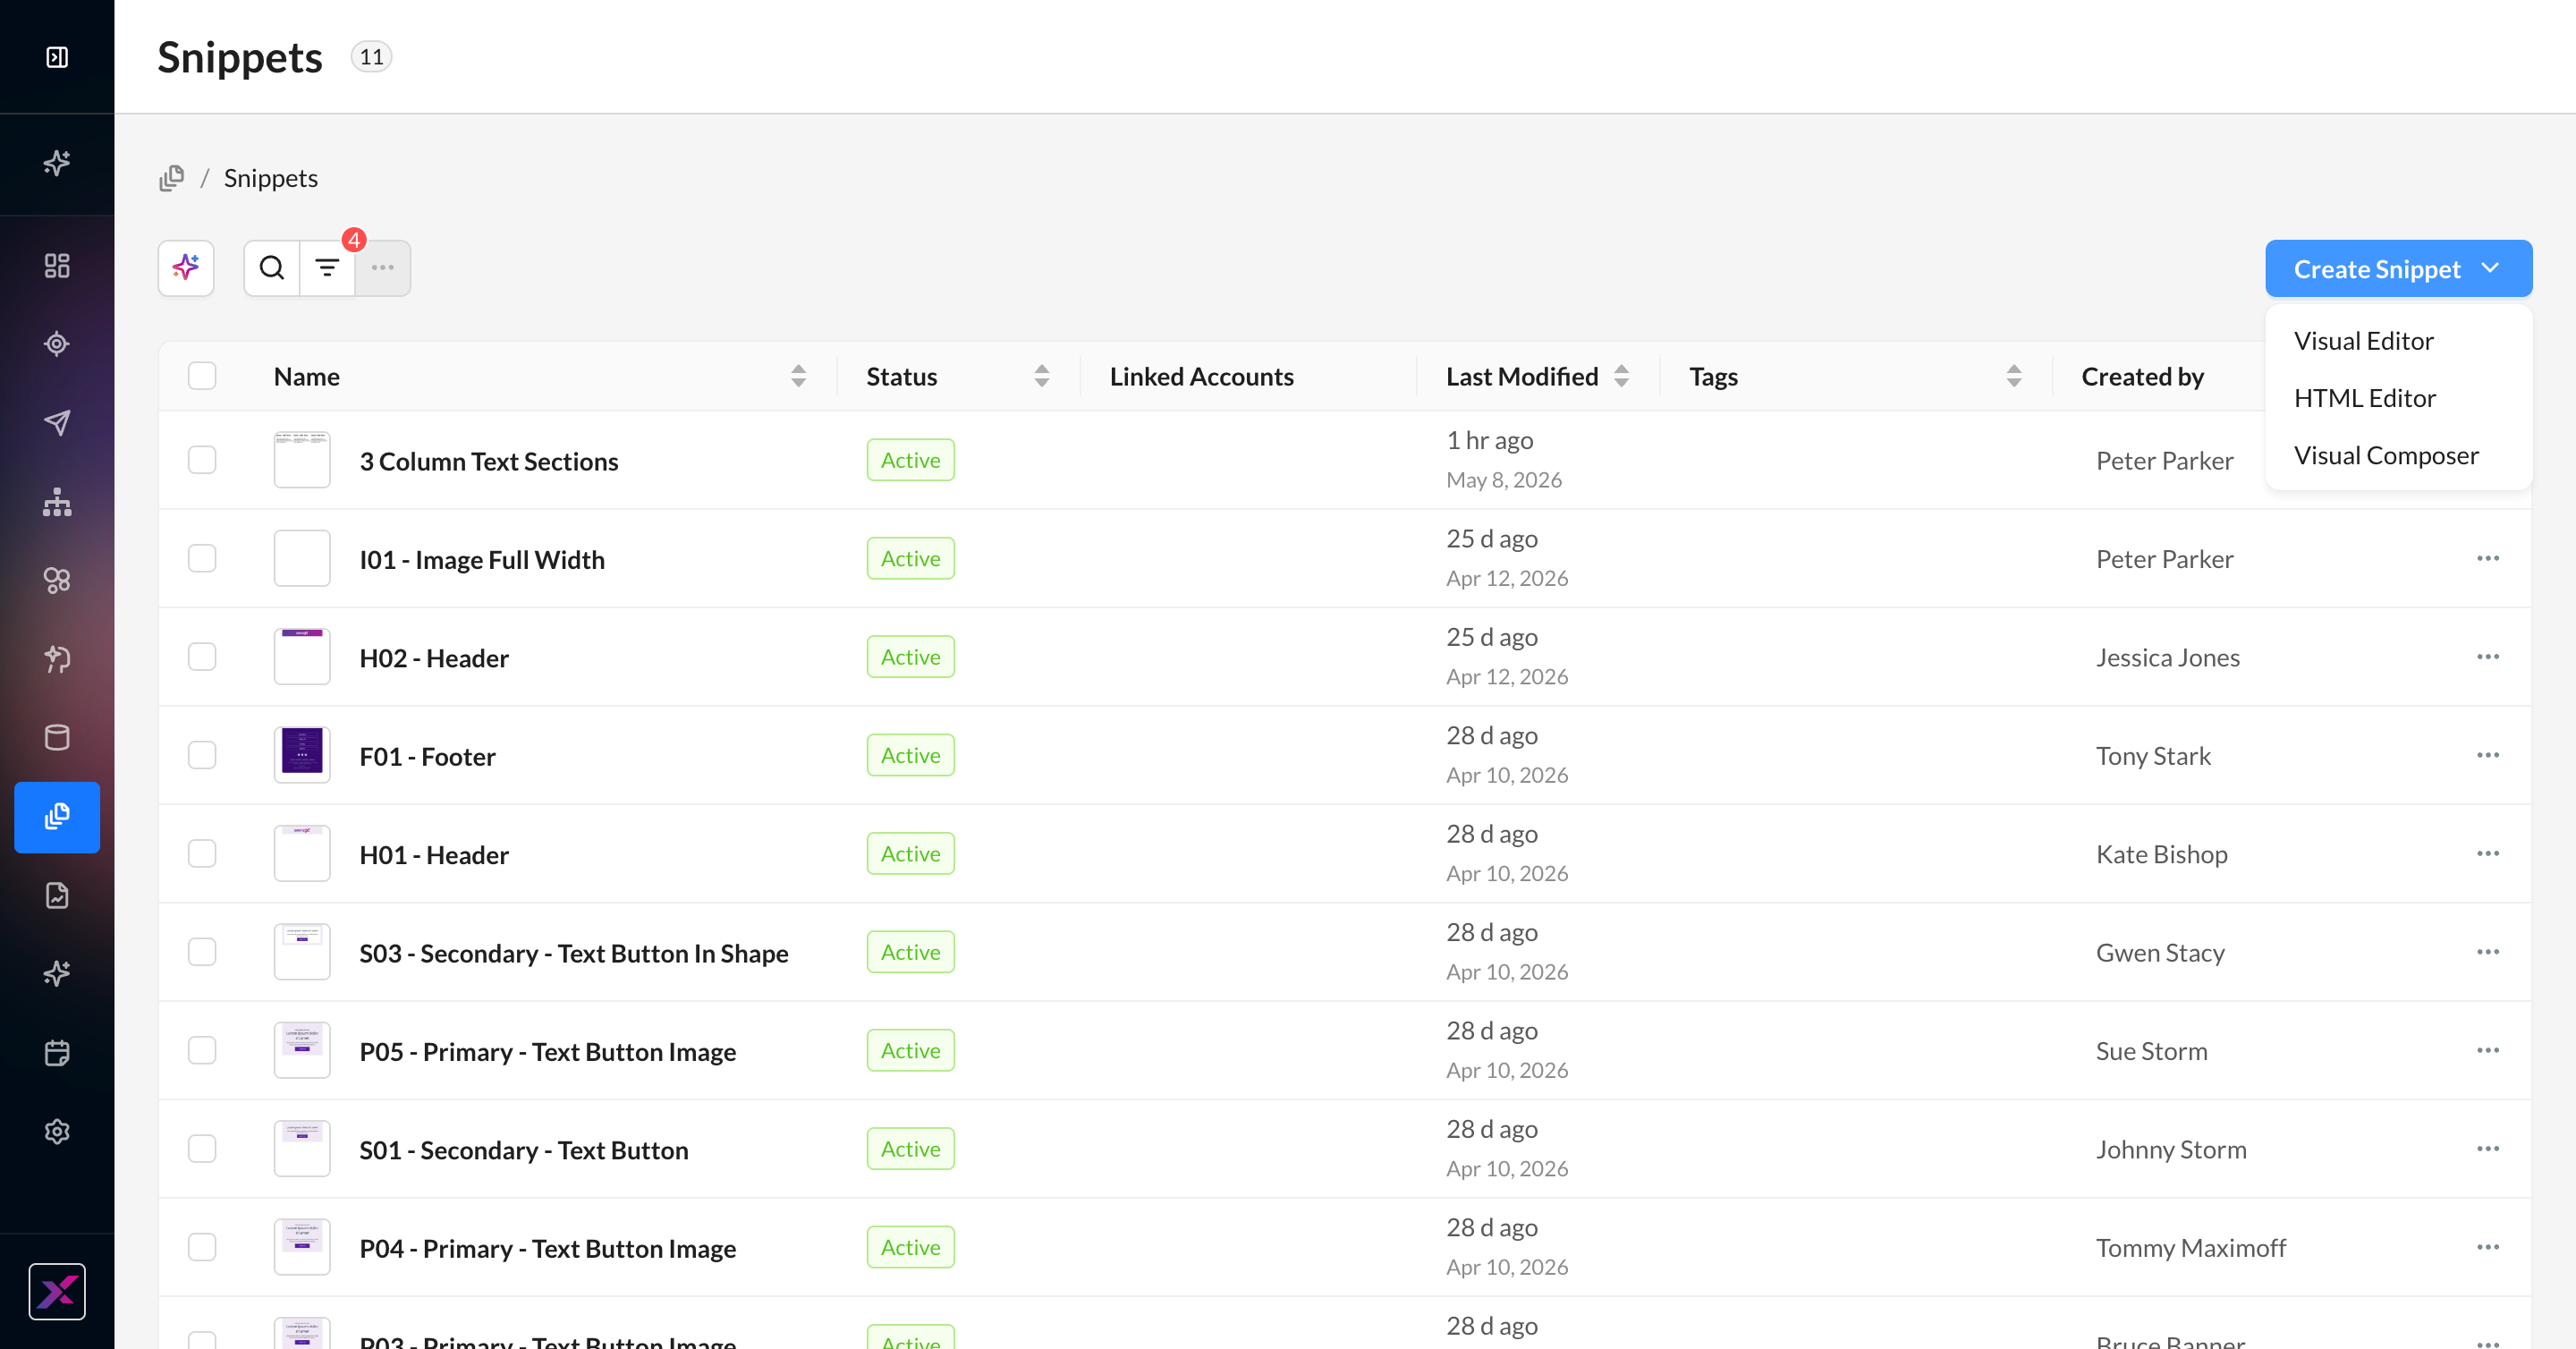
1. From the menu on the left, navigate to Content > Snippets.
2. To view existing snippets, click on the name of the snippet to open it in its respective editor.
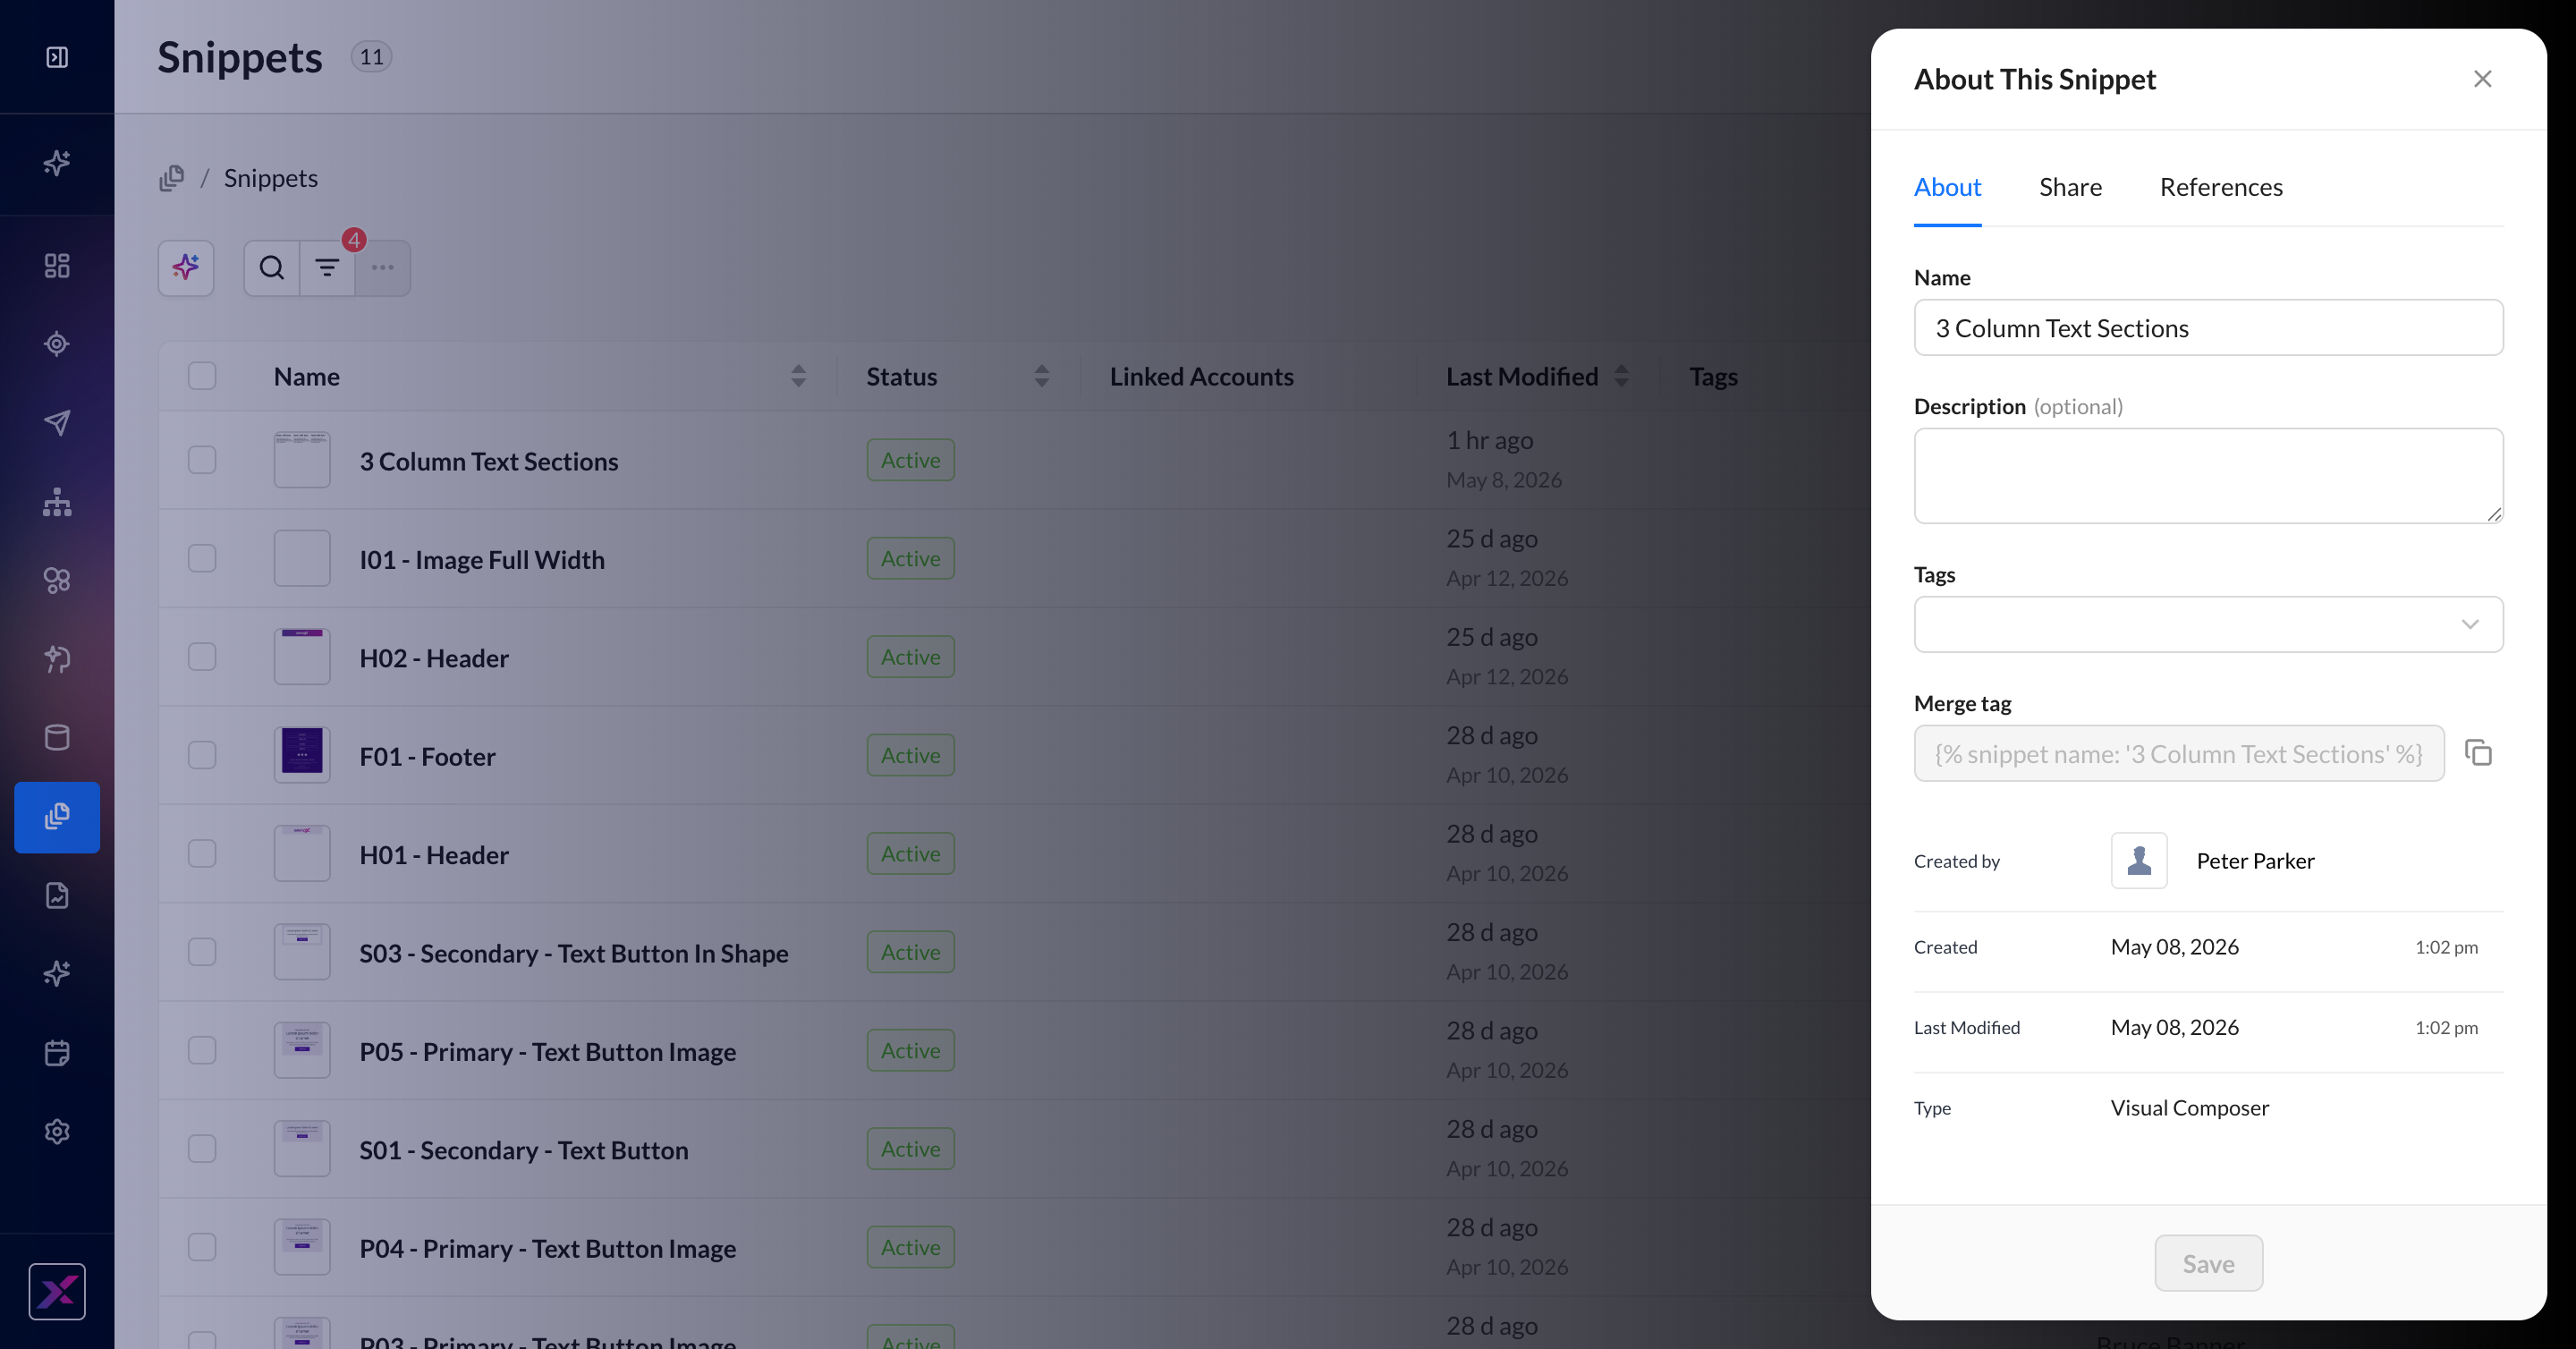
3. Clicking on the row of a snippet opens to an About This Snippet panel with more information about the snippet, including metadata, sharing across accounts, and a list of places where the snippet merge tag is being referenced.
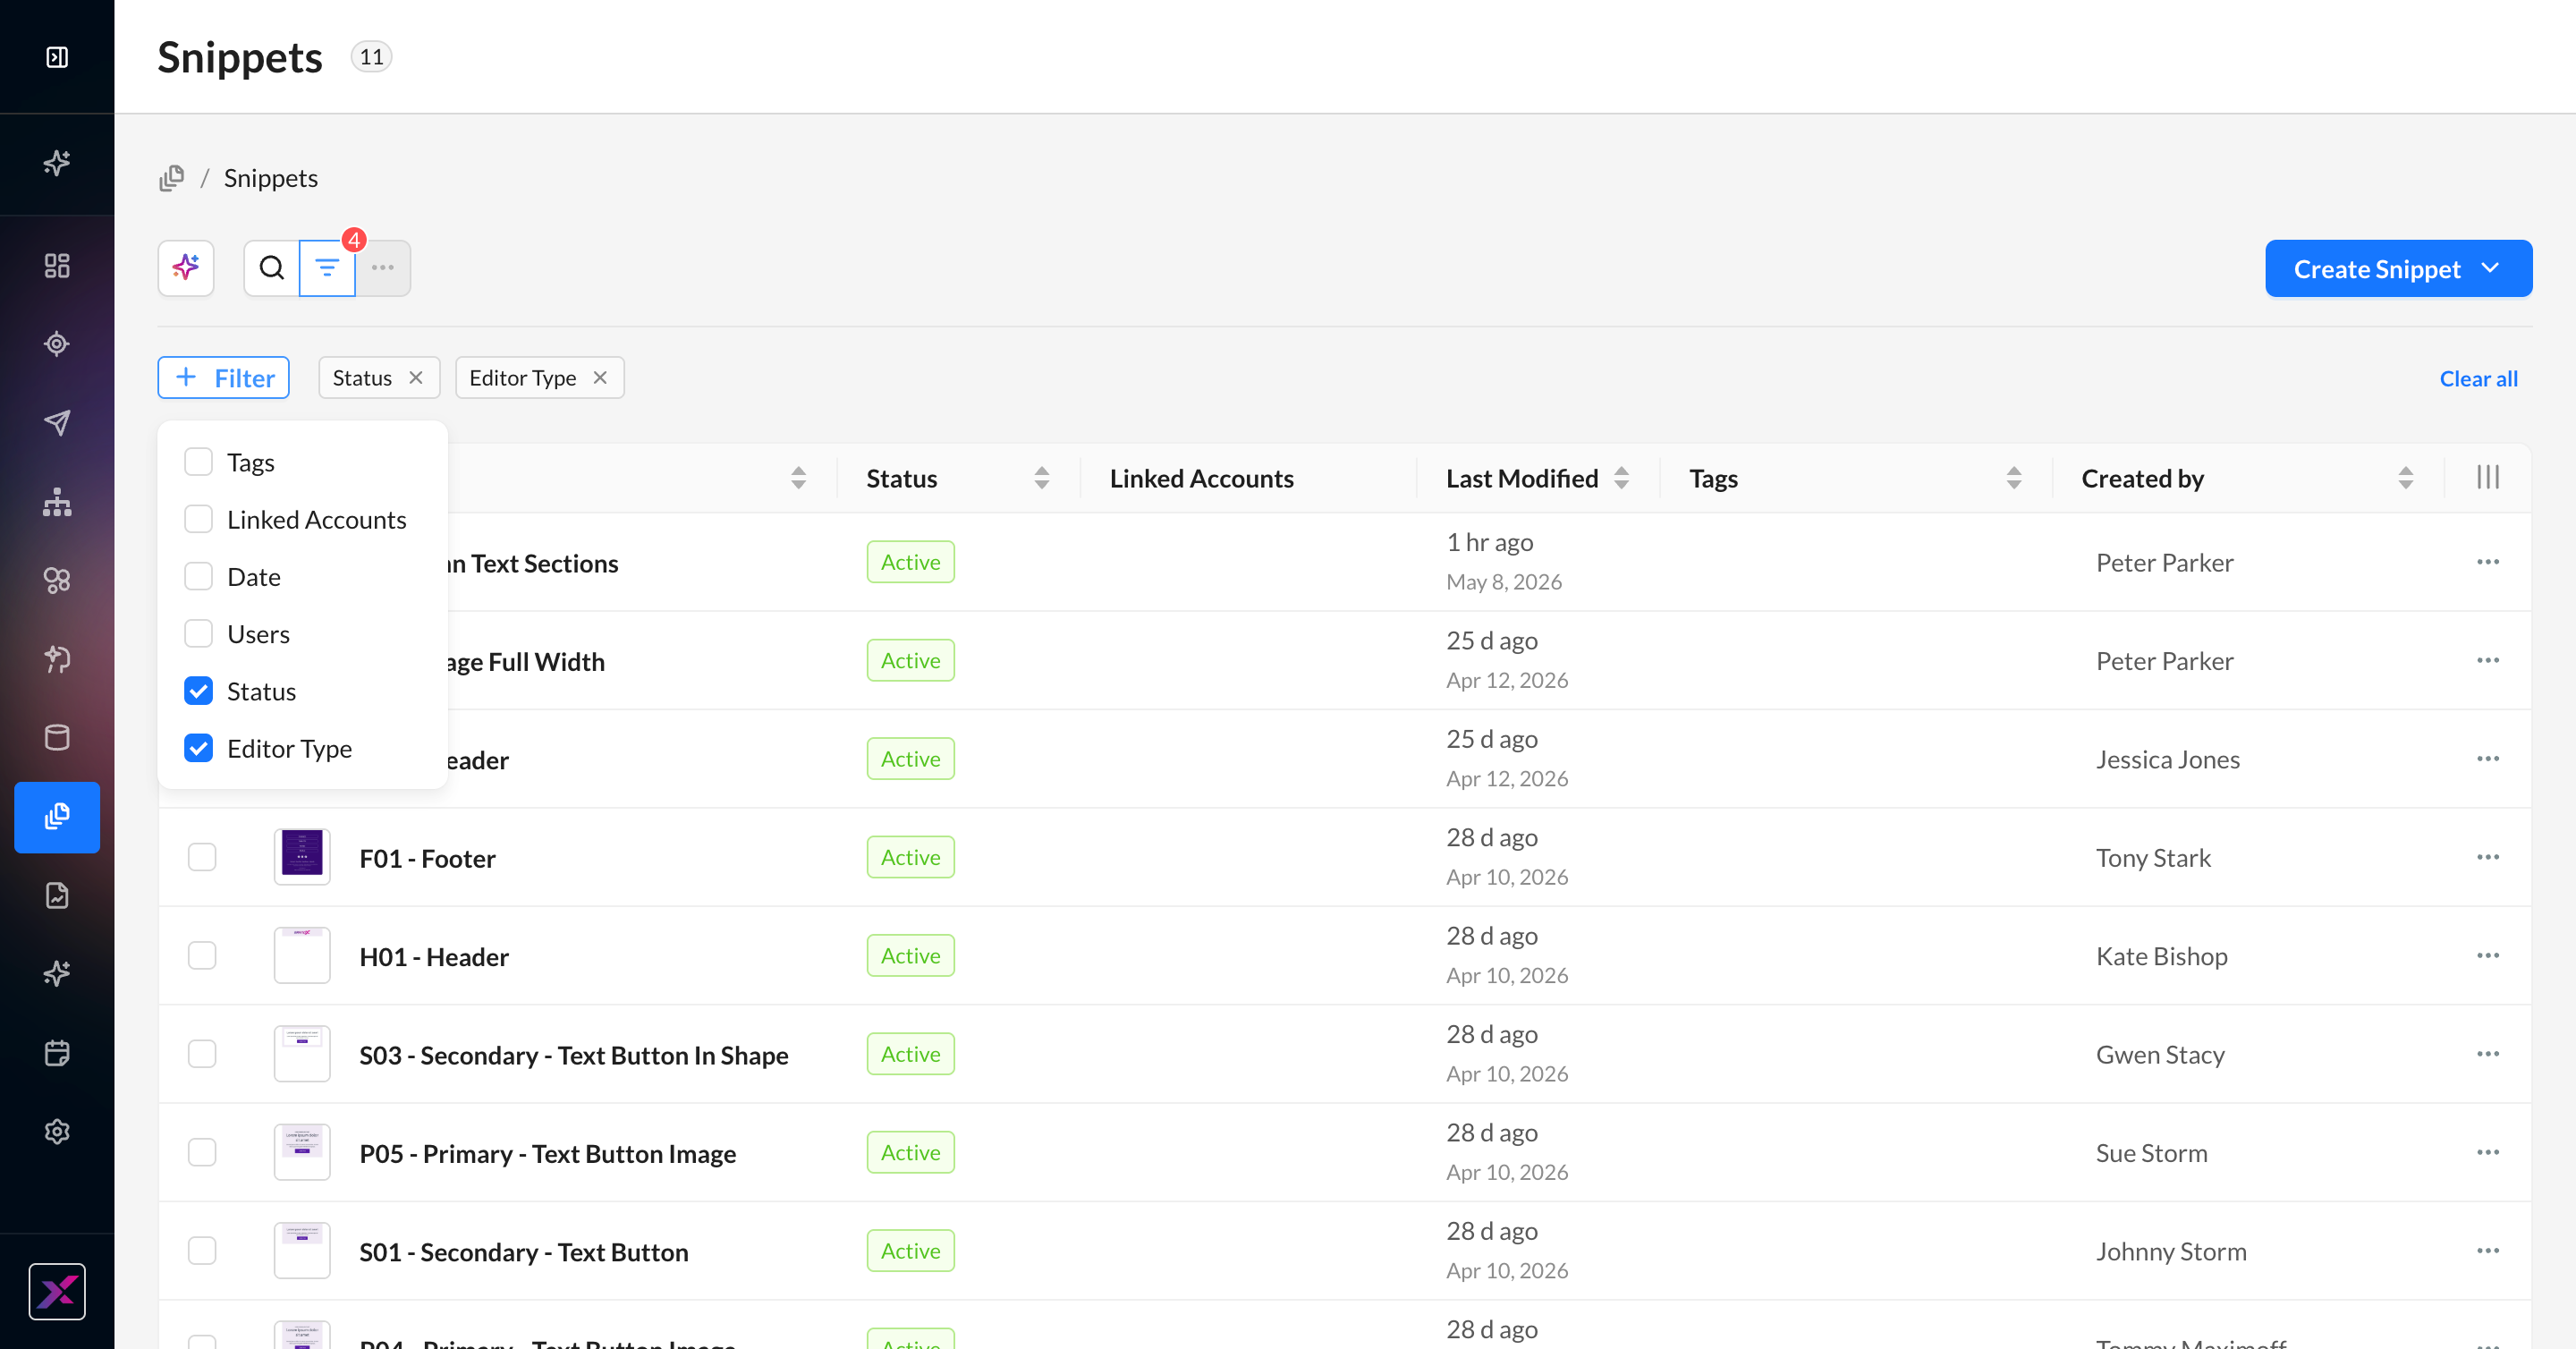
4. You can filter and search your snippets to narrow down to the ones you need.
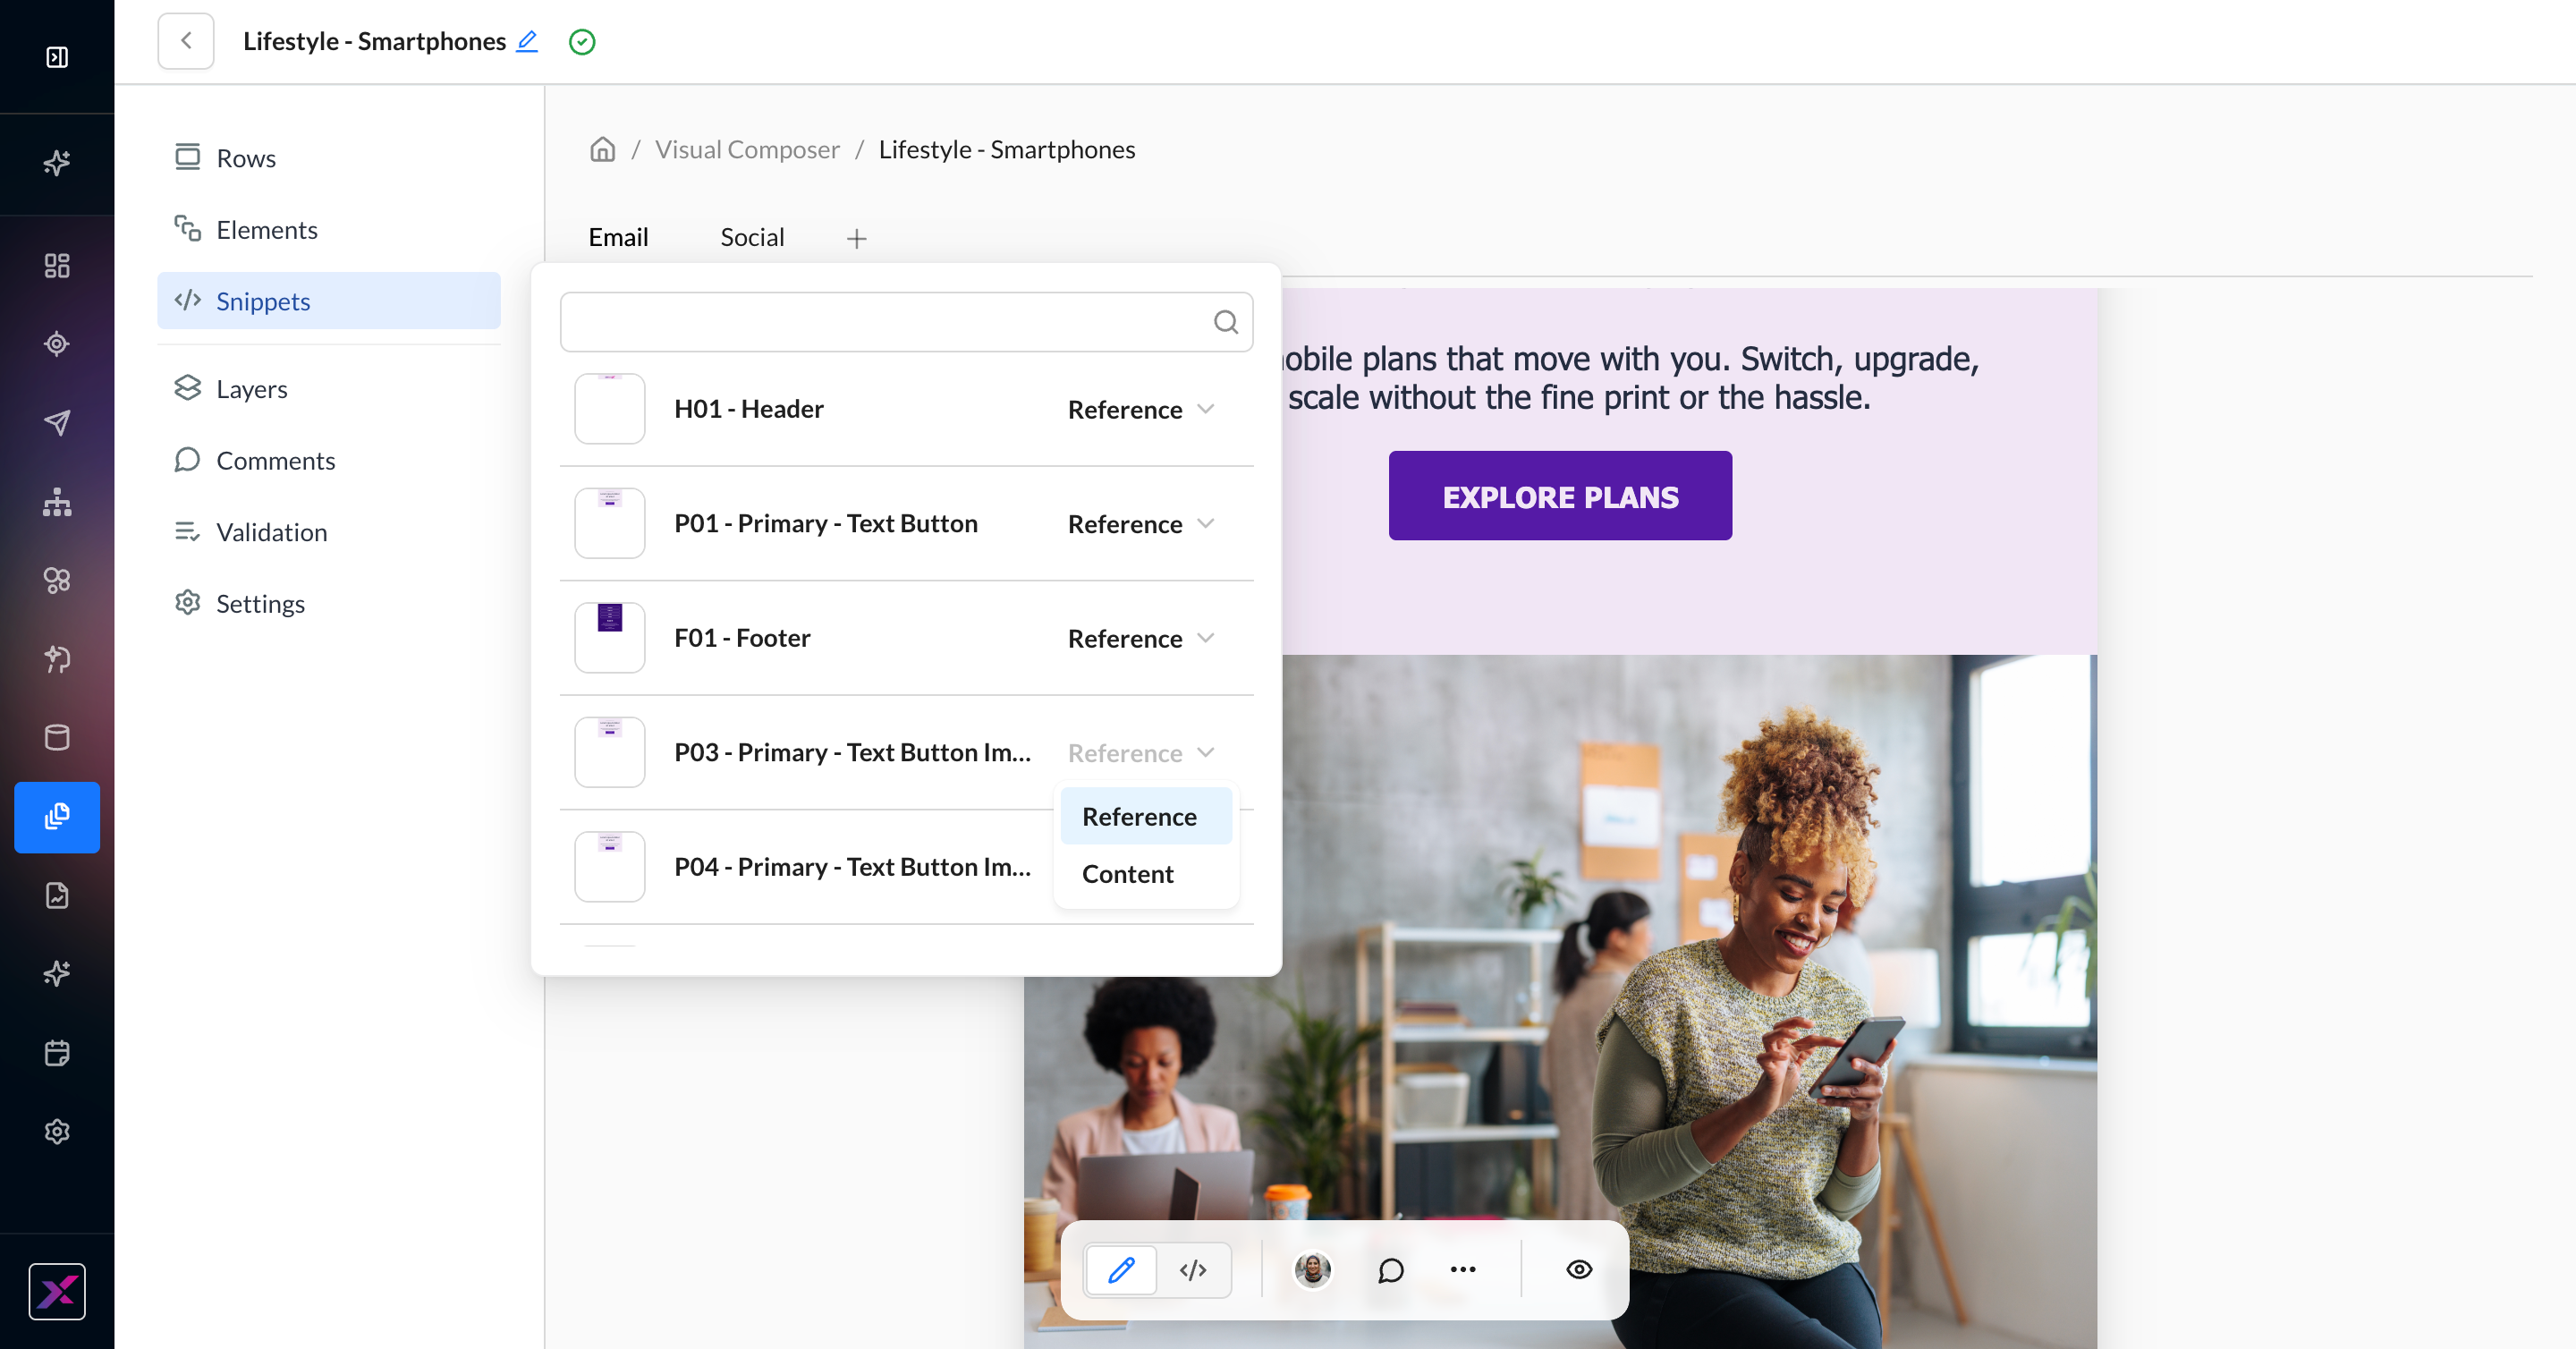
5. To use a snippet, you can copy and paste the merge tag into any campaign, template, or snippet. Merge tags ensure content is consistent, and updating a snippet will automatically update all references. A list of references can be found in the About This Snippet panel.
6. You can also insert a snippet into an email template without a reference, which will duplicate the content of the snippet but break the connection to the original snippet, so future changes do not affect the content in this particular email template.
.png?cb=8c5c19ed65a060273be2d84581ee578d)
.png?cb=4a4e21c757249af4244401b8b6fe65be)
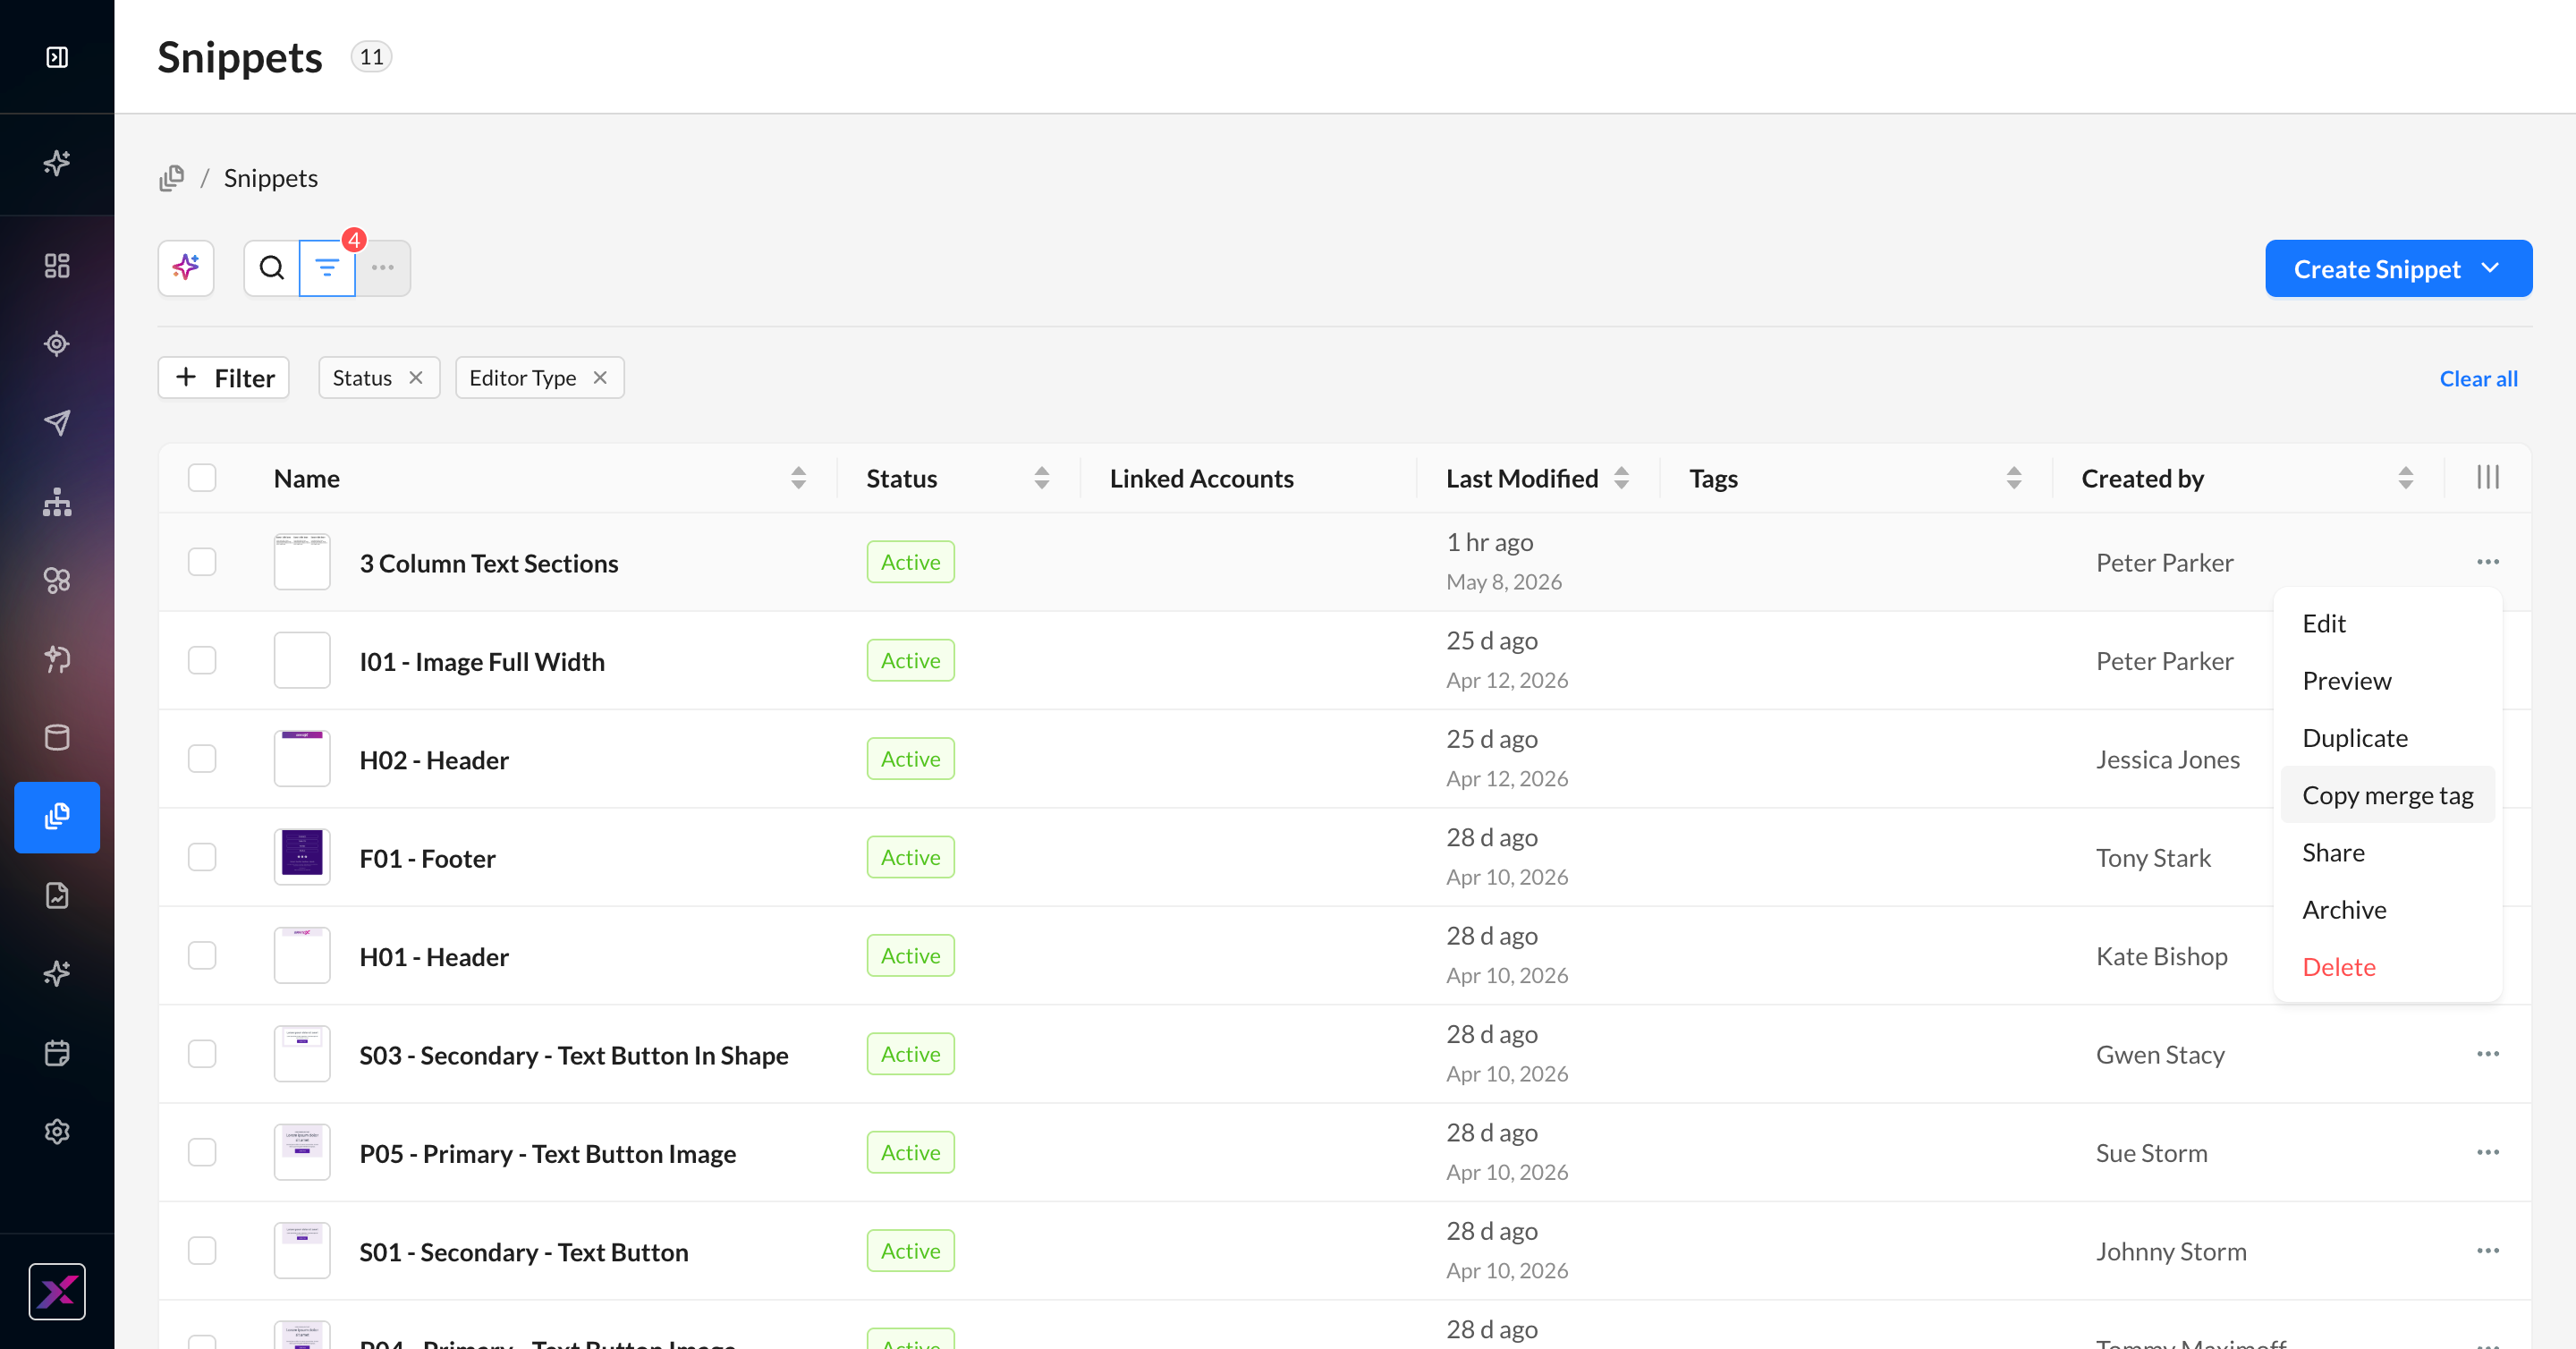
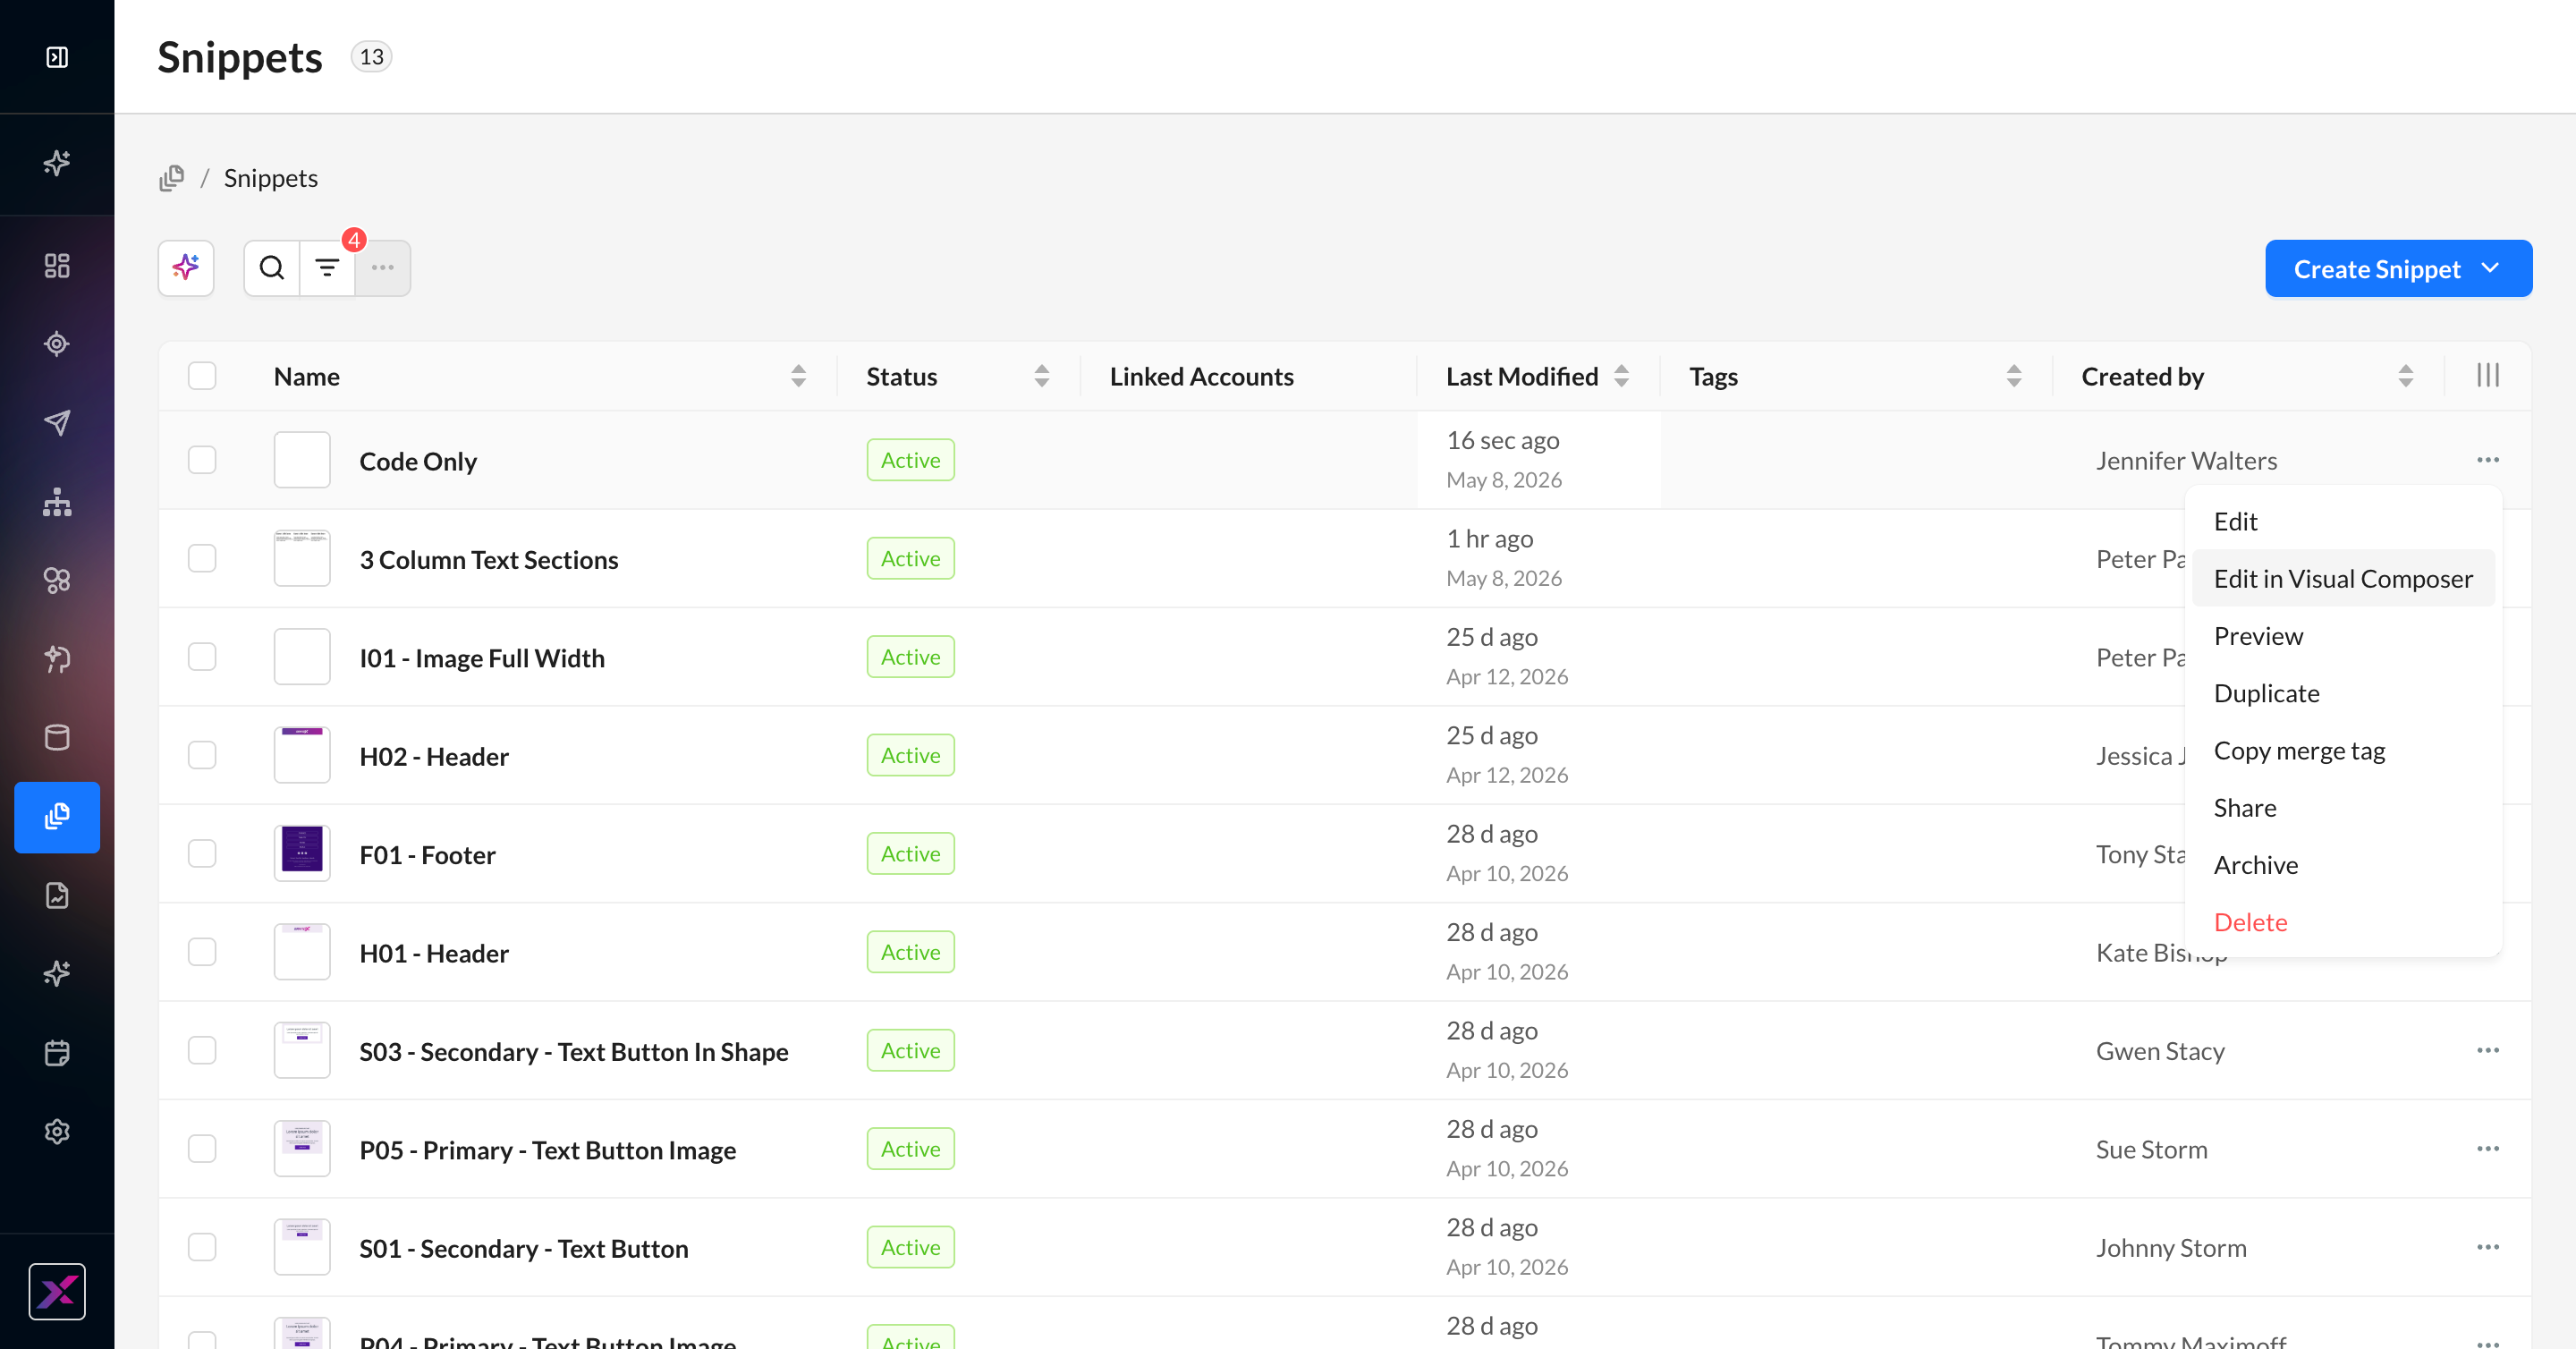
7. As the snippet is saved in the Snippets library, you can select multiple snippets from the list and apply bulk actions of archiving, sharing, renaming, and deleting them altogether.
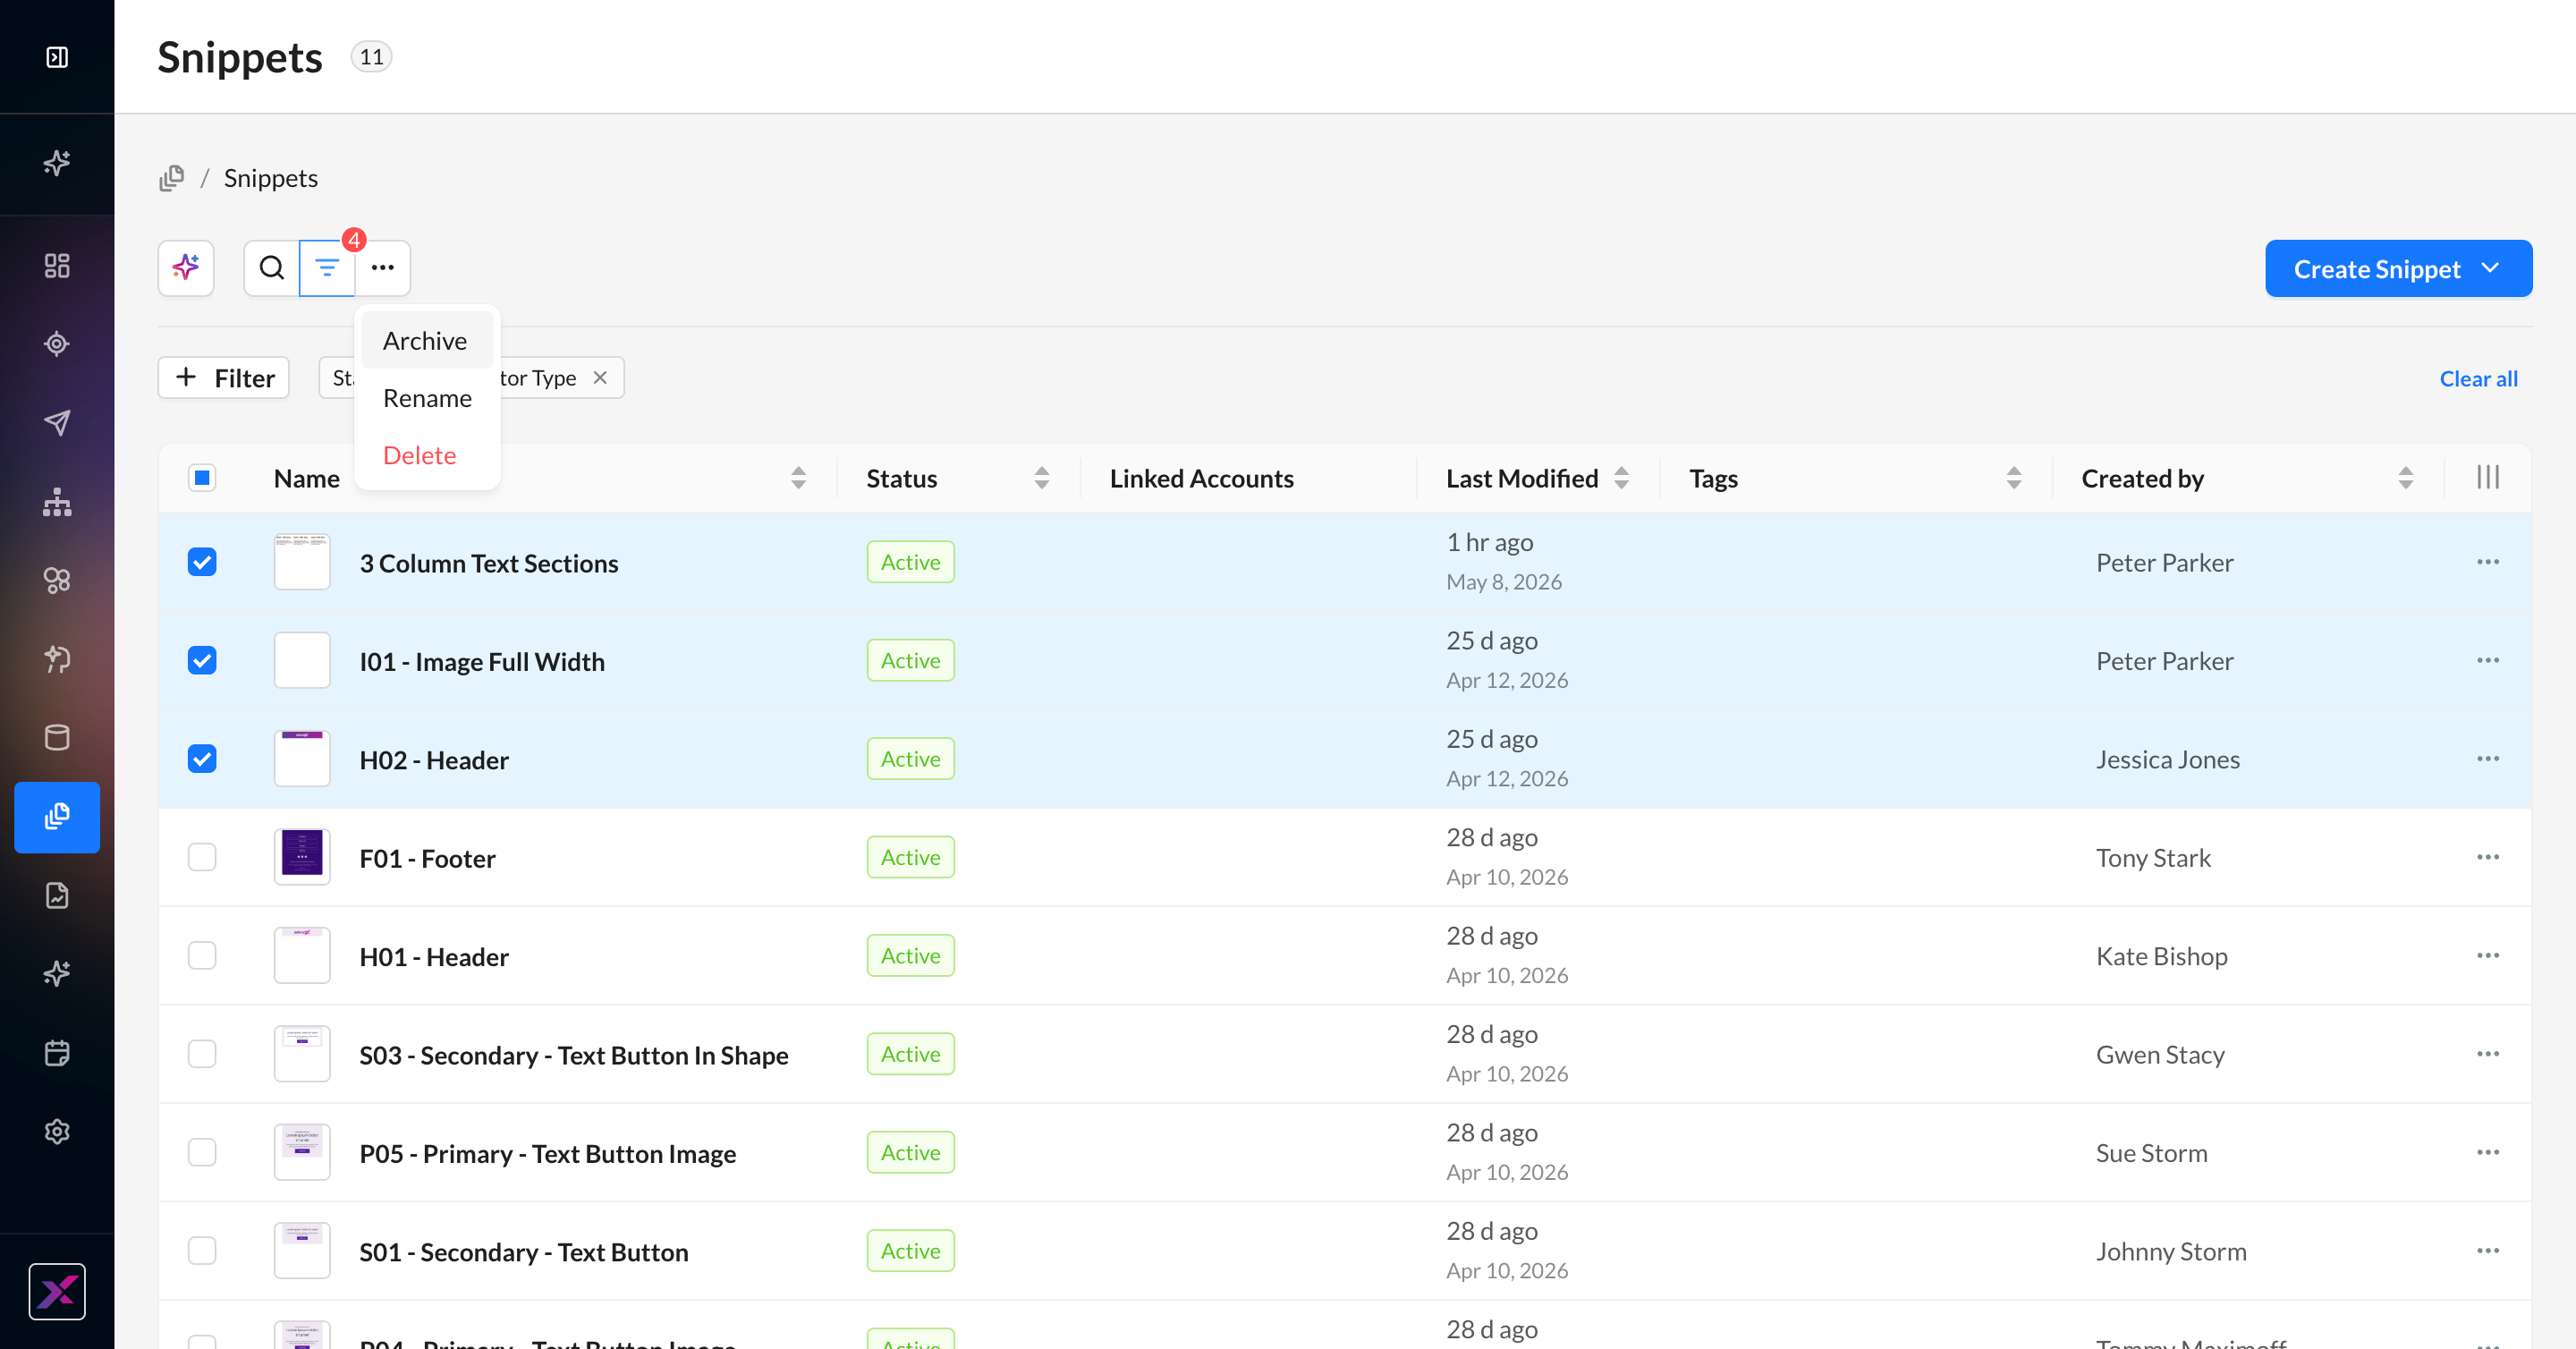
Renaming the snippet will not update its references in other campaigns.
Snippet References
If your snippet’s merge tag is used elsewhere in the ZMP, you can see a list of all relevant campaigns, templates, and snippets in the References tab of the About This Snippet panel. Search or sort to find exactly what you need.
Organized by type, each row contains the name (which can be clicked to open the campaign, template, or snippet in a new tab) and the last time it was modified. Campaigns that have been sent will instead display the last sent date.
The number at the end of the row denotes the count of how many times the merge tag is used in that campaign, template, or snippet. Hover on the number for campaigns to see a further breakdown of which field(s) the merge tag is used (eg, subject line, content, global variables, etc) and count for each. This works for all campaign channels, whether broadcast or triggered.
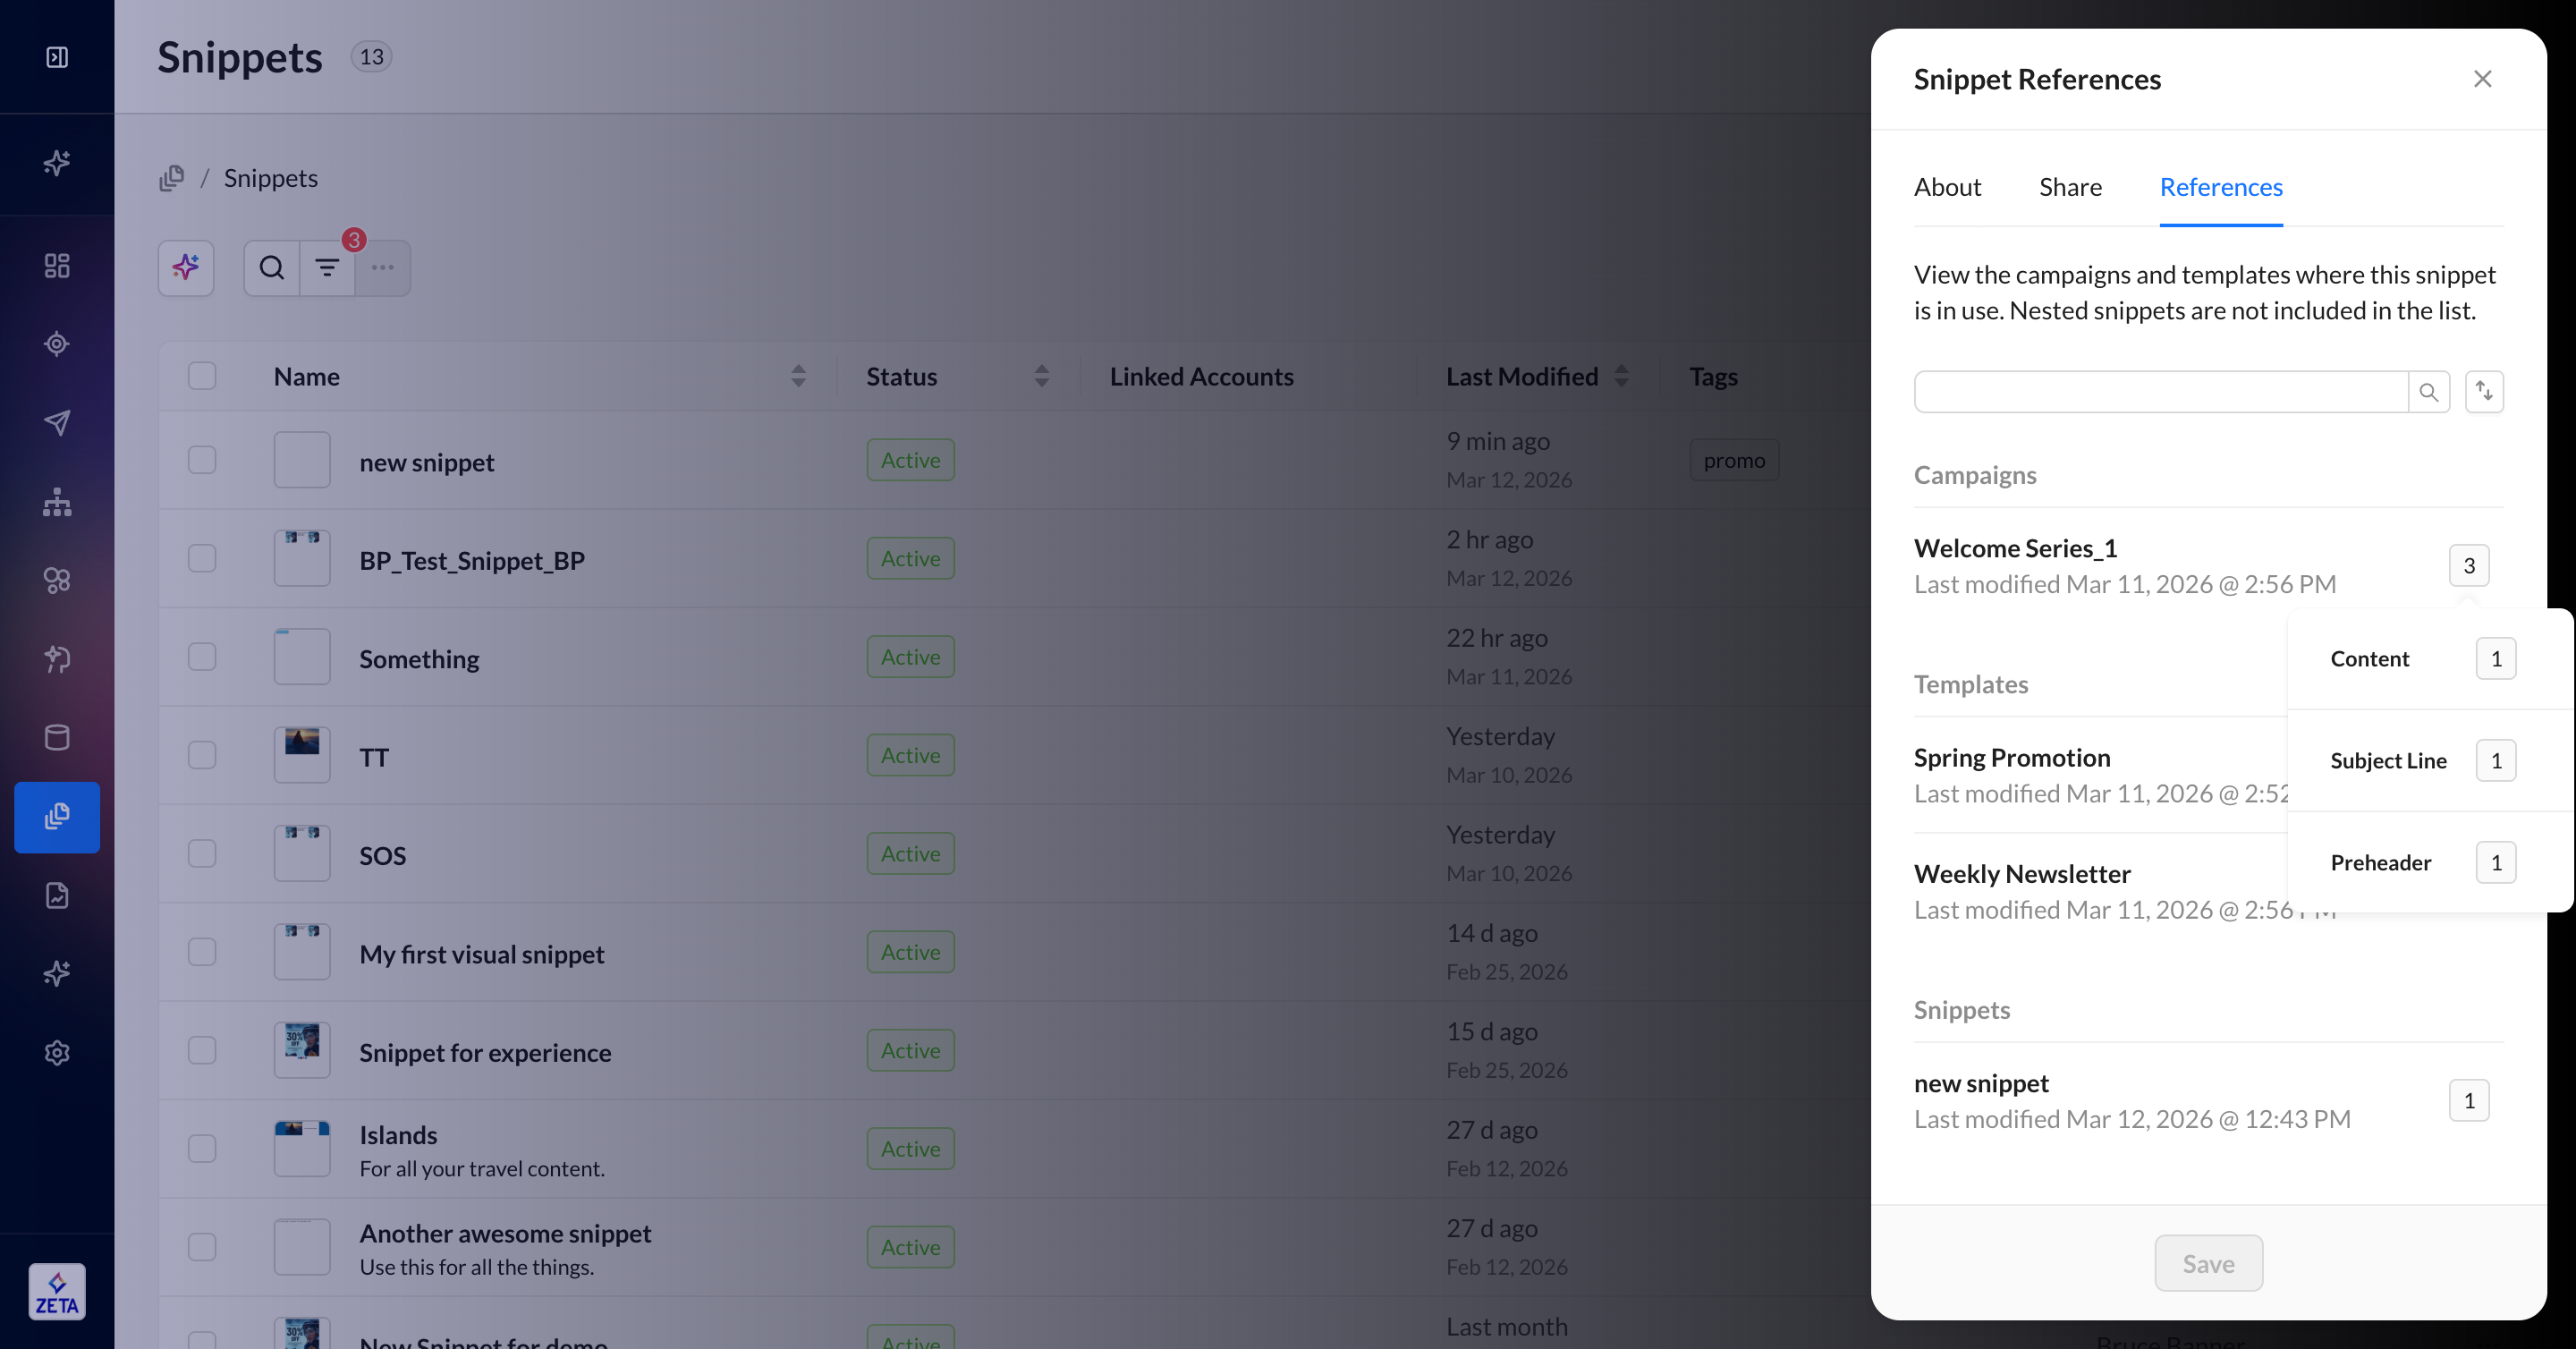
Nested snippets beyond the first layer of code will not be included in this list.
Creating Snippets
On the Snippets listing page, click on Create Snippet on the top-right and choose the editor that best fits your use case.
Visual Composer Snippets
To generate a snippet via Athena, use the Visual Composer launchpad and specify that you want a snippet in your prompt. Learn more about Visual Composer.
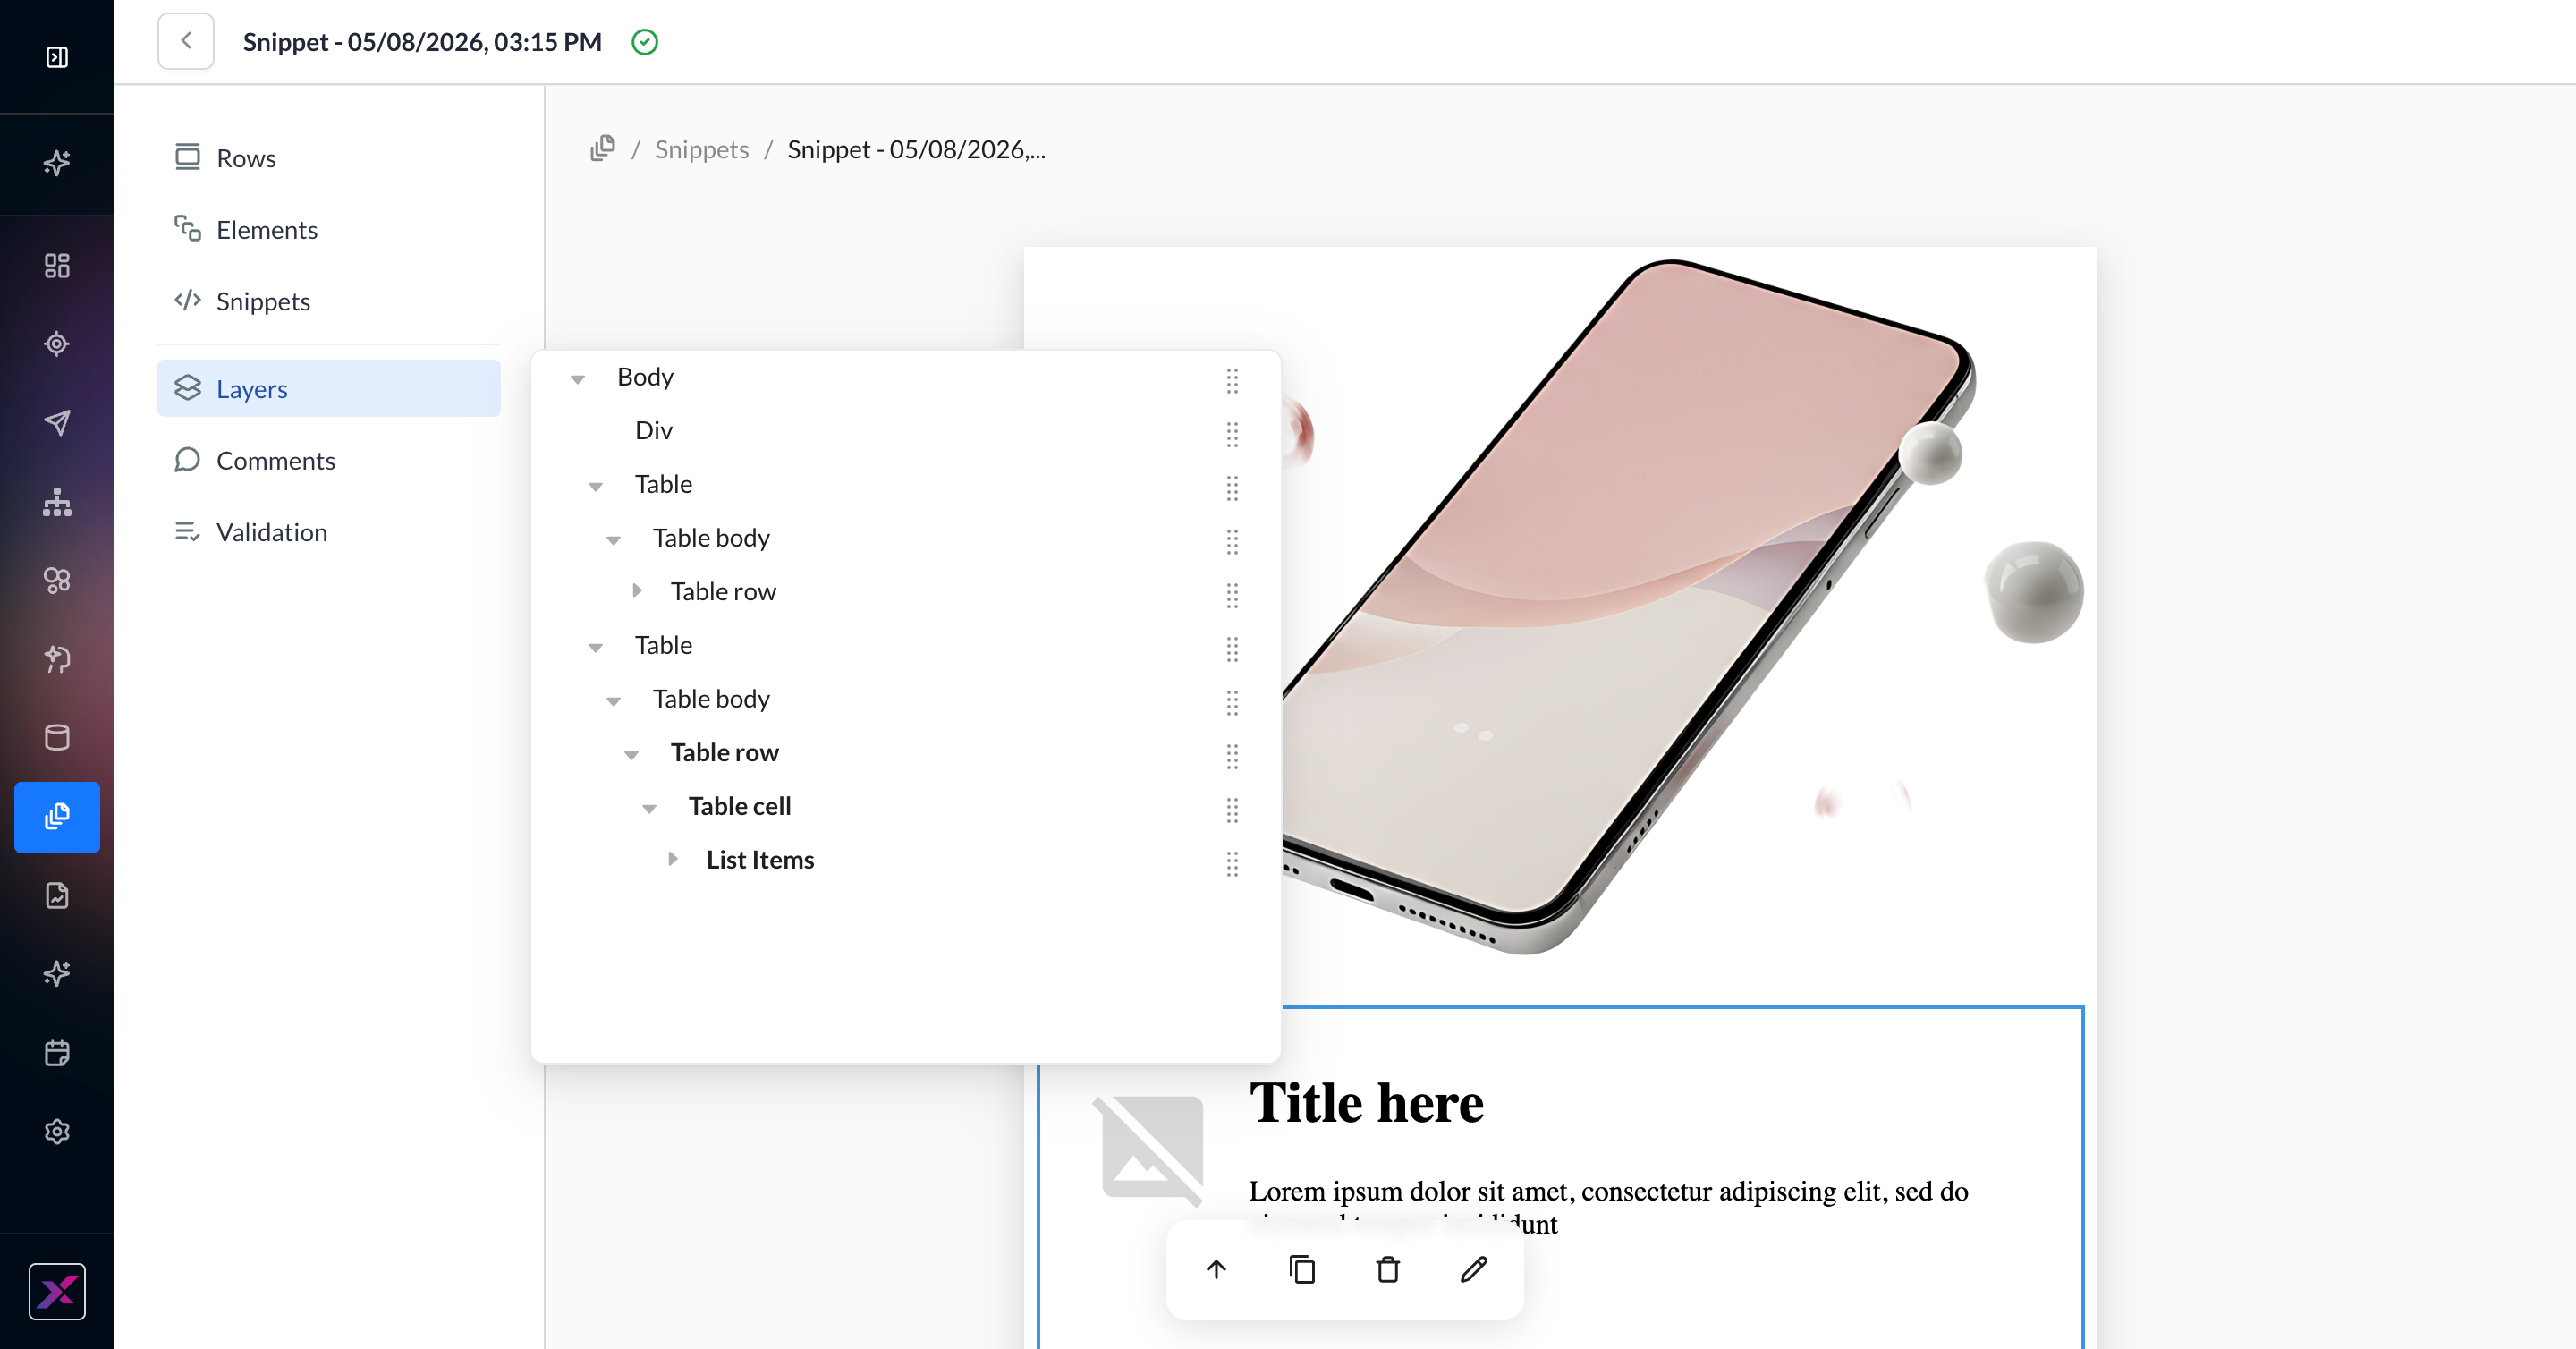
1. Clicking New Snippet > Visual Composer will take you to a blank canvas with most of your standard Visual Composer functions, including Athena-powered image, text, and validation assistants, available. Snippets always inherit width and font settings from the template they are inserted into, so you won’t find the Settings item in the build panel.
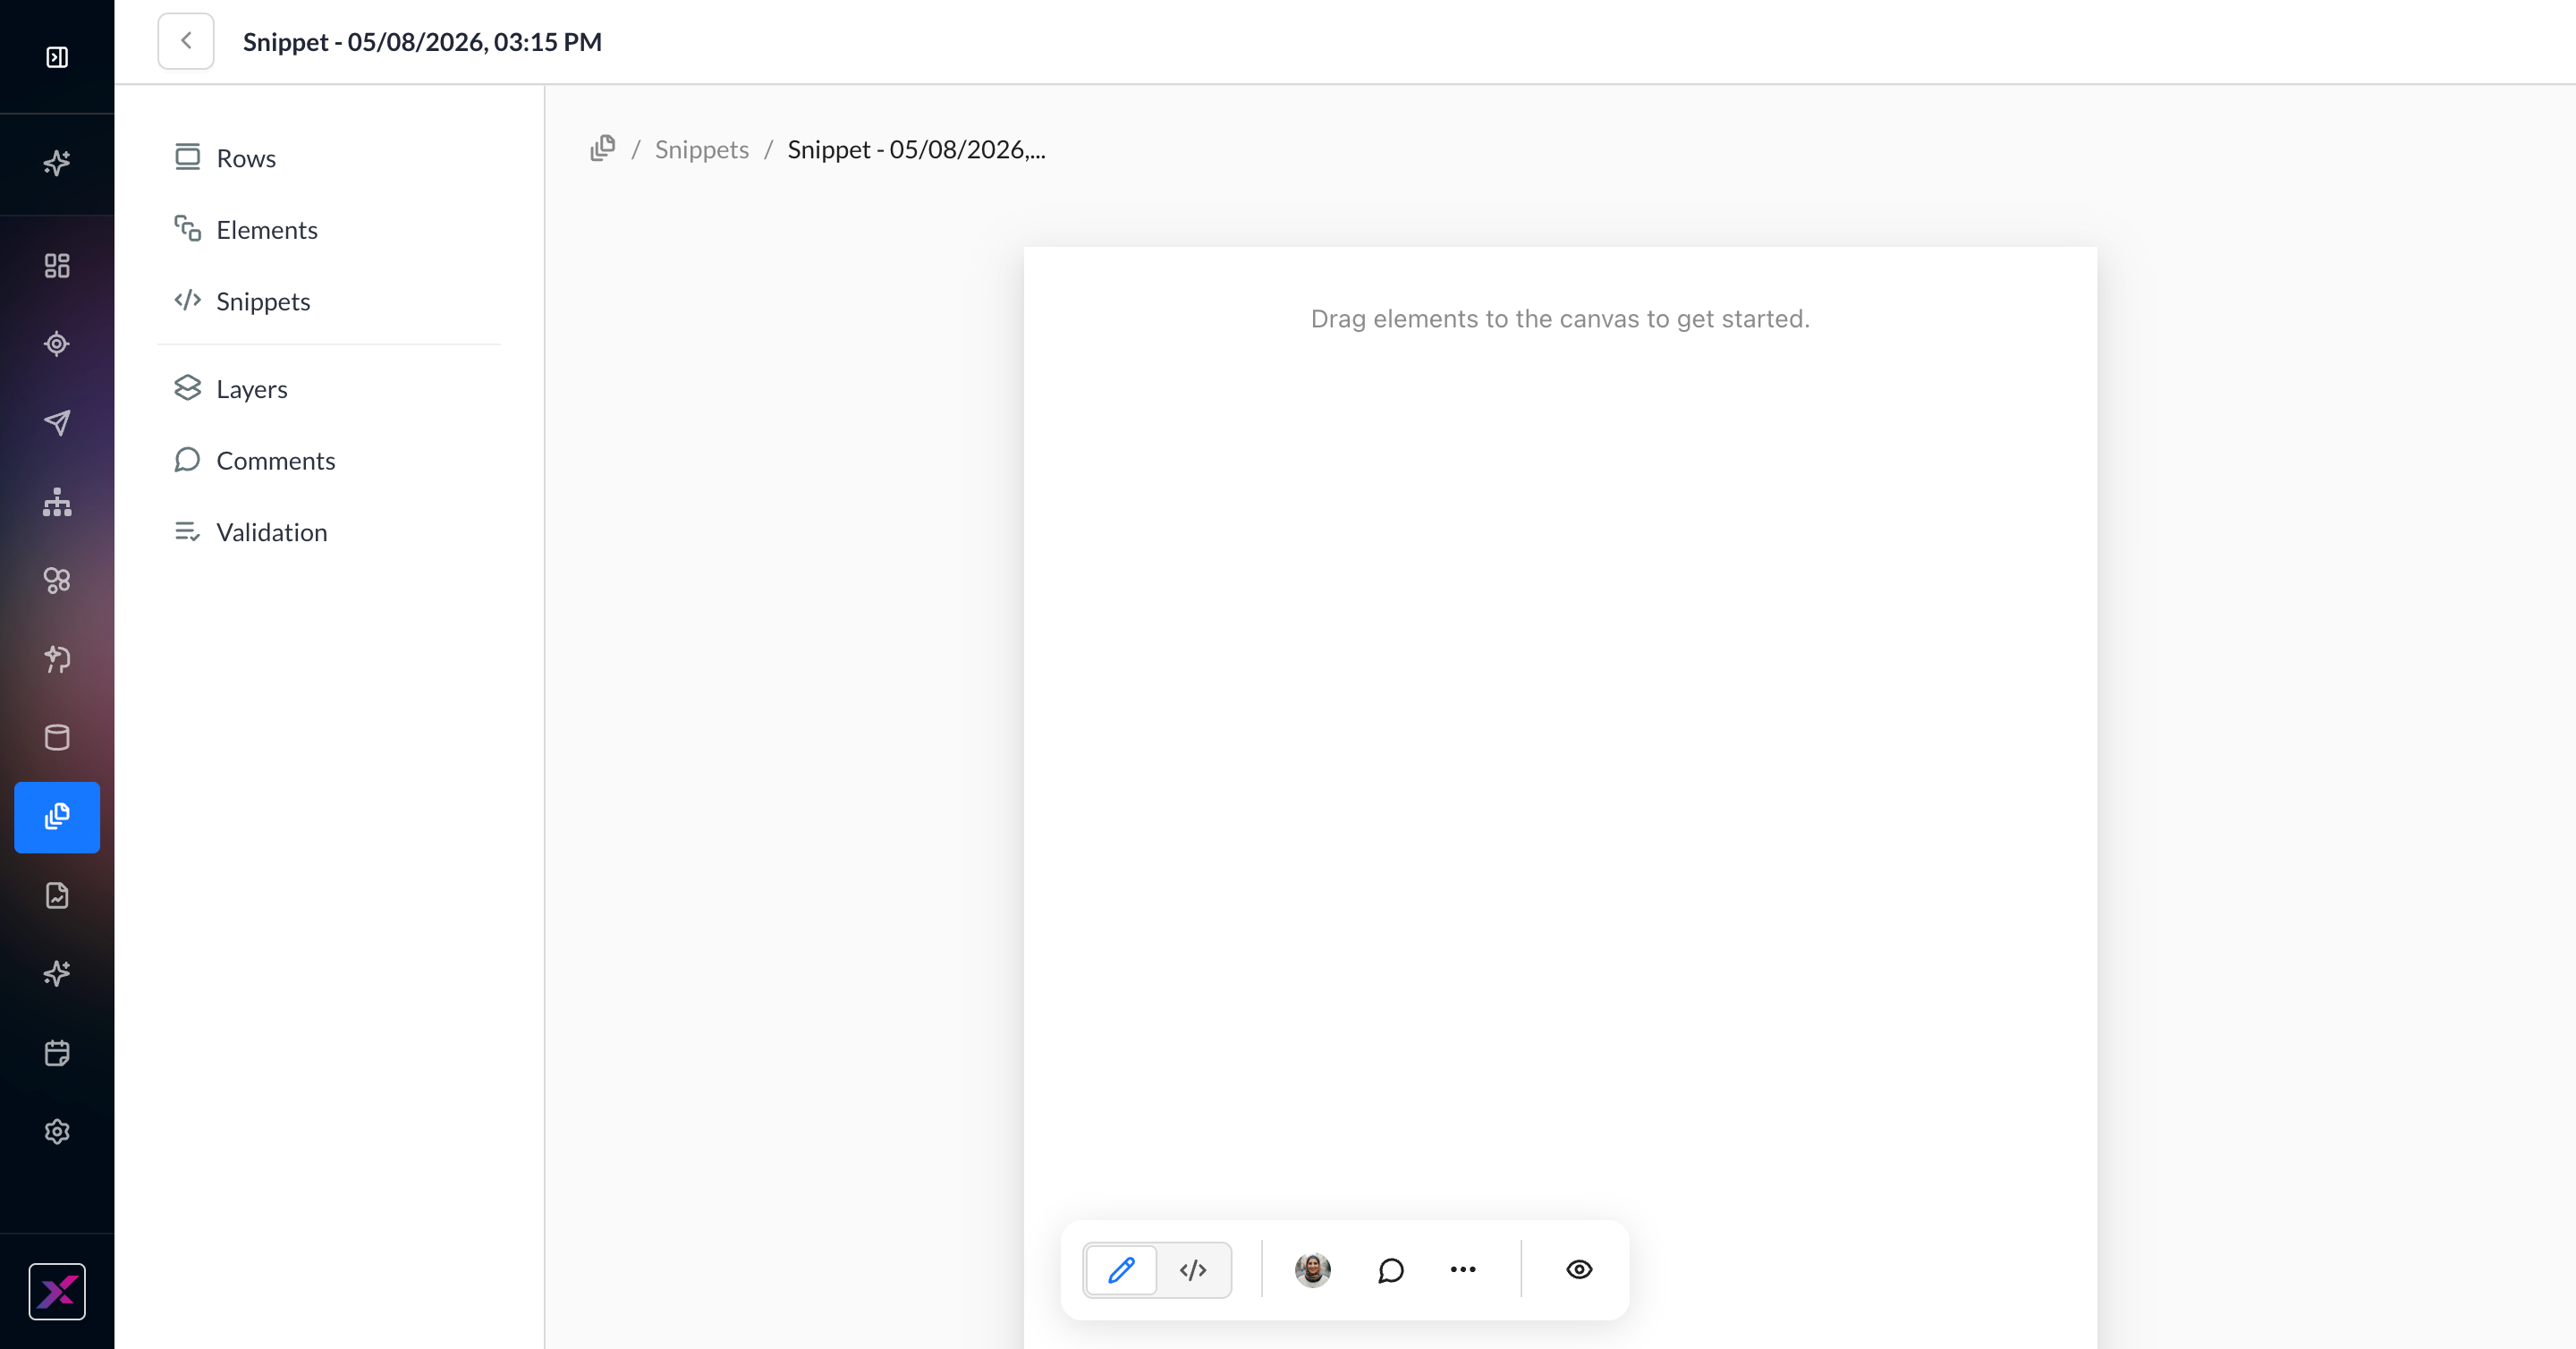
2. Visual Composer snippets support multiple rows, so you can have larger, more flexible instances of repeatable content.
3. Visual Composer uses autosave, so your snippet is ready to use once it’s created. You can retroactively rename it and add a description. Once you begin using the merge tag anywhere, you will need to be careful about renaming the snippet since the merge tag won’t be updated automatically. There’s a warning message in the About This Snippet panel.
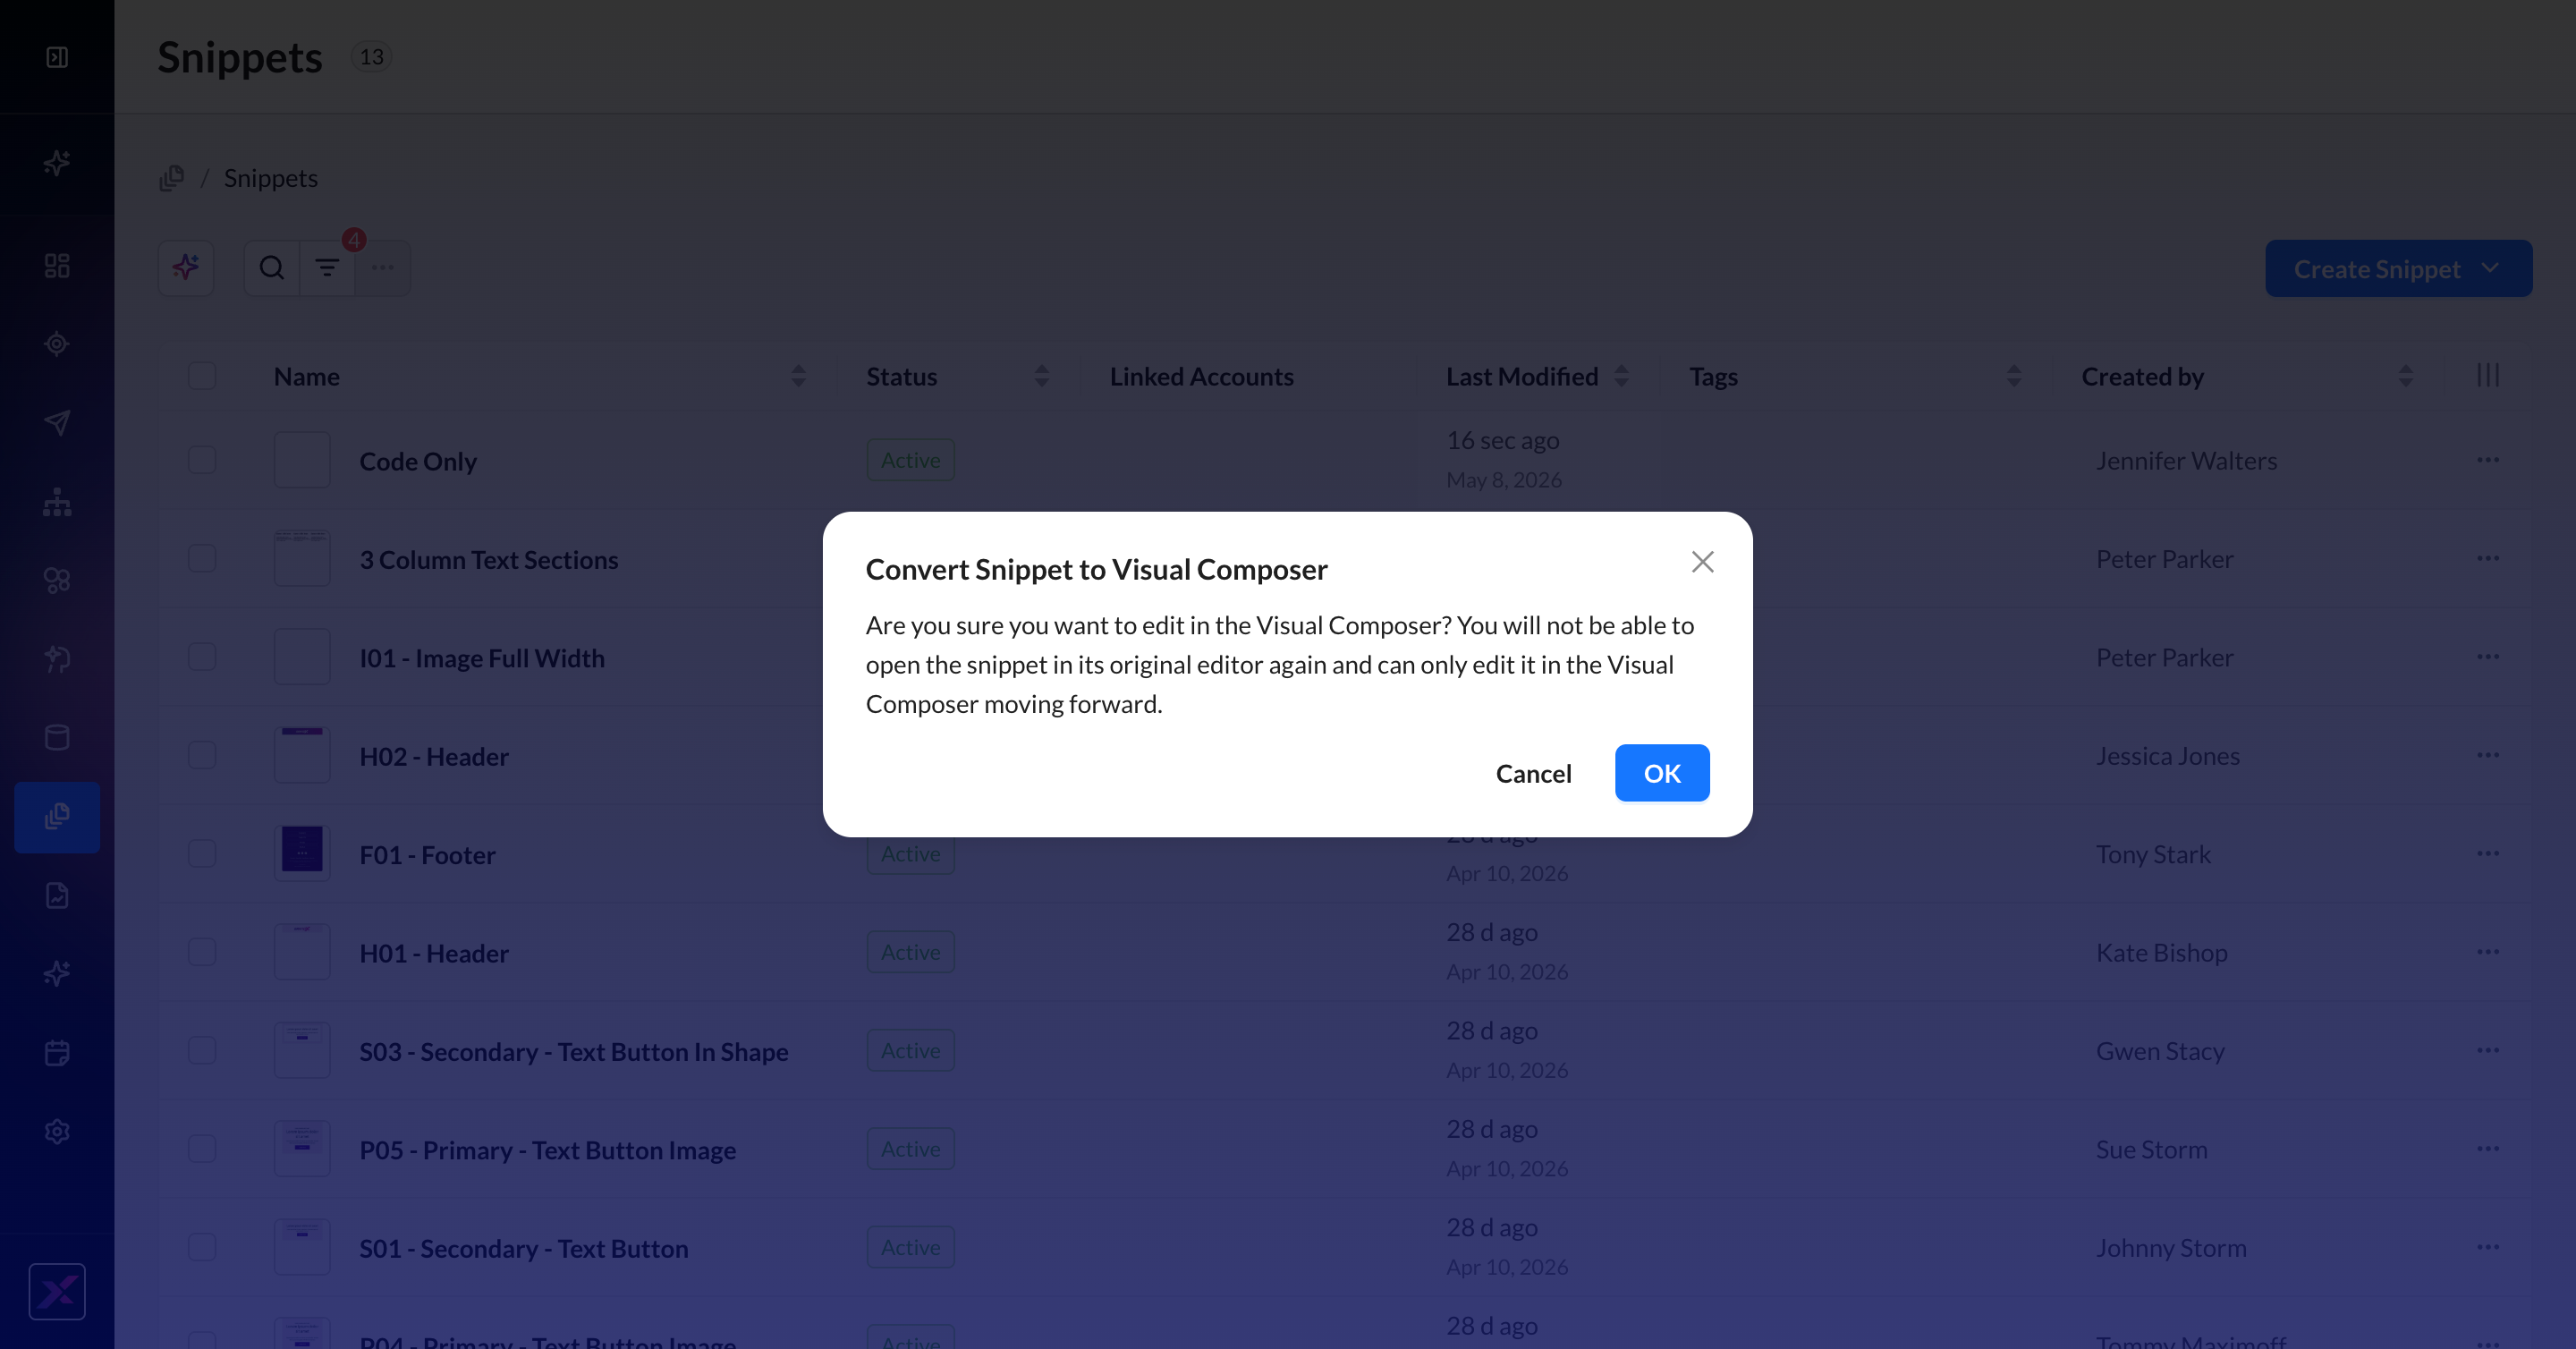
4. You can also convert existing snippets created in HTML Editor or Visual Editor to Visual Composer from the listings page, similar to templates. Click the snippet menu, then select Edit in Visual Composer.
5. Because this conversion cannot be reversed, you will need to confirm in the warning modal that you want to change the editor type. If you’d prefer to preserve your existing snippets, you can make a duplicate of each snippet and then convert the copy.
HTML Snippets
1. Type in the code for the snippet in the HTML editor or click on the snippets icon to paste content from an existing snippet or insert a reference to it.
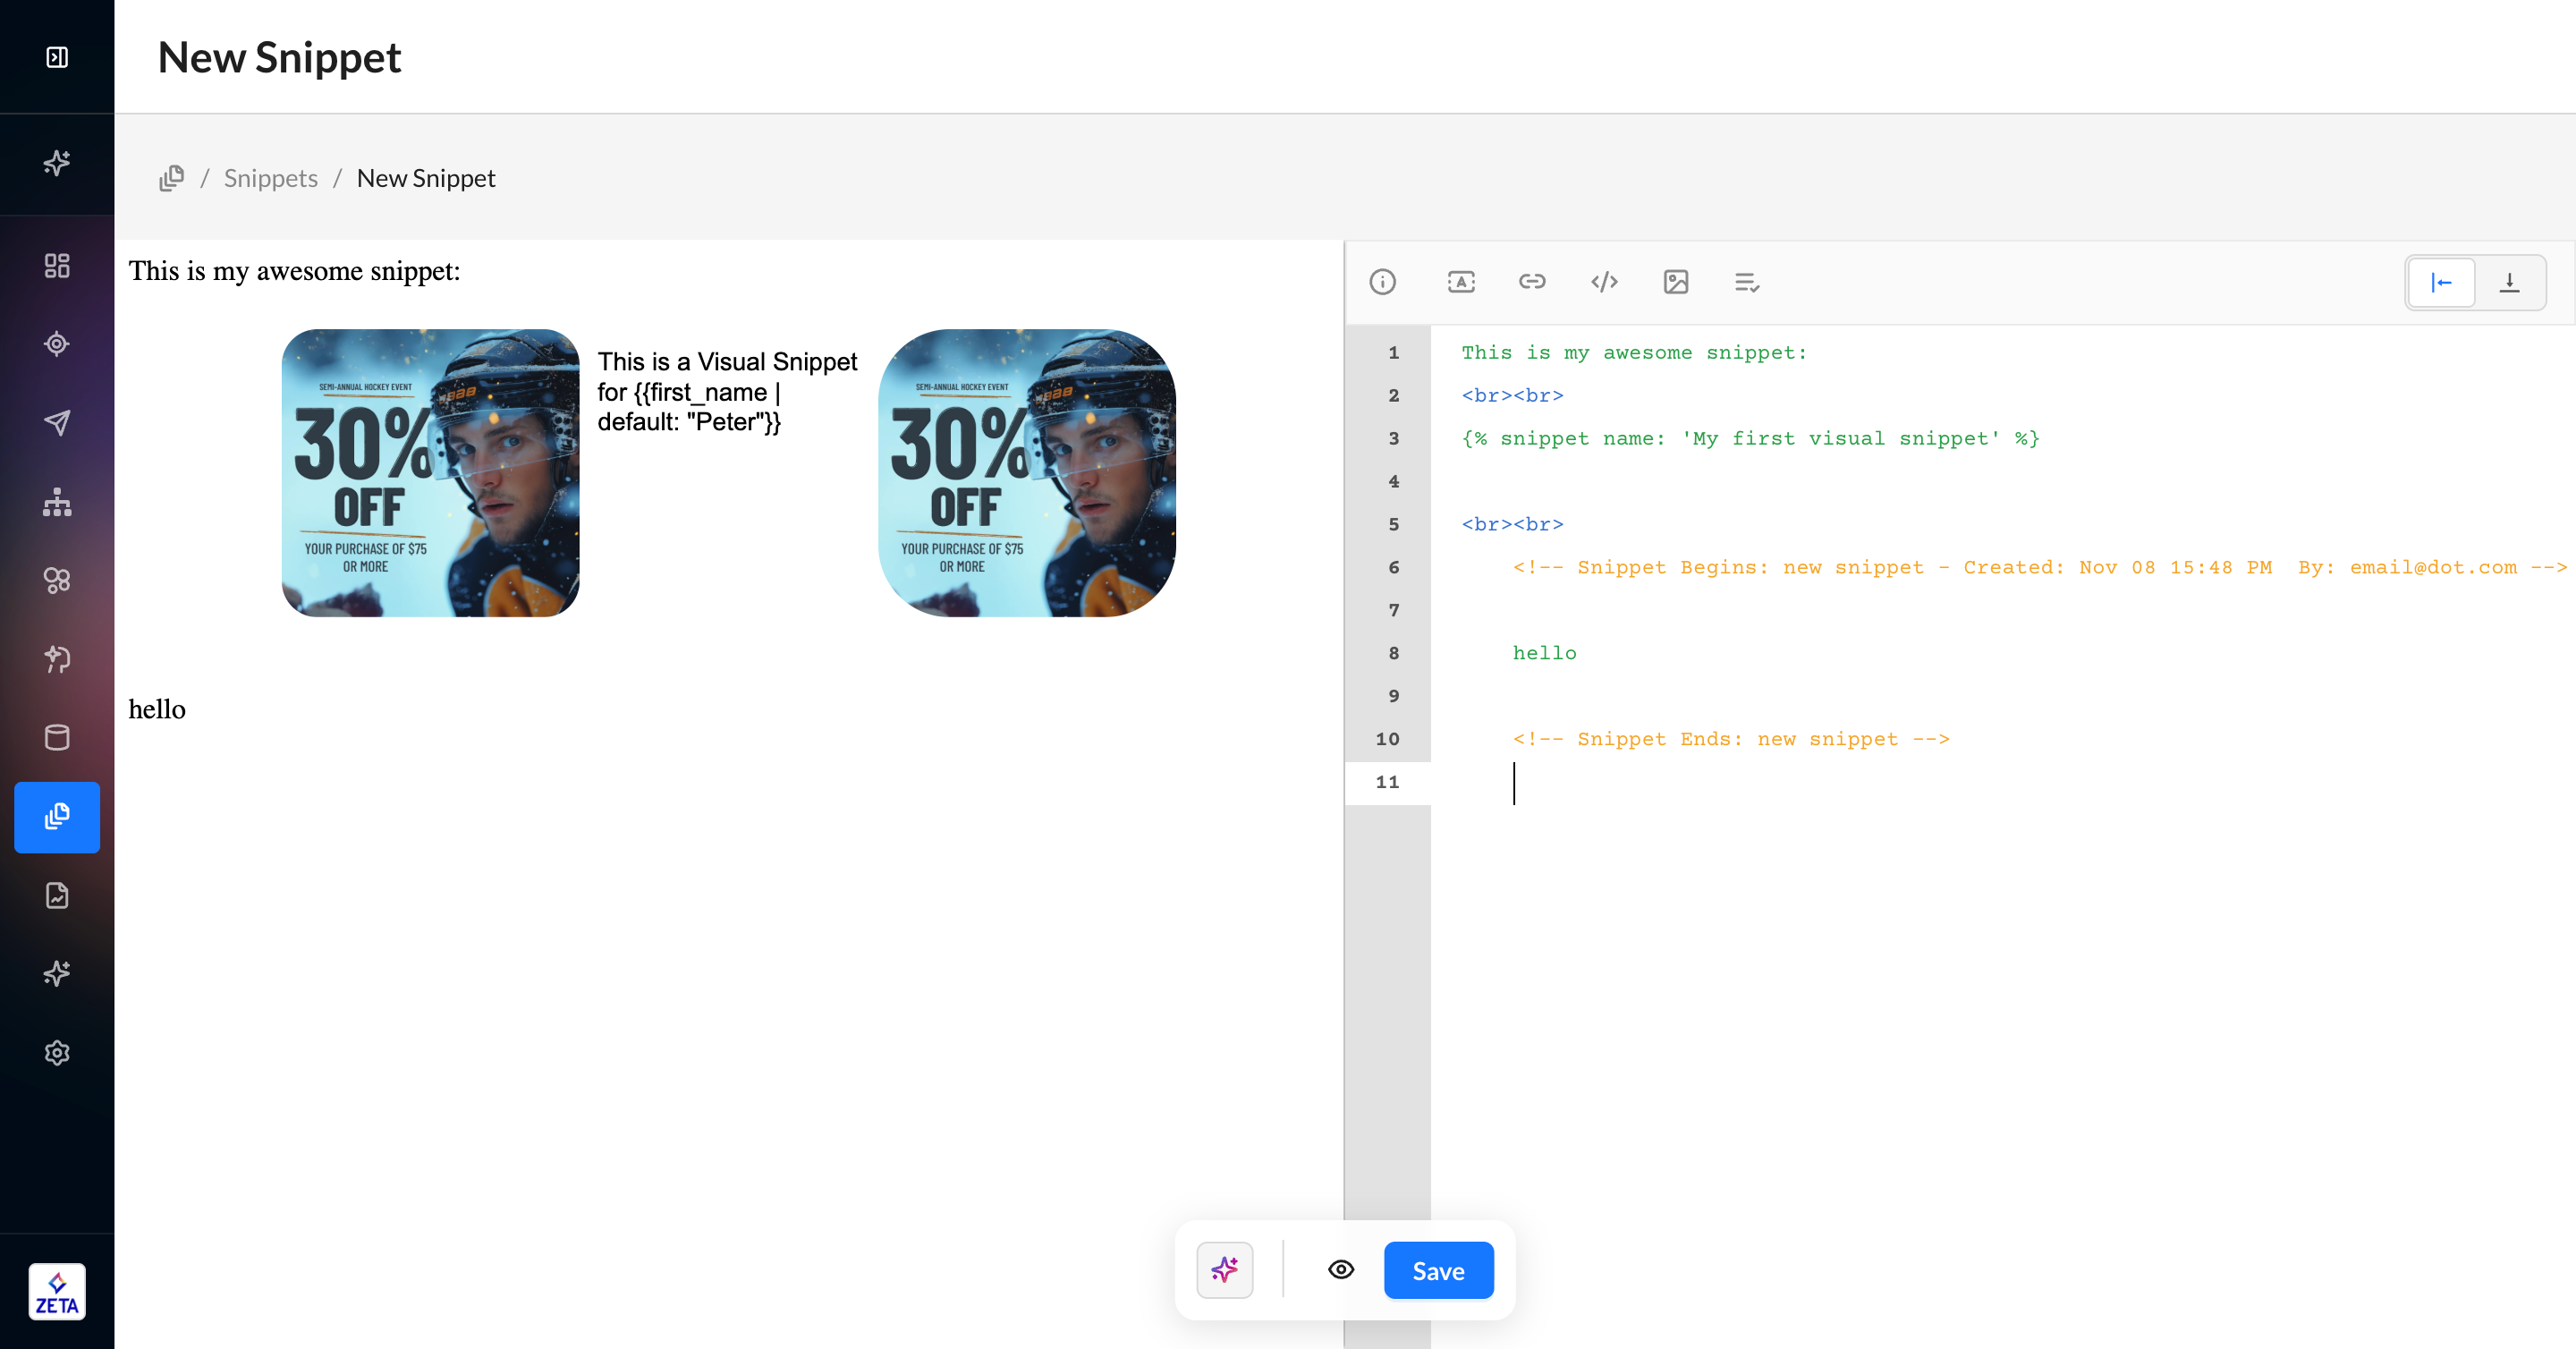
2. Use the navigation to move the code editor to the left-hand side or below the preview.
3. Some properties, special links, and snippets are also available for use in the code or content via the toolbar directly above the code editor. You can also edit links to add reporting tags when these snippets are referenced in campaigns or run a link validator to make sure your links are using the correct syntax.
4. When you’re done, click Save.
-
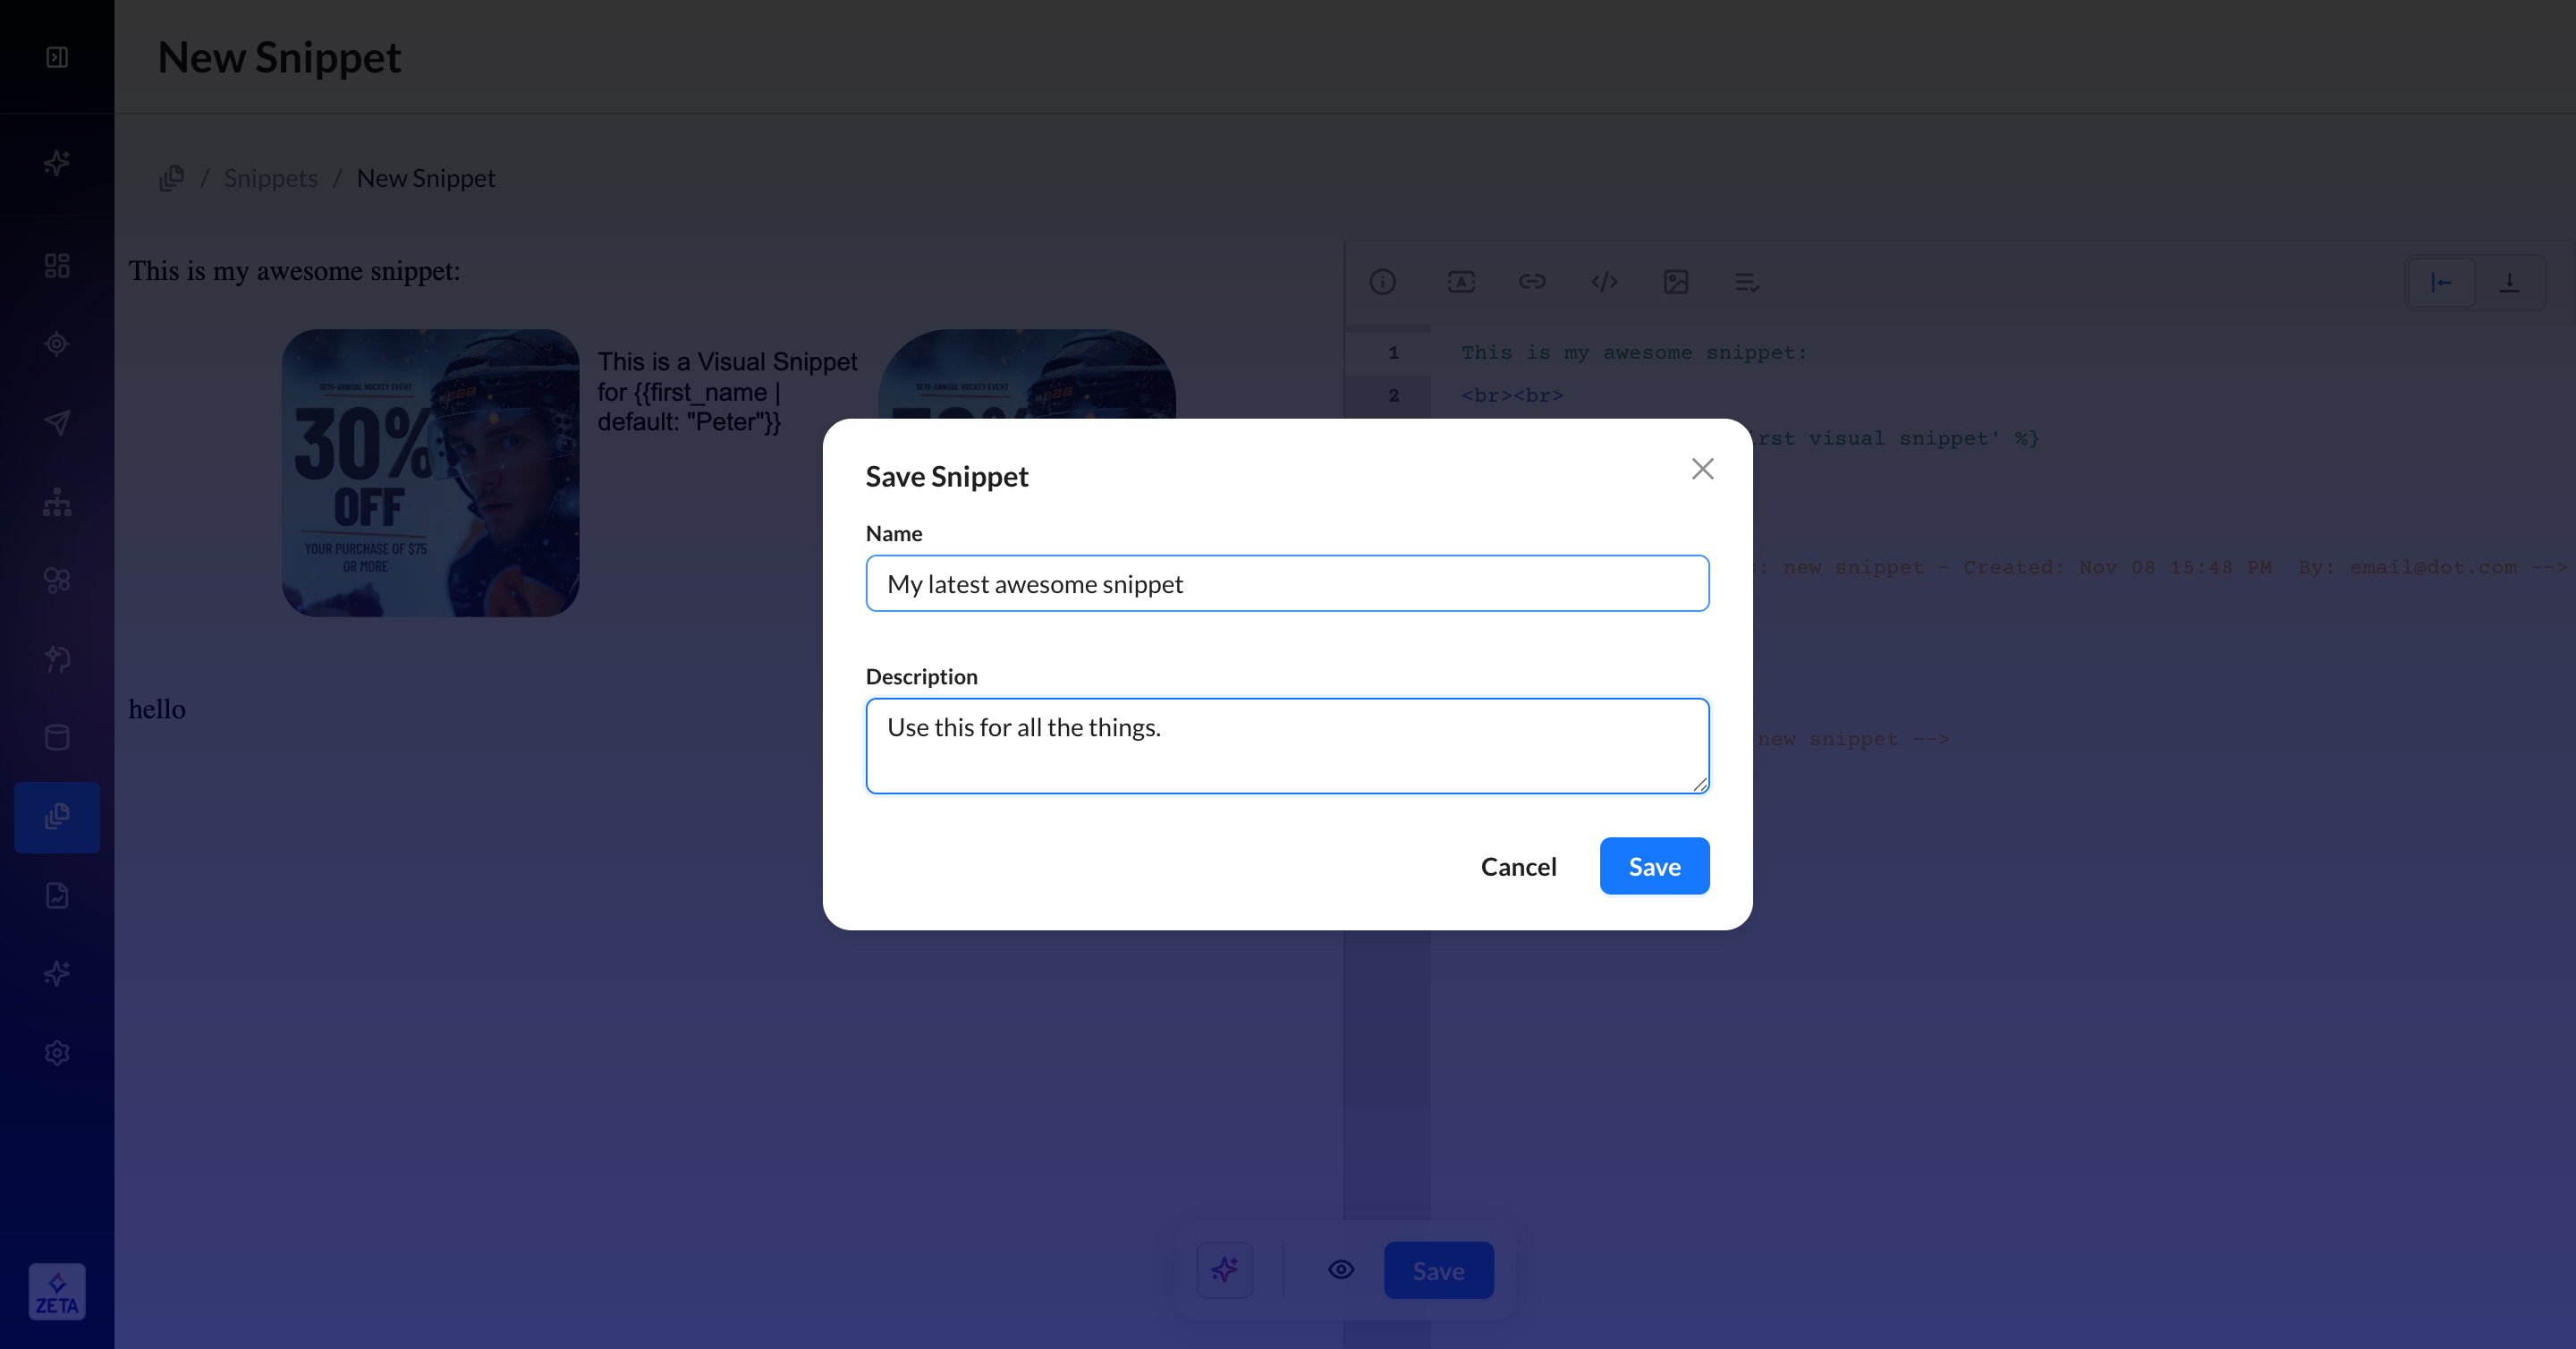
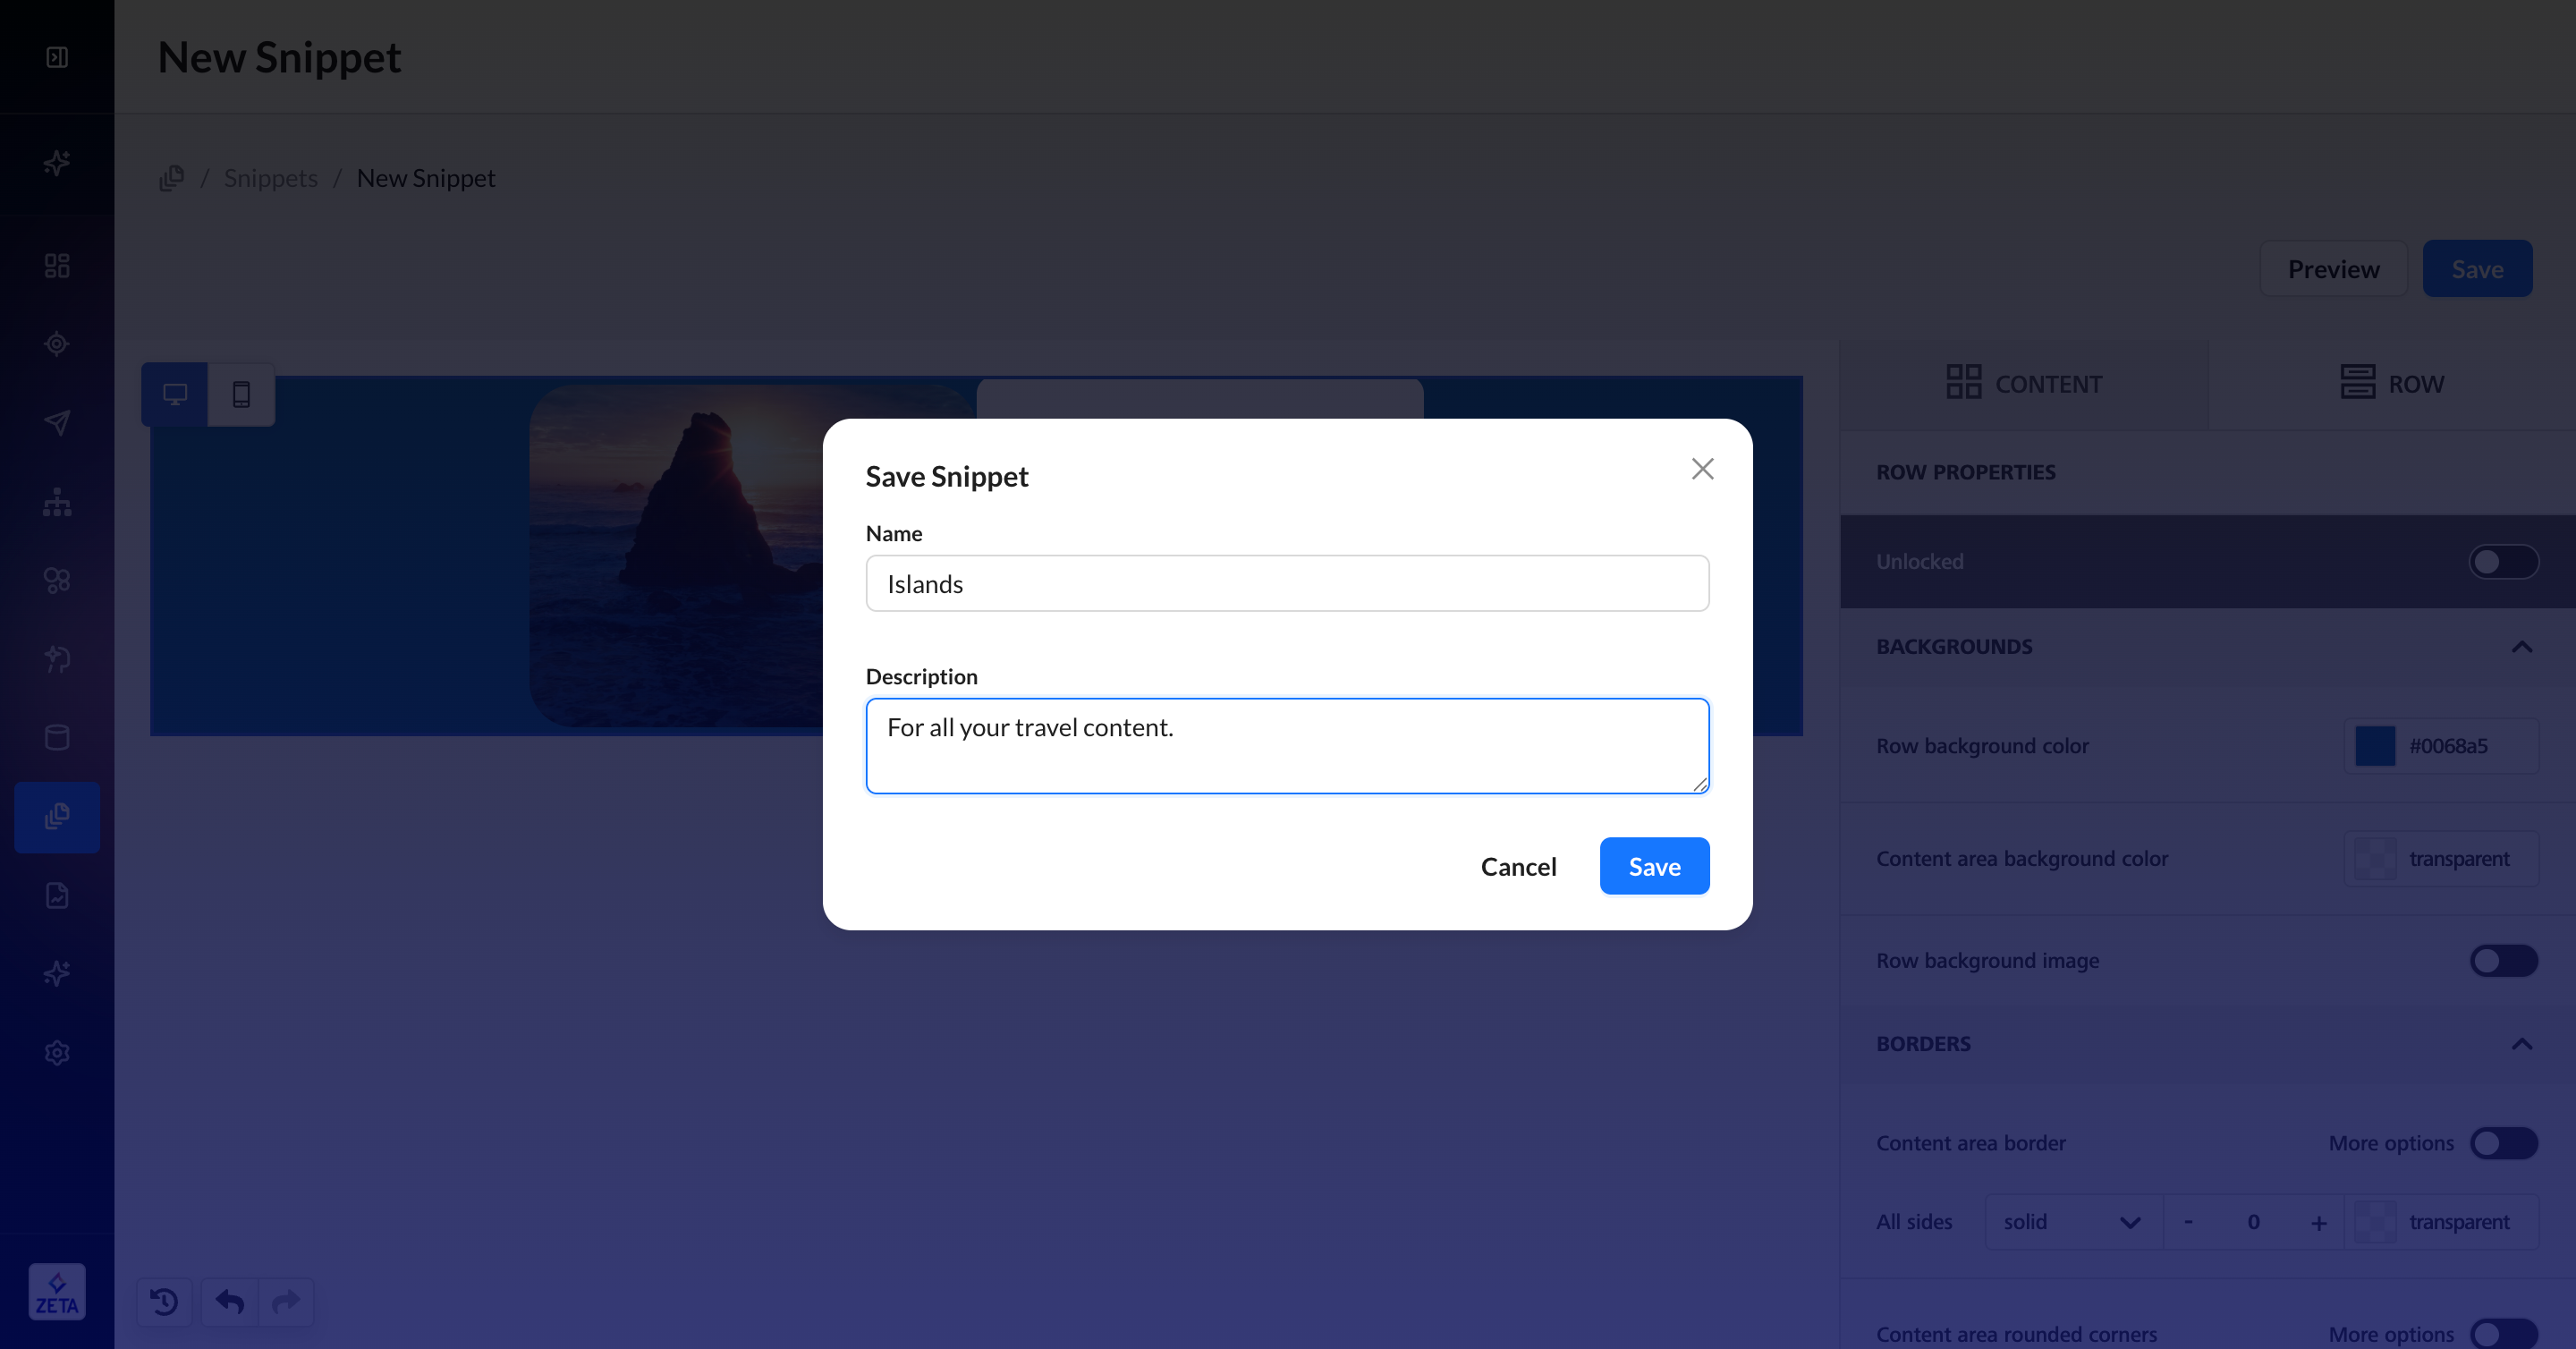
Add a name for the snippet; the name will be the same as used in the merge tag created by the platform. This field is restricted to 50 characters, and the only special characters allowed are hyphens and dashes.
-
The description should narrate what purpose the snippet serves. This field is limited to 200 characters.
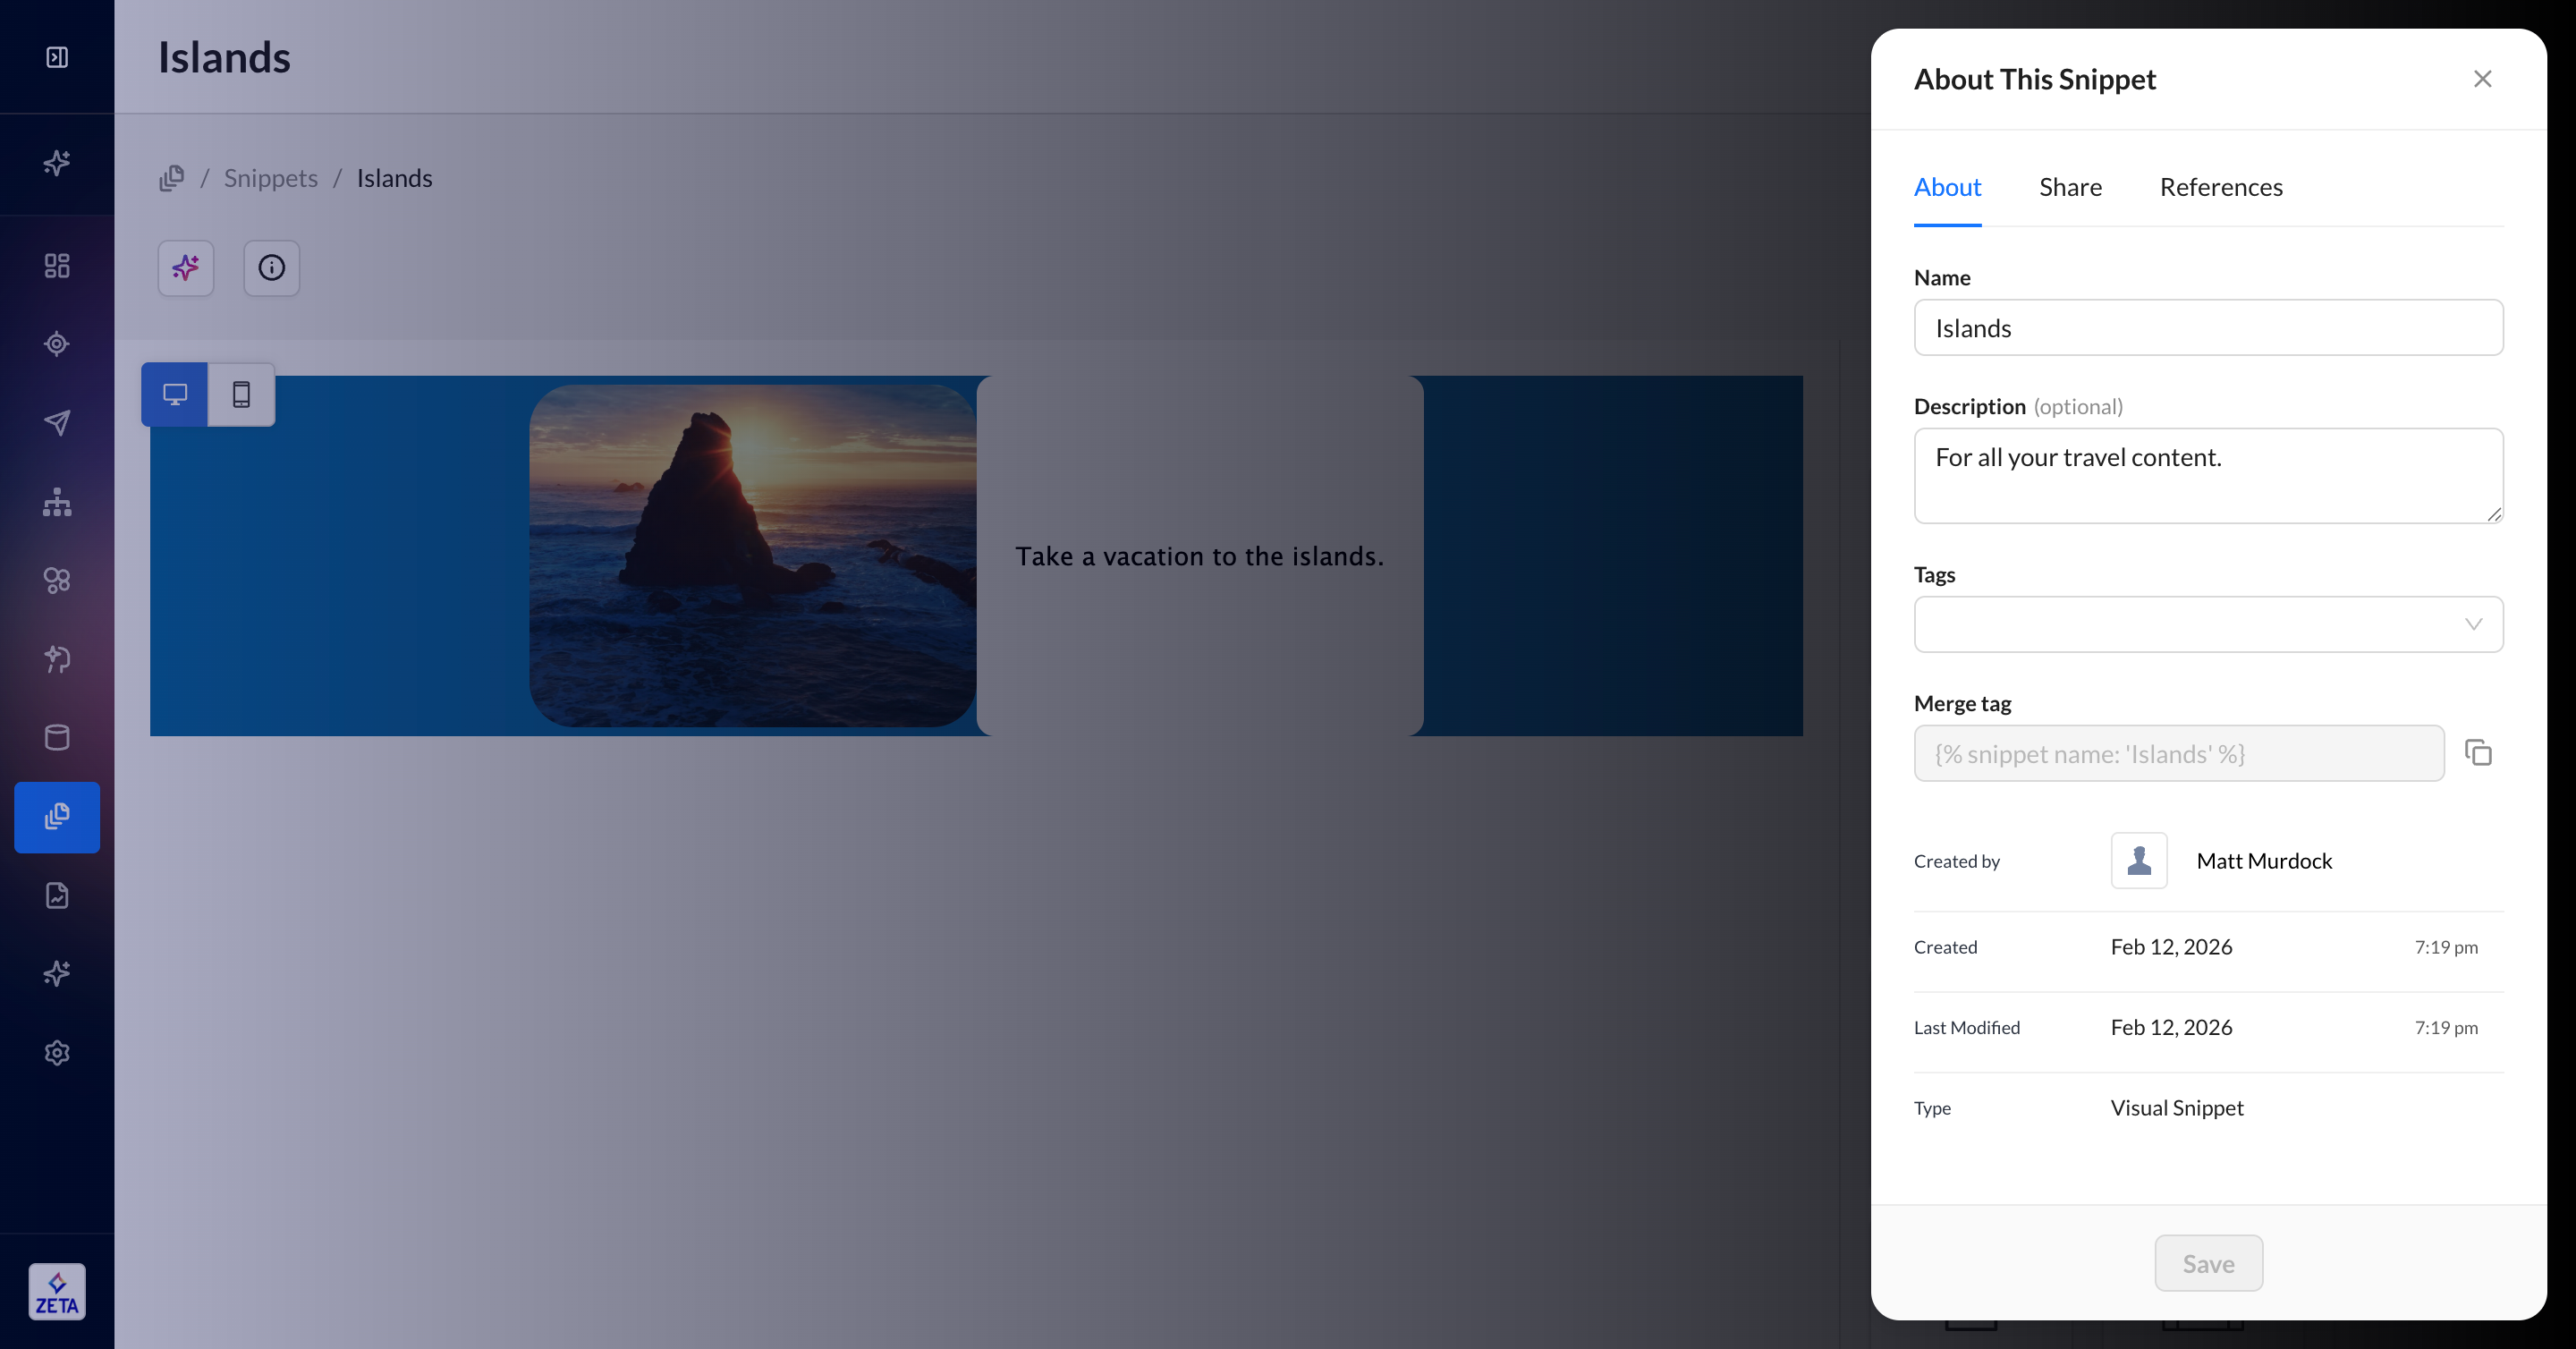
5. Upon saving the snippet, you can click on the icon to open the About This Snippet panel. Here, you can rename the snippet, update the description, add tags, or share the snippet with another account.

Visual Snippets
1. Visual Snippets is a single-row version of the Visual Editor, so all content blocks and rows are available.
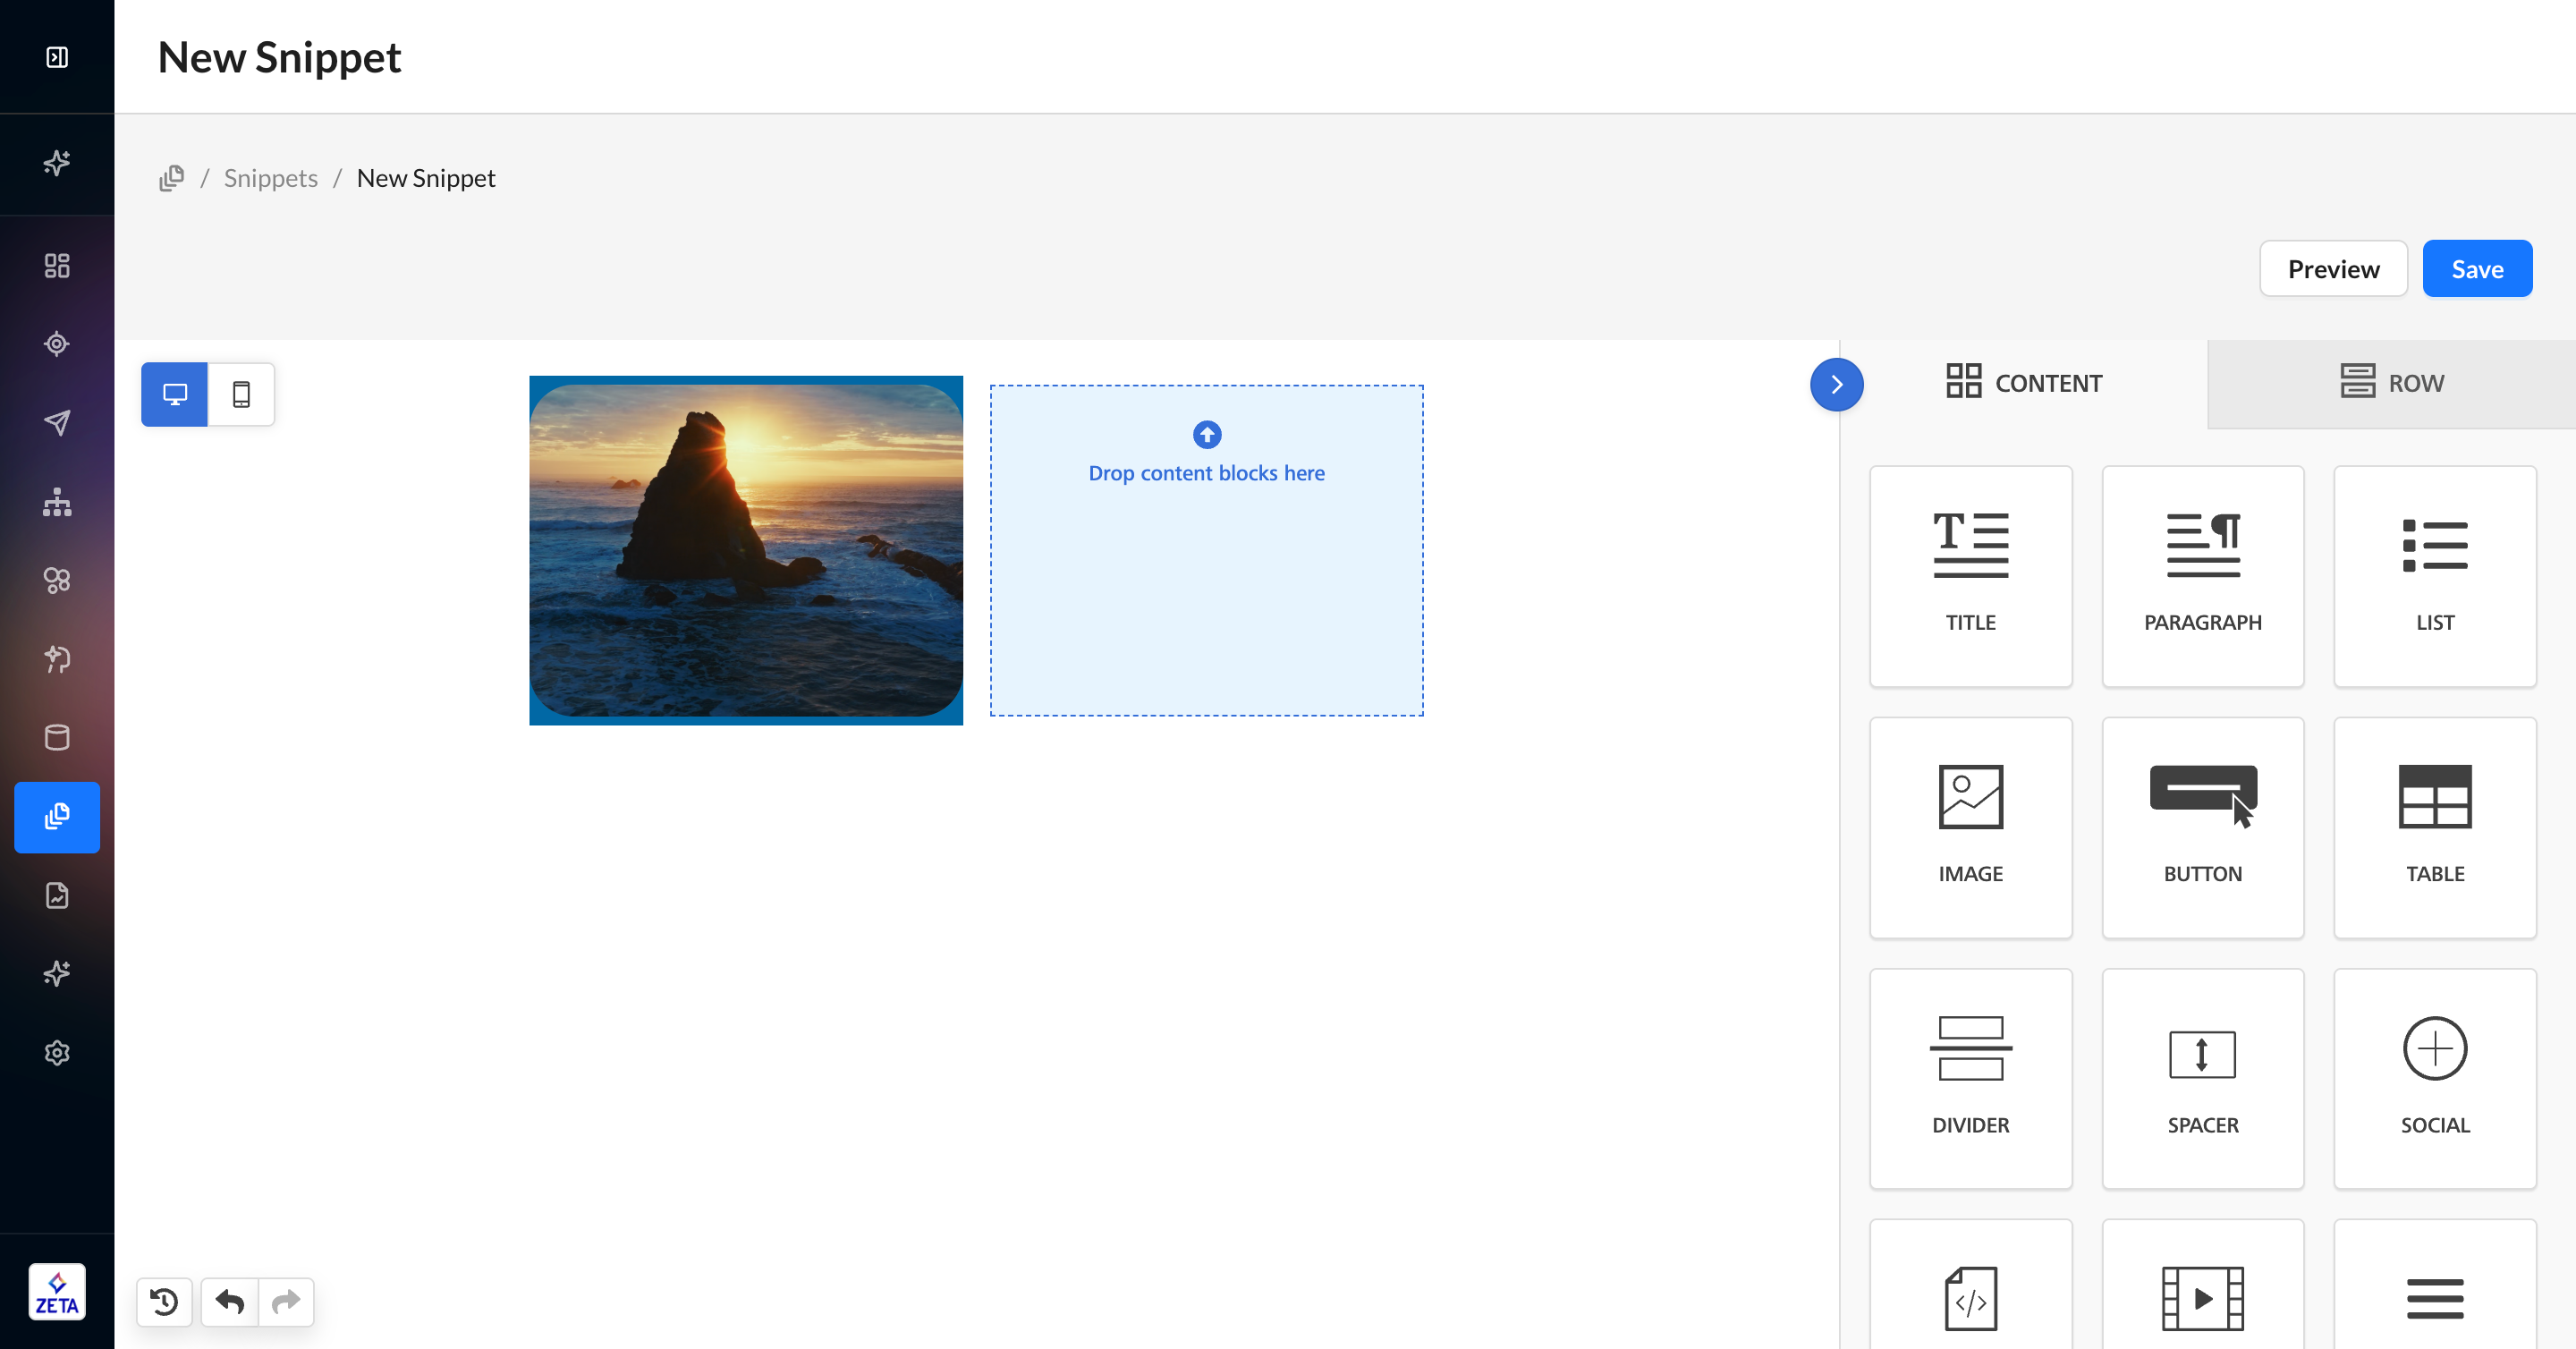
2. To add multiple content blocks, add more columns to the row.
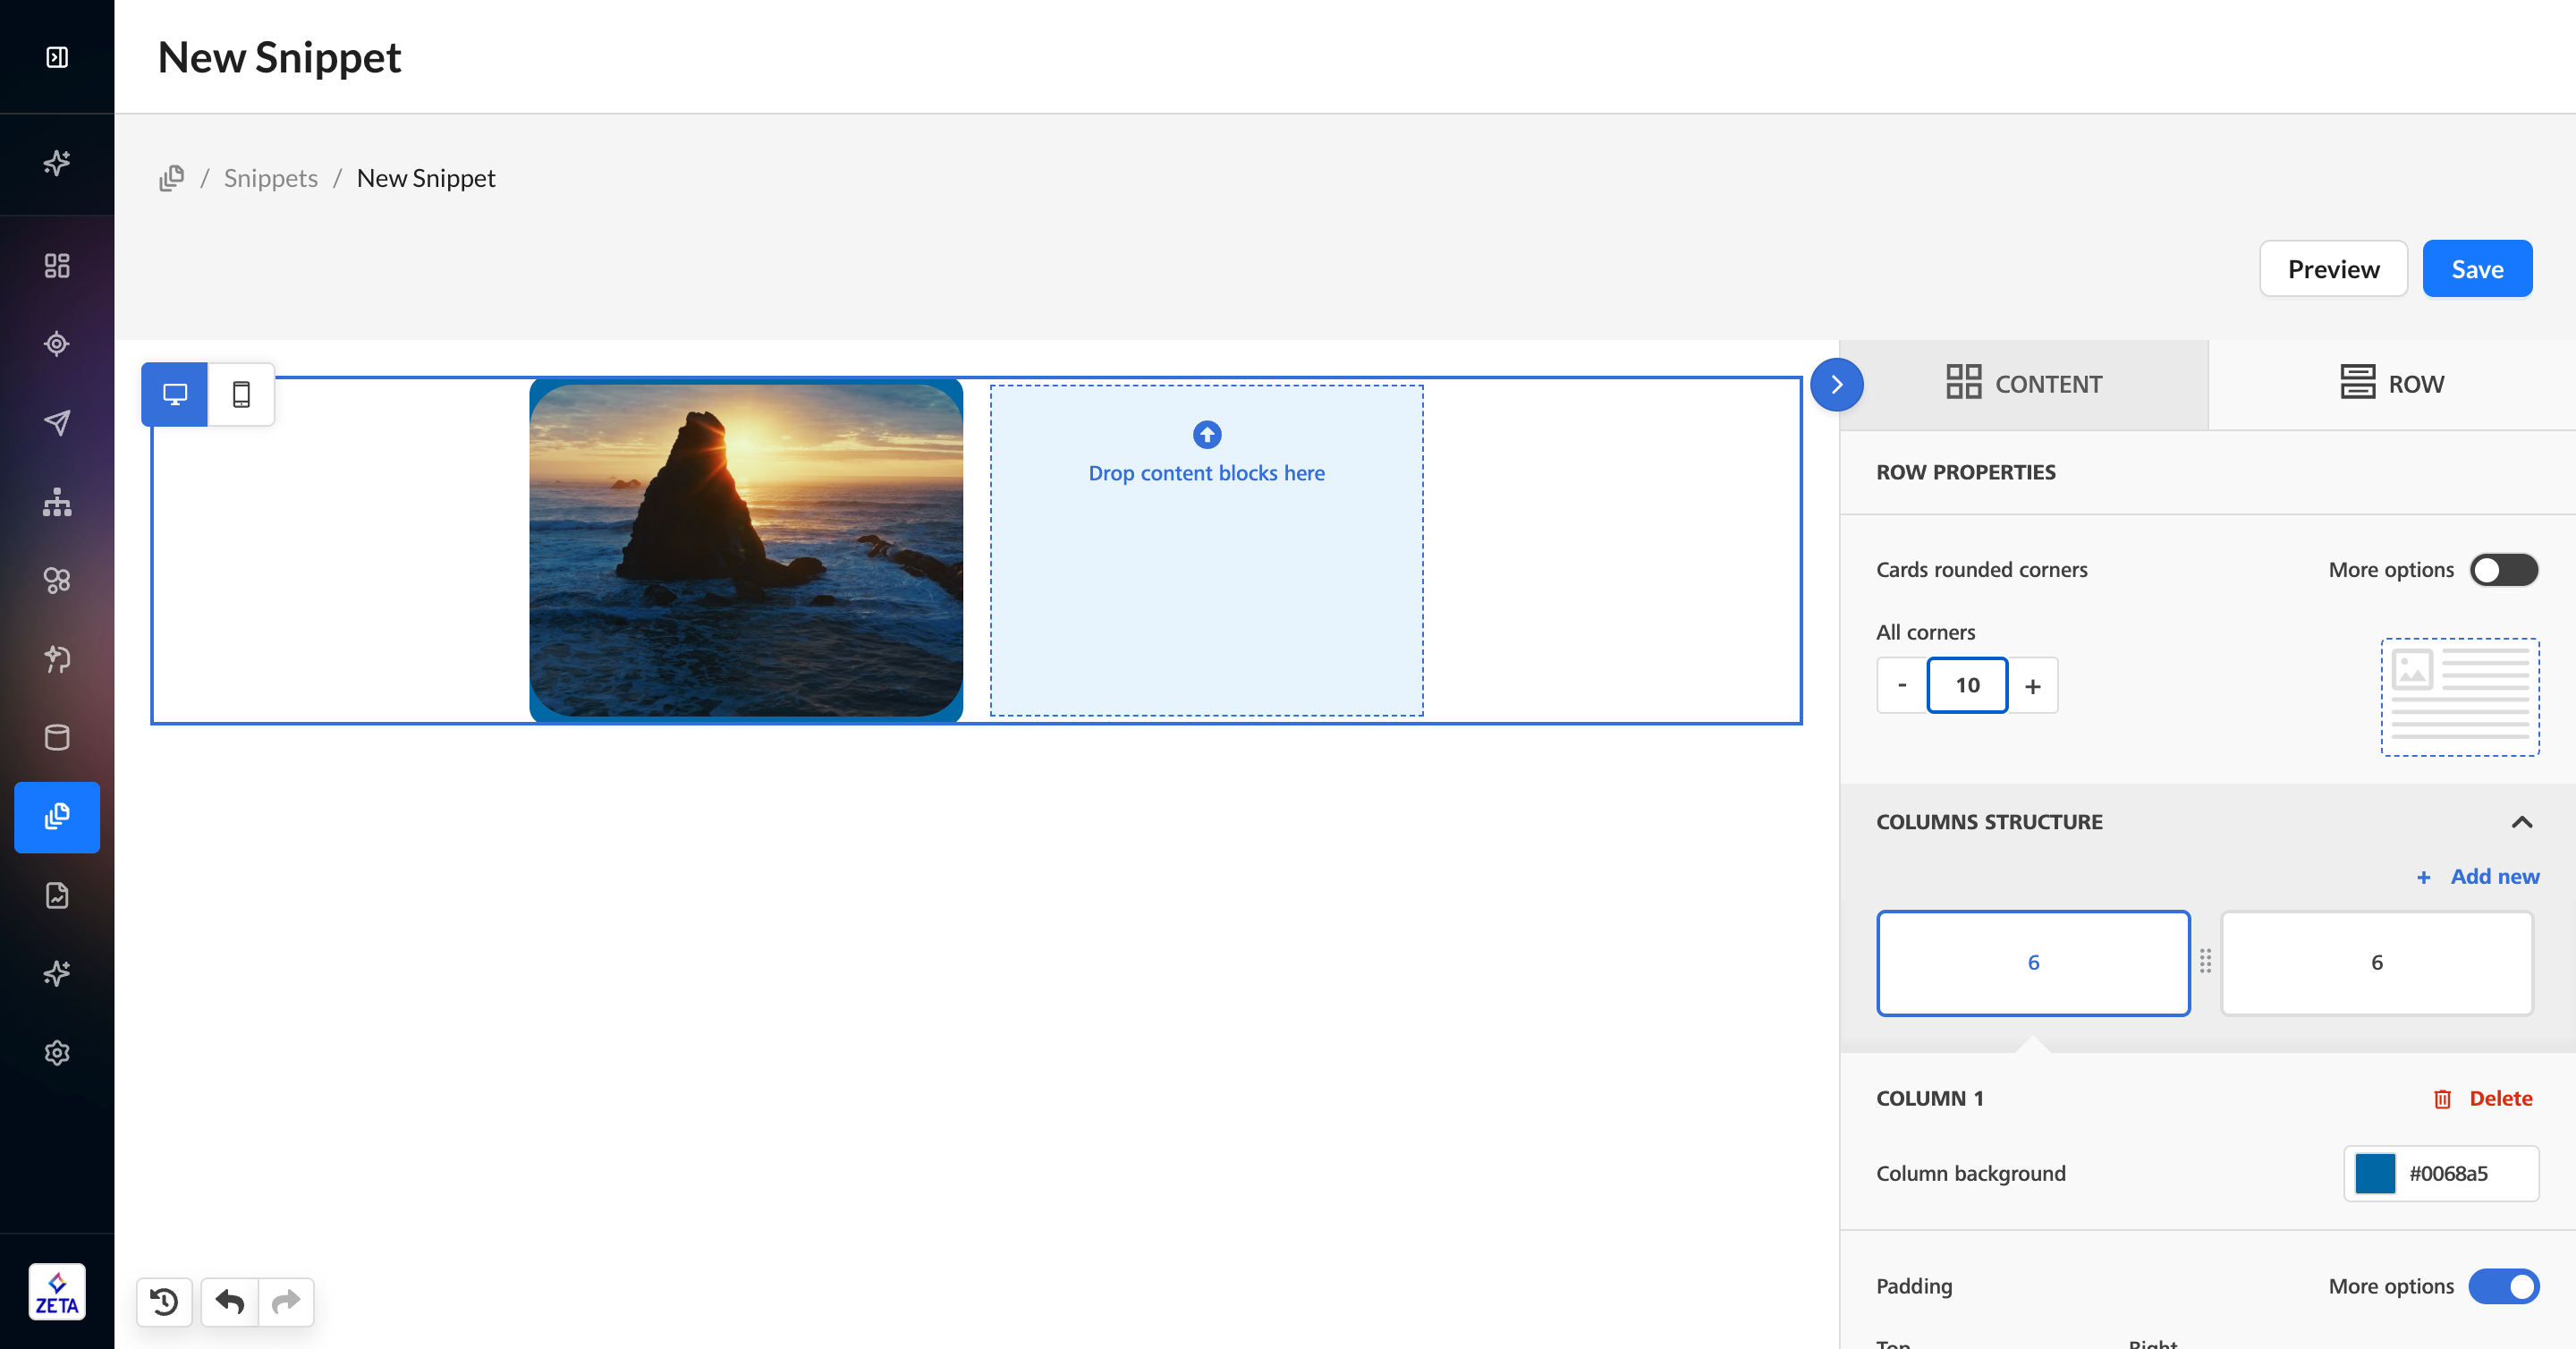
3. Rows have more settings, like card styles and column background colors, to help you fine-tune your content.
4. When you’re done, click Save.
-
Add a name for the snippet; the name will be the same as used in the merge tag created by the platform. This field is restricted to 50 characters, and the only special characters allowed are hyphens and dashes.
-
The description should narrate what purpose the snippet serves. This field is limited to 200 characters.
5. Upon saving the snippet, you can click on the icon to open the About This Snippet panel. Here, you can rename the snippet, update the description, add tags, or share the snippet with another account.
The Visual Snippets editor does not have a settings tab because Visual Snippets inherit settings from the templates that they’re inserted into.
Sharing Snippets
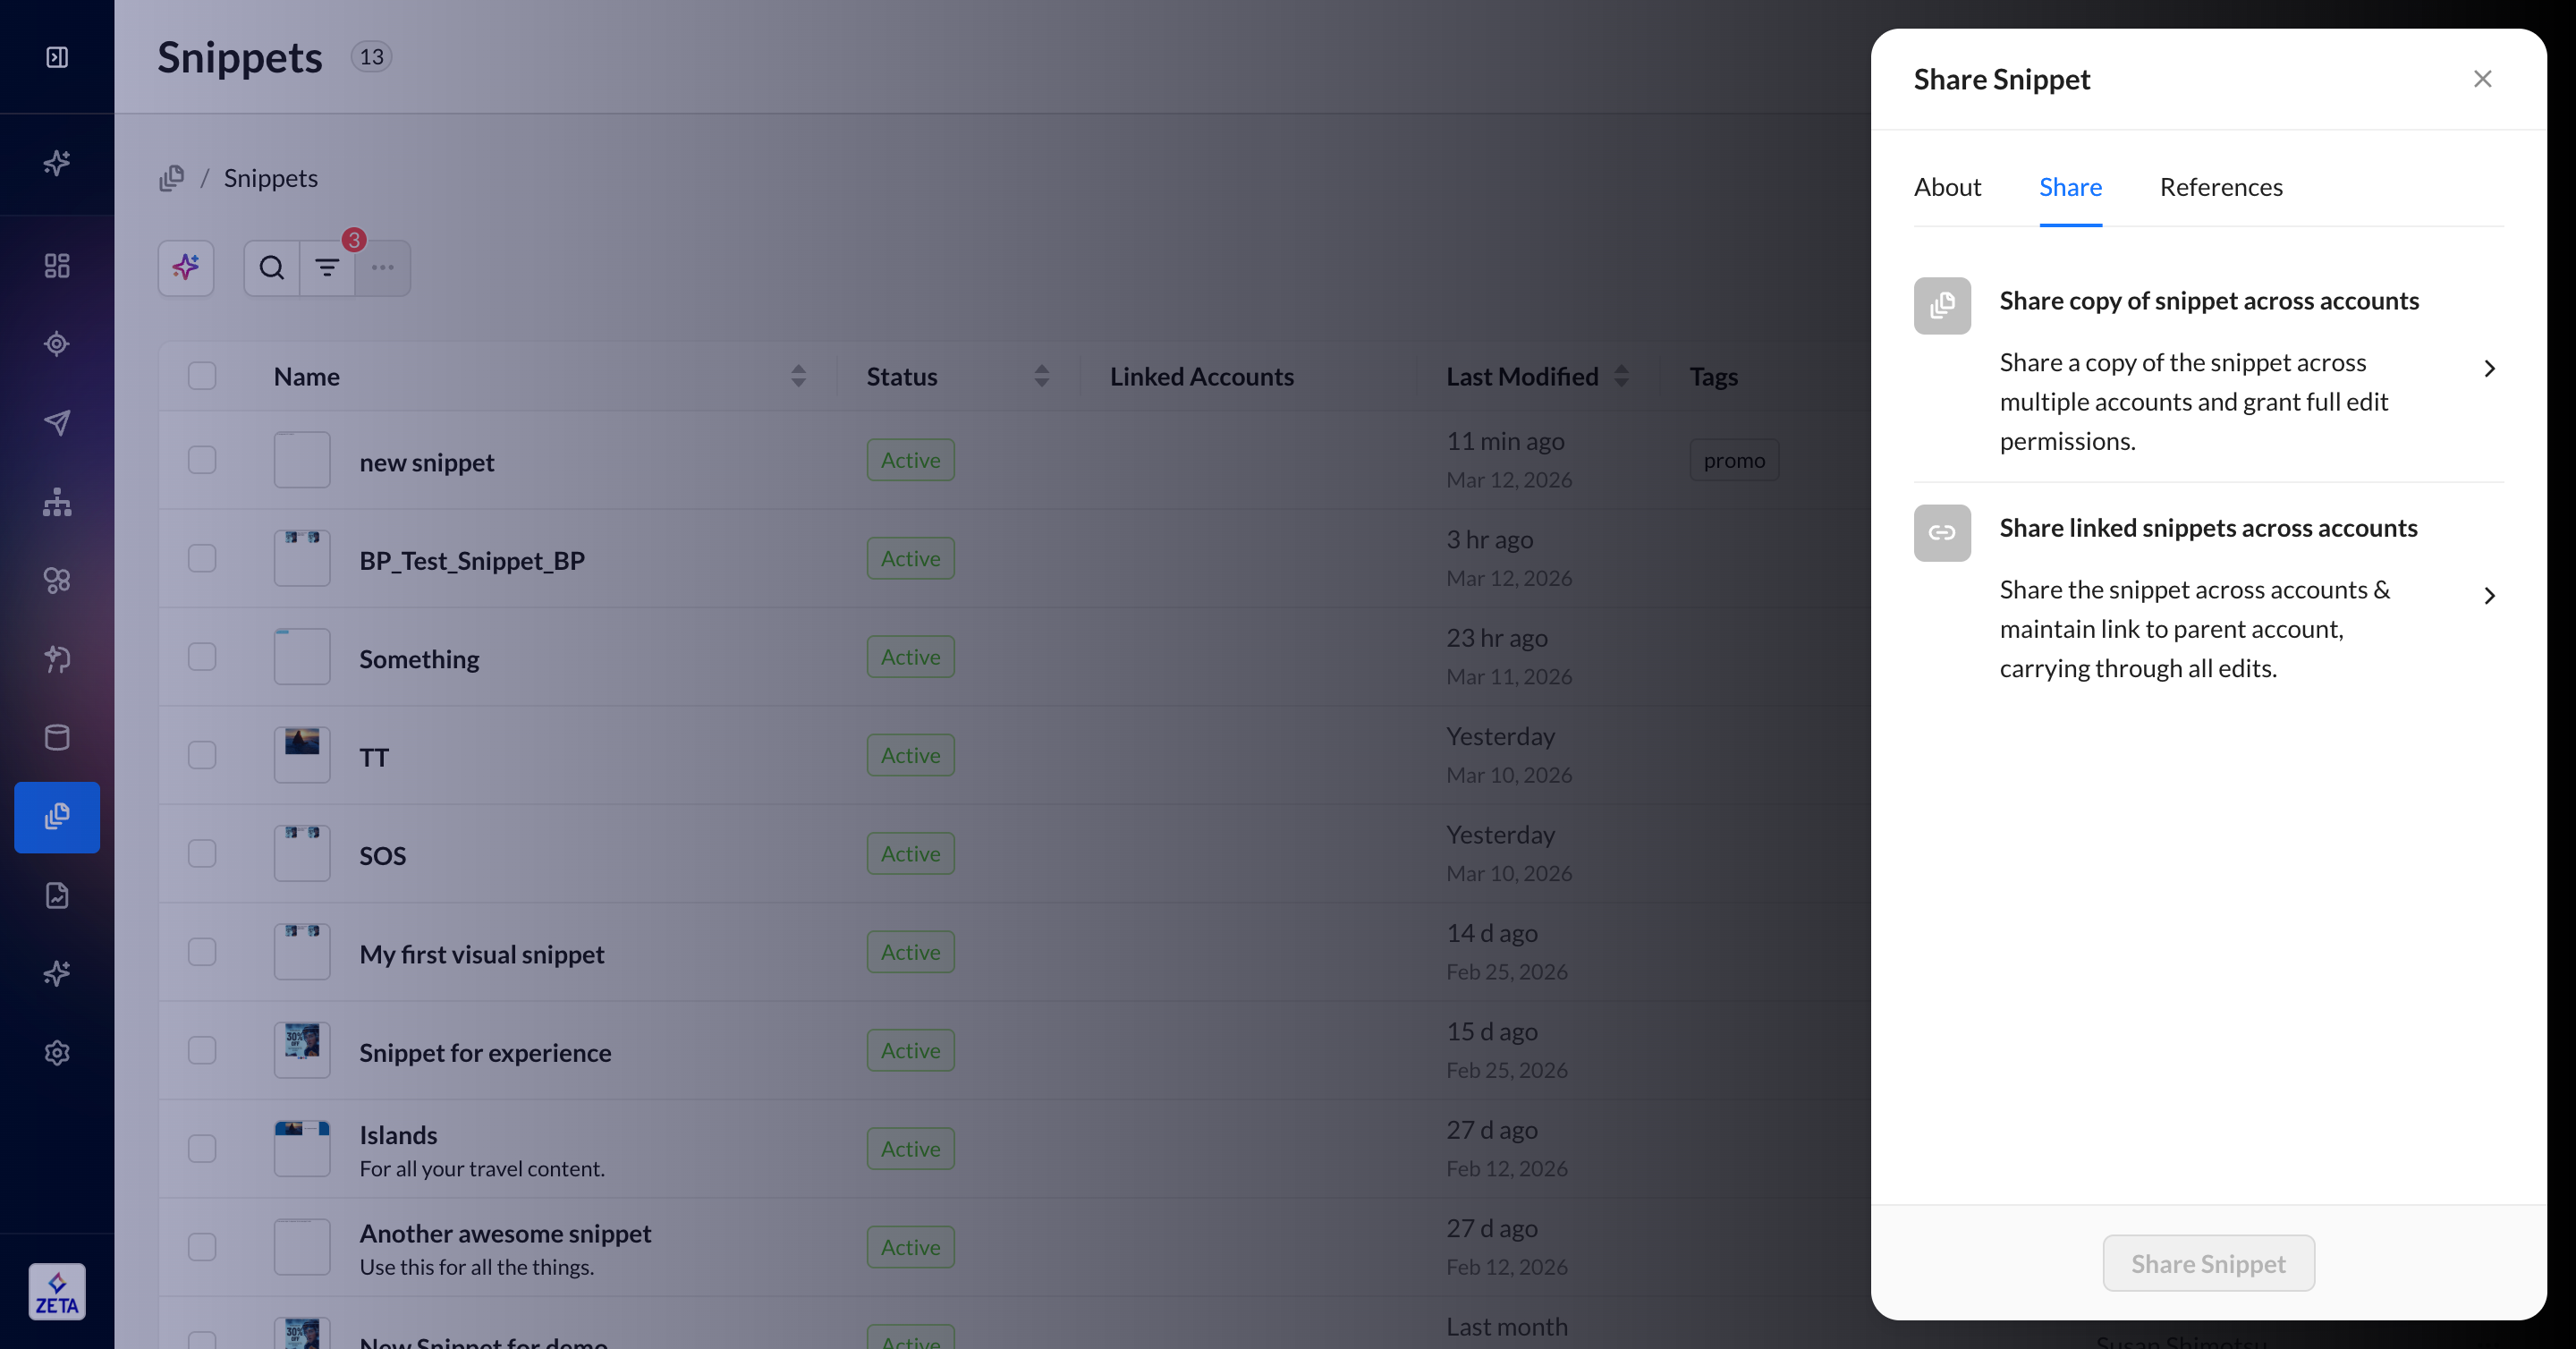
To simplify testing across development and production accounts, you can share a snippet either as a copy or a linked copy to accounts within the same family structure.
On the Snippets page, select a snippet and click Share from the snippet menu.
-
Share Snippet Copy: Create a duplicate of the snippet across accounts, with no link back to the original snippet.
-
Share Linked Snippet: Make the snippet available to be used in multiple accounts, where all content is controlled by the original snippet. You cannot make changes to a linked snippet in the accounts that are linked.
Share access with users & teams is a separate feature from snippets sharing. Learn more about Selective Access.
Share Snippet Copy
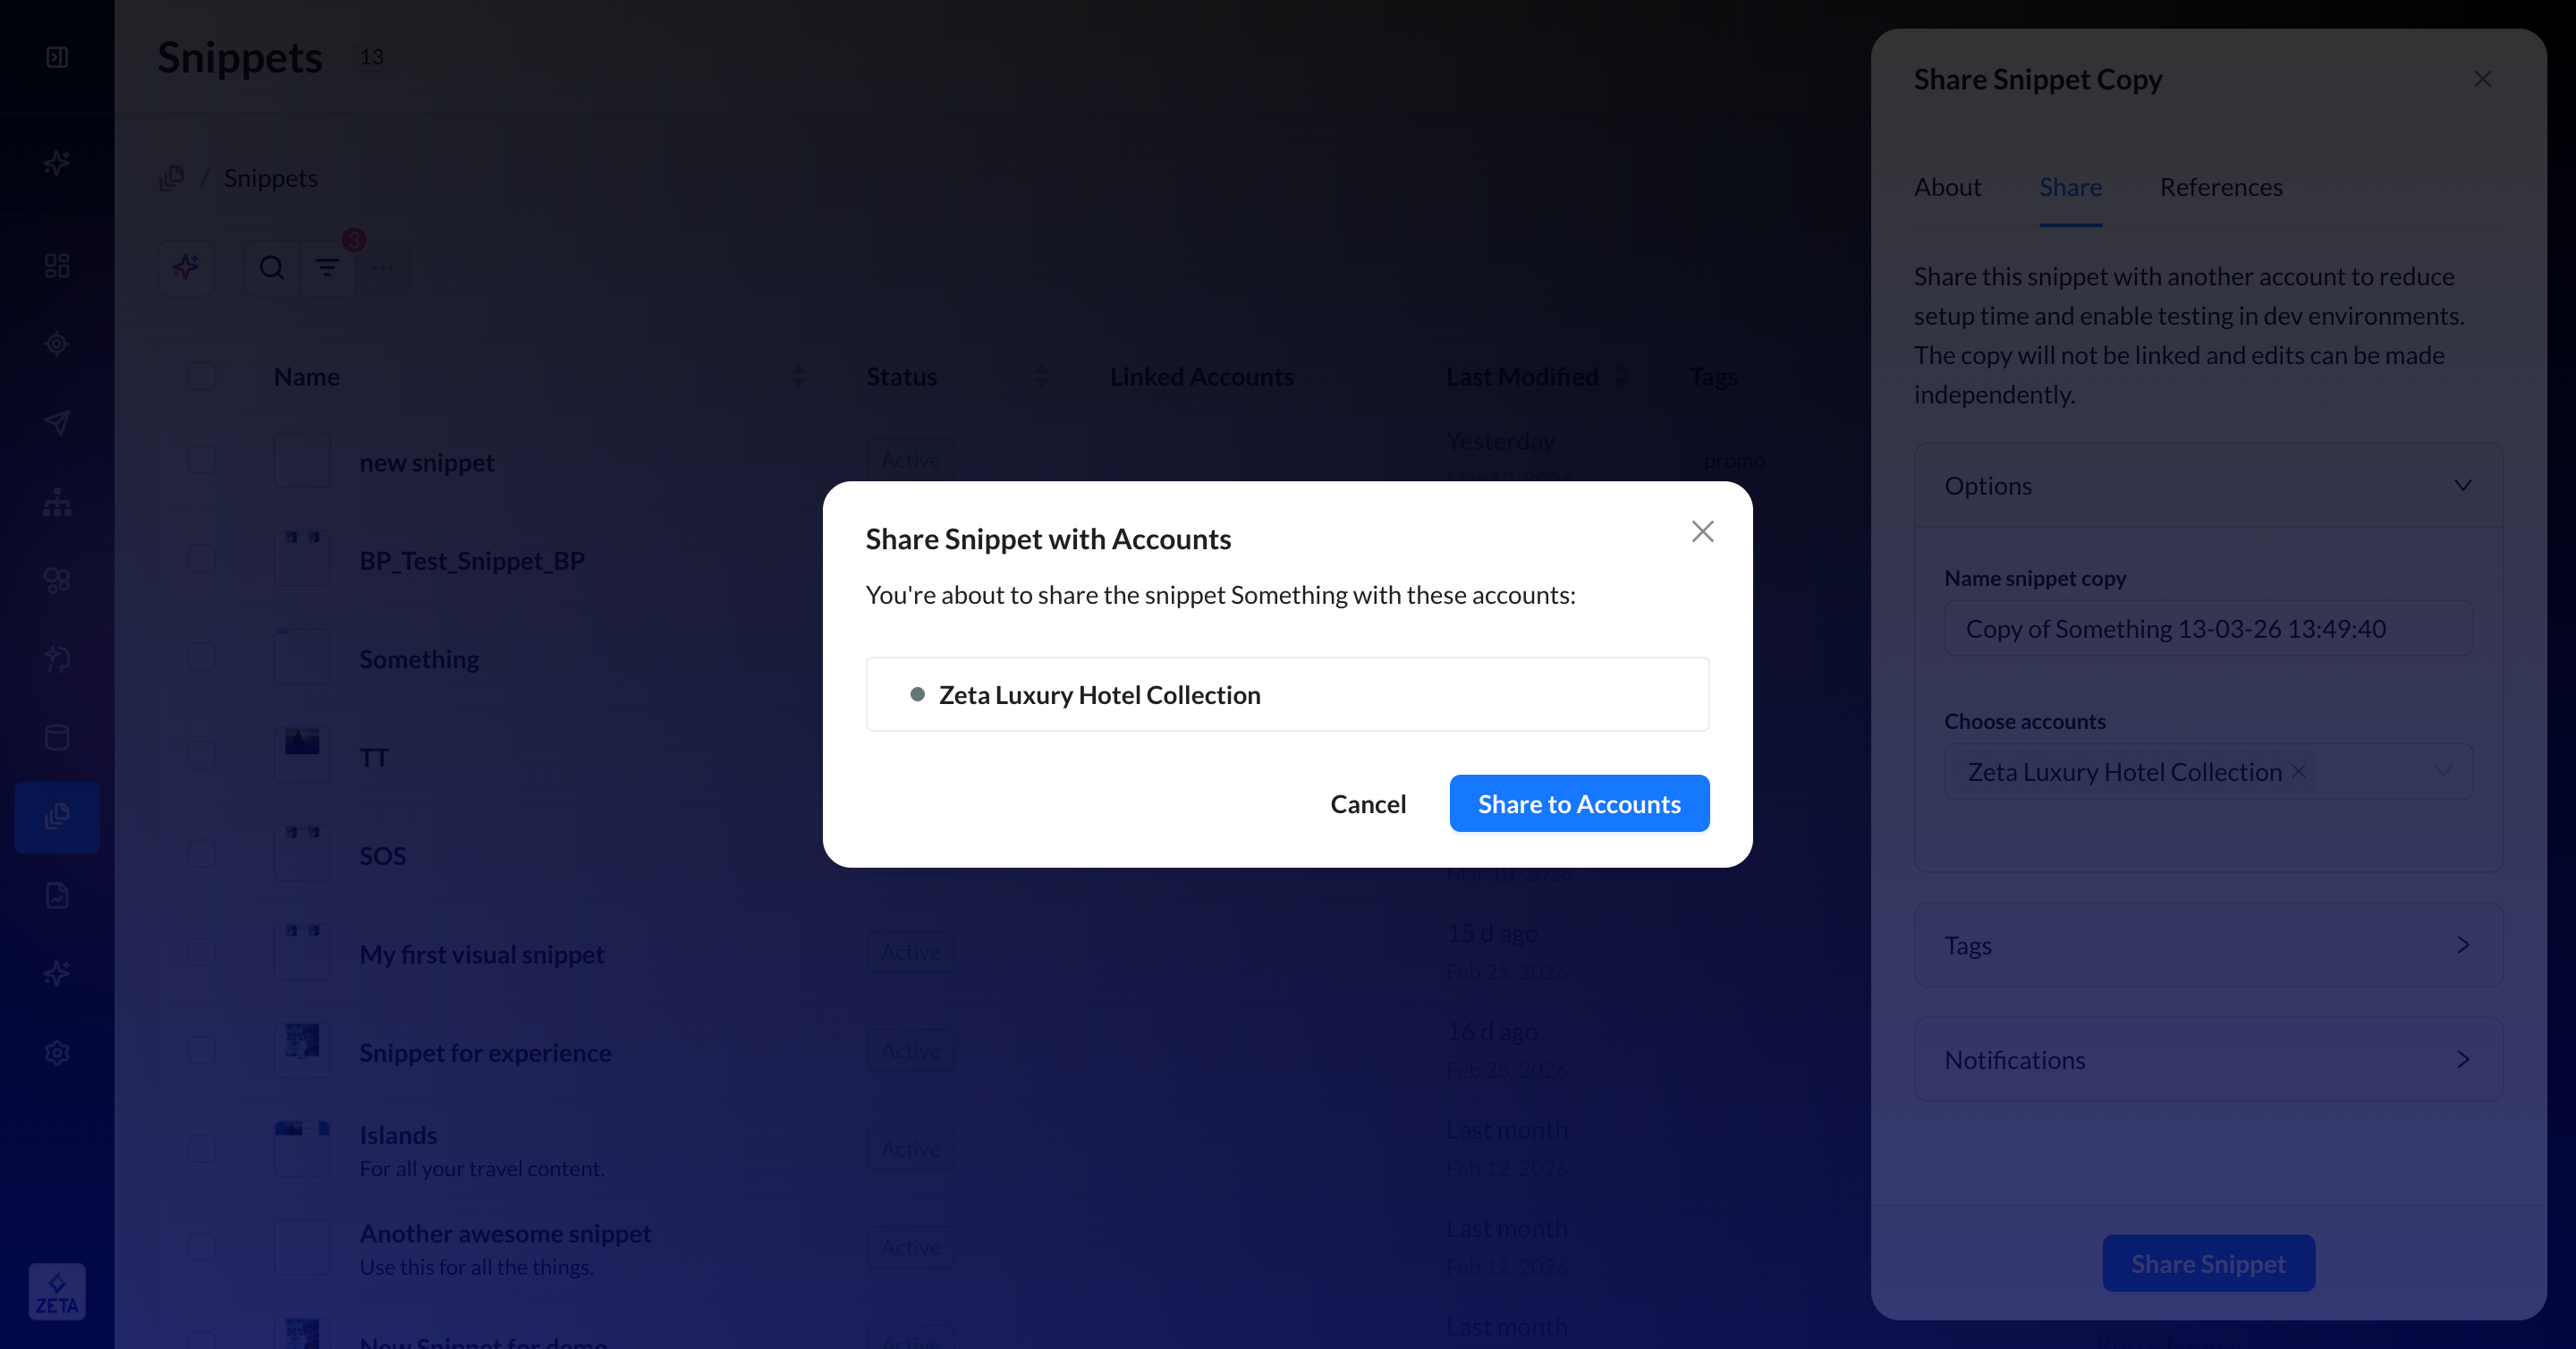
1. Clicking Share copy of snippet across accounts will allow you to configure a new snippet name and select the accounts you want to share this new snippet with. You can optionally add tags or a notification to your teammates.
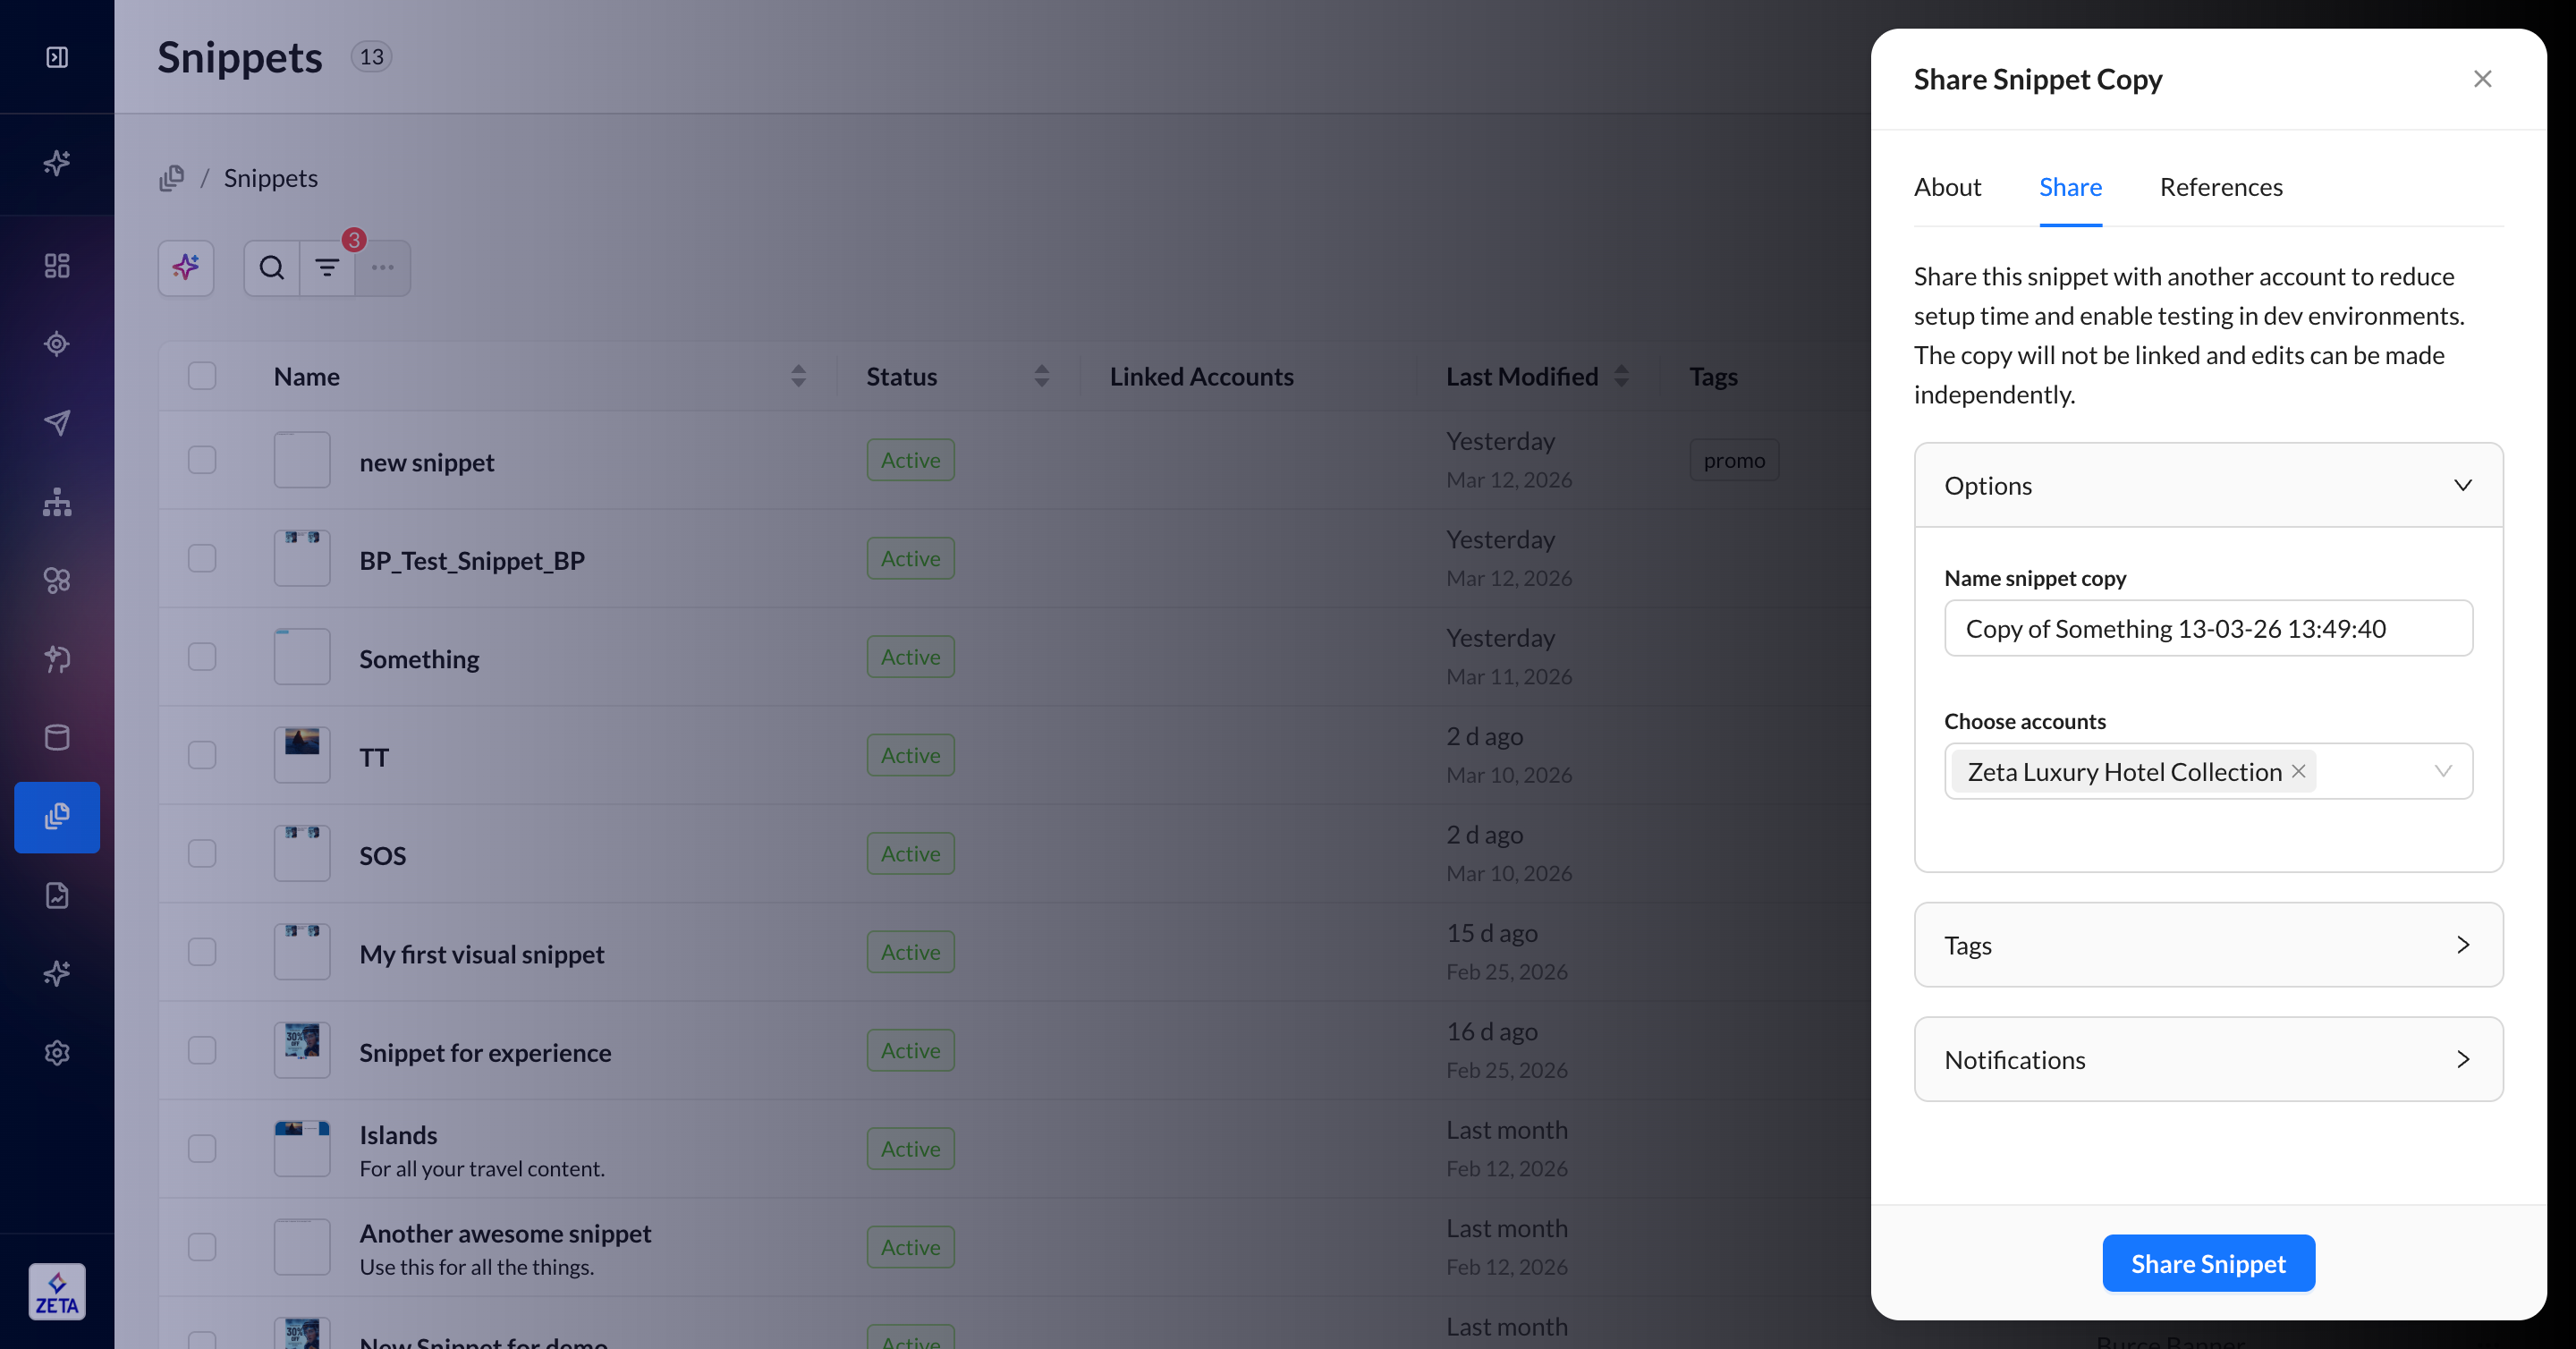
2. Confirm your selected accounts.
3. Once shared, go to one of the accounts you just selected. Since there is no link between this snippet and its duplicates—and there’s no limit to the number of times you can share a copy of a snippet—there is no list of accounts for you to reference.
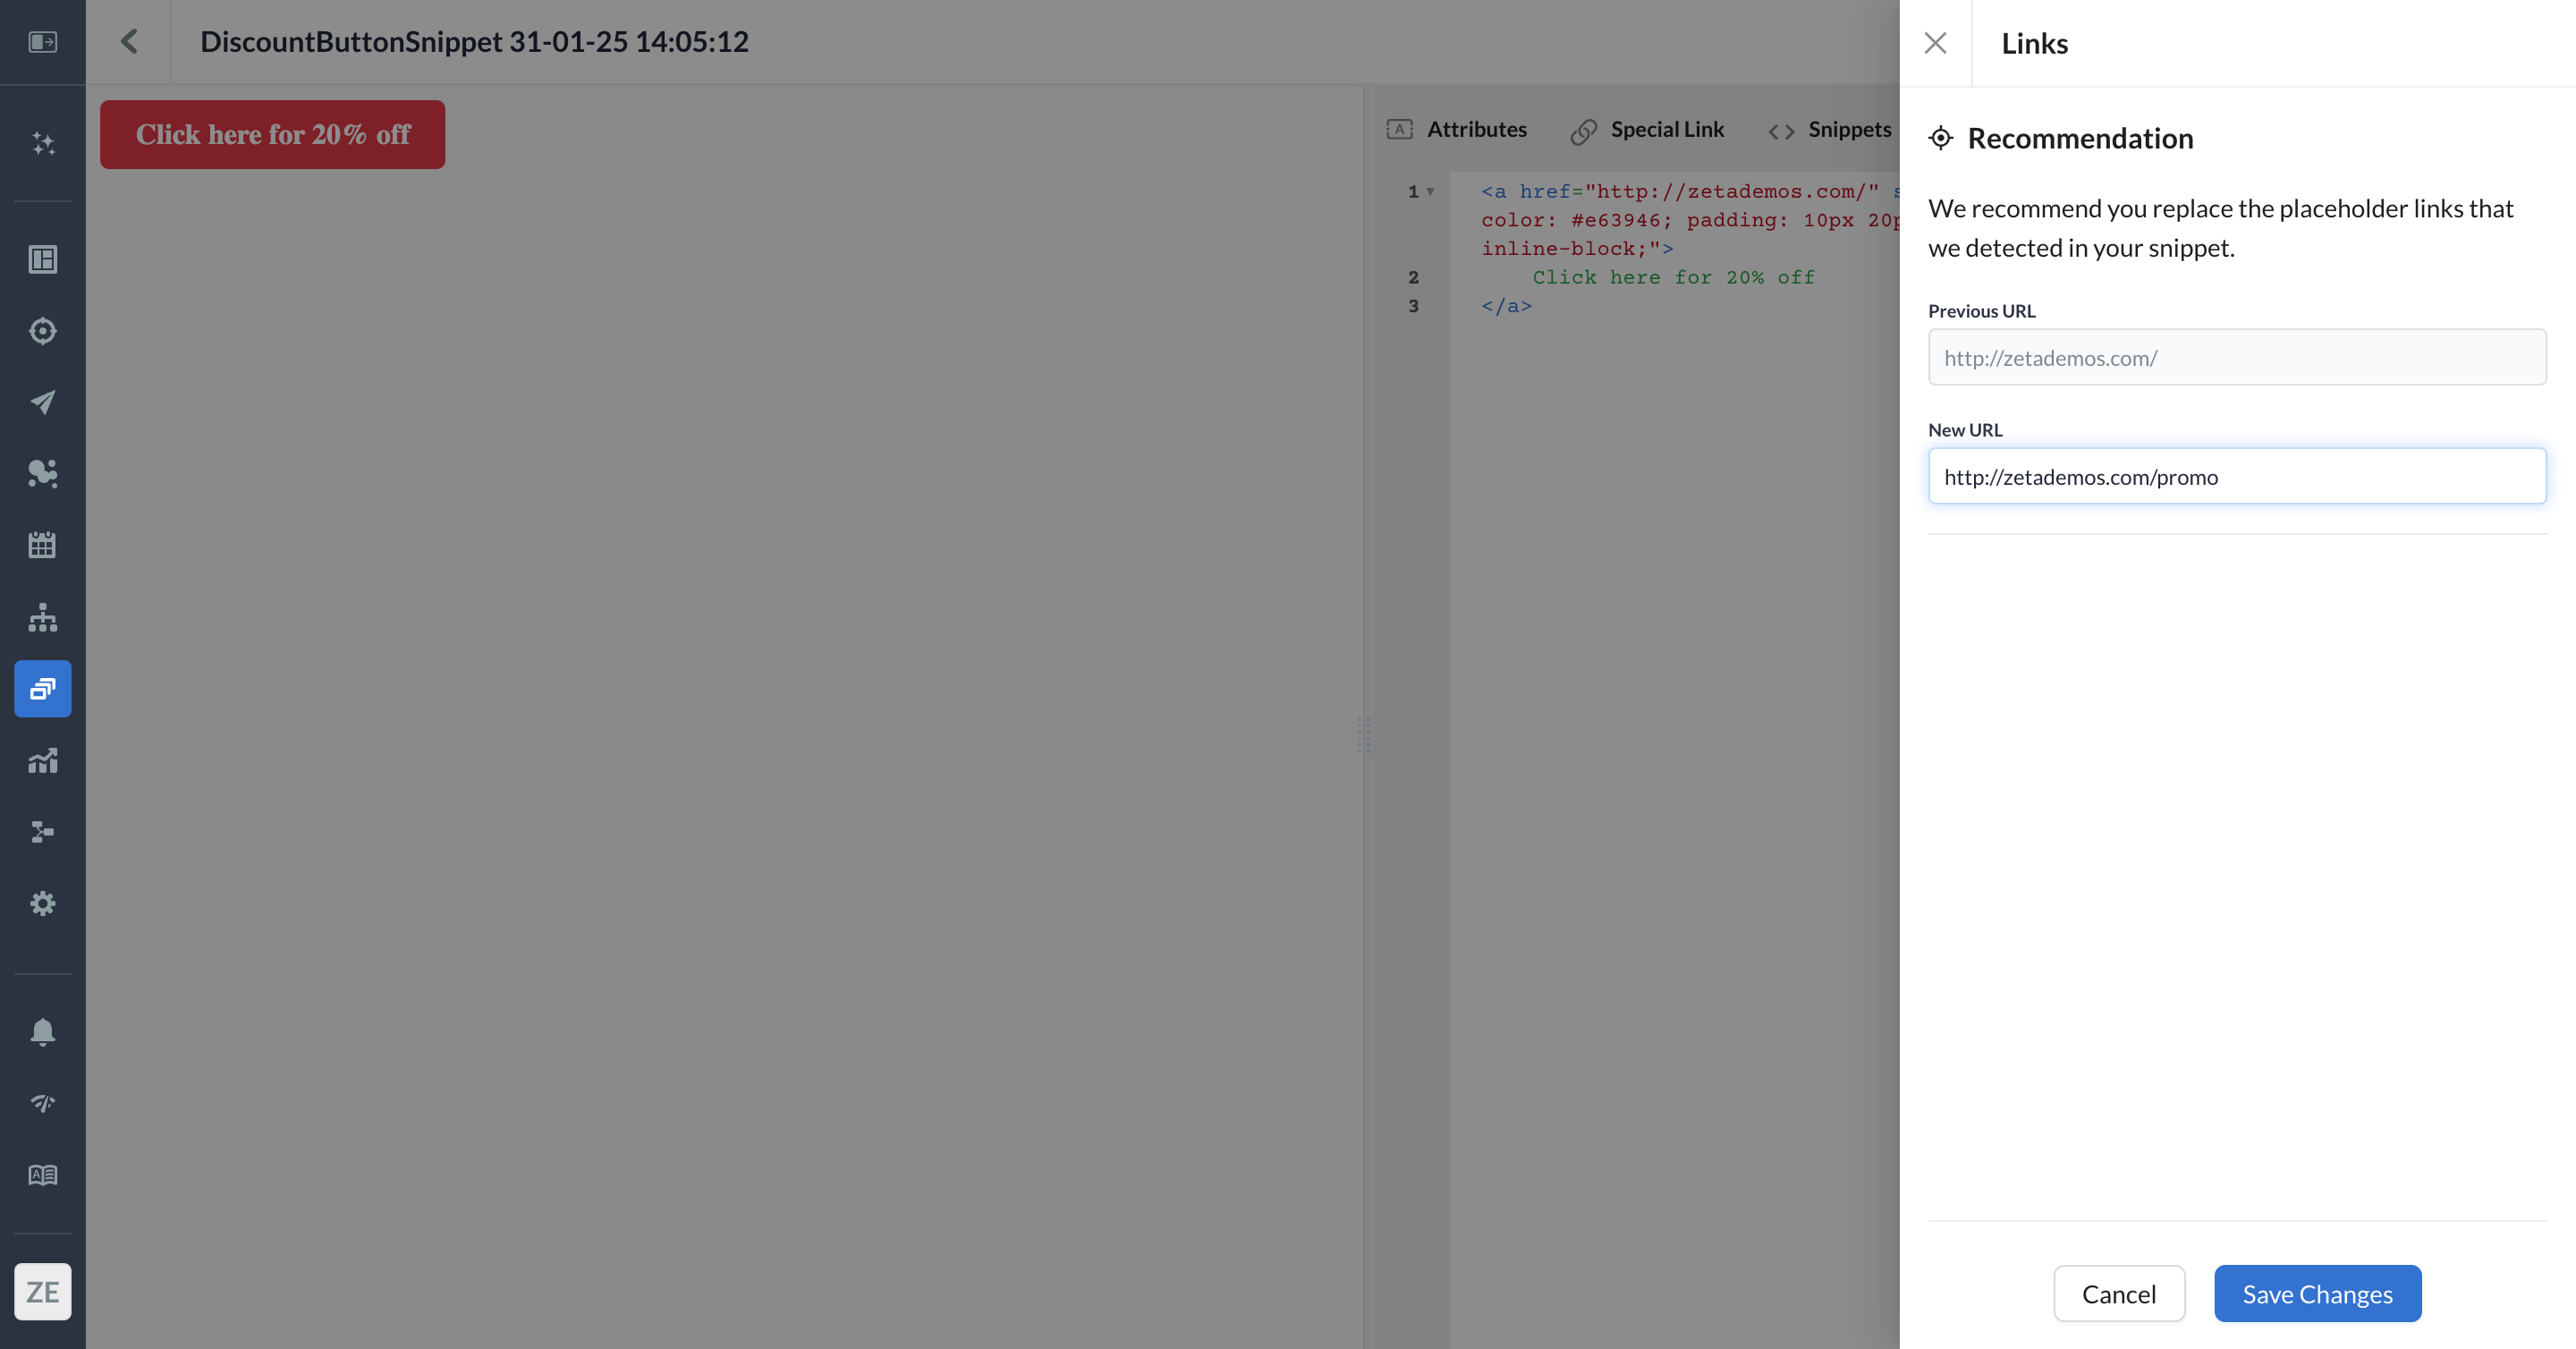
4. For snippets created in the HTML Editor, the code is evaluated and will identify certain links and properties that can be updated to match the destination account. For those created in the Visual Editor, you’ll be given a list you need to manually check and update. All relevant items will be listed on the right-hand panel and can be revisited with the yellow warning icon in the top nav.
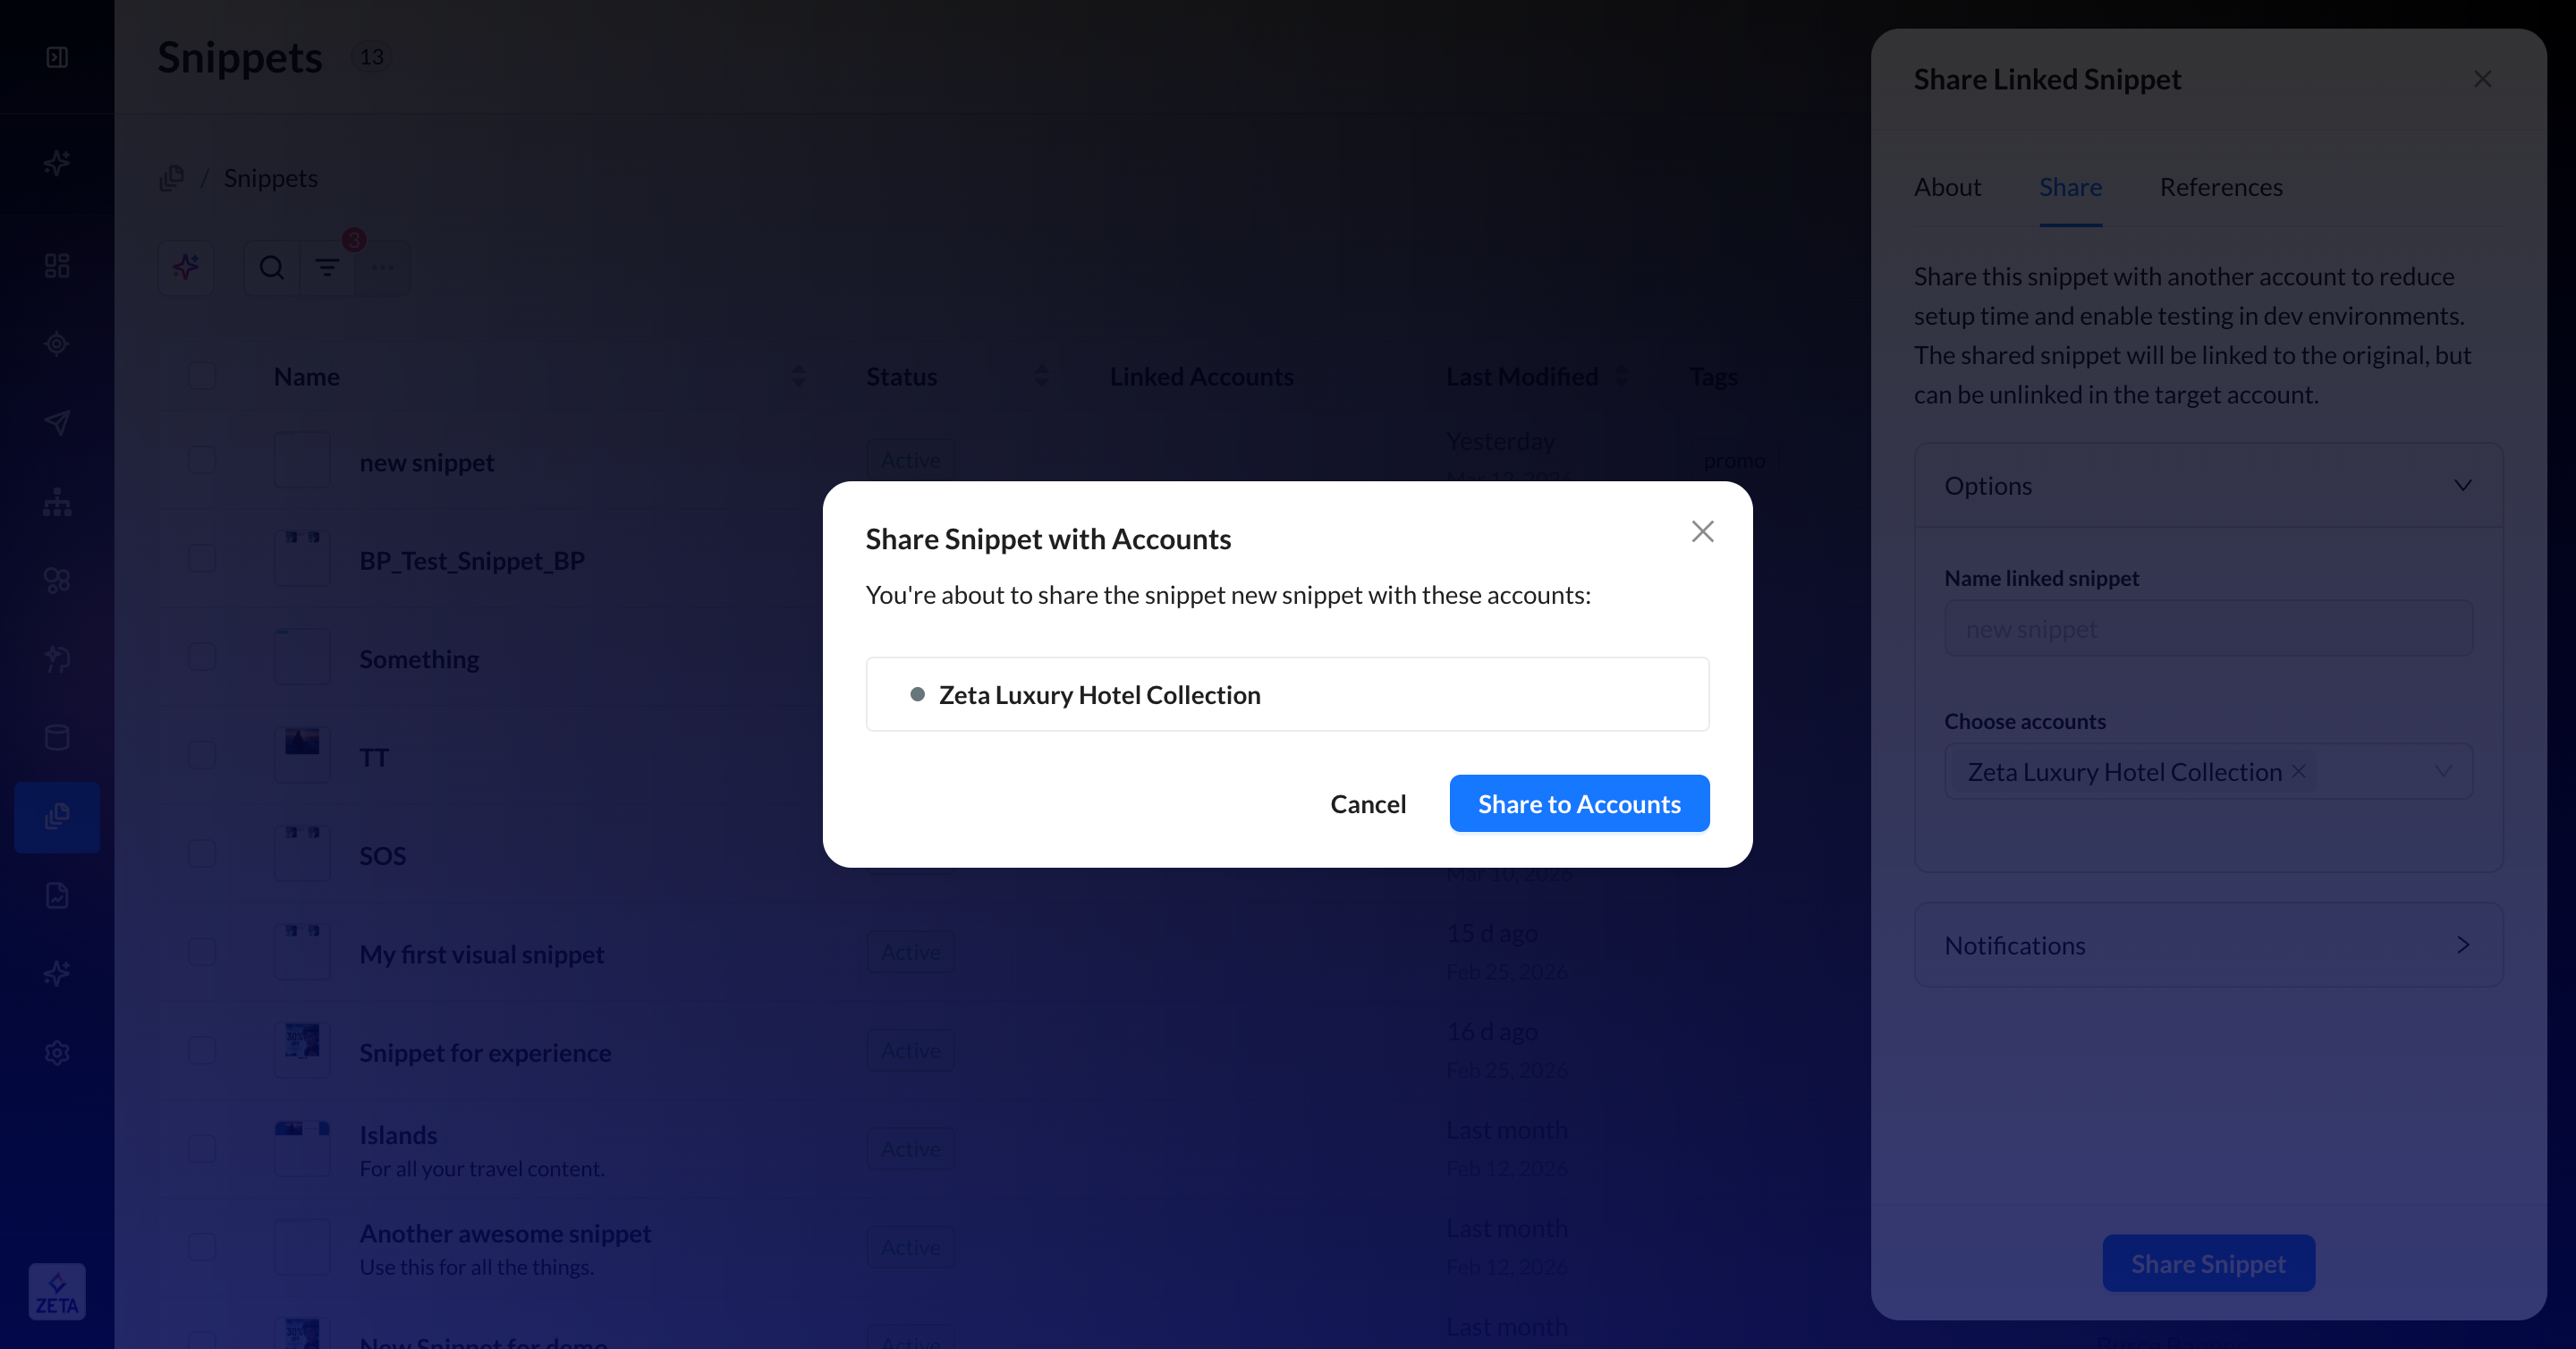
Share Linked Snippet
1. Clicking Share linked snippets across accounts will allow you to give permission to certain accounts to use the snippet linked from the original account. Since you’re sharing a single entity, you cannot edit the name of the linked snippet. You can optionally add tags or a notification to your teammates.
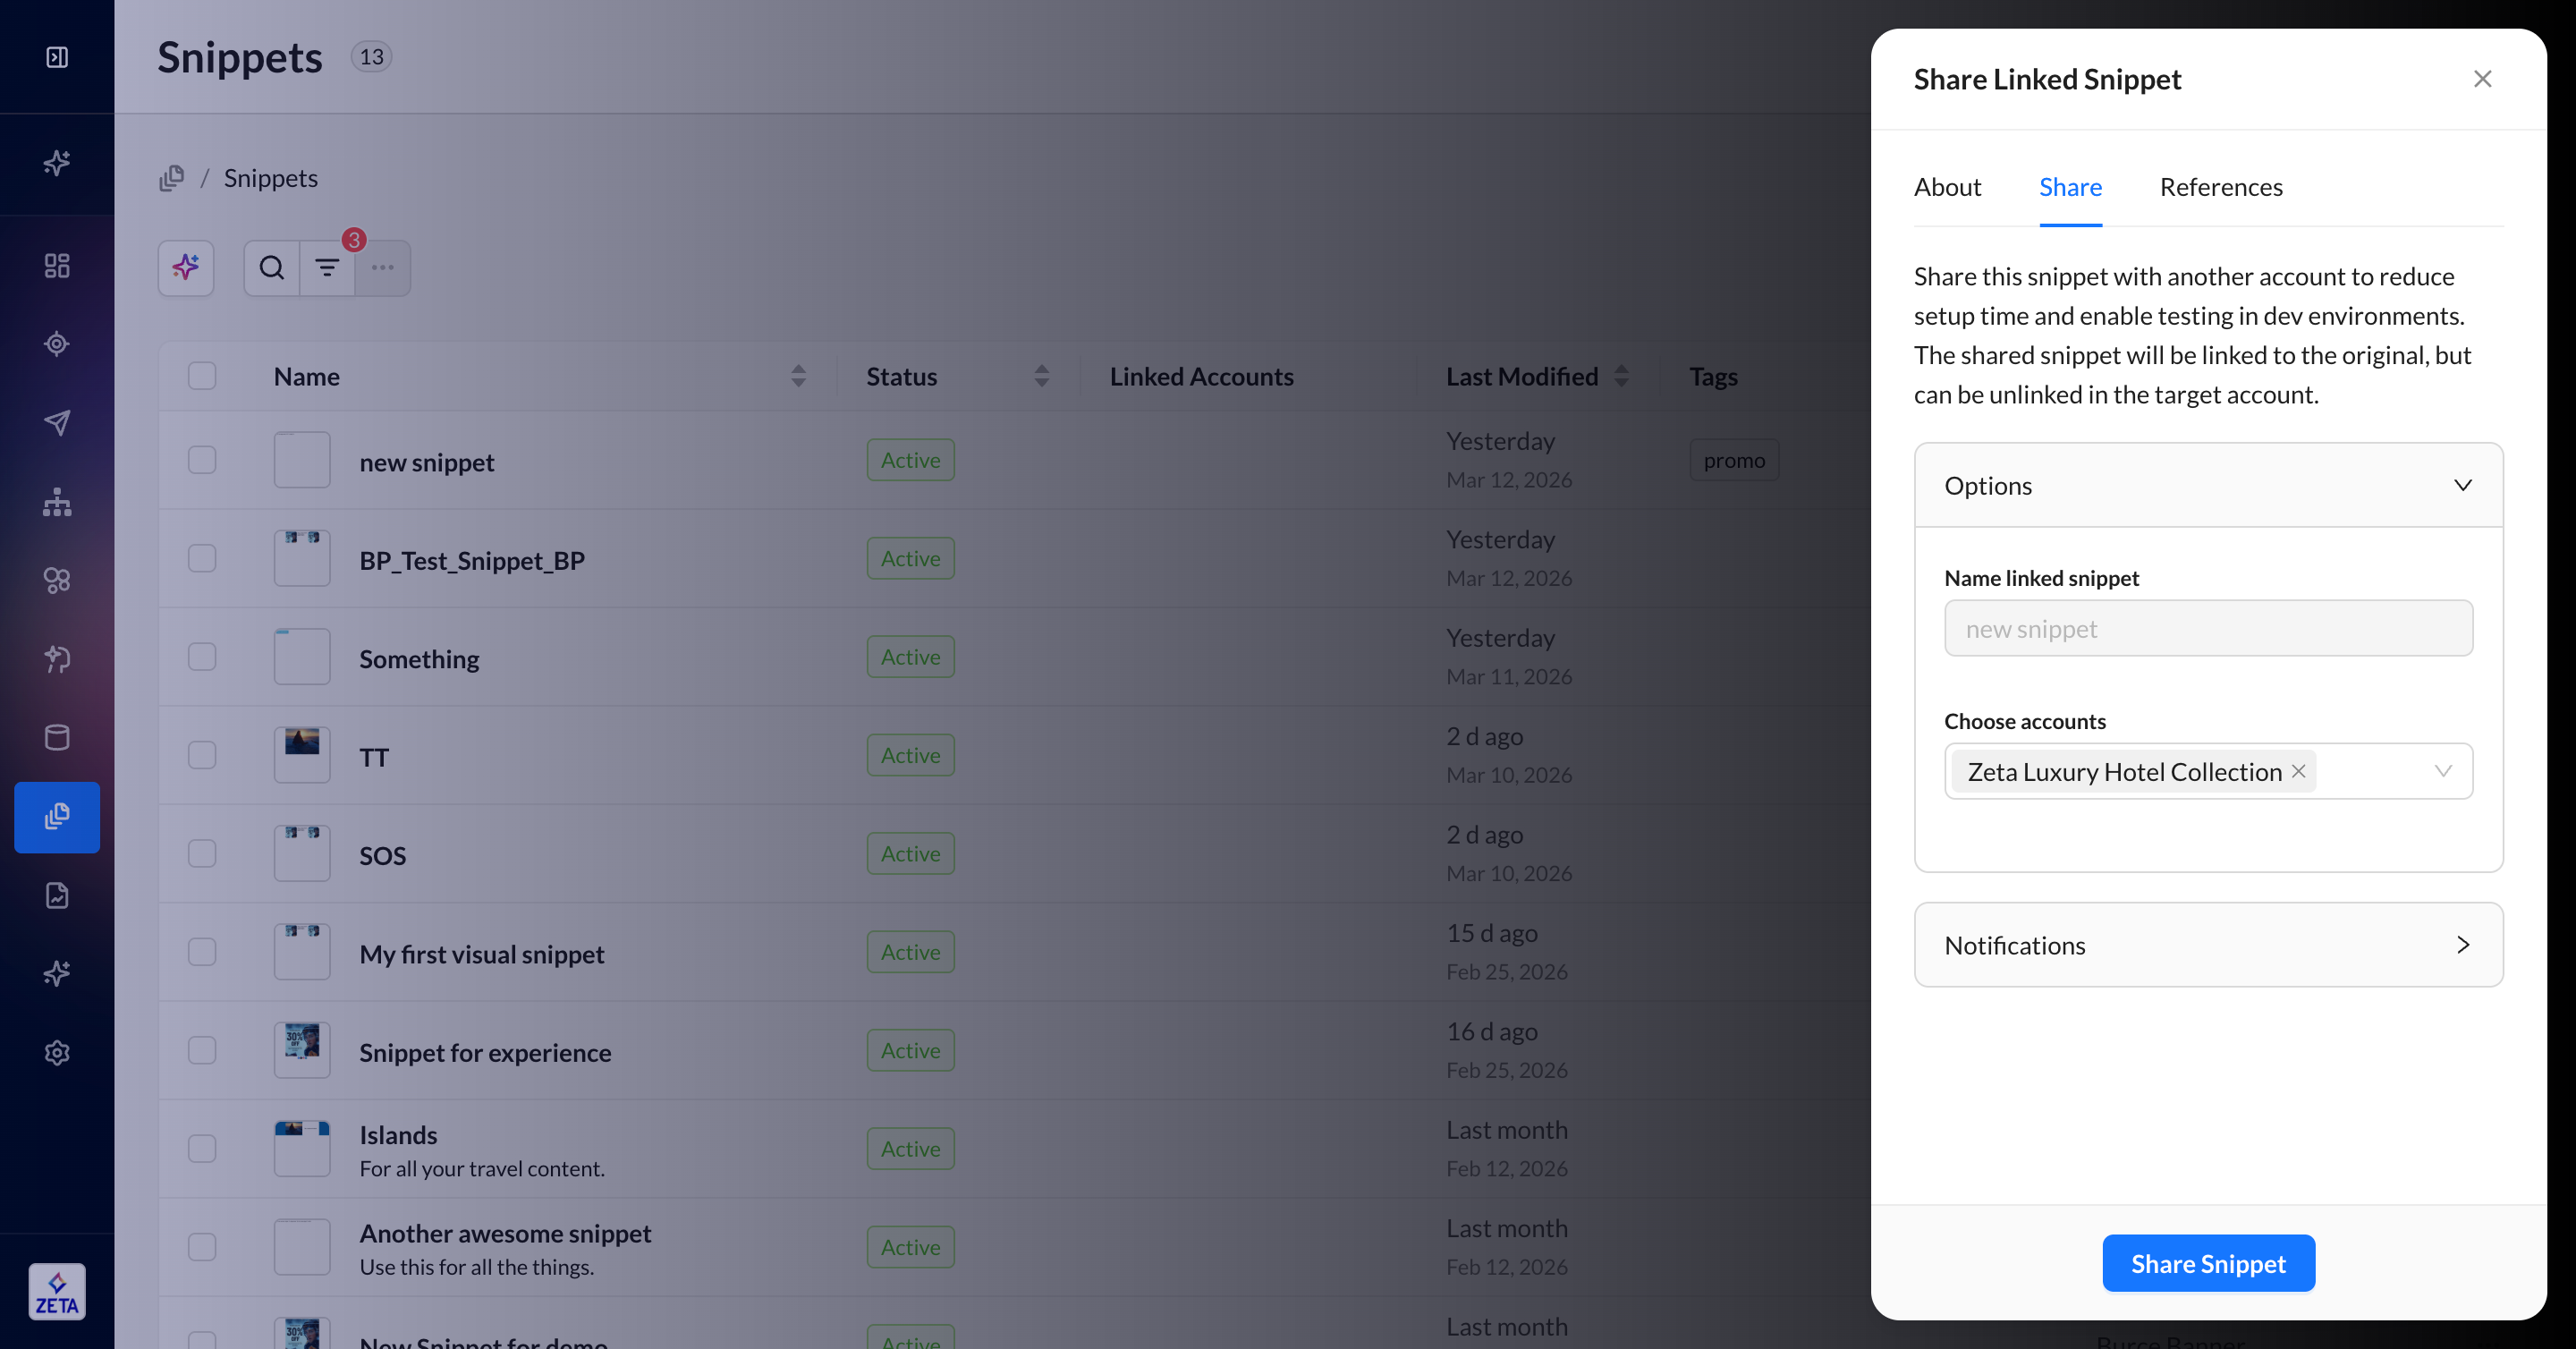
2. Confirm your selected accounts.
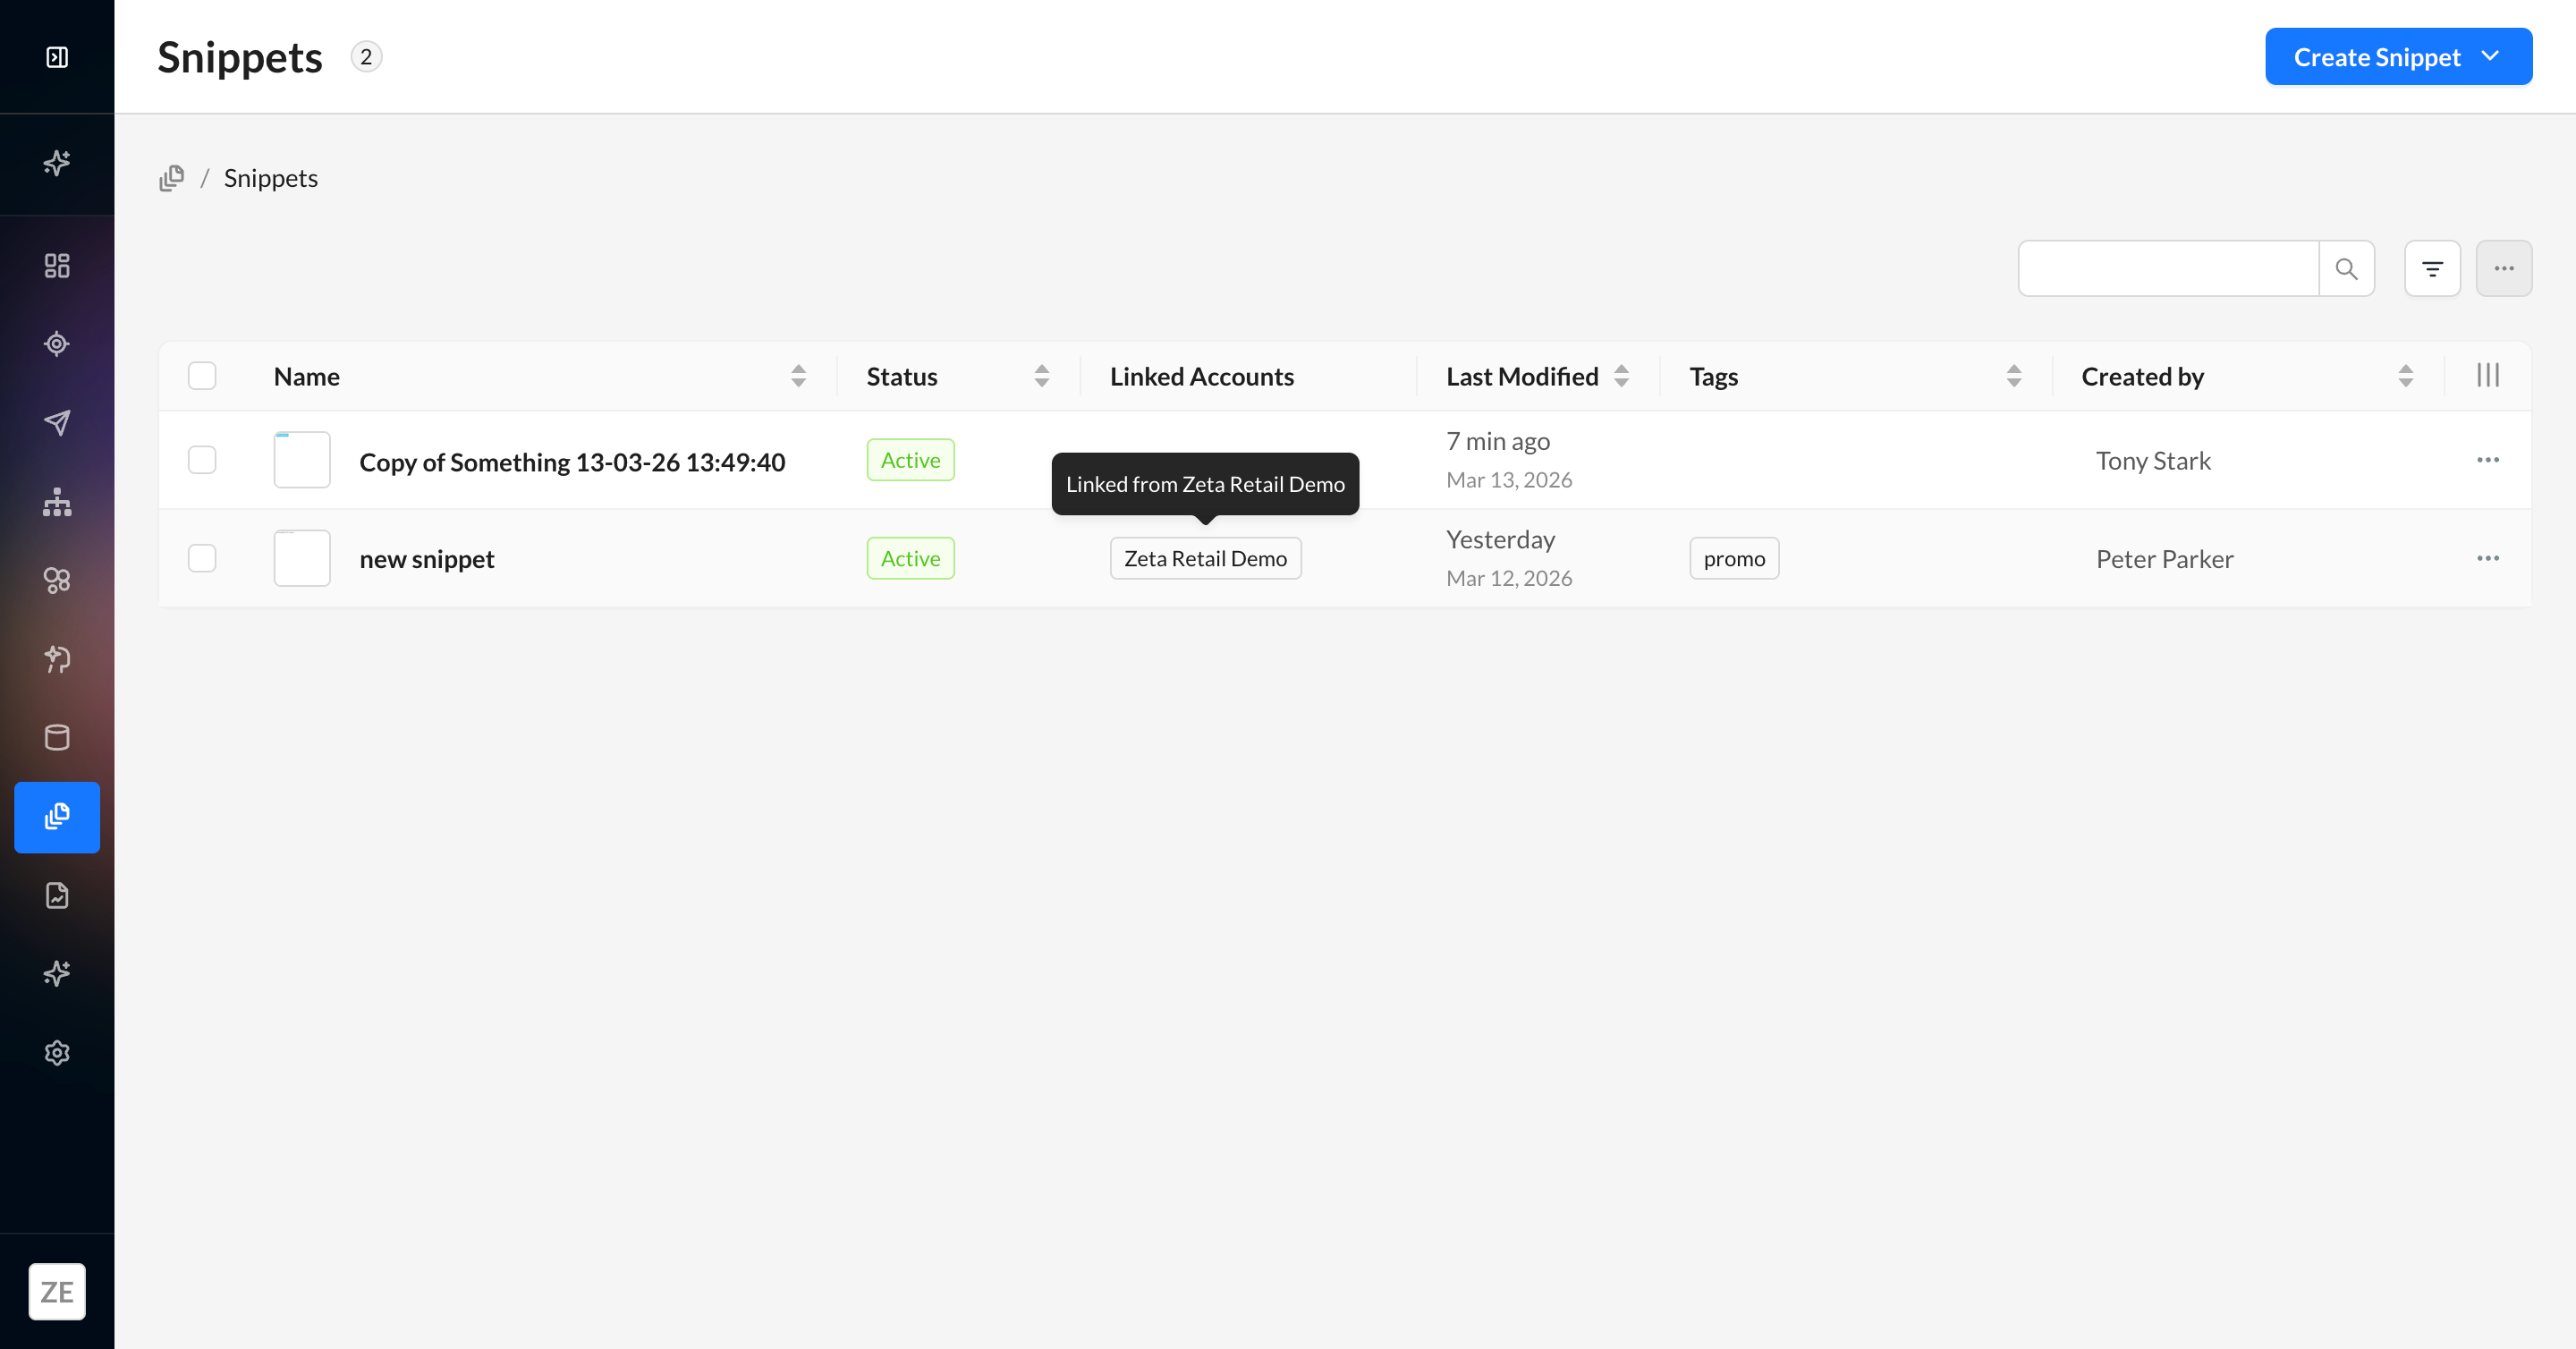
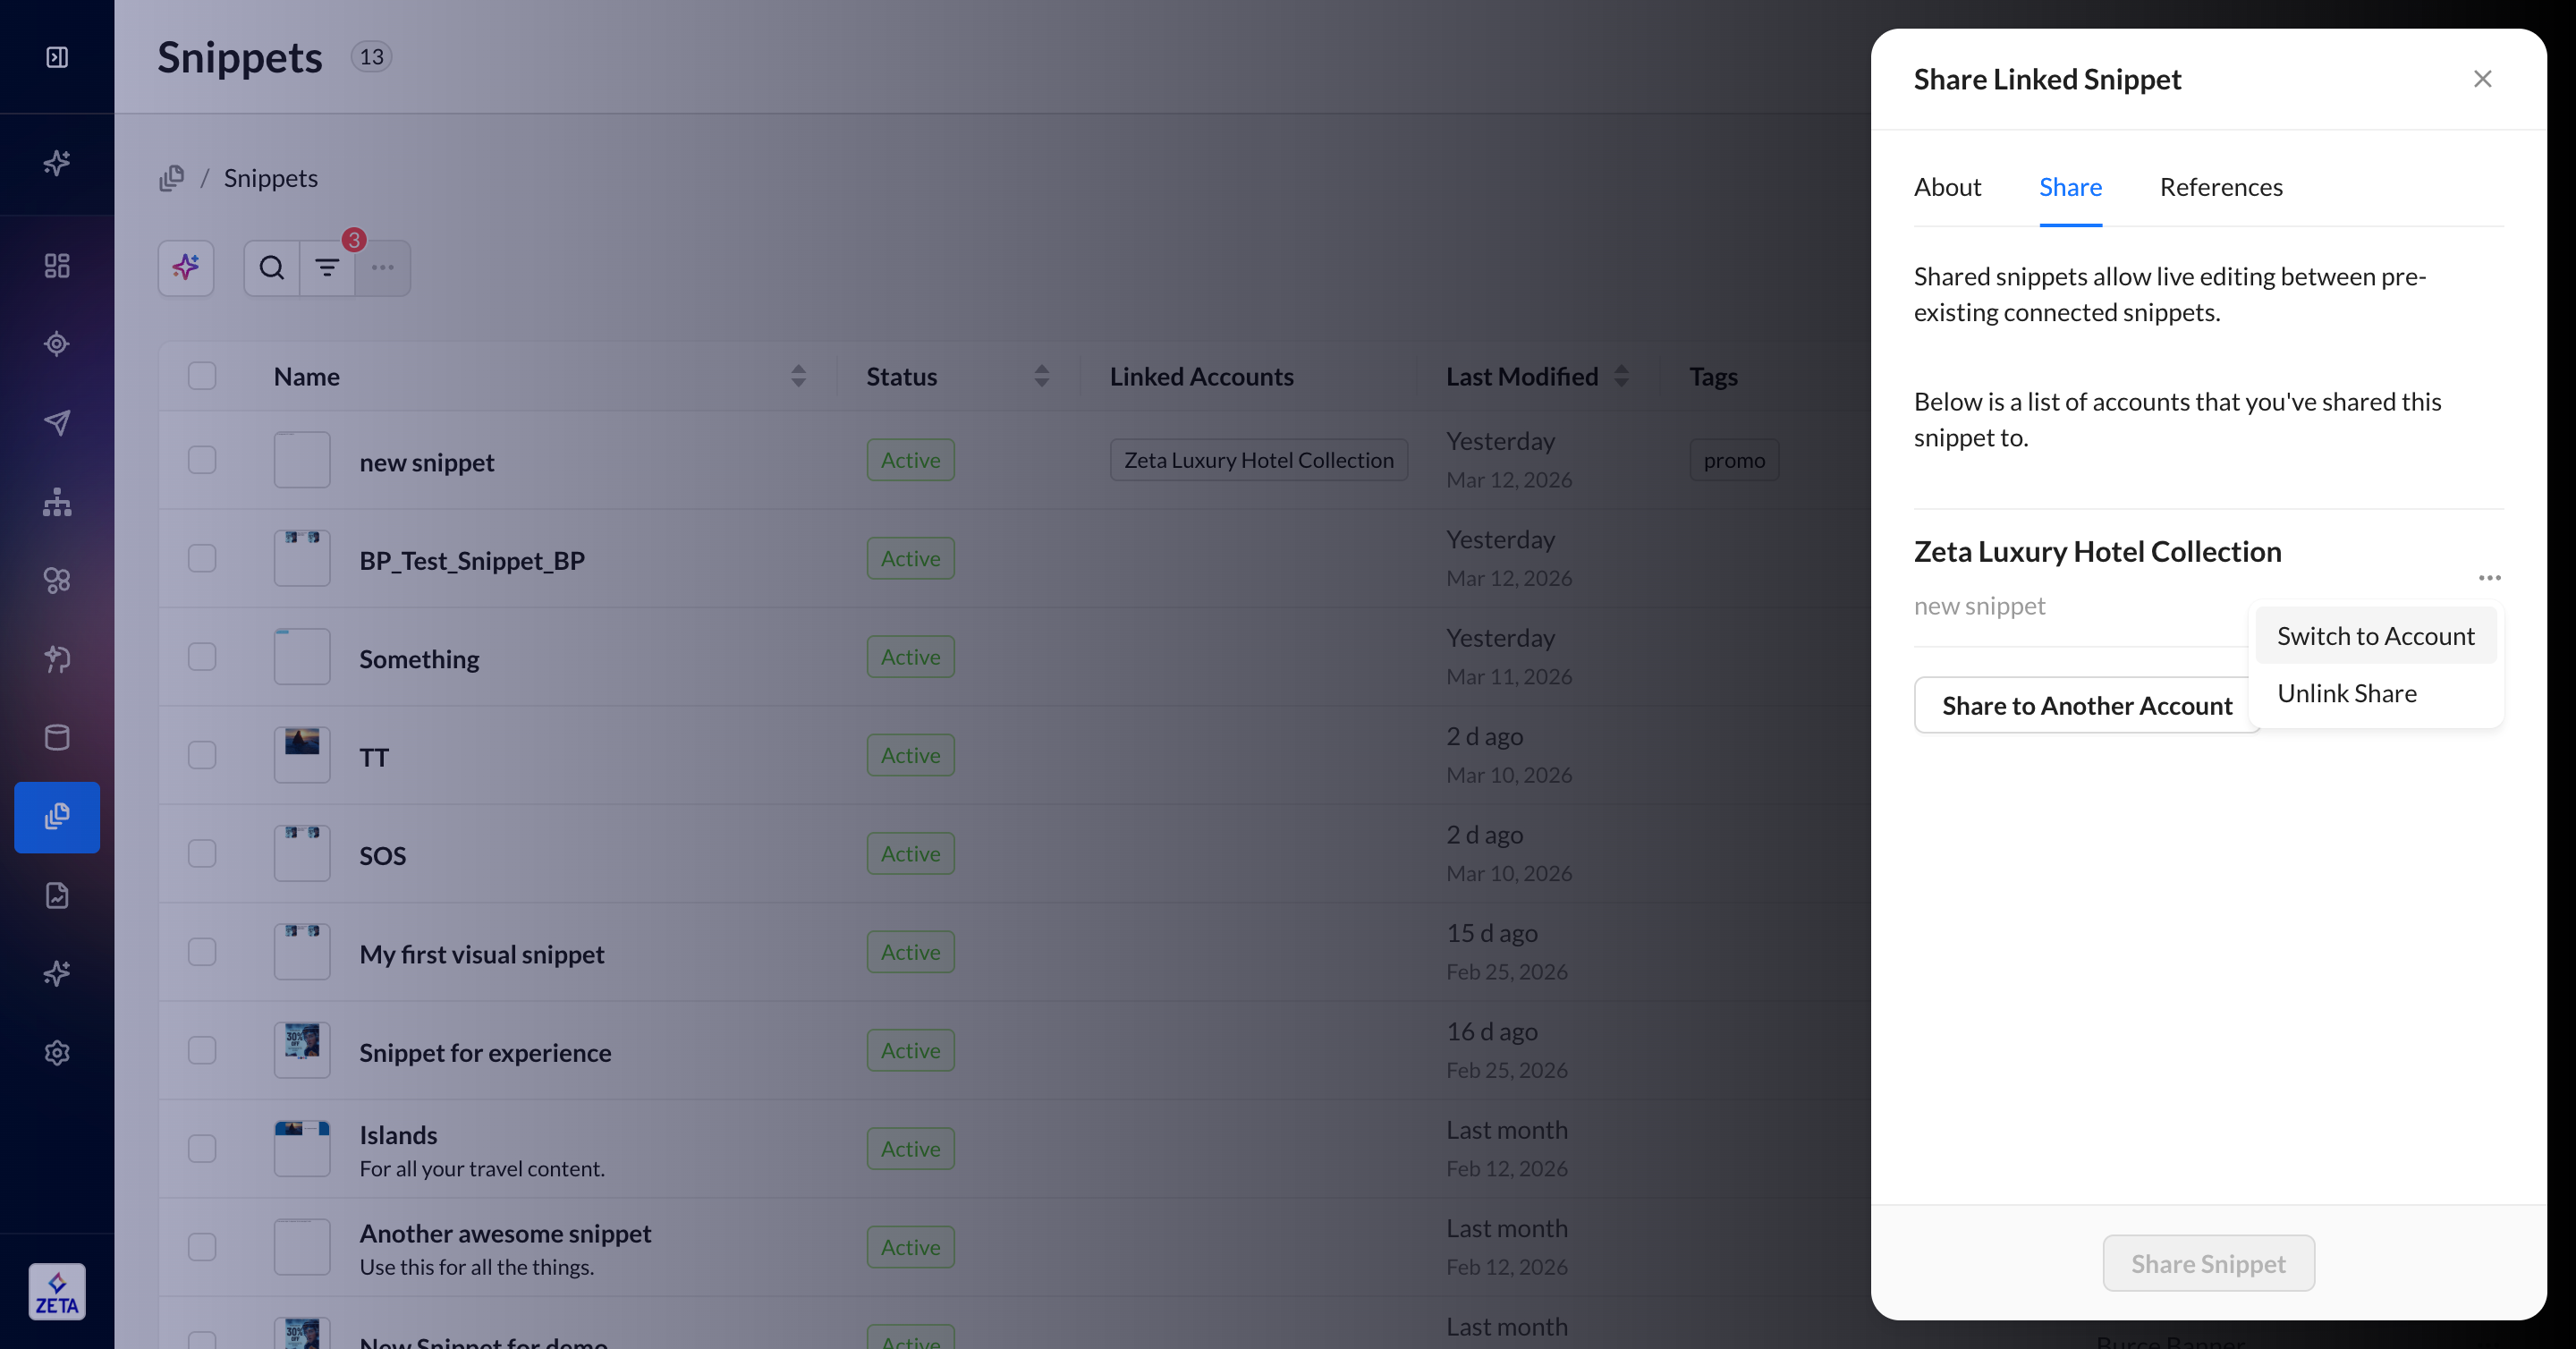
3. Once shared, you’ll see an active list of accounts that have access to this linked snippet. You can edit this list by unlinking or sharing to another account at any time; it will be automatically shown if you click Share linked snippets across accounts for this snippet again.
4. When you go to an account with a linked snippet, you’ll see an icon indicating that it’s linked in the Linked Accounts column. Since you can’t edit it, it cannot be opened in the linked account but it can be inserted into a campaign template using codeless personalization or ZML. To make edits, return to the original account and update the original snippet. Once saved, its edits will be reflected across all accounts that are linked to the snippet.