

Open the Campaign Builder to fill out the Campaign Details:
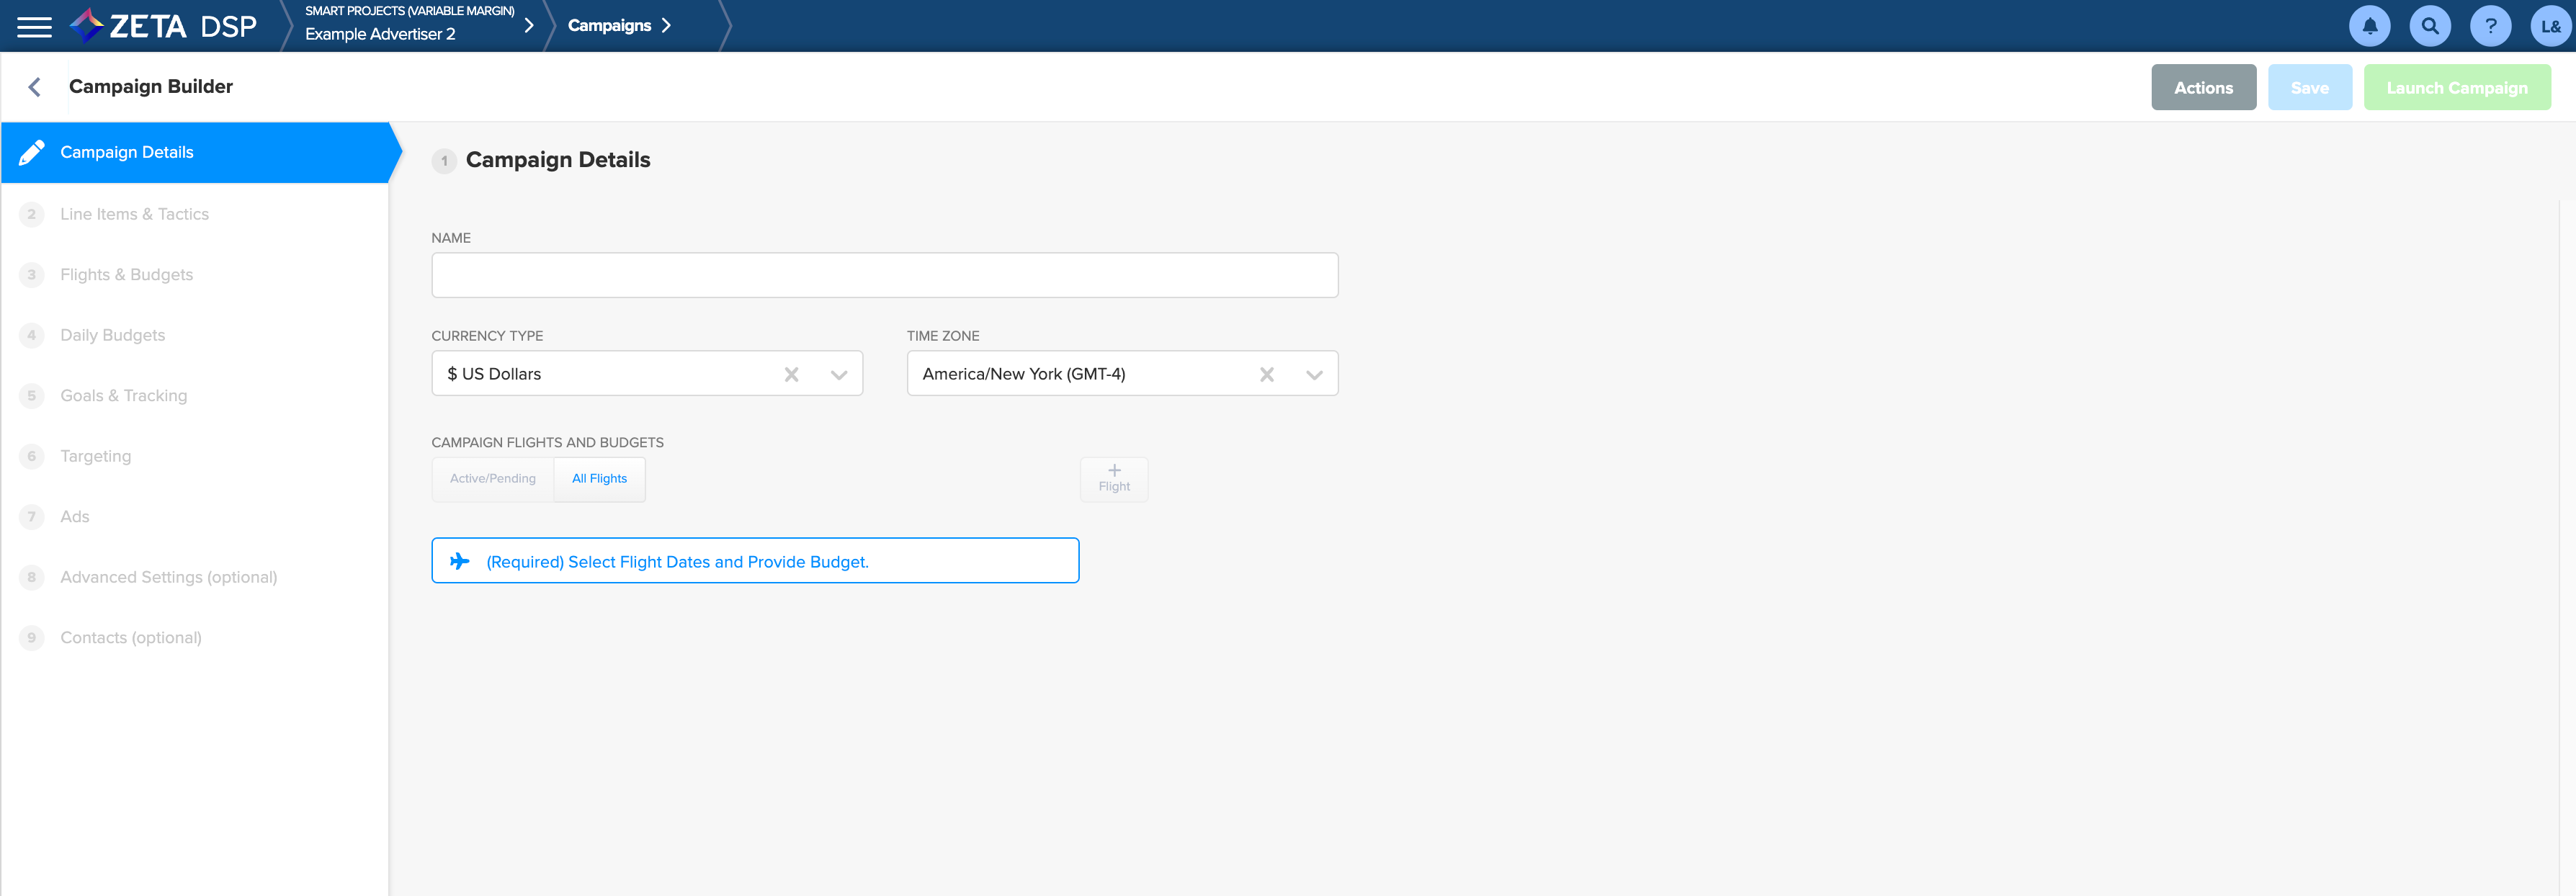
1. Enter the campaign name in the Name box.
Give the campaign a name that is easily identifiable. (The current limit is a max of 255 characters.)
2. Optional: Select the Currency Type to change from the default.
The default value in this box is inherited from the Account Network and Advertiser.
3. Optional: Select the Time Zone to change from the default. This time zone is used in conjunction with the start and end date to launch and end the campaign.
The default value in this box is inherited from the Account Network and Advertiser.
.gif?cb=c28e47034353c4bdc05132421e097198)
4. Click on (Required) Select Flight Dates and Provide Budget to add the first flight to the campaign.
The Edit Flight window appears:
.gif?cb=a1c7e3bc1e1025a52b10e8898460f636)
-
Enter the Start Date & Time and End Date & Time.
By default, each flight begins and ends at midnight. -
Select the Budget.
If you are using Fixed Media Mark Up/Tech Fee billing type, you will get the option to select the Budget Type:
-
Impressions
-
Spend
Enter the expected total flight budget in the Spend field or the Total number of Impressions in the Impression Budget Field.
-
Click on OK to save the flight.
Repeat these steps for each flight.
5. Click on the Save button in the upper-right corner to save your campaign as a draft.
6. Click on Continue to Line-Items & Tactics at the bottom of the screen to continue building your campaign.
.gif?cb=3d85446bbb0f5caa6830e49629c4fb81)