

Let’s review the creation of Image Ads:
To ensure acceptance on the Google Ad Exchange (ADX) as well as the best delivery and performance outcomes, use SSL-compliant URLS, i.e. https rather than http, only.
Creating New Image Ads
1. Once you’ve selected the Account and your Advertiser, navigate to Creatives > Ads within the menu on the left.
.gif?cb=a32b60cbbb78eaeed1f54d4f69244095)
2. Click on + New Ad and choose Image from the drop-down.
3. Set values for this Ad Type per the table below.
Image Ad Creation Fields
|
Field |
Description |
|
Ad name* |
It is best practice to include the following in this field:
Example: 170617-ImproveAnimalAdoption-Native (Tablet) |
|
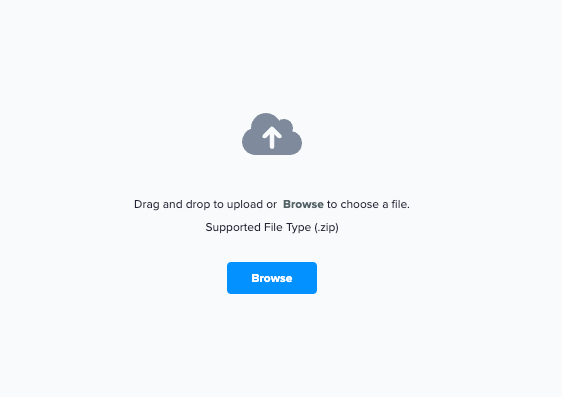
Image File* |
Browse and select the image file from your computer. |
|
Size, Width. Height* |
Select one of the provided sizes to match the Ad or select Custom to input the Ad's pixel dimensions manually. |
|
Bonus Ad |
Check this box to give the Ad "Bonus-Status"; only when your Zeta Account Manager instructs you to do so. |
|
Click-through URL |
If you have a click-tracker URL enter it here. Otherwise, enter the landing URL, i.e. the URL visitors reach when they select the Ad. Implement click trackers in this field. Click trackers should redirect to the landing page. |
|
Land in New Window |
Check this box if clicking the Ad should take the visitor to a new window. |
|
Ad Vendors |
The DSP should auto-populate this field so you should not need to enter anything. However, if in the rare event you need to do so, or if an Ad Exchange rejects an Ad, for this reason, set this field as follows. An Ad Vendor is an Ad Partner beyond the Ad Server having a component within the Ad. Examples include Brand Safety tools and Rich Media such as Double Verify or Ad Safe. |
|
Ad Attributes |
The DSP should auto-populate this field so you should not need to enter anything. However, if in the rare event you need to do so, or if an Ad Exchange rejects an Ad for this reason, set this field as follows. IAB advertisement category attributes are now available to select as additional aspects of the creative. The options available in the Ad Attributes field allow you to select one or more attributes to apply to the creative, such as HTML5, expandable, etc. |
|
Time Zone |
Select the time zone that the Zeta use to run the Ad per the Start and End Times specified in the next two fields. |
|
Start Date/Time |
(Optional) Specify the beginning date and time during which the Ad is to be available to campaigns. If you leave it unspecified, the Ad is available immediately. Zeta suggests leaving the Start Date and End Date fields blank unless you are working in one of the following scenarios:
|
|
End Date/Time |
(Optional) Specify the end date and times during which the Ad is to be available to campaigns. If you leave it unspecified, the Ad inherits the run dates of its campaign. Zeta suggests leaving the Start Date and End Date fields blank unless you are working in one of the following scenarios:
|
|
Third-Party Placement ID |
(Optional) Use this field to store on the Third Party Placement ID, and then report on this field using the Third Party Placement ID metric in the Report Builder. Third-Party Ad ID was a legacy metric that was automatically extracted from some DCM ad tags. In those cases, this field is automatically populated. You can overwrite this field as necessary. |
|
Unsecure Extra HTML and Secure Extra HTML |
(Optional) Input additional tags and trackers here. May include both<img> and<script> tags. The Zeta DSP does not automatically insert macros in this field. Please reach out to Zeta Support if any assistance is needed for applying macros to the additional trackers.
|
|
Frequency Counters |
(Optional) When the advertiser also utilizes the new ZetaDMP or the integrated DMP/DSP, you may use this field to add frequency counters. To apply Frequency Counter(s):
|
Bulk Upload
For bulk uploads, add a line to the spreadsheet for each creative asset to become an Ad in the DSP. The DSP does not limit the number of ads you can bulk upload at one time.
|
AdForm (XLS/XLSX), Atlas (XLS), DoubleClick Excel (XLS), DoubleVerify (DCM), FlashTalking (XLS), Weborama Big (XLS), Weborama Small (XLS), Atlas (HTML), AdForm (Text), Adition (Text), Admotion (Text), DCM (Text), DoubleClick (Text), EyeReturn(txt), FlashTalking (Text), MediaMind (Text), Mediaplex (Text), Weborama 435229 (Text), Weborama 50 (Text) |
Bulk Upload Template
1. On the Ads Creation page, click on Bulk Upload and select Image from the drop-down.
2. Within the Bulk Upload Wizard, click on Download Template to export the formatted template required for this process.
.gif?cb=15944ab29e52aa13fa25fac28f47b005)
3. Fill out the XLSX template accordingly. When you're finished, import your tags by uploading the required template.
Bulk Upload XLSX File Fields