
The DSP has a simple and intuitive process for creating various pixel types for your Advertisers and Campaigns.
Before you create a pixel, keep in mind:
-
If you plan to create more than one pixel, postpone generating code until you have created all of them. After they are created, export them in bulk.
-
If your pixel code has any errors or does not fully conform to what the platform expects, you can edit it.
-
If you already have a pixel that is similar to the one you want to create, it may be faster to clone it.
To create a pixel,
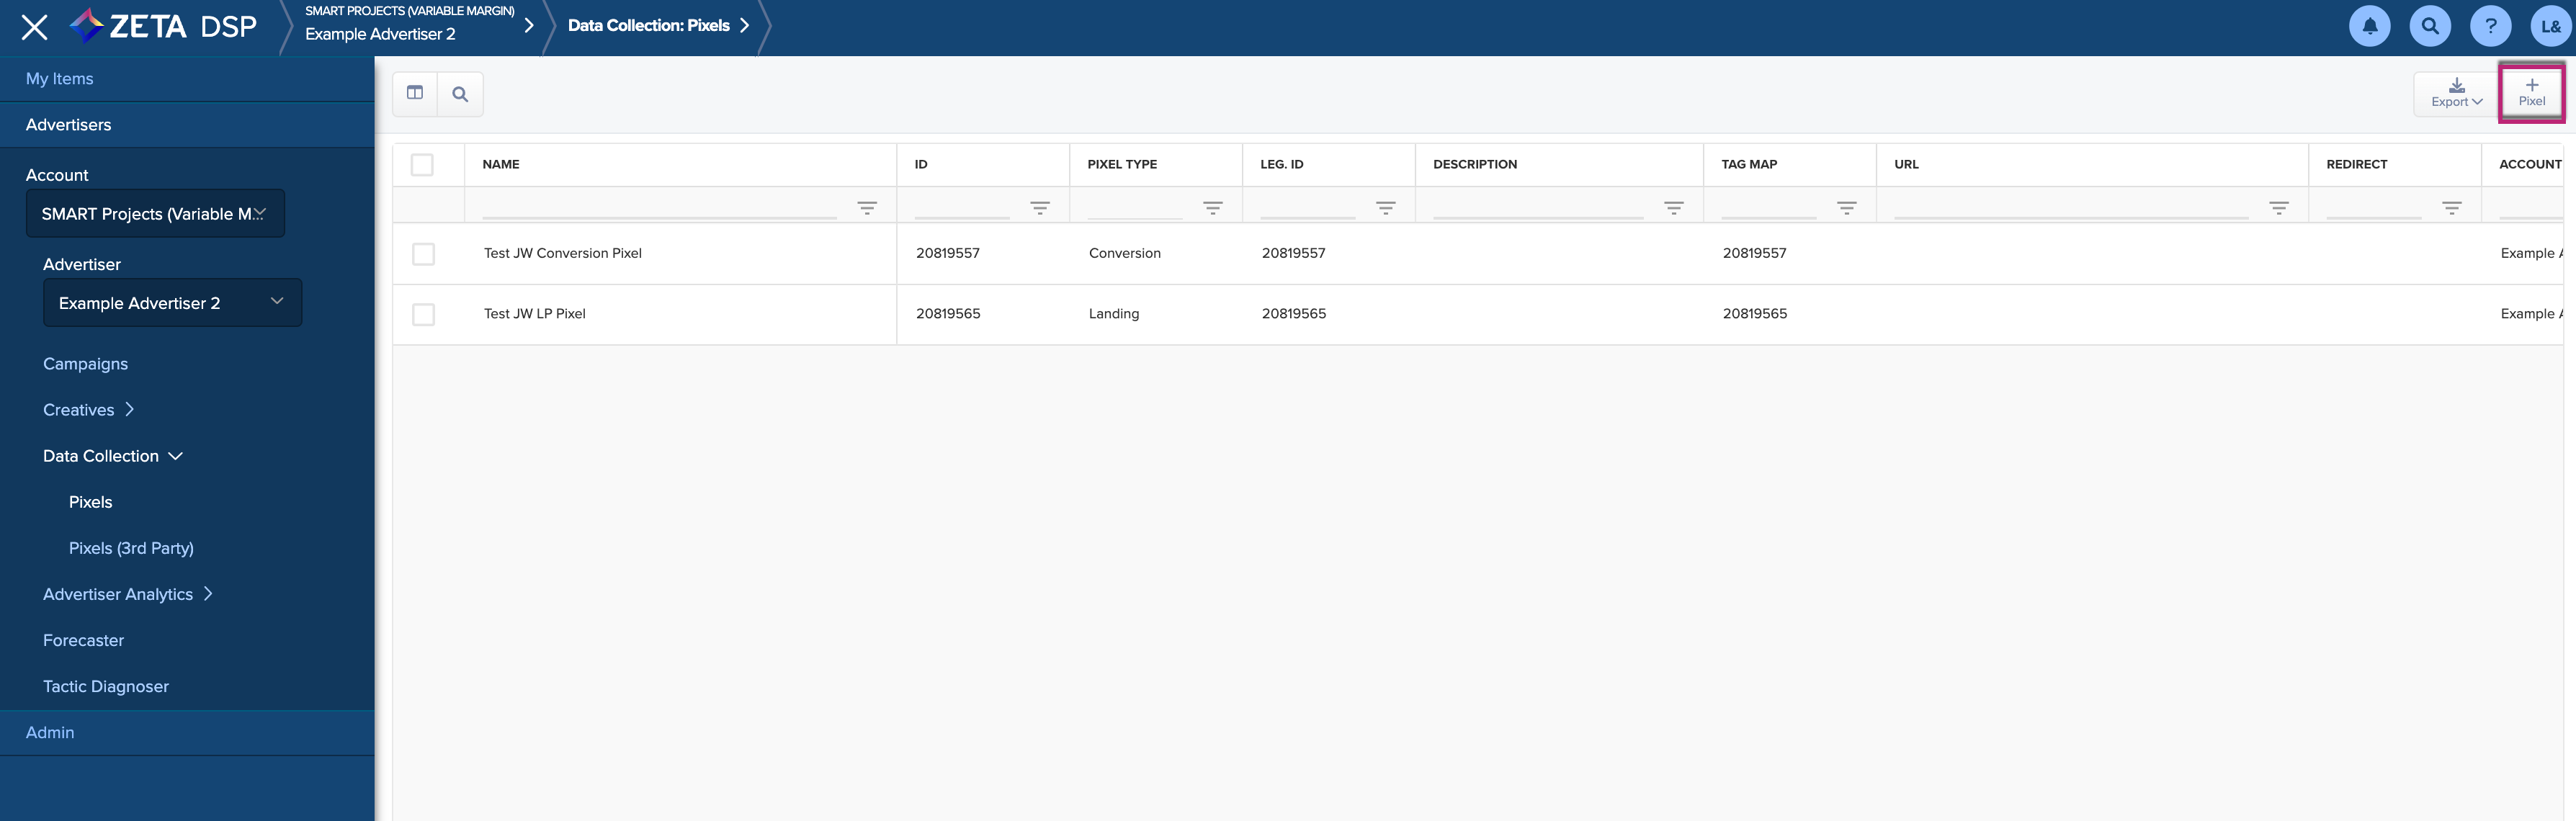
1. From the menu on the left, choose the Account and Advertiser from the respective dropdowns.
2. Navigate to Data Collection > Pixels.
3. Click on +Pixel on the upper-right to pop open the Pixel:New panel on the right.
4. Within the Settings tab, fill in the required fields and click on Save.
.gif?cb=ab0a8986df55c0b7d2e7d142e5f4cf6f)
-
Your created pixel will be saved in the grid. Click on it to reopen the Pixel:[Name] window.
5. Within the panel, click on the Pixel Code tab to view the code generated from your filled-in choices above.
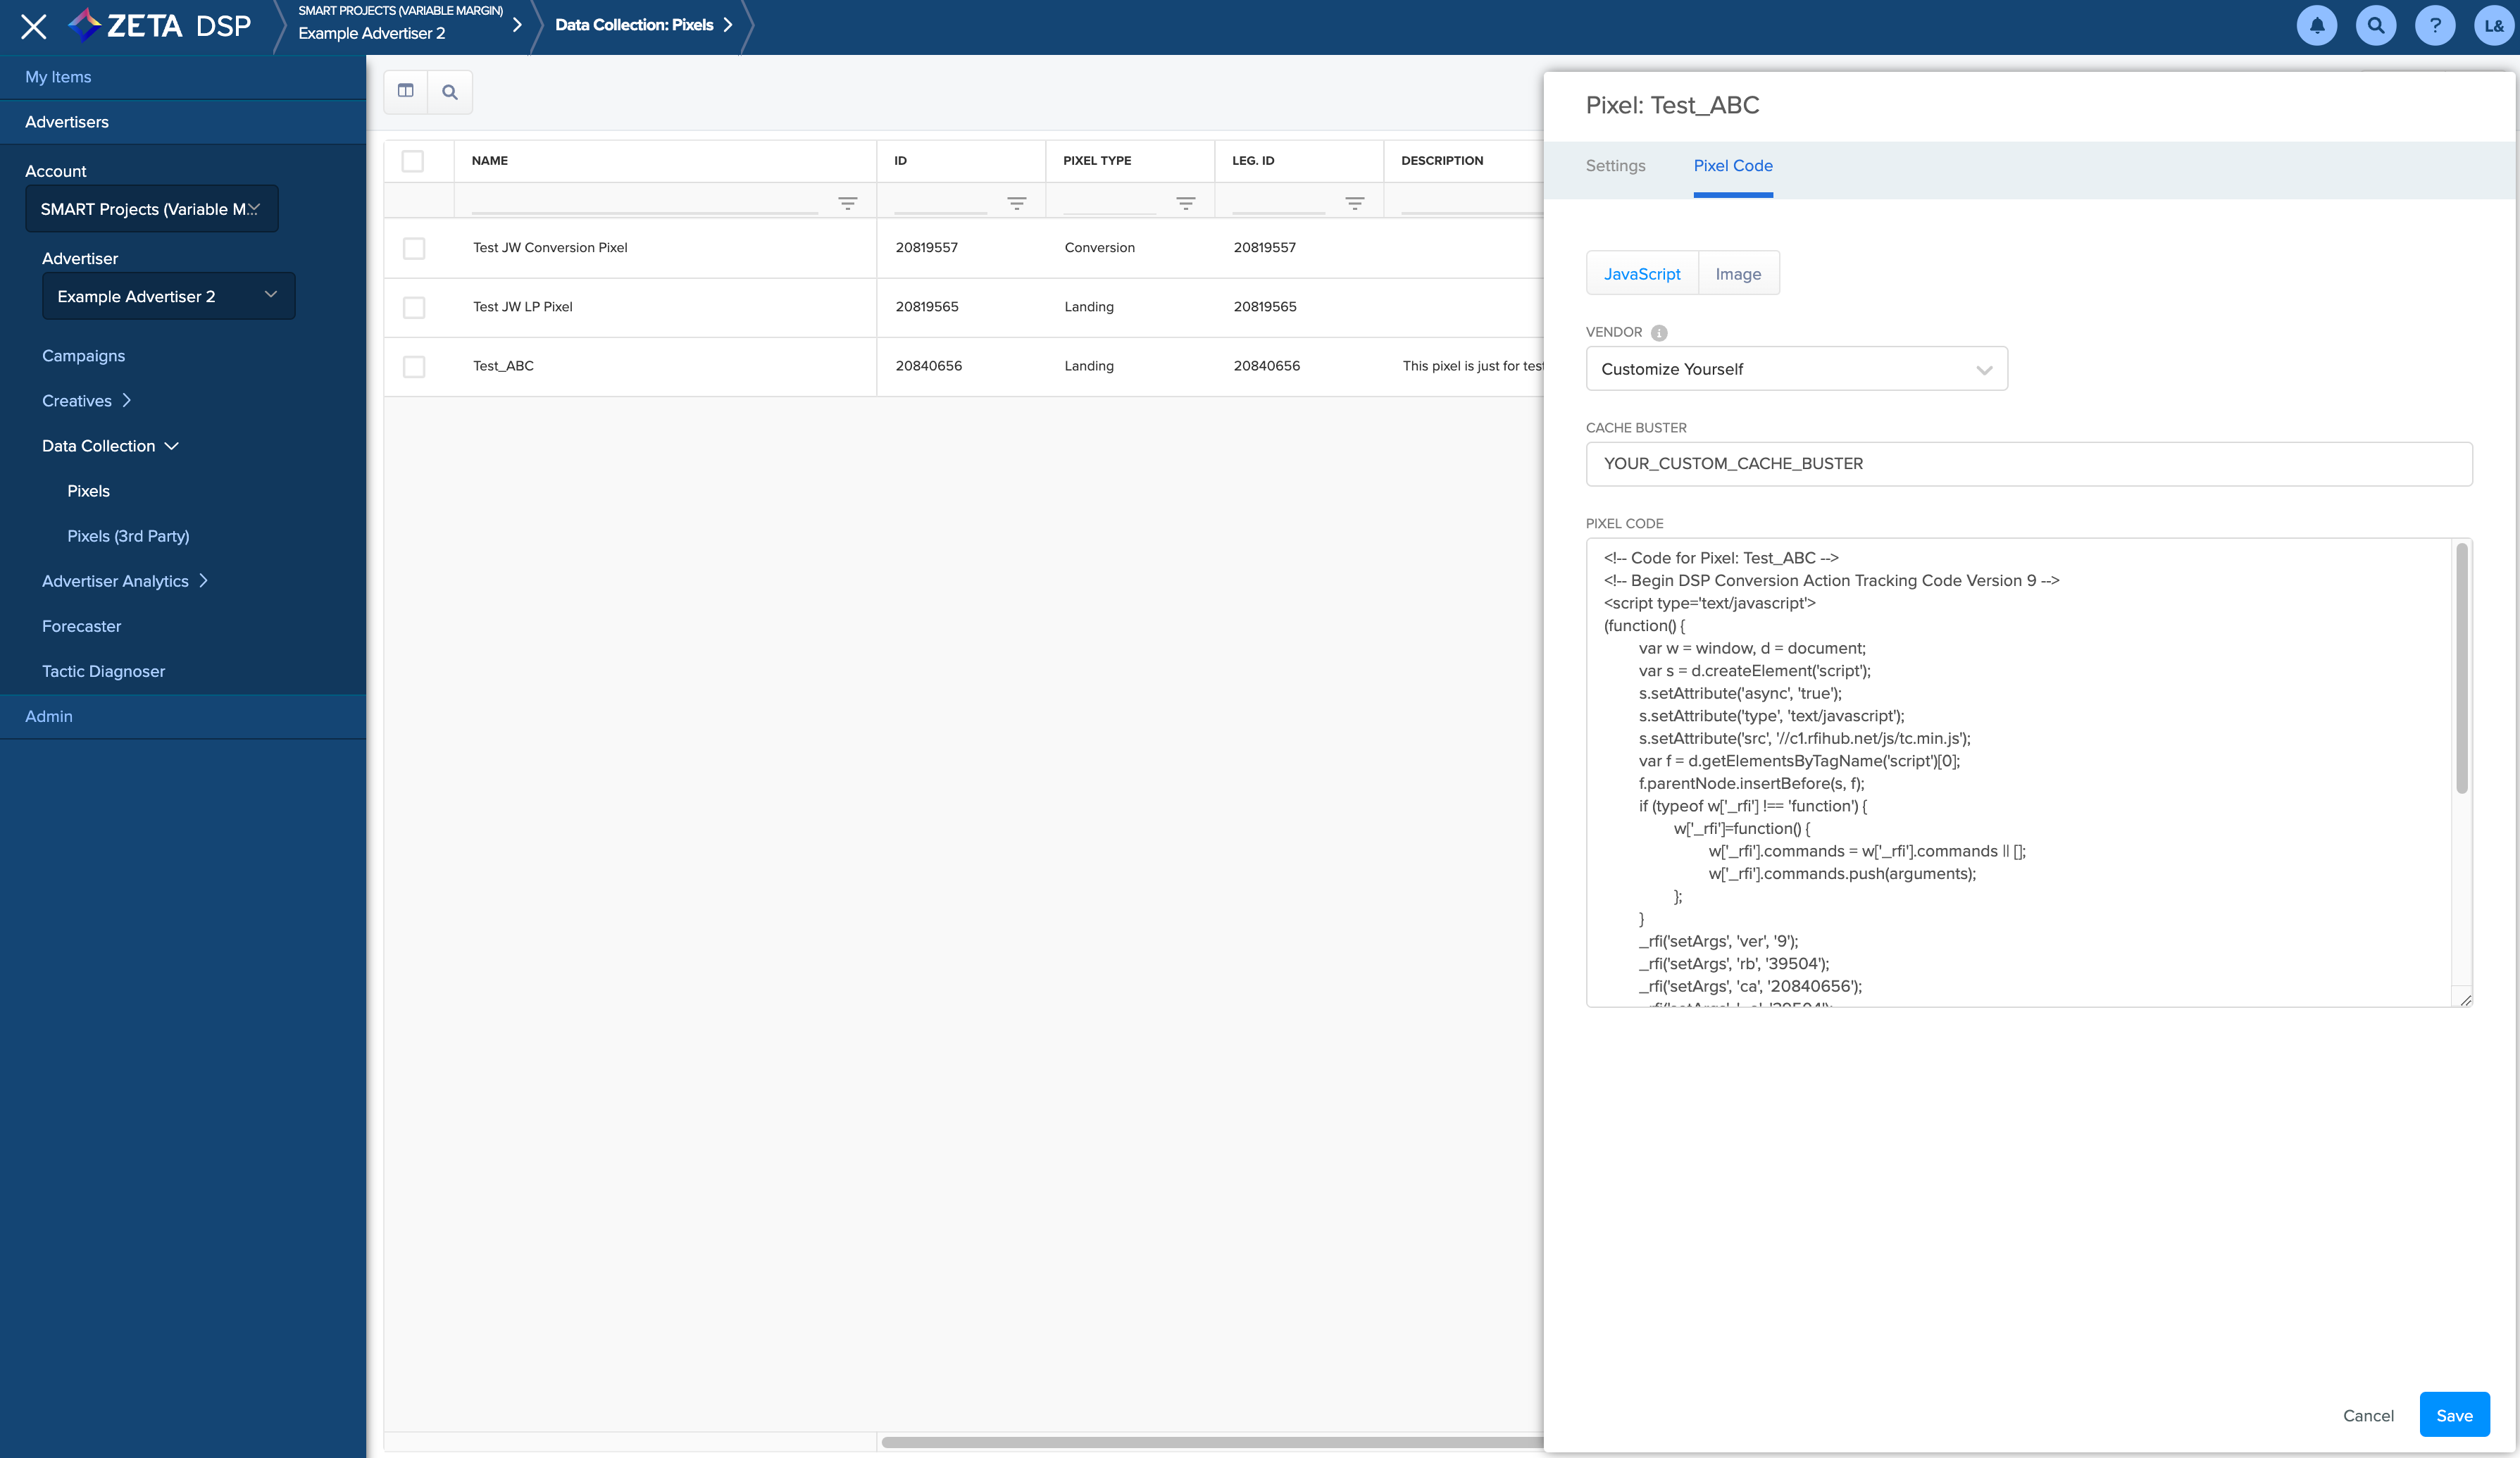
While some pixels let you choose the type of code, we strongly suggest you use JavaScript pixels for the following benefits:
-
JavaScript Pixels capture richer data than image pixels do.
-
They permit parallel loading that helps prevent slowdowns on the page.
-
The same Pixel can be employed on both secure and non-secure pages.
-
They work well with tag-management systems and container tags.
-
They include <noscript> logic for backward compatibility with browsers that do not support JavaScript.
-
If you have questions/concerns about Pixels/ Tags, reference the FAQs.
|
Copying Pixel Code 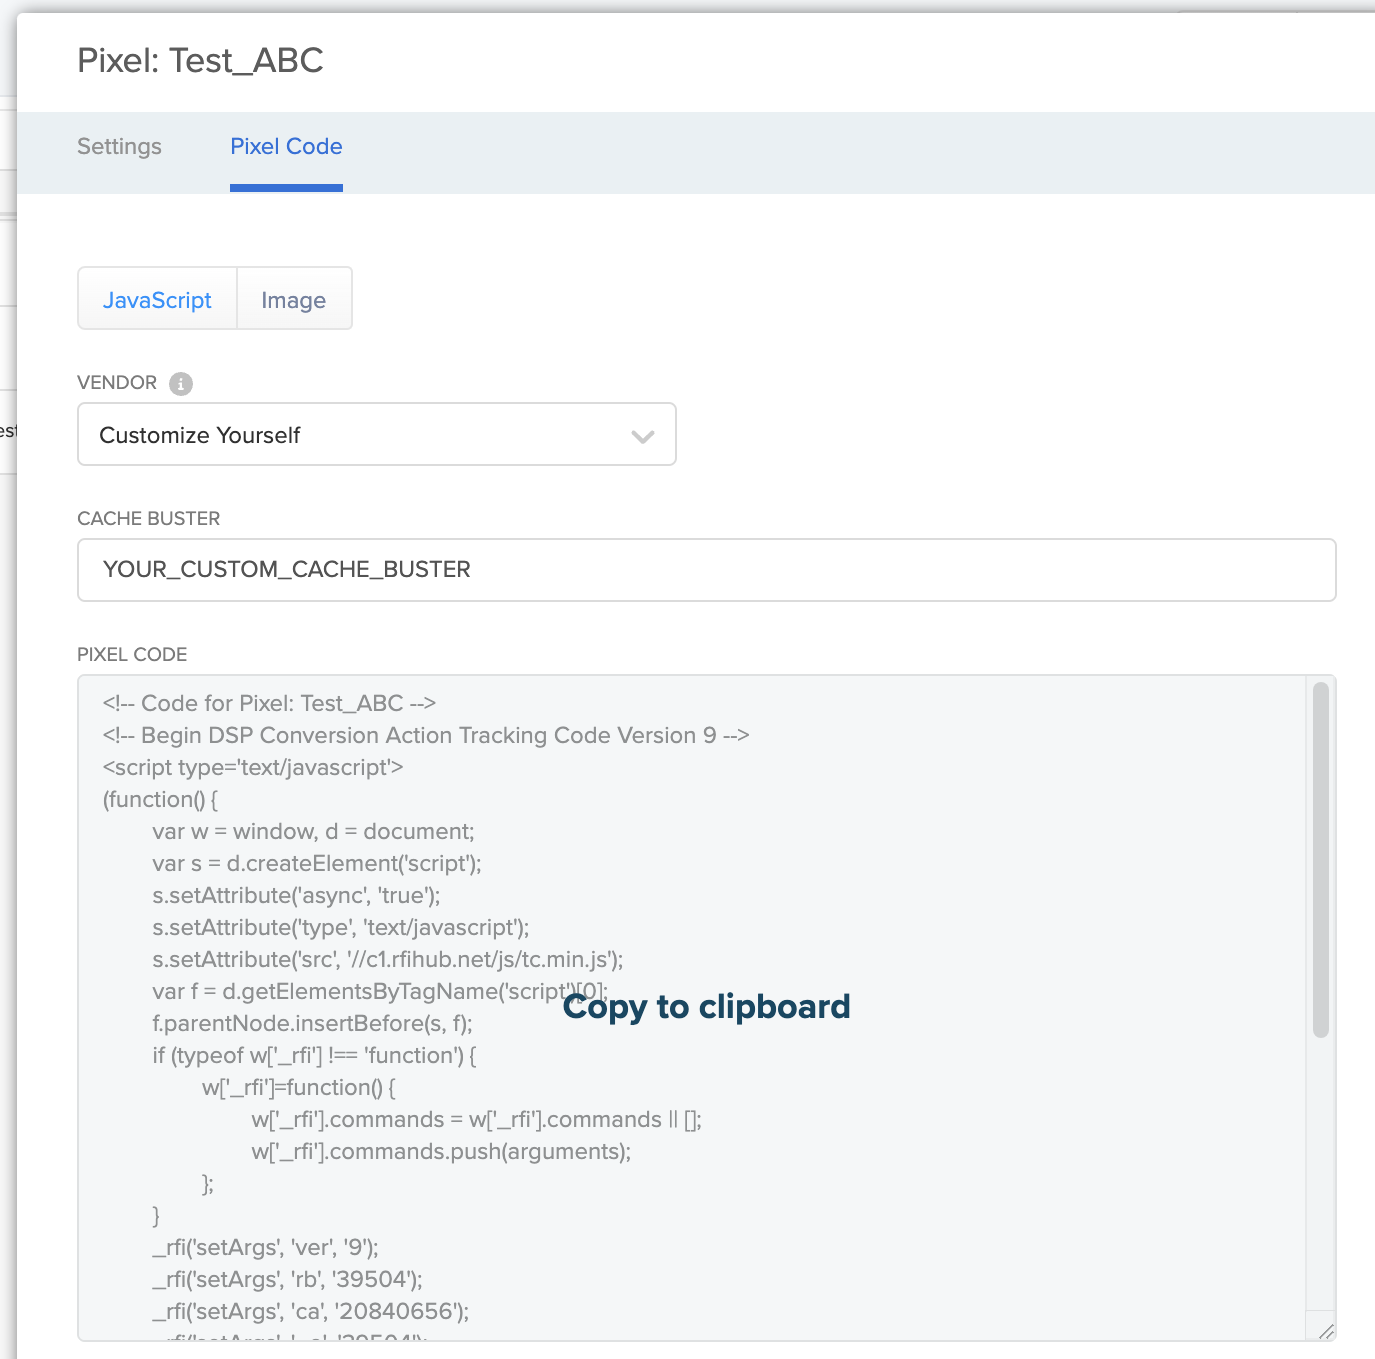
|
6. Click on Save.
Pixel:New Window- Field Descriptions
|
Field |
Description |
|---|---|
|
Basic Settings |
|
|
Name |
The name of the pixel as entered by you. |
|
Pixel Type |
Choose from: Attribution, Conversion, Data Transfer, Landing, Post Conversion, Redirect, Survey, Tracking, Video Completion |
|
Description |
A description of the pixel as entered by you. |
|
View Window |
|
|
View Attribution |
This will assign a fractional conversion credit based on this value (0-100%) |
|
Click Window |
Actions will be counted if a conversion happens within this number of days after an ad click
|
|
Click Attribution Rate |
This will assign a fractional conversion credit based on this value (0-100%) |
|
Repeat Conversions |
You can now configure how conversions are counted using the following options:
Repeat conversion settings will only apply to events occurring after the rule is applied (it is not retroactive). |
|
Share with Accounts |
Select the Account(s) the pixel should be shared with. |
|
Tag Code |
The unique identifier for the given pixel. It can contain letters, numbers, dashes, or underscores. If not specified by you, a unique number will automatically be assigned. |
|
Value |
The value in currency associated with this pixel. |
|
Piggy Backing |
|
|
Pixel Implementation |
Indicates which version of the DSP pixel (JavaScript or Image) will be placed on the client’s site. The selection made here will determine which field is shown beneath it. |
|
Secure HTML |
This field is displayed if JavaScript is selected under Pixel Implementation. If the JavaScript version of the DSP pixel is placed on the client’s site, then any number of JavaScript or Image pixels can be piggybacked. The HTML code for any 3rd party pixels can be pasted into this field as long as they are wrapped in <img> or <script> tags and use secure HTTPS protocol. |
|
Secure URL |
This field is displayed if Image is selected under Pixel Implementation. If the Image version of the DSP pixel is placed on the client’s site, then only one Image pixel can be piggybacked. The URL for a 3rd party pixel can be entered into this field as long as secure HTTPS protocol is used. |
|
URLS |
|
|
Landing Page URLS |
Enter the URL that the user can land on after clicking the pixel |
|
|
Click on the |
|
Redirect |
If you plan to use the piggy-back functionality that is outlined above, this setting must be Disabled in order for the Piggybacking settings to function correctly. If Enabled, you need to select how the redirect URL call will be made:
|