

The Zeta Marketing Platform enables you to build Customer Match Audiences in Google Ads from your Segments and Lists. To get started, the integration with Google must be configured first.
Once you’ve enabled the feature, you’ll need to authenticate that you have permission to use your client’s Google Ads account. Zeta maintains a Zeta Global MCC (master account), and all approved client accounts fall under this umbrella. This means you only need one set of credentials to connect any account you wish. If you do not have Google Ads account credentials, reach out to Solutions and they’ll authenticate for you.
Configuring the Connection
If your account already has Google Ads set up through CRM Features, you can skip this section.
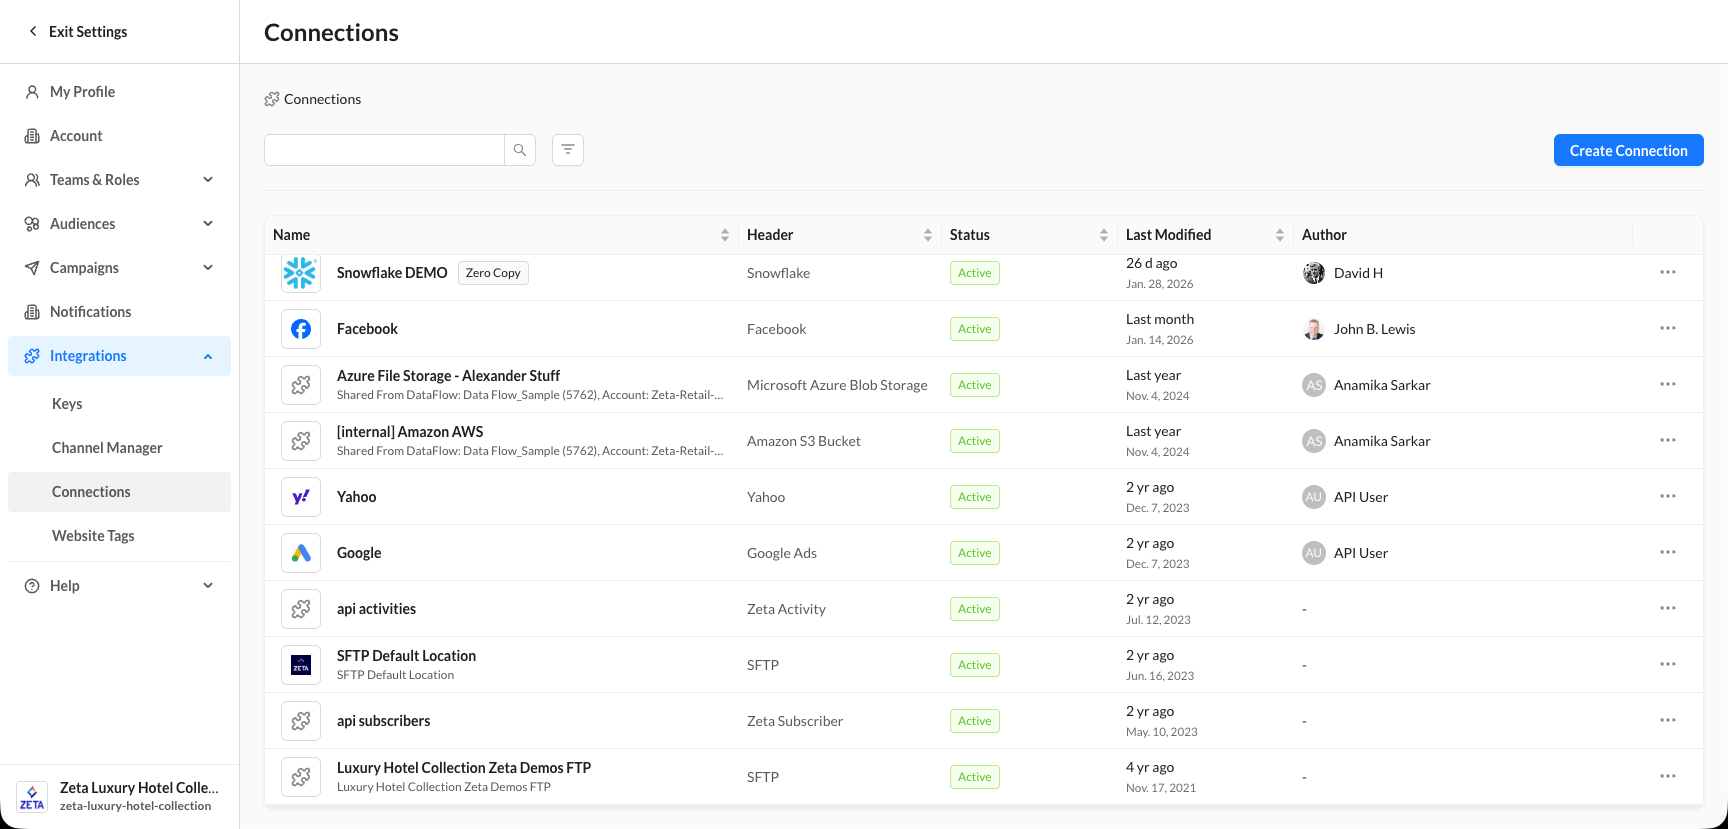
1. Navigate to Settings > Integrations > Connections, and then click on Create Connection.
-20260224-051959.gif?cb=a6d5a558d2772d3207f04ff13ed55676)
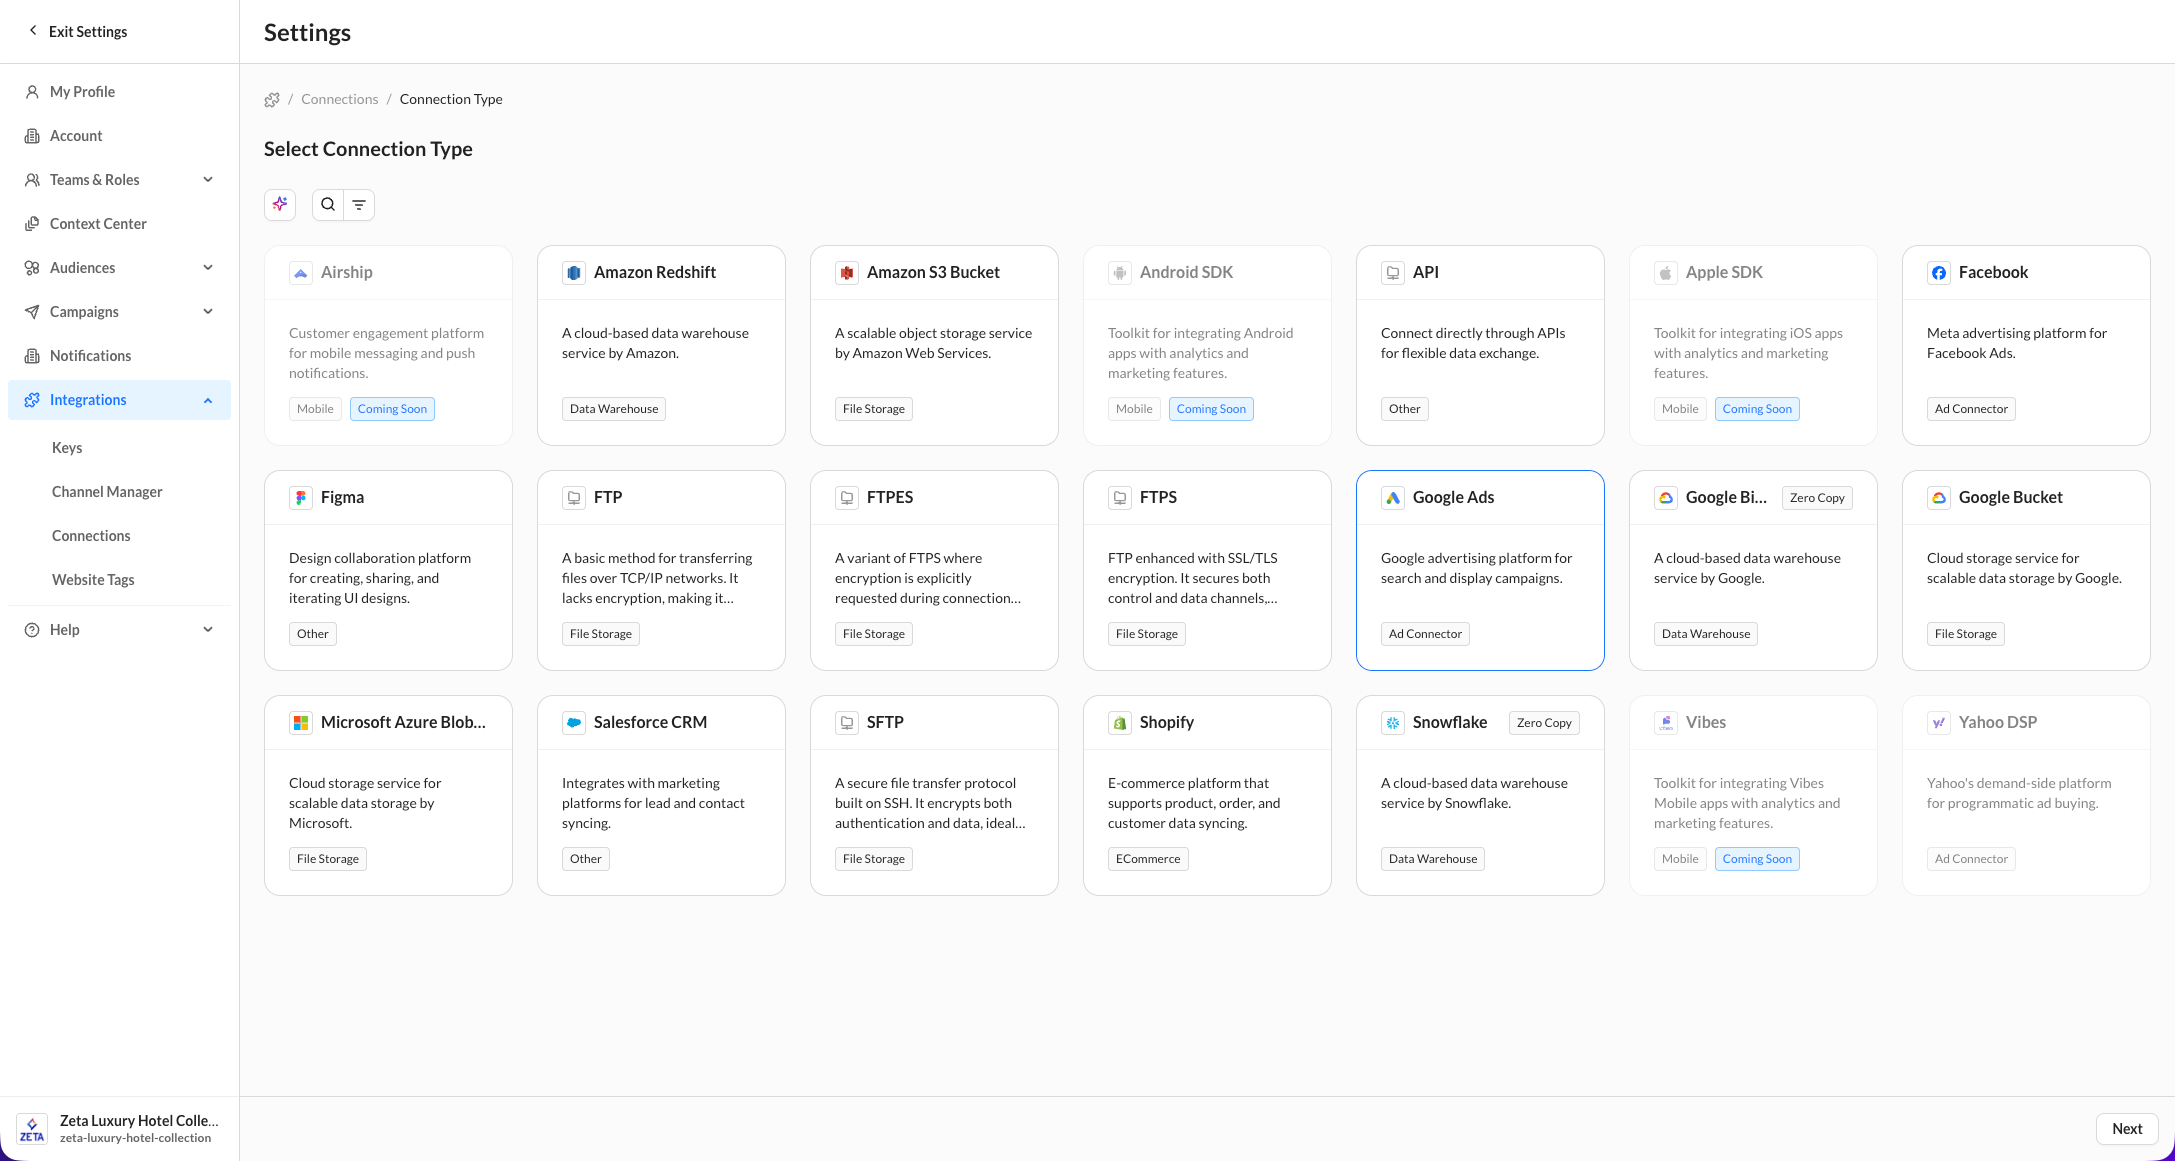
2. On the Select Connection Type page, click on the Google Ads tile. Click on Next.
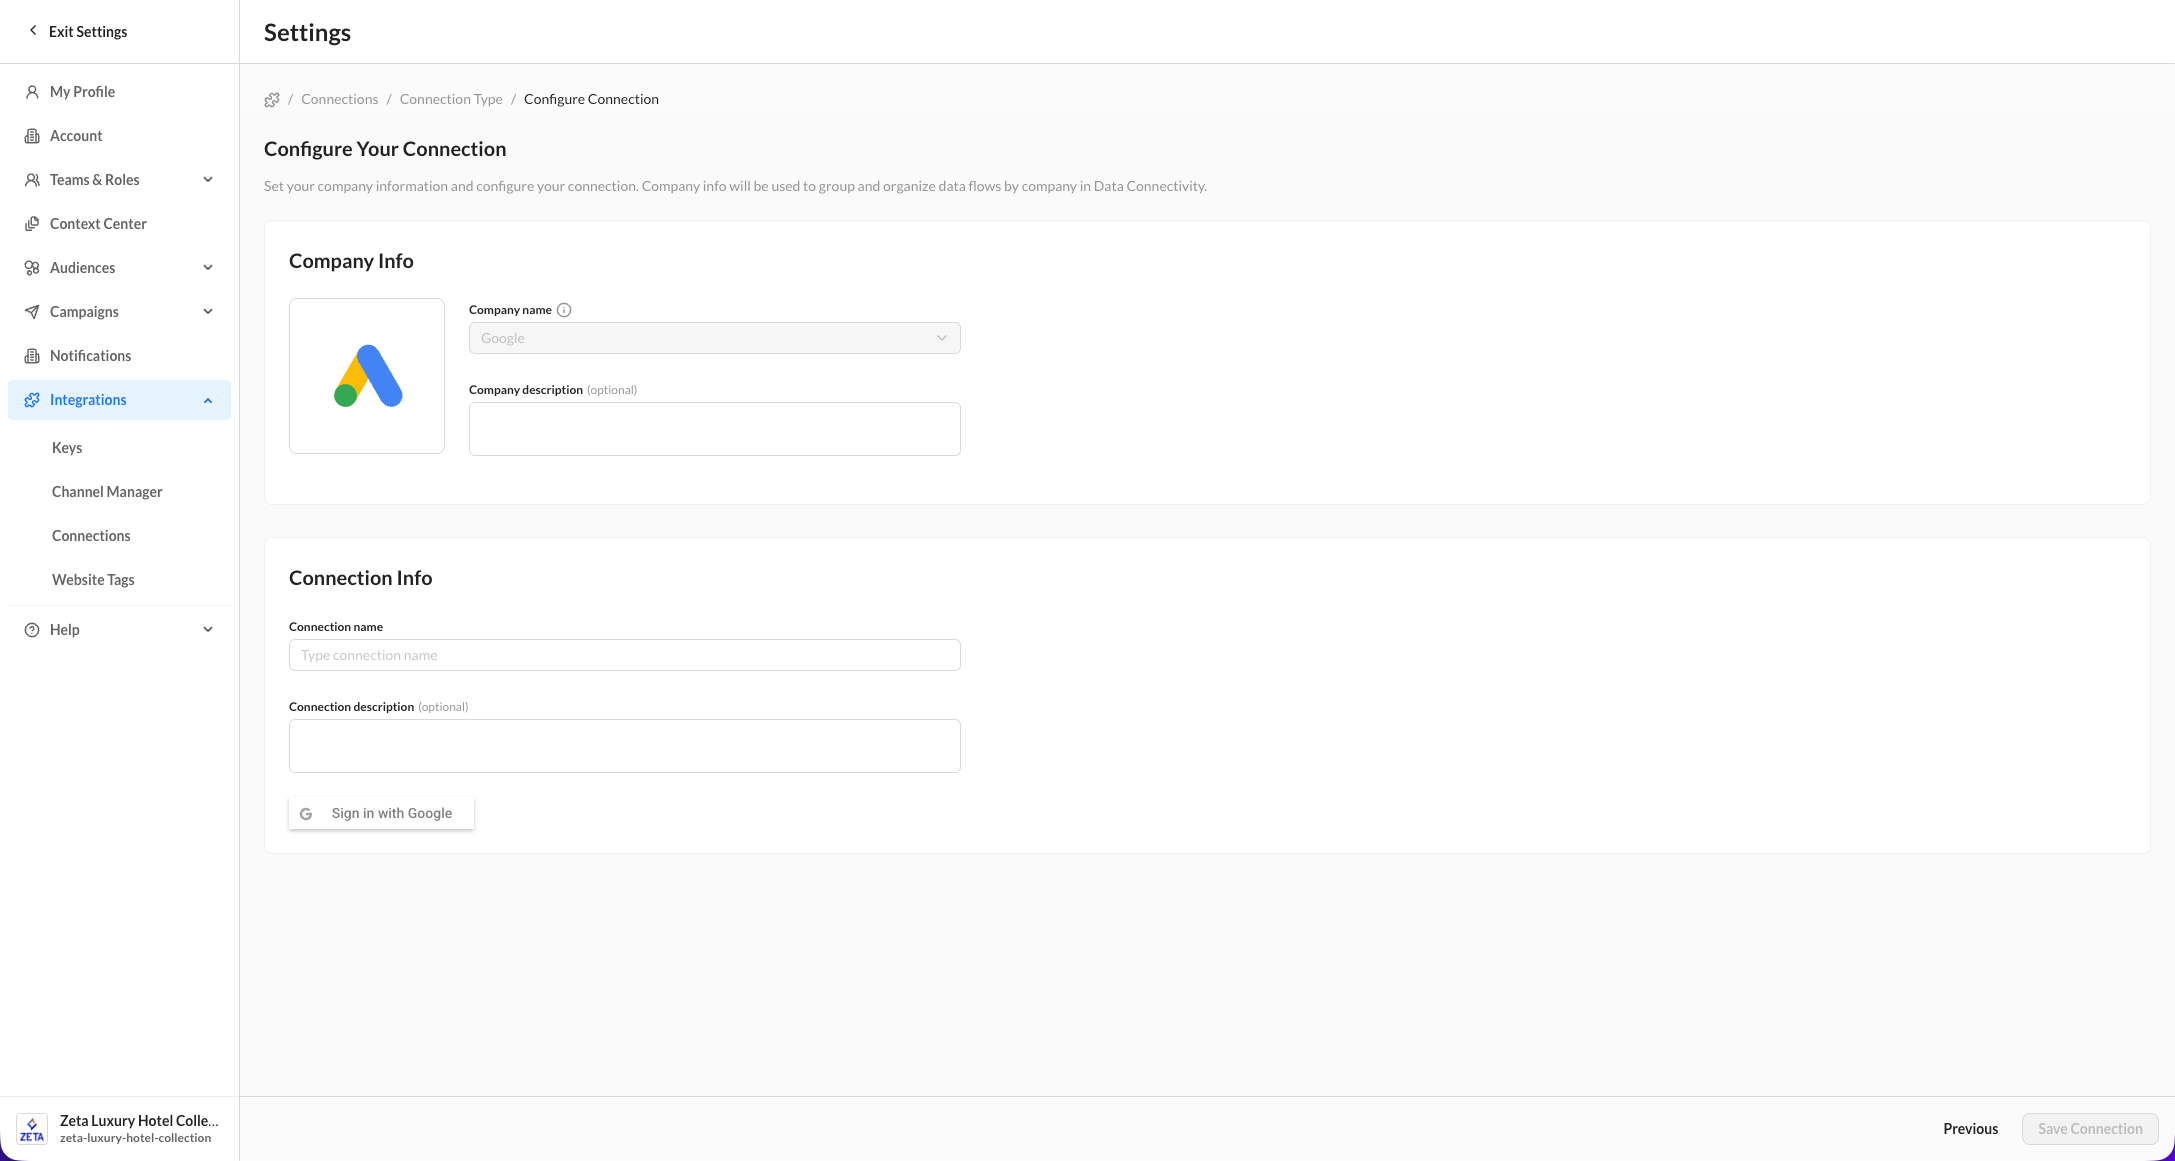
3. Once selected, the fields will resolve to a single Sign in with Google button for you to sign in to your account via SSO. Clicking the button opens a pop-up to sign in.
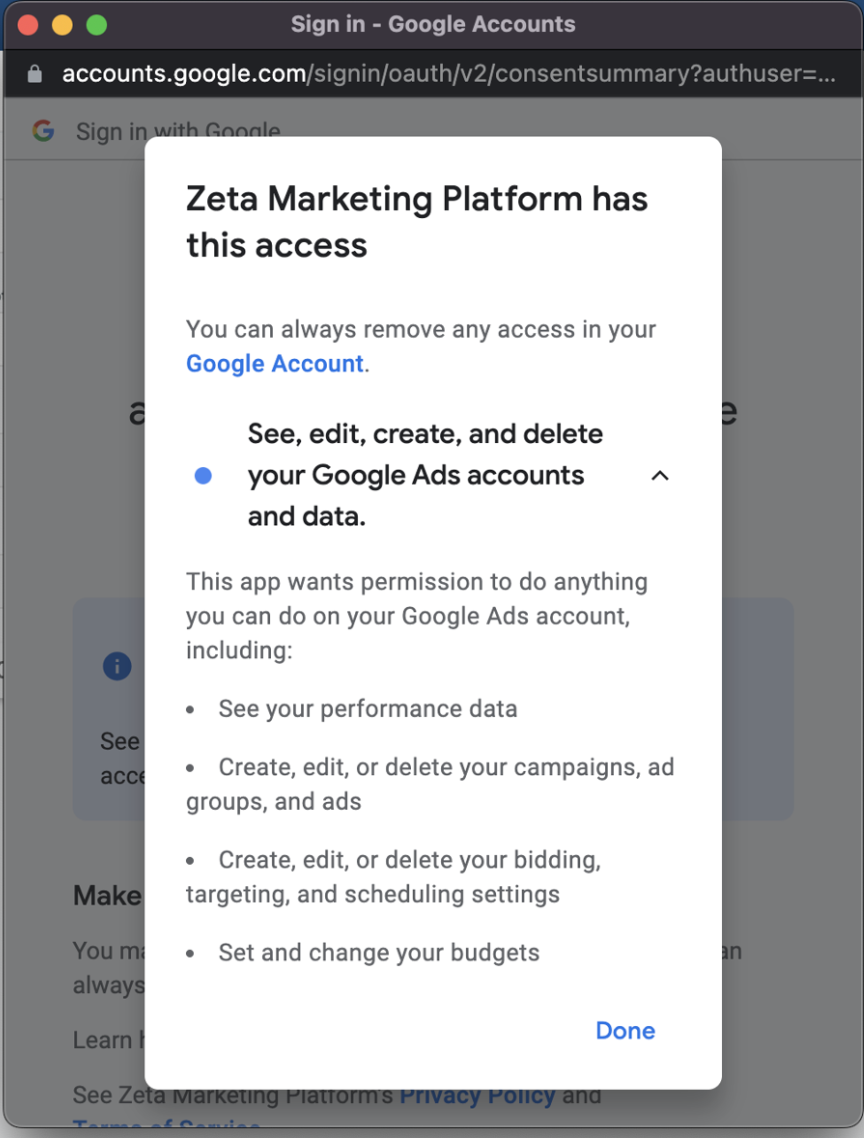
4. When prompted, make sure you accept all permissions so you can send data from ZMP to Google Ads.
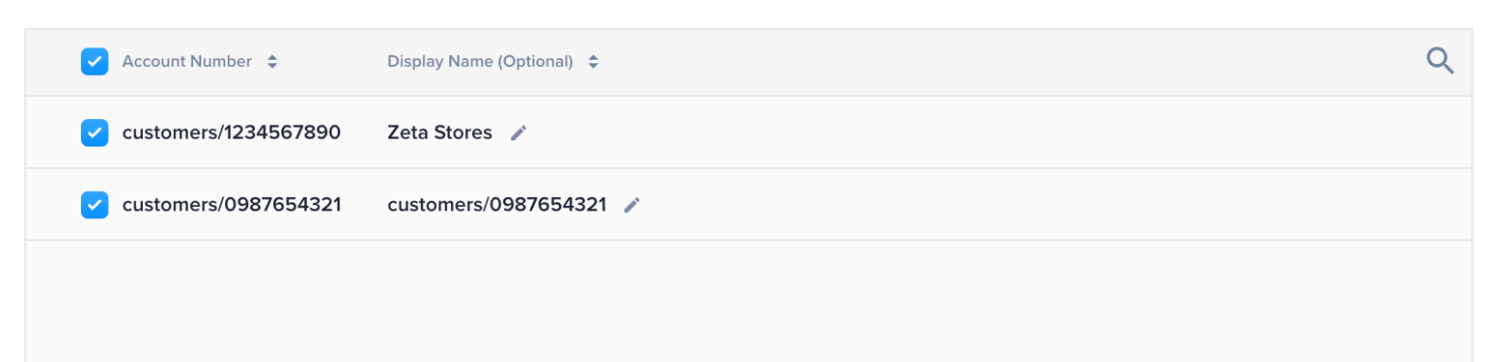
5. Once authenticated, all the Google Ads accounts attached to your username will appear in a table. Check the boxes of the accounts you want to use on the current ZMP instance. To add an optional Display Name for each account number, click the pencil icon to open the editor and save.
6. After clicking Save on the Google Ads Connection page, you’ll be redirected to the Connections page, where you can see the active status of your connection.
Sync using Automated Exports
Synchronizing Segments and Lists with an Automated Export can be done by following these steps:
1. Navigate to the Segment or List summary from the Audience section on the left sidebar. The process for setting up an export for both a Segment and a List is the same.
2. Locate the segment or list you want to set up an export for, and click on the in-row menu (three dots) on the right side of the UI. Click on Export from the list of options.
3. Here, you can confirm the source for the export. Make sure it's the same as the list or segment you intend to export, and a dropdown list of all Google Audiences available in your Google Ads account will automatically show up for selection.
4. Next, choose the appropriate destination for your export. In this case, we'll use Google Ads.
5. Once Google Ads is selected, a dropdown list of all Google Audiences available in your Google Ads account will automatically show up for selection. If an audience is disabled, then you don’t have permission to edit that audience.
Read-only audiences are by default disabled.
-20260224-053350.gif)
-
If you'd like to create a new Customer Match Audience in your Ad account, simply enter the name, and you will see an option to create one in-line directly from the ZMP.
-
When the export runs, all active contacts for a user are hashed and sent to Google Ads to generate a match audience.
-
When selecting Optional Settings when configuring your export, there are 2 Google Ads-specific fields that can be included. These fields must be created with these exact names as user-level properties, and values must be in the format prescribed by Google, documented below:
|
Field Name |
Function |
Accepted Values |
|---|---|---|
|
google_ad_user_data |
consent for sending advertising user data to Google |
|
|
google_ad_personalization |
consent for personalization advertising within Google Ads |
|
Google Ads also accepts Address for matching, so the following fields can be selected: first_name, last_name, city, state , country_code, postal_code, street_address - per Google requirements, at least these 4 must be included for matching: country_code, postal_code, first_name, and last_name
6. Select the desired Google Audience and click on Next.
7. Click on Connect to save the export. Turn the Automate Connection toggle on to schedule your export.
Once you start an export to a Customer Match Audience, you won’t be able to use that audience as a destination again until the initial export is finished.
You can only export audiences up to 85MM to Google Ads. Prospect Audiences will be further matched to email_sha256 identifiers in Data Cloud.
The audience export to Google Ads includes only new users identified within the platform. If a user already exists in the client’s Google Ads audience list, they will not be re-added or duplicated during the export process.
Based on official documentation from Google and Meta, the following figures represent general match rate benchmarks. Actual match rates may vary depending on data quality, formatting, audience composition, and the identifiers provided.
Meta (Facebook Custom Audiences):
-
Average Match Rate: 60–80%
-
High-Quality Data Sets: Can exceed 85% when multiple recommended identifiers are included.
Google (Customer Match):
-
Average Match Rate: 70–90%
-
Higher match rates are typically achieved when multiple identifiers (such as email, phone number, and address) are provided.
These benchmarks should be used as general guidance only and are not guaranteed outcomes.
Sync using Experiences
The Experience Builder allows you to both add and remove users from a Customer Match Audience using the Actions node.
While Segments & Lists allow you to export audiences to Google Ads in bulk, some campaigns require action-based criteria. With Experience Builder, you can create trigger-based workflows that determine how and when a person is added to or removed from a Google Ads Customer Match Audience.
1. Navigate to Experiences > Builder and click Create Experience to open the canvas.
2. Begin building your experience by selecting a trigger event. Add any relevant flow-control, wait, split, or decision nodes required for your campaign logic.
3. Select the + button on the Experience Builder canvas to open the node menu, and then select Actions.
4. From the Actions panel, select the Google Ads sync action.
5. In the sync dialog, choose the Google Ads account you want to use. If only one account is authenticated for the connection, it will be selected automatically.
6. Select the Customer Match Audience you want to update. You can choose an existing editable audience, or create a new audience directly from ZMP when the option is available.
7. Choose whether the node should add users to the audience or remove users from the audience, depending on the goal of that branch in the experience.
8. Click Add To Experience. The action appears on the canvas and will run for users who reach that node after the experience is activated.
-20260911-061025.gif?cb=19f28b5c81d25cbb20c38bbeafd7f29b)
Use separate branches or nodes when different audiences, accounts, or add/remove actions are needed. Confirm that each branch is syncing the correct user population before activating the experience.
Google Ads audience updates may take time to process and match after users reach the sync node. Users must meet Google Customer Match eligibility and policy requirements before they can be activated in Google Ads campaigns.