

Zero Copy Database Explorer enables marketers to work directly against connected Snowflake and Google BigQuery environments using either visual audience-building workflows or SQL-based audience creation. Users can define audiences against external data without moving data into ZMP and can save resulting audiences for immediate campaign activation.
Please get in touch with your Zeta Representative to enable this functionality for your account(s).
Connecting a Snowflake or Google BigQuery Database
1. To create a connection, navigate to Settings > Integrations > Connections.
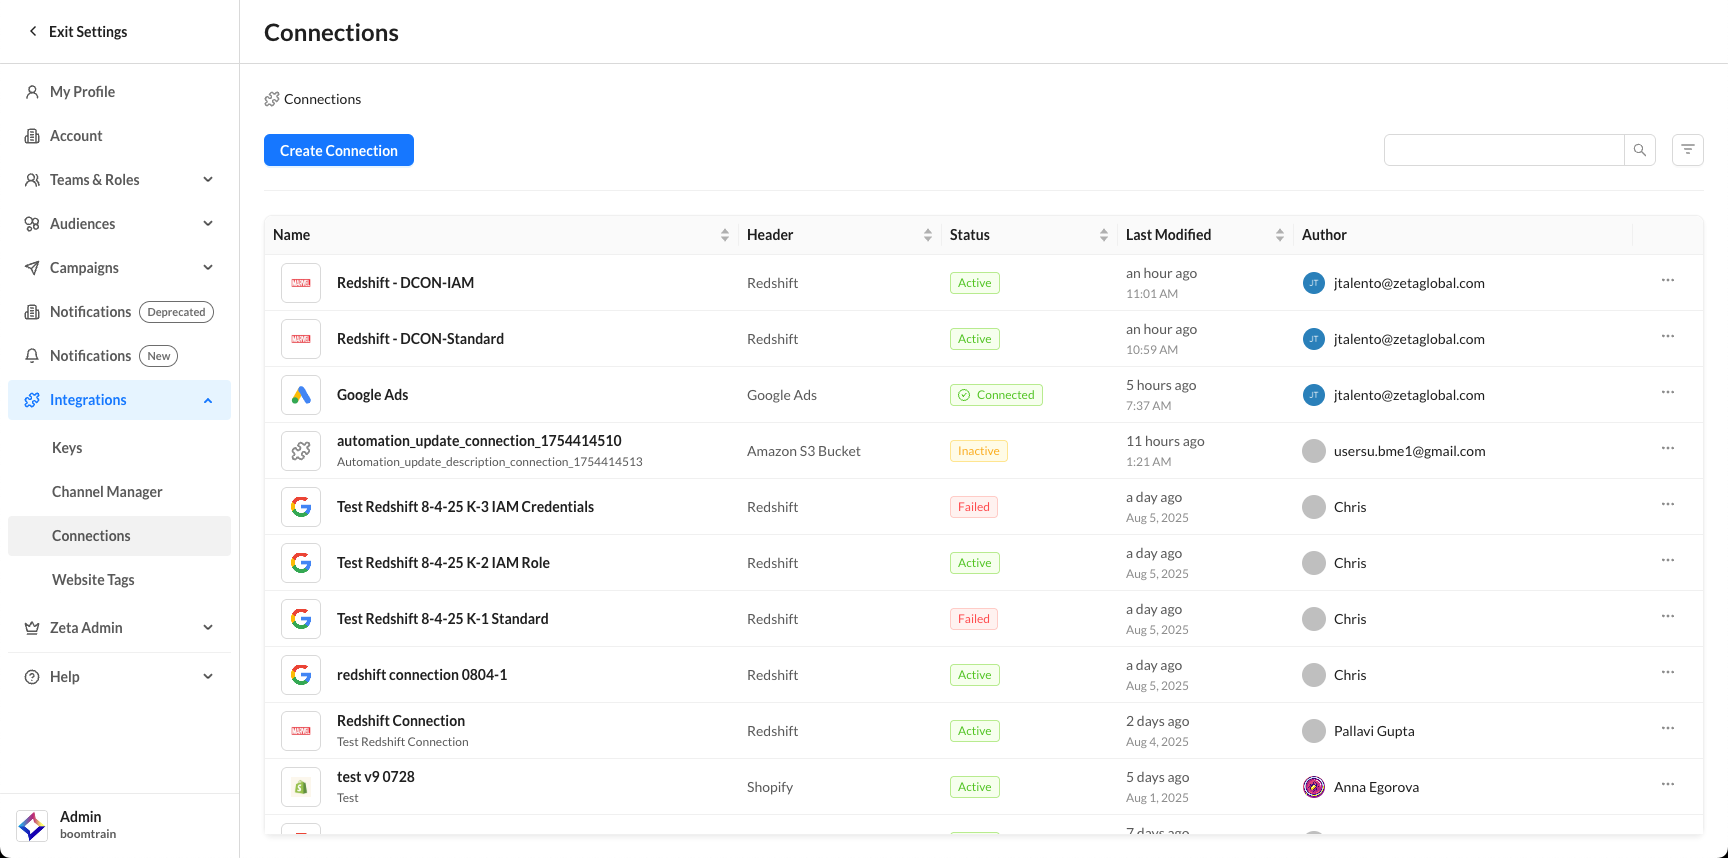
2. Click on Create Connection.
-20250806-044112.gif?cb=6fc9fc0744ebbb62c83df85748205036)
2. Start by filling in the required fields, then select your preferred connection method from the Connection Via dropdown. Finally, enter your authentication credentials to enable secure access.
3. Once your connection is saved, you can immediately create SQL segments, but you will at least need to assign a user_id to create a segment with the Database Explorer.
Configuring a Connected Database
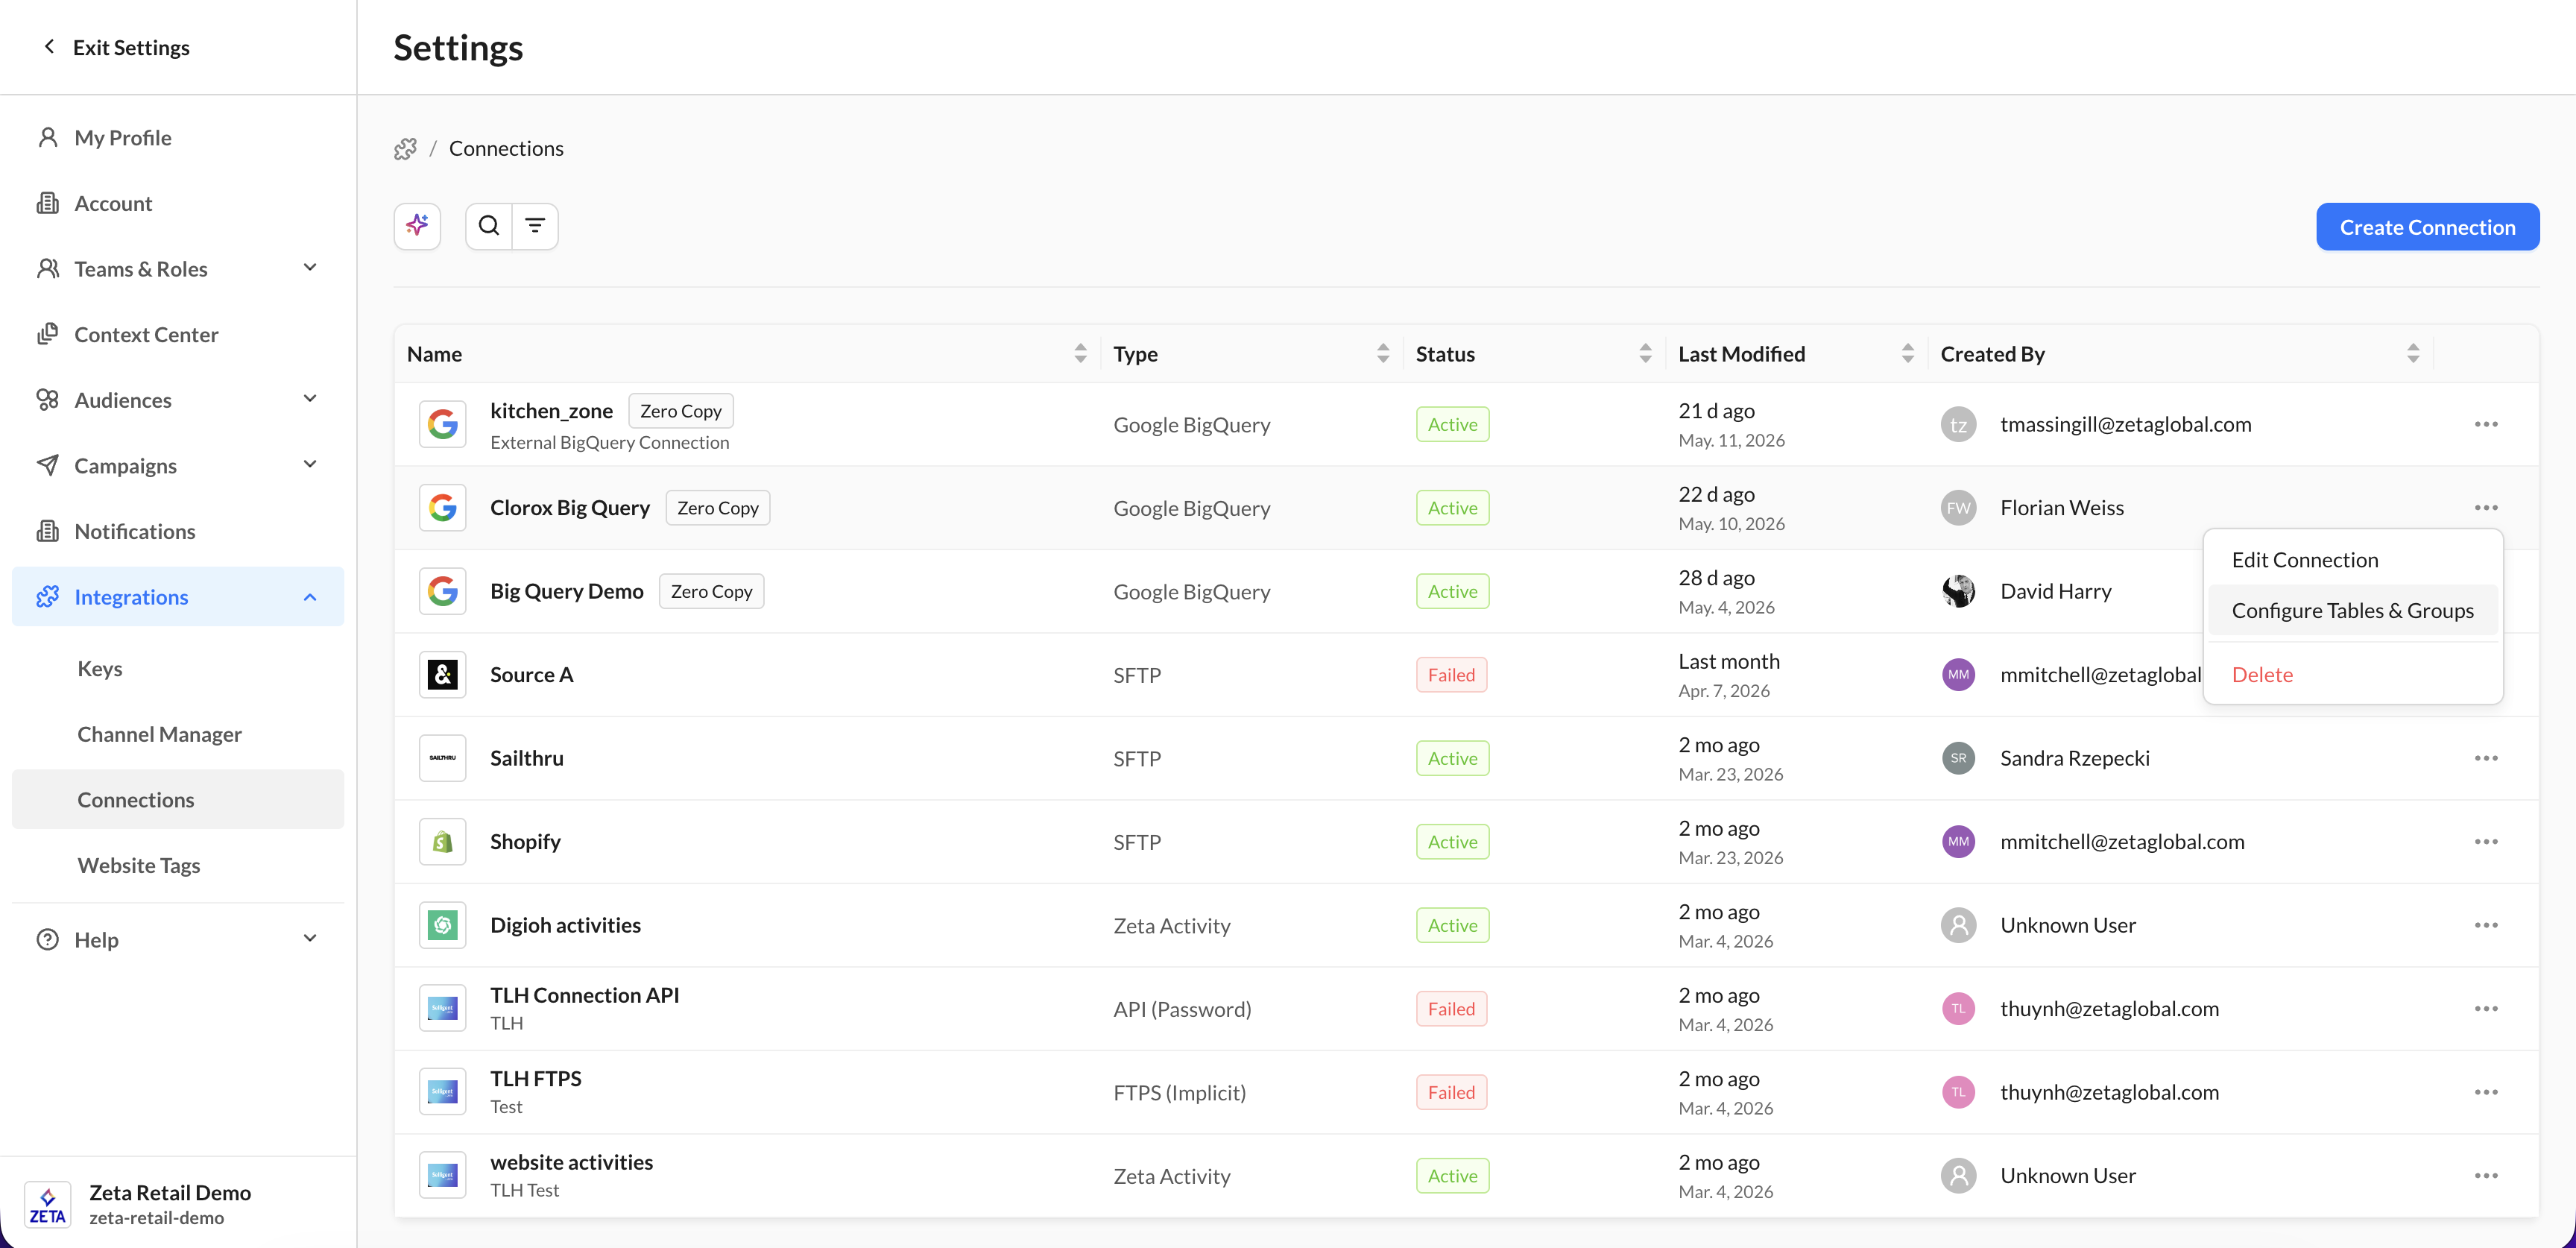
1. Within the Connections library, click on the action menu (three dots) against the desired Snowflake or Google BigQuery connection and select Configure Tables & Groups from the dropdown.
-
This will direct you to a listing of all the tables and groups in your connection.
2. From the action menu (three dots) next to the group, select Configure Tables.
-20260602-100637.gif?cb=ad695adbcf568467aabe860b325a9171)
-
Review the list of tables available within the group.
Please note that it can take a few minutes for all the tables to populate upon initially creating the connection.
3. Locate the table you want to configure, click its action menu (three dots), and select Edit Mappings.
4. Create or update table mappings to define how tables are joined for segmentation.
Edit Mappings
Select your source table, and from its action menu (three dots), select Table Mappings. Within the Mappings page, click on Add Mapping to create a new join.
-20260602-101334.gif?cb=df0786846e8a2ff78827054f5972c263)
1. From the Edit Mappings page, select the destination table from the Table 2 dropdown.
2. Select the desired Join Type.
3. Choose the column from Table 1 and the corresponding column from Table 2 that will be used for the first join condition.
4. Click Add Join Condition.
5. Select an additional pair of matching columns from Table 1 and Table 2.
-
6. Repeat this process to add as many join conditions as required for the mapping.
7. Review all configured join conditions to ensure they accurately define the relationship between the two tables.
8. Click Save Mappings to save your changes.
Tip: Use multiple join conditions when a single field is not sufficient to uniquely identify matching records between tables. For example, you may join records using both an Account ID and a Region field to ensure more precise matching.
Please note that segmentation is available for single tables without any configuration, but only one table may be targeted at a time unless the mappings (joins) are configured here.
Edit Columns
Click on the action menu (three dots) against the table that contains your users and select Configure Columns.
-20260602-102128.gif?cb=7b1cd2c57fcc6c104ee01cd18911a2e4)
-
Turn on Set as User ID for the column that uniquely identifies users.
-
Enable or disable columns for Targeting and Personalization.
-
Add column aliases to simplify field names.
-
Configure the Type of each column using the Type dropdown.
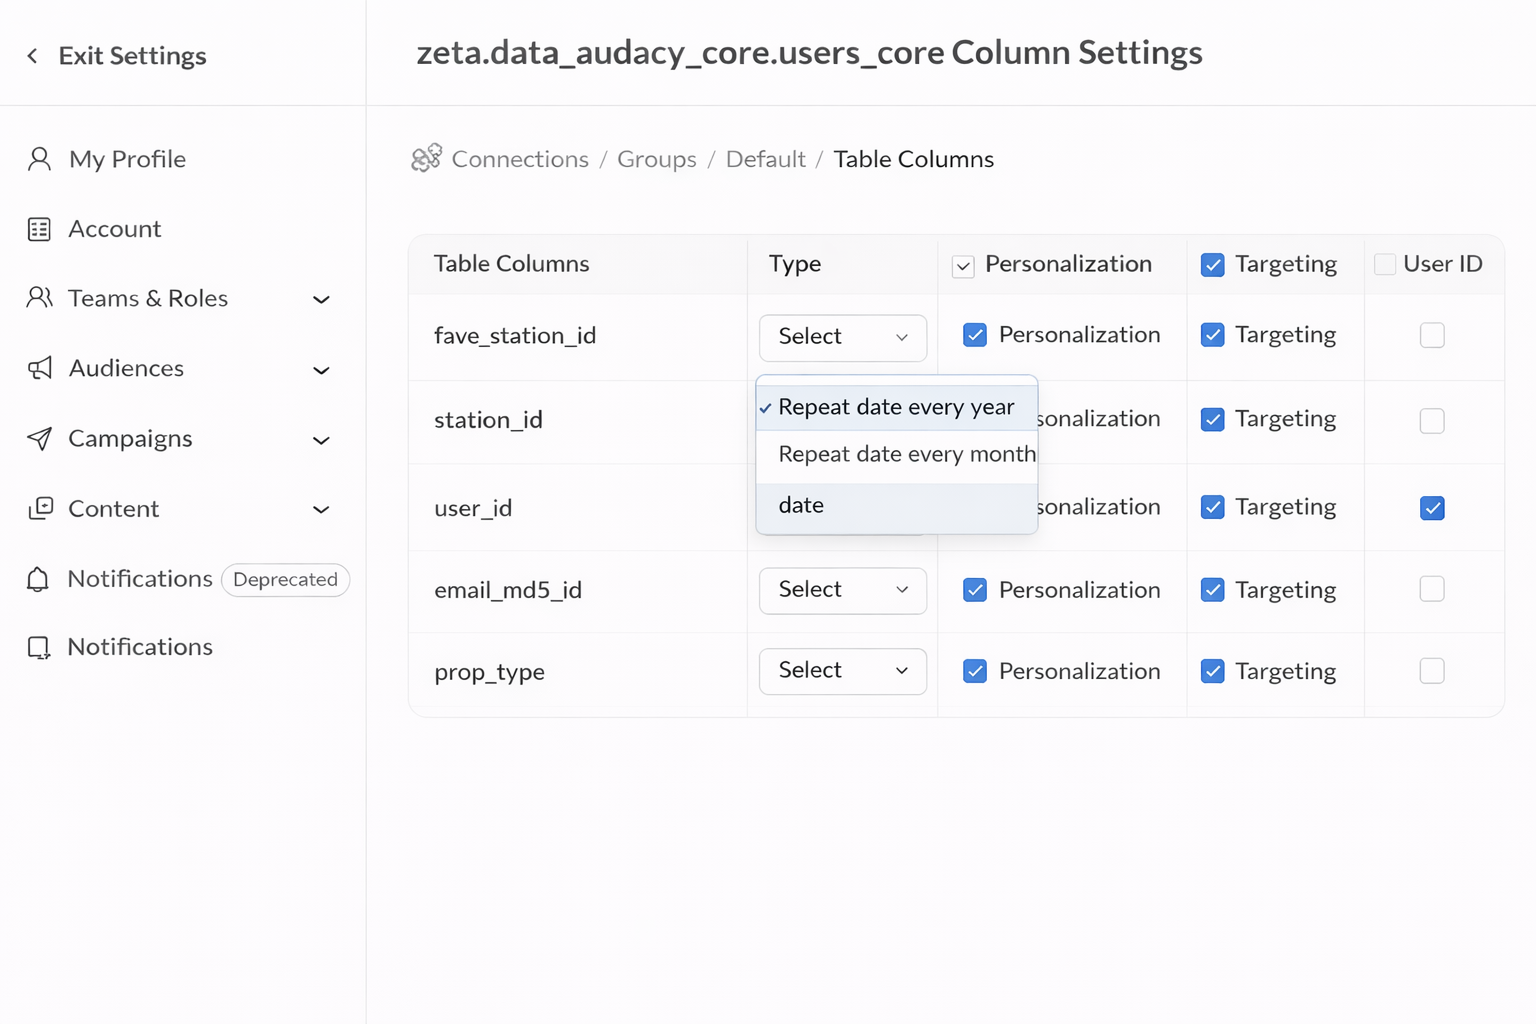
For date-based fields, the Type dropdown includes:
-
Date – Standard date field.
-
Repeat date every year – For recurring annual dates such as birthdays and anniversaries.
-
Repeat date every month – For recurring monthly dates such as billing or renewal dates.
Selecting a recurring date type allows Database Explorer to correctly evaluate recurring rules and campaigns, such as birthday audiences using conditions like birthdate = currentdate().
Note: Use recurring date types only for fields that should be evaluated repeatedly over time. Standard date fields will continue to be evaluated as fixed dates.
About
Selecting About from the action menu (three dots) dropdown will display the panel containing information about the specific table.
-20260602-102230.gif?cb=7720ea8f41628cdadf19f187ce26a9ce)
-
We can add an alias to make the segmentation easier. For example, instead of seeing
demo_db.external_schema.users.email, we would seeusers.email.
Refresh Table
Selecting Refresh Table from the action menu (three dots) dropdown will allow us to manually refresh the connected table to add/remove columns if the table has been updated. This process happens periodically but can be refreshed manually as well if needed.
-20250806-053914.gif?cb=f3bc2ba37a3820cf1767c2e24bdbb6ae)
Creating Groups
Click the Create Group button, then choose the tables you'd like to include in the new group from the list.
-20250806-054715.gif?cb=4789a83a0c6baa168bbb50263ecd6c52)
Editing Groups
From the action menu next to a group, select Edit Group from the drop-down list.
-20250806-055340.gif?cb=24f503805a660a2b7ab82be47fa7292e)
-
Make updates to the Group Name, Description, or table selections and click on Save Group.
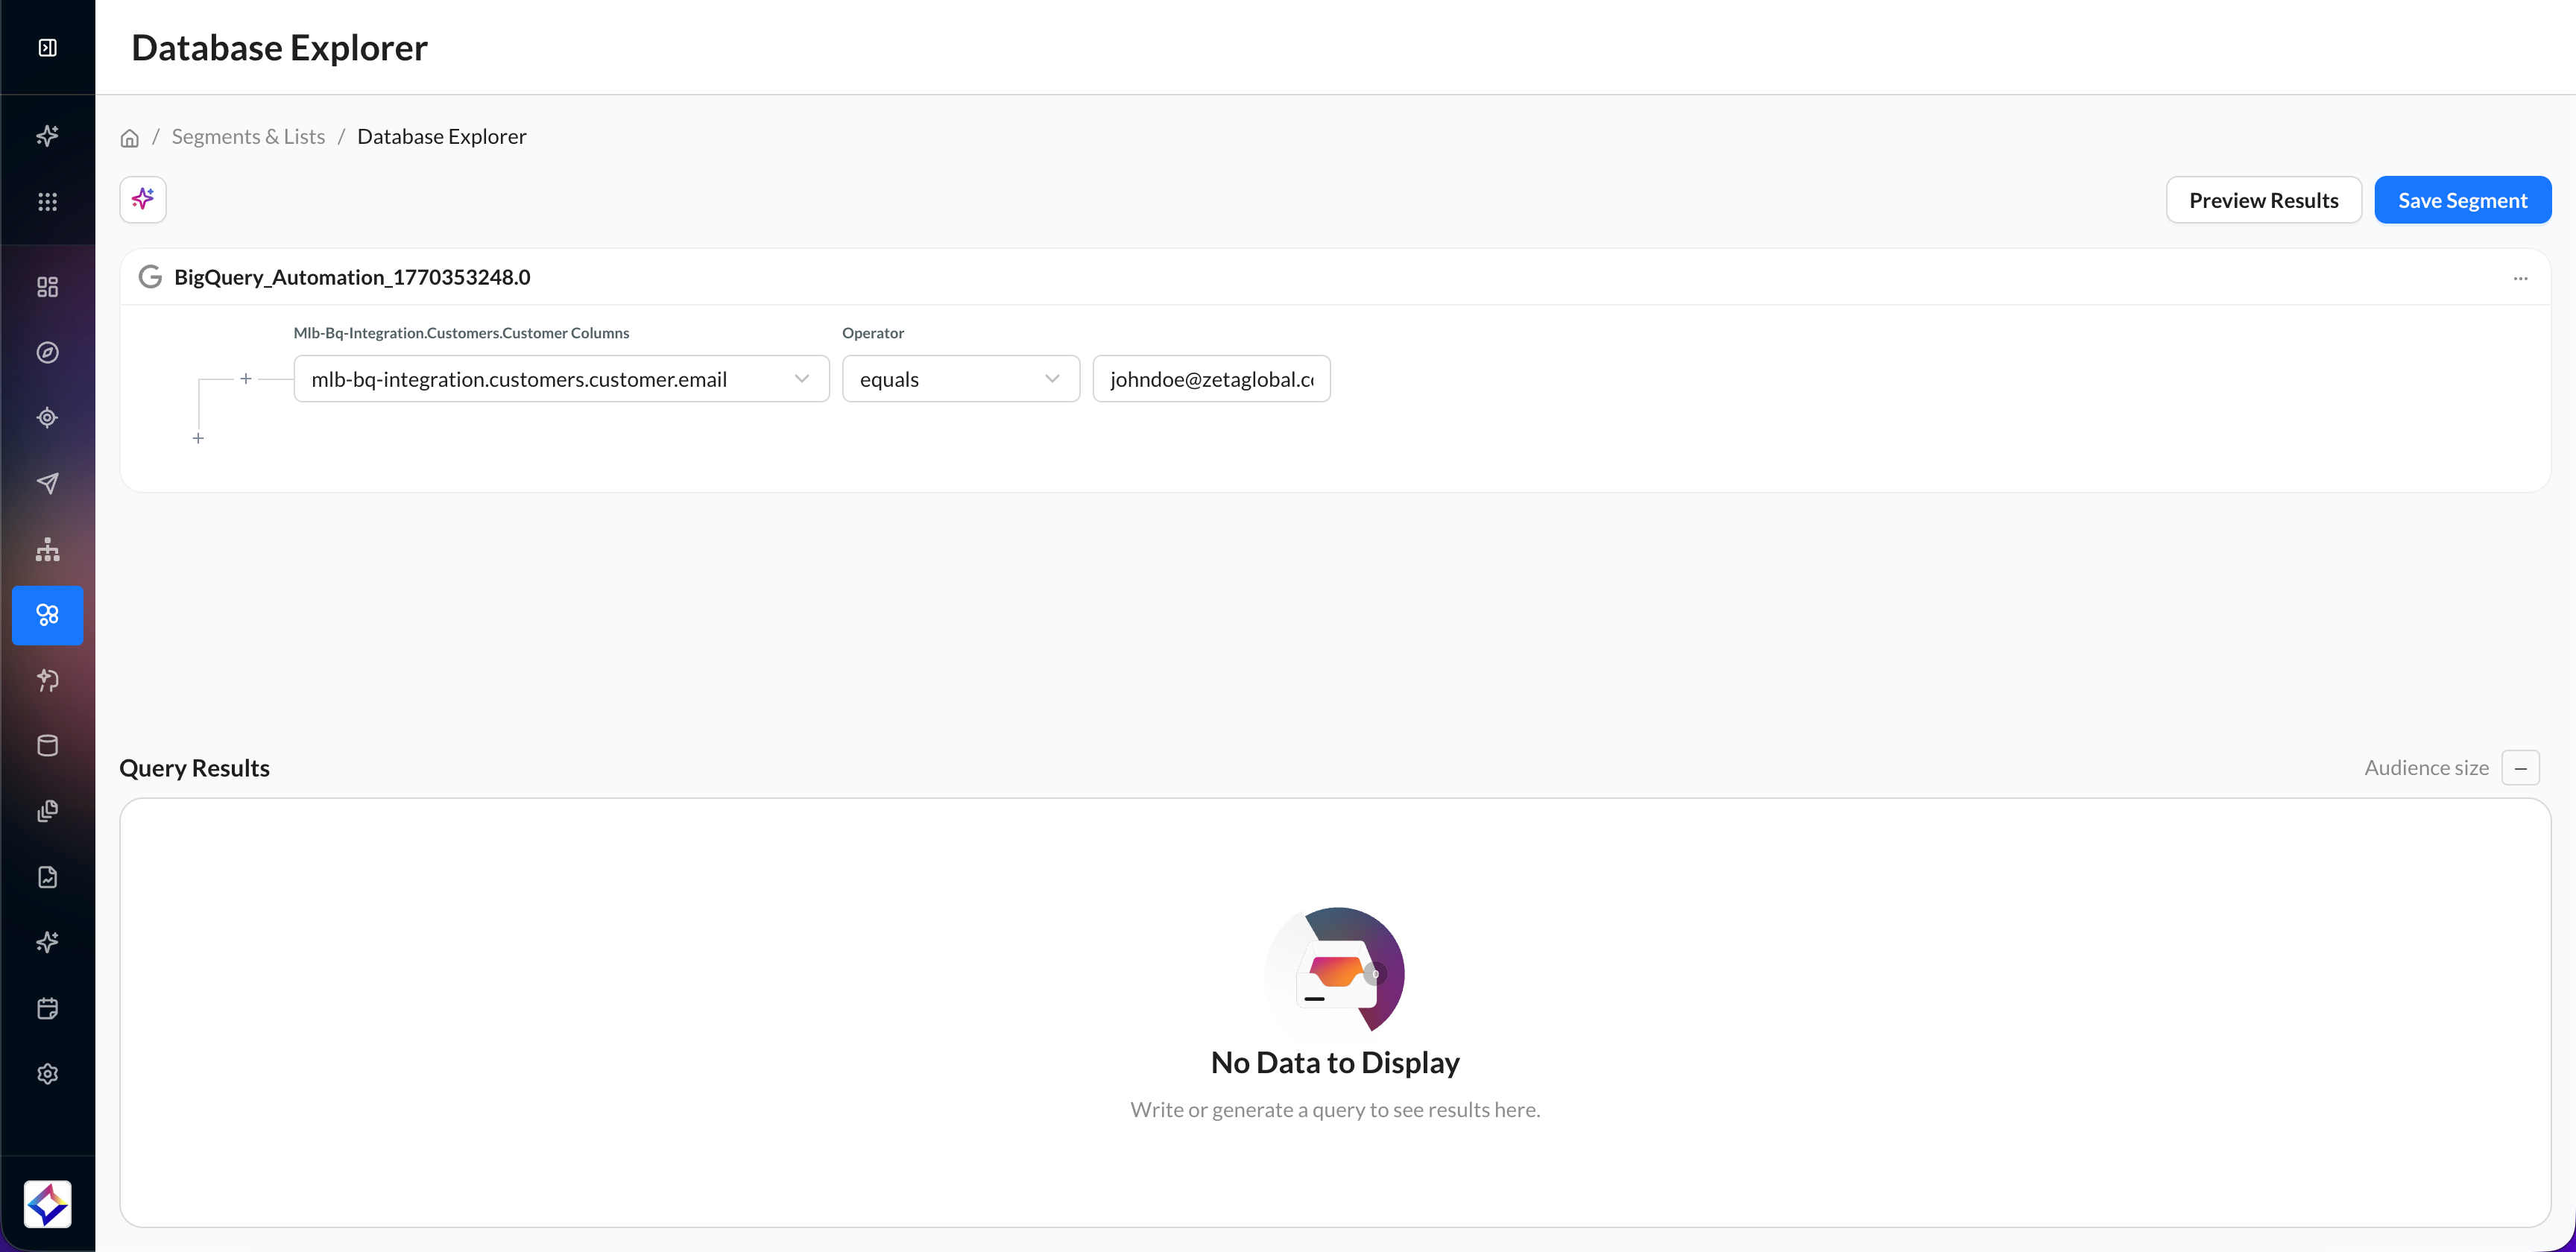
Using a Connected Database in Segmentation
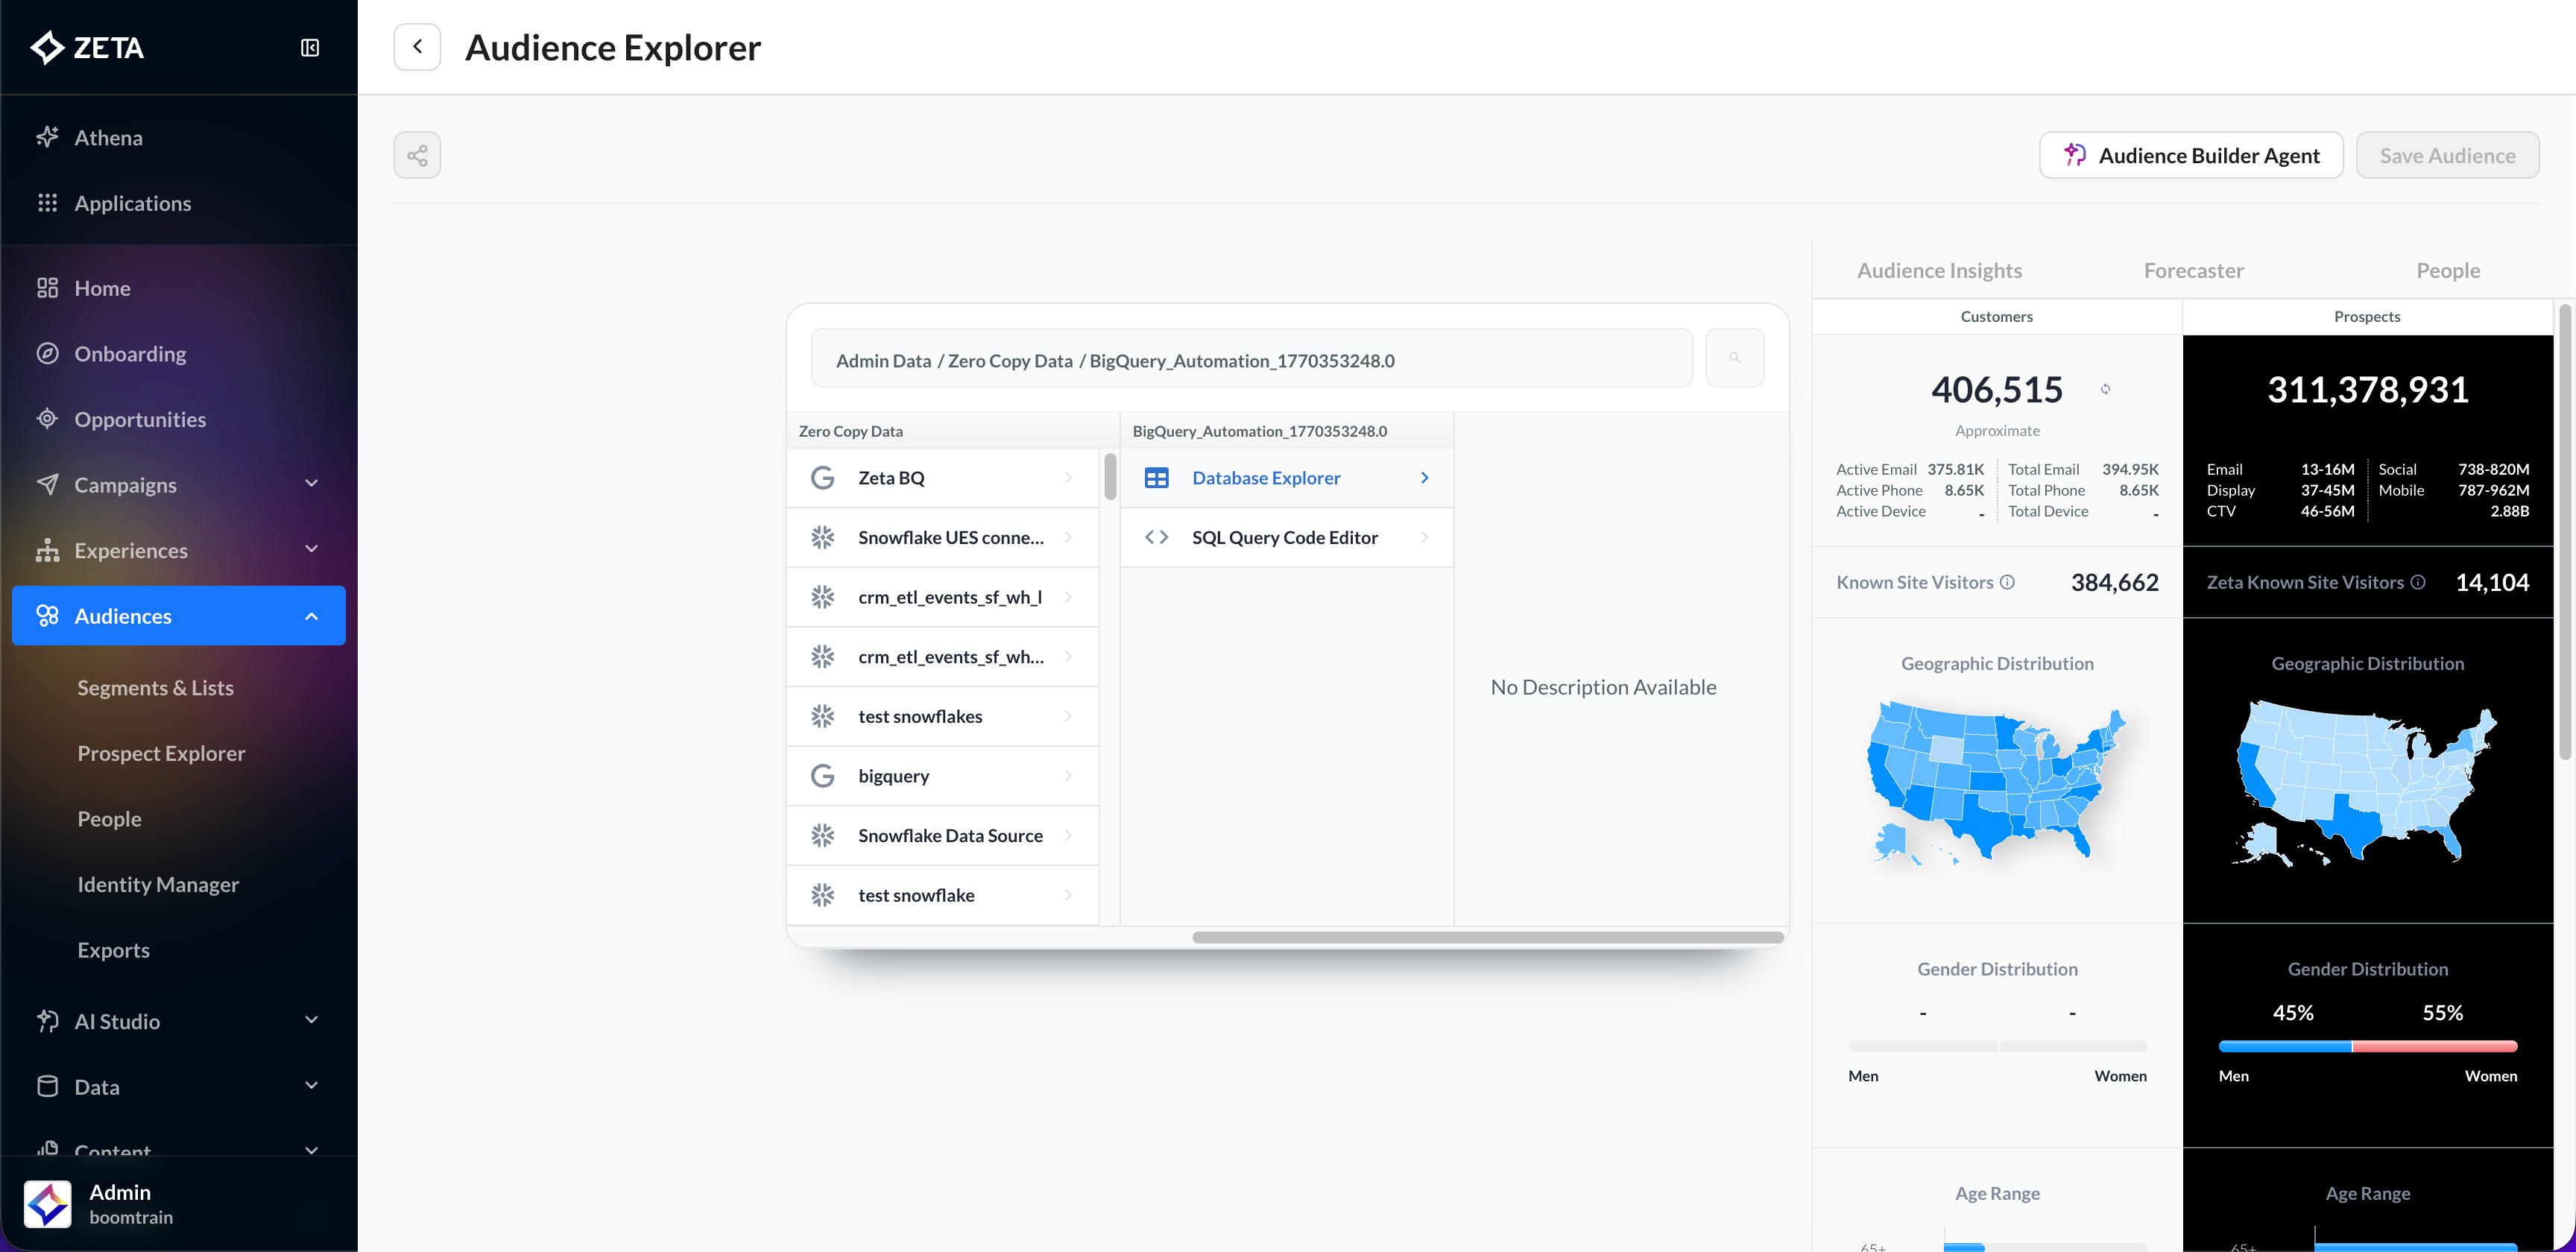
1. From the main menu on the left, navigate to Audiences > Database Explorer to segment based on the data available to you for a given connection.
Please note that you cannot join multiple sources of data when segmenting with this option.
2. Select your fields for segmentation.
-20260601-073959.gif)
Please note that when creating a segment, some fields may be unavailable if they are not part of a mapped table that has already been selected.
3. Once the criteria are established, review the Results Preview panel to validate the returned records. When you are satisfied with the audience definition, run counts for the segment. Remember that the count is in terms of rows, not people.
In some cases, the numbers may be the same, but it is important to learn that, depending on how the data is structured, we may be returning duplicate rows for the same user_id.

Create Audiences with Natural Language
You can create audiences directly from connected databases by describing the desired audience in plain language.
1. Open Database Explorer and select the connected data source.
2. Launch Athena from the audience creation workspace.
-
Describe the audience criteria using natural language.
.png?cb=ecdc1a2407f7d459348a785a64d3b746)
-
Athena generates the corresponding SQL query.
-
Review and optionally edit the generated SQL.
-
Preview the returned records.
-
Save the audience for use in campaigns and journeys.
Athena-generated SQL remains fully editable.
Previewing Query Results
Database Explorer now includes a Results Preview panel that allows you to validate your audience before saving or activating a segment.
Results Preview helps you confirm that:
-
Your filters are returning the expected records.
-
The correct fields are being included in the audience.
-
The audience definition matches your intended targeting criteria.
This capability is especially useful when working with large datasets and performing final audience quality checks before activation.
Viewing Results
After selecting your audience criteria, click on Preview Results. The Results Preview panel displays a sample of matching records.

-
Review the returned fields and values to verify that your segment is configured correctly.
-
The preview initially displays a sample of records. Click Show More to load additional results.
You can progressively expand the preview up to 100 rows for deeper validation and spot-checking.
Results Preview can be used to validate audiences generated through either manual SQL creation or Athena-assisted natural language requests. Reviewing sample records before saving an audience helps confirm that the generated logic matches the intended targeting criteria.
Using Connected Database in Campaigns & Content
-
Once you have created a segment, you can select it as usual in your campaigns.
Note that if a User ID is not assigned, you will not be able to send a campaign.
-
Within content, you can access the fields marked for personalization by using the
{{segment}}tag. You will get an object of the available fields, for example,{ "users_id"=>"1518", "users_fname"=>"Zeta", "users_city"=>"New York", "users_state"=>"New York", "users_account_id"=>"A9036205", "users_user_created_on_date"=>"2021-09-06 00:00:00", "users_glbl_user_opt_in"=>"1", "users_glbl_user_opt_out_dt"=>"", "users_user_create_src"=>"site", "uid"=>"zeta@zetaglobal.com" } -
Within the
{{segment}}tag, fields will be available with their alias names or original names, if not aliased. Table/fields will be delimited with an underscore, for example,users.idin segmentation will be available as{{segment.users_id}}in content.