

Making impactful campaigns pop requires the right assets to be right at your fingertips, cutting down the complexity of managing accumulated assets and making them easily findable.
The ZMP comes with an asset library, which is a centralized hub for all content and assets that can help you build the most engaging communication for your customers. The Asset Library also makes it easy to find the right images to use and to further ensure that they adhere to the design language of your brand.
Navigation
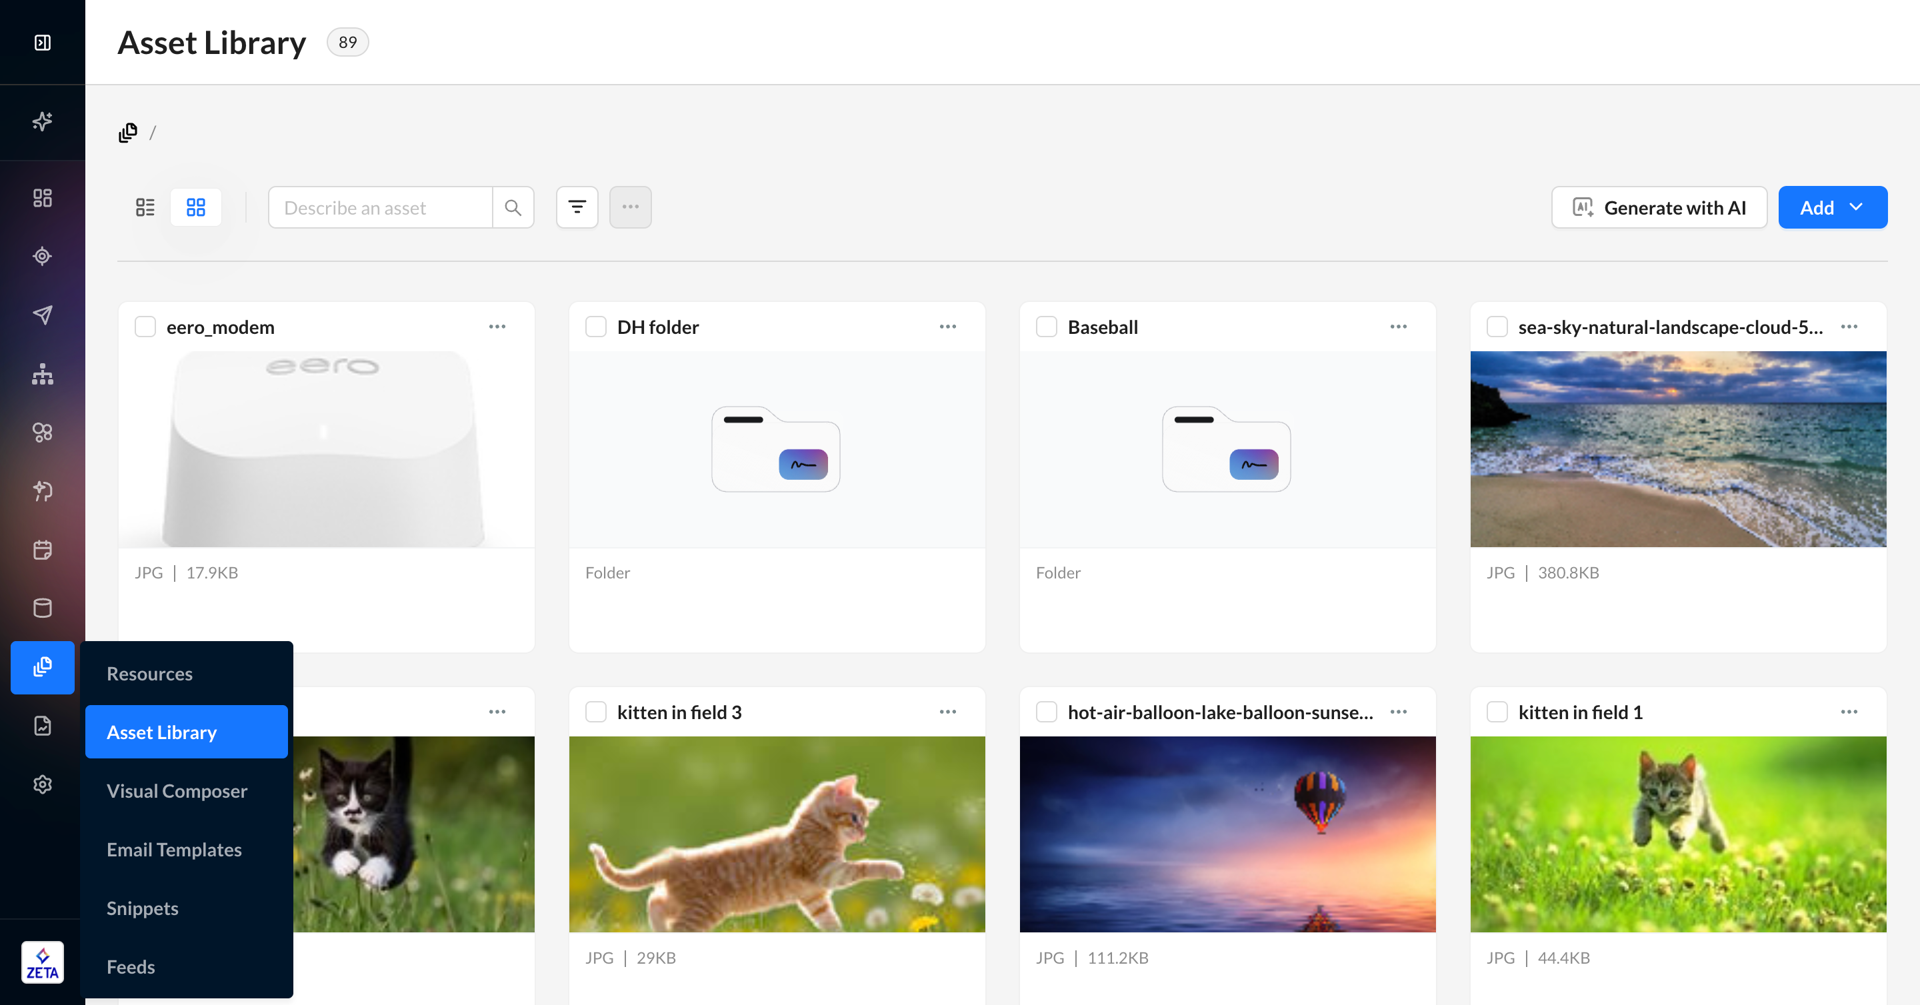
Navigate to Content > Asset Library from the menu on the left.
Using the Asset Library
Changing the View
The Asset Library can be viewed in 2 forms, and you can switch between them at any point by clicking on the list and grid icons at the top nav.
-
Grid: See assets and folders in a tile format, centered on a large thumbnail of the file
-
List: See assets and folders listed in a table format, with more information displayed in columns
Searching and Filtering Assets
Combine your search with filters to find what you need quickly and easily.
-
Enter your query in the Search field to find an asset. The Asset Library supports natural language for intelligent search, so you can use generic keywords to describe the content of your asset, in addition to filename, tags, and description, when returning results.
-
Click on the Filter icon at the top right to slide open the Asset Filters window from the right. Apply the Filters as needed to display the assets of your preference.
Adding Assets
-
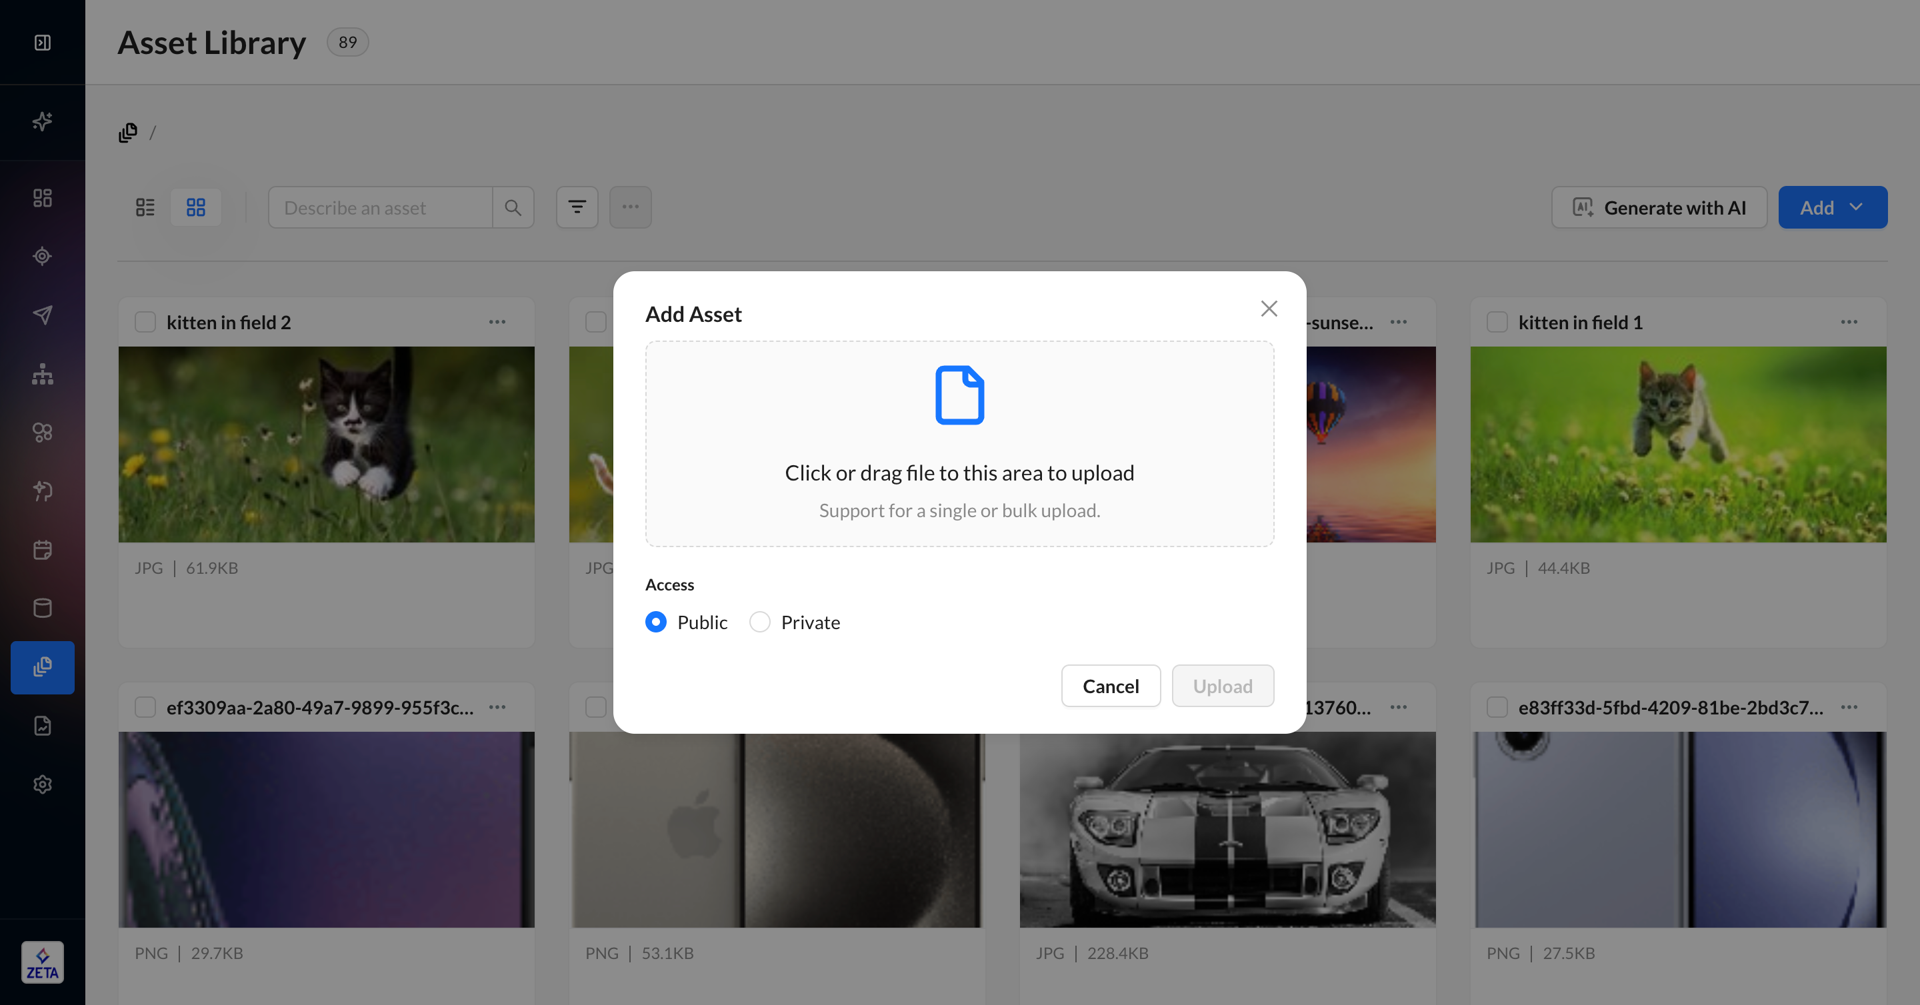
Click on the Add button at the top-right to reveal a dropdown with two options: Add Assets and Create Folder.
-
You can add multiple assets or one at a time.
-
By default, all assets and folders are set to public, but they can be switched to private prior to upload. You can manage access once uploaded.
-
Click on Create Folder to add an asset within it. You can also create subfolders within a folder.
-
If you upload a file into a folder where the filename already exists, then you can choose if you want to replace the file or upload it with a suffix appended.
-
The Asset Library supports a range of file formats, including but not limited to JPG, PNG, PDF, XLSX, and custom formats like FOO.
"doc", "pdf", "eps", "csv", "pptx", "xlsx", "docx", "ttf", "heic", "svg", "webp", "ics", "css", "html", "mp4", "mov", "bmp", "gif", "jpg", "png", "tif", "psd" -
Maximum file size is 30MB per file
-
There is no limit to the number or size of files per library
-
Only media files like JPG, GIF, PNG, PDF, and MP4 can be previewed directly within the Asset Library.
-
Users can also paste in a URL to add an associated asset to the system. Once uploaded, assets can be filtered by metadata, including type (e.g., JPG, PNG, XLSX, etc.), making it easier to search and organize.
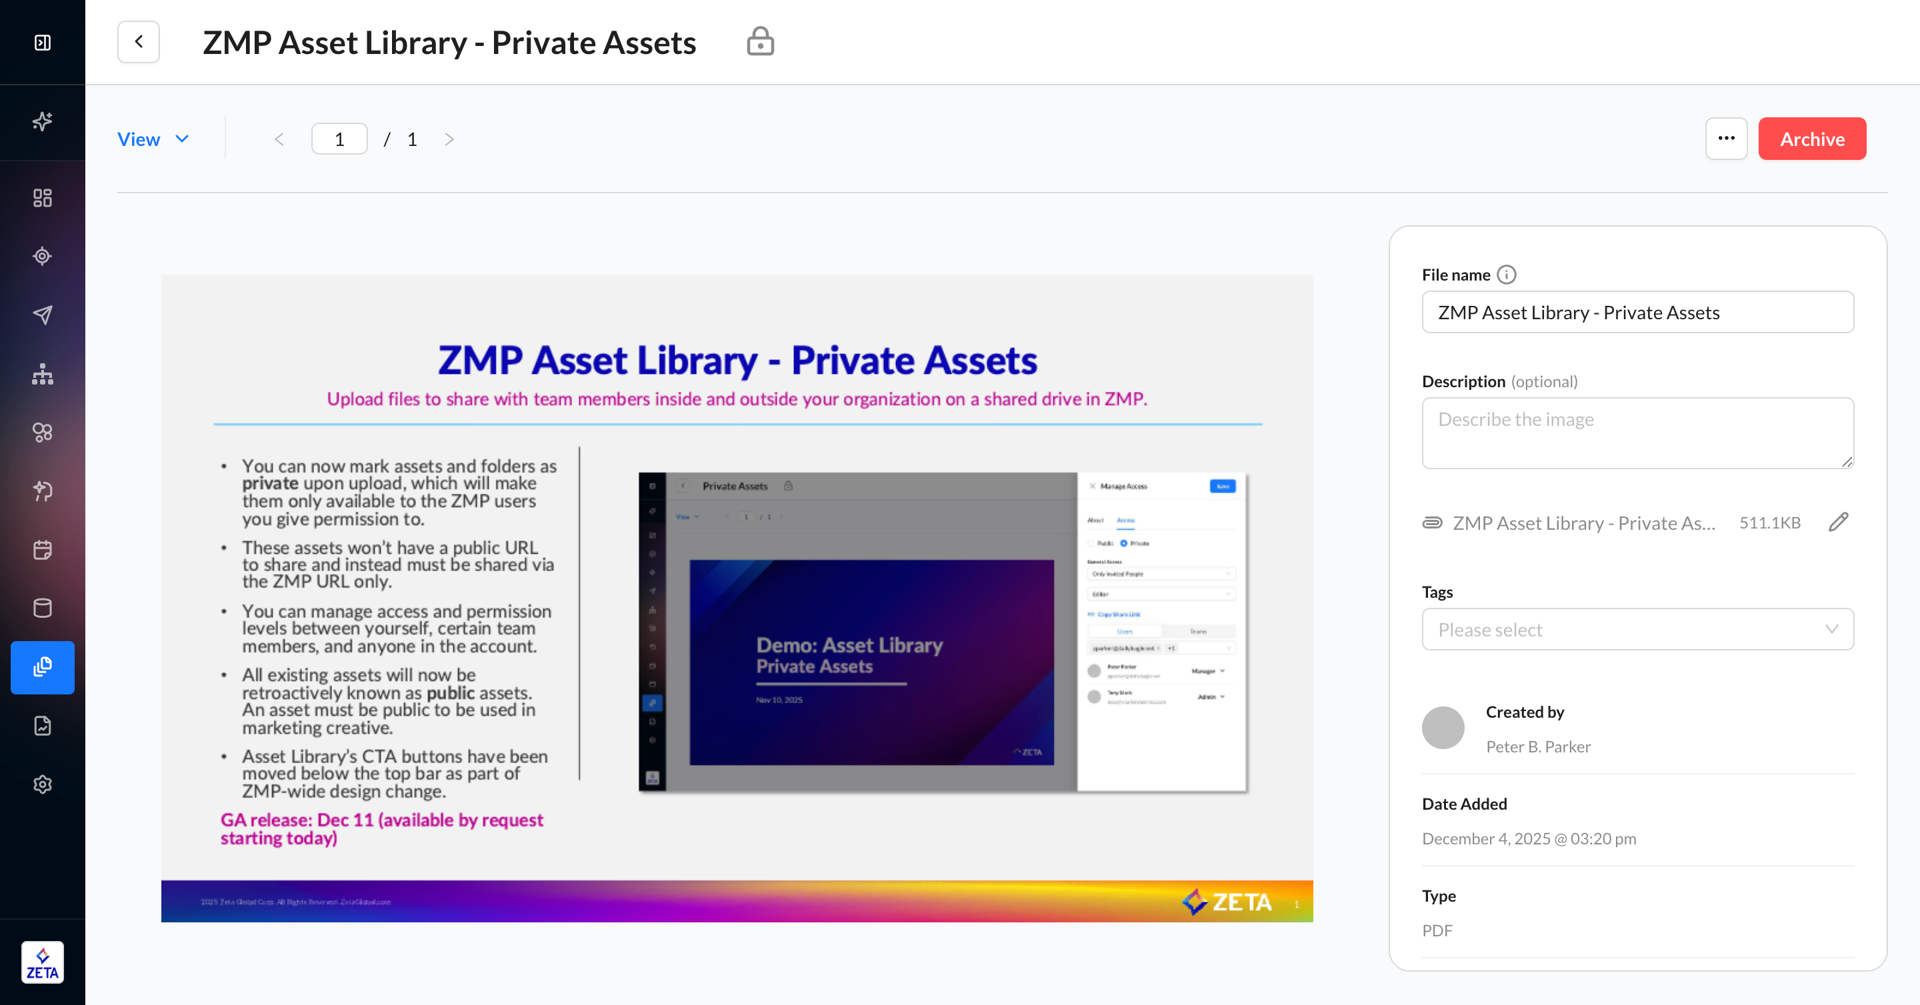
Private Assets
By default, all files uploaded to the ZMP are public — meaning they can be used in marketing creative and accessed via public URL by any user. With private assets, we’ve introduced a way to share files with team members outside your organization that are only accessible by logged-in ZMP users whom you’ve granted permission to view.
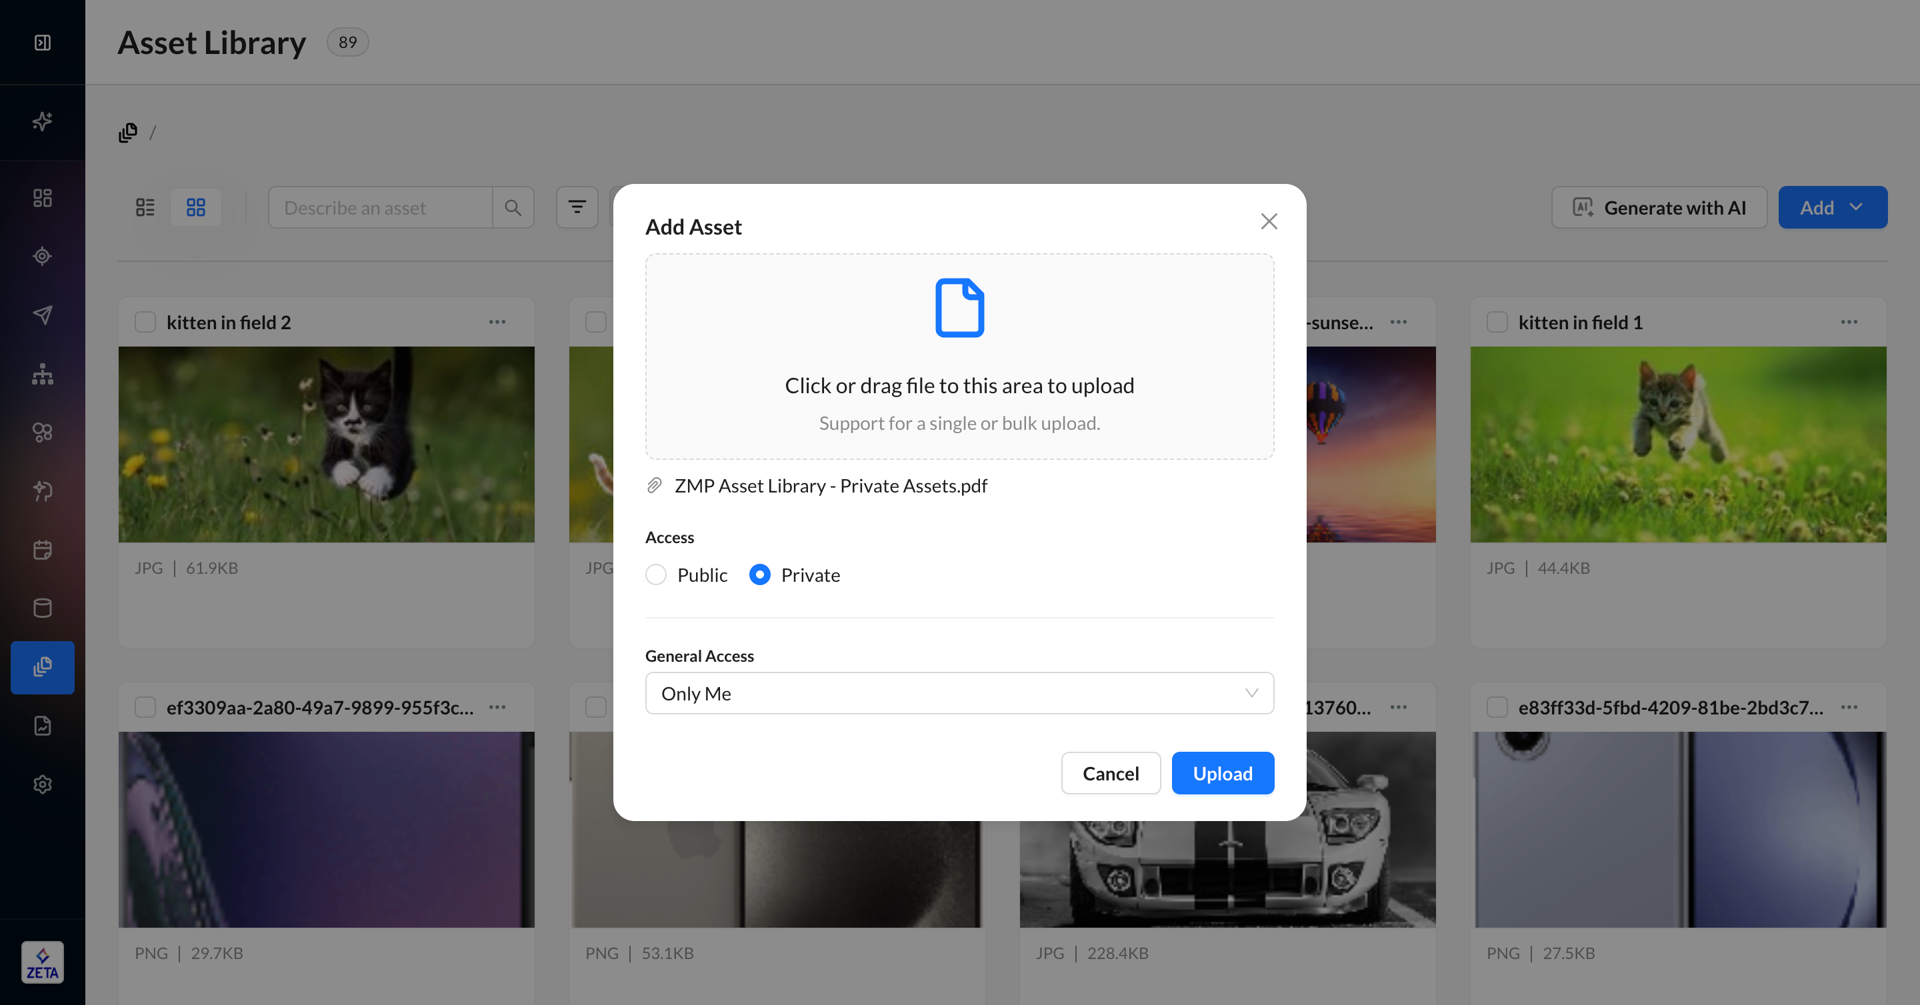
1. When uploading an asset or creating a folder, select the radio button for Private.
2. Select whether you want Only Me or Everyone in [Account Name]. If you only want to share with certain users, select Only Me and specify the individual users and teams after the upload is finished.
3. Private assets are marked in the listings page by either a text label or a badge that says Private. They are marked on the asset page with a lock icon next to the asset name in the header.
4. Once uploaded, you can share the asset with other users in your account via Manage Access. You can select the user and specify their level of access.

|
Access Level |
Access Functions |
Definition |
|---|---|---|
|
Viewer |
View |
User can view the asset but cannot make edits. |
|
Editor |
View and edit |
User can view the asset and make edits to the metadata. If they have the |
|
Manager |
View, edit, and download |
User can view or edit the asset, as well as download it to their device. |
|
Admin |
View, edit, download, and share |
User can view, edit, or download the asset, as well as manage access for other ZMP users. The owner of the asset will always have access to it, even if another admin tries to select Only Me. |
5. If a user is granted access to a private folder, then they will have access to all files in that folder unless a user changes the access on a specific asset for that specific user. This is especially important if you move an asset from one private folder to another — only users with specific access to the asset will retain access.
6. If a user clicks on a private asset URL outside the platform, they will need to log in to the ZMP. Then, they must be in the specific account for that private asset. Lastly, they will need to have access to that specific asset to view it. If a ZMP user does not have access, they can request it in the UI, and a notification will be sent to the owner to update access.
-
While you can mark an existing public asset or folder as private, or vice versa, we recommend doing so upon upload as a best practice.
-
User access is separate from user-level permissions. For example, you must have the
View ContentZMP permission enabled in addition to being shared a specific private asset in order to view the asset. -
If an asset is private, then the Copy URL button will display a link to the ZMP preview page rather than a public link hosting the asset.
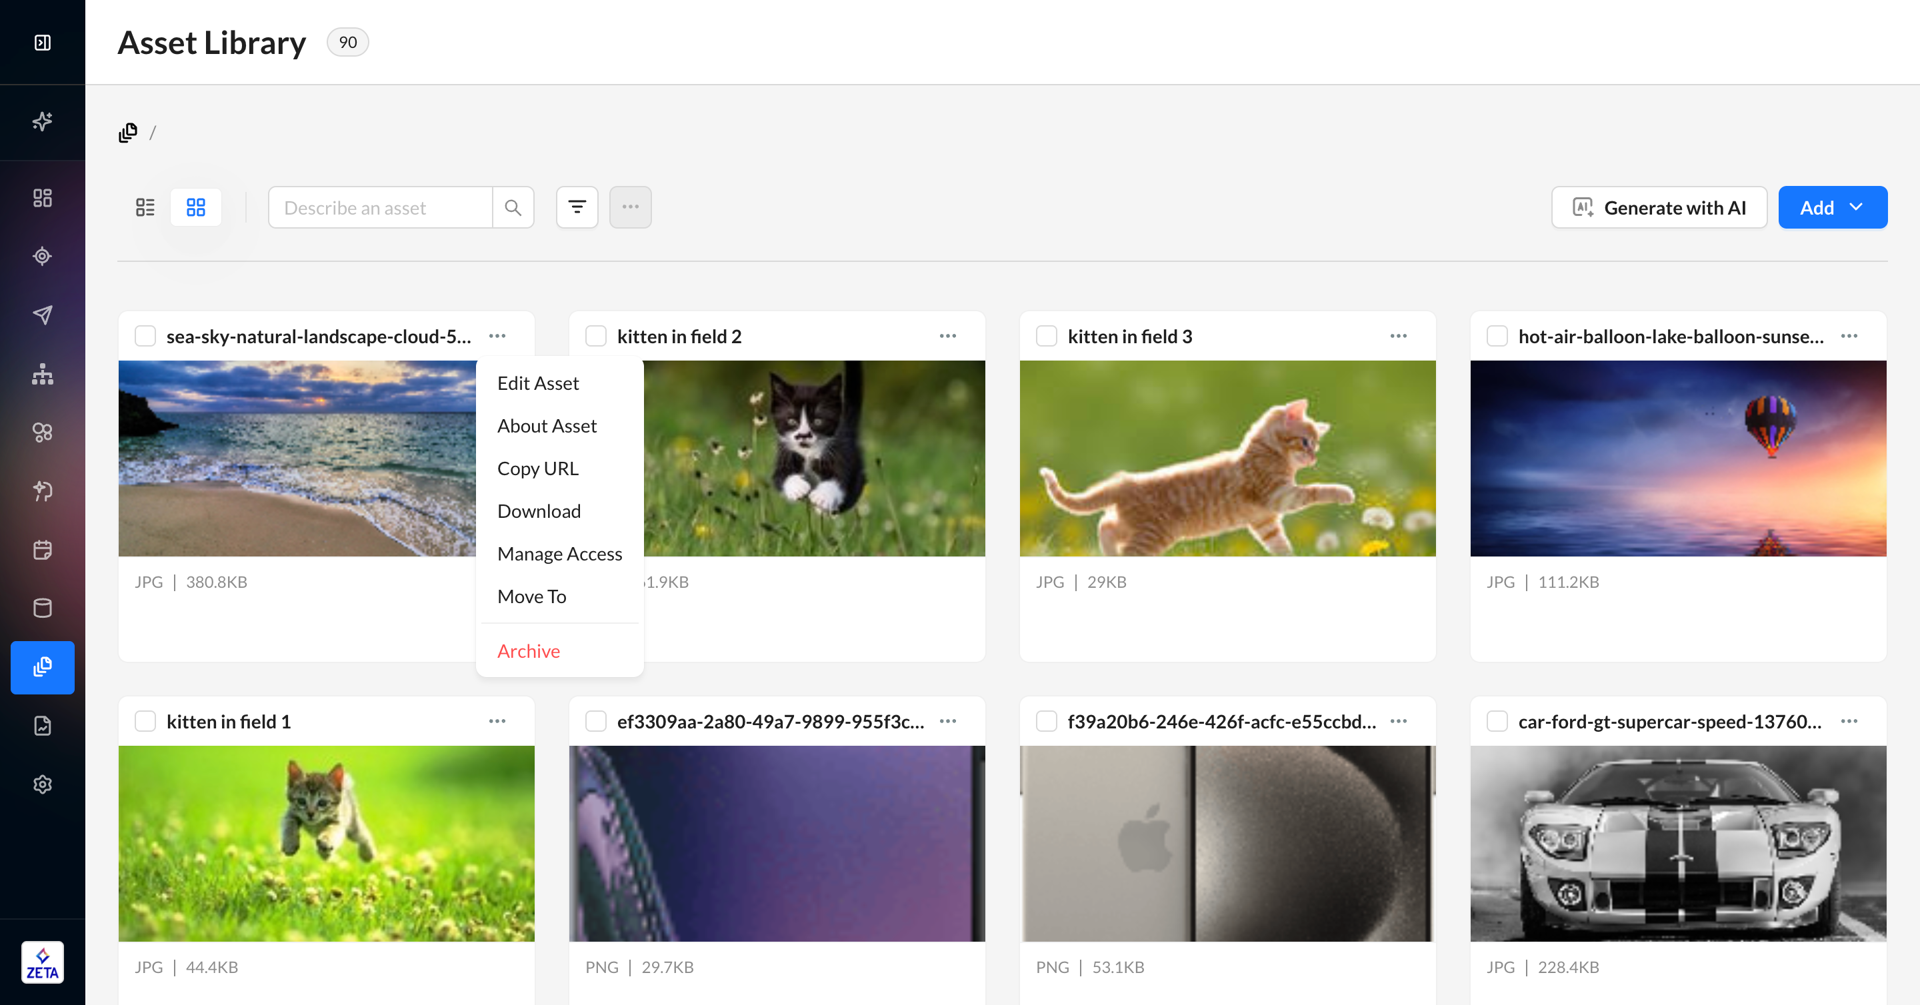
Using Existing Assets
From the Asset Library, you can:
-
Edit Asset - Opens the asset in its own editor page
-
About Asset - See metadata about the file in the Asset Library
-
Copy URL - Copies the asset URL to your browser’s clipboard. If this is a public asset, it will be the hosted URL; if this is a private asset, it will be the ZMP URL to the asset’s editor page.
-
Download - Saves the asset to your local device
-
Manage Access - Changes the access of a private asset. It can also change an asset from public to private or vice versa.
-
Move to - Moves the asset to another folder
-
Archive - Archives the asset so it no longer appears by default in the Asset Library
Moving Assets
Once files are uploaded, you can reorganize folders and assets using drag-and-drop functionality, giving you more flexibility to organize your files. Moving files between folders will not change the asset URL.
You can move assets and folders in two ways:
-
Checking multiple boxes and dragging in the UI
-
Clicking the
…menu and selecting Move to
Moving assets between private folders can grant or revoke access to assets and subfolders depending on the settings of the new folder. Users granted access directly to an asset will always keep access to that asset unless explicitly revoked.
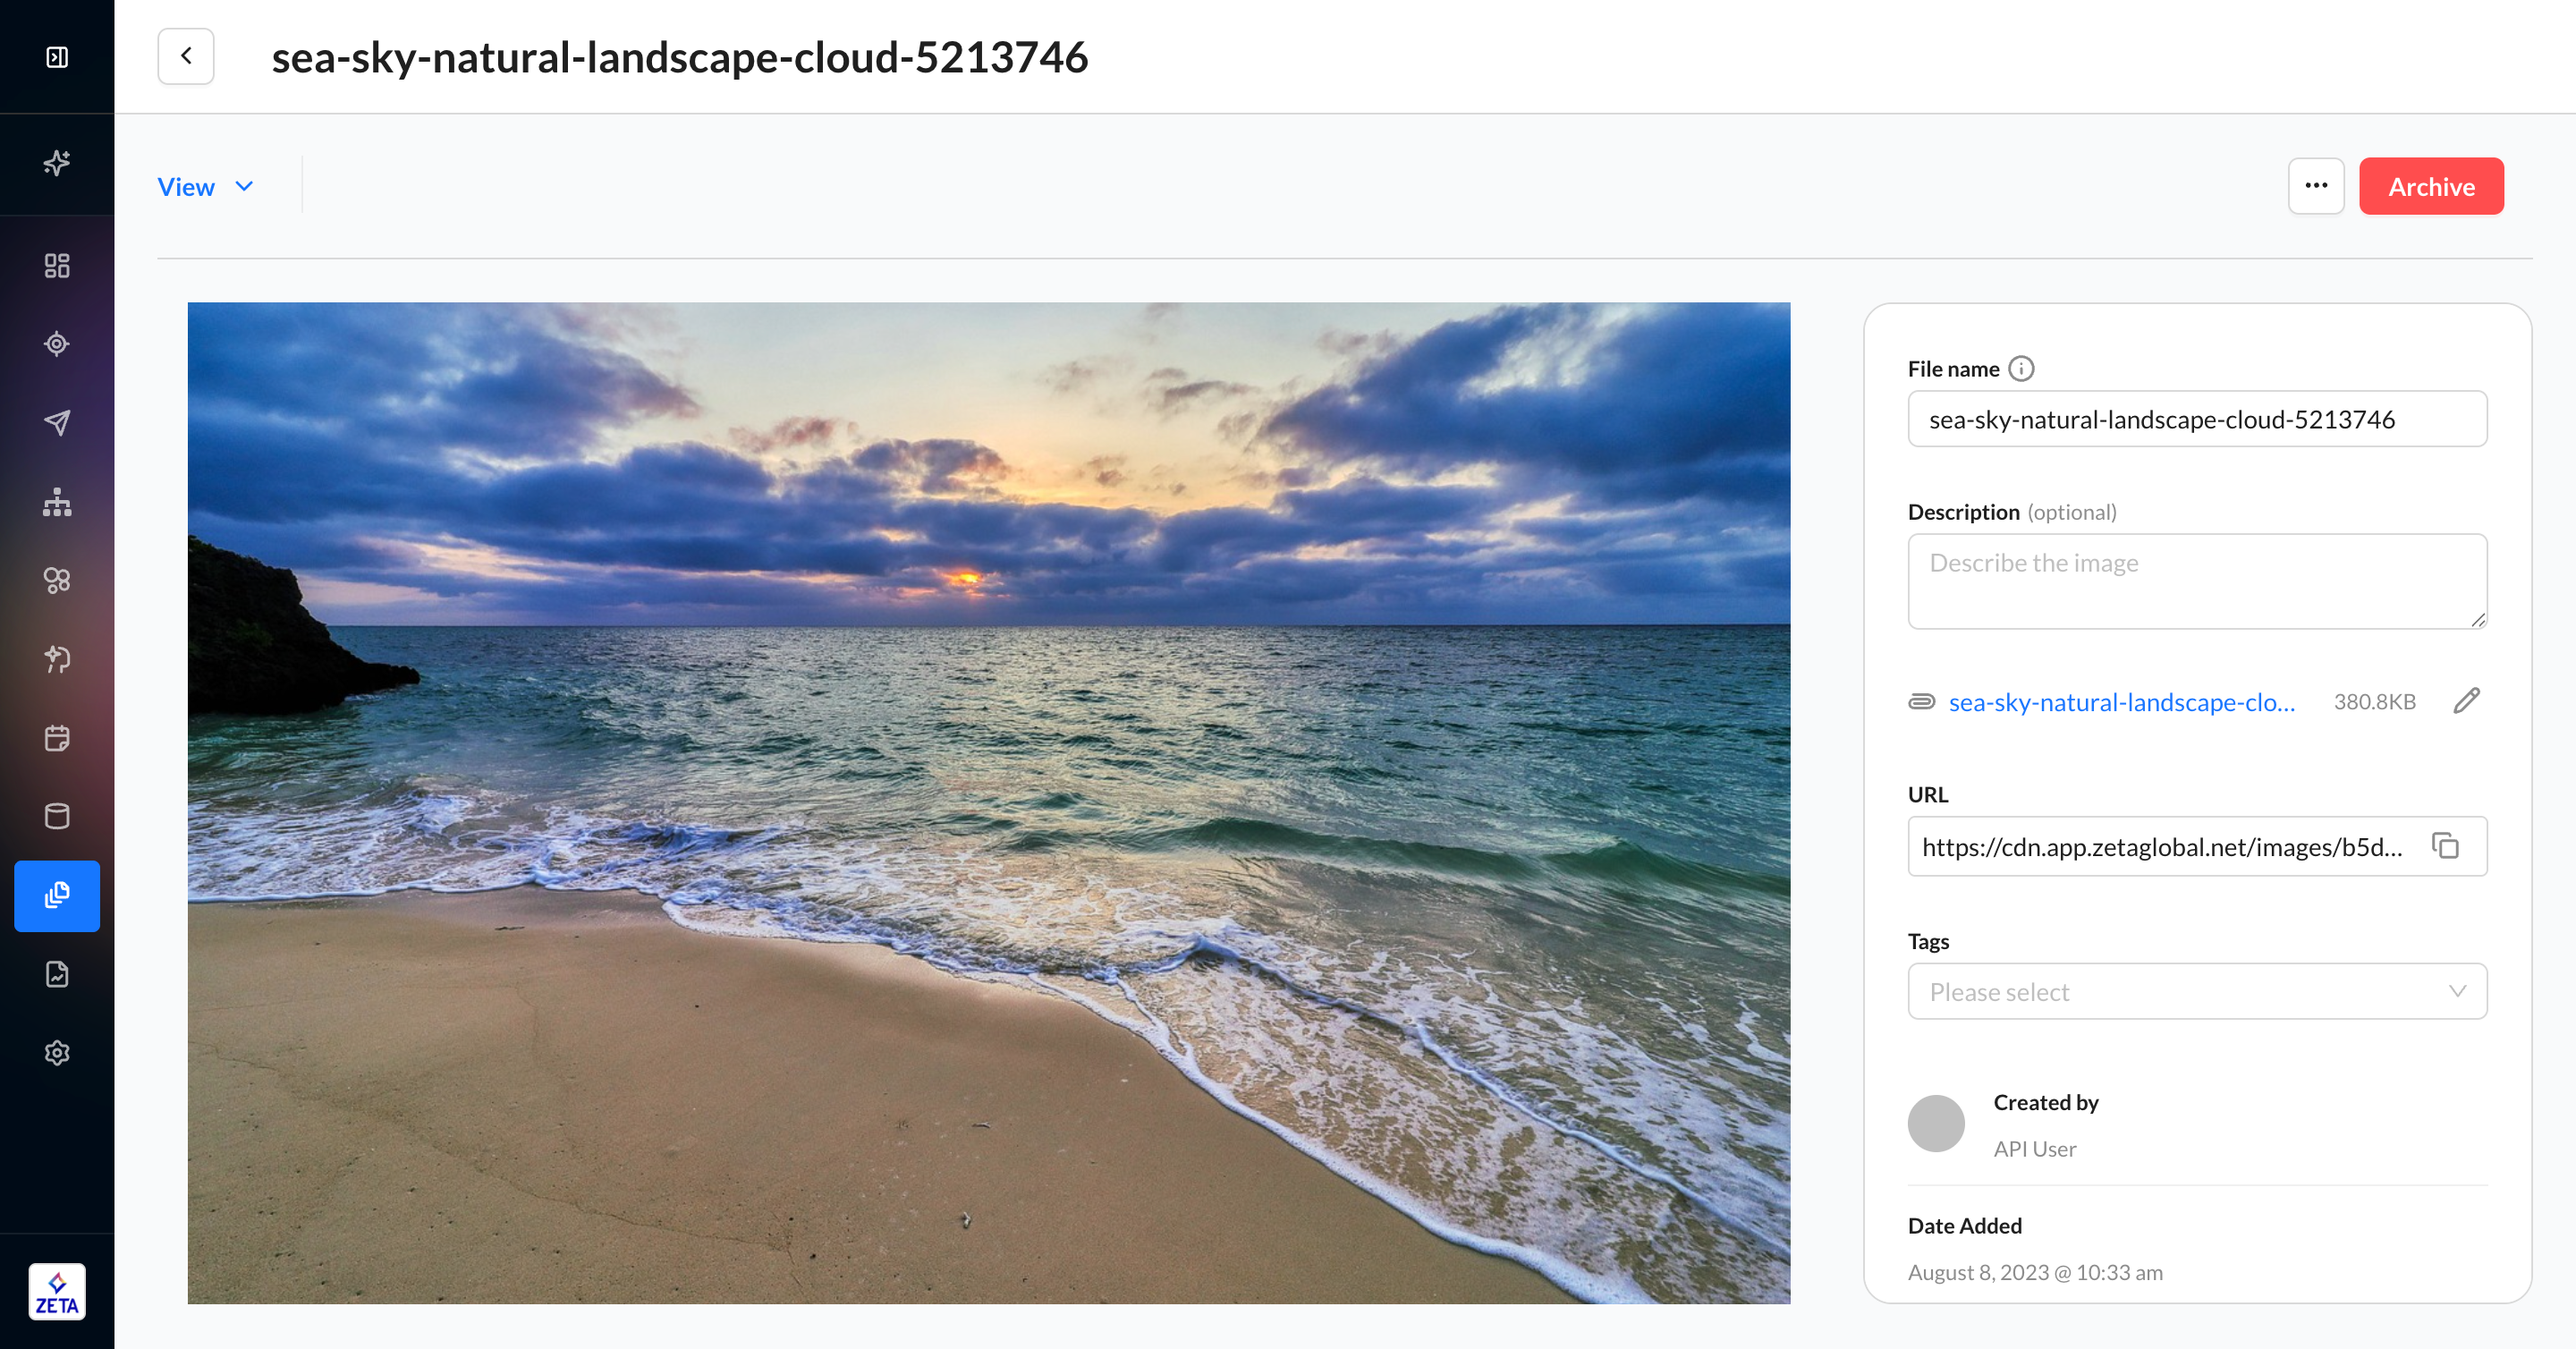
Editing Assets
On the asset’s editor page, you can:
-
Change file name
-
Add description
-
Replace the image - this will not change the URL, and the new file will be reflected everywhere the URL is used
-
Copy the URL
-
Add tags
-
See metadata
-
Archive the asset
-
Manage access
-
There is no need to make any changes to a content source (e.g., email templates) that uses an asset you have edited.
-
Replacing an image or changing its name will not change the asset URL. While the asset URL does end in a filename and file extension, the content of the file will reflect the most recent updates you make in the Asset Library.
-
If an asset is private, then the Copy URL button will display a link to the ZMP preview page rather than a public link hosting the asset.
Archiving Assets
If an asset is outdated (e.g., a marketing logo in an old style) or was mistakenly added, you can archive it in two ways:
-
Clicking the
…menu in the Asset Library and selecting Archive -
Selecting Archive on the asset’s editor page
Once archived, you can still see the asset in the Asset Library by filtering on Status > Archived. You can always unarchive later if you need the asset again.
Any content using that URL will still render the asset even while the status is archived. You will need to remove any URLs in your content that reference that asset.
Sharing Assets
To simplify testing across development and production accounts, you can share an asset either as a copy or a linked copy to accounts within the same family structure.
On the Asset Library page, select an asset and click Share from the asset menu.
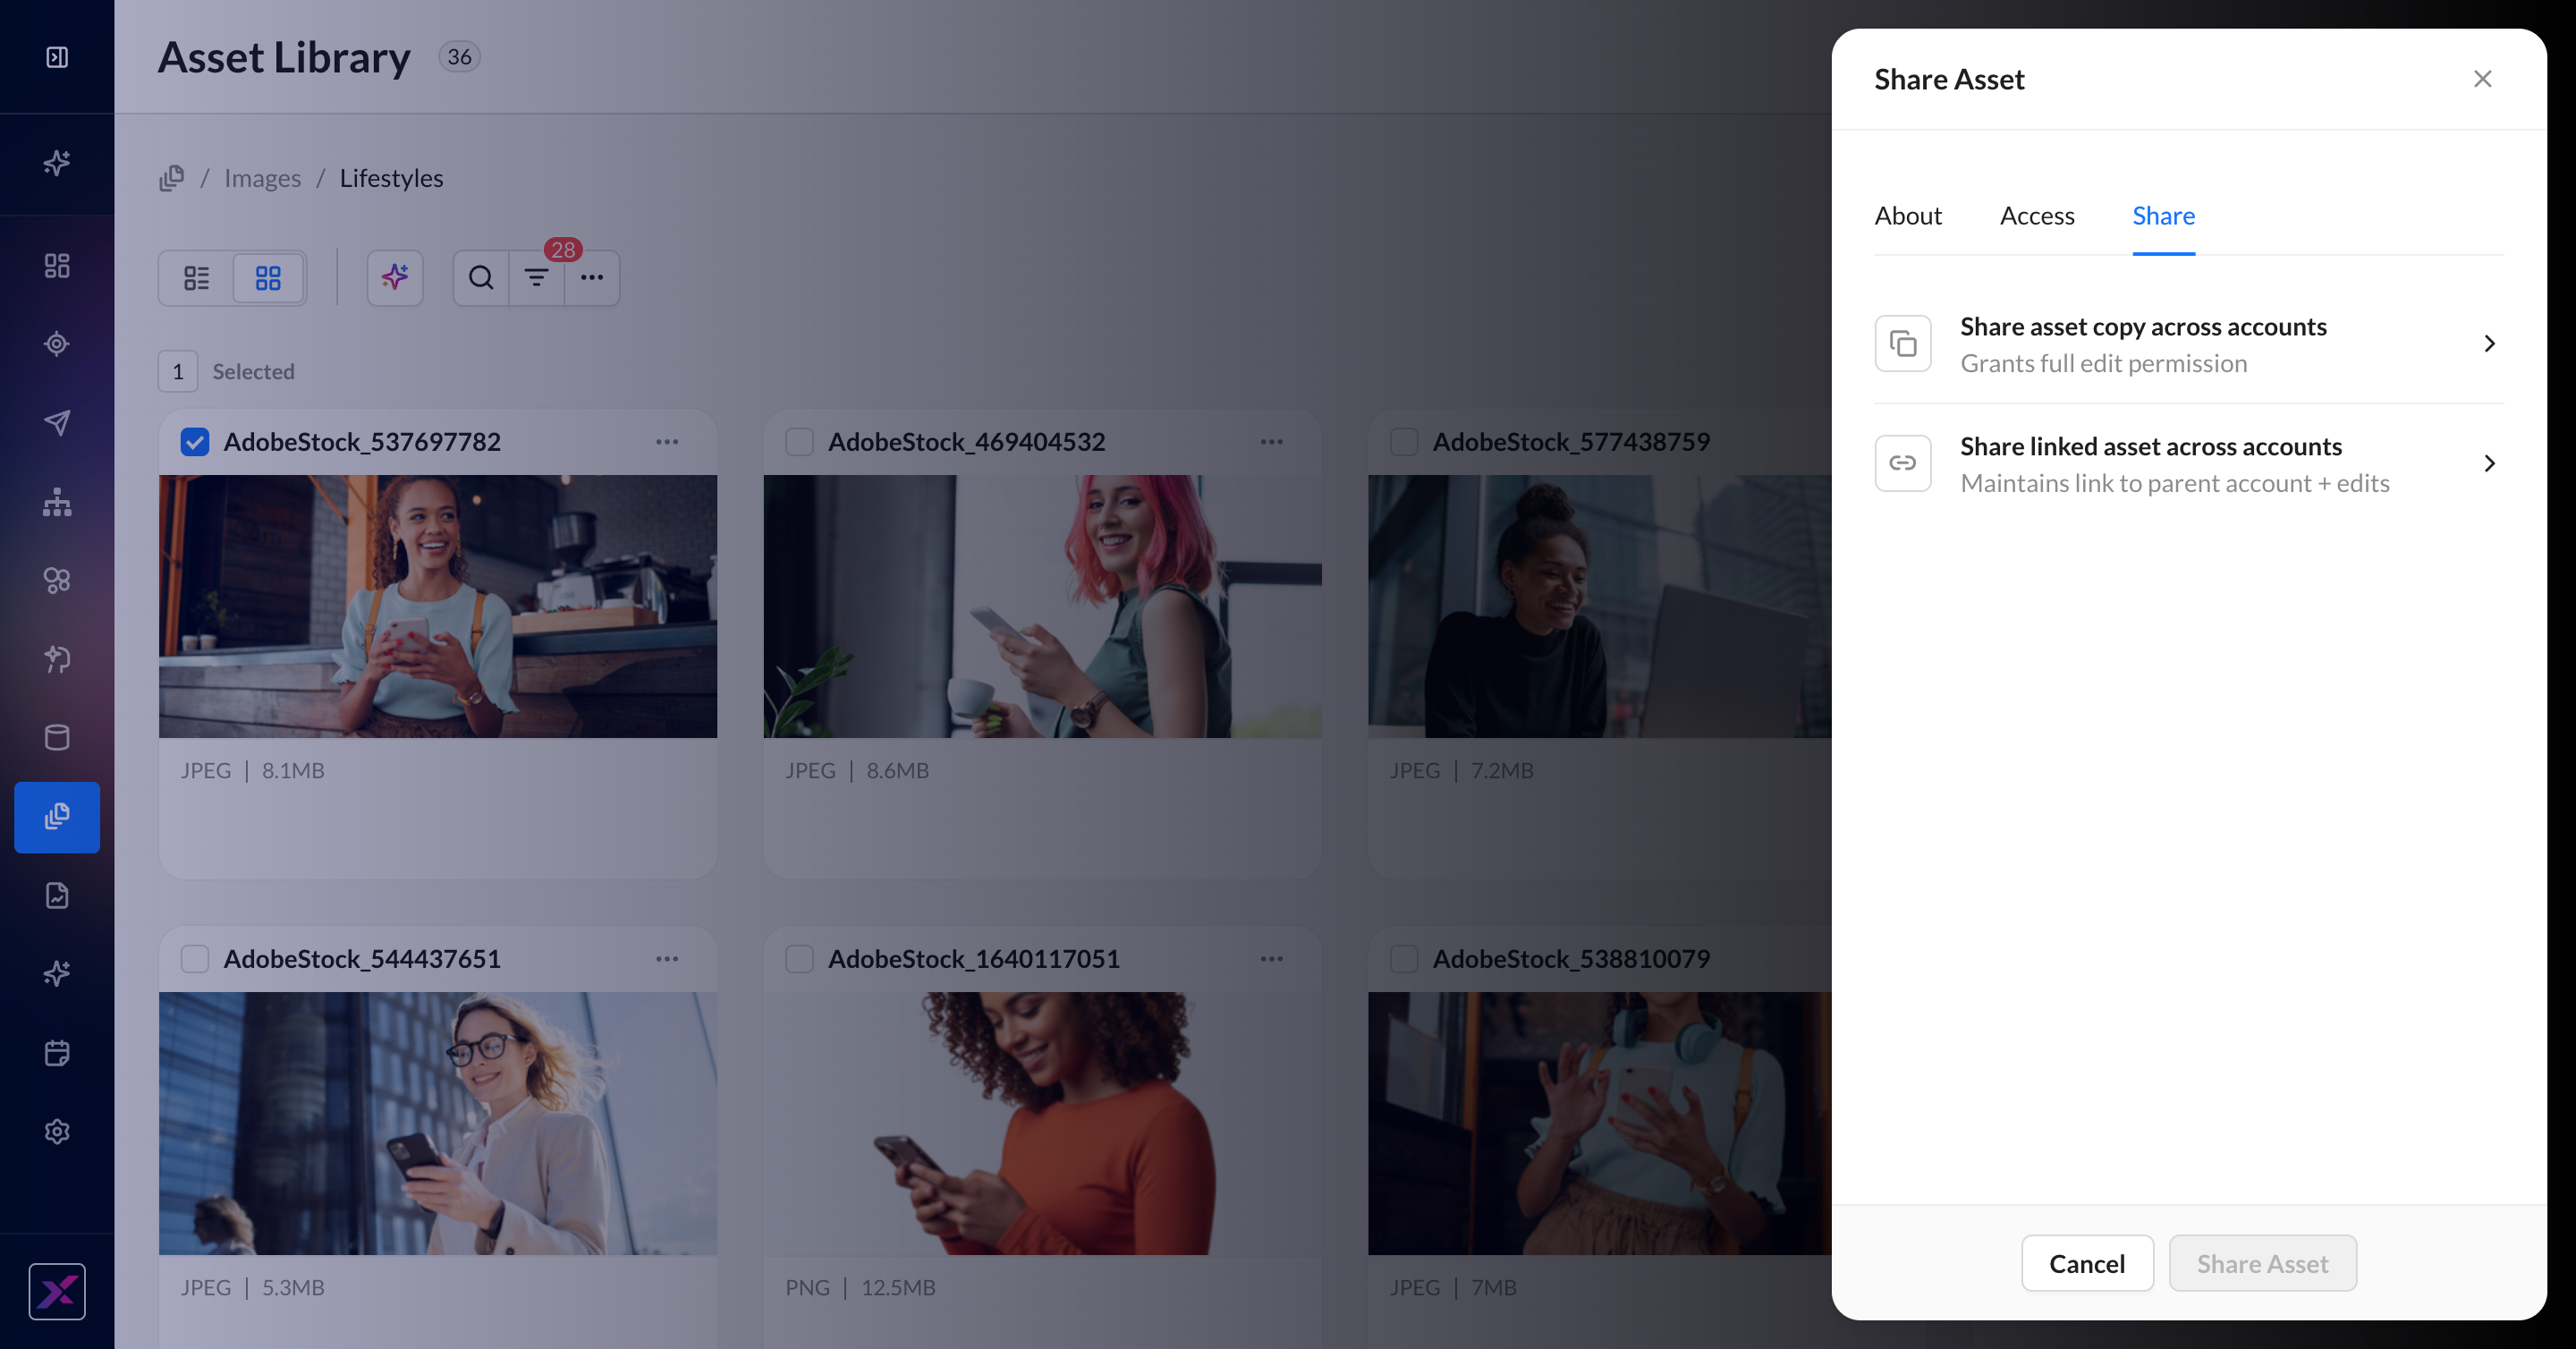
-
Share Asset Copy: Create a duplicate of the asset across accounts, with no link back to the original asset. It will have its own asset URL.
-
Share Linked Asset: Make the asset available to be used in multiple accounts, where all content is controlled by the original asset. You cannot make changes to a linked asset in the accounts that are linked.
Share access with users & teams is a separate feature from asset sharing. Learn more about Selective Access.
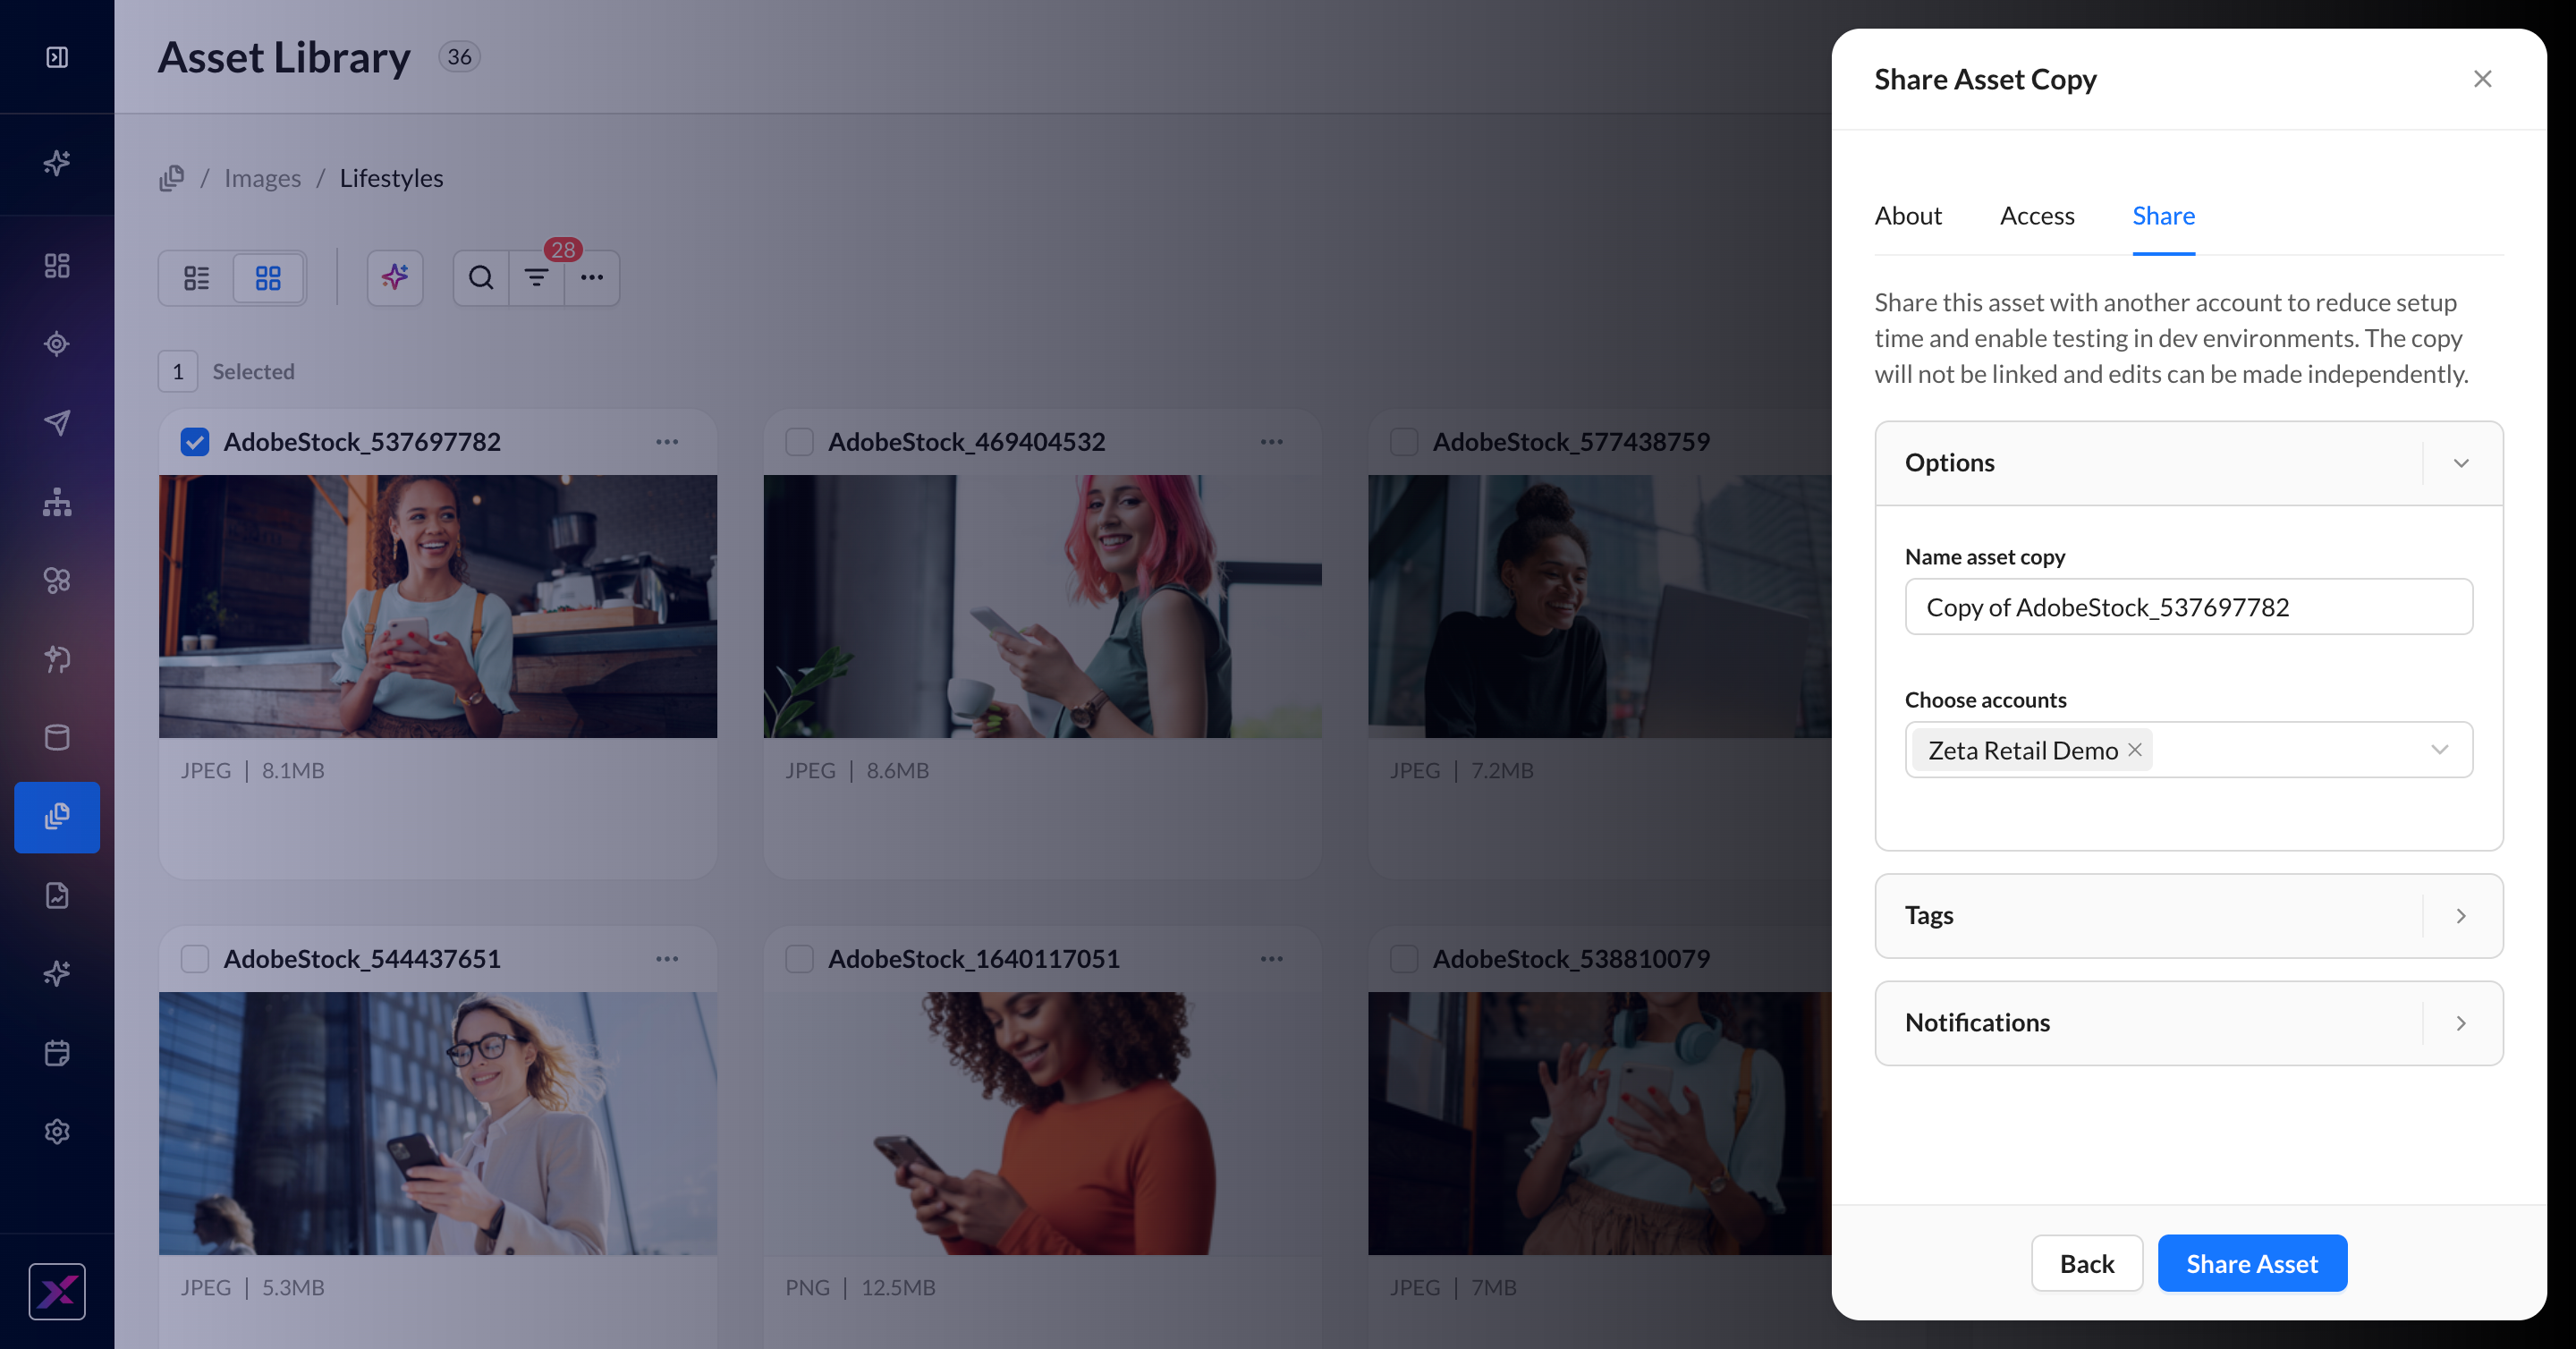
Share Asset Copy
1. Clicking Share asset copy across accounts will allow you to configure a new asset name and select the accounts you want to share this new asset with. You can optionally add tags or a notification to your teammates.
2. Confirm your selected accounts.
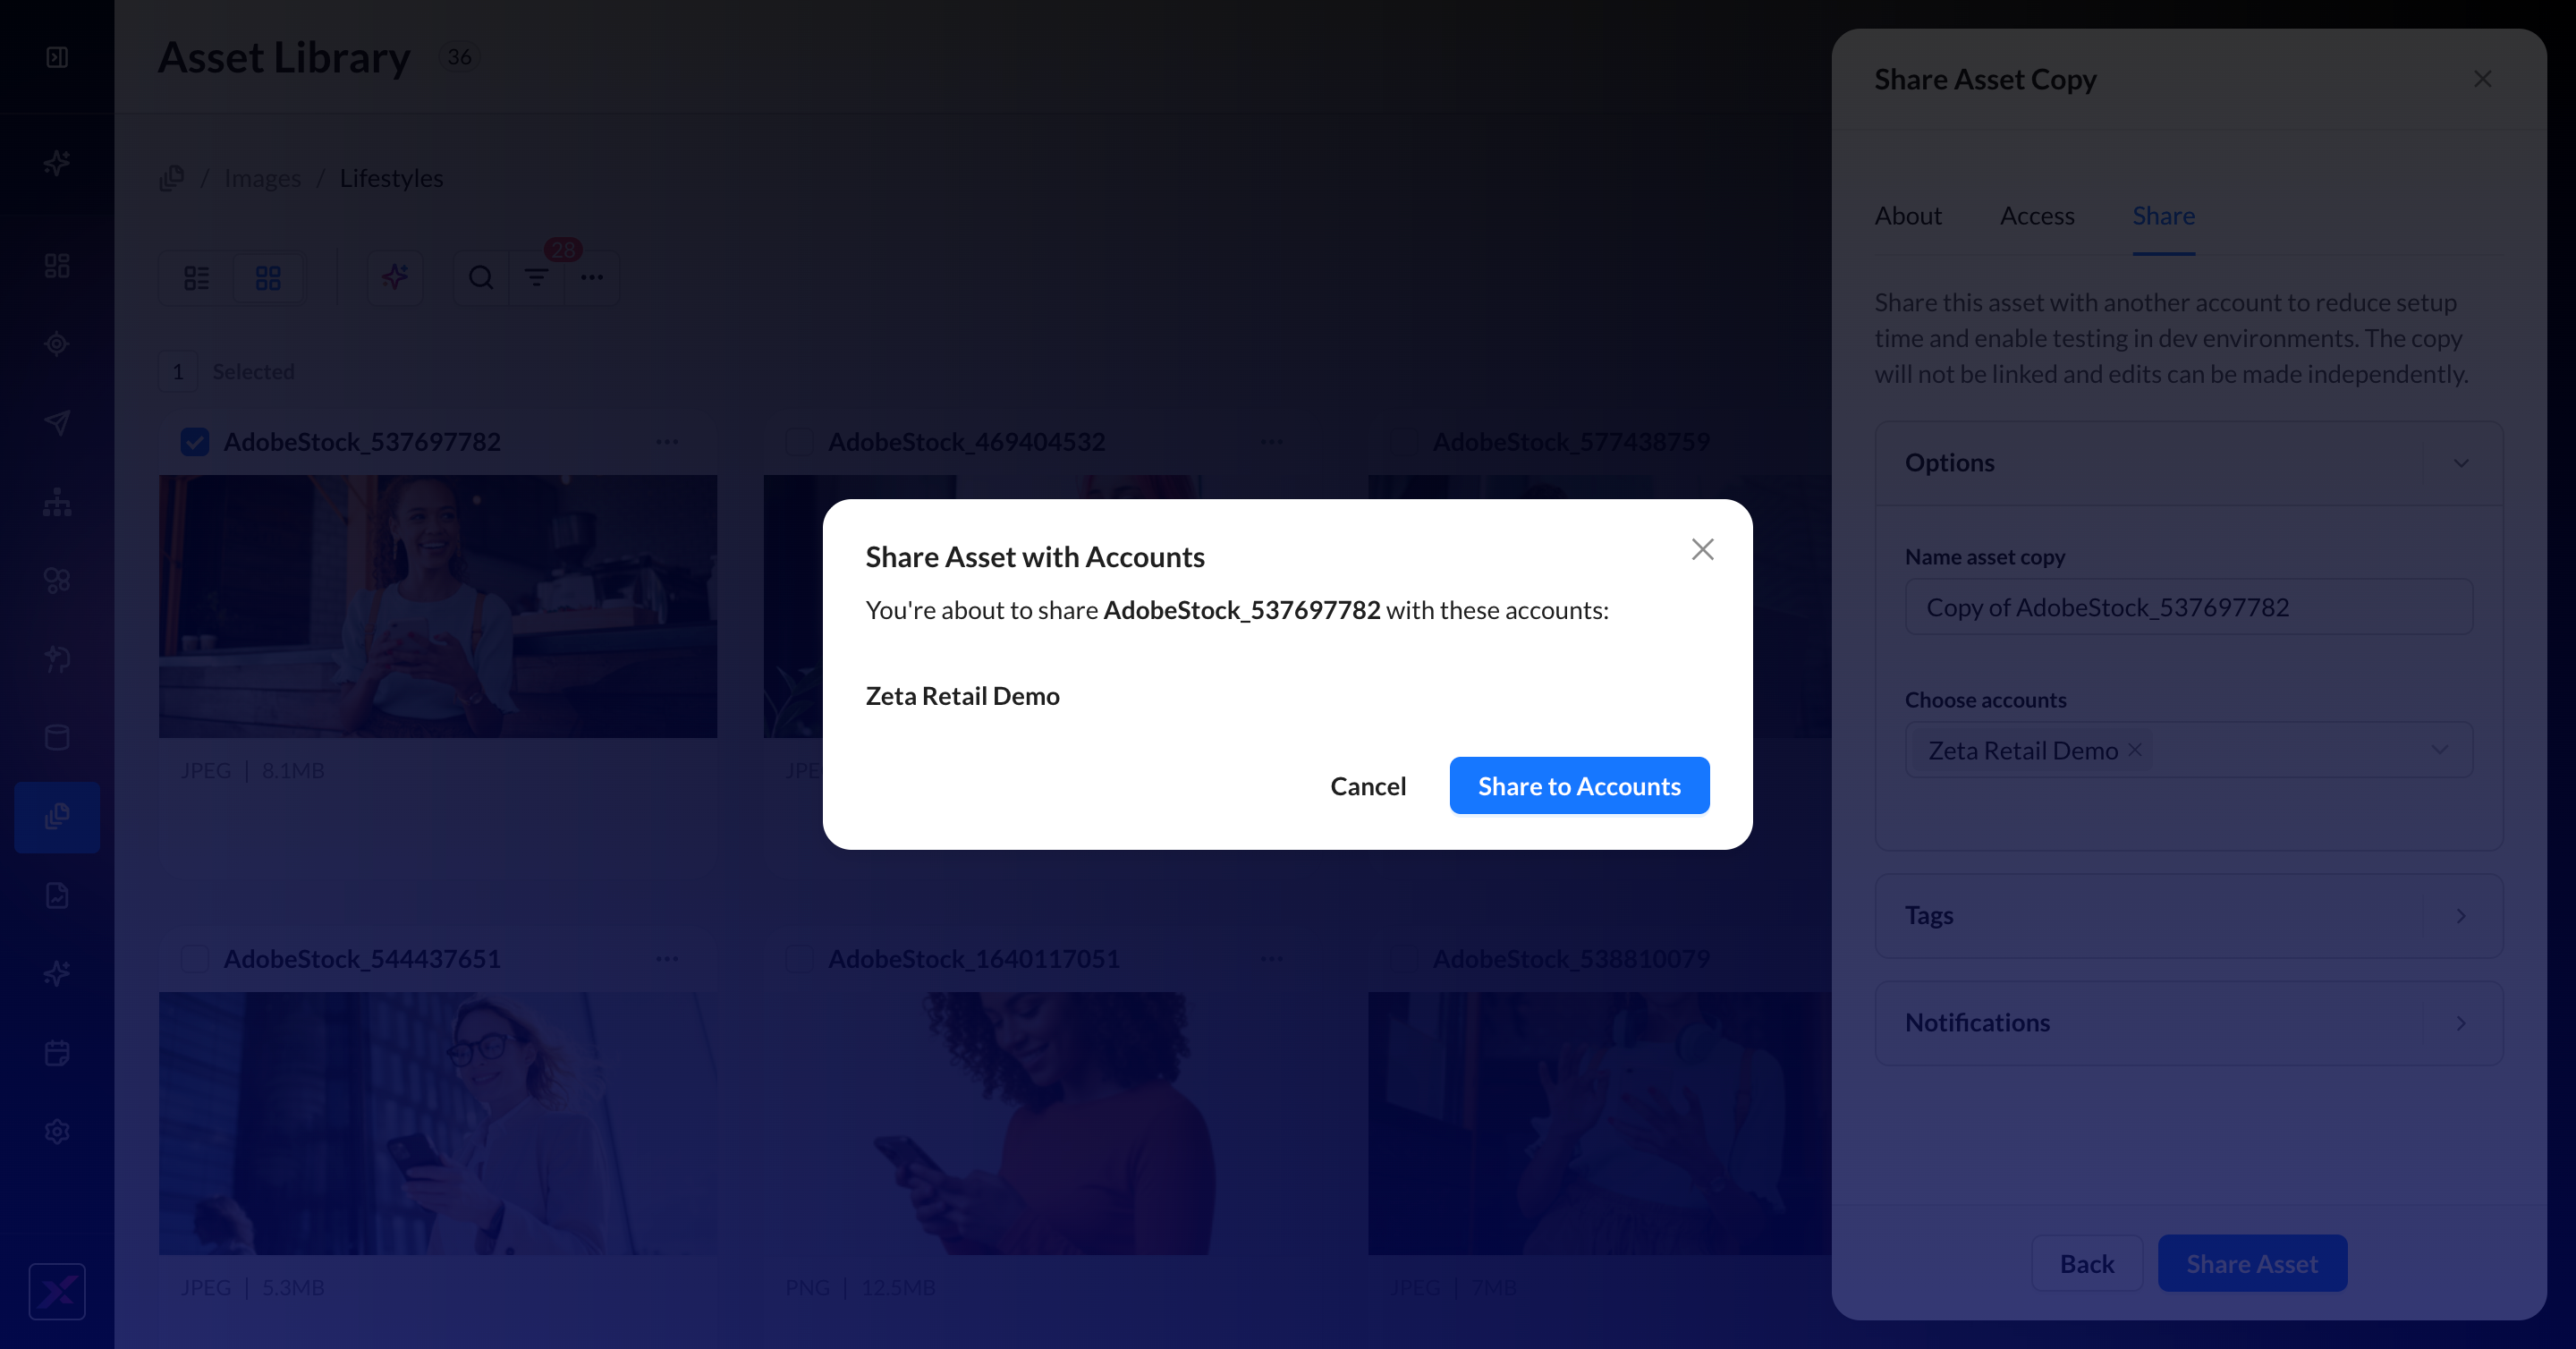
3. Once shared, go to one of the accounts you just selected. Since there is no link between this asset and its duplicates—and there’s no limit to the number of times you can share a copy of an asset—there is no list of accounts for you to reference.
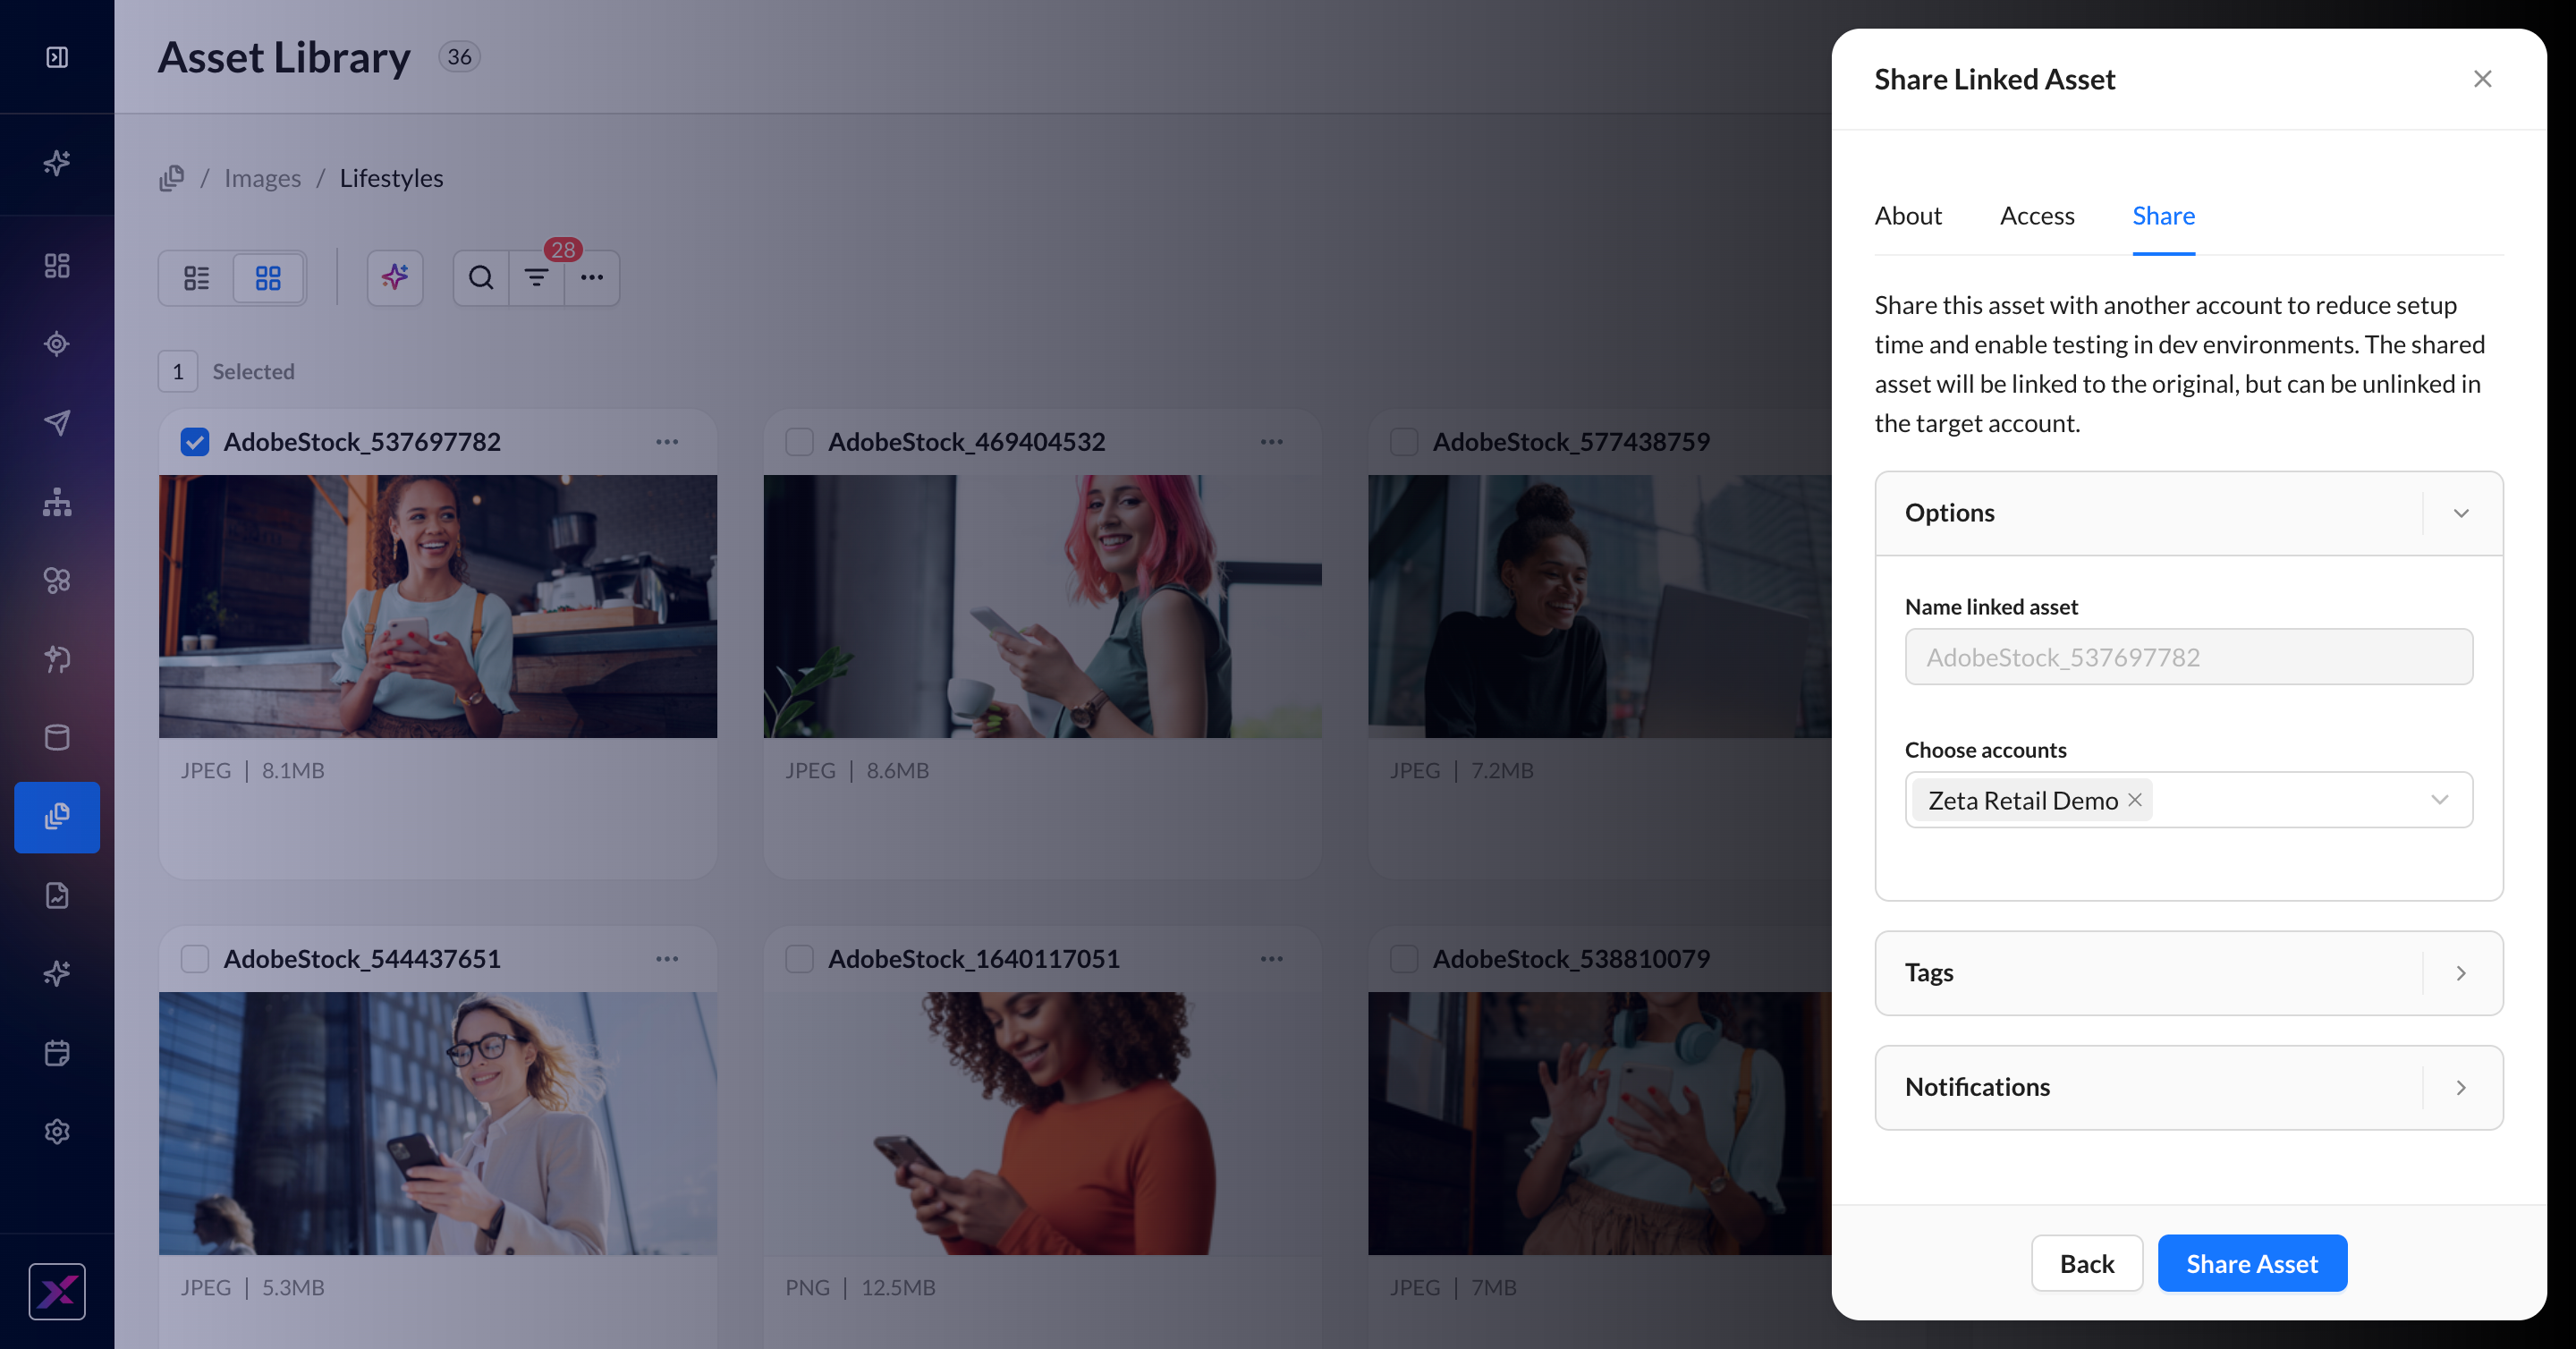
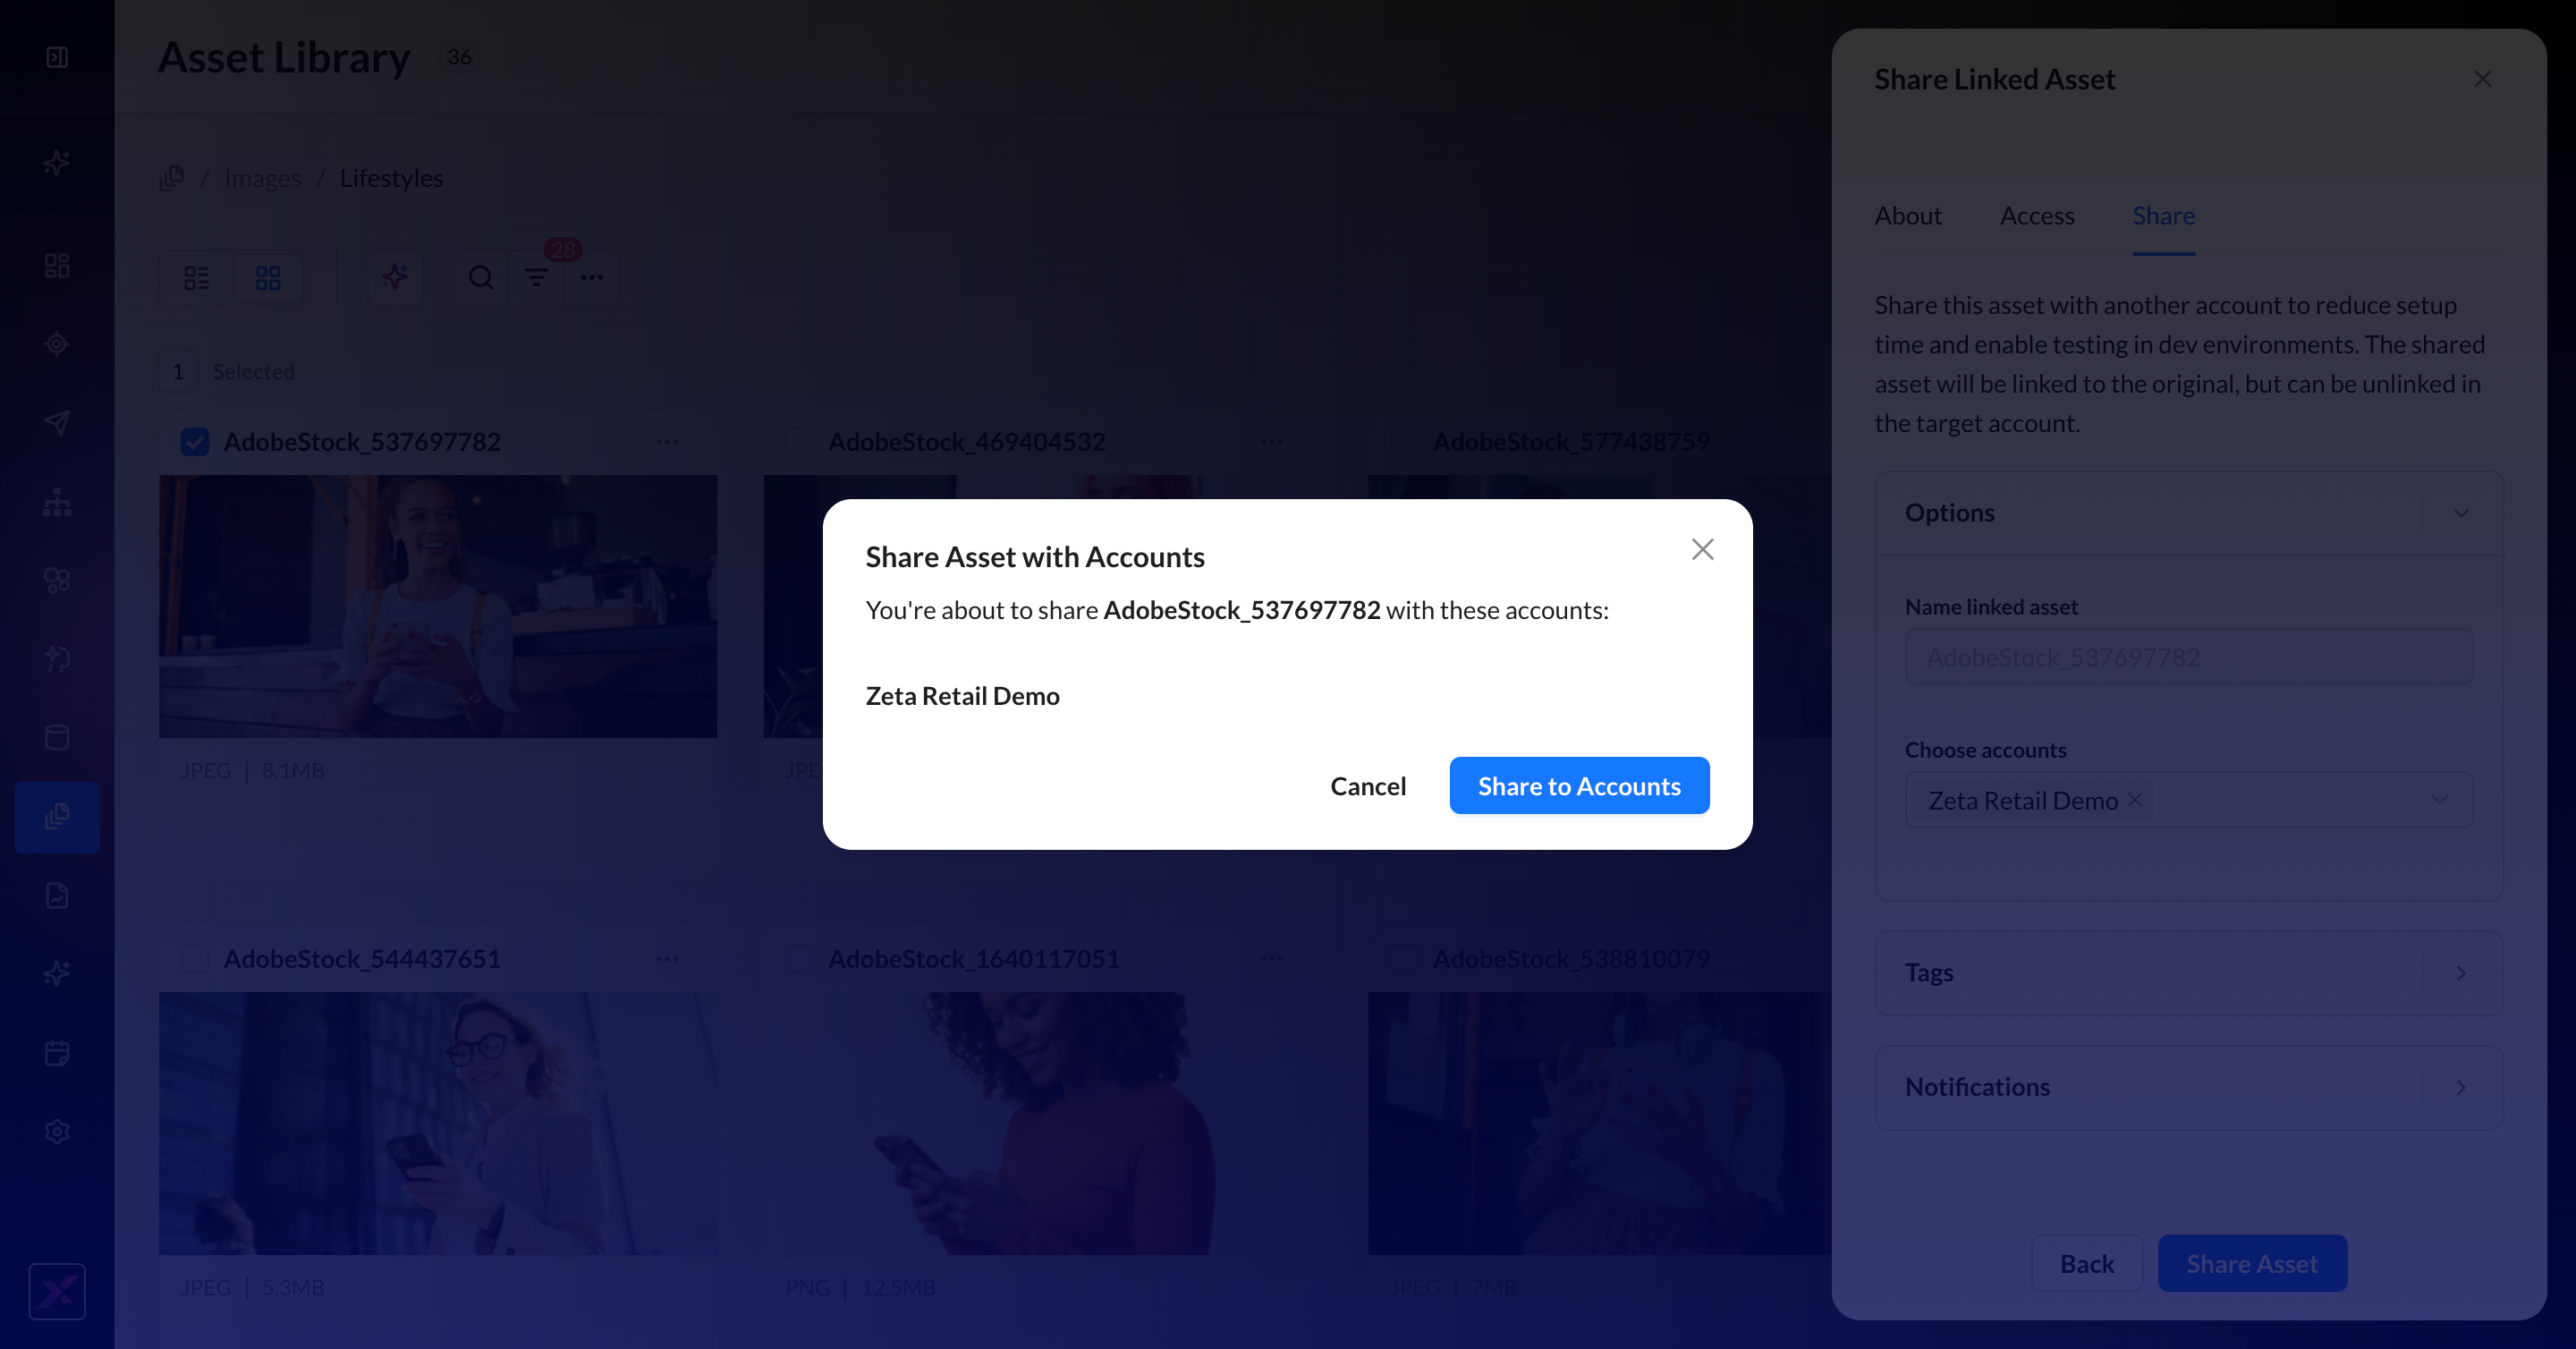
Share Linked Asset
1. Clicking Share linked asset across accounts will allow you to give permission to certain accounts to use the asset linked from the original account. Since you’re sharing a single entity, you cannot edit the name of the linked asset. You can optionally add tags or a notification to your teammates.
2. Confirm your selected accounts.
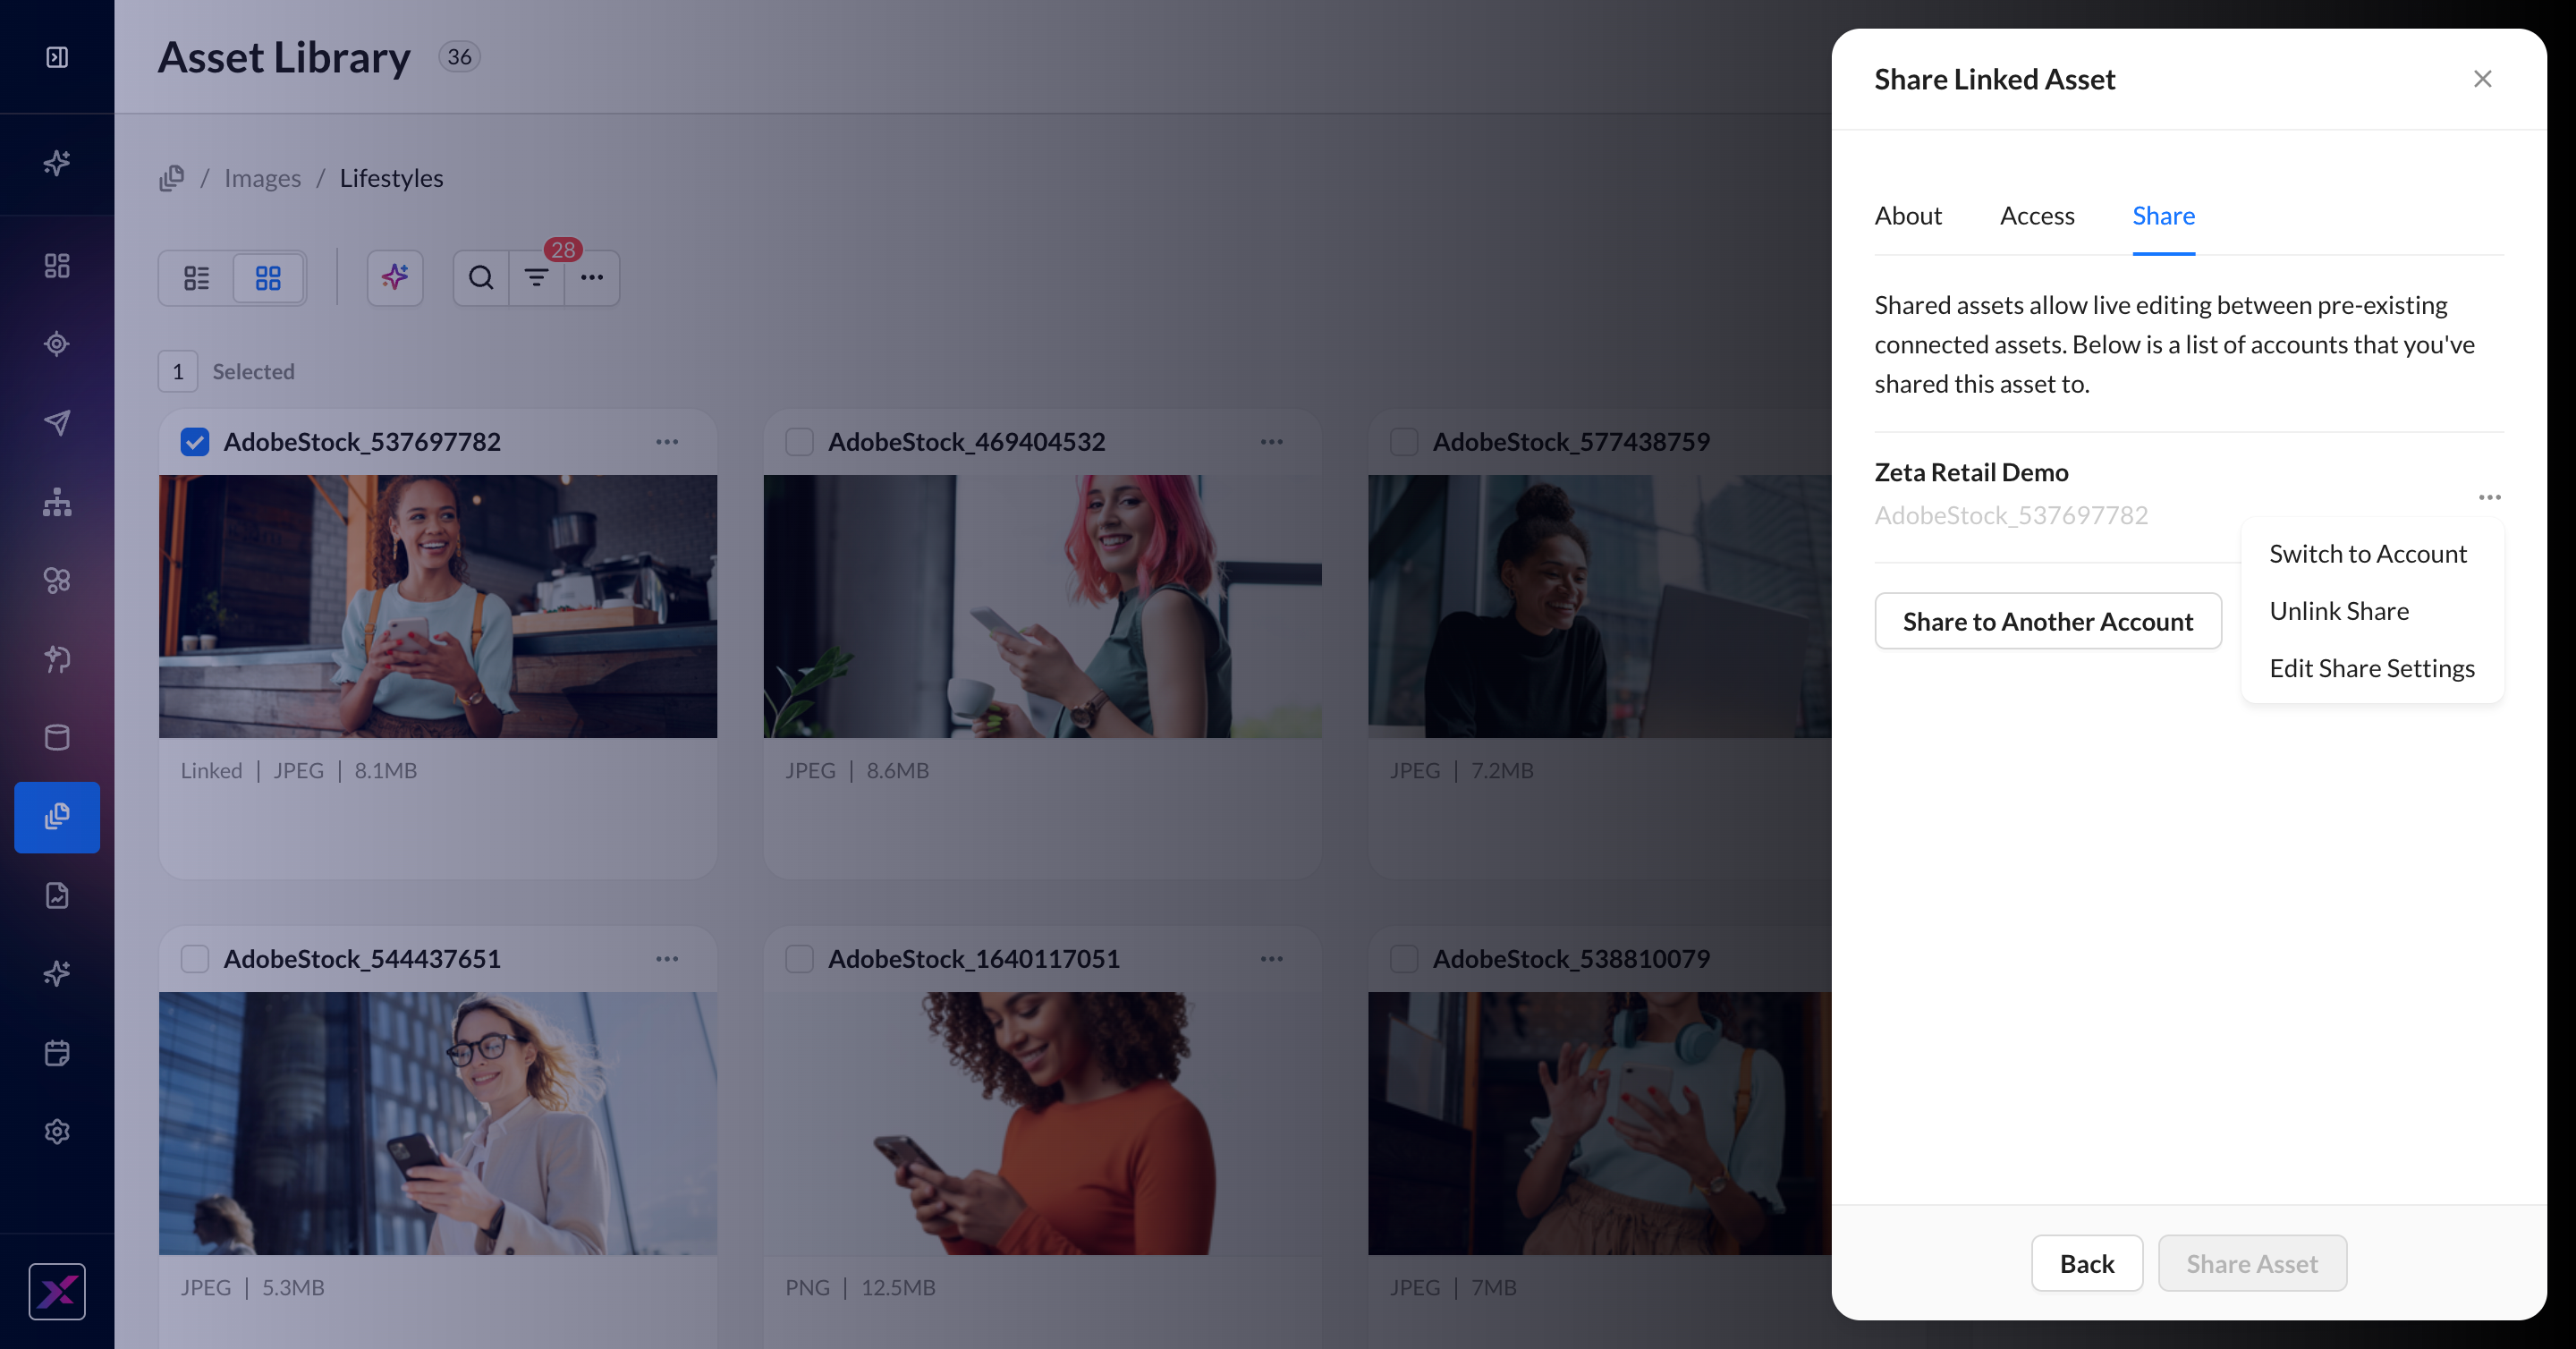
3. Once shared, you’ll see an active list of accounts that have access to this linked asset. You can edit this list by unlinking or sharing to another account at any time; it will be automatically shown if you click Share linked asset across accounts for this asset again.
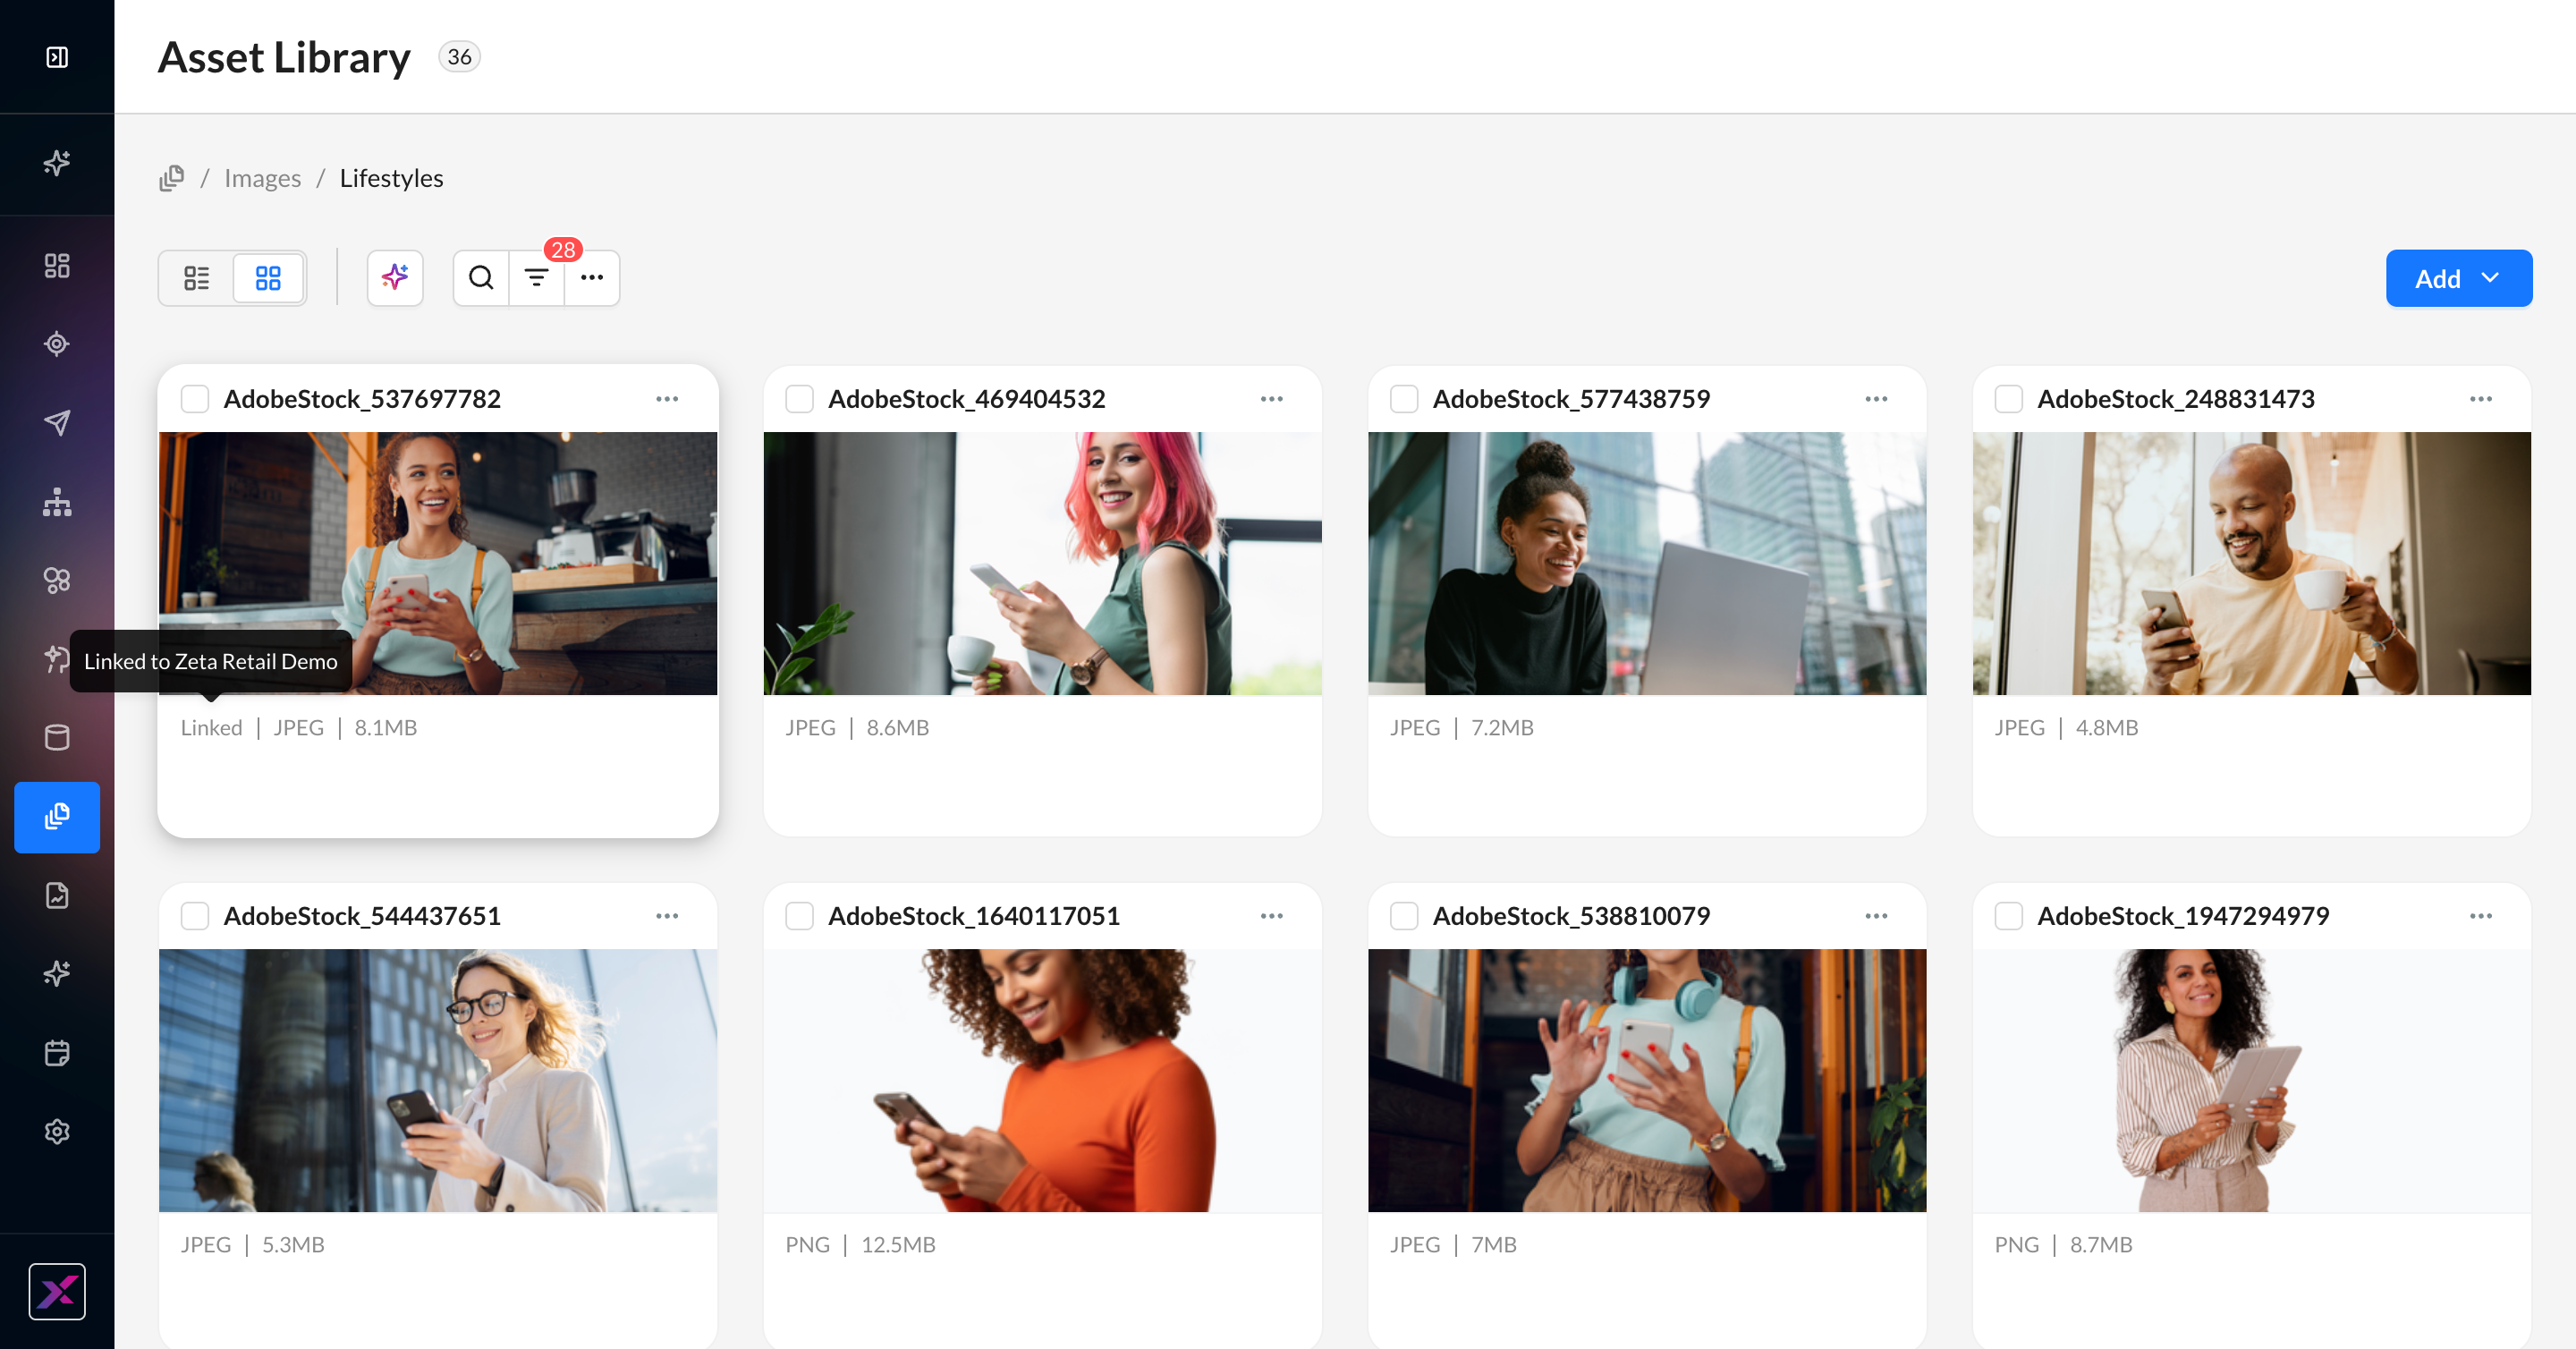
4. When you have linked assets in an account, you’ll see a text indicator (in grid) or Linked Accounts column (in list) to identify that the asset is linked, either as the original or shared account. While you cannot open an asset in a linked account, it can still be inserted into a campaign template using codeless personalization or ZML. To make edits, return to the original account and update the original asset. Once saved, its edits will be reflected across all accounts that are linked to the asset.
FAQs
|
Question |
Answer |
|---|---|
|
Why does clicking the "Change Image" button in the asset library template redirect me to a different set of folders, and why do my assets not appear when I search for "subscriptions"? |
The issue occurs because the "Asset Library View" toggle is turned OFF. This setting controls whether you view assets in the Asset Library or the File Manager. To resolve the problem and access the Asset Library, simply switch the toggle ON. The tooltip clarifies: "This toggle changes where you view assets or images: Asset Library or File Manager." |
|
Why do the image URLs differ from usual when we upload images to ZMP via the Content tab (Assets Library)? |
A recent update in ZMP has changed the format of image URLs in the Content tab. Previously, URLs began with This change affects all U.S. accounts. While image storage remains on S3, the CDN domain is now used to load images in the UI, templates, and snippets. The underlying files haven’t changed, but the new CloudFront CDN domain is exposed instead of the S3 domain, which is also used for email assets when no custom CDN domain is configured. |